2
140 lbs.
(63.5 kg)
If your TV weighs more, this mount is NOT compatible.
Visit ECHOGEAR.com to find a compatible mount.
Your TV (including accessories)
CANNOT EXCEED 140 lbs.
(63.5 kg) for this mount.
“You can think about it ...
but doooon’t do it.”
IMPORTANT SAFETY INSTRUCTIONS. READ ENTIRE MANUAL PRIOR TO USE. SAVE These INSTRUCTIONS
Weight Restrictions
Please read through these instructions completely to be sure you’re comfortable with this easy install process.
Also check your TV owner’s manual to see if there are any special requirements for mounting your TV.
If you do not understand these instructions or have doubts about the safety of the installation, assembly
or use of this product, contact The ECHOGEAR Pros (see back page).
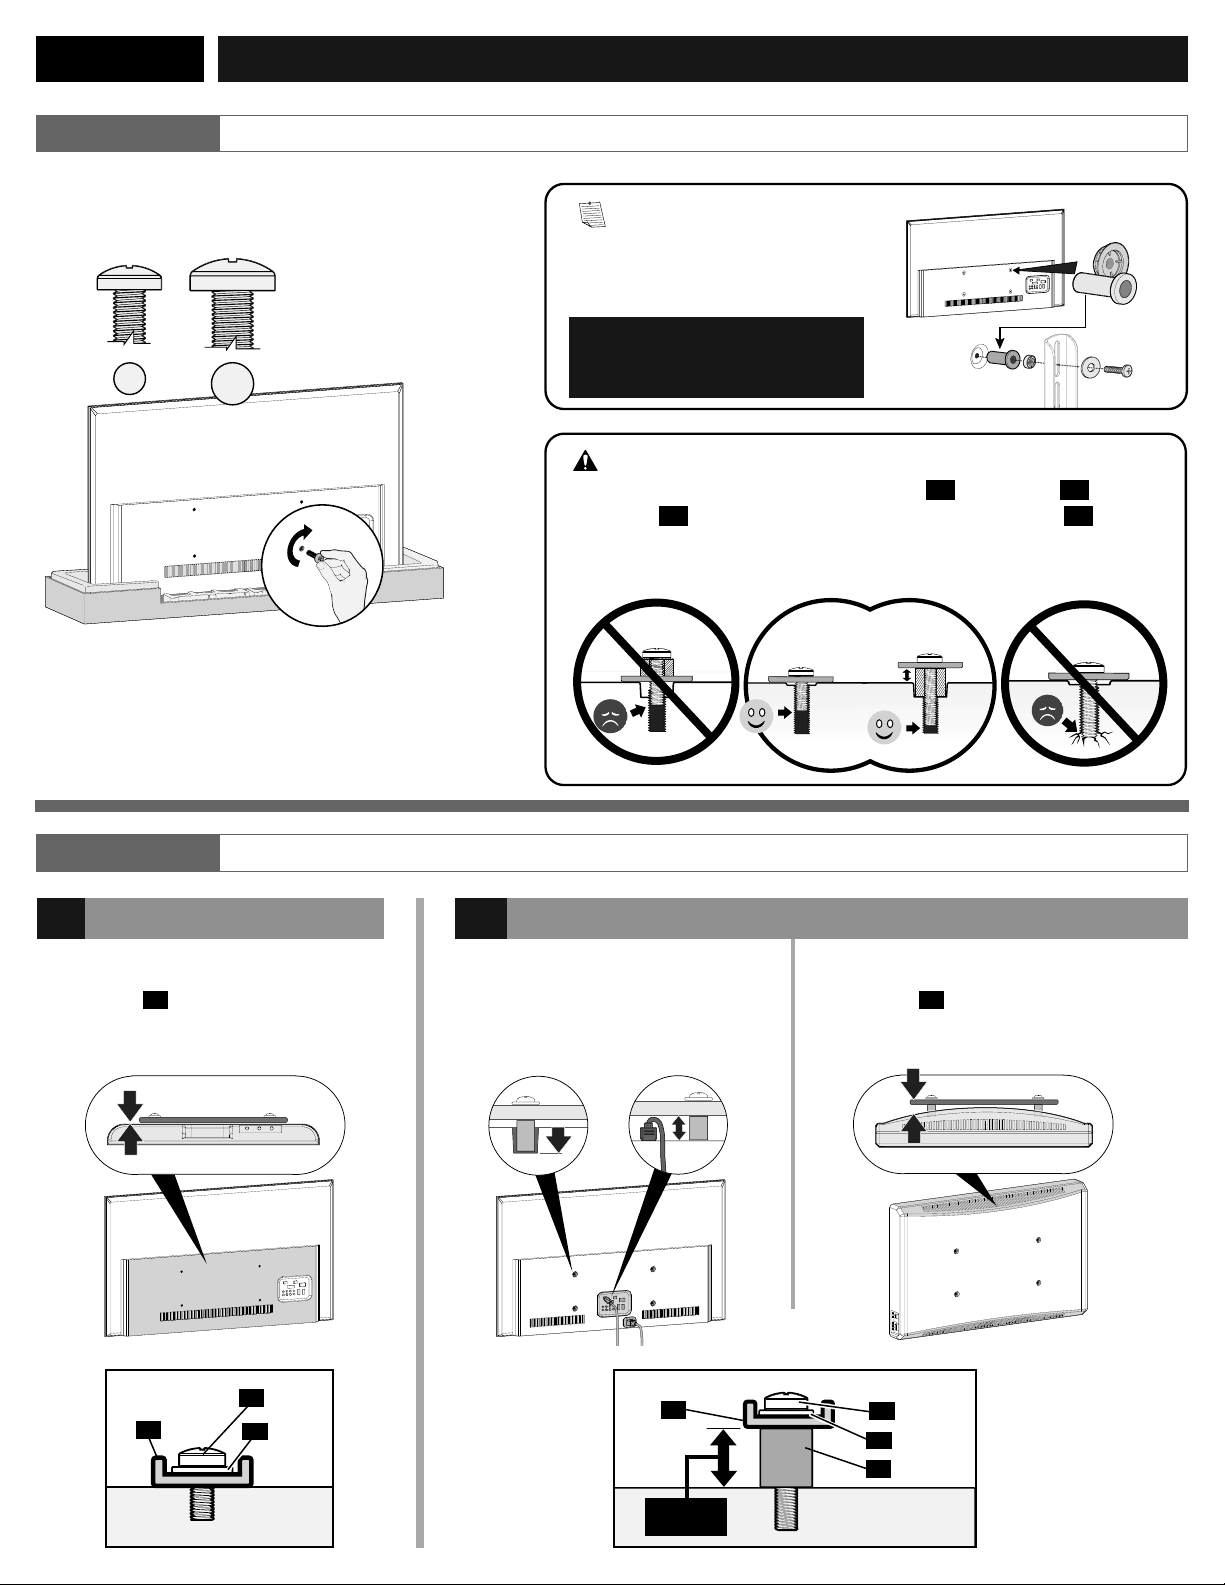
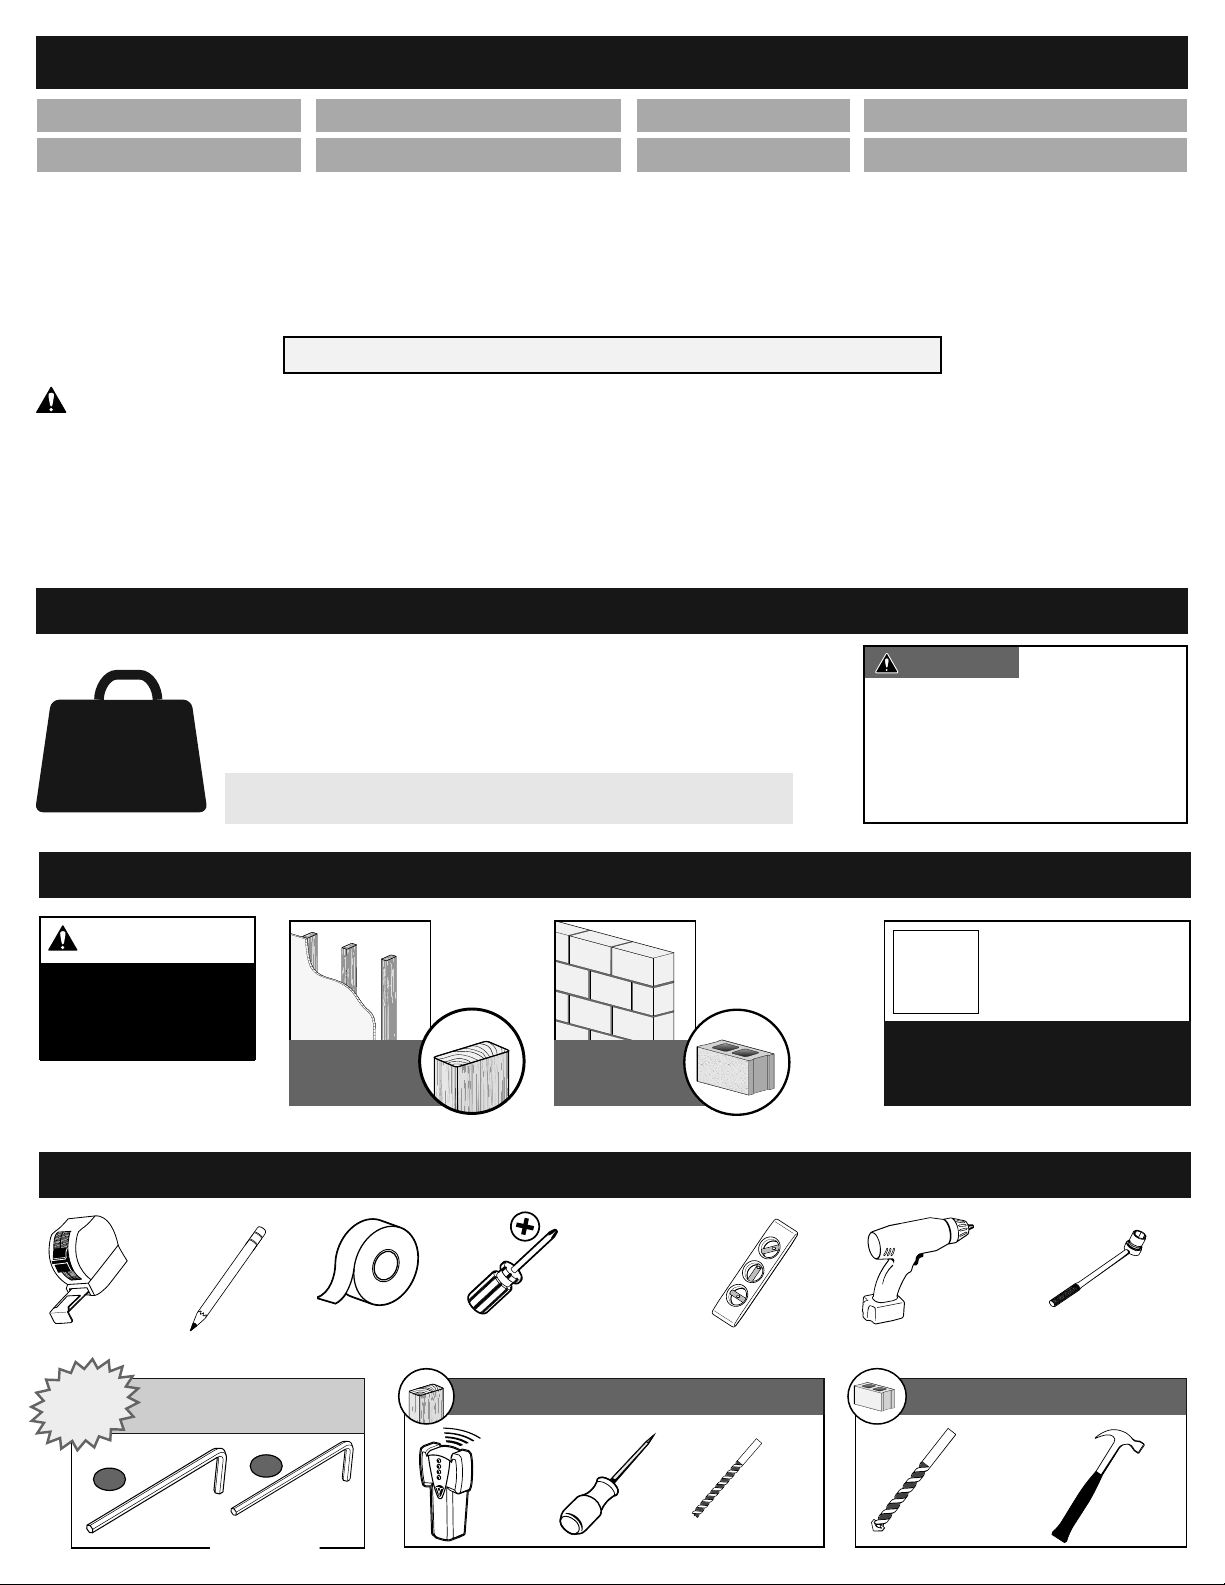
CAUTION: Avoid potential personal injuries and property damage!
►This product is designed for use in wood stud, solid concrete, and concrete block walls -
DO NOT install into drywall alone
►The wall must be capable of supporting five times the weight of the TV and mount combined
►Do not use this product for any purpose not explicitly specified by manufacturer
►Manufacturer is not responsible for damage or injury caused by incorrect assembly or use
CAUTION: DO NOT exceed
the maximum weight indicated. This
mounting system is intended for
use only with the maximum weights
indicated. Use with products
heavier than the maximum weights
indicated may result in collapse
of the mount and its accessories,
causing possible injury.
Wood
Studs?Solid
Concrete or
Concrete
Block?
Perfect!
Good to Go Perfect!
Good to Go
Unsure?
Contact The ECHOGEAR
Pros (see back page)
?
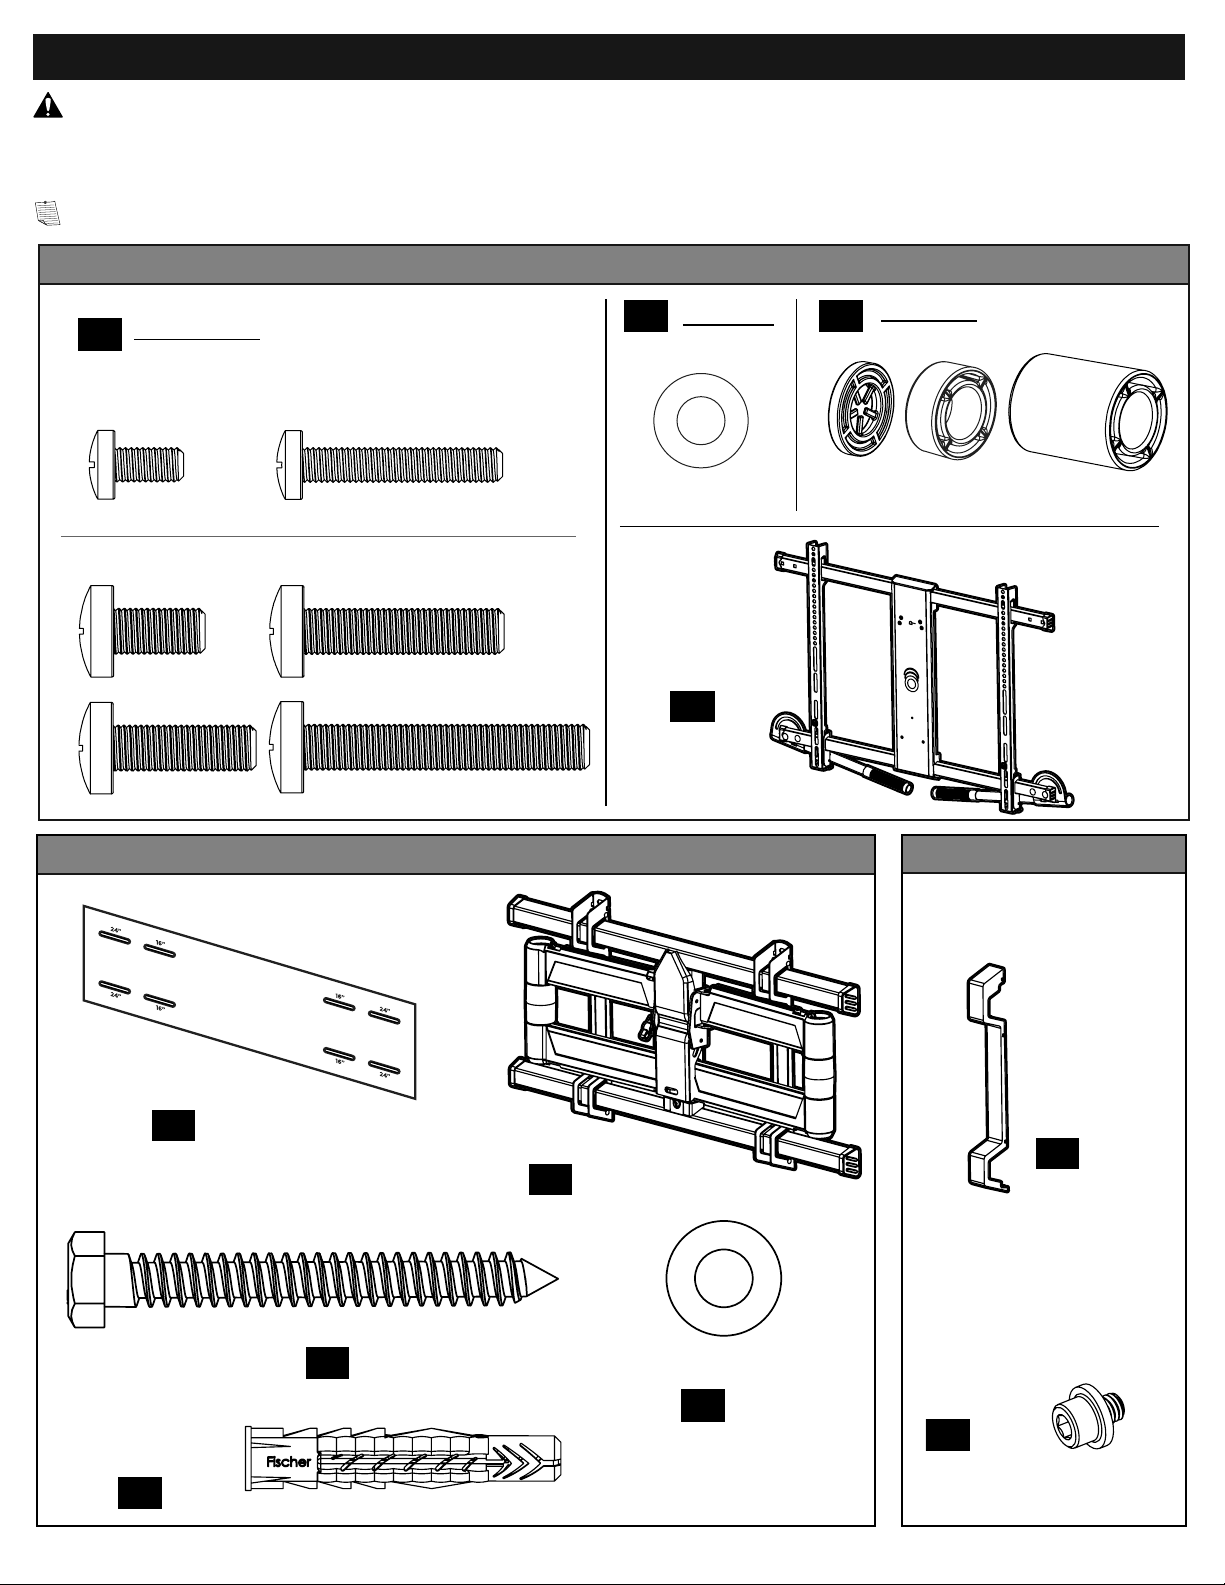
Grab Your Tools
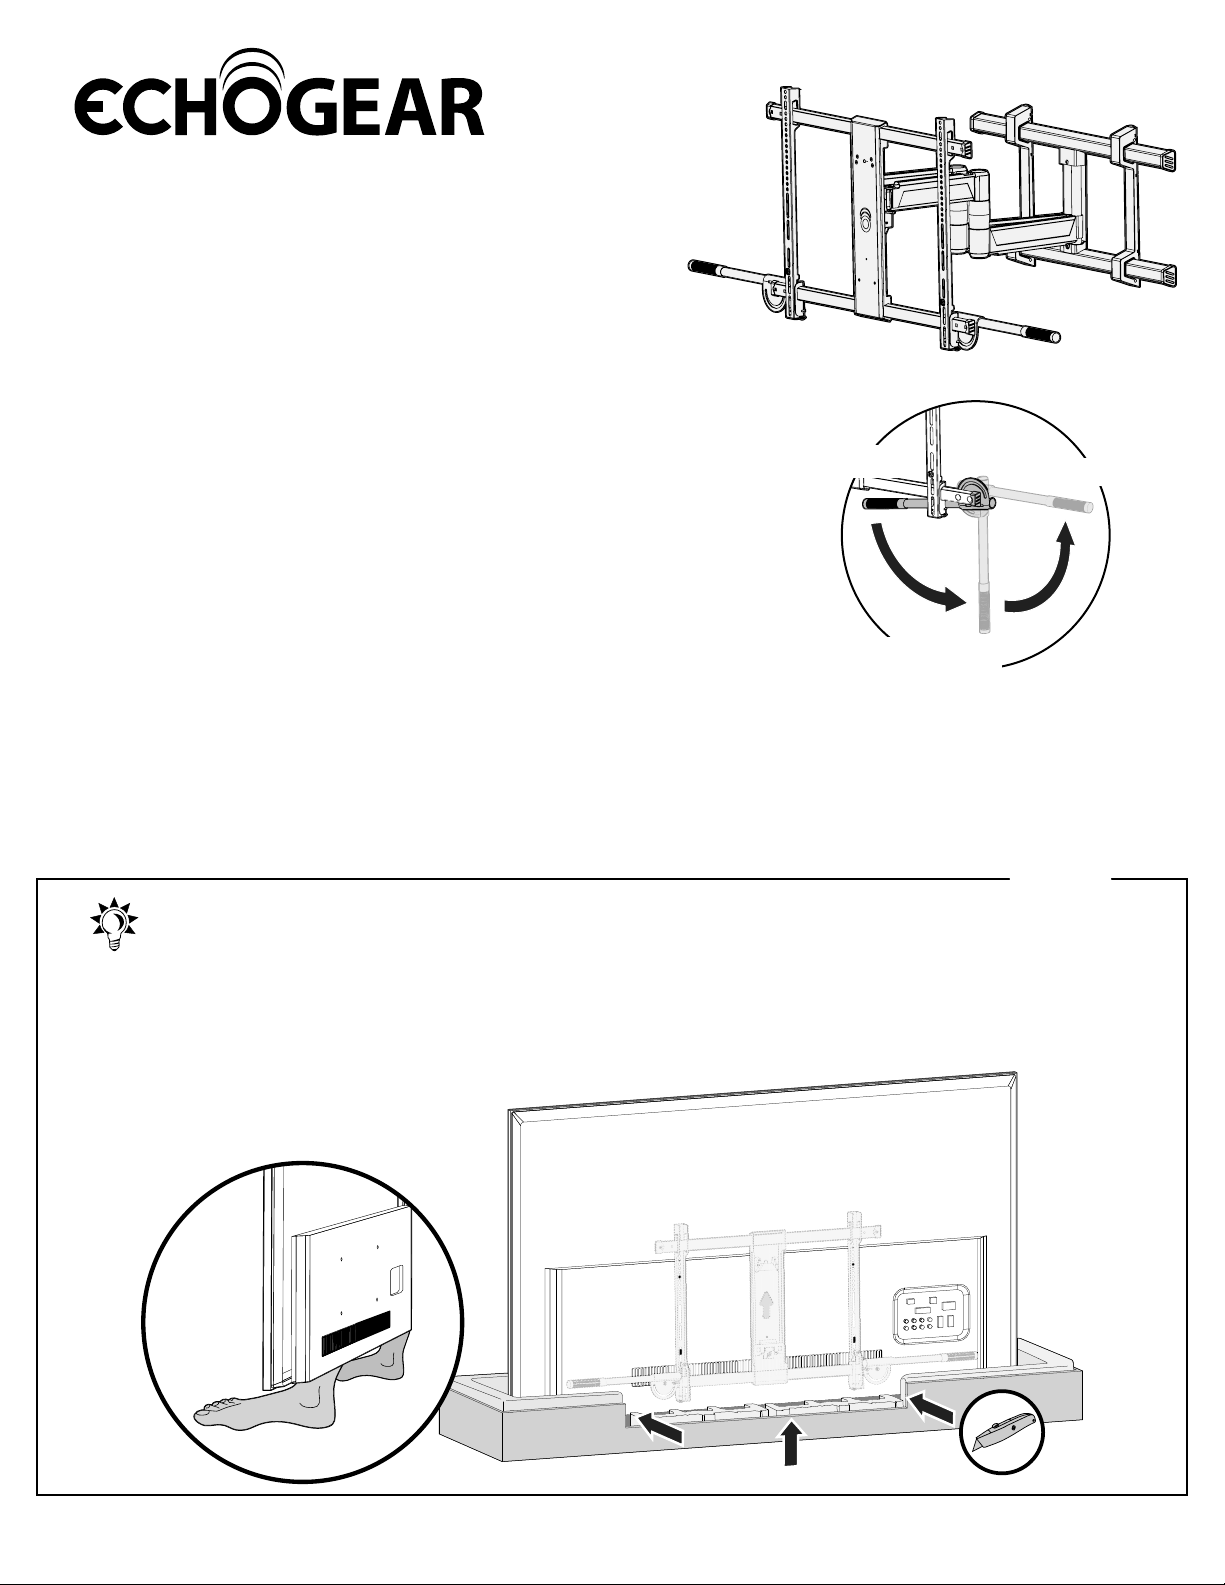
Verify Your Wall Construction
UUUUHHH?!?
CAUTION:
DO NOT
install into
drywall alone
... unless you WANT to
watch your TV fall and
crash onto the floor.
Awl
Stud
Finder
7/32 in.
(5.5 mm)
for wood
Drill Bit
Socket
Wrench
Hammer
Drill Bit
3/8 in.
(10 mm)
for concrete
Wood Stud Installation Concrete Installation
Pencil Tape Level
Phillips
Screwdriver
Tape
Measure
Electric
Drill
Hex Key Hex Key
1/2 in.
(13 mm)
"Give it back
to Phil when
you finish"
TOY SURPRISETOY SURPRISE
Inside Every Box
H1 H2
FREE
Texto en español, página 20 Deutscher Text Seiten 24 Svensk text sida 28
中文文字说明请参见第 32页
Texte français page 22 Nederlandse tekst op pagina 26
Русский текст: стр. 30 日本語は 34 ページ
Yea, the boring stuff ... but read it, so you don’t jack things up!
“no oense to
all you Jacks in
the world.”
1/8 in.
5/32 in.
"collect the
whole set!"