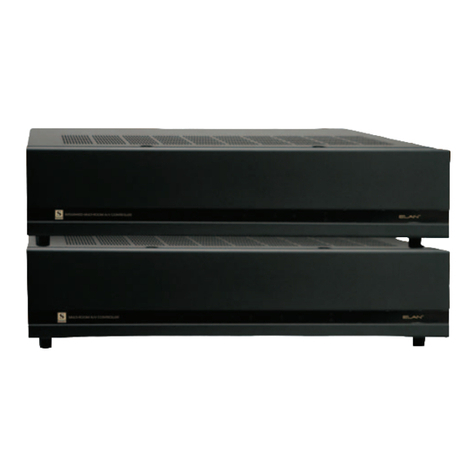
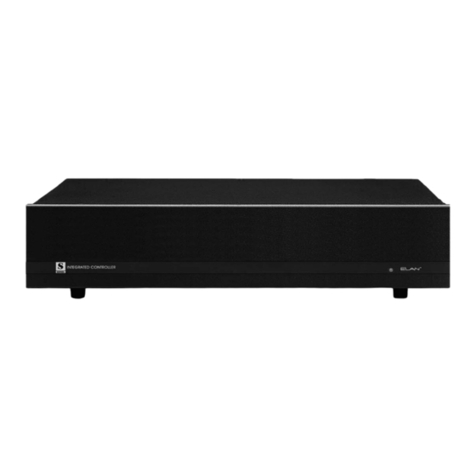
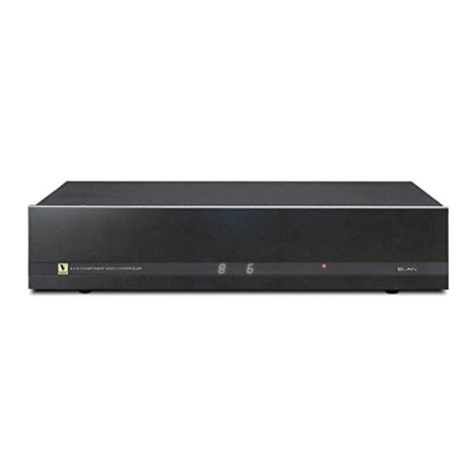
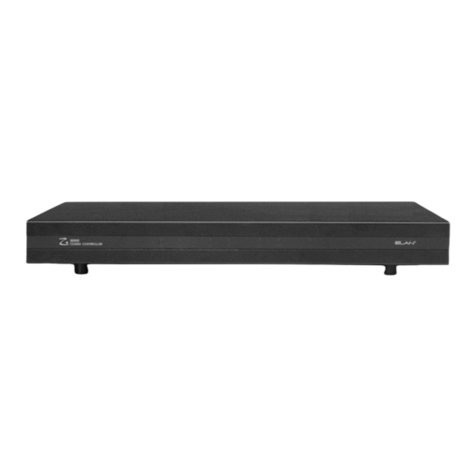
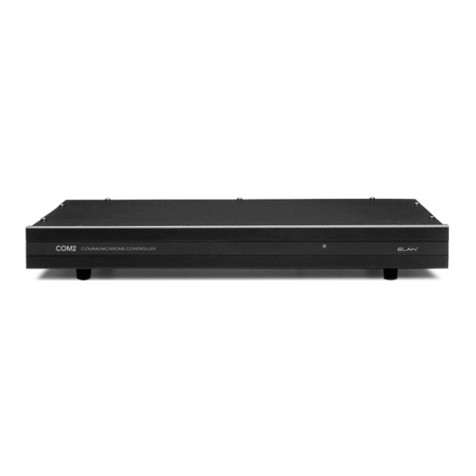
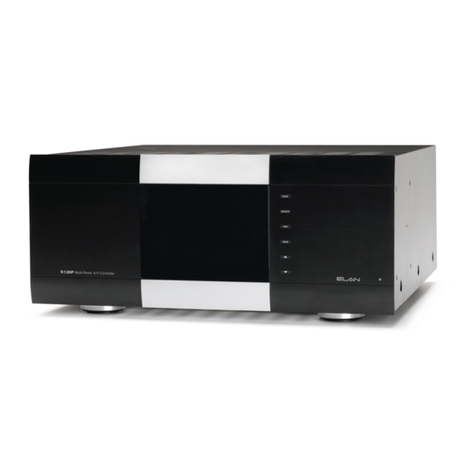
Elan Z-880 User manual

VIDEO
CONTROLLER
I n s t a l l a t i o n MMa n u a l
880
Rev. 1/03

ELAN HOME SYSTEMS INSTALLATION MANUAL
880
© ELAN Home Systems • 2003 • All rights reserved. 1/03 Page 2
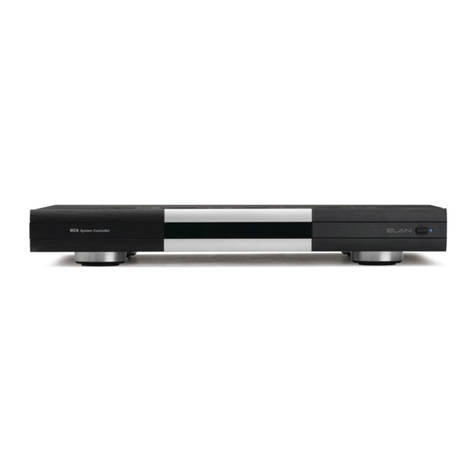
You have purchased the highest quality video controller on the market today -
the Z•880 Video Controller. We at ELAN Home Systems are proud of this preci-
sion component and are pleased you have chosen this ELAN product as the
cornerstone to your A/V system. Crafted to be the de facto standard in its class,
the Z•880’s circuit design, small footprint and robust peformance are the latest
in technology and should provide you with years of superior A/V performance.
The Z•880 is also available in a rack mount version––the Z•881.
As a manufacturer, ELAN strives to provide you with excellent service after the
sale. If you have any questions or comments concerning the performance,
installation or features of the Z•880 Video Controller, please call the ELAN
Service and Technical Support Department at 1(859)269-7760.
ELAN Home Systems designs and manufactures the industry’s most complete
line of multi-room audio/video systems and components. For free product infor-
mation write us at:
ELAN Home Systems
Product Information
2428 Palumbo Drive
Lexington, Kentucky 40509
Email: [email protected]
Look for these other Z•Series Products:
Z•630/631 PreAmp Controller
Z•600/601 Comm Controller
Z•660/661 Multi-Channel Power Amplifier
Z•300/301 Two-Channel Power Amplifier
Z•POWER Intelligent Power Controller
Z•FAN Modular Cooling Component
ZPAD Intelligent Keypads
CONGRATULATIONS AND THANK YOU
©1999 ELAN Home Systems, LLC. ELAN, ELAN Home Systems and Z•Series, Z•880/881, Z•630, Z•600, ZPADS are registered
trademarks of ELAN Home Systems, Lexington, KY 40509. ELAN reserves the right to change product specifications without notice.

© ELAN Home Systems • 2003 • All rights reserved. 1/03 Page 3
ELAN HOME SYSTEMS INSTALLATION MANUAL
880
TABLE OF CONTENTS
Congratulations and Thank You . . . . . . . . . .2
Safety Information . . . . . . . . . . . . . . . . . . . . . . . .4-5
Introduction . . . . . . . . . . . . . . . . . . . . . . . . .6
Features . . . . . . . . . . . . . . . . . . . . . . . . . . . .8
System Overview . . . . . . . . . . . . . . . . . . . . .9
System Configurations . . . . . . . . . . . . . . . .10
Dip Switch Settings . . . . . . . . . . . . . . . . . .10
Diagrams . . . . . . . . . . . . . . . . . . . . . . . . . . .11
Z•880 to Z•630 Connections . . . . . . . . . . . . . . . .11-12
Z•880 to HD Connections . . . . . . . . . . . . . . . . . .13-16
Stand-Alone RS232 Connections . . . . . . . . . . . . . .17
Stand-Alone Security/Surveillance Application . . . . .18
CCTV Camera Connections . . . . . . . . . . . . . . . . . .18
Sharing Video Sources . . . . . . . . . . . . . . . . . . . . . .19
External IR Receiver Connections . . . . . . . . . . . . . .19
6-Pin DIN to 6-Pin DIN Cable Extension . . . . . . . . .20
6-Pin DIN to RS-232 D-SUB . . . . . . . . . . . . . . . . . .20
Z•880 RS232 Protocol . . . . . . . . . . . . . . . . .20
Specifications . . . . . . . . . . . . . . . . . . . . . . .21
Warranty . . . . . . . . . . . . . . . . . . . . . . . . . . .22

ELAN HOME SYSTEMS INSTALLATION MANUAL
© ELAN Home Systems • 2003 • All rights reserved. 1/03 Page 4
880

© ELAN Home Systems • 2003 • All rights reserved. 1/03 Page 5
ELAN HOME SYSTEMS INSTALLATION MANUAL
880
FEDERAL COMMUNICATIONS COMMISSION (FCC) NOTICE:
This device complies with Part 15 of the FCC Rules. Operation is subject to the following conditions: (1) This device
may not cause harmful interference and (2) this device must accept any interference received, including interference
that may cause undesired operation.

© ELAN Home Systems • 2003 • All rights reserved. 1/03 Page 6
ELAN HOME SYSTEMS INSTALLATION MANUAL
880
The Z•880 is the most versatile high-performance composite video switcher on
the market today. Its 8x8 matrix can independently select any one of 8 video
sources in up to 8 video zones. Or with as many as three Z880s, 8x24 switching
is possible.
HDTV-compatible wide band switch matrix and video line drivers are placed on
a premium double-sided flooded ground plane circuit board, ensuring that the
highest quality video and cross-talk performance specifications are maintained.
User/Installer-friendly LED readouts, selectable 75 ohm/Hi Z video inputs, and
configurable RS-232 baud rates provide unsurpassed flexibility for almost any
application. Additionally, control interfaces include front panel IR receiver, rear
panel IR input for remote sensors, RS-485, RS-232, and ELAN HD Series serial
control data links.
System IIntegration
The Z•880 is fully compatible with ELAN’s Z• Series, S• Series and HD Series
multi-source/multi-zone systems and can be integrated with RS-232 controllers
such as a PC or touchscreen via its RS-232 serial communication port. It can
also serve as a stand-alone video switcher for security/surveillance applications.
S• aand ZZ•SSeries – the Z•880 interfaces easily with the System6 and
Z•630 PreAmp Controller. In a Z• System, the Z•880 can switch up to 6
video sources into 3 zones (with 1 Z•630), 6 zones (when using 2
Z•630s), 9 zones (using 3 Z•630s and 2 Z•880s), or 12 zones (using 4
Z•630s and 2 Z•880s). The Z•880 and System6 or Z•630 enables Z•PADs,
VIA! Touch Panels, or IR receivers in each zone to independently control
both the system’s audio and video sources.
HD SSeries – in an ELAN HD system, the MCU* and the Z•880 communi-
cate via RS-232 serial communications. A dual 6-pin DIN Serial Interface
cable is provided with the Z•880 and is used to link the RS-232 ports on
the HD’s Automation Control Card to the HD/RS232 serial port on the
Z•880. RS-232 THRU ports on the Z•880 allow you to connect up to 3
Z•880s to the system, giving you a total of 8 video sources that are inde-
pendently accessible in up to 24 zones. As with Z•Series integration, all
keypads and/or IR receivers in an ELAN HD System will be able to control
all audio and video sources.
880 INTRODUCTION
NOTE: *MCU software revision
3900 or higher is required for
HD/Z•880 interface.

ELAN HOME SYSTEMS INSTALLATION MANUAL
880
© ELAN Home Systems • 2003 • All rights reserved. 1/03 Page 7
RS232 CControllers – the Z•880 can easily be integrated with systems
that use PCs or touch screens as the main system controller. Once
again, the RS-232 serial communication ports are used as the data link
between devices. Selectable baud rates of 19,200 and 9,600 make the
Z•880 compatible with most RS232 controllers on the market. A 9-pin
DSUB to 6-pin DIN cable is included to make this connection. Easy-to-
write Z•880 RS-232 protocol is provided at the back of this manual, and is
available for download from our web site. (www.elanhomesystems.com).
Stand-aalone – the Z•880 is the perfect choice for security and surveil-
lance applications. Multiple CCTV cameras (up to eight!) can be indepen-
dently selected and viewed in 8 different locations.
Sharing VVideo SSources – Have a home theater or media room and
want distributed video throughout the house? The Z•880 eliminates the
need to dedicate duplicate sources for both applications. Eight (one for
each source) 75 ohm/Hi Z selectable dip switches allow any of the eight
video sources connected to the Z•880 to be ‘shared’ with a surround
sound processor or A/V receiver in the main media room or home
theater - without any signal degradation.

© ELAN Home Systems • 2003 • All rights reserved. 1/03 Page 8
ELAN HOME SYSTEMS INSTALLATION MANUAL
880
880 FEATURES
123456
78910
1. Power ON/Off Switch
2. Z630 Network/IR Interface Jack (RJ-45)
3. RS232 Serial Port IN (6-pin DIN)
4. RS232 Thru Port (6-pin DIN)
5. Composite Video Inputs (8)
6. Composite Video Outputs (8)
11
7. Mode Selector
8. Impedance Selector, Inputs 1 & 2
9. Impedance Selector, Inputs 3 & 4
10. Impedance Selector, Inputs 5 & 6
11. Impedance Selector, Inputs 7 & 8
12. Hardwire IR input (tip=IR, sleeve=ground)
ZONE
DISPLAY
POWER
LED
IR ACTIVITY
LED
IR
RECEIVER
SOURCE
DISPLAY
AUXILIARY
Z 880 INDICATORS
FRONT VIEW
REAR VIEW
AUTO/MAN (Automatic/Manual)
Pressing MAN disconnects the Z880 from
Z630 network communications and allows you
to manually access any of the video sources
via the Source 1-8 keys. Typically, this feature
would only be used to access sources 7 and 8
(i.e. front door and back yard cameras), as they
are not part of the Z wholehouse system. Note
that if manually selecting sources 1-6, Z system
keypads and audio will not track. Pressing
AUTO puts the Z880 back on the Z630 network
and will re-sync the video to the audio selected
on the keypad.
None
None
System Applications:
Z -
HD/RS232 Application:
Stand-Alone Application:
MUTE
'Mutes' the video in a zone only when Z880
is in MANual mode
-
System Applications:
Z -
HD/RS232 'Mutes' the video in a zone
- 'Mutes' the video in a zone
(Note: when a video source is 'muted' from the
hand-held remote, the TV screen will go blank,
but system audio will remain on.
Standalone
PWR
Power ON/OFF toggle (for Z880 only)
SOURCE 1-8
- Functional in MANual mode only. Use to view
7 & 8. Will also manually select sources 1-6,
but keypads and audio will not track. To re-sync
to Z630 press AUTO.
None
(Although you select sources 1-8 with the
remote, this feature is generally not used in an
HD or RS232 controller application. In these
systems, the HD's keypads or the RS232
controller (i.e. a touch screen) controls both
audio and video switching. When selecting
sources manually from the remote, keypads
and audio will not track. Should you change
sources with the Z880's remote, you would
need to re-select the original source to re-sync
the system [pressing AUTO will not do it])
System Applications:
Z
HD/RS232 Application:
can
Stand-Alone Application:
Selects video sources 1-8
ZONE 1-8
System Applications:
Z
HD/RS232
Stand-Alone
- Lets you visually check what source is being
viewed in each zone; also lets you change
sources in the zone selected (MAN mode only).
- Same as above.
- Same as above.
Z 038 Hand Held Remote Control
12
IMPORTANT NOTE: The Z038 Remote no longer ships with the
Z880. However, it may be purchased as a separate item.

ELAN HOME SYSTEMS INSTALLATION MANUAL
880
ELAN Home Systems • 2003 • All rights reserved. 1/03 Page 9
or
*ELAN HD SERIES
MCU (requires
HDC2042 Serial
Communications Card)
Zone 2
TV
Zone 6
TV
Zone 4
TV
Video Source #5
Video Source #3
Video Source #1
(ELAN CAM5000
CCTV Camera)
Video Source #7
Video
patch
cables
Coax
(up to 500')
Video patch cables
(Shown in this diagram - Video sources 1,3, 5 & 7. Video zones 2,4,6 & 8)
Video Patch
Cables
from Z 880
from RF
Distribution
Network
to TV
Video
input
to TV
RF
Input
F-to-RCA
connector
F-to-F
connector
from RF
Distribution
Network
Zone 8
TV
RCA-to-F
Wall Plate,
configurable
in 2,3,4,6 or 8 ports
Combination
F-to-RCA/ F-to-F
Wall Plate
distributes both
composite and RF
signals to TV Coax
Dual-Port Wall Plate
DIN-to-DIN RS232
interface cable
supplied. Can be
extended up to
500' w/ CAT-5
Z880
Z630 or System6
IR
The Z•880 can switch up to eight composite (base-band)
video signals into eight zones and is fully compatible with
ELAN S•, Z• and HD* Series systems–-as well as for use
as a stand-alone video switcher.
The Z•880 will require runs of RG6 or RG59 coaxial cable
to be pulled to each video zone. Dual runs of coax are
recommended so that multiple signals (i.e. Z•880 compos-
ite and distributed RF [cable/antenna] are available at
each TV location. ELAN’s new line of modular wall plates
provide easy termination of your coax runs back at the
head end–-as well as TV-to-coax connections in each
video zone. Use high-quality video interconnect cables
between the sources and the Z•880 and also between the
TV and the video zone’s wall plate.
880 SYSTEM OVERVIEW

ON
Factory Default:
All dip switches in the
DOWN (ON) position
ON
ON
ON
ON
Factory Default: All dip switches on the DOWN (ON) position
SOURCE #'s
1. (Factory Default, HD - Down)
This dip switch will remain in the factory default down position
at all times unless the Z880 is being used in a stand-alone
application where the Z880 is being controlled by an RS232
device such as a PC or touchscreen controller. The dip switch
would then be moved to the UP position.
2. (Factory Default, MSTR - Down)
In an ELAN HD system or RS232 controller application where
more than 8 video zones are needed, this dip switch determines
whether the Z880 is the A E unit (Zones 1-8) or one of the
two possible iliary units (Zones 9-16 and 17-24). If more
than one Z880 is being used, this dip switch must be moved to
the UP position on the 2nd and 3rd Z880s.
3. (Factory Default, AUX1 - Down)
In a application, if the Z880 is the 1st iliary unit
(Zones 9-16) this dip switch will remain in the factory default
DOWN position. If the Z880 is the 2nd AUXiliary unit (Zones
17-24), this dip switch must be moved to the (UP) position.
4. (Factory Default, 19.2K - Down)
This dip switch determines the baud rate (the rate at which
RS232 devices communicate with the Z880). The factory
default setting of 19.2K is the same rate as that of
serial port on the HDC2040 Automation Control Card.
When interfacing with other RS232 devices, confirm that
unit's baud rate and move the dip switch to the 9.6K setting
if necessary.
HD/RS232
MSTR/AUX
MSTR
AUX
AUX1/AUX2
MSTR/AUX AUX
AUX2
19.2K/9.6K
When the video output of a source is sent to
multiple Z880s or shared with another device
such as an A/V receiver or Surround Sound
Processor, these dip switches (one for each
source) must be moved to the UP position.
Failure to set these dip switches correctly
will result in poor picture quality.
© ELAN Home Systems • 2003 • All rights reserved. 1/03 Page 10
ELAN HOME SYSTEMS INSTALLATION MANUAL
880
880 IR CONFIGURATIONS - Z AND SYSTEM6
880 DIP SWITCH SETTINGS
MODE Dip Swtich Settings
75 OHM Termination Dip Switch Settings
As many as three Z880s may be used at one time. ELAN-
TOOLS! software provides discrete IR codes enabling
Z880s to perform 8x8, 8x16, 8x24, or 15x16 matrix switch-
ing.
All routing is programmed automatically using the AUTO-
BUILD feature. See the ELANTOOLS! Setup Software
Reference Manual for details.
NOTE 1: When configuring a system using a System6 or
Z630 Preamp Controllers - ELAN strongly recommends
using IR to control the Z880.
NOTE 2: An ELAN IRZ may be utilized to enable a single
“IR ALL” port on a System6, Z630, or HD system to control
of as many as THREE Z880s.
PLEASE SEE THE ELAN WEBSITE and download the
Technical Bulletin titled “Z630/Z880 IR Distribution
Methods” dated 1/3/03 for information detailing how to use
an ELAN IRZ to drive multiple IR Emitters from a single “IR
ALL” port.

ELAN HOME SYSTEMS INSTALLATION MANUAL
880
© ELAN Home Systems • 2003 • All rights reserved. 1/03 Page 11
RS485+
RS485 -
BLUE
WHITE/BLUE
ORANGE
WHITE/ORANGE
GREEN
WHITE/GREEN
BROWN
WHITE/BROWN
Z630
BLUE
WHITE/BLUE
ORANGE
WHITE/ORANGE
GREEN
WHITE/GREEN
BROWN
WHITE/BROWN
Z880
from ZPADs
}
from ZPADs
}
from Z600
RS485+
RS485-
C45P RJ-45
Interface Cables
AUDIO
OUT
VIDEO
OUT
LR
A/V Source #1 of 6
Zone 2
TV
Zone 1
TV
Zone 3
TV
(see Z630 Installation Manual for complete Z630 installation and wiring instructions)
Z880
x
x
x
+12V
GND
IR
to Optional Local
IR Receiver
Z 880 to Z 630 RS485 Network Connections
IR INPUTS NETWORK/IR
INTERFACE
NOTE: When using the Z 880 in a Z 630 system, the Z 880's dip
switches remain in the factory default setting (all down) unless
you are sharing the video sources with another device such as
an A/V receiver (see SHARING VIDEO SOURCES, Page 15 for details).
(See below
for additional
connections)
CAUTION!!!
Connect the RS485 wires between
the Z630 and Z880 ONLY if ONE
or TWO Z630s and NO CAMERAS
are utilized.
DO NOT
Connect the RS485 wires between
the Z630 and Z880 if CAMERAS are
used, or if THREE or FOUR Z630s
(with or without CAMERAS) are utilized.
880 DIAGRAMS
Z•880 to Z•630 PreAmp Controller Connections
Connecting the Z•880 to a Single (3-Zone) Z•630 PreAmp Controller

© ELAN Home Systems • 2003 • All rights reserved. 1/03 Page 12
cELAN HOME SYSTEMS INSTALLATION MANUAL
880
RS485 Connections between the Z•880 and twin Z•630s
RS485+
RS485-
C45P RJ-45
Interface Cables
AUDIO
OUT
VIDEO
OUT
LR
A/V Source #1 of 6
Zone 2
TV
Zone 1
TV
Zone 3
TV
Zone 5
TV
Zone 4
TV
Zone 6
TV
(see Z630 Installation Manual for complete Z630 installation and wiring instructions)
AUX Z 630
Z 880
RS485+
RS485 -
BLUE
WHITE/BLUE
ORANGE
WHITE/ORANGE
GREEN
WHITE/GREEN
BROWN
WHITE/BROWN
MAIN
Z 630
BLUE
WHITE/BLUE
ORANGE
WHITE/ORANGE
GREEN
WHITE/GREEN
BROWN
WHITE/BROWN
Z 880
from ZPADs
}
from ZPADs
}
from Z600
RS485+
RS485 -
BLUE
WHITE/BLUE
ORANGE
WHITE/ORANGE
GREEN
WHITE/GREEN
BROWN
WHITE/BROWN
AUX
Z 630
from ZPADs
}
from ZPADs
}
from Z600
+12V
GND
IR
to Optional Local
IR Receiver
x
x
x
Z 880 to Dual Z 630 RS485 Network Connections
IR INPUTS
IR INPUTS
NETWORK/IR
INTERFACE
NOTE: When using the Z880 in a Z630 system, the Z880's DIP switches remain in the
factory default setting (all down) unless you are sharing the video sources with another
device such as an A/V receiver (see SHARING VIDEO SOURCES, page 15 for details).
CAUTION!!!
Connect the RS485 wires between the Z630 and Z880 ONLY if ONE
or TWO Z630s and NO CAMERAS are utilized. DO NOT connect
the RS485 wires between the Z630 and Z880 if CAMERAS are used,
or if THREE or FOUR Z630s (with or without CAMERAS) are utilized.
MAIN Z 630
Z630 DIP Switches
(front panel)
Zone 1 VAR/FIXED
Zone 2 VAR/FIXED
Zone 3 VAR/FIXED
Chassis Config.
Chassis Config.
Main
Chassis 2
Chassis 3
Chassis 4
DIP #4 #5
(See below
for additional
connections)

ELAN HOME SYSTEMS INSTALLATION MANUAL
880
© ELAN Home Systems • 2003 • All rights reserved. 1/03 Page 13
AUDIO
OUT
VIDEO
OUT
LR
ON
ON
ON
ON
ON
AUDIO
OUT
VIDEO
OUT
LR
A/V Source #1
A/V Source #8
Zone 1
TV
Zone 5
TV
Zone 8
TV
Audio from
A/V Source #2
Audio from
A/V Source #3
Audio from
A/V Source #4
Z 880
Quad Source Input Card #2,
Audio from A/V Sources 5-8
Audio from
A/V Source #1
Z¥880 DIP SWITCH SETTINGS REMAIN AT FACTORY DEFAULT (ALL DOWN)
(Video Zones 1-8)
HD Connections Using 1 Z•880 for a Maximum of 8
Video Zones
Shown: A/V Sources 1 and 8, Video Zones 1, 5, 8
Z880 DIP SWITCH SETTINGS REMAIN AT FACTORY DEFAULT (ALL DOWN)

© ELAN Home Systems • 2003 • All rights reserved. 1/03 Page 14
ELAN HOME SYSTEMS INSTALLATION MANUAL
880
AUDIO
OUT
VIDEO
OUT
LR
ON
ON
ON
ON
ON
AUDIO
OUT
VIDEO
OUT
LR
A/V Source #1
A/V Source #8
Zone 1
TV
Zone 9
TV
Zone 16
TV
Audio from
A/V Source #2
Audio from
A/V Source #3
Audio from
A/V Source #4
Z 880 #1
Quad Source Input Card #2,
Audio from A/V Sources 5-8
Audio from
A/V Source #1
ON
ON
ON
ON
ON
ON
ON
ON
ON
ON
move MODE
dip switch #2
to the UP
position
for each source that is "Y'd" to the inputs of both
Z 880s, the associated 75 OHM dip switch must
be moved to the UP position
"Y"
"Y"
Z 880 #2
Video Zones 1-8
Video Zones 9 -16
Z 880 #2 (AUX1, Video Zones 9-16)
Z 880 #1 (MASTER, Video Zones 1-8)
REMAINS AT FACTORY DEFAULT (ALL DOWN)
HD Connections Using 2 Z•880’s for a Maximum of 16
Video Zones
Shown: A/V Sources 1 and 8, Video Zones 1, 9, 16
Dip Switch Settings

ELAN HOME SYSTEMS INSTALLATION MANUAL
880
© ELAN Home Systems • 2003 • All rights reserved. 1/03 Page 15
AUDIO
OUT
VIDEO
OUT
LR
ON
ON
ON
ON
ON
AUDIO
OUT
VIDEO
OUT
LR
A/V Source #1
A/V Source #8
Zone 1
TV
Zone 9
TV
Zone 17
TV
Audio from
A/V Source #2
Audio from
A/V Source #3
Audio from
A/V Source #4
Z 880 #1 Video Zones 1-8
Quad Source Input Card #2,
Audio from A/V Sources 5-8
Audio from
A/V Source #1
ON
ON
ON
ON
ON
ON
ON
ON
ON
ON
Z¥880 #2 (AUX1, Video Zones 9-16)
move MODE dip
switch #2 to the
UP position
for each source that is "Y'd" to the inputs of both
the Master and AUX1 Z 880s, the associated 75
OHM dip switch must be moved to the UP position
Z¥880 #1 (MASTER, Video Zones 1-8)
REMAINS AT FACTORY DEFAULT (ALL DOWN)
ON
ON
ON
ON
ON
Z 880 #2 Video Zones 9-16
Zone 24
TV
ON
ON
ON
ON
ON
Z¥880 #3 (AUX2, Video Zones 17-24)
move MODE dip
switches 2 & 3
to the UP position
for each source that is "Y'd" from the AUX1 Z 880
to the AUX2 Z 880, the associated 75 OHM dip
switch must be moved to the UP position
"Y"
"Y"
"Y"
"Y"
Z 880 #3 Video Zones 17-24
HD Connections Using 3 Z•880’s for a Maximum of 24
Video Zones
Shown: A/V Sources 1 and 8, Video Zones 1, 9, 17, 24

© ELAN Home Systems • 2003 • All rights reserved. 1/03 Page 16
ELAN HOME SYSTEMS INSTALLATION MANUAL
880
Z•880/HD Serial Port Connections
Z•880/HD + RS232 Controller Serial Port Connections
Dual 6-pin DIN
Serial Interface
Cable (supplied)
ON
Z 880
HDC2042
Serial
Communications
Card
ONON ON
from HDC2042
Serial Communication
Card
Master
Z 880
AUX 1
Z 880
AUX 2
Z 880
Dual 6-pin DIN
Serial Interface
Cable (supplied)
HDC2042 Serial
Communications
Card
6-pin DIN
Serial Interface
cable (supplied)
9-pin DSUB
to 6-pin DIN
cable (supplied)
PC/Touch Screen, etc.
ON
Z 880
COMM Port
ON ON
to HDC2042
Serial
Communications
Card
from RS232
Controller
COMM port
ON
Master
Z 880
AUX 1
Z 880
AUX 2
Z 880
9-pin DSUB
to 6-pin DIN
cable (supplied)
Dual 6-pin DIN
Serial Interface
cable (supplied)
USING 1 Z•880 USING MULTIPLE Z•880s

ELAN HOME SYSTEMS INSTALLATION MANUAL
880
© ELAN Home Systems • 2003 • All rights reserved. 1/03 Page 17
ON ON
from RS232
Controller
COMM port
ON
Master
Z 880
AUX 1
Z 880
AUX 2
Z 880
9-pin DSUB
to 6-pin DIN
cable (supplied)
Dual 6-pin
DIN Serial
Interface
cables
(1 supplied)
S A RS CTAND- LONE 232 ONNECTIONS
Stand-Alone RS232 Connections and Dip Switch
Settings
ON
ON
ON
ON
ON
Z 880 #2 (AUX1, Video Zones 9-16)
move MODE dip
switches 1 & 2 to
the UP position
for each source that is "Y'd" to the inputs of both
the Master and AUX1 Z 880s, the associated 75
OHM dip switch must be moved to the UP position
Z 880 #1 (MASTER, Video Zones 1-8)
ON
ON
ON
ON
ON
Z 880 #3 (AUX2, Video Zones 17-24)
move MODE dip
switches 1, 2 & 3
to the UP position
for each source that is "Y'd" from the AUX1 Z 880
to the AUX2 Z 880, the associated 75 OHM dip
switch must be moved to the UP position
S A RS D S STAND- LONE 232 IP WITCH ETTINGS
ON
ON
ON
ON
ON
move MODE dip
switch #1 to the UP
(RS232) position
for each source that is "Y'd" to the inputs of both
the Master and AUX1 Z 880s, the associated 75
OHM dip switch must be moved to the UP position

© ELAN Home Systems • 2003 • All rights reserved. 1/03 Page 18
ELAN HOME SYSTEMS INSTALLATION MANUAL
880
Z•880 Surveillance Application and
CCTV Connections
COAX
ON
ON
ON
ON
ON
Zone 6
TV
Zone 2
TV
Zone 8
TV
CAM2
CAM4
CAM6
CAM8
18/2 (for Power)
(Remove)
WHITE STRIPE
is POSITIVE (+)
BLACK = ( - )
12VDC
500mA
P/N
9500006
F-to-RCA
Adapter
F-to-RCA
Adapter
ELAN Z880
WHITE = (+)

ELAN HOME SYSTEMS INSTALLATION MANUAL
880
© ELAN Home Systems • 2003 • All rights reserved. 1/03 Page 19
AUDIO
OUT
VIDEO
OUT
LR
ON
ON
ON
ON
ON
VIDEO
IN
A/V Source #1
A/V Receiver
Zone 1
TV
Zone 5
TV
Zone 8
TV
Z 880
Shown: A/V Source 1, Video Zones 1, 5, 8
VIDEO
OUT
"Y"
TV in
Media Room/
Home Theater
cutaway
view
ON
ON
ON
ON
For each source that is "Y'd" to the inputs of both the Z880
and another device such as a A/V receiver or surround sound
processor, the associated 75 OHM dip switch must be moved
to the UP position.
In an HD or stand-alone RS232 application where more than
one Z880 is being used and the sources are being 'shared',
the associated source 75 OHM termination dip switch on all
Z880s (including the MASTER) must be moved to the UP
position.
BLUE
WHITE/BLUE
ORANGE
WHITE/ORANGE
GREEN
WHITE/GREEN
BROWN
WHITE/BROWN
Z 880
+12V
GND
IR
NETWORK/IR
INTERFACE
ELAN IRC3000
In-Wall Decora
IR Receiver
R
+12V
+12V
GND
GND
IR
IR
Up to 10 IR receivers can be connected in parallel to the Z 880
Sharing Video Sources
75 OHM Termination Dip Switch Settings
Z•880 External IR Receiver Connections

© ELAN Home Systems • 2003 • All rights reserved. 1/03 Page 20
ELAN HOME SYSTEMS INSTALLATION MANUAL
880
The Z880 Serial Port uses the following communication settings:
baud o parity data bits stop bit
Protocol format: <CR> V X Y
19,200 N 8 1
Device
ID
Zone #
Source
#
Carriage
Return
<CR> V X Y
ENTER V 1 1 = select ZONE #1/SOURCE #1
ENTER V 5 8 = select ZONE #5/SOURCE #8
ENTER V 7 0 = select ZONE #7/MUTE
General ASCII Commands
Zone #
1
2
3
4
5
6
7
8
9
10
11
12
13
14
15
16
17
18
19
20
21
22
23
24
X
1
2
3
4
5
6
7
8
9
A
B
C
D
E
F
G
H
I
J
K
L
M
N
O
Source #
0
1
2
3
4
5
6
7
8
Y
Zone Mute
1
2
3
4
5
6
7
8
End
Character*
Hex = 0x18
Dec = 24
*the End Character protocol is required only when the
serial port of an HD Series Automation Control Card
is being "looped through" the Z880.
PLEASE NOTE: All characters are UPPER CASE, and
all command lines must be preceded by a carriage
return (ENTER), i.e.
Z•880 Standard Protocol
6-Pin DIN to 9-Pin DSUB
Cable Extension
RTS
HDTX
RTS
RX
SHEILD
NC
RX
RTSRTS
HDTX
NC
6-Pin DIN to 6-Pin DIN
Cable Extension
6-PIN Mini DIN
(MALE)
RS232 D-SUB
(FEMALE)
6-PIN Mini DIN
(MALE)
6-PIN Mini DIN
(MALE)
Table of contents
Other Elan Controllers manuals
Popular Controllers manuals by other brands

Hoval
Hoval TopTronic E instructions

Nexmosphere
Nexmosphere XPERIENCE XC-941 quick start guide

Neptronic
Neptronic BM200S Specification & installation instructions

YASKAWA
YASKAWA CIPR-GA50C series Installation and operation instruction

NSI
NSI NCM 6200 Operation manual

Jflow controls
Jflow controls IQL Installation & operation manual