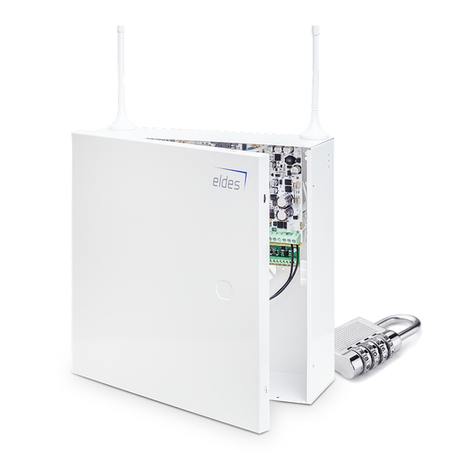
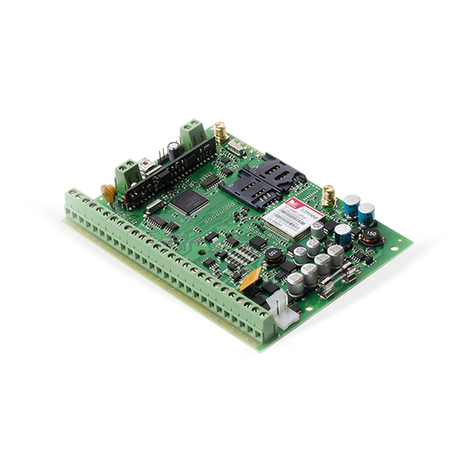
Eldes ESIM264 User manual

GSM ALARM AND MANAGEMENT SYSTEM
ESIM264
COMPLIES WITH EN 50131-1 GRADE 2, CLASS II REQUIREMENTS

2
CONTENTS
1. General Information ..............................................................................................................................................................................8
1.1 Functionality ..................................................................................................................................................................................................................................... 8
1.2 Compatible Device Overview .....................................................................................................................................................................................................8
1.3 Default Parameters & Ways of Parameter Conguration ..................................................................................................................................................9
2. Technical Specications ......................................................................................................................................................................11
2.1 Electrical & Mechanical Characteristics .................................................................................................................................................................................11
2.2 Main Unit, LED & Connector Functionality...........................................................................................................................................................................12
2.3 Wiring Diagrams ............................................................................................................................................................................................................................13
2.3.1 General Wiring ............................................................................................................................................................................................................................13
2.3.2 Zone Connection Types...........................................................................................................................................................................................................13
2.3.3 Siren................................................................................................................................................................................................................................................13
2.3.4 iButton® Key Reader & Mini Buzzer......................................................................................................................................................................................14
2.3.5 Temperature Sensor & iButton® Key Reader ....................................................................................................................................................................14
2.3.6 Relay Finder® 40.61.9.12 with Terminal Socket 95.85.3 ...............................................................................................................................................15
2.3.7 Keyboards.....................................................................................................................................................................................................................................16
3. Installation ...........................................................................................................................................................................................18
4. Operation Description.........................................................................................................................................................................19
4.1 Arming & Disarming.....................................................................................................................................................................................................................19
4.2 Zones ................................................................................................................................................................................................................................................19
4.3 Programmable Outputs (PGM) ................................................................................................................................................................................................20
4.4 Wireless Devices.............................................................................................................................................................................................................................21
4.5 RS485 Interface ..............................................................................................................................................................................................................................21
4.6 1-Wire® Interface............................................................................................................................................................................................................................21
4.7 Backup Battery, Main Power Failure & Memory ................................................................................................................................................................21
4.8 Communication with Monitoring Station............................................................................................................................................................................21
4.9 GSM Loss Indication .....................................................................................................................................................................................................................21
4.10 Partitions........................................................................................................................................................................................................................................21
5. Conguration & Control ......................................................................................................................................................................22
5.1 Primary System Conguration..................................................................................................................................................................................................22
5.2 Ways of System Conguration..................................................................................................................................................................................................22
5.3 Remote System Conguration via GPRS Connection ......................................................................................................................................................23
5.3.1 Establishing Remote Connection Between ESIM264 System and Conguration Server.................................................................................24
5.3.2 Connecting to ELDES Conguration Server using ELDES Conguration Tool Software.................................................................................24
5.3.3 Ending the Conguration Process.......................................................................................................................................................................................24
5.4 Parameter Conguration Set (SMS, EKB2, EKB3)................................................................................................................................................................25
5.4.1 SMS Language ............................................................................................................................................................................................................................25
5.4.2 Passwords .....................................................................................................................................................................................................................................26
5.4.3 User Phone Numbers................................................................................................................................................................................................................28
5.4.4 Date & Time..................................................................................................................................................................................................................................30
5.4.5 Arming & Disarming the System..........................................................................................................................................................................................31
5.4.6 Zones..............................................................................................................................................................................................................................................33
5.4.7 PGM Outputs...............................................................................................................................................................................................................................45
5.4.8 Siren................................................................................................................................................................................................................................................48
5.4.9 Info SMS.........................................................................................................................................................................................................................................51
5.4.10 Notication in Case of Alarm...............................................................................................................................................................................................52
5.4.11 Notication About Arming & Disarming.........................................................................................................................................................................55
5.4.12 Notication About Temperature Change.......................................................................................................................................................................56
5.4.13 Notication About Main Power Supply Status .............................................................................................................................................................58
5.4.14 Remote Listening ....................................................................................................................................................................................................................60
5.4.15 System Control from Any Phone Number .....................................................................................................................................................................61
5.4.16 Partitions ...................................................................................................................................................................................................................................62

MANUAL ELDES ESIM264 V2.0 3
5.4.17 Additional Parameters...........................................................................................................................................................................................................65
6. Technical Support................................................................................................................................................................................68
6.1 Trouble Indication ........................................................................................................................................................................................................................68
6.2 Frequently Asked Questions .....................................................................................................................................................................................................70
6.3 Troubleshooting ............................................................................................................................................................................................................................71
6.4 Restoring Default Parameters...................................................................................................................................................................................................72
6.5 Upgrading the Firmware using USB Cable...........................................................................................................................................................................72
6.6 Upgrading the Firmware via GPRS Connection (FOTA)...................................................................................................................................................73
7. Wired Devices ......................................................................................................................................................................................74
7.1 EKB2 - LCD Keyboard....................................................................................................................................................................................................................74
7.1.1. Technical Specications..........................................................................................................................................................................................................74
7.1.1.3 Connector and Main Unit Functionality ........................................................................................................................................................................75
7.1.1.4 Keyboard Address ..................................................................................................................................................................................................................75
7.1.2 Installation....................................................................................................................................................................................................................................76
7.1.3 Operation Description ...........................................................................................................................................................................................................77
7.1.3.1 EKB2 Zone & Tamper ............................................................................................................................................................................................................77
7.1.3.2 Arming & Disarming .............................................................................................................................................................................................................77
7.1.3.3 Keyboard Partition .................................................................................................................................................................................................................78
7.1.3.4 Icons & Messages....................................................................................................................................................................................................................78
7.1.4 Menu Tree.....................................................................................................................................................................................................................................80
7.2 EKB3 - LED Keyboard....................................................................................................................................................................................................................86
7.2.1 Technical Specications...........................................................................................................................................................................................................86
7.2.1.1 Electrical & Mechanical Characteristics .........................................................................................................................................................................86
7.2.1.2 LED Funcionality.....................................................................................................................................................................................................................86
7.2.1.3 Keys Functionality ..................................................................................................................................................................................................................86
7.2.1.4 Connector Functionality......................................................................................................................................................................................................86
7.2.1.5 Keyboard Address ..................................................................................................................................................................................................................87
7.2.2 Installation....................................................................................................................................................................................................................................88
7.2.3 Operation Description .............................................................................................................................................................................................................89
7.2.3.1 EKB3 Zone & Tamper ............................................................................................................................................................................................................89
7.2.3.2 Arming & Disarming..............................................................................................................................................................................................................89
7.2.3.3 Keyboard Partition .................................................................................................................................................................................................................89
7.3 EPGM1 - Zone & PGM Output Expansion Module.............................................................................................................................................................90
7.3.1 Technical Specications ..........................................................................................................................................................................................................90
7.3.1.1 Electrical & Mechanical Characteristics .........................................................................................................................................................................90
7.3.1.2 LED Functionality ...................................................................................................................................................................................................................90
7.3.1.3 Connector Funcionality........................................................................................................................................................................................................90
7.3.1.4 Wiring Diagram .......................................................................................................................................................................................................................91
7.3.2 Installation....................................................................................................................................................................................................................................91
7.4 EPGM8 - PGM Output Expansion Module ............................................................................................................................................................................92
7.4.1 Technical Specications ..........................................................................................................................................................................................................92
7.4.1.1 Electrical & Mechanical Characteristics .........................................................................................................................................................................92
7.4.1.2 Connector Functionality .....................................................................................................................................................................................................92
7.4.2 Installation ...................................................................................................................................................................................................................................93
7.5 EA1 – Audio Output Module.....................................................................................................................................................................................................94
7.5.1 Technical Specications...........................................................................................................................................................................................................94
7.5.2 Installation....................................................................................................................................................................................................................................94
7.6 EA2 – Audio Output Module with Amplier........................................................................................................................................................................95
7.6.1 Technical Specications...........................................................................................................................................................................................................95
7.6.2 Installation....................................................................................................................................................................................................................................95
7.7 iButton® Key Reader & Keys.......................................................................................................................................................................................................96
7.7.1 Technical Specications ..........................................................................................................................................................................................................96
7.7.1.1 Electrical & Mechanical Characteristics ..........................................................................................................................................................................96
7.7.2 Installation....................................................................................................................................................................................................................................96
7.7.3 Managing iButton® Keys..........................................................................................................................................................................................................97

4
8. ELDES Wireless Devices .....................................................................................................................................................................100
8.1 EWT1 - Wireless Transmitter-Receiver................................................................................................................................................................................. 102
8.1.1 Technical Specications........................................................................................................................................................................................................ 102
8.1.1.1 Electrical & Mechanical Characteristics ....................................................................................................................................................................... 102
8.1.2 Installation................................................................................................................................................................................................................................. 102
8.2 EW1 - Wireless Zone & PGM Output Expansion Module.............................................................................................................................................. 103
8.2.1 Technical Specications........................................................................................................................................................................................................ 103
8.2.1.1 Electrical & Mechanical Characteristics ....................................................................................................................................................................... 103
8.2.1.2 Connector & LED Functionality ...................................................................................................................................................................................... 103
8.2.3. EW1 Zones, PGM Outputs & Tamper ..............................................................................................................................................................................104
8.2.4 Restoring Default Parameters ........................................................................................................................................................................................... 104
8.3 EWP1 – Wireless PIR Movement Sensor ............................................................................................................................................................................. 104
8.3.1 Technical Specications........................................................................................................................................................................................................ 104
8.3.1.1 Electrical & Mechanical Characteristics ....................................................................................................................................................................... 104
8.3.2 Installation................................................................................................................................................................................................................................. 105
8.3.3 EWP1 Zone & Tamper ............................................................................................................................................................................................................ 105
8.3.4 Battery Replacement............................................................................................................................................................................................................. 105
8.3.5 Restoring Default Parameters ........................................................................................................................................................................................... 105
8.4 EWD1 – Wireless Magnetic Door Contact.......................................................................................................................................................................... 107
8.4.1 Technical Specications........................................................................................................................................................................................................ 107
8.4.1.1 Electrical & Mechanical Characteristics ....................................................................................................................................................................... 107
8.4.2 Installation................................................................................................................................................................................................................................. 107
8.4.3 EWD1 Zones & Tamper.......................................................................................................................................................................................................... 108
8.4.4 Battery Replacement ............................................................................................................................................................................................................ 108
8.4.5 Restoring Default Parameters ........................................................................................................................................................................................... 108
8.5 EWK1 - Wireless Key-Fob..........................................................................................................................................................................................................109
8.5.1 Technical Specications........................................................................................................................................................................................................ 109
8.5.1.1 Electrical & Mechanical Characteristics ....................................................................................................................................................................... 109
8.5.2 Installation................................................................................................................................................................................................................................. 109
8.6 EWS1 – Wireless Indoor Siren................................................................................................................................................................................................. 110
8.6.1 Technical Specications........................................................................................................................................................................................................ 110
8.6.1.1 Electrical & Mechanical Characteristics ....................................................................................................................................................................... 110
8.6.1.2 Main Unit & LED Functionality .......................................................................................................................................................................................110
8.5.3 EWK1 Zones (Panic Button).................................................................................................................................................................................................114
8.5.4 Battery Replacement ............................................................................................................................................................................................................ 114
8.5.5 Restoring Default Parameters ........................................................................................................................................................................................... 114
8.7.2 Installation................................................................................................................................................................................................................................. 115
8.7.3 Restoring Default Parameters ........................................................................................................................................................................................... 115
9. Monitoring Station ............................................................................................................................................................................116
9.1 Basic Overview ............................................................................................................................................................................................................................ 116
9.2 Event Messages...........................................................................................................................................................................................................................116
9.3 Monitoring Station Parameter Conguration (SMS, EKB2, EKB3) ............................................................................................................................. 117
9.3.1 Main Parameters .....................................................................................................................................................................................................................117
9.3.2 GPRS Network Settings......................................................................................................................................................................................................... 123
9.3.3 Voice Calls Settings................................................................................................................................................................................................................. 127
9.3.4 CSD Settings ............................................................................................................................................................................................................................. 129

MANUAL ELDES ESIM264 V2.0 5
Other manuals for ESIM264
6
Table of contents
Other Eldes Security System manuals
Popular Security System manuals by other brands

Secure
Secure USAB-1 operating instructions

B&B
B&B 480 SERIES Operation & maintenance manual

ADEMCO
ADEMCO VISTA-20P Series Installation and setup guide

Inner Range
Inner Range Concept 2000 user manual

Johnson Controls
Johnson Controls PENN Connected PC10 Install and Commissioning Guide

Aeotec
Aeotec Siren Gen5 quick start guide
