Eldes EPIR2 User manual

EPIR2GSM Alarm System

2
2
EN EPIR2 User Manual v.1.4
SAFETY INSTRUCTIONS
Valid for EPIR2 v1.01.11 and up
(later referred to as ‘the EPIR2’, ‘the system’, ‘the device’ ‘the unit’ or ‘the detector’)
Please read and follow these safety guidelines to safeguard yourself and others:
• DO NOT use the system where it can interfere with other devices - such as medical devices
• The alarm system radio transceiver operates in the GSM850, GSM900, GSM1800 and
GSM1900 bands
• DO NOT use the system in hazardous environments
• DO NOT expose the system to high humidity, chemical environments or mechanical impact
• DO NOT attempt to repair the system yourself - any repairs must be carried out by fully quali-
ed personnel only
The EPIR2 comes with its own power supply unit so you can plug it in straight away.
The unit is not meant for outdoor use, i.e. you should use it inside a building and the
power supply must be plugged into a standard Euro 2-pin socket or UK 3-pin socket
(depending on the version you have bought). The main circuit should be protected by
short circuit or over-current protection.
Please use the power supply unit which comes with your EPIR2, as it meets the EN
60950-1 standard. Any additional device you connect to the system, such as a com-
puter, must also be powered by an EN 60950-1 approved supply.
Disconnect the mains power before installing. Never install or carry out maintenance
during stormy weather. The electric socket that powers the system must be easily
accessible. In case of power cut, the system is powered by a back-up battery.
WARNING: Only use the approved 8.4V 250mAh rechargeable Ni-Mh 6HR61
(IEC)/7.2H5 (ANSI/NEDA) back-up battery with the system to avoid re or explosion.
Take care when connecting positive and negative battery terminals.
To switch the system o, unplug the external electric power supply and disconnect
the battery by rst removing the front cover of the device. A blown fuse cannot be
replaced by the user. The replacement fuse has to be of the kind indicated by the
manufacturer (fuse F1 type – C1S 2.5A).
If you use a computer to select your ideal settings, it must be earthed.
The WEEE (Waste Electrical and Electronic Equipment) symbol on this product (see
left) means it must not be disposed of in household waste. To prevent possible harm
to human health and/or the environment, you must dispose of this product in an
approved and environmentally safe recycling facility. For further information contact
your system supplier, or your local waste authority.

3
3
EPIR2 User Manual v.1.4
Contents
Technical Specications.................................................................................................... 5
1. QUICK START GUIDE ...................................................................................................... 7
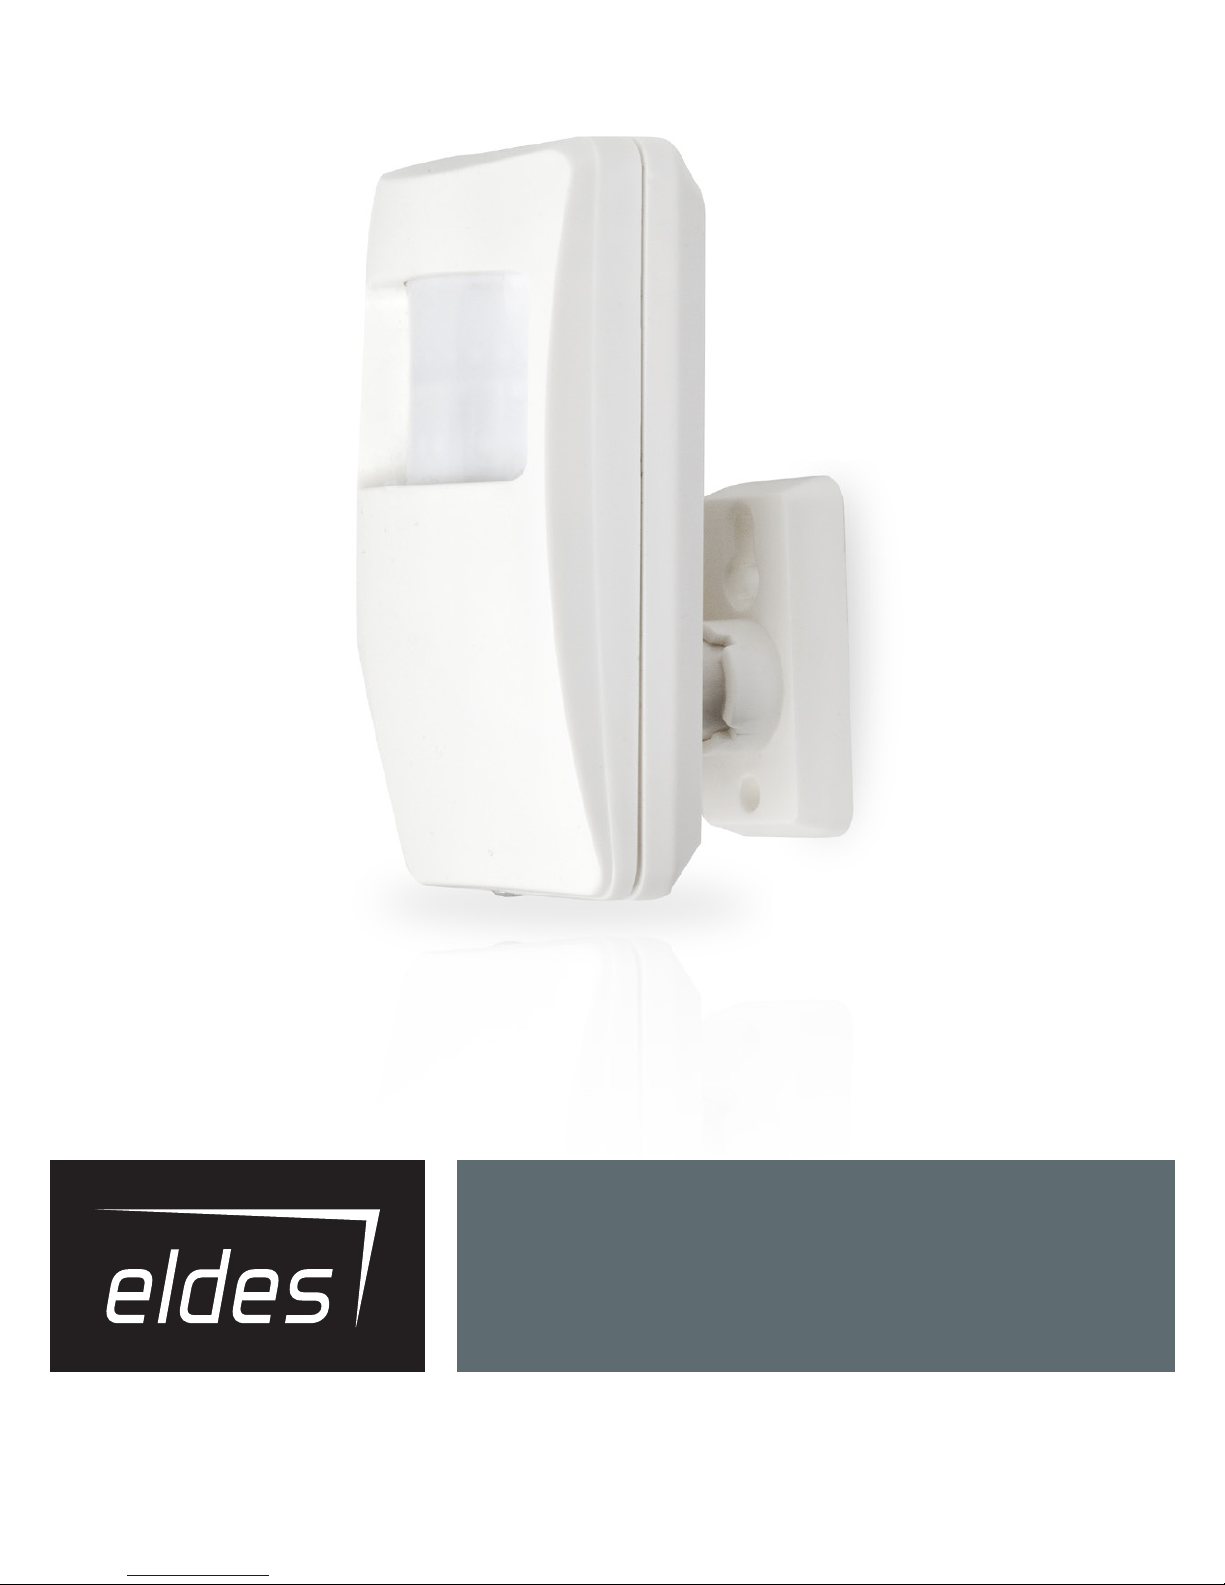
1.1. How and where to x the holder to the wall.............................................................................7
1.2. Prepare the SIM card.................................................................................................................... 8
1.3. How to insert the SIM card .......................................................................................................... 8
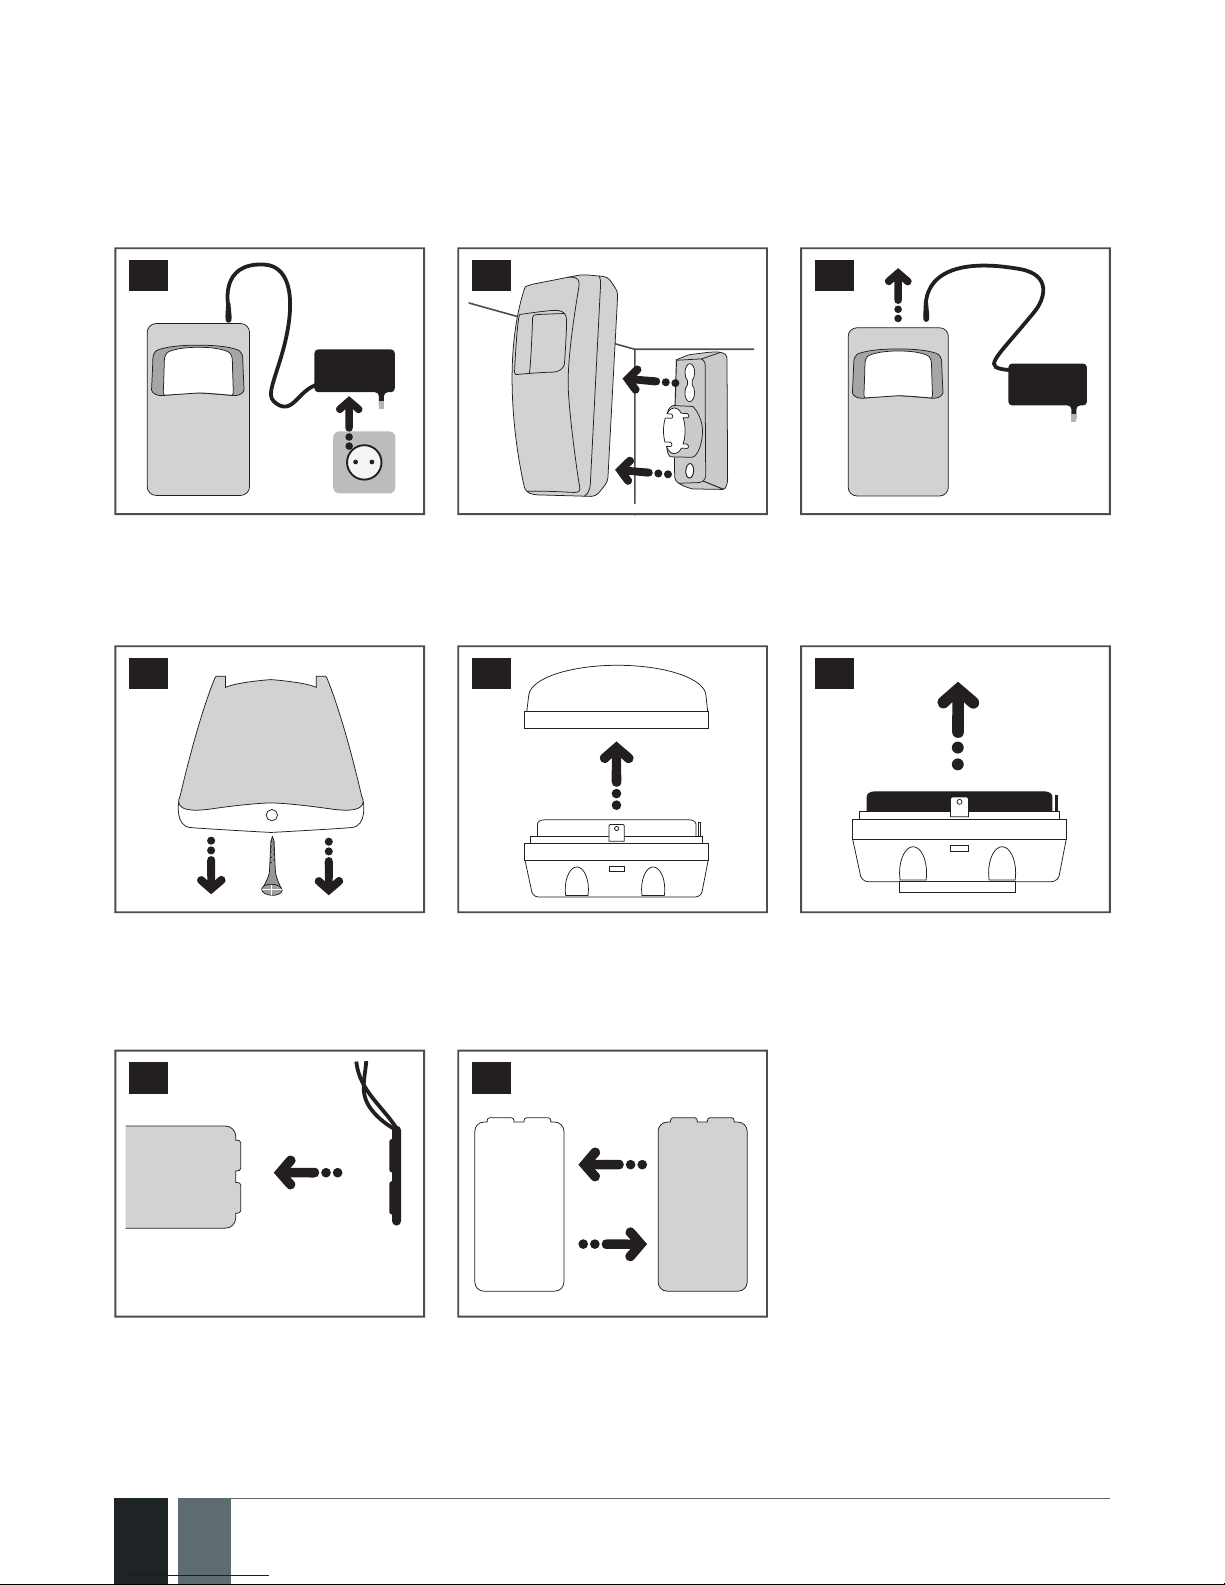
1.4. Plug the power supply connector into the device....................................................................9
1.5. Place the device into the holder..................................................................................................9
1.6. Insert the plug into the mains socket.........................................................................................9
1.7. How to check the detector is working........................................................................................9
1.8. About the back-up battery and how to replace it ................................................................. 10
1.9. How to program EPIR2 system..................................................................................................11
1.10.How to arm and disarm the system ......................................................................................... 18
1.11. A 15 second delay allows you to leave the premises ............................................................ 19
1.12. Receiving an alarm call............................................................................................................... 19
1.13. In case of mains power failure .................................................................................................. 19
1.14. Receiving an SMS/text message when temperature exceeds the set values ................ 20
1.15. Additional capabilities................................................................................................................ 20
2. HOW TO MANAGE THE WIRELESS DEVICES ................................................................ 20
2.1. How to bind a wireless device to the system......................................................................... 21
2.2. How to remove a wireless device from the system .............................................................. 24
2.3. EKB3W wireless keypad overview ........................................................................................... 25
2.4. EWK1 and EWK2 wireless keyfob overview ........................................................................... 30
3. HOW TO PROGRAM THE SYSTEM USING YOUR MOBILE PHONE ................................ 32
4. TROUBLESHOOTING.................................................................................................... 43
5. ADDITIONAL INFORMATION FOR ADVANCED USERS .................................................44
5.1. How to connect a wired siren or a LED indicator to the wired output ...............................44
5.2. How to connect a sensor to the wired zone........................................................................... 47
5.3. How to connect to the system remotely via GPRS connection............................................51
5.3.3. Ending the conguration process........................................................................................... 52
5.4. How to reset the system to default settings ......................................................................... 53
5.5. How to upgrade the rmware locally via USB connection................................................... 53
5.6. How to upgrade the rmware remotely via GPRS connection............................................ 53
5.7. Monitoring station...................................................................................................................... 54
5.8. SMART SECURITY........................................................................................................................ 54
6. Related products......................................................................................................... 58
Copyright © “ELDES UAB”, 2014. All rights reserved.
It is forbidden to copy and distribute information in this document without advance
written authorisation from ELDES UAB. We reserve the right to update or modify
this document and/or related products without warning. The EPIR2 GSM Alarm Sys-
tem complies with the essential requirements and relevant provisions of Directive
1999/5/EC. The declaration of conformity may be viewed at www.eldes.lt

4
4
EN EPIR2 User Manual v.1.4
Contents of pack:
Item Quantity
EPIR2 alarm system ....................... 1
Power supply ...................................1
User manual .....................................1
MiniUSB cable ..................................1
Back-up battery ...............................1
Screws ...............................................1
5,6kΩ resistor ...................................1
Not included: You will need to supply your own SIM card – we recommend you get a contract SIM,
not Pay As You Go.
Limited Liability
The buyer agrees that the system will reduce the risk of re, theft, burglary or other danger but
that it does not guarantee against the occurrence of such events.
ELDES UAB will not take any responsibility for the loss of personal eects, property or revenue
whilst using the system. The liability of ELDES UAB is limited to the value of the system purchased.
ELDES UAB is not aliated with any mobile/wireless/cellular provider and is therefore not respon-
sible for the quality of such services.
Manufacturer’s Warranty
The system carries a 24-month manufacturer warranty from ELDES UAB.
The warranty begins the day the system is purchased by the user and the receipt must be retained
as proof of purchase date. The warranty remains valid only if the system is used as intended, fol-
lowing all guidelines outlined in this manual and in accordance with the operating conditions
specied.
The warranty is void if the system has been exposed to mechanical impact, chemicals, high humid-
ity, uids, corrosive and hazardous environments or force majeure factors.
Dear Customer,
Thank you for choosing to purchase the EPIR2 alarm system to protect your property. Your
thoughtful decision will ensure reliable protection for many years as all ELDES products are
manufactured to meet the highest standards.
We are condent that you will be completely satised with your product. However, in the un-
likely event that you do experience a problem, please contact the dealer from whom you made
your purchase.
UAB ELDES
www.eldes.lt

5
5
EPIR2 User Manual v.1.4
Protecting your home and property with the EPIR2 alarm system
Where and how to use the alarm system
The EPIR2 is a convenient, easy to use, remote control security system for houses, cottages, coun-
try homes, garages and other buildings.
It uses an internal SIM card (not supplied by ELDES) and an infra red sensor, and communicates
with your mobile phone so you can:
• Protect your property while you are away from home
• Listen to what is happening in your property following a security alert
• Switch the system on or o from anywhere in the world at no cost
• Receive SMS/text messages updating you on the system status
• Include up to ten users to receive system status messages and/or security alerts
• Receive SMS/text messages updating you on the temperature of the surrounding area
In addition, the EPIR2 system has a built-in wireless module for system extension capabilities.The
wireless module easily allows you to bind ELDES-made wireless devices to the system. For more
details, please, refer to section 2. HOW TO MANAGE THE WIRELESS DEVICES.
IMPORTANT Please read the user manual before operating the system. The user manual will
show you how to install and operate the EPIR2 alarm security system safely and easily. You’ll
nd a quick start guide in section 1. To learn how to take advantage of additional functions,
see sections 2, 3 and 4.
Technical Specications
Supply voltage.........................................................11-15V 500mA max
Supported back-up battery....................................8.4V 250mAh rechargeable Ni-Mh 6HR61
(IEC)/7.2H5 (ANSI/NEDA)
GSM modem frequency..........................................850/900/1800/1900 Mhz
Dimensions ..............................................................104x60x33mm
Operating temperature range...............................-10…+40 °C
Humidity...................................................................0-90% RH @ 0... +40 °C (non-condensing)
Back-up battery operating time...........................up to 24 hours*
Detection angle.......................................................90°
Maximum motion detection range.......................10 metres
Wireless transmitter-receiver frequency...........868 Mhz
Wireless communication range ............................up to 30m in premises; up to 150m in open areas
Maximum number of wireless devices................16
Communications .....................................................SMS, Voice Calls, GPRS Network
Supported protocols...............................................Ademco Contact ID®, EGR100, Kronos, Cortex® SMS
BELL+: siren output commuted values...............Current - 150mA max.; voltage - 15V (EPIR2 on
external power supply) /8V (EPIR2 on backup battery)
* - with Smart Security disabled; with wireless transmitter-receiver module disabled

6
6
EN EPIR2 User Manual v.1.4
Components of the EPIR2 security system
BACK SIDE INSIDE VIEW
1
8
4
2
7
8
9
12
BELL- / COM
BELL+
Z2
13
3
5
16 6 315
10
11
14
SIM
GSM
BATTERY
1
1. EPIR2 holder for xing on the wall
2. Lens for movement detector and LED
3. Power supply socket to connect to mains electricity
4. Power supply transformer
5. Power supply connection lead
6. Reset button to restore default parameters
7. Holder to x the unit in place
8. Mini-USB connector to allow programming via your PC
9. Holder for SIM card
10. GSM module
11. Back-up battery in case of mains power supply failure
12. Motion detector to sense possible intruders
13. TAMPER button to alert you if anyone interferes with the unit
14. Microphone to allow you to listen in to an incident using your mobile phone
15. Wired zone for wired sensor & output for siren or indicator connection
16. Built-in GSM antenna
Connector Description
BELL- / COM Siren output negative terminal / output terminal / common
return terminal
Z2 Security zone terminal
BELL+ Siren output positive terminal

7
7
EPIR2 User Manual v.1.4
1. QUICK START GUIDE
OVERVIEW
This section tells you how to install the EPIR2 system quickly and easily and covers all the pro-
cedures required for full system operation. The alarm system functions via the GSM network, so
you will rst need to purchase a SIM card so you can ‘talk’ to and program your device via your
mobile phone.
How to expand your system with additional wireless devices
Your EPIR2 system has a built-in wireless module providing expansion capabilities to your system
by binding additional ELDES wireless devices to it. However, the EPIR2 system can operate fully
without any wireless devices bound to it.
This section does not cover the procedures for adding wireless devices to the system. If you in-
tend to use the wireless devices with your EPIR2 system, follow the instructions for setting up
the EPIR2 in this section then refer to section 2: HOW TO MANAGE THE WIRELESS DEVICES.
Step-by-step system installation
1.1. How and where to x the holder to the wall
The system should be installed indoors, in stationary environment ONLY. Choose a location
where unauthorised entry is most likely.
234
To prevent false alarms, avoid installing the unit in the following locations:
• With the lens facing direct sunshine, for instance in front of windows
• Places with high temperature uctuations, such as near replaces, boilers, ovens etc
• Anywhere with high dust or air ow
• In an area surrounded by metal or thick walls where the GSM connection may be lost
5After a suitable location for
your EPIR2 is chosen, x the
holder to the wall using the
screws supplied.

8
8
EN EPIR2 User Manual v.1.4
1.2. Prepare the SIM card
3
6Place the SIM card in your
mobile phone and disable
the PIN code by following the
appropriate menus on your
mobile phone. This will help
ensure that when you install
the SIM card in the EPIR2 it
will operate correctly.
IMPORTANT RECOMMENDATIONS
• We advise you to choose the same GSM SIM provider for your system as for your mobile
phone. This will ensure the fastest, most reliable SMS/text message delivery service and
phone call connection.
• For maximum system reliability we recommend you do NOT use a Pay As You Go SIM card.
Otherwise, in the event of insucient credit balance on the SIM card, the system would fail
to make a phone call or send messages.
• We also recommend you to disable call forwarding, voice mail/text message reports
on missed/busy calls. Please contact your GSM provider for more details on these ser-
vices and how to disable them.
1.3. How to insert the SIM card
The SIM card must be prepared as described in (1.2) before being inserted into the device.
7
OPEN
89
To insert the SIM card, rst
remove the front cover of
the device (containing the
detector lens) by removing
the screw at the base.
Open the SIM card holder
by rst sliding the the cover
to the right then hinging it
upwards.
Then insert the SIM card into
the holder. Insert SIM card so
that gold contacts are face
down when SIM card cover is
ipped back down.

9
9
EPIR2 User Manual v.1.4
LOCK
10 11
Slide the SIM card cover back
to lock SIM card in place.
Fit the front cover and replace
screw.
For more information see the diagram of the EPIR2 and the description of components on
page <6>.
101012 13 14
1.4. Plug the power
supply connector into
the device
1.5. Place the device into
the holder
1.6. Insert the plug into
the mains socket
1.7. How to check the detector is working
15 The system will start in 1 - 2
minutes. To test that the sys-
tem is working, when the red
LED is switched o move your
hand in front of the EPIR2
lens. The system will detect
the motion and the LED will
light up for a few seconds.
If the LED indicator blinks fast (a few times a second), the SIM card may not be inser-
ted properly or the PIN code may not have been disabled.

10
10
EN EPIR2 User Manual v.1.4
1.8. About the back-up battery and how to replace it
The back-up battery should last for at least two years. Its lifespan will largely depend on the sur-
rounding temperature and the frequency of disruptions to the mains power. During mains failure
the battery should power the system for up to twenty-four hours.
How to replace the battery:
16 17 18
1. Unplug the power supply
from the mains electricity
socket.
2. Remove the EPIR2 from its
holder.
3. Unplug the power supply
connector.
1
19
20
1021
4. Remove the screw located
on the base of the unit.
5. Open the cover. 6. Carefully remove the
back-up battery.
22 23
7. With one hand holding the
back-up battery, unplug
the battery connector.
8. Replace the battery with
the type specied in the
technical specications.

11
11
EPIR2 User Manual v.1.4
1.9. How to program EPIR2 system
Before you continue, you need to program your EPIR system. We recommend that you program
the EPIR system using your PC and ELDES Conguration Tool software as it’s the quickest, easiest
way and oers more options for your system, such as exible SMS/text message management.
NOTE
If you wish to program the EPIR2 system by SMS/text message, please refer to section 3. HOW
TO PROGRAM THE SYSTEM USING YOUR MOBILE PHONE. If not, please proceed to section
1.9.1 Download ELDES Conguration Tool software
1.9.1. Download ELDES Conguration Tool software.
Visit www.eldes.lt , you will nd a link to the Conguration Tool under the menu option
DOWNLOAD.
24
Once you are at Conguration
Tool section, left-click on the
ELDES Conguration Tool
v3.x.xx (setup.exe).
25
In the newly popped-up
window left-click on the Save
button.

12
12
EN EPIR2 User Manual v.1.4
26
Specify a location for setup le and left-click on the Save button.
We recommend placing the le on your desktop.
1.9.2. install ELDES Conguration Tool software.
27
Double left-click on the
downloaded setup file to
run it.

13
13
EPIR2 User Manual v.1.4
In the newly popped-up
window left-click on
the Next button to
continue.
28
In the next window
left-click on the Next
button to continue.
29

14
14
EN EPIR2 User Manual v.1.4
In the following window
left-click on the Next
button to continue.
30
In the next window
left-click on the Next
button to continue.
31

15
15
EPIR2 User Manual v.1.4
In the following window
left-click on the Install
button to begin the
installation process.
32
Wait for the installation
progress to complete
and do not click on any
button.
33

16
16
EN EPIR2 User Manual v.1.4
After the successful
installation, the
following window
will pop-up. Left-click
on the Finish button
in order to end the
installation and launch
ELDES Conguration
Tool software after-
wards.
34
NOTE: You do not have to repeat the installation process the next time when you want to run
ELDES Conguration Tool software again.
1.9.3. Connect EPIR2 to your PC via the USB cable
IMPORTANT: Before connecting EPIR2 to your PC via the USB cable, rst ensure the EPIR2
is powered up.
35
Plug the
miniUSB
connector
into EPIR2.
36
Plug the USB
connector
into your PC.

17
17
EPIR2 User Manual v.1.4
1.9.4. Run ELDES Conguration Tool software.
Run the software anytime you
want by double left-clicking on the
ELDES CongTool shortcut located
on the desktop.
37
38
Once the software is up
and running, left-click
on the USB connection /
-connect- button.
39
Type in 4-digit
administrator password,
which is 1470 (by default)
and click on the Continue
button.

18
18
EN EPIR2 User Manual v.1.4
40
On successful rst-time connection, a Quick Start Wizard window will show up. Left-click on the
Start Wizard button and follow the step-by-step instructions to program the EPIR2 system.
After completing all of the Quick Start Wizard steps, your system is ready for use.
1.10. How to arm and disarm the system
To arm your system dial the SIM card and wait until it rings three times and then drops the call.
This means the system is now successfully armed.
To disarm the system, dial the SIM card and wait until it rings once and then drops the call. The
system is now successfully disarmed.
In both cases be sure to wait until the system automatically drops your call. Again in both cases
the user will receive a short SMS/text message each time the system is successfully armed or
disarmed.
IMPORTANT: Dialing the SIM card is free of charge as the system drops your call in both cases.
Before arming the system it is necessary to close all doors and windows in the secured area and
move yourself away from the movement detection eld.
Alternatively, you can arm/disarm your EPIR2 system by sending an SMS text message (see
3.HOW TO PROGRAM THE SYSTEM USING YOUR MOBILE PHONE).

19
19
EPIR2 User Manual v.1.4
Close all
doors
Close all
doors
Don’t stand in
movement sensor
detection zone Close all
windows
41
1.11. A 15 second delay allows you to leave the premises
When you arm the system via your phone, a keyfob or a keypad, the system will give you a 15
second delay before it activates, giving you time to leaving the premises. You can change the time
delay at any time (see ELDES Conguration Tool software’s Help section).
The red LED on the detector lens will start to blink, indicating the time delay is in operation and
you must leave room. The red light will go o after 15 seconds when the system will be armed.
1.12. Receiving an alarm call
When the detector is armed and motion is detected in the room, the system will send a SMS/text
message to User 1 and then ring the user until the call is answered. If the call is not answered
after several rings (predetermined by your mobile phone operator) the system will hang up. If
the call is not picked up by User 1, the system will ring all the pre-programmed numbers in order
of priority starting with User 2 until a user picks up or the call expires. If the rst user is “busy” or
“out of radio coverage”, the system will also ring the next pre-programmed number. When a call is
answered, the system will activate the remote microphone so you can listen to what is happening
in the building.
You can also program the system to send an SMS/text message to all users (see ELDES Congu-
ration Tool software’s Help section).
1.13. In case of mains power failure
The system will automatically switch to the back–up battery supply in case of mains power
failure. At this time you will receive an SMS/text message warning message. You will also receive
an SMS/text message when the mains power has been restored. Likewise the system will warn
you by SMS/text message when the back-up battery is getting low, just before the system is
switched o.

20
20
EN EPIR2 User Manual v.1.4
1.14. Receiving an SMS/text message when temperature exceeds the set values
The system comes equipped with a feature intended for temperature measurement in the
surrounding area. This feature allows to monitor the temperature and receive a notication by
SMS text message, identied as the Temperature Info SMS, to user phone number when the set
temperature MIN or MAX boundaries are exceeded. For this purpose you may use the system’s
built-in temperature sensor or one of the temperature sensors incorporated in the wireless
device (if any). The following wireless devices contain a built-in temperature sensor:
ATTENTION: The supported temperature range is -10... +40 °C.
• EWP1 - wireless PIR sensors (motion detectors);
• EWS1 & EWS2 - internal and external sirens;
• EWF1 – wireless smoke detectors;
• EW1 - wireless zone and PGM output expansion module;
• EW1B - battery-powered wireless zone and PGM output expansion module.
By default, temperature measurement feature is disabled. To enable it, please refer to ELDES
Conguration Tool software. To set the MIN and MAX temperature boundaries, please refer to
section 3 or ELDES Conguration Tool software.
1.15. Additional capabilities
You can also use your mobile to request information about the system, the power supply and
the network quality. Plus you can listen in to what’s happening in the secured location through a
remote microphone. See section 3 for more details.
EPIR2 system comes equipped with built-in wireless module allowing to enhance your securi-
ty system with the addition ELDES wireless PIRs (Passive Infrared Sensors), sirens, magnetic
door and window sensors or expansion modules. See section 2 for more details.
2.HOW TO MANAGE THE WIRELESS DEVICES
IMPORTANT: Before you continue, rst follow the entire section 1. QUICK START and
prepare the system for use as described.
OVERVIEW
Your EPIR2 has a built-in wireless module. This section tells you how to bind and remove a wireless
device using your PC and ELDES Conguration Tool as well as briey describing every available
wireless device which can operate together with your EPIR2 system.
It is possible to connect up to 16 wireless devices to the EPIR2 system. This includes the following:
• EWP1 - wireless PIR sensors (motion detectors);
• EWD1 - magnetic door contacts;
• EWS1 & EWS2 - internal and external sirens;
• EWK1 & EWK2 - wireless keyfobs to arm and disarm the system without using a mobile
phone;
• EKB3W – wireless keypads to arm,disarm and congure the system without using a mobilephone;
• EWF1 – wireless smoke detectors;
• EW1 - wireless zone and PGM output expansion module;
• EW1B - battery-powered wireless zone and PGM output expansion module.
Other manuals for EPIR2
2
Table of contents
Other Eldes Security System manuals
Popular Security System manuals by other brands

Honeywell
Honeywell Lynx Plus Series Installation and setup guide

AEI Security & Communications
AEI Security & Communications SolarGuard SG1100ARM2 user guide

Silencer
Silencer Silencer ALA200FKE owner's manual

UTC Fire and Security
UTC Fire and Security interlogix Concord 4 installation manual

Rosslare
Rosslare HLX-40 user manual

TeleEye
TeleEye NX173 installation guide