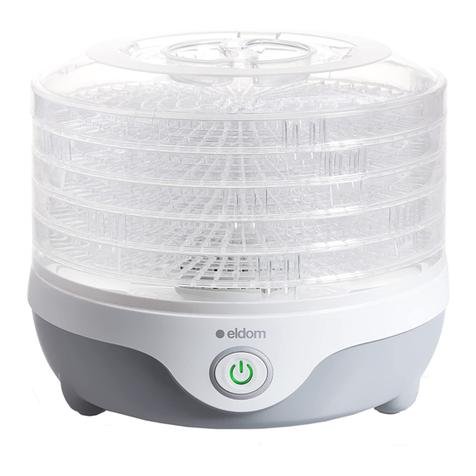
Eldom Elin SG500 User manual

Eldom Sp. zo.o. •ul. Pawła Chromika 5a • 40-238 Katowice, POLAND
tel: +48 32 2553340 • fax: +48 32 2530412 • www.eldom.eu
SG500
elin
/ PL / SUSZARKA DO ŻYWNOŚCI / EN / FOOD DEHYDRATOR
/ DE / LEBENSMITTEL DEHYDRATOR / RU / СУШИЛКА ДЛЯ ПИЩЕВЫХ ПРОДУКТОВ
/ ES / DESHIDRATADOR DE ALIMENTOS


3
/PL/
Usuwanie wyeksploatowanych urządzeń elektrycznych ielektronicznych (dotyczy krajów Unii Europejskiej iinnych
krajów europejskich zwydzielonymi systemami zbierania odpadów).
Ten symbol na produkcie lub jego opakowaniu oznacza, że produkt nie powinien być zaliczany do odpadów domowych.
Należy go przekazać do odpowiedniego punktu, który zajmuje się zbieraniem i recyklingiem urządzeń elektrycznych
ielektronicznych. Prawidłowe usunięcie produktu zapobiegnie potencjalnym negatywnym konsekwencjom dla środowiska
naturalnego izdrowia ludzkiego wynikających zobecności substancji niebezpiecznych wprodukcie. Urządzenie elektryczne
należy oddać tak, aby ograniczyć jego ponowne użycie iwykorzystanie. Jeżeli wurządzeniu znajdują się baterie należy je wyjąć
ioddać do punktu składowania osobno. URZĄDZENIA NIE WRZUCAĆ DO POJEMNIKA NA ODPADY KOMUNALNE. Recykling
materiałów pomaga wzachowaniu surowców naturalnych. Aby uzyskać szczegółowe informacje orecyklingu tego produktu,
należy się skontaktować zwładzami lokalnymi, rmą świadczącą usługi oczyszczania lub sklepem, wktórym produkt został
kupiony.
/EN/
The disposal of used electrical and electronic equipment (applies to European Union countries and other European
countries with separate waste-collection systems).This symbol on the product or its packaging indicates that it should not
be classied as household waste. It should be handed over to an appropriate company dealing with the collection and recycling
of electrical and electronic equipment. The correct disposal of the product will prevent potential negative consequences for
the environment and human health resulting from hazardous substances present in the product. Electrical devices must be
handed over to restrict their re-use and further treatment. If the device contains batteries, remove them, and hand them
over to astorage point separately. DO NOT THROW EQUIPMENT INTO THE MUNICIPAL WASTE BIN. Material recycling helps to
preserve natural resources. For detailed information on how to recycle this product, please contact your local authority, the
recycling company, or the shop where you bought it.
/DE/
Entsorgung von gebrauchten Elektro- bzw. Elektronikgeräten (gilt für Länder der Europäischen Union und andere
europäische Länder mit getrennten Abfallsammelsystemen).
Dieses Symbol auf dem Produkt oder seinerVerpackung weist darauf hin, dass das Produkt nicht als Hausmüll entsorgt werden
darf. Übergeben Sie Elektroschrott an die entsprechende Sammel- und Recyclingstelle für Elektro- bzw. Elektronikgeräte.
Die ordnungsgemäße Entsorgung des Produkts verhindert mögliche negative Folgen für die Umwelt und die menschliche
Gesundheit, die sich aus den im Produkt enthaltenen gefährlichen Stoen ergeben können. Das elektrische Gerät muss so
übergeben werden, dass die Wiederverwendung und der weitere Gebrauch eingeschränkt sind. Falls sich Batterien im Gerät
benden, entfernen Sie diese und übergeben Sie sie separat an die Sammelstelle. NICHT IN DEN HAUSMÜLL WERFEN. Das
Recycling von Materialien trägt zur Schonung der natürlichen Ressourcen bei. Detaillierte Informationen zum Recycling dieses
Produkts erhalten Sie bei Ihren örtlichen Behörden, dem Entsorgungsbetrieb oder dem Geschäft, in dem Sie dieses Produkt
gekauft haben.
/ES/
Eliminación de residuos de aparatos eléctricos y electrónicos (aplicable alos países de la Unión Europea y aotros
países europeos que poseen sistemas aislados de recogida de residuos).
Este símbolo en el producto oen su embalaje indica que el producto no debe clasicarse como residuo doméstico. Hay que
entregarlo en un punto autorizado de recogida y reciclaje de aparatos eléctricos y electrónicos. La eliminación adecuada
del producto prevendrá las posibles consecuencias negativas para el medio ambiente y la salud humana derivadas de la
presencia de sustancias peligrosas en el producto. El dispositivo eléctrico debe ser entregado de manera que se pueda limitar
su reutilización y reuso. Si hay pilas en el aparato, hay que quitarlas y entregarlas por separado al punto de almacenamiento.
NO TIRAR EL DISPOSITIVO EN EL CUBO DE BASURA MUNICIPAL. El reciclaje de materias ayuda apreservar los recursos naturales.
Para obtener la información especíca sobre el reciclaje de este producto, póngase en contacto con las autoridades locales,
con un proveedor de servicios de reciclaje ocon la tienda en la que lo compró.
/RU/
(
).
Этот символ на продукте или его упаковке означает, что продукт не следует рассматривать как бытовые отходы. Его
следует направить в соответствующий пункт сбора и последующей переработки электрического и электронного
оборудования. Правильная утилизация продукта предотвратит возможные негативные последствия для окружающей
среды и здоровья человека, связанные с наличием в продукте опасных веществ. Электрическое устройство должно
быть передано для утилизации таким образом, чтобы ограничить его повторное использование. Если в устройстве
имеются батарейки, извлеките их и передайте в место сбора отдельно. НЕ ВЫБРАСЫВАЙТЕ ОБОРУДОВАНИЕ В
КОНТЕЙНЕР ДЛЯ БЫТОВЫХ ОТХОДОВ. Повторная переработка материалов помогает сохранить природные ресурсы.
Для получения подробной информации о том, как утилизировать данное изделие, обратитесь в местный орган власти,
компанию, занимающуюся уборкой мусора, или в магазин, в котором вы приобрели данный продукт.
4
WSKAZÓWKI BEZPIECZEÑSTWA
Przed użyciem przeczytać dokładnie instrukcję obsługi.
1. Urządzenie przeznaczone jest tylko do użytku domowego.
2. Przewód przyłączeniowy należy podłączyć do gniazdka oparame-
trach zgodnych zpodanymi winstrukcji.
3. Używanie przedłużacza ztym urządzeniem nie jest zalecane. Jeśli
jednak konieczne jest użycie przedłużacza, należy się upewnić, że
jego parametry są zgodne zparametrami urządzenia, aby uniknąć
przegrzania. Nie używać jednocześnie żadnego innego urządzenia
na przedłużaczu. Nie należy umieszczać przedłużacza wmiejscu,
wktórym może zostać pociągnięty przez dzieci lub zwierzęta lub
potknąć się oniego
4. Nie używać jednorazowo dłużej niż 48 godzin. Po zakończeniu
nieprzerwanej pracy urządzenia przez 48 godzin należy wyłączyć
urządzenie, wyjąć wtyczkę zgniazdka ipozostawić do ostygnięcia.
5. Nie używać na wolnym powietrzu.
6. Nie chwytać urządzenia mokrymi rękami.
7. Nie należy pozostawiać używanego urządzenia bez nadzoru.
8. Niniejszy sprzęt może być użytkowany przez dzieci wwieku co naj-
mniej 8 lat iprzez osoby oobniżonych możliwościach zycznych,
umysłowych i osoby o braku doświadczenia i znajomości sprzę-
tu, jeżeli zapewniony zostanie nadzór lub instruktaż odnośnie do
użytkowania sprzętu wbezpieczny sposób, tak aby związane ztym
zagrożenia były zrozumiałe. Dzieci nie powinny bawić się sprzę-
tem. Dzieci bez nadzoru nie powinny wykonywać czyszczenia
ikonserwacji sprzętu. Zachować szczególną ostrożność, gdy wpo-
bliżu urządzenia znajdują się dzieci. Dzieci winny pozostawać pod
nadzorem, by mieć pewność, że nie wykorzystują one urządzenia
do zabawy.
9. Ustawić urządzenie na płaskiej, stabilnej i odpornej na wysoką
temperaturę powierzchni.
10. Urządzenie należy odłączać od sieci zawsze poprzez pociągnięcie
za wtyczkę anie za przewód zasilający.

5
11. Nie wieszać przewodu na ostrych krawędziach inie dopuszczać,
aby stykał się zgorącymi powierzchniami.
12. Wyłączyć urządzenie z sieci, jeśli nie jest już ono używane oraz
przed jego czyszczeniem.
13. Pozostawić do ostygnięcia przed założeniem lub zdjęciem części.
14. Nie dotykać gorących powierzchni.
15. Przed wyjęciem wtyczki zgniazdka sieciowego wyłączyć najpierw
urządzenie.
16. Nie wolno zanurzać podstawy z silnikiem, przewodu i wtyczki
wwodzie lub innych płynach.
17. Nie wolno używać uszkodzonego urządzenia również wtedy, gdy
uszkodzony jest przewód sieciowy lub wtyczka. Wtakim przypad-
ku należy oddać urządzenie do naprawy wautoryzowanym punk-
cie serwisowym.
18. Nie przenosić ani nie przesuwać wtrakcie użytkowania.
19. Nie wolno niczego stawiać na pokrywie urządzenia.
20. Nie przykrywać urządzenia wczasie pracy.
21. Nie używać wpobliżu materiałów łatwopalnych jak meble, pościel,
papier, ubrania, rany, wykładziny itp.
22. Nie wolno stawiać urządzenia w pobliżu innych urządzeń elek-
trycznych, palników, kuchenek, piekarników, itp.
23. Stosowanie akcesoriów niezalecanych przez producenta urządze-
nia może spowodować obrażenia.
24. Nie wolno wykorzystywać urządzenia do innych celów niż zostało
przeznaczone.
25. Niewłaściwe użytkowanie urządzenia może spowodować jego
uszkodzenie izranienie użytkownika.
26. Firma Eldom Sp. zo. o. nie ponosi odpowiedzialności za ewentual-
ne szkody powstałe wwyniku niewłaściwego używania urządze-
nia.

6
OPIS OGÓLNY (fot. 1)
1. Pokrywa
2. Sita (5 szt.)
3. Podstawa
4. Regulacja temperatury
5. Wyświetlacz
6. Włącznik / timer
DANE TECHNICZE
- moc: 245W
- napięcie zasilania: 220-240V ~ 50Hz
- regulacja temperatury: 40-70°C
- dopuszczalny czas nieprzerwanej pracy: 48 godz.
- przerwa przed ponownym rozpoczęciem pracy: 2 godz.
PRZEZNACZENIE
Suszenie produktów to skuteczny sposób na ich konserwację. Ciepłe powietrze ostałej, regulowanej temperaturze
swobodnie krąży wewnątrz urządzenia między górną idolną pokrywą, sitami, których wysokość można regulować
oraz podstawą zasilającą. Dlatego produkty znajdujące się w sekcjach urządzenia schną równomiernie i przy
minimalnych stratach prozdrowotnych witamin. Dzięki temu można cieszyć się owocami, warzywami igrzybami,
które są przygotowywane bez użycia niezdrowych substancji przez cały rok.
Za pomocą suszarka SG500 można suszyć większość artykułów spożywczych, między innymi:
- grzyby,
- owoce,
- mięsa (wołowina, drób),
- makarony,
PL INSTRUKCJA OBSŁUGI
SUSZARKA DO ŻYWNOŚCI SG500
1
3
456
2
fot. 2fot. 1

7
- warzywa - np. wcelu przygotowania zdrowych posiłków instant (bez konserwantów),
- rośliny (kwiaty, liście),
- zioła, przyprawy
- owoce wcukrze, do późniejszego przetworzenia na soki instant,
UŻYTKOWANIE
Po rozpakowaniu urządzenia należy upewnić się, czy nie uległo ono uszkodzeniu wczasie transportu. Wrazie
jakichkolwiek wątpliwości należy wstrzymać się z jego użyciem do czasu skontaktowania się z punktem
serwisowym. Przewód przyłączeniowy należy podłączyć do sieci elektrycznej oparametrach zgodnych zpodanymi
na tabliczce znamionowej.
Przed pierwszym użyciem należy umyć sita (2) ipokrywę (1).
OBSŁUGA
- Upewnić się, że przewód przyłączeniowy jest odłączony od sieci.
- Ustawić podstawę (3) suszarki na płaskiej, stabilnej iodpornej na wysoką temperaturę powierzchni.
- Ułożyć sita (2) zproduktami na podstawie (3).
- produkty przed suszeniem należy umyć, anastępnie osuszyć.
UWAGA.
Nie umieszczać na sitach produktów mokrych.
- Produkty należy pokroić wkawałki mieszczące się swobodnie między ułożonymi sitami.
- Aby zwiększyć przestrzeń między sitami (2) wypustki zgórnego sita należy ustawić na podpórkach dolnego
(fot. 2). Wprzypadku cieńszych plastrów produktów można zredukować wysokość sit.
- Wczasie pracy urządzenia ciepłe powietrze krąży we wnętrzu suszarki między pokrywą isitami, apodstawą.
Ztego też powodu produkty na sitach układać należy wsposób umożliwiający swobodny przepływ powietrza
– produkty nie mogą być ułożone zbyt blisko siebie.
UWAGA.
Zaleca się założenie wszystkich 5 sit na podstawie podczas suszenia produktów, niezależnie od tego, ile sit
jest pustych.
- Na najwyższe sito (2) nałożyć pokrywę (1).
- Włączyć wtyczkę urządzenia do sieci, anastępnie nacisnąć raz przycisk (6) – cyfry na wyświetlaczu (5) zaczną
migać.
- W czasie gdy cyfry na wyświetlaczu migają ustawić czas pracy urządzenia naciskają przycisk (6). Można
ustawić czas od 1 do 48 godzin.
- Po ustawieniu żądanego czasu cyfry przestaną migać iurządzenie rozpocznie pracę.
UWAGA.
Urządzenie nie włączy się jeśli nie zostanie ustawiony czas pracy.
Czas pracy można ustawić tylko gdy cyfry na wyświetlaczu (5) migają.
Gdy przestają migać, aby ustawić czas pracy należy urządzenie wyłączyć.
- Przyciskiem (4) ustawić temperaturę pracy od 40-70°C
- Zalecane temperatury dla przykładowych produktów:
- zioła: 40°C
- pieczywo: 40-50°C
- warzywa: 50-55°C
- owoce: 55-60°C
- mięso, ryby: 65-70°C
- Po włączeniu urządzenia na wyświetlaczu (5) będzie pokazywany czas do zakończenia pracy na przemian
zustawioną temperaturą.
UWAGA.
Po włączeniu urządzenia nie można zmienić czasu pracy.
Aby zmienić czas pracy należy wyłączyć urządzenie iponownie ustawić parametry pracy.
Wtrakcie pracy urządzenia można zmienić temperaturę.
- Urządzenie wyłączy się automatycznie po upływie zadanego czasu.
- Aby wyłączyć urządzenie wcześniej należy wcisnąć iprzytrzymać włącznik (6).
- Po zakończeniu używania odłączyć urządzenie od sieci.

8
PORADY IWSKAZÓWKI
-poniższa tabela zawiera orientacyjne czasy suszenia przykładowych produktów. Czas suszenia zależy
od rodzaju produktu, grubości plastrów, stopnia wilgotności,
-czas suszenia zależny jest również od temperatury oraz wilgotności pomieszczenia,
- produkty przed suszeniem należy umyć, anastępnie osuszyć
- należy usunąć zgniłe części oraz pestki,
- wprzypadku ziół wskazane jest suszenie tylko młodych liści,
- wysuszone produkty najlepiej przechowywać wszklanych pojemnikach zmetalowymi nakrętkami wciemnym
isuchym miejscu. Wysuszone zioła można przechowywać wpapierowych torebkach,
- przechowywać tylko ostudzone produkty,
- pojemniki do przechowywania muszą być suche iczyste.
PRODUKT PRZYGOTOWANIE STOPIEŃ WYSUSZENIA CZAS
JABŁKA Obrać, wydrążyć ipokroić
wplasterki. Na 2 minuty
zanurzyć wmarynacie.
Odsączyć iułożyć na sitach.
Giętkie 4-15 godz..
ŚLIWKI Umyć, pozostawić wcałości
lub przepołowić, usunąć
pestki.
Zawilgocenie niewidoczne 5-25 godz.
BANANY Obrać ipokroić na kawałki
ogr.3mm.
Zawilgocenie niewidoczne 5-25 godz.
TRUSKAWKI Umyć ipokroić na kawałki
ogr. 9mm.
Zawilgocenie niewidoczne 5-25 godz.
ANANAS (świeży) Obrać, pokroić wplastry lub
wkostkę.
Twarde 6-36 godz.
ANANAS (zpuszki) Przed ułożenie na sitach
odcedzić iosuszyć.
Giętkie 6-36 godz.
WIŚNIE Przed suszeniem
wypestkować.
Twarde 6-36 godz.
SKÓRKA
POMARAŃCZY
Obraną skórkę pociąć na
plasterki.
Kruche 6-15 godz.
GRUSZKI Obrać iwydrążyć gniazdo
nasienne. Pokroić wplasterki,
połówki lub ćwiartki.
Giętkie itwarde 5-24 godz.
RABARBAR Suszyć tylko miękkie łodygi. Chrupiące 4-16 godz.
GRZYBY Wybrać grzyby ozawiniętych
pod spód kapeluszach,
oczyścić zpiachu lub obrać.
Suszyć pokrojone lub
wcałości.
Twarde ikruche 3-10 godz.
PIETRUSZKA Ułożyć listki na sitach. Kruche 2-10 godz.
MARCHEW Do suszenia wybrać młode
kruche korzenie. Gotować
na parze, aż będą miękkie.
Pokroić wplasterki lub
kostkę, anastępnie odsączyć.
Twarde 4-12 godz.

9
CZYSZCZENIE IKONSERWACJA
- przed przystąpieniem do czyszczenia odłączyć urządzenie od sieci iodczekać do ostygnięcia,
- podstawy (3) nie wolno zanurzać wwodzie,
- do mycia nie używać ostrych środków czyszczących,
- podstawę (3) można czyścić lekko zwilżoną szmatką iwytrzeć do sucha,
- sita (2) oraz pokrywę (1) myć wletniej wodzie,
-nie wolno myć wzmywarkach do naczyń.
OCHRONA ŚRODOWISKA
- urządzenie jest zbudowane zmateriałów, które mogą być poddane
ponownemu przetwarzaniu lub recyklingowi,
- należy je przekazać do odpowiedniego punktu, który zajmuje się zbieraniem
irecyklingiem urządzeń elektrycznych ielektronicznych.
GWARANCJA
- urządzenie przeznaczone jest do użytku prywatnego wgospodarstwie domowym,
- nie może być używane do celów zawodowych,
- gwarancja traci ważność wprzypadku nieprawidłowej obsługi,
-sprzęt oddawany do reklamacji powinien być czysty ikompletny.
Warunki gwarancji podane są wzałączniku.

10
SAFETY INSTRUCTIONS
Read the operating instructions carefully before use.
1. Connect the connecting cable to the socket according to the spe-
cications given in the instructions.
2. Using an extension cord with this appliance is not recommended.
However, if it is necessary to use an extension cord, make sure that
its ratings are compatible with those of the device to avoid overhe-
ating. Do not use the extension cord to supply any other device
at the same time. Do not use the extension cord where it can be
pulled by children or animals, or cause arisk of tripping
3. Do not use for more than 48 hours at atime. When the appliance
has operated continuously for 48 hours, turn it o (the switch sho-
uld be in the "OFF" position), unplug it from mains and allow it to
cool down.
4. Do not use the device outdoors.
5. Do not hold the device with wet hands.
6. Do not leave the device in use unattended.
7. This equipment may be used by children at least eight years of age
and by persons with reduced physical and mental capabilities and
persons lacking experience and knowledge of equipment, if su-
pervision or instruction is provided regarding the safe use of the
equipment so that threats related thereto were understandable.
Children should not play with equipment. Unattended children
should not perform cleaning and maintenance of the equipment.
8. Take special care when children are near the device. Children sho-
uld be supervised to ensure that they do not play with the device.
9. Place the device on aat, stable and heat-resistant surface.
10. Always disconnect the device from the power supply by pulling on
the plug and not on the power cord.
11. Do not hang the cord on sharp edges and do not let it touch hot
surfaces.
12. Disconnect the device from the power supply if it is not in use and
before cleaning it.

11
13. Turn o the device rst before removing the plug from the wall
socket.
14. Do not immerse the base with the motor, cord and plug in water
or other liquids.
15. Do not use adamaged device even if the power cord or plug is
damaged. In this case, have your device repaired by an authorized
service centre.
16. This appliance is intended for home use only. Do not use the devi-
ce for any purpose other than intended use.
17. Do not move or displace the device during use.
18. Do not place anything on the device cover.
19. Do not cover the device during operation.
20. Do not use the device near ammable materials such as furniture,
bedding, paper, clothes, curtains, etc.
21. Do not place the device near other electrical appliances, burners,
stoves, ovens, etc.
22. Refer servicing to an authorized service centre. Modifying the ap-
pliance or using spare parts or elements other than the original
ones is forbidden and can expose the user to hazard.
23. Eldom Sp. z o. o. shall waive any liability for any damages resulting
from user’s operating the device improperly.

12
GENERAL DESCRIPTION (photo 1)
1. Lid
2. Screens (5 pcs)
3. Base
4. Temperature control
5. Display
6. Power switch / timer
TECHNICAL DATA
- power output: 245W
- power supply voltage: 220-240 V, ~ 50 Hz
- temperature control: 40-70°C
- acceptable continuous use: 48 hours
- break before resuming to use: 2 hours
INTENDED USE
Drying is an eective way to preserve food. Warm air at a constant and adjustable temperature
circulates freely inside the appliance between the top and bottom covers, the height-adjustable
screens and the power base. Therefore, the products in the appliance sections are dried evenly
and with minimal loss of health-promoting vitamins. This way you will enjoy fruits, vegetables and
mushrooms that are prepared without unhealthy substances all year round.
EN INSTRUCTION MANUAL
FOOD DEHYDRATOR SG500
1
3
456
2
photo 2photo 1

13
You can use the SG500 dryer to dry most food products including:
- mushrooms,
- fruits,
- meat (beef, poultry),
- pasta,
- vegetables - e.g. to prepare healthy instant meals (without preservatives),
- plants (owers, leaves),
- herbs, spices,
- candied fruits for later processing into instant juice.
USE
After unpacking the appliance, make sure that it has not been damaged during transport. In case of
any doubts, do not use the appliance until the service station has been contacted. Connect the power
cord to the mains with specications matching those on the rating plate.
Wash the screens (2) and lid (1) before the rst use.
OPERATION
- Make sure that the appliance is disconnected from the mains.
- Place the base (3) on aat, stable and heat-resistant surface.
- Put the screens (2) with the products onto the base (3).
- The products should be washed and then wiped before drying.
CAUTION
Do not place wet products on the screens.
- Cut the food into pieces to t feely between the stacked screens.
- In order to increase the space between the screens (2) place the tabs of the upper screen on the
supports of the lower one (photo 2). For thinner product slices, the height of the screens can be
reduced.
- When the appliance is powered on warm air circulates inside the dryer between the lid, screens
and the base.Therefore, products should be placed on the screens so as allow the air to ow freely.
CAUTION
It is recommended to put all 5 screens on the base while drying, regardless of how many of
them are empty.
- Place the lid (1) on the uppermost screen (2).
- Connect the appliance plug to the mains and then press the button (6) once – the digits on the
display (5) will start ashing.
- While the digits on the display are ashing, set the operating time by pressing the button (6). The
possible range is 1 to 48 hours.
- Once the desired time has been set, the digits will stop ashing and the appliance will begin
operating.
CAUTION.
The appliance will start unless the operating time is set.
The operating time can only be set when the digits in the display (5) are ashing.
When they stop ashing, the appliance has to be turned o to set the operating time.
- Use the button (4) to set the operating temperature from 40 to 70°C
- Recommended temperatures for some products:
- herbs: 40°C
- bread: 40-50°C
- vegetables: 50-55°C

14
- fruits: 55-60°C
- meat, sh: 65-70°C
- When the appliance is switched on, the display (5) will show the remaining time alternating with
the set temperature.
CAUTION
When the appliance is turned on, the operating time cannot be changed.
To change the operating time, turn it o and set the parameters again.
You can change the temperature while the appliance is operating.
- The appliance will switch o automatically after the time set.
- To switch it o earlier, press and hold the switch (6).
- After use, disconnect the appliance from the mains.
HELPFUL HINTS
- the table below presents approximate drying times for some products. Draying time depends on
the kind of product, thickness of the slices and water content,
- the drying time depends also on the temperature and humidity of the room,
- the products should be washed before drying,
- any overripe parts or pits and stones should be removed,
- in the case of herbs, only the young leaves should be dried,
- the dried products should be stored in glass containers with metal lids in adark and dry place;
dried herbs can be stored in paper bags,
- only cooled down products should be stored,
- the storage containers should be clean and dry,
PRODUCTS PREPARATION DESIRED DRYING EFFECT DRYING
TIME
APPLES Wash, peel and slice. Can
be left in apretreatment
solution for two minutes.
Drain and place on the trays.
pliable 4-15 hours.
PRUNES Wash, dry whole or cut into
halves,
remove stones.
no moist 5-25 hours
BANANAS Peel and cut into 3 mm slices. no moist 5-25 hours
STRAWBERRIES Wash and cut into 3 mm
slices.
no moist 5-25 hours
PINEAPPLE
FRESH
Peel and slice or dice. tough 6-36 hours
PINEAPPLE
TINNED
Drain and dry before placing
on the trays.
pliable 6-36 hours
CHERRIES Remove the pits before
drying
tough 6-36 hours
ORANGE PEEL Cut the peel into stripes. brittle 6-15 hours

15
PEARS Peel and remove the core.
Cut into slices, halves or
quarters.
tough and pliable 5-24 hours
RHUBARB Dry only the soft stems brittle 4-16 hours
MUSHROOMS Pick ones with ball-shaped
caps. Clean from sand or
peel. Dry sliced or whole.
tough and brittle 3-10 hours
PARSLEY Place the leaves on the trays. aky 2-10 hours
CARROTS Pick tender and crunchy
roots. Steam till tender. Slice
or dice and then drain.
tough 4-12 hours
CLEANING AND MAINTENANCE
- before cleaning, unplug the appliance and wait until it cools down,
- do not immerse the base (3) in water,
- do not use aggressive cleaning agents,
- the base (3) can be cleaned with aslightly damp cloth and wiped dry,
- wash the sieves (4) and the cover in lukewarm water,
- do not wash the appliance in adish-washer machine.
ENVIRONMENTAL PROTECTION
- the appliance is made of materials which can be recovered or recycled
- the appliance should be handed over to the appropriate centre of collection and recycling of
electrical and electronic equipment
WARRANTY
- the appliance is intended for personal use at ahousehold,
- it is not intended for professional purposes,
- in case of misuse, the warranty is rendered null and void.

16
SICHERHEITSBEDINGUNGEN
Vor Gebrauch die Bedienungsanleitung genau durchlesen.
1. Die Anschlussleitung ist an die Steckdose mit den Parametern an-
zuschließen, die mit der Bedienungsanleitung angegeben werden.
2. Die Verwendung einer Steckdosenleiste mit diesem Gerät wird
nicht empfohlen. Falls es jedoch die Verwendung einer Steckdo-
senleiste erforderlich ist, stellen Sie sicher, dass deren Parame-
ter mit dem Gerät kompatibel sind. Ansonsten kann es zu einer
Überhitzung kommen. Verwenden Sie gleichzeitig kein anderes
Gerät an der Steckdosenleiste. Verlegen Sie das Kabel nicht so, dass
Kinder oder Tiere daran ziehen oder darüber stolpern können.
3. Nicht länger als 48 Stunden auf einmal verwenden. Nachdem das
Gerät 48 Stunden lang ununterbrochen in Betrieb war, schalten Sie
das Gerät aus (Schalter in der Position„OFF“), ziehen Sie den Netz-
stecker und lassen Sie es abkühlen.
4. Nicht im Freien gebrauchen.
5. Nicht mit nassen Händen anfassen.
6. Die gebrauchte Anlage nicht ohne Aufsicht lassen.
7. Diese Anlage darf von mindestens 8-jährigen Kindern und von Per-
sonen mit gesenkten körperlichen und geistigen Fähigkeiten und
von Personen ohne Erfahrung und Kenntnisse über die Anlage ge-
braucht werden, wenn Aufsicht oder Anweisung zum sicheren Ge-
brauch der Anlage organisiert wird, so dass die damit verbundene
Gefahr verständlich ist. Kinder sollen mit der Anlage nicht spielen.
Kinder ohne Aufsicht sollen die Anlage nicht reinigen oder warten.
8. Besonders vorsichtig handeln, wenn sich in der Nähe der Anla-
ge Kinder benden. Kinder sollen unter Aufsicht bleiben, um zu
gewährleisten, dass sie die Anlage nicht als Spielzeug verwenden.
9. Die Anlage auf eine ache, stabile Oberäche stellen, die gegen
hohe Temperaturen widerständig ist.
10. Die Anlage soll vom Netz ausgeschaltet werden, indem der Stecker
und nicht die Anschlussleitung gezogen wird.
11. Die Anschlussleitung nicht auf scharfe Ränder hängen und ihren
Kontakt mit heißen Oberächen verhindern.

17
12. Die Anlage vor ihrer Reinigung und wenn sie nicht gebraucht wird
vom Netz abschalten.
13. Die Anlage ausschalten, bevor die Steckdose aus dem Stecker
gezogen wird.
14. Das Gestell mit dem Motor, die Leitung und der Stecker dürfen
nicht im Wasser oder in anderen Flüssigkeiten getaucht werden.
15. Die beschädigte Anlage darf auch dann nicht gebraucht werden,
wenn die Anschlussleitung oder der Stecker beschädigt wurde. In
so einem Fall ist die Anlage bei einem autorisierten Servicepunkt
reparieren zu lassen.
16. Die Anlage dient nur zum Gebrauch im Haushalt. Sie darf nicht für
andere Zwecke gebraucht werden, als sie bestimmt wurde.
17. Die Anlage nicht übertragen oder verschieben, wenn sie gebra-
ucht wird.
18. Auf die Anlagendecke darf nichts gestellt werden.
19. Die Anlage während der Arbeit nicht bedecken.
20. Nicht in der Nähe von leicht entzündbaren Materialien wie Möbel,
Bettdecken, Papier, Kleidung, Gardinen, Bodenbeläge usw. gebra-
uchen.
21. Die Anlage darf nicht in der Nähe von anderen elektrischen Anla-
gen gestellt werden, wie Brenner, Kocher, Öfen usw.
22. Reparaturen können ausschließlich von einer autorisierten unden-
dienstwerkstätte durchgeführt werden. Jegliche Modernisierung
oder Einsatz nicht originaler Ersatzund Zubehörteile ist untersagt
und gefährdet die Nutzungssicherheit.
23. Firma Eldom Sp. z o. o. [GmbH] trägt keine Verantwortung für die
eventuellen Schaden, die durch den unsachgemäßen Gebrauch
des Geräts verursacht werden.

18
ALLGEMEINE BESCHREIBUNG (foto 1)
1. Deckel
2. Dörretagen (5 Stk.)
3. Sockel
4. Temperaturregelung
5. Anzeige
6. Ein/Aus-Schalter / Timer
TECHNISCHE DATEN
- Leistung: 245W
- Versorgungsspannung: 220-240V ~ 50Hz
- Temperaturregelung: 40-70°C
- zulässige Dauer des ununterbrochenen Betriebs: 48 Std.
- Pause vor Wiederaufnahme des Betriebs: 2 Std.
BESTIMMUNG
Der Dörrvorgang von Lebensmitteln ist eine wirksame Konservierungsmethode. Warme Luft mit
einer konstanten, einstellbaren Temperatur zirkuliert frei im Inneren des Geräts zwischen dem
oberen und unteren Deckel, den höhenverstellbaren Dörretagen und dem Sockel. So trocknen die
Lebensmittel gleichmäßig und mit einem minimalen Verlust an gesundheitsfördernden Vitaminen.
Dadurch können Sie das ganze Jahr über Obst, Gemüse und Pilze genießen, die ohne ungesunde
Stoe zubereitet sind.
DE BEDIENUNGSANLEITUNG
LEBENSMITTEL DEHYDRATOR SG500
1
3
456
2
foto 2foto 1

19
Mit dem Dörrautomat SG500 können die meisten Lebensmittel getrocknet werden, einschließlich:
- Pilze,
- Obst,
- Fleisch (Rindeisch, Geügel),
- Nudeln,
- Gemüse, z. B. zur Zubereitung gesunder Instantgerichte (ohne Konservierungsstoe),
- Panzen (Blüten, Blätter),
- Kräuter, Gewürze
- gezuckerte Früchte zur späteren Verarbeitung zu Instantsäften.
GEBRAUCH
Nach dem Auspacken des Geräts überprüfen Sie, dass es nicht durch denTransport beschädigt wurde.
Nehmen Sie das Gerät im Zweifelsfall nicht in Betrieb, bis Sie eine Servicestelle kontaktiert haben.
Das Anschlusskabel muss an ein Stromnetz mit den auf dem Typenschild angegebenen Parametern
angeschlossen werden.
Waschen Sie die Dörretagen (2) und den Deckel (1) vor dem ersten Gebrauch.
BEDIENUNG
- Achten Sie darauf, dass das Anschlusskabel vom Netz getrennt ist.
- Stellen Sie den Sockel (3) des Dörrautomaten auf einen ebenen, stabilen und hitzebeständigen
Untergrund.
- Legen Sie die Dörretagen (2) mit den Lebensmitteln auf den Sockel (3).
- Die Lebensmittel sollten vor dem Dörren gewaschen und dann abgetrocknet werden.
ACHTUNG
Legen Sie keine nassen Produkte auf die Dörretagen.
- Falls erforderlich, sollten die zu dörrenden Produkte in kleine Stücke geschnitten werden, die
bequem zwischen die gestapelten Dörretagen passen.
- Um den Abstand zwischen den Dörretagen (2) zu vergrößern, legen Sie die Stifte der oberen
Dörretage auf die Stützen der unteren Dörretage (foto 2). Für dünnere Produktscheiben kann die
Höhe der Dörretagen reduziert werden.
- Während des Betriebs warme Luft zirkuliert im Inneren des Dörrautomaten zwischen dem Deckel,
den einzelnen Dörretagen und dem Boden. Aus diesem Grund sollten die Produkte so auf den
Bildschirmen platziert werden, dass ein freier Luftstrom möglich ist.
ACHTUNG
Es wird empfohlen, beim Dörren alle 5 Dörretagen auf den Sockel zu legen, unabhängig davon,
wie viele Dörretagen leer sind.
- Setzen Sie einen Deckel (1) auf die oberste Dörretage (2).
- Stecken Sie den Gerätestecker in die Steckdose und drücken Sie dann einmal die Taste (6), die
Ziern im Display (5) blinken.
- Während die Ziern im Display blinken, stellen Sie die Betriebszeit durch Drücken der Taste (6)
ein. Die Dörrzeit können Sie von 1 bis 48 Stunden einstellen.
- Sobald die gewünschte Dörrzeit eingestellt ist, blinken die Ziern nicht mehr und das Gerät
startet das Dörren.
ACHTUNG
Das Gerät schaltet sich nicht ein, wenn die Dörrzeit nicht eingestellt ist.
Die Dörrzeit kann nur eingestellt werden, wenn die Ziern im Display (5) blinken.
Wenn sie nicht mehr blinken, muss das Gerät zur Einstellung der Dörrzeit ausgeschaltet werden.
- Mit der Taste (4) können Sie die Betriebstemperatur von 40oC bis 70oC einstellen.

20
- Empfohlene Temperaturen für verschiedene Lebensmittel:
- Kräuter: 40°C
- Brot: 40-50°C
- Gemüse: 50-55°C
- Obst: 55-60°C
- Fleisch, Fisch: 65-70°C
- Nach dem Einschalten des Geräts wird im Display (5) die Zeit bis zum Abschluss des Dörrvorgangs
im Wechsel mit der eingestellten Temperatur angezeigt.
ACHTUNG
Wenn das Gerät eingeschaltet ist, kann die Dörrzeit nicht geändert werden.
Um die Dörrzeit zu ändern, schalten Sie das Gerät aus und stellen Sie die Dörrparameter neu
ein.
Bei laufendem Gerät können Sie hingegen die Temperatur ändern.
- Nach Ablauf der eingestellten Dörrzeit schaltet sich das Gerät automatisch aus.
- Um das Gerät früher auszuschalten, drücken und halten Sie den Schalter (6) gedrückt.
- Trennen Sie das Gerät nach dem Gebrauch vom Netz.
RATSCHLÄGE UND HINWEISE
- Die nachstehende Tabelle stellt ungefähre Trocknungszeiten beispielsweise Produkte dar. Die
Trocknungszeit hängt von der Produktart, Schichtdicke und dem Feuchtigkeitsgrad ab.
- Die Trocknungszeit hängt auch von der Raumtemperatur und –Feuchtigkeit ab.
- Vor dem Trocknen sollen die Produkte gewaschen werden.
- Verfaulte Teile, Steine und Kerne sollen entfernt werden.
- Bei Kräutern sollen nur junge Blätter getrocknet werden.
- Getrocknete Produkte sollen in Glasbehältern mit Metalldeckeln, an dunklem und trockenen
Platz aufbewahrt werden. Getrocknete Kräuter können in Papiertüten aufbewahrt werden.
- Nur abgekühlte Produkte können aufbewahrt werden.
Behälter zur Aufbewahrung müssen trocken und sauber sein.
PRODUKTE ZUBEREITUNG AUSTROCKNUNGSGRAD ZEIT
ÄPFEL Schälen, Kerngehäuse
entfernen und in
Scheiben schneiden. Für 2
Minuten in
Marinade einlegen. Abgießen
und auf die
Siebe legen.
biegsam 4 4-15 Std.
PFLAUMEN Waschen, ganz lassen oder
halbieren,
Steine entfernen.
unsichtbare Anfeuchtung 5-25 Std.
BANANEN Schälen und in 3mm-Stücke
schneiden.
unsichtbare Anfeuchtung 5-25 Std.
ERDBEEREN Waschen und in 9mm-Stücke
schneiden.
unsichtbare Anfeuchtung 5-25 Std.
ANANAS FRISCH Schälen, in Scheiben oder
Würfel schneiden.
hart 6-36 Std.
ANANAS
AUS DER DOSE
Vor dem Trocknen abgießen
und ab trocknen.
biegsam 6-36 Std.
Table of contents
Languages:
Other Eldom Kitchen Appliance manuals

Eldom
Eldom MF 1500 User manual

Eldom
Eldom MP7 User manual

Eldom
Eldom MP19 User manual

Eldom
Eldom Perfect mix2 User manual

Eldom
Eldom SG200 User manual

Eldom
Eldom SK10 User manual

Eldom
Eldom PERFECT MIX2 MFC2505 User manual

Eldom
Eldom SK11A User manual

Eldom
Eldom sliss KR350 User manual

Eldom
Eldom SK12 User manual