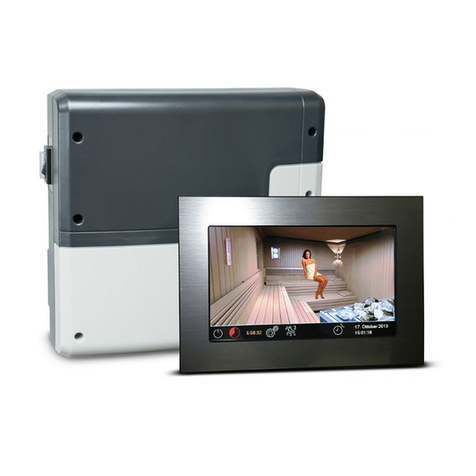
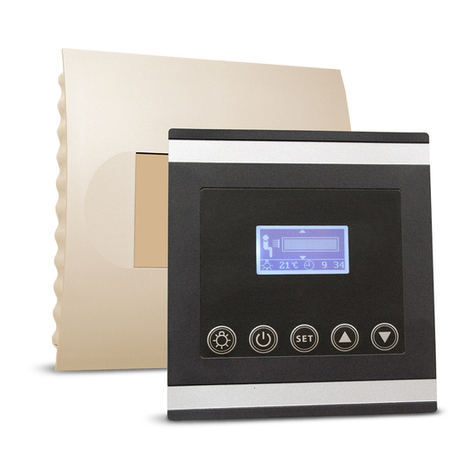
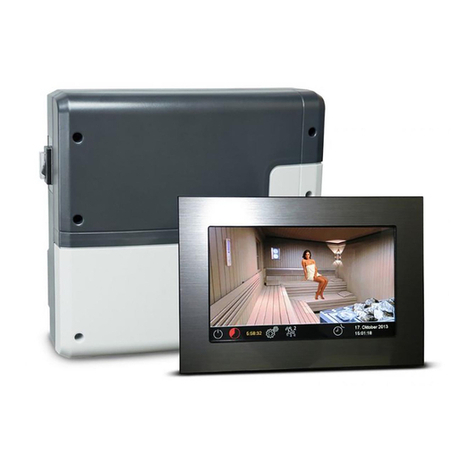
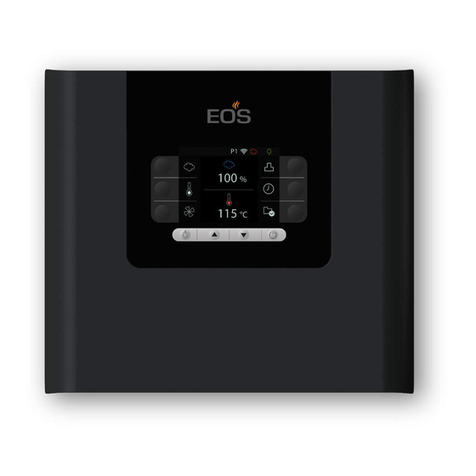
EOS EmoTouch 3 User manual

Druck-Nr.: 2902 5150
Stand: 32/20
EN
Made in Germany
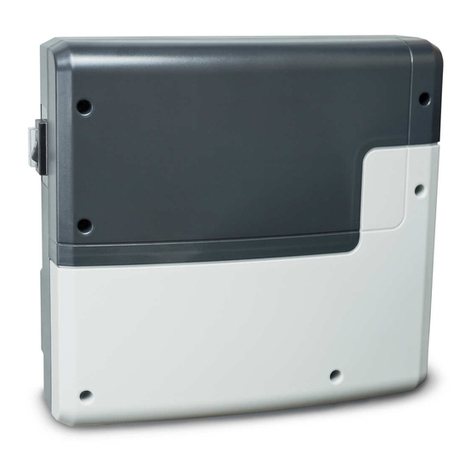
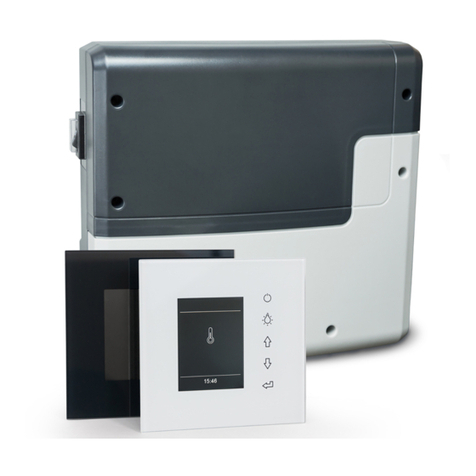
EmoTouch 3
Control Unit for Sauna Cabins
Installation Instructions for retailers

2 Installation Instructions - EmoTouch 3
Documentation
EN
Documentation
Manufacturer
Original installation instructions EN
Copyright for these installation instructions remains with
EOS Saunatechnik GmbH.
Copyright as per DIN ISO 16016:
The copying and distribution of this document, as well as the use and com-
munication of its contents without express authorisation, are not permit-
ted. Compensation will be claimed in the event of infringements.
All rights reserved with regard to patent claims or submission of design or
utility patent.
Characters, symbols and illustrations
Revision history
EOS Saunatechnik GmbH
Schneiderstriesch 1
35759 Driedorf, Germany
Tel. +49 2775 82-0
Fax +49 2775 82-431
Web www.eos-sauna.com
Additional information about an operating step
Cross-reference to a page
Read instructions
Result of a step
Table title
Title of figure
Date Version Description
1 Aug. 2020 01.00 First version

EmoTouch 3 - Installation Instructions 3
Contents
Documentation.........................................................................................................2
1 General safety instructions.................................................................................5
1.1 Safety levels.......................................................................................................5
1.2 Mounting and electrical installation ........................................................6
1.3 Operator instruction ......................................................................................7
1.4 Standards and regulations ..........................................................................9
2 Identification ...........................................................................................................10
2.1 Information about the unit........................................................................10
2.1.1 Leistungsteil ...................................................................................10
2.1.2 EmoTouch 3 control panel ........................................................11
2.2 Intended use...................................................................................................11
3 Description of the units ......................................................................................13
3.1 Scope of delivery...........................................................................................13
3.2 Technical data ................................................................................................15
4Mounting...................................................................................................................16
4.1 Power supply and data lines ....................................................................16
4.2 Installation work inside the cabin...........................................................17
4.2.1 Installing the temperature sensor ..........................................19
4.2.2 Installing cabin lighting..............................................................22
4.2.3 Fan......................................................................................................22
4.2.4 Potential-free contact .................................................................23
4.3 Relay box..........................................................................................................24
4.3.1 Guidelines........................................................................................24
4.3.2 Installing the relay box ...............................................................26
4.4 Control panel .................................................................................................28
4.4.1 Guidelines........................................................................................29
4.4.2 Mounting the control panel......................................................30
5 Electrical installation ...........................................................................................35
5.1 Circuit board assignment...........................................................................36
5.2 Connections ...................................................................................................37
5.2.1 Sensors..............................................................................................37
5.2.2 Terminals .........................................................................................39
5.3 Setting the jumper for maximum heating time.................................42
5.4 Connecting data lines ................................................................................43
5.5 Connecting and configuring consumers .............................................44
5.6 Closing the relay box housing..................................................................46


4 Installation Instructions - EmoTouch 3
EN
6Commissioning..................................................................................................... 47
6.1 Operation basics........................................................................................... 47
6.1.1 User interface icons..................................................................... 48
6.1.2 Switching on and off................................................................... 49
6.2 Setup during commissioning or after a reset ................................... 49
6.3 Defining the light source manually ....................................................... 51
6.4 Troubleshooting .......................................................................................... 54
7 Installing multiple cabins ................................................................................. 55
7.1 Configuration options ................................................................................ 56
7.1.1 Configuration 1– 8 sauna cabins............................................ 57
7.1.2 Configuration 2 – 1 steam room and
4 additional cabins ...................................................................... 58
7.1.3 Configuration 3 – 2 steam room cabins............................... 59
7.1.4 Configuration 4 – 2 steam room cabins and
4 additional cabins ...................................................................... 60
7.2 Control lines and cabin addresses ......................................................... 61
7.3 Programming of the cabin address....................................................... 63
7.4 Setting up a multi-cabin installation..................................................... 64
8 General terms and conditions of service .................................................. 67
9Disposal..................................................................................................................... 70

EmoTouch 3 - Installation Instructions 5
General safety instructions
1.1 Safety levels
Safety instructions and important operating instructions are clas-
sified according to ANSI Z535.6. Please familiarise yourself with
the following terms and symbols:
DANGER
Danger
Indicates a hazardous situation which, if not avoided, will result in
death.
WARNING
Warning
Indicates a hazardous situation which, if not avoided, could result
in death or serious injury.
CAUTION
Caution
Indicates a hazardous situation which, if not avoided, could result
in minor or moderate injury.
NOTICE
Notice
Indicates a hazardous situation which, if not avoided, will result in
damage to the unit.

6 Installation Instructions - EmoTouch 3
General safety instructions
EN
1.2 Mounting and electrical installation
These installation instructions are intended for qualified person-
nel familiar with the laws and regulations applicable to electrical
installations at the installation site. Observe the following general
safety instructions during mounting, configuration and commis-
sioning of the product.
Risk to life and limb
and risk of fire
Risk to life and limb from electric shock and fire in the event of im-
proper or faulty electrical connection. This risk also applies follow-
ing completion of the installation work.
The electrical installation of the relay box and other electrical
systems or equipment with a fixed mains connection must only
be performed by a trained electrician from an authorised elec-
trical company.
Observe the stipulations in VDE 0100 part 701.
The system must be disconnected and removed entirely from
the mains supply before commencing installation and repair
work.
The housing cover must only be removed by a specialist.
Fire hazard from
overheating
Insufficient ventilation can lead to device overheating and fire.
Flammable parts must not exceed a temperature of 140°C when
the unit is operated as intended or in the event of a malfunction.
Do not install control panels, relay boxes and modules in en-
closed cabinets or wood panelling.
Observe the sauna heater manufacturer's safety and installa-
tion instructions.
Observe the cabin manufacturer's safety and installation in-
structions.
Touchable glass surfaces on the outside of the cabins could
reach a maximum of 76°C. Attach safety devices if needed.
Damage to the unit Corrosive or heavy saline atmospheres damage the contacts in the
control panel, in the relay box and in the sensors.
The control panel and sensors should not be installed in a cor-
rosive or heavy saline atmosphere.

EmoTouch 3 - Installation Instructions 7
General safety instructions
Damage due to
incorrect mounting
location
The control unit is not suitable for outdoor use.
It must be operated only inside buildings and may not be ex-
posed to environmental conditions such as extreme humidity
and moisture or the possible formation of condensation or cor-
rosive substances in the ambient air, as well as other weather
conditions.
Similarly, excessive cold and extreme exposure to sunlight must
be prevented.
Protect the unit accordingly if there is an increased risk of me-
chanical damage.
1.3 Operator instruction
The operator of the infrared or sauna cabin must be instructed in
the general safety instructions during commissioning. The opera-
tor must be given a copy of the operating instructions.
The operator must make the end user aware of safety instructions
that are relevant to the end user.
Risk of electric shock A risk to life and limb from electric shock and fire arises in the event
of improper repair work. This risk also applies after work is com-
pleted.
The unit covers must only be removed by a specialist.
Repairs and installations must only be performed by a trained
specialist.
The system must be disconnected and removed entirely from
the mains supply before commencing repair work.
Use only original spare parts from the manufacturer.
Fire hazard Objects placed on the sauna heaters can easily be ignited and
cause fires.
Do not place objects on the sauna heater.
If you switch on the sauna heater using pre-set timers or a re-
mote control, attach a protective cover to the heater or install a
suitable safety device.
Inspect the cabin prior to commissioning.
When using control units with a remote control option (see
EN 60335-1), protection from switching on a covered sauna
heater is required.

8 Installation Instructions - EmoTouch 3
General safety instructions
EN
Risk of burns and
chemical burns
Touching hot parts may lead to skin burns and chemical burns of
the skin.
The operator must be familiar with the unit's hot parts and be
able to identify them.
The operator must be familiar with the settings for the heating
period and understand how it is controlled.
Health risks Spending time in an infrared or sauna cabin can lead to serious
health risks or even death for persons with health impairments.
Persons with health impairments who spend time in a sauna
must consult a doctor before entering an infrared or sauna cab-
in.
Equipment damage
due to overuse
The uninterrupted operation time of the sauna cabin(s) can lead to
property damage.
If the sauna cabin is used commercially, the heating time must
be set so that it switches off automatically after a specific period
of time.
If the heating does not switch off automatically after a defined
heating period, cabin use must be supervised at all times.
Inspect the cabin before each use.
Operation by
children or persons
with reduced mental
capacity
Children and persons with reduced mental capacity can be a risk.
Children must be supervised to ensure they do not play with
the unit.
Children under 8 years of age should not operate the sauna
cabin.
The settings for the heating time must only be used by children
under 8 years of age if they are supervised by an adult.
The sauna cabin must only be used by persons with reduced
mental capacity, or limited physical or sensory abilities under
supervision or if they have already been instructed in its use and
understand the risks.
Children and persons who have not received proper instruction
must not clean or service the system.

EmoTouch 3 - Installation Instructions 9
General safety instructions
1.4 Standards and regulations
The following standards, in their currently applicable versions, were
observed during design and construction.
Local regulations also apply to the installation and operation of heating,
sauna, and steam room systems.
Standard Title
DIN EN 60335-1 Household and similar electrical appliances – Part 1: General requirements
DIN EN 60335-2-53 Household and similar electrical appliances – safety – Part 2–53: Particular
requirements for sauna heating appliances and infrared cabins
DIN EN 60335-2-96 Household and similar electrical appliances – safety – Part 2–96: Particular
requirements for heating equipment
DIN EN 55014-1 Electromagnetic compatibility – Requirements for household appliances, electric
tools and similar apparatus – Part 1: Emission
DIN EN 55014-2 Electromagnetic compatibility – Requirements for household appliances, electric
tools and similar apparatus – Part 2: Immunity

10 Installation Instructions - EmoTouch 3
Identification
EN
Identification
The EmoTouch 3 control unit consists of a relay box, a control panel, a tem-
perature sensor and the connecting cables, and is used to operate a sauna
cabin.
2.1 Information about the unit
2.1.1 Leistungsteil
The nameplate is attached to the underside of the base of the housing.
Nameplate (example)
A Name F Country of origin
B Model G Manufacturer
C Item number H Manufacturing date
D Operating voltage I Serial number
E Maximum switching output (kW)
Saunasteuergerät/Control unit
IPX4
Type EmoTouch 3 Lastteil / Relay Box
Art. Nr. 94 6505 00
400 V 3N AC 50 Hz
Max. Schaltleistung 9 kW
Made in Germany
EOS SAUNATECHNIK GmbH, 35759 Driedorf
S-No. 0010915.19
A
B
C
D
E
F
G
H I

EmoTouch 3 - Installation Instructions 11
Identification
2.1.2 EmoTouch 3 control panel
The nameplate is attached to the back of the control panel.
Nameplate (example)
Requirements for operation and storage
The control panel must be installed outside of sauna cabins only. The
mounting location must meet the following climate condition require-
ments:
Ambient temperature during operation -10°C to 35°C
Storage temperature: -20°C to 60°C
2.2 Intended use
In conjunction with a suitable sauna heater, the EmoTouch 3 control unit is
intended to be used only to heat sauna cabins. It is suitable for cabins used
in private and commercial settings.
The relay box and control panel are intended only for mounting on the
wall.
The control unit is not suitable for outdoor use.
It must be operated only inside buildings and may not be exposed to envi-
ronmental conditions such as extreme humidity and moisture or the possi-
ble formation of condensation or corrosive substances in the ambient air,
as well as other weather conditions. Similarly, excessive cold and extreme
exposure to sunlight must be prevented. Protect the unit accordingly if
there is an increased risk of mechanical damage.
A Name F Country of origin
B Model G Manufacturer
C Item number H Manufacturing date
D Operating voltage I Serial number
E Maximum switching output (kW)
Saunasteuergerät/Control unit
IPX4
Type EmoTouch 3 Bedienteil / Control Panel
Art. Nr. 94 6505 00
400 V 3N AC 50 Hz
Max. Schaltleistung 9 kW
Made in Germany
EOS SAUNATECHNIK GmbH, 35759 Driedorf
S-No. 0010915.19
A
B
C
D
E
F
G
H I

12 Installation Instructions - EmoTouch 3
Identification
EN
Foreseeable misuse
The following are considered instances of foreseeable misuse:
The control and sensor cable plugs are plugged in incorrectly.
The unit is operated without knowledge of or compliance with the
safety instructions.
Operating, service and maintenance requirements are not observed.
The unit is operated after technical or other modifications are made to
the relay box.
The unit is operated by children or persons with reduced mental capac-
ity or by persons who have not been thoroughly instructed in its use.
The manufacturer is not liable for unauthorised modifications made to the
equipment and damages resulting from these modifications. The person
modifying the equipment alone shall bear the associated risk.
General safety instructions, 5

EmoTouch 3 - Installation Instructions 13
Description of the units
EmoTouch 3 consists of a relay box, a control panel, a temperature sensor
and connecting cables. Additional modules/devices can be connected to
the relay box for total control of a sauna cabin, for example, lighting, fan
and additional sensors.
3.1 Scope of delivery
The following components are included in the scope of delivery:
EmoTouch 3 scope of delivery
Ensure that you have received all parts in the scope of delivery upon
receipt or before installation at the latest.
A Relay box with 2-piece front cover
B 8 bushings
C 3 wood screws 4 x 25 mm
D 5 m connecting cable with RJ14/RJ10 modular plug for
control panel
E Removal tools for control panel
F EmoTouch 3 control panel with housing for mounting
in the wall
G Installation and operating instructions
H Ferrite ring for data lines
I Line for safety temperature limiter
J Spare fuse for safety temperature limiter
K Temperature sensor including 5 m connecting cable
with RJ10 plug, housing, circuit board, 2 screws
4x40 mm
A
BG
I
K
C D FE
J
H

14 Installation Instructions - EmoTouch 3
Description of the units
EN
Accessories (optional)
Accessories Item no.
20 m connecting cable for temperature sensor 94.6281
50 m connecting cable for temperature sensor 94.6282
10 m connecting cable for control panel (RJ10/RJ14) 94.6802
25 m connecting cable for control panel (RJ10/RJ14) 94.6285
50 m connecting cable for control panel (RJ10/RJ14) 94.6968
100 m connecting cable for control panel (RJ10/RJ14) 94.6969
10 m connecting cable for sauna bus (RJ12/RJ12) 94.5861
25 m connecting cable for sauna bus (RJ12/RJ12) 94.4647
50 m connecting cable for sauna bus (RJ12/RJ12) 94.4648
Mains adapter 230 V for control panel with cable length >
25 m
94.6671
Bench sensor 94.5725
Humidity sensor 94.5726
SBM-HOT 94.6800
SBM-ECO 94.6980
IR module as installation add-on 94.6966
IR plug-in module with adapter cable 94.2046
IR plug-in module without adapter cable 94.4960
2.5 m connecting cable for IR plug-in module 94.4396
Set SBM ECO push button 94.6980
SBM-WCI-01 web app module 94.5987
SBM remote start 94.5782
SBM-FL75/150 coloured light module 94.5996, 94.6007
SBM-S BT sound module 94.5920, 94.5921
Infrared receiver for coloured light module and sound mod-
ule
94.6810
SBM-GLT-MOD HOME Modbus module 94.7077
SBM-GLT-KNX HOME KNX module 94.7078
Modular distributor RJ12 for connecting cable for control
panel and sauna bus
2001.5298

EmoTouch 3 - Installation Instructions 15
Description of the units
3.2 Technical data
* Fan and light connections are protected by a joint 2AF fuse.
Power supply 400 V 3 N AC 50 Hz
Switching output Max. 9 kW resistive load, upgrade with LSG units possible
Fuse 3 x 16 A
Ambient temperature -10°C to +35°C
S1 output Max. 50 W/50 VA (no capacitive loads)
Supply for terminal area/sauna
heater connection
0.5–2.5 mm² rigid or flexible with wire-end ferrule, two conductors with identical
cross-section per terminal can be connected.
Terminal area WM, 3, 4, light, fan 0.34–2.5 mm² rigid or flexible with wire-end ferrule. Observe minimum cross-sec-
tions for fuse protection for the supply line.
Potential-free contact Load rating of contact for resistive loads:
- Maximum power supply: 10 A
- Maximum voltage: 30 VDC/250 VAC
Storage temperature -20°C to +60°C
Relay box housing Plastic
Dimensions (H x W x D) 270 x 300 x 100 mm
Control panel: 142 x 210 x 42 mm, mounting depth approx. 37 mm
Weight Relay box: approx. 1.5 kg
Relay box outputs/inputs 3 x RJ10 jack for sensor connection
2 x RJ14 jack for control panel and add-on modules
Control panel outputs/inputs 4 x RJ10 jack for relay box and multi-cabin connection
1 x connection for memory card (input/host, jack type A)
Connection for power adapter 24 V DC
Display Colour capacitive 7" touchscreen display in 16:9 format
Error display: Text on the display
Heating time limitation Up to 6 hrs/12 hrs/18 hrs/infinite
Temperature control 30°C–115°C (dry sauna mode)
30°C–70°C (humidity mode)
Humidity regulation Time-proportionally or optionally according to % rel. air humidity with connected
humidity sensor
Sensor system Digital sensor with safety temperature limiter 139°C
Control characteristics Digital two-point control
Connection for fan* Min. 5 W, max.150 W (only fan without starting capacitor)
Use only fans that are suitable for phase control, otherwise the fan or the control
unit can be damaged.
Connection for lighting* Min. 5 W (20 mA), resistive load, max. 100 W
Dimmable energy-saving bulbs, max. 35 W
Light source with conventional transformers, max. 60 VA. Use only dimmable light
sources.

16 Installation Instructions - EmoTouch 3
Mounting
EN
Mounting
This chapter describes how to install the relay box, the control panel and
the most important components.
Heat-resistant cables must be used to connect the sauna heater, vapor-
iser(s), lighting, fan(s) or other components if they are installed inside the
sauna cabin or in the cabin wall.
NOTICE
Damage due to incorrect mounting location
The control unit is not suitable for outdoor use.
It must be operated only inside buildings and may not be ex-
posed to environmental conditions such as extreme humidity
and moisture or the possible formation of condensation or cor-
rosive substances in the ambient air, as well as other weather
conditions.
Similarly, excessive cold and extreme exposure to sunlight must
be prevented.
Protect the unit accordingly if there is an increased risk of me-
chanical damage.
4.1 Power supply and data lines
All electrical installations and all connecting lines that are installed inside a
cabin must be suitable for an ambient temperature of at least 170°C and
protection class IPx4 or be suitable for use in a steam room (IP 65).
All lines must be routed in such a way that they are well-protected, e.g. in a
cable conduit.
NOTICE
Electronics malfunctions
Routing data and power supply lines together can lead to elec-
tronics malfunctions because, e.g. because the sensor will not be
detected.
Do not route sensor and sauna bus lines together with power
supply lines.
Route separate cable conduits.

EmoTouch 3 - Installation Instructions 17
Mounting
Line routing
The control line should be routed between the insulation and the outer
wall of the cabin. If it is installed on the cabin wall, it should be routed
through a cable conduit. Cabin insulation must be installed in such a way
that the temperature in the area in which cables are routed cannot exceed
75°C.
Extending the control panel's control line
For longer connections, special RJ10/RJ14 connecting cables with lengths
of 10 m, 25 m, and 50 m are available as an option. A power adapter is
required for cables 25 m or longer.
Alternately, the supplied (as standard) 5 m line can also be extended with
an RJ12/RJ12 coupling and an RJ12/RJ12 extension cord.
The extensions and couplings are available as options.
See Accessories (optional), 14
4.2 Installation work inside the cabin
At minimum, the cabin lighting and a temperature sensor (main sensor)
must be installed inside the cabin. Additional connections are possible,
depending on the amenities, e.g. coloured lights and audio systems as
optional add-on modules.
All electrical installations and all connecting lines that are installed inside a
sauna cabin must be suitable for an ambient temperature of at least 170°C
and protection class IPx4 or be suitable for use in a steam room (IP 65).
NOTICE
Equipment damage due to improper installation
Additional modules can be mounted in a cabin.
Connect the safety temperature limiter only to the relay box.
Always connect the safety temperature limiter as an isolated
contact.
If the installation uses multiple sauna heaters, multiple safety
temperature limiters may be required. Observe the separate
EOS instructions.

18 Installation Instructions - EmoTouch 3
Mounting
EN
Temperature sensor requirements
CAUTION
Fire hazard from overheating
Requirements that apply to installing the main sensor may exist
for certain sauna heaters.
Before installation, ensure that there are no heater-specific re-
quirements that apply to installing the sensor.
The main sensor (heater sensor) must be installed where expected temper-
atures are the highest, meaning directly above the sauna heater. Proper
installation is necessary to ensure compliance with the temperature limits
and to ensure that there is only a very slight fluctuation in temperature in
the areas of the sauna cabin where there are reclining options.
The main sensor is installed in observance of the following distances from
the cabin wall, depending on the cabin size.
Installation configuration – main sensor (heater sensor) distance from wall
Cabin smaller than 2 x 2 m Distance from wall 19 cm
Cabin larger than 2 x 2 m Distance from wall 35 cm
19 cm
35 cm
Cabin smaller than 2x2 m Cabin larger than 2x2 m

EmoTouch 3 - Installation Instructions 19
Mounting
Bench sensor requirements
The bench sensor is mounted on the ceiling above the back recliner bench
across from the sauna heater.
Installation configuration – bench sensor
Humidity sensor requirements
The humidity sensor (optional) is installed in the middle of the side wall
facing away from the sauna heater and door, at a height of approx. 150 cm.
Installation configuration – humidity sensor
4.2.1 Installing the temperature sensor
The main sensor must be installed where expected temperatures are the
highest.
Hardware + tools:
Temperature sensor and connecting cables
Drill to drill a hole in the cabin ceiling
Screwdriver
Taut wire, as needed

20 Installation Instructions - EmoTouch 3
Mounting
EN
Installation diagram
Installing the temperature sensor in the cabin
1Determine a suitable location for the installation.
The main sensor (heater sensor) must be installed on the cabin
ceiling above the sauna heater. A second sensor (bench sensor) can
be installed above the back bench.
2Drill a hole in the cabin ceiling for the cable.
3NOTICE Do not pull at the plug when routing the control line(s). Doing
so could damage the line. Attach the taut wire only to the cable.
Route the sensor cable through the hole.
4Open the temperature sensor's housing and connect the sensor bus ca-
ble.
Temperature sensor connections
A Cabin ceiling
B Temperature sensor housing
C RJ10 plug for relay box
D Line for safety temperature limiter (2-pole)
A White (sensor bus)
B Green (sensor bus)
C Brown (sensor bus)
A
B
C D
A
B
C
Other manuals for EmoTouch 3
3
This manual suits for next models
1
Table of contents
Other EOS Control Unit manuals
Popular Control Unit manuals by other brands

Grundfos
Grundfos CIM 260 Functional profile and user manual

NOVAK
NOVAK Timbuk2 Field guide

Rockwell Automation
Rockwell Automation Allen-Bradley 1734-IR2 user manual

Siemens
Siemens SENTRON PAC PROFIBUS DP operating instructions

4EVAC
4EVAC LOOPDRIVE FIM-RC quick start guide

Gardena
Gardena 1254 Operator's manual