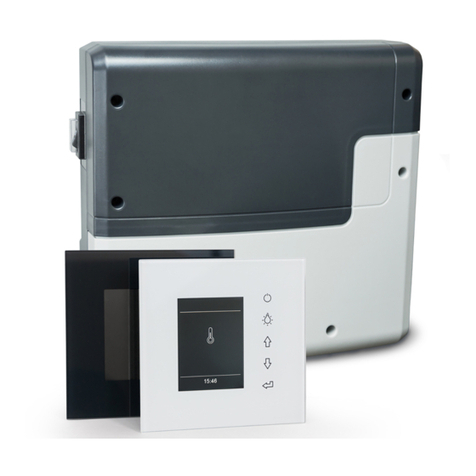
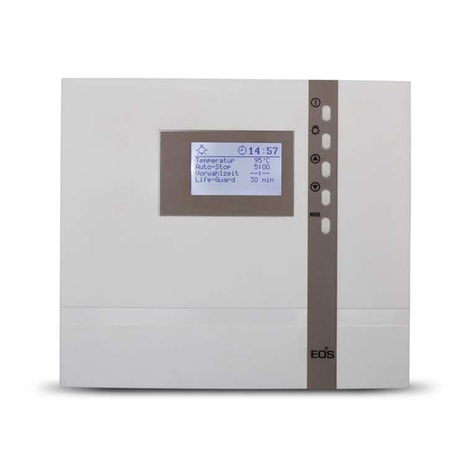
EOS InfraTec Premium User guide

INNOVATIVE SAUNA TECH N O L OGY
Made in Germany
EOS InfraTec Premium
Druck Nr. 29344785en / 27.21
EN Installation and operating instruction
Control unit for infrared cabins

2EN
English
Table of Contents
Specifications..................................................................................................................................................4
Scope of delivery...........................................................................................................................................4
General information.....................................................................................................................................5
General safety precautions........................................................................................................................5
Assembly..........................................................................................................................................................6
Relay box installation...................................................................................................................................6
Control panel installation
Installation.................................................................................................................................................7
Laying the connection cable...............................................................................................................7
Electrical Connection...................................................................................................................................8
Adapting the control to the installed components....................................................................8
Installation diagram ...............................................................................................................................9
Terminal arrangement on the circuit board..................................................................................9
Connection diagram for IR radiant heaters ................................................................................10
Connection diagram for IR heating foils...................................................................................... 11
Connection diagram for IR radiant heaters and IR heating foils......................................... 12
Connecting the sensor cables ......................................................................................................... 13
Installation of the room sensor....................................................................................................... 13
Installation of the optional heating foil sensor......................................................................... 14
Operation...................................................................................................................................................... 15
General.....................................................................................................................................................15
The user interface .......................................................................................................................... 15
Operating buttons.........................................................................................................................15
Default display Stand-by............................................................................................................. 16
Default display in operation....................................................................................................... 16
Energy-saving display................................................................................................................... 16
Initial commissioning ...................................................................................................................17
Change language...........................................................................................................................18
Change time .................................................................................................................................... 18
Foil temperature ............................................................................................................................19
Switching on the IR system ........................................................................................................ 20
Switching off the IR system........................................................................................................ 20

3
EN
Individual settings ............................................................................................................................... 21
Room temperature........................................................................................................................21
Room temperature for heating foil operation..................................................................... 22
Radiant heater for back................................................................................................................ 23
Front radiant heater ...................................................................................................................... 24
Radiant heater for legs................................................................................................................. 25
Heating time.................................................................................................................................... 26
Switch Off...................................................................................................................................................... 27
Error messages............................................................................................................................................ 28
Recycling....................................................................................................................................................... 29
Service Address:.......................................................................................................................................... 29
General Terms and Conditions of Service.......................................................................................... 30

4EN
Specications
Voltage: 230 V 1N AC 50 Hz
Fuse: 1 x 16 A
Power rating: max. 3500 W
Output circuits: 3 separate circuits (front, back, foot area)
• Front and back individually dimmable, max. 1500 W
• Switchable foot area, cannot be controlled via sensor,
max. 500 W
Temperature control range: • According to room temperature, control range 30 - 70 ° C
• According to feelings through individual dimmable zones 1
and 2
Control characteristics: Digital output control (channels 1 and 2)
Sensor system: KTY sensor (main sensor, cabin temperature)
KTY sensor (heating foil sensor, optional)
Heating time limitation: 1 - 99 minutes / 0 -12 hours
Ambient temperature: -10 to 40° C
Dimensions control panel, HxBxT: 130 x 118 x 24 mm
Dimensions relay box, HxBxT: 240 x 230 x 70 mm
Weight control panel: ca. 120 g
Weight relay box: ca. 1,5 kg
Scope of delivery
(subject to changes)
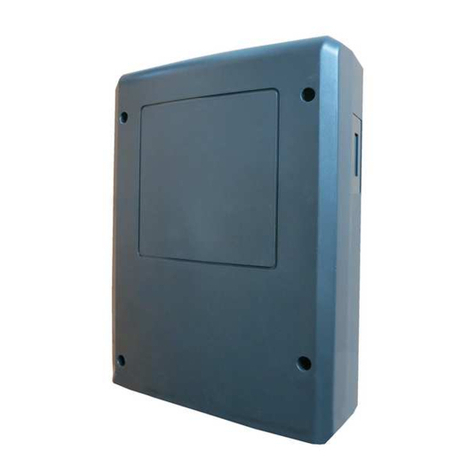
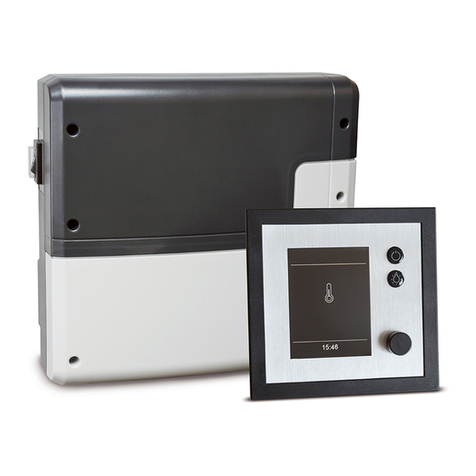
Included in control unit scope of delivery:
• Relay box
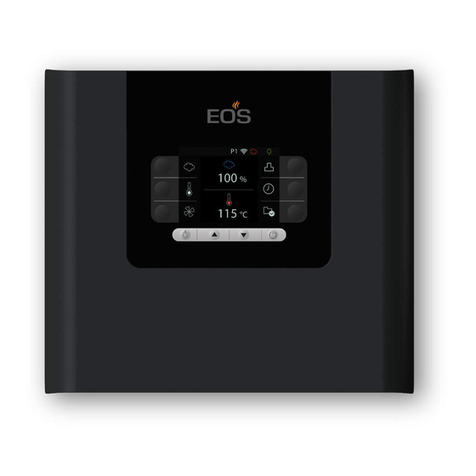
• Control panel of the control unit, incl. 2 decorative strips
• Control panel, incl. 5 m connection cable
• Plastic bag containing four mounting screws 4 x 20 mm
• Temperature sensor, two mounting screws 3 x 25 mm, sensor cable 2 m red
• Installation and operating instruction

5
EN
Dear customer,
with the purchase of this IR control unit, you have
opted for a superior quality and an innovative
electronic device which has been developed
and manufactured according to the highest
standards and norms.
Please read the guidelines in these instructions
carefully so that you can familiarise yourself
quickly and easily with the unit.
General information
The IR control unit is designed for power supply
230 V 1N 50 Hz AC and shall be protected with a
separate 16 A fuse.
The installation and connection of the sauna fa-
cilities and other electrical operating equipment
may only be carried out by a specialist from an
authorised specialist electrical company; here
VDE 0100 Part 703/2006-2 must be observed.
Please read the following installation and operat-
ing instructions through carefully so that your IR
system can be operated without malfunctions.
Please also follow the information and instruc-
tions provided by the IR cabin manufacturer.
General safety precautions
• The unit may only be used for its intended
purpose as a control for IR radiators or IR heat-
ing foils up to max. 3.5 kW.
• The electrical installation may only be per-
formed by an authorized electrician.
• You must comply with the regulations of your
utility company as well as the standard VDE-
guidelines (DIN VDE 0100).
• CAUTION! Danger of death, never carry out
repairs and installations yourself. Only a
qualied technician may remove the housing
cover.
• Caution: The control power element may not
be installed in enclosed switching cabinets or
be enclosed in wooden panelling!
• The unit may only be used for its intended
purpose as a control for IR radiant heaters.
• The system must be disconnected at all poles
from the mains during all installation and re-
pair work, meaning that you must switch o
all fuses or the main switch.
• Follow the safety and installation information
provided by the manufacturer.
• This unit is not intended for use by persons
(including children) with restricted physi-
cal, sensory or mental capacity or by per-
sons without the necessary experience and/
or knowledge unless they are supervised by
someone responsible for their safety or re-
ceive instructions from them on how to use
the unit.
• Children are to be supervised in order to en-
sure that they do not play with this device.
• Only IR radiators acc. DIN 60335 or IR
heating foils with integrated overheating pro-
tection (140°C) may be connected.
• Follow the safety and installation information
provided by the IR radiant heater manufac-
turer.


6EN
Installation
Relay box
The relay box may only be installed outside the
cabin. It is advisable to select the outside wall
of the cabin or the cabin ceiling for the instal-
lation. If ductwork is provided for the electri-
cal installations then the position of the power
switchgear is predetermined by that. Please fol-
low the instructions for installation:
1. Remove the cover of the power ele-
ment. To do this, push the retaining tang
to the inside with a at screwdriver and
pivot the housing top upwards (Fig. 1).
The 5 mm diameter boreholes for the sup-
plied wood screws 4 x 20 mm are drilled ac-
cording to the dimensions shown in Fig. 2.
2. Insert one of the wood screws into the top
center hole. The power element is hooked
onto this screw. Therefore, leave the screw
out by ca. 3 mm (Fig. 3).
3. Hook the power element to the 3 mm pro-
truding screw in the upper mounting hole
Insert the supplied rubber grommet
into the openings at the rear wall of
the housing and insert the connect-
ing cable through these openings.
Fasten the bottom section of the housing
rmly to the cabin wall or cabin ceiling by
inserting the screws into the two lower bore-
holes (Fig. 4).
Fig. 1
Fig. 2
19 cm
17.4 cm
1. Wall or ceiling
Fig. 4
Feed-throughs for:
Mains supply line
IR radiant heater /
IR heating foils
Lamp
Feed-through
for sensor
lines
Upper mounting hole
Mounting holes
Fig. 3
3 mm

7
EN
Fig. 7
20 cm
Eye level
Fig. 5
Installation
Control panel
The control panel should be mounted outside
the cabin. If the control panel is mounted in-
side the cabin it may not be placed in the direct
range of the IR-beam and the maximum room
temperature may not exceed 60°C. If ductwork
is already provided for electrical installations
then the position of the control panel is prede-
termined by that. The installation is done into
the cabin wall. Please follow the instructions for
installation:
The mounting position must be specied rst
for installation outside the cabin.
Inside the cabin select a mounting position
that is preferably underneath an IR-beam.
Fig. 6
Inside wall of cabin Outside wall
of cabin
Insulation control panel cable
Lay the connection cable from the control pan-
el to the relay box.
The connection cablemay only be laid between
the insulation and the outside wall of the cabin
(Fig. 7). The insulation must be designed for
max. outside temperature of 75 °C.
Mount the control panel in the wall opening
and x it with the 4 screws enclosed.
Connection cables
Fastening screws
Finally glue the self-adhesive decorative strips
into the horizontal grooves of the control panel.
Decorative strips
Fig. 8
Fig. 9
Make a wall opening to a size of 105 mm (width)
X 90 mm (height) X 25 mm (min. depth).
105 mm
90 mm

8EN
Electrical Connection
The electrical connection may only be done
by a certied electrician in compliance with
the guidelines of the local utility company
and the VDE.
Mains connection is carried out using a Schuko
type plug, to be mounted by the customer, to
a separate Schuko type socket with a 16A fuse.
Because of the higher starting current has the
unit to be fused by a 16A circuit breaker with K
characteristic.
All electrical installations and all connection
lines that are installed inside the cabin must
be suitable for an ambient temperature of at
least 170 °C.
Lay the connection cables (max. 5 m length)
from the separate IR radiators to the relay box
and connect according to the connection dia-
gram.
If more than one IR-radiator is to be connected
per heating circuit, the respective connection
lines fromthese radiators must be connected
in junction boxes provided by the customer
outside the power unit. Only one cable line may
be connected to the terminals of each power
output circuits.
Lay the connection cable from the control ele-
ment to the power switchgear and produce the
plug connections according to the connection
diagram.
Adapting the control to the installed
components.
On the circuit board of the IR control power unit
you will nd a pin block for three jumpers
The type of emitters used is set using the jump-
ers 1 + 2.
IR radiant heater
If exclusively IR radiant heaters are
installed, both jumpers remain open
IR heating foil
If IR heating foils are installed, Jump-
er 1 is connected and Jumper 2
remains open.
A radiant heater for the legs can also
be installed
IR radiant heater & IR heating foil
If both IR radiant heaters - except for
the radiant heater for legs - and IR
heating foils are installed, Jumper 2
is connected and Jumper 1 remains
open.
You can set the maximum heating
time with Jumper 3
Maximum heating time 99 minutes
Jumper 3 open
Maximum heating time 12 hours
Jumper 3 closed
Notice: by connection of IR heating foils the
optional 2nd sensor (surface sensor for heat-
ing foils) shall be connection and activated
through the jumper setting.
Jumper 1
Jumper 2
Jumper 1
Jumper 2
Jumper 3
Jumper 1
Jumper 2
Jumper 1
Jumper 2
Jumper 3
Jumper 3

9
EN
Terminal arrangement on the circuit board.
(Power unit)
Installation diagram
F1
0,2 AT
6,3 AT
3
3
3
3
3
2
2
Bedienteil
Control panel
IR - Emitter 1
IR - Emitter 2
IR - Emitter 3
Leistungsteil
Relay box
= optional
230 V AC 50 Hz
IR

10 EN
Connection diagram for IR radiant heaters
Front radiator circuit P1
Rear radiator circuit P2
Feet radiator circuit P3
Power load P1 = max. 1.500 W
P2 = max. 1.500 W
P3 = max. 500 W
Circuits with dimmable (variable) power output: P1 and P2
Circuit with switchable output: P3
IR Emitter 1
Power P1
IR Emitter 2
Power P2
IR Emitter 3
Power P3
230 V AC 50 Hz
N
N CTR
LN
L
IR-1
IR-2
L
LIGHTMAINS IR-3
Jumper
KTY 10/5
LNNN L L
S1 S2
Platine
JP3
JP2
JP1
NOTICE:
The total power of all IR emitters in any combination may not exceed 3500 W..

11
EN
Connection diagram for IR heating foils
IR heating foil circuit P1
IR heating foil circuit P2
Feet radiator circuit P3
230 V AC 50 Hz
N
N CTR
LN
IR
L
IR-1
IR-2
L
LIGHTMAINS IR-3
Jumper
KTY 10/5
KTY 10/5
LNNN L L
S1 S2
Platine
JP3
JP2
JP1
IR Emitter 1
Power P1
IR Emitter 2
Power P2
IR Emitter 3
Power P3
IR
IR
Power load P1 = max. 1.500 W
P2 = max. 1.500 W
P3 = max. 500 W
Circuits with dimmable (variable) power output: P1 and P2
Circuit with switchable output: P3
NOTICE:
The total power of all IR emitters in any combination may not exceed 3500 W..

12 EN
Connection diagram for IR radiant heaters and IR heating foils
IR radiator circuit P1
IR heating foil circuit P2
Feet radiator circuit P3
IR Emitter 1
Power P1
IR Emitter 2
Power P2
IR Emitter 3
Power P3
230 V AC 50 Hz
N
N CTR
LN
IR
L
IR-1
IR-2
L
LIGHTMAINS IR-3
Jumper
KTY 10/5
KTY 10/5
LNNN L L
S1 S2
Platine
JP3
JP2
JP1
Power load P1 = max. 1.500 W
P2 = max. 1.500 W
P3 = max. 500 W
Circuits with dimmable (variable) power output: P1 and P2
Circuit with switchable output: P3
NOTICE:
The total power of all IR emitters in any combination may not exceed 3500 W..

13
EN
Connecting the sensor cable
You should not draw sensor and power supply
cables together or lead them through the same
duct. This can lead to interferences in the elec-
tronics, such as "uttering" in the relays. If it is
necessary to lay the cables down together, or if
the sensor line is longer than 3m, use a shielded
sensor cable (2 x 0.5 mm²).
Connect the shielding to ground in the control
unit.
Please observe that the following dimensions
relate to the values stipulated during the unit
inspection acc. EN 60335-2-53. The room tem-
perature sensor must always be mounted on
the ceiling in the centre of the cabin. The fol-
lowing Figs. give you an overview of the instal-
lation point for the sensor.
1. The heater sensor is mounted in the centre of
the cabin ceiling.
Housing
Sensor circuit
board
Sensor
S1 S2
Hole
Cabin ceiling
Centre sensor housing on
middle section
Sensor cable
Terminals in control
unit
2. Drill a hole to lead the cable through, prefer-
ably through the middle of one of the wood-
en boards.
3. Draw the sensor cable through the drilled
hole and connect it to the sensor board ac-
cording to the Fig. below.
Installation of the room sen-
sor

14 EN
Installation of the op-
tional heating foil sensor
Installation location:
The heating foil sensor shall be mounted in the
area of the overheating protection of the small-
est heating foil installed and shall be relaibly
xed with a strain safeguard.
CAUTION! Measurement value falsica-
tion!
If the heating foil sensor is not directly mounted
onto the IR heating foil, the measurement val-
ues will be falsied. Therefore place the heating
foil sensor directly onto the heating foil.
Only mount the heating foil sensor when
using IR heating foils with integrated overheat-
ing protection.
• Mount the sensor directly between the heat-
ing foil and the insulation.
IR
Sensor IR heating foil
Overheating pro-
tection
Insulation
Outside
wall
Inside
wall
• Fix the heating foil sensor cable outside the
IR heating foil with the strain relief
IR heating foil
Overheating pro-
tection
Heating foil sensor
Strain relief
CAUTION! Do not damage the IR heating
foil during installation.
• Draw the sensor line to the control power
unit and connect to the S2 terminals.

15
EN
Operation
General
The user interface
Once the system has been installed with all components and all covers have been xed, you can
put your IR cabin into operation.
The following pages explain the operation, settings and options of the Infratec Premium control
unit.
The g. shows the operating unit in Stand-by mode with the light
switched on.
Operating buttons
= Cabin lighting
= Heating On - O (stand-by)
= Programming mode
= Previous function / Increase the value
= Next function / Decrease the value
12:0028°C

16 EN
Default display Stand-by
is shown if the system is in Stand-by mode.
Reset to this display takes place from other
menu items if no activity is carried out > 15 s.
Default display in operation
is shown if the system is in operation.
Reset to this display takes place from other
menu items if no activity is carried out > 15 s.
Energy-saving display
If the unit is not used, it will switch af-
ter 15 seconds into energy-saving mode.
First the background lighting is switched
o and then a moving time is shown after
30 minutes, similar to a PC screensaver.
By pressing any key you can return to the
Stand-by default display.
The following applies for all settings:
The following is shown at the bottom area of
the display:
12:00
20°C
12:00
20
min.
20°C
12:00
14:00
12:00
20°C 12:00
20°C
Modiable value
If the background around a value in the bottom
part of the display is shown in black, this value
can be changed using or .
If no key is pressed for >15 s., the unit switches
back into the default display. Changes made up
to then are not saved
All settings out of Stand-by are conrmed by
pressing >3 s and saved in the unit. After
saving, the changed value will ash twice.
12:34
12:00
14:35
12:00
20°C 12:00
20°C
> 3 s
Cabin lighting switched on
Current cabin temperature
The Clock symbol
Current time

17
EN
Initial commissioning
12:00
14:35
12:00
20°C 12:00
20°C
12:00
DE GB FR ESNL
12:00
20°C
12:00
10:00
12:00
20°C 12:00
20°C
12:00
DE GB FR ESNL
12:00
20°C
12:00
14:00
12:00
20°C 12:00
20°C
12:00
14:00
12:00
20°C 12:00
20°C
12:00
14:35
12:00
20°C 12:00
20°C
> 3 sek.
12:00
20°C
Step 1 - connect the
device to the mains
Step 2 - Select and
set language
To conrm press“Set”
To conrm press“Set”
To conrm press“Set”
The display shows
the standby mode
Step 3 - Set time
(hours)
Step 4 - Set time
(minutes)

18 EN
Change language Change time
12:00
DE GB FR ESNL
12:00
20°C
12:00
DE GB FR ESNL
12:00
20°C
12:00
20°C
&
12:00
DE GB FR ESNL
12:00
20°C
12:00
DE GB FR ESNL
12:00
20°C
> 3 sek.
12:00
20°C
&
12:00
DE GB FR ESNL
12:00
20°C
12:00
10:00
12:00
20°C 12:00
20°C
12:00
10:00
12:00
20°C 12:00
20°C
12:00
14:00
12:00
20°C 12:00
20°C
12:00
DE GB FR ESNL
12:00
20°C
12:00
14:00
12:00
20°C 12:00
20°C
12:00
14:35
12:00
20°C 12:00
20°C
Press “Set” and ▼
simultaneously
Press “Set” and ▼
simultaneously
Use ▼or ▲to jump
to the temperature
setting for foil sensors
Start the language
selection mode with
“Set”
Start the setting
mode with“Set”
Save with “Set”, the
selection jumps to
the minutes
Select language
Set hour
Set minutes
Press “Set” for 3 sec.
to conrm

19
EN
Foil temperature
If IR heating foil and the optional heating foil
sensor are connected to your IR cabin, the max-
imum permitted temperature for the IR heating
foil is set.
12:00
14:35
12:00
20°C 12:00
20°C
> 3 sec.
12:00
20°C
12:00
DE GB FR ESNL
12:00
20°C
15 sec.
Press “Set” for 3 sec-
onds to conrm
To exit press “Start”
or wait 15 sec. The
display changes back
to standby mode.
12:00
110°C
12:00
20°C
12:00
20°C
&
12:00
DE GB FR ESNL
12:00
20°C
12:00
100°C
12:00
20°C
12:00
100°C
12:00
20°C
12:00
110°C
12:00
20°C
> 3 sek.
Press “Set” and ▼
simultaneously
Use ▼ or ▲to jump
to the temperature
setting for foil sen-
sors
Start the setting
mode with“Set”
Set the desired tem-
perature
Press “Set” for 3 sec.
to conrm

20 EN
&
12:00
20°C 12:00
20°C
C
12:00
C
20°C 12:00
20°C
12:00
20°C 12:00
122°F
F
12:00
DE GB FR ESNL
12:00
20°C
15 sek.
12:00
20°C
To exit press „Start“
or wait 15 sec. The
display changes back
to standby mode
Setting the temperature unit °C / °F
12:00
20°C
12:00
DE GB FR ESNL
12:00
20°C
12:00
20°C 12:00
20°C
F
> 3 sec.
15 sec.
Switching on the IR system
12:00
20°C
Switching o the IR system
20 minutes
12:00
20 min.
20°C
12:00
20 min.
20°C
12:00
20°C
To switch on the sau-
na heater, press the
„Start“ button. The
heater will run for the
pre-set time.
To switch o, press
the„Start“ button. Af-
ter expiration of the
pre-set heating time,
the heating switches
o as well.
12:00
20°C
Other manuals for InfraTec Premium
1
Table of contents
Other EOS Control Unit manuals
Popular Control Unit manuals by other brands

Spectrum Digital
Spectrum Digital TMS320VC5509 Technical reference

Pego
Pego VISION100 THR Use and maintenance manual

DANIEL
DANIEL 762 user manual

Siemens
Siemens Flowrite 599 Series Technical instructions

CHENGDU VANTRON TECHNOLOGY
CHENGDU VANTRON TECHNOLOGY AP6255 user manual

Swagelok
Swagelok RHPS Series user manual

Lenze
Lenze EtherNet/IP E84AYCEO Mounting instructions

Ossur
Ossur Icelock Alloy 4-Hole 674 Instructions for use

GRAUPNER
GRAUPNER Soundswitch 2 instructions

Parker
Parker DINCon II Installation, operating, & maintenance instructions

Apacer Technology
Apacer Technology EFC-D Series user manual

Cornelius
Cornelius LEOPARD ERV Operator's manual