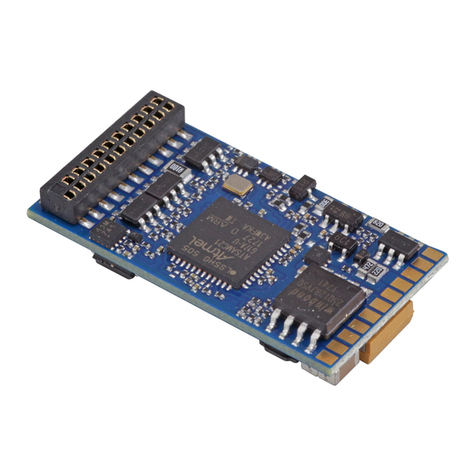
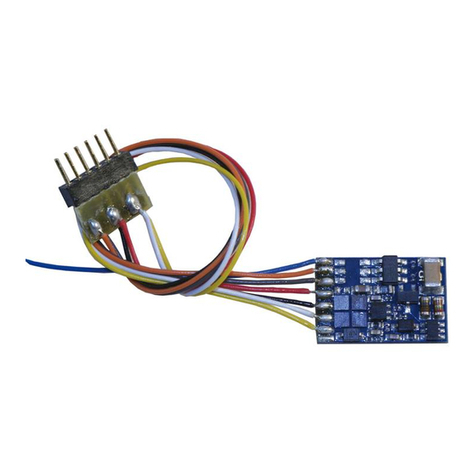
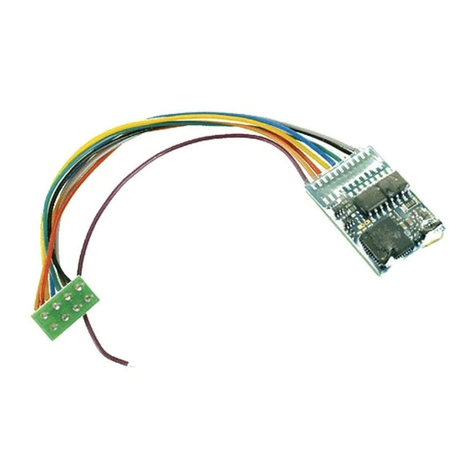
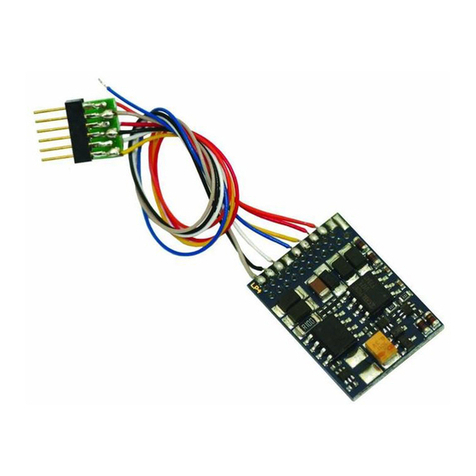
Esu LokPilot Standard User manual

www.esu.eu
LokPilot Standard
ESU P/N 02714-14649
P Reliable, Dual Mode DCC / DC decoder with B-EMF function
P Four powered function outputs (+2 logic level outputs for 21MTC version)
P RailComPlus® for automatic Registration at ESU ECoS command station
P For all engines equipped with DC- or coreless motors
ESU LLC
477 Knopp Drive
Muncy Pennsylvania 17756
USA
ESU GmbH & Co. KG
Edisonallee 29
D - 89231 Neu-Ulm
GERMANY
53611 LokPilot Standard
Digital Decoder
NMRA 8 pin wire harness
DCC & RailComPlus 4AOEGOP*fdgbbh+
MADE IN CHINA
Specification
Operational
modes
NMRA/DCC with 14, 28, 128 speed steps.
2-digit (short) and 4-digit (long) addresses.
Analog DC operation (de-selectable).
Automatic recognition of operational mode and DCC speed step selection.
Supports Lenz® LG 100 braking sections.
Throttle Runs DC and coreless motors.
0,9 A continuous load. Silent, safe 20,00 kHz pulse width frequency motor regulation.
Motor output overload protection; Back EMF (de-selectable).
Function outputs 4 powered outputs with overload protection.
250mA load per output.
500mA total load of all function outputs.
21MTC connector version has two additional logic outputs.
Shunting speed and momentum key selectable.
Programming DCC Servicemode & DCC POM (Programming on Main).
Features RailCom® Feedback system. RailComPlus® automatic Registration.
Interface NEM652 (8 pin) 21MTC PluX12
dimensions in mm
dimensions
25,5x 15,5 x4,5
1.00x 0.61 x0.18
25,5x 15,5 x4,5
1.00x 0.61 x0.18
14,5x 8,3 x2,4
0.57x 0.33 x0.09
Item- Number 53611 53614 53616
This product is not a toy. Not recommended for children under 14 years of age.
WARNING: This product contains chemicals known to the State of California to cause cancer and birth defects or
other reproductive harm.

Warnings
•Do not expose to wet and humid conditions and
Avoid mechanical force or pressure on the decoder
•Do not remove the heat shrink sleeve.
•Never solder on the circuit board, extend cables if
necessary.
•Never wrap the decoder in insulation tape, since this
may cause overheating.
•Any wiring has to be carried out while power is dis-
connected.
•Make sure that neither the decoder nor any blank
wire ends may come into contact with the engine
chassis (risk of short circuit).
•Never operate the LokPilot unattended. The LokPi-
lot is not a (children’s) toy
Requirements for Installation
The locomotive must be in perfect operating condi-
tion prior to the conversion: Only a locomotive with
faultless mechanical properties and smooth running
characteristics in analogue mode is worth converting
to digital. Check and replace all wear and tear parts
such as motor brushes, wheel contacts, light bulbs
etc., if necessary.
Installing the Decoder
Locomotives with 8-pin NEM 652 interface
Some LokPilot Standard decoders are supplied with
an 8-pin interface as per NEM 652 (refer to Fig 1).
Remove the dummy plug from the socket and keep
it for later use. Insert the plug of the decoder in such
a way that pin 1 of the plug (this is the side with
the red / orange wires) sits next to the corner of the
socketthatisusuallymarkedwith*,+,•.Makesure
that the pins are straight and do not tilt when inser-
ting the plug.
Abb. 1: LokPilot Standard with NEM652 interface
AUX2 --
Right motor terminal --
Right track terminal --
Rear light --
Common (+pole) --
AUX1 --
Head light --
Left track terminal --
Left motor terminal --
Pin Description Color
1 Right motor terminal orange
2 Rear light yellow
3 Output AUX1 green
4 Left track terminal black
5 Left motor terminal gray
6 Head light white
7 Common (+pole) blue
8 Right track terminal red
5 4
1
Abb. 2: LokPilot Standard with 21MTC interface
n.c. 1
n.c. 2
n.c. 3
AUX4 4
n.c. 5
n.c. 6
Rear light 7
Head light 8
n.c. 9
n.c. 10
Index pin 11
22 Right track
21 Left track
20 GND
19 Right motor
18 Left motor
17 n.c.
16 Common (+)
15 AUX1
14 AUX2
13 AUX3
12 VCC
How to connect the decoder: Insert the decoder with
connector towards top
(e.g. Atlas, Intermoun-
tain, Bowser, Märklin®)
Insert the decoder with
connector towards
bottom (e.g. Brawa®)
Locomotive PCB
(Side view)
Locomotive PCB
(Side view)
Locomotives with PluX12 interface
The LokPilot Standard supplied with a PluX12 inter-
face (fig. 3) ist designed for locomotives in gauge TT.
Decoders fitted with PluX12 connector also will fit
into locomotives with PluX16 or PluX22 interface.
Consider the correct seating of the decoder: One
position of the multi-pin plug of the decoder has no
pin (index pin). This position should be marked in the
locomotive.
Abb. 3: LokPilot Standard with PluX12 interface
Head light 7
Common (+) 9
Index pin 11
Rear light 13
- 15
- 17
8 Motor +
10 Motor -
12 Right track
14 Left track
16 AUX1
18 AUX2
Locomotives without interface
Firstly, please cut all wires installed in the locomotive.
Take special care to remove any connections to the
chassis (ground): the motor leads must be positively
potential-free, in other words they may not have any
contact to the chassis or body or the wheels and
wheel contacts. Figure 4 shows all connections.
Function outputs
You can wire all kind of load to the function outputs.
Please make sure that the load does not exceed
the permitted maximum current and there are no
short circuits. The outputs of the LokPilot have pro-
tection but if an external voltage is applied, the
outputs may suffer damage or destruction.
Only install bulbs rated 16V or higher and with a no-
minal current draw, that does not exceed 50 mA or
use suitable smoke generators such as Seuthe No.
11. If you like to use LEDs, a resistor with a rating
between 470 Ohms and 2.2 kOhms need to be wi-
red in series. Running the LED without resistor will
lead to their immediate destruction!
Only the decoders with 21MTC interface have two
additional outputs besides the 4 standard outputs,
namely AUX3 and AUX4. Since they are pure „logic-
outputs“, it is not possible to connect any external
loads directly. External power transistors are requi-
red. Connect AUX3 and AUX4 via the 21MTC inter-
face; there are equal to the other outputs. ESU offers
an appropriate adapater board (art.no. 51968) with
transistors.
Locomotives with 21MTC interface
Some LokPilot Standard decoders are equipped with
an 21MTC interface (fig. 2) You can insert the deco-
der in two ways: either the pins are put through the
decoder; the socket of the decoder remains visible
after installation (mounting on top) or the decoder
is inserted in such a way that the pins go straight
into the socket. Once the decoder sits in the socket,
the socket is hidden from view. Which of the two
mounting positions is the correct one depends solely
on the locomotive. The position of the marker-pin is
the crucial indicator. Plug the decoder into the socket
in such a way that the locomotive interface corre-
sponds with the decoder. Do not apply too much
pressure when inserting the plug. The decoder must
go in without force.

DCC Operation
The LokPilot Standard works with any DCC system..
Remove any capacitors that are wired into the track
feeders (e.g. ROCO® feeder track). This could impair
the functionality of the decoder.
The address is set to 03 with 28 speed steps.
F1 switches output AUX1
F2 switches output AUX2
F3 switches the switching mode on and off
F4 switches the acceleration an deceleration on /off
F5 switches output AUX3 (if applicable)
F6 switches output AUX4 (if applicable)
DC Operation
The LokPilot Standard are set ex factory to operate
on conventional DC layouts as well. No settings are
needed to be done.
Decoder Settings (Programming)
A list of all CV parameters ist given later. These can
be changes using any DCC command station. LokPi-
lot decoders support all NMRA programming modes
as there are the programming track modes (Direct
Mode, Register Mode, Paged Mode) and the mode
for the main („POM“, „Programming on the Main“).
With RailCom® you can read CV values on the main.
RailComPlus®
Using RailComPlus®, the decoder will be automa-
itcelly recognized by a compatible command station.
You can disable this feature by deleting Bit 7 of CV
28.
Function Outputs
Each function output can be set to a certain effect.
For each physical output one CV (CV113 - CV118,
refer table page 4) is provided to define both their
behaviour (Mode) and the brightness. Please write
the following values into the corresponding CVs to
enable the following effects:
Name Description Brighness Mode
Light Normal light 0- 15 + 0
Blink light
Phase I
Output is blinking with
defined frequency
0- 15 + 16
Blink light
Phase II
like above, but the light is
blinking alternating
0- 15 + 32
Strobe Strobe light 0- 15 + 48
firebox Flickering light of a fire box
or braking lights
0- 15 + 80
Zoom Light that fades in / out 0- 15 + 112
Marslight Mars light 0- 15 + 128
Gyra light Gyra light 0- 15 + 144
Ditch light Ditch light phase I 0- 15 + 208
Ditch light Ditch light phase II 0- 15 + 244
Flash rate for blinking lights
You can also set the flash rate for all lighting effects
globally. All effects will flash or strobe at the same
rate. The desired value should be stored in CV 112.
Function Mapping
All function outputs may be assigned to the available
function buttons. Your dcc throttle may not have all
function button. Each function button is linked to a
CV in which any number of events ma be combined.
The number you enter defines the behaviour of the
output. Some functions are directional. For F0 For-
ward, it is CV33, for F0 Reverse it is CV34 and so on.
Example: Writing the value 8 into CV36 defines that
output AUX2 will listen to Function Button F2.
The following table shows the different possible
combinations and also the ex-factory settings (hown
in bold numbers):
CV Funktion LV LR AUX
1
AUX
2
AUX
3
AUX
4
Shun-
ting Acc/Dec
33 F0 Forward 124816 32 64 128
34 F0 Reverse 124 8 16 32 64 128
35 F1 Forward 1 2 4816 32 64 128
36 F2 124816 32 64 128
37 F3 1 2 4 8 16 32 64 128
38 F4 Forward 1 2 4 8 16 32 64 128
39 F5 Forward 1 2 4 8 16 32 64 128
40 F6 Forward 1 2 4 8 16 32 64 128
41 F7 Forward 1 2 4 8 16 32 64 128
42 F8 1 2 4 8 16 32 64 128
43 F9 1 2 4 8 16 32 64 128
44 F10 1 2 4 8 16 32 64 128
45 F11 1 2 4 8 16 32 64 128
46 F12 1 2 4 8 16 32 64 128
47 F1 Reverse 1 2 4816 32 64 128
129 F13 1 2 4 8 16 32 64 128
130 F14 1 2 4 8 16 32 64 128
131 F15 1 2 4 8 16 32 64 128
132 F16 1 2 4 8 16 32 64 128
133 F17 1 2 4 8 16 32 64 128
134 F18 1 2 4 8 16 32 64 128
135 F4 Reverse 1 2 4 8 16 32 64 128
136 F5 Reverse 1 2 4 8 16 32 64 128
137 F6 Reverse 1 2 4 8 16 32 64 128
138 F7 Reverse 1 2 4 8 16 32 64 128
Refering to the table, locate the intersection of
•The row of the desired function button and
•The column for the desired function output.
There you can find the value that you have to enter
into the appropriate CV. If one function button has
to control more outputs, simply add the numbers
and write the result into the CV (33 - 138).
Abb. 4: Wiring diagram for LokPilot Standard (wiring example)
violet
orange
red
yellow
blue
green
white
black
grey
R
housing
violet
AUX2
green
AUX1
yellow
Rear
light
white
Head
light
black orange grey

CV 8 Function Description
90 Normal default Refer to table page 3
91 Tillig Diesel- and
Electric engines
F0 = Front white / Rear Red
directional
F1 = No Rear Red lights,
directional
F2 = Switching light
92 Tillig Diesel- und E-
Loks mit Fernlicht
F0 = Front white / Rear Red,
directional
F1 = Additional High beam light
F2 = No Rear Red lights,
directional
F3 = Switching light
(but no High beam lights)
CV Name Description Range Value
1Locomotive address Adress of engine 1 - 127 3
2Start voltage Sets the minimum speed of the engine 1 - 64 3
3Accceleration This value multiplied by 0.25 is the time from stop to maximum speed 0 - 255 16
4Deceleration This value multiplied by 0.25 is the time from maximum speed to stop 0 - 255 12
5Maximum speed Maximum speed of the engine 0 - 64 64
6Medium speed Medium speed of the engine 0 - 64 22
8Manufacturer ID Manufacturer´s ID ESU - Writing value 8 in this CV triggers a reset 151 -
17/ 18 Extended address Long address of the engine 128- 9999 192
19 Consist Address Additional address for consist operation. Value 0 or 128 disables the
consist address
1 – 127 Consist address, normal direction
129 – 255 Consist address, reverse direction
0-255 0
27 Brake mode Allowed brake modes 24
Bit Function Value
3Brake on DC, if polarity against driving direction 8
4Brake on DC, if polarity like driving direction 16
28 RailCom® Configuration Settings for RailCom® (Set value to 0 to disable an option) 131
Bit Function Value
0Channel 1 Broadcast enabled 1
1Data transmission allowed on channel 2 2
7RailComPlus® automatic loco recognition enabled 128
29 Configuration register This CV contains important information to setup your decoder 12
Bit Function Value
0Reverse Direction of travel 1
128 or 128 speed steps instead of 14 speed steps 2
2Enable analogue operation 4
3Enable RailCom® 8
4Speed curve through CV 67 - 94 (instead of CV 2,5,6) 16
5Long addresses (CV 17+18) instead basic address (CV 1) 32
33-47 Function mapping Assignment of function outputs to the function buttons. Part #1 0 - 255 -
49 Extended Configuration Further settings of the decoder (set value to 0 to disable an option) 0 - 255 17
Bit Function Value
0Enable B-EMF function 1
4Enable automatic DCC speed step detection 16
53 Control Reference
voltage
Defines the Back EMF voltage, which the motor should generate at
maximum speed. If the engine does not reach maximum speed, reduce
this parameter.
0 - 255 140
54 Load control parameter
«K»
«K»-component of the internal PI-controller. Defines the effect of load
control. The higher the value, the stronger the effect of Back EMF
0 - 255 50
55 Load control parameter
«I»
«I»-component of the internal PI-controller. Defines the momentum
(inertia) of the motor. The higher the momentum of the motor (large
flywheel or bigger motor diameter), the higher this value has to be set.
0 - 255 100
67-94 Speed table Defines motor voltage for speed steps. 0 - 255 -
112 Blinking frequency Blinking frequency for light effects. A multiple of 0.065536 Seconds. 1 - 255 16
113 Head light configuration Defines brightness and mode of output Head light 0 - 255 15
114 Rear light configuration Defines brightness and mode of output Rear light 0 - 255 15
115 AUX1 configuration Defines brightness and mode of output AUX1 0 - 255 15
116 AUX2 configuration Defines brightness and mode of output AUX2 0 - 255 15
117 AUX3 (21MTC) config. Defines brightness and mode of output AUX3 (21MTC only) 0 - 255 15
118 AUX4 (21MTC) config. Defines brightness and mode of output AUX4 (21MTC only) 0 - 255 15
129-
136
Function mapping Assignment of function outputs to the function buttons. Part #2 0 - 255 -
Decoder Reset
You can reset the decoder to the default settings
at any time.
Enter the value 08 into CV 08.
Function outputs for Tillig locomotives
There are specific default settings for the function
mapping stored in the decoder in order to make the
usage easier for some Tillig TT scale engines. To ena-
ble them, you need to write a certain value into CV
8. The following settins do exist:
Other Esu Media Converter manuals
Esu
Esu PowerPack Mini User manual

Esu
Esu LokPilot V4.0 User manual
Esu
Esu SwitchPilot 3 User manual

Esu
Esu 51801 User manual

Esu
Esu SwitchPilot User manual
Esu
Esu LokPilot 52600 User manual

Esu
Esu LokPilot mfx User manual
Esu
Esu L.Net converter User manual
Esu
Esu LokSound 5 User manual

Esu
Esu LokSound User manual

