ETAS ES910.3-A User manual

ES910.3-A
Prototyping and Interface Module
User’s Guide

2
Copyright
The data in this document may not be altered or amended without special noti-
fication from ETAS GmbH. ETAS GmbH undertakes no further obligation in rela-
tion to this document. The software described in it can only be used if the
customer is in possession of a general license agreement or single license. Using
and copying is only allowed in concurrence with the specifications stipulated in
the contract.
Under no circumstances may any part of this document be copied, reproduced,
transmitted, stored in a retrieval system or translated into another language
without the express written permission of ETAS GmbH.
© Copyright 2018 ETAS GmbH, Stuttgart
The names and designations used in this document are trademarks or brands
belonging to the respective owners.
ES910.3-A - User’s Guide R09 EN - 12.2018

ES910.3-A - User’s Guide 3
Contents
ETAS Contents
1 About this Manual . . . . . . . . . . . . . . . . . . . . . . . . . . . . . . . . . . . . . . . . . . . . . . . . . 8
1.1 Identification of Safety Notices . . . . . . . . . . . . . . . . . . . . . . . . . . . . . . . . . . . 8
1.2 Presentation of Information . . . . . . . . . . . . . . . . . . . . . . . . . . . . . . . . . . . . . 8
1.3 Scope of Supply . . . . . . . . . . . . . . . . . . . . . . . . . . . . . . . . . . . . . . . . . . . . . . 9
1.4 Additional Information . . . . . . . . . . . . . . . . . . . . . . . . . . . . . . . . . . . . . . . . . 9
2 Basic Safety Notices . . . . . . . . . . . . . . . . . . . . . . . . . . . . . . . . . . . . . . . . . . . . . . . 10
2.1 General Safety Information . . . . . . . . . . . . . . . . . . . . . . . . . . . . . . . . . . . . . 10
2.2 Requirements for Users and Duties for Operators . . . . . . . . . . . . . . . . . . . . 10
2.3 Intended Use . . . . . . . . . . . . . . . . . . . . . . . . . . . . . . . . . . . . . . . . . . . . . . . 10
3 Hardware Description . . . . . . . . . . . . . . . . . . . . . . . . . . . . . . . . . . . . . . . . . . . . . . 16
3.1 Overview . . . . . . . . . . . . . . . . . . . . . . . . . . . . . . . . . . . . . . . . . . . . . . . . . . 16
3.1.1 Rapid Prototyping of Software Functions . . . . . . . . . . . . . . . . . . . . 16
3.1.2 ES910.3-A Features . . . . . . . . . . . . . . . . . . . . . . . . . . . . . . . . . . . . 16
3.2 Housing . . . . . . . . . . . . . . . . . . . . . . . . . . . . . . . . . . . . . . . . . . . . . . . . . . . 18
3.3 Interfaces . . . . . . . . . . . . . . . . . . . . . . . . . . . . . . . . . . . . . . . . . . . . . . . . . . 19
3.3.1 Front Panel . . . . . . . . . . . . . . . . . . . . . . . . . . . . . . . . . . . . . . . . . . 19
3.3.2 Back Panel. . . . . . . . . . . . . . . . . . . . . . . . . . . . . . . . . . . . . . . . . . . 20
3.4 Indicators . . . . . . . . . . . . . . . . . . . . . . . . . . . . . . . . . . . . . . . . . . . . . . . . . . 21
3.4.1 Flash Codes . . . . . . . . . . . . . . . . . . . . . . . . . . . . . . . . . . . . . . . . . . 21
3.4.2 ES910.3-A Operational State . . . . . . . . . . . . . . . . . . . . . . . . . . . . . 21
3.4.3 ES910.3-A Functional State . . . . . . . . . . . . . . . . . . . . . . . . . . . . . . 22
3.4.4 Functional State of Individual Interfaces . . . . . . . . . . . . . . . . . . . . . 23
3.5 Acoustic Signal . . . . . . . . . . . . . . . . . . . . . . . . . . . . . . . . . . . . . . . . . . . . . . 24
4 Functional Description. . . . . . . . . . . . . . . . . . . . . . . . . . . . . . . . . . . . . . . . . . . . . . 25
4.1 Block Diagram . . . . . . . . . . . . . . . . . . . . . . . . . . . . . . . . . . . . . . . . . . . . . . 25
4.2 Power Supply (7-29V DC) . . . . . . . . . . . . . . . . . . . . . . . . . . . . . . . . . . . . . . 25
4.3 ON/AUTO Switch . . . . . . . . . . . . . . . . . . . . . . . . . . . . . . . . . . . . . . . . . . . . 25

ES910.3-A - User’s Guide 4
ETAS Contents
4.3.1 ON/AUTO Switch in Position „ON“ . . . . . . . . . . . . . . . . . . . . . . . . 25
4.3.2 ON/AUTO Switch in Position „AUTO“ . . . . . . . . . . . . . . . . . . . . . . 26
4.4 Operational States . . . . . . . . . . . . . . . . . . . . . . . . . . . . . . . . . . . . . . . . . . . 26
4.4.1 Operational State: “Off” . . . . . . . . . . . . . . . . . . . . . . . . . . . . . . . . 26
4.4.2 Operational State: “Standby” . . . . . . . . . . . . . . . . . . . . . . . . . . . . 26
4.4.3 Operational State: “On” . . . . . . . . . . . . . . . . . . . . . . . . . . . . . . . . 26
4.5 “Wake-Up” Function . . . . . . . . . . . . . . . . . . . . . . . . . . . . . . . . . . . . . . . . . 26
4.6 Service Interface (SP) . . . . . . . . . . . . . . . . . . . . . . . . . . . . . . . . . . . . . . . . . . 28
4.6.1 “Manual Trigger” Function . . . . . . . . . . . . . . . . . . . . . . . . . . . . . . 28
4.6.2 “Wake Up Control” Pin. . . . . . . . . . . . . . . . . . . . . . . . . . . . . . . . . 29
4.7 PC Interface (PC) . . . . . . . . . . . . . . . . . . . . . . . . . . . . . . . . . . . . . . . . . . . . . 30
4.7.1 Mixed Network . . . . . . . . . . . . . . . . . . . . . . . . . . . . . . . . . . . . . . . 30
4.7.2 ES910.3-A Standalone Operation . . . . . . . . . . . . . . . . . . . . . . . . . 30
4.8 CAN Interface (CAN1/LIN1, CAN2/LIN2) . . . . . . . . . . . . . . . . . . . . . . . . . . . 30
4.8.1 Operating Modes . . . . . . . . . . . . . . . . . . . . . . . . . . . . . . . . . . . . . 30
4.8.2 Feature . . . . . . . . . . . . . . . . . . . . . . . . . . . . . . . . . . . . . . . . . . . . . 31
4.8.3 Bus Terminating Resistor . . . . . . . . . . . . . . . . . . . . . . . . . . . . . . . . 31
4.9 LIN Interface (CAN1/LIN1, CAN2/LIN2) . . . . . . . . . . . . . . . . . . . . . . . . . . . . 31
4.9.1 Operating Modes . . . . . . . . . . . . . . . . . . . . . . . . . . . . . . . . . . . . . 32
4.9.2 Feature . . . . . . . . . . . . . . . . . . . . . . . . . . . . . . . . . . . . . . . . . . . . . 32
4.9.3 Power Supply on the Bus . . . . . . . . . . . . . . . . . . . . . . . . . . . . . . . . 32
4.10 ETK Interface (ETK) . . . . . . . . . . . . . . . . . . . . . . . . . . . . . . . . . . . . . . . . . . . 32
4.10.1 Initialization. . . . . . . . . . . . . . . . . . . . . . . . . . . . . . . . . . . . . . . . . . 33
4.10.2 Operating Modes . . . . . . . . . . . . . . . . . . . . . . . . . . . . . . . . . . . . . 33
4.11 IO Interface (IO) . . . . . . . . . . . . . . . . . . . . . . . . . . . . . . . . . . . . . . . . . . . . . 34
4.11.1 Operating Modes . . . . . . . . . . . . . . . . . . . . . . . . . . . . . . . . . . . . . 34
4.11.2 "Daisy Chain" Operating Mode. . . . . . . . . . . . . . . . . . . . . . . . . . . 34
4.11.3 "EtherCAT" Operating Mode . . . . . . . . . . . . . . . . . . . . . . . . . . . . 35
4.11.4 Feature . . . . . . . . . . . . . . . . . . . . . . . . . . . . . . . . . . . . . . . . . . . . . 35
4.11.5 Overload for Rapid Prototyping Applications . . . . . . . . . . . . . . . . . 36
4.12 ECU Interface (ECU) . . . . . . . . . . . . . . . . . . . . . . . . . . . . . . . . . . . . . . . . . . 37
4.12.1 Connecting the Hardware and Configuration . . . . . . . . . . . . . . . . 37
4.12.2 Hardware Detection and Protocols. . . . . . . . . . . . . . . . . . . . . . . . . 38
4.12.3 "XETK / ECU with Ethernet Interface" Operating Mode . . . . . . . . . 38
4.12.4 "Ethernet Interface with iLinkRTTM Protocol" Operating Mode. . . . 39
4.12.5 "External Switch with ETAS Modules" Operating Mode. . . . . . . . . 40
4.12.6 Feature . . . . . . . . . . . . . . . . . . . . . . . . . . . . . . . . . . . . . . . . . . . . . 40
4.13 Extension Slot . . . . . . . . . . . . . . . . . . . . . . . . . . . . . . . . . . . . . . . . . . . . . . . 40
4.14 NVRAM . . . . . . . . . . . . . . . . . . . . . . . . . . . . . . . . . . . . . . . . . . . . . . . . . . . 40
4.15 Watchdog . . . . . . . . . . . . . . . . . . . . . . . . . . . . . . . . . . . . . . . . . . . . . . . . . 40
4.16 Real Time Clock . . . . . . . . . . . . . . . . . . . . . . . . . . . . . . . . . . . . . . . . . . . . . 41
4.17 Firmware . . . . . . . . . . . . . . . . . . . . . . . . . . . . . . . . . . . . . . . . . . . . . . . . . . 41
4.17.1 Firmware of the ES910.3-A . . . . . . . . . . . . . . . . . . . . . . . . . . . . . . 41
4.17.2 Firmware of the Modules mountable in the Extension Slot . . . . . . 41
5 Getting Started . . . . . . . . . . . . . . . . . . . . . . . . . . . . . . . . . . . . . . . . . . . . . . . . . . . 42
5.1 Transferring Dissipated Heat . . . . . . . . . . . . . . . . . . . . . . . . . . . . . . . . . . . . 42
5.1.1 Ventilation of the Module . . . . . . . . . . . . . . . . . . . . . . . . . . . . . . . 42
5.1.2 Monitoring the Temperature . . . . . . . . . . . . . . . . . . . . . . . . . . . . . 42

ES910.3-A - User’s Guide 5
ETAS Contents
5.2 Setup . . . . . . . . . . . . . . . . . . . . . . . . . . . . . . . . . . . . . . . . . . . . . . . . . . . . . 42
5.2.1 Requirements for Setting Up an ES910.3-A Module. . . . . . . . . . . . 42
5.2.2 Requirements when Setting up with Other Modules . . . . . . . . . . . 43
5.3 Assembly and Locking . . . . . . . . . . . . . . . . . . . . . . . . . . . . . . . . . . . . . . . . 44
5.3.1 Fixing a Module onto a Carrier System. . . . . . . . . . . . . . . . . . . . . . 44
5.3.2 Connecting Several Modules Mechanically . . . . . . . . . . . . . . . . . . 45
5.4 Applications . . . . . . . . . . . . . . . . . . . . . . . . . . . . . . . . . . . . . . . . . . . . . . . . 47
5.4.1 ETK Bypass Systems. . . . . . . . . . . . . . . . . . . . . . . . . . . . . . . . . . . . 47
5.4.2 ETK Bypass System with Simultaneous Measuring and Calibration . 50
5.4.3 ES910.3-A with ES720.1 Drive Recorder . . . . . . . . . . . . . . . . . . . . 53
5.4.4 ES910.3-A for fast application access with INCA-MCE . . . . . . . . . . 55
5.5 Cabling . . . . . . . . . . . . . . . . . . . . . . . . . . . . . . . . . . . . . . . . . . . . . . . . . . . . 57
5.5.1 Power Supply Interface (7-29V DC) . . . . . . . . . . . . . . . . . . . . . . . . 57
5.5.2 PC Interface (PC) . . . . . . . . . . . . . . . . . . . . . . . . . . . . . . . . . . . . . . 57
5.5.3 IO Interface (IO) . . . . . . . . . . . . . . . . . . . . . . . . . . . . . . . . . . . . . . . 58
5.5.4 ECU Interface (ECU). . . . . . . . . . . . . . . . . . . . . . . . . . . . . . . . . . . . 59
5.6 Configuring the ES910.3-A . . . . . . . . . . . . . . . . . . . . . . . . . . . . . . . . . . . . . 60
5.6.1 Web Interface . . . . . . . . . . . . . . . . . . . . . . . . . . . . . . . . . . . . . . . . 60
5.6.2 Launching the ES910.3-A Web Interface . . . . . . . . . . . . . . . . . . . . 60
5.6.3 Configuring the “Wake Up” Function . . . . . . . . . . . . . . . . . . . . . . 60
5.6.4 Configuring the CAN/LIN Interfaces. . . . . . . . . . . . . . . . . . . . . . . . 61
5.6.5 Configuring the IO Interface . . . . . . . . . . . . . . . . . . . . . . . . . . . . . 62
5.6.6 Configuring the ECU Interface. . . . . . . . . . . . . . . . . . . . . . . . . . . . 63
6 Troubleshooting Problems. . . . . . . . . . . . . . . . . . . . . . . . . . . . . . . . . . . . . . . . . . . 65
6.1 Troubleshooting ES910.3-A Problems . . . . . . . . . . . . . . . . . . . . . . . . . . . . . 65
6.2 Problems and Solutions . . . . . . . . . . . . . . . . . . . . . . . . . . . . . . . . . . . . . . . . 67
6.2.1 Network Adapter cannot be selected via Network Manager. . . . . . 67
6.2.2 Search for Ethernet Hardware fails. . . . . . . . . . . . . . . . . . . . . . . . . 68
6.2.3 Personal Firewall blocks Communication . . . . . . . . . . . . . . . . . . . . 69
7 Technical Data . . . . . . . . . . . . . . . . . . . . . . . . . . . . . . . . . . . . . . . . . . . . . . . . . . . 74
7.1 General Data . . . . . . . . . . . . . . . . . . . . . . . . . . . . . . . . . . . . . . . . . . . . . . . 74
7.1.1 Identifications on the Product . . . . . . . . . . . . . . . . . . . . . . . . . . . . 74
7.1.2 Fulfilled Standards and Norms . . . . . . . . . . . . . . . . . . . . . . . . . . . . 75
7.1.3 Environmental Conditions . . . . . . . . . . . . . . . . . . . . . . . . . . . . . . . 75
7.1.4 Maintenance of the Product . . . . . . . . . . . . . . . . . . . . . . . . . . . . . 75
7.1.5 Cleaning the Product. . . . . . . . . . . . . . . . . . . . . . . . . . . . . . . . . . . 75
7.1.6 Mechanical Data . . . . . . . . . . . . . . . . . . . . . . . . . . . . . . . . . . . . . . 76
7.2 RoHS Conformity . . . . . . . . . . . . . . . . . . . . . . . . . . . . . . . . . . . . . . . . . . . . 76
7.2.1 European Union . . . . . . . . . . . . . . . . . . . . . . . . . . . . . . . . . . . . . . 76
7.2.2 China . . . . . . . . . . . . . . . . . . . . . . . . . . . . . . . . . . . . . . . . . . . . . . 76
7.3 CE Marking . . . . . . . . . . . . . . . . . . . . . . . . . . . . . . . . . . . . . . . . . . . . . . . . 76
7.4 Product Return and rRcycling . . . . . . . . . . . . . . . . . . . . . . . . . . . . . . . . . . . 76
7.5 Use of Open Source Software . . . . . . . . . . . . . . . . . . . . . . . . . . . . . . . . . . . 77
7.6 System Requirements . . . . . . . . . . . . . . . . . . . . . . . . . . . . . . . . . . . . . . . . . 77
7.6.1 Hardware . . . . . . . . . . . . . . . . . . . . . . . . . . . . . . . . . . . . . . . . . . . 77
7.6.2 Supported Applications and Software Requirements . . . . . . . . . . . 78

ES910.3-A - User’s Guide 6
ETAS Contents
7.6.3 Compatibility between Rapid Prototyping Models and ES910.3-A Firm-
ware . . . . . . . . . . . . . . . . . . . . . . . . . . . . . . . . . . . . . . . . . . . . . . . 80
7.6.4 Information about the Combination ES910.3-A with ES715 Drive
Recorder . . . . . . . . . . . . . . . . . . . . . . . . . . . . . . . . . . . . . . . . . . . . 80
7.7 Electrical Data . . . . . . . . . . . . . . . . . . . . . . . . . . . . . . . . . . . . . . . . . . . . . . . 81
7.7.1 Power Supply . . . . . . . . . . . . . . . . . . . . . . . . . . . . . . . . . . . . . . . . 81
7.7.2 Simulation Controller . . . . . . . . . . . . . . . . . . . . . . . . . . . . . . . . . . 81
7.7.3 PC Interface (PC) . . . . . . . . . . . . . . . . . . . . . . . . . . . . . . . . . . . . . 81
7.7.4 CAN Interfaces (CAN1/LIN1 and CAN2/LIN2) . . . . . . . . . . . . . . . . 82
7.7.5 LIN Interfaces (CAN1/LIN1 and CAN2/LIN2) . . . . . . . . . . . . . . . . . . 82
7.7.6 ETK Interface (ETK) . . . . . . . . . . . . . . . . . . . . . . . . . . . . . . . . . . . 83
7.7.7 Service Interface (SP) . . . . . . . . . . . . . . . . . . . . . . . . . . . . . . . . . . . 84
7.7.8 IO Interface . . . . . . . . . . . . . . . . . . . . . . . . . . . . . . . . . . . . . . . . . . 85
7.7.9 ECU Interface (ECU). . . . . . . . . . . . . . . . . . . . . . . . . . . . . . . . . . . . 85
7.7.10 Miscellaneous . . . . . . . . . . . . . . . . . . . . . . . . . . . . . . . . . . . . . . . . 86
7.8 Pin Assignment . . . . . . . . . . . . . . . . . . . . . . . . . . . . . . . . . . . . . . . . . . . . . . 87
7.8.1 Power Supply Interface (7-29V DC) . . . . . . . . . . . . . . . . . . . . . . . . 87
7.8.2 PC Interface (PC) . . . . . . . . . . . . . . . . . . . . . . . . . . . . . . . . . . . . . . 88
7.8.3 CAN/LIN Interface (CAN1/LIN1 and CAN2/LIN2) . . . . . . . . . . . . . . . 89
7.8.4 ETK Interface (ETK) . . . . . . . . . . . . . . . . . . . . . . . . . . . . . . . . . . . . 90
7.8.5 SP Interface (SP). . . . . . . . . . . . . . . . . . . . . . . . . . . . . . . . . . . . . . . 91
7.8.6 IO Interface (IO) . . . . . . . . . . . . . . . . . . . . . . . . . . . . . . . . . . . . . . . 92
7.8.7 ECU Interface (ECU). . . . . . . . . . . . . . . . . . . . . . . . . . . . . . . . . . . . 93
8 Cables and Accessories . . . . . . . . . . . . . . . . . . . . . . . . . . . . . . . . . . . . . . . . . . . . 94
8.1 Power Supply Cable . . . . . . . . . . . . . . . . . . . . . . . . . . . . . . . . . . . . . . . . . . 94
8.1.1 CBP120 Cable . . . . . . . . . . . . . . . . . . . . . . . . . . . . . . . . . . . . . . . . 95
8.1.2 CBP1205 Cable . . . . . . . . . . . . . . . . . . . . . . . . . . . . . . . . . . . . . . . 96
8.2 PC Interface Cable . . . . . . . . . . . . . . . . . . . . . . . . . . . . . . . . . . . . . . . . . . . 97
8.3 Ethernet Adapter Cable (1 Gbit/s / 100 Mbit/s) . . . . . . . . . . . . . . . . . . . . . . 97
8.4 Combined CAN and LIN Cable . . . . . . . . . . . . . . . . . . . . . . . . . . . . . . . . . . 98
8.5 CAN Interface Cable . . . . . . . . . . . . . . . . . . . . . . . . . . . . . . . . . . . . . . . . . 100
8.5.1 K106 Cable . . . . . . . . . . . . . . . . . . . . . . . . . . . . . . . . . . . . . . . . . 100
8.5.2 K107 Cable . . . . . . . . . . . . . . . . . . . . . . . . . . . . . . . . . . . . . . . . . 100
8.5.3 CBCX130-2 Cable . . . . . . . . . . . . . . . . . . . . . . . . . . . . . . . . . . . . 101
8.5.4 CBAC130-3 Cable. . . . . . . . . . . . . . . . . . . . . . . . . . . . . . . . . . . . 101
8.5.5 CBAC140-3 Cable. . . . . . . . . . . . . . . . . . . . . . . . . . . . . . . . . . . . 101
8.5.6 CBAC150-2m5 Cable . . . . . . . . . . . . . . . . . . . . . . . . . . . . . . . . . 102
8.6 CAN Terminating Resistor . . . . . . . . . . . . . . . . . . . . . . . . . . . . . . . . . . . . . 102
8.7 ETK Interface Cable CBM150-x . . . . . . . . . . . . . . . . . . . . . . . . . . . . . . . . . 103
8.8 ECU Interface Cable . . . . . . . . . . . . . . . . . . . . . . . . . . . . . . . . . . . . . . . . . 103
8.9 Ethernet Chain Connection and Power Supply Cable (Daisy Chain Modules) . .
104
8.9.1 CBEP430.1 Cable . . . . . . . . . . . . . . . . . . . . . . . . . . . . . . . . . . . . 104
8.9.2 CBEP4305.1 Cable . . . . . . . . . . . . . . . . . . . . . . . . . . . . . . . . . . . 104
9 Ordering Information . . . . . . . . . . . . . . . . . . . . . . . . . . . . . . . . . . . . . . . . . . . . . 105
9.1 ES910.3-A . . . . . . . . . . . . . . . . . . . . . . . . . . . . . . . . . . . . . . . . . . . . . . . . 105
9.1.1 ES910.3-A with CBP120 Power Supply Cable . . . . . . . . . . . . . . 105

ES910.3-A - User’s Guide 7
ETAS Contents
9.1.2 ES910.3-A with CBP1205 Power Supply Cable . . . . . . . . . . . . . 105
9.2 Cables and Accessories . . . . . . . . . . . . . . . . . . . . . . . . . . . . . . . . . . . . . . 106
9.2.1 Power Supply Interface Cable . . . . . . . . . . . . . . . . . . . . . . . . . . . 106
9.2.2 PC Interface Cable . . . . . . . . . . . . . . . . . . . . . . . . . . . . . . . . . . . 106
9.2.3 CAN/LIN Interface Cable and Adapter . . . . . . . . . . . . . . . . . . . . . 106
9.2.4 ETK Interface Cable . . . . . . . . . . . . . . . . . . . . . . . . . . . . . . . . . . 107
9.2.5 IO Interface Cable . . . . . . . . . . . . . . . . . . . . . . . . . . . . . . . . . . . . 107
9.2.6 ECU Interface Cable and Adapter . . . . . . . . . . . . . . . . . . . . . . . . 107
9.2.7 SP Interface Cable . . . . . . . . . . . . . . . . . . . . . . . . . . . . . . . . . . . 108
9.2.8 Extension Module . . . . . . . . . . . . . . . . . . . . . . . . . . . . . . . . . . . . 108
9.2.9 Housing Accessories . . . . . . . . . . . . . . . . . . . . . . . . . . . . . . . . . . 109
10 ETAS Contact Addresses . . . . . . . . . . . . . . . . . . . . . . . . . . . . . . . . . . . . . . . . . . . 110
Figures . . . . . . . . . . . . . . . . . . . . . . . . . . . . . . . . . . . . . . . . . . . . . . . . . . . . . . . . 111
Index . . . . . . . . . . . . . . . . . . . . . . . . . . . . . . . . . . . . . . . . . . . . . . . . . . . . . . . . . 113

ES910.3-A - User’s Guide 8
ETAS About this Manual
1 About this Manual
This chapter contains information about the following topics:
• "Identification of Safety Notices" on page 8,
• "Presentation of Information" on page 8,
• "Scope of Supply" on page 9,
• "Additional Information" on page 9.
1.1 Identification of Safety Notices
The safety notices contained in this manual are identified with the danger symbol
shown below:
The safety notices shown below are used for this purpose. They provide notes to
extremely important information. Please read this information carefully.
1.2 Presentation of Information
All activities to be performed by the user are presented in a "Use Case" format.
That is, the goal to be accomplished is briefly defined in the heading, and the
respective steps required for reaching this goal are then presented in a list. The
presentation looks as follows:
Goal definition:
any advance information...
•Step1
Any explanation for step 1...
•Step2
Any explanation for step 2...
•Step3
Any explanation for step 3...
DANGER!
indicates an immediate danger with a high risk of death or serious
injury, if not avoided.
WARNING!
indicates a possible danger with moderate risk of death or (serious)
injury, if not avoided.
CAUTION!
identifies a hazard with low risk that could result in minor or medium
physical injuries or property damages if not avoided.

ES910.3-A - User’s Guide 9
ETAS About this Manual
Any concluding comments...
Typographical conventions
The following typographical conventions are used:
Important notes for the user are presented as follows:
1.3 Scope of Supply
Prior to the initial commissioning of the module, please check whether the mod-
ule was delivered with all required components and cables (see chapter 9.1
on page 105).
Additional cables and adapters can be obtained separately from ETAS. A list of
available accessories and their order designation is located in chapter "Cables
and Accessories" on page 106 of this manual or in the ETAS product catalog.
1.4 Additional Information
The configuration instructions for the module under INCA can be found in the
corresponding software documentation.
Bold Labels of the device
Italic Particularly important text passages
Note
Important note for the user.

ES910.3-A - User’s Guide 10
ETAS Basic Safety Notices
2 Basic Safety Notices
This chapter contains information about the following topics:
• "General Safety Information" on page 10,
• "Requirements for Users and Duties for Operators" on page 10,
• "Intended Use" on page 10.
2.1 General Safety Information
Please observe the Product Safety Notices ("ETAS Safety Notice") and the follow-
ing safety notices to avoid health issues or damage to the device.
ETAS GmbH does not assume any liability for damages resulting from improper
handling, unintended use or non-observance of the safety precautions.
2.2 Requirements for Users and Duties for Operators
The product may be assembled, operated and maintained only if you have the
necessary qualification and experience for this product. Improper use or use by a
user without sufficient qualification can lead to damages or injuries to one's
health or damages to property.
The assembler of the system is responsible for the safety of any system incorper-
ating the equipment.
General safety at work
The existing regulations for safety at work and accident prevention must be fol-
lowed. All applicable regulations and statutes regarding operation must be
strictly followed when using this product.
2.3 Intended Use
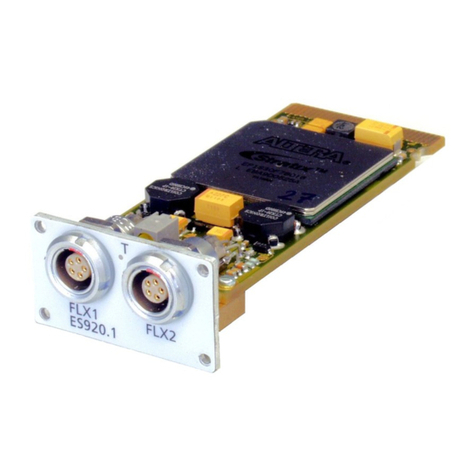
The ES910.3-A has a simulation controller and the ECU interfaces CAN, LIN, ETK
and XETK and also one interface for Daisy Chain modules (ES4xx/ES63x/ES93x
modules). If additional interfaces are required, the extension slot of the ES910.3-
A can be used with the ES920.1 FlexRay module, the ES921.1 CAN module or
with the ES922.1 CAN FD module.
Application area of the product
This product was developed and approved for applications in the automotive
sector. The module is suitable for use in interiors, in the passenger cell or in the
trunk of vehicles. The module is not suitable for installation in the engine com-
partment and similar environments. For use in other application areas, please
contact your ETAS contact partner.
Requirements for the technical state of the product
The product is designed in accordance with state-of-the-art technology and rec-
ognized safety rules. The product may be operated only in a technically flawless
condition and according to the intended purpose and with regard to safety and
Note
Carefully read the documentation (Product Safety Advice and this User's Guide)
that belongs to the product prior to the startup.

ES910.3-A - User’s Guide 11
ETAS Basic Safety Notices
dangers as stated in the respective product documentation. If the product is not
used according to its intended purpose, the protection of the product may be
impaired.
Requirements for operation
• Use the product only according to the specifications in the corresponding
User's Guide. With any deviating operation, the product safety is no lon-
ger ensured.
• Observe the requirements on the ambient conditions.
• Do not use the product in a wet or damp environment.
• Do not use the product in potentially explosive atmospheres.
Electrical safety and power supply
• Observe the regulations applicable at the operating location concerning
electrical safety as well as the laws and regulations concerning work
safety!
• Connect only current circuits with safety extra-low voltage in accordance
with EN 61140 (degree of protection III) to the connections of the module.
• Ensure that the connection and setting values are being followed (see the
information in the chapter "Technical data").
• Do not apply any voltages to the connections of the module that do not
correspond to the specifications of the respective connection.
Power supply
• The power supply for the product must be safely disconnected from the
supply voltage. For example, use a car battery or a suitable lab power sup-
ply.
• Use only lab power supplies with double protection to the supply network
(with double insulation/reinforced insulation (DI/ RI)).
• The lab power supply must be approved for an operating altitude of
5000 m and for an ambient temperature of up to 70 °C.
• In regular operation of the modules as well as very long standby opera-
tion, a discharge of the vehicle battery is possible.
Connection to the power supply
• The power cable must not be connected directly to the vehicle battery or
lab power supply, but via a fuse of up to 20 A.
• Ensure that the connections of the lab power supply, the power supply at
the module and the vehicle battery are easily accessible!

ES910.3-A - User’s Guide 12
ETAS Basic Safety Notices
• Route the power cable in such a way that it is protected against abrasion,
damages, deformation and kinking. Do not place any objects on the
power cable!
Approved power supply cables
Power supply cables suitable for the ES910.3-A module can be delivered in two
designs:
• power supply cable CBP120 with standard banana plugs (current design)
and
• power supply cable CBP1205 with safety banana plugs (new design).
De-energizing the module
The module does not have an operating voltage switch. The module can be de-
energized as follows:
• Disconnecting the cables from the measurement inputs
and
• Disconnecting the module from the power supply
– Disconnecting the module from the lab power supply
Separating device is the lab plug of the power cable or the plug of the
power cable at the connection of the module
or
– Disconnecting the module from the vehicle battery
Separating device is the lab plug of the power cable or the plug of the
power cable at the connection of the module
or
– Disconnecting the vehicle battery.
Approved cables
• Use exclusively ETAS cables at the connections of the module!
DANGER!
Dangerous electrical voltage!
Connect the power cable only with a suitable vehicle battery or with
a suitable lab power supply! The connection to power outlets is not
allowed!
To prevent an inadvertent insertion in power outlets, ETAS recom-
mends to equip the power cables with safety banana plugs in areas
with power outlets.
Note
Power supply cables with safety banana plug are suitable only for connection
to voltage sources with safety socket.
Note
Application, permissible voltages and all the other technical data of the power
supply cables are identical for both designs.

ES910.3-A - User’s Guide 13
ETAS Basic Safety Notices
• Adhere to the maximum permissible cable lengths!
• Do not use any damaged cables! Cables may be repaired only by ETAS!
• Never apply force to insert a plug into a socket. Ensure that there is no
contamination in and on the connection, that the plug fits the socket, and
that you correctly aligned the plugs with the connection.
Requirements for the location
• Position the module or the module stack on a smooth, level and solid
underground.
• The module or the module stack must always be securely fastened.
Fixing the modules on a carrier system
• When selecting the carrier system, observe the static and dynamic forces
that could be created by the module or the module stack on the carrier
system.
Requirements on the ventilation
• Keep the module away from heat sources and protect it against direct
exposure to the sun.
• Do not stand the module on its long sides.
• Do not stand the module on its top side.
• Never place objects on top of the module.
• The free space above and behind the module must be selected so that
sufficient air circulation is ensured. Adhere to the minimum distances of at
least 10 centimeters on the sides and above the module.
• Do not operate the module in completely enclosed containers.
CAUTION!
Heat concentration in the module possible!
The electronics can be damaged due to overheating.
Do not cover ventilation slits when setting up, assembling or connect-
ing the ES910.3-A module.
Adhere to the minimum distances at the sides and above.
CAUTION!
Heat concentration on the long sides of the module.
The electronics can be damaged due to overheating.
Do not cover ventilation slits when setting up, assembling or connect-
ing with other modules. Adhere to the minimum distance at the sides.

ES910.3-A - User’s Guide 14
ETAS Basic Safety Notices
Assembling (interconnecting) the modules
• Prior to assembling (interconnecting) or separating a module stack, the
modules must be disconnected from the supply voltage or they have to be
in the standby operating mode.
Transport
• Stack and connect the modules only at the location of the startup!
• Do not transport the modules at the cable of the module or any other
cables.
Maintenance
The product is maintenance-free.
Repair
If an ETAS hardware product should require a repair, return the product to ETAS.
Cleaning the module housing
• Use a dry or lightly moistened, soft, lint-free cloth for cleaning the module
housing.
• Do not user any sprays, solvents or abrasive cleaners which could damage
the housing.
• Ensure that no moisture enters the housing. Never spray cleaning agents
directly onto the module.
Ambient conditions
The housing and the connectors of the module as well as the plug connectors of
the cables meet the degree of protection IP30.
CAUTION!
Heat concentration on the top of the module.
The electronics can be damaged due to overheating.
Do not stack several ES910.3-As on top of each other.
When stacking the ES910.3-A with other ETAS modules, it always has
to be on top.
10 cm
10 cm 10 cm
CA N 1
LIN1 CA N 2
LIN2 ETK
TT
ON
TX
ER
°C
1
2
R
H
ES910.3
A

ES910.3-A - User’s Guide 15
ETAS Basic Safety Notices
Opening the module
Potential equalization
Cabling
For detailed information about cabling, see the User's Guide of the module.
CAUTION!
Damage to the module and loss of properties based on IP30!
Do not open or change the module housing!
Work on the module housing may only be performed by ETAS.
CAUTION!
Potential equalization in the vehicle is possible via the shield of
the connecting cables of the modules!
Install the modules only at locations with the same electrical potential
or isolate the modules from the installation location.

ES910.3-A - User’s Guide 16
ETAS Hardware Description
3 Hardware Description
This chapter provides you with an overview of the ES910.3-A with information
on the housing, serial number, interfaces and indicators.
3.1 Overview
Rapid prototyping can be executed with the compact module ES910.3-A. The
ES910.3-A has a simulation controller and the ECU interfaces CAN, LIN, ETK and
XETK and also one interface for Daisy Chain modules (ES4xx/ES63x/ES93x mod-
ules). If additional interfaces are required, the extension slot of the ES910.3-A
can be used with the ES920.1 FlexRay module, the ES921.1 CAN module or with
the ES922.1 CAN FD module. The Service Port provides the functions “Wake
Up” and “Trigger”. The ES910.3-A is supported by INCA as an interface for mea-
sure, calibration and diagnostic applications.
3.1.1 Rapid Prototyping of Software Functions
In this context, rapid prototyping refers to processes which enable early control
of the specifications in close-to-production vehicles. The fact that new develop-
ments are tested and confirmed at an early stage reduces the risks, increases the
quality of the development, and reduces the development time and thus the
costs.
The modeled software function is to be implemented as a prototype. Rapid pro-
totyping systems can be used as an execution platform for the software portions
of the control and diagnostic functions. They are then linked to the generators,
sensors, actuators, and ECUs of the vehicle. Due to these interfaces to the vehi-
cle, the software functions must be executed in the rapid prototyping system –
as in the ECU – while meeting real-time requirements.
Rapid prototyping systems are usually real-time computer systems with signifi-
cantly higher computing performance than ECUs. Rapid prototyping systems can
be configured, depending on the application, e.g., regarding the required inter-
faces for input and output signals. The entire system is designed for use in the
vehicle and is operated, e.g., using a PC. The software function can be tested
and modified directly in the vehicle.
In the bypass application, new or modified software functions are specified by a
model and run on the rapid prototyping system.
This approach is suited for enhancing existing functions. The existing functions in
the control unit are often still calculated but modified, so that the input values
are sent via the bypass interface, and the output values from the new bypass
function are used.
3.1.2 ES910.3-A Features
Overview of the major features of the ES910.3-A:
• Highly efficient, compact development and experimental platform with
high computing and simulation performance due to the use of a close-to-
target, fast floating-point processor.
• Smooth transition from the finished function prototype to ECU software
development by using the AUTOSAR-compatible RTA-OSEK operating sys-
tem.
• 1 Gbit/s Ethernet connection to the PC

ES910.3-A - User’s Guide 17
ETAS Hardware Description
• Equipment with universal ECU interfaces:
– One ETK ECU interface for bypass, measure and calibration applica-
tions
– Two CAN interfaces (High-Speed or Low-Speed) for bypass applica-
tions
– Two LIN interfaces for measure and Rapid prototyping applications
• Equipping with a configurable Ethernet interface:
– for an XETK for bypass, measurement and calibration applications or
– for an ECU with Ethernet interface (XCP on UDP) for
bypass, measurement and calibration applications or
– for the XCP-on-Ethernet interface iLinkRTTM for fast measurement and
calibration privileges (application with INCA-MCE)
• Equipping with a configurable IO interface:
– for ES400 Micro I/O & Measurement Modules for Rapid Prototyping
applications or
– for standardized, real time-capable automation bus as EtherCAT-slave
device for fast measurement and calibration privileges (application
with INCA-MCE)
• Support of the ETAS synchronization mechanism at the interfaces PC
(SYNC IN functionality) and ECU (SYNC OUT functionality)
• EtherCAT selectable as source for ETAS synchronization mechanism
• One slot for extension modules (extension slot)
• Module suitable for use in automotive applications; suitable for use in the
development environment and in the vehicle on test drives.
– Channels galvanically isolated from each other, from the device
ground and from the supply voltage
– Not sensitive to extreme environmental conditions (temperature, EMC)
– Wide range of power supply
– High mechanical stability and durability
• Member of the ETAS Tool Suite
– Rapid prototyping of control functions with MATLAB®/Simulink®,
ASCET-MD, and C by integration in INTECRIO
– Supported by INCA, INCA ES9xx Add-On, INCA-EIP, RTA-TRACE, HSP
For the complete technical data of the ES910.3-A, refer to the chapter "Techni-
cal Data" on page 74.

ES910.3-A - User’s Guide 18
ETAS Hardware Description
3.2 Housing
Standard housing with interfaces on the front and rear of the device is used for
the ES910.3-A. The sturdy metal housing of the ES910.3-A has nonskid plastic
feet.
It can be easily screwed onto a carrier system for installation in a vehicle or in the
lab. The housings of this device family can also quickly and easily be connected
to one another (see the chapter "Setup" on page 42).
The ES910.3-A is specifically designed to be installed in the passenger cell.
Fig. 3-1 ES910.3-A View of the Device

ES910.3-A - User’s Guide 19
ETAS Hardware Description
3.3 Interfaces
3.3.1 Front Panel
The following interfaces are on the front panel of the ES910.3-A:
• Extension slot (e.g. for ES920.1 FlexRay Module)
• CAN1/LIN1 (1 x CAN, 1 x LIN)
• CAN2/LIN2 (1 x CAN, 1 x LIN)
• ETK (1 x ETK)
Fig. 3-2 ES910.3-A Front Panel
LEDs are assigned to the module and to the interfaces of the module:
No. in Fig. 3-2
(Name of LED)
Assignment Display Function
1
(1, 2)
Module Operational state of the module
(see chapter 3.4.2 on page 21)
1
(R, H)
Configurable Customized configuration
(see chapter 3.4.2 on page 21)
2
(T)
CAN1/LIN1,
CAN2/LIN2
Communication at the interfaces CAN1,
LIN1, CAN2 and LIN2
(see chapter 3.4.4 on page 23)
3
(T)
ETK Communication at the ETK interface (see
chapter 3.4.4 on page 23)
4
(ON, TX, ER, °C)
Module Functional state of the module
(see chapter 3.4.3 on page 22)
CA N1
LIN1 CA N 2
LIN2 ETK
TT
ON
TX
ER
°C
1
2
R
H
ES910.3
A
1 2 3 4

ES910.3-A - User’s Guide 20
ETAS Hardware Description
3.3.2 Back Panel
The following interfaces are on the back panel of the ES910.3-A:
• 6 ... 32V DC (power supply)
•ON/AUTO switch
• SP (Service Port)
• IO (interface for ES4xx/ES63x/ES93x modules or EtherCAT automation
bus)
• ECU SYNC OUT (ECU or iLinkRTTM interface)
• PC SYNC IN (Ethernet interface to the PC)
Fig. 3-3 ES910.3-A Back Panel
LEDs are assigned to some interfaces of the module:
No. in Fig. 3-3
(Name of LED)
Assignment Display Function
1
(T, 2E)
IO Communication at the IO interface
(see chapter 3.4.4 on page 23)
2
(T, S)
ECU Communication at the ECU interface
(see chapter 3.4.4 on page 23)
3
(T, S)
PC Communication at the PC interface
(see chapter 3.4.4 on page 23)
4
(SYNC)
Module Synchronization state of the module (see
chapter 3.4.3 on page 22)
Table of contents
Other ETAS Control Unit manuals
Popular Control Unit manuals by other brands

Honeywell
Honeywell 026593.10 Mounting and Connection Instructions

Mitsubishi Electric
Mitsubishi Electric GT1030-HBD General description

Technologic Systems
Technologic Systems TS-7558 Schematics

MicroKopter
MicroKopter NaviCtrl 2.1 manual

AXIOMTEK
AXIOMTEK CEM312 Quick installation guide

ICP DAS USA
ICP DAS USA ET-7000 series user manual