ETAS ES595.1 User manual

ETAS ES595.1
Network Module
User Guide

Copyright
The data in this document may not be altered or amended without special noti-
fication from ETAS GmbH. ETAS GmbH undertakes no further obligation in
relation to this document. The software described in it can only be used if the
customer is in possession of a general license agreement or single license.
Using and copying is only allowed in concurrence with the specifications stipu-
lated in the contract.
Under no circumstances may any part of this document be copied, reproduced,
transmitted, stored in a retrieval system or translated into another language
without the express written permission of ETAS GmbH.
© Copyright 2021 ETAS GmbH, Stuttgart
The names and designations used in this document are trademarks or brands
belonging to the respective owners.
ES595.1 -User Guide R07 EN -02.2021

ETAS Contents
Contents
ES595.1 -User Guide 3
1 About this Document . . . . . . . . . . . . . . . . . . . . . . . . . . . . . . . . . . . . . . . . . . . . . . . . . . . 6
1.1 Classification of Safety Messages . . . . . . . . . . . . . . . . . . . . . . . . . . . . . . . . . . . . . . . . . . 6
1.2 Presentation of Instructions . . . . . . . . . . . . . . . . . . . . . . . . . . . . . . . . . . . . . . . . . . . . . . . 6
1.3 Typographical Conventions . . . . . . . . . . . . . . . . . . . . . . . . . . . . . . . . . . . . . . . . . . . . . . . . 7
1.4 Presentation of Supporting Information . . . . . . . . . . . . . . . . . . . . . . . . . . . . . . . . . . . . . 7
2 About this Manual . . . . . . . . . . . . . . . . . . . . . . . . . . . . . . . . . . . . . . . . . . . . . . . . . . . . . 8
2.1 Scope of Supply . . . . . . . . . . . . . . . . . . . . . . . . . . . . . . . . . . . . . . . . . . . . . . . . . . . . . . . . . . 8
2.2 Additional information . . . . . . . . . . . . . . . . . . . . . . . . . . . . . . . . . . . . . . . . . . . . . . . . . . . . 8
3 Basic Safety Notices . . . . . . . . . . . . . . . . . . . . . . . . . . . . . . . . . . . . . . . . . . . . . . . . . . . 9
3.1 General Safety Information . . . . . . . . . . . . . . . . . . . . . . . . . . . . . . . . . . . . . . . . . . . . . . . . 9
3.2 Requirements for Users and Duties for Operators . . . . . . . . . . . . . . . . . . . . . . . . . . . . 9
3.3 Intended Use. . . . . . . . . . . . . . . . . . . . . . . . . . . . . . . . . . . . . . . . . . . . . . . . . . . . . . . . . . . . . 9
4 Hardware Description . . . . . . . . . . . . . . . . . . . . . . . . . . . . . . . . . . . . . . . . . . . . . . . . 14
4.1 Overview . . . . . . . . . . . . . . . . . . . . . . . . . . . . . . . . . . . . . . . . . . . . . . . . . . . . . . . . . . . . . . . 14
4.2 Features. . . . . . . . . . . . . . . . . . . . . . . . . . . . . . . . . . . . . . . . . . . . . . . . . . . . . . . . . . . . . . . . 14
4.3 Housing . . . . . . . . . . . . . . . . . . . . . . . . . . . . . . . . . . . . . . . . . . . . . . . . . . . . . . . . . . . . . . . . 15
4.4 Interfaces . . . . . . . . . . . . . . . . . . . . . . . . . . . . . . . . . . . . . . . . . . . . . . . . . . . . . . . . . . . . . . 16
4.4.1 Front Panel . . . . . . . . . . . . . . . . . . . . . . . . . . . . . . . . . . . . . . . . . . . . . . . . . . . . 16
4.4.2 Back Panel. . . . . . . . . . . . . . . . . . . . . . . . . . . . . . . . . . . . . . . . . . . . . . . . . . . . . 16
4.5 LEDs . . . . . . . . . . . . . . . . . . . . . . . . . . . . . . . . . . . . . . . . . . . . . . . . . . . . . . . . . . . . . . . . . . . 16
4.5.1 Flash Codes. . . . . . . . . . . . . . . . . . . . . . . . . . . . . . . . . . . . . . . . . . . . . . . . . . . . 16
4.5.2 Operational State of the Module . . . . . . . . . . . . . . . . . . . . . . . . . . . . . . . . . . 17
4.5.3 Functional State of Individual Interfaces . . . . . . . . . . . . . . . . . . . . . . . . . . . 18
5 Functional Description. . . . . . . . . . . . . . . . . . . . . . . . . . . . . . . . . . . . . . . . . . . . . . . . 20
5.1 Block Diagram . . . . . . . . . . . . . . . . . . . . . . . . . . . . . . . . . . . . . . . . . . . . . . . . . . . . . . . . . . 20
5.2 Power Supply (7-29V DC) . . . . . . . . . . . . . . . . . . . . . . . . . . . . . . . . . . . . . . . . . . . . . . . . . 20
5.3 Ethernet Switch . . . . . . . . . . . . . . . . . . . . . . . . . . . . . . . . . . . . . . . . . . . . . . . . . . . . . . . . . 20
5.3.1 Host Port (HOST) . . . . . . . . . . . . . . . . . . . . . . . . . . . . . . . . . . . . . . . . . . . . . . . 21
5.3.2 Ethernet Ports ((ETH1) . . . . . . . . . . . . . . . . . . . . . . . . . . . . . . . . . . . . . . . . . . 21
5.3.3 Power-Saving Feature . . . . . . . . . . . . . . . . . . . . . . . . . . . . . . . . . . . . . . . . . . . 21
5.4 Module Network. . . . . . . . . . . . . . . . . . . . . . . . . . . . . . . . . . . . . . . . . . . . . . . . . . . . . . . . . 22
5.5 Time Synchronization . . . . . . . . . . . . . . . . . . . . . . . . . . . . . . . . . . . . . . . . . . . . . . . . . . . . 22
5.6 ETK Interface (ETK). . . . . . . . . . . . . . . . . . . . . . . . . . . . . . . . . . . . . . . . . . . . . . . . . . . . . . 22
5.6.1 Initialization . . . . . . . . . . . . . . . . . . . . . . . . . . . . . . . . . . . . . . . . . . . . . . . . . . . . 23
5.6.2 Operating Modes . . . . . . . . . . . . . . . . . . . . . . . . . . . . . . . . . . . . . . . . . . . . . . . 23
5.7 CAN Interface (CAN1/LIN1, CAN2/LIN2) . . . . . . . . . . . . . . . . . . . . . . . . . . . . . . . . . . . 24
5.7.1 Operating Modes . . . . . . . . . . . . . . . . . . . . . . . . . . . . . . . . . . . . . . . . . . . . . . . 24
5.7.2 Feature . . . . . . . . . . . . . . . . . . . . . . . . . . . . . . . . . . . . . . . . . . . . . . . . . . . . . . . . 24
5.7.3 Bus Terminating Resistor . . . . . . . . . . . . . . . . . . . . . . . . . . . . . . . . . . . . . . . . 24
5.8 LIN Interface (CAN1/LIN1, CAN2/LIN2) . . . . . . . . . . . . . . . . . . . . . . . . . . . . . . . . . . . . 25
Contents

ETAS Contents
ES595.1 -User Guide 4
5.8.1 Operating Modes . . . . . . . . . . . . . . . . . . . . . . . . . . . . . . . . . . . . . . . . . . . . . . . 25
5.8.2 Feature . . . . . . . . . . . . . . . . . . . . . . . . . . . . . . . . . . . . . . . . . . . . . . . . . . . . . . . . 25
5.8.3 Power Supply on the Bus . . . . . . . . . . . . . . . . . . . . . . . . . . . . . . . . . . . . . . . . 25
5.9 FlexRay Interface (FLX1, FLX2). . . . . . . . . . . . . . . . . . . . . . . . . . . . . . . . . . . . . . . . . . . . 26
5.9.1 Feature . . . . . . . . . . . . . . . . . . . . . . . . . . . . . . . . . . . . . . . . . . . . . . . . . . . . . . . . 26
5.9.2 Bus Termination Resistor . . . . . . . . . . . . . . . . . . . . . . . . . . . . . . . . . . . . . . . . 26
5.9.3 Synchronisation Nodes. . . . . . . . . . . . . . . . . . . . . . . . . . . . . . . . . . . . . . . . . . 27
5.10 Firmware Update . . . . . . . . . . . . . . . . . . . . . . . . . . . . . . . . . . . . . . . . . . . . . . . . . . . . . . . . 27
6 Getting Started . . . . . . . . . . . . . . . . . . . . . . . . . . . . . . . . . . . . . . . . . . . . . . . . . . . . . . 28
6.1 Assembly and Locking . . . . . . . . . . . . . . . . . . . . . . . . . . . . . . . . . . . . . . . . . . . . . . . . . . . 28
6.1.1 General Installation Recommendations . . . . . . . . . . . . . . . . . . . . . . . . . . . 28
6.1.2 Fixing a Module onto a Carrier System . . . . . . . . . . . . . . . . . . . . . . . . . . . . 28
6.1.3 Connecting Several Modules Mechanically . . . . . . . . . . . . . . . . . . . . . . . . 29
6.2 Applications . . . . . . . . . . . . . . . . . . . . . . . . . . . . . . . . . . . . . . . . . . . . . . . . . . . . . . . . . . . . 31
6.3 Wiring . . . . . . . . . . . . . . . . . . . . . . . . . . . . . . . . . . . . . . . . . . . . . . . . . . . . . . . . . . . . . . . . . . 32
6.3.1 “HOST” Port . . . . . . . . . . . . . . . . . . . . . . . . . . . . . . . . . . . . . . . . . . . . . . . . . . . . 32
6.3.2 “7-29V” Port . . . . . . . . . . . . . . . . . . . . . . . . . . . . . . . . . . . . . . . . . . . . . . . . . . . 32
6.3.3 “ETH1” Port . . . . . . . . . . . . . . . . . . . . . . . . . . . . . . . . . . . . . . . . . . . . . . . . . . . . 33
6.4 Configuring the ES595.1. . . . . . . . . . . . . . . . . . . . . . . . . . . . . . . . . . . . . . . . . . . . . . . . . . 34
6.4.1 Web Interface . . . . . . . . . . . . . . . . . . . . . . . . . . . . . . . . . . . . . . . . . . . . . . . . . . 34
6.4.2 Launching the ES595.1 Web Interface. . . . . . . . . . . . . . . . . . . . . . . . . . . . . 34
6.4.3 Configuring the “Wake Up” Function. . . . . . . . . . . . . . . . . . . . . . . . . . . . . . . 34
7 Troubleshooting Problems . . . . . . . . . . . . . . . . . . . . . . . . . . . . . . . . . . . . . . . . . . . . 35
7.1 Error LEDs . . . . . . . . . . . . . . . . . . . . . . . . . . . . . . . . . . . . . . . . . . . . . . . . . . . . . . . . . . . . . . 35
7.2 Troubleshooting ES595.1 Problems . . . . . . . . . . . . . . . . . . . . . . . . . . . . . . . . . . . . . . . 35
7.3 Problems and Solutions . . . . . . . . . . . . . . . . . . . . . . . . . . . . . . . . . . . . . . . . . . . . . . . . . . 37
7.3.1 Network Adapter cannot be selected via Network Manager . . . . . . . . . . 37
7.3.2 Search for Ethernet Hardware fails. . . . . . . . . . . . . . . . . . . . . . . . . . . . . . . . 38
7.3.3 Personal Firewall blocks Communication. . . . . . . . . . . . . . . . . . . . . . . . . . 39
8 Technical Data . . . . . . . . . . . . . . . . . . . . . . . . . . . . . . . . . . . . . . . . . . . . . . . . . . . . . . 45
8.1 General Data . . . . . . . . . . . . . . . . . . . . . . . . . . . . . . . . . . . . . . . . . . . . . . . . . . . . . . . . . . . . 45
8.1.1 Product Labeling . . . . . . . . . . . . . . . . . . . . . . . . . . . . . . . . . . . . . . . . . . . . . . . 45
8.1.2 Fulfilled Standards and Norms . . . . . . . . . . . . . . . . . . . . . . . . . . . . . . . . . . . 46
8.1.3 Environmental Conditions . . . . . . . . . . . . . . . . . . . . . . . . . . . . . . . . . . . . . . 46
8.1.4 Maintenance the Product . . . . . . . . . . . . . . . . . . . . . . . . . . . . . . . . . . . . . . . . 46
8.1.5 Cleaning the product . . . . . . . . . . . . . . . . . . . . . . . . . . . . . . . . . . . . . . . . . . . . 46
8.1.6 Mechanical Data. . . . . . . . . . . . . . . . . . . . . . . . . . . . . . . . . . . . . . . . . . . . . . . . 47
8.2 RoHS Conformity. . . . . . . . . . . . . . . . . . . . . . . . . . . . . . . . . . . . . . . . . . . . . . . . . . . . . . . . 47
8.3 CE conformity. . . . . . . . . . . . . . . . . . . . . . . . . . . . . . . . . . . . . . . . . . . . . . . . . . . . . . . . . . . 47
8.4 UKCA conformity . . . . . . . . . . . . . . . . . . . . . . . . . . . . . . . . . . . . . . . . . . . . . . . . . . . . . . . . 47
8.5 KCC conformity . . . . . . . . . . . . . . . . . . . . . . . . . . . . . . . . . . . . . . . . . . . . . . . . . . . . . . . . . 47
8.6 Taking the Product Back and Recycling . . . . . . . . . . . . . . . . . . . . . . . . . . . . . . . . . . . . 47
8.7 Use of Open Source software . . . . . . . . . . . . . . . . . . . . . . . . . . . . . . . . . . . . . . . . . . . . . 48
8.8 System Requirements. . . . . . . . . . . . . . . . . . . . . . . . . . . . . . . . . . . . . . . . . . . . . . . . . . . . 48
8.8.1 Hardware . . . . . . . . . . . . . . . . . . . . . . . . . . . . . . . . . . . . . . . . . . . . . . . . . . . . . . 48
8.8.2 Supported Applications and Software Requirements . . . . . . . . . . . . . . . . 49

ETAS Contents
ES595.1 -User Guide 5
8.9 Electrical Data. . . . . . . . . . . . . . . . . . . . . . . . . . . . . . . . . . . . . . . . . . . . . . . . . . . . . . . . . . . 50
8.9.1 Power Supply . . . . . . . . . . . . . . . . . . . . . . . . . . . . . . . . . . . . . . . . . . . . . . . . . . 50
8.9.2 Host Interface (HOST) . . . . . . . . . . . . . . . . . . . . . . . . . . . . . . . . . . . . . . . . . . 50
8.9.3 Ethernet Interface (ETH1) . . . . . . . . . . . . . . . . . . . . . . . . . . . . . . . . . . . . . . . 52
8.9.4 ETK Interface (ETK) . . . . . . . . . . . . . . . . . . . . . . . . . . . . . . . . . . . . . . . . . . . 52
8.9.5 CAN Interfaces (CAN1/LIN1 and CAN2/LIN2) . . . . . . . . . . . . . . . . . . . . . . 53
8.9.6 LIN Interfaces (CAN1/LIN1 and CAN2/LIN2) . . . . . . . . . . . . . . . . . . . . . . . 53
8.9.7 FlexRay Interfaces (FLX1 and FLX2) . . . . . . . . . . . . . . . . . . . . . . . . . . . . . . 54
8.10 Pin Assignment . . . . . . . . . . . . . . . . . . . . . . . . . . . . . . . . . . . . . . . . . . . . . . . . . . . . . . . . . 54
8.10.1 Power Supply Interface (7-29V) . . . . . . . . . . . . . . . . . . . . . . . . . . . . . . . . . . 54
8.10.2 Host Interface (HOST). . . . . . . . . . . . . . . . . . . . . . . . . . . . . . . . . . . . . . . . . . . 55
8.10.3 Ethernet Interface (ETH1). . . . . . . . . . . . . . . . . . . . . . . . . . . . . . . . . . . . . . . . 55
8.10.4 ETK Interface (ETK) . . . . . . . . . . . . . . . . . . . . . . . . . . . . . . . . . . . . . . . . . . . . . 56
8.10.5 CAN/LIN Interface (CAN1/LIN1 and CAN2/LIN2) . . . . . . . . . . . . . . . . . . . 56
8.10.6 FlexRay Interfaces (FLX1 and FLX2) . . . . . . . . . . . . . . . . . . . . . . . . . . . . . . 57
9 Cable and Accessoires . . . . . . . . . . . . . . . . . . . . . . . . . . . . . . . . . . . . . . . . . . . . . . . 58
9.1 Cable for the "7-29 V DC" connection . . . . . . . . . . . . . . . . . . . . . . . . . . . . . . . . . . . . . . 58
9.1.1 CBP120 Cable . . . . . . . . . . . . . . . . . . . . . . . . . . . . . . . . . . . . . . . . . . . . . . . . . 59
9.1.2 CBP1205 Cable . . . . . . . . . . . . . . . . . . . . . . . . . . . . . . . . . . . . . . . . . . . . . . . . 60
9.2 HOST Interface Cable . . . . . . . . . . . . . . . . . . . . . . . . . . . . . . . . . . . . . . . . . . . . . . . . . . . 60
9.3 ETH1 Interface Cable . . . . . . . . . . . . . . . . . . . . . . . . . . . . . . . . . . . . . . . . . . . . . . . . . . . . 61
9.3.1 Ethernet Connection and Power Supply Cable. . . . . . . . . . . . . . . . . . . . . . 61
9.3.2 Ethernet Connection Cable. . . . . . . . . . . . . . . . . . . . . . . . . . . . . . . . . . . . . . . 63
9.3.3 Ethernet Connection Adapter Cable . . . . . . . . . . . . . . . . . . . . . . . . . . . . . . 64
9.4 ETK Interface Cable . . . . . . . . . . . . . . . . . . . . . . . . . . . . . . . . . . . . . . . . . . . . . . . . . . . . . 64
9.5 CAN/LIN Interface Cable and Adapter. . . . . . . . . . . . . . . . . . . . . . . . . . . . . . . . . . . . . . 64
9.5.1 CAN Interface Cable . . . . . . . . . . . . . . . . . . . . . . . . . . . . . . . . . . . . . . . . . . . . 64
9.5.2 Combined CAN and LIN Cable . . . . . . . . . . . . . . . . . . . . . . . . . . . . . . . . . . . 66
9.5.3 CAN Termination Resistor . . . . . . . . . . . . . . . . . . . . . . . . . . . . . . . . . . . . . . . 68
9.6 FLX Interface Cable and Adapter . . . . . . . . . . . . . . . . . . . . . . . . . . . . . . . . . . . . . . . . . . 69
9.6.1 FlexRay Interface Cable . . . . . . . . . . . . . . . . . . . . . . . . . . . . . . . . . . . . . . . . . 69
9.6.2 FlexRay Termination Resistor . . . . . . . . . . . . . . . . . . . . . . . . . . . . . . . . . . . . 72
10 Ordering Information . . . . . . . . . . . . . . . . . . . . . . . . . . . . . . . . . . . . . . . . . . . . . . . . . 73
10.1 ES595.1 . . . . . . . . . . . . . . . . . . . . . . . . . . . . . . . . . . . . . . . . . . . . . . . . . . . . . . . . . . . . . . . . 73
10.1.1 ES595.1 with CBP120 Power Supply Cable . . . . . . . . . . . . . . . . . . . . . . . 73
10.1.2 ES595.1 with CBP1205 Power Supply Cable . . . . . . . . . . . . . . . . . . . . . . 73
10.2 Cable and Accessoires . . . . . . . . . . . . . . . . . . . . . . . . . . . . . . . . . . . . . . . . . . . . . . . . . . 74
10.2.1 Cable for the "7-29 V DC" connection . . . . . . . . . . . . . . . . . . . . . . . . . . . . . . 74
10.2.2 "HOST" Interface Cable . . . . . . . . . . . . . . . . . . . . . . . . . . . . . . . . . . . . . . . . . 74
10.2.3 "ETH1" Interface Cable . . . . . . . . . . . . . . . . . . . . . . . . . . . . . . . . . . . . . . . . . . 74
10.2.4 "ETK" Interface Cable . . . . . . . . . . . . . . . . . . . . . . . . . . . . . . . . . . . . . . . . . . . 75
10.2.5 "CAN/LIN" Interface Cable and Adapter. . . . . . . . . . . . . . . . . . . . . . . . . . . . 75
10.2.6 "FLX1/FLX2" Interface Cable and Adapter. . . . . . . . . . . . . . . . . . . . . . . . . . 76
10.2.7 Housing Accessoires . . . . . . . . . . . . . . . . . . . . . . . . . . . . . . . . . . . . . . . . . . . 76
10.2.8 Software . . . . . . . . . . . . . . . . . . . . . . . . . . . . . . . . . . . . . . . . . . . . . . . . . . . . . . 76
11 Contact Information. . . . . . . . . . . . . . . . . . . . . . . . . . . . . . . . . . . . . . . . . . . . . . . . . . 77
Figures . . . . . . . . . . . . . . . . . . . . . . . . . . . . . . . . . . . . . . . . . . . . . . . . . . . . . . . . . . . . 78
Index . . . . . . . . . . . . . . . . . . . . . . . . . . . . . . . . . . . . . . . . . . . . . . . . . . . . . . . . . . . . . . 80

ETAS About this Document
ES595.1 -User Guide 6
1 About this Document
1.1 Classification of Safety Messages
The safety messages used here warn of dangers that can lead to personal
injury or damage to property:
1.2 Presentation of Instructions
The target to be achieved is defined in the heading. The necessary steps for his
are in a step-by-step guide:
Target definition
1. Step 1
2. Step 2
3. Step 3
> Result
DANGER
indicates a hazardous situation with a high risk of death or serious injury if
not avoided
WARNING
indicates a hazardous situation of medium risk which could result in death or
serious injury if not avoided.
CAUTION
indicates a hazardous situation of low risk which may result in minor or
moder-ate injury if not avoided.
NOTICE
indicates a situation which may result in damage to property if not avoided.

ETAS About this Document
ES595.1 -User Guide 7
1.3 Typographical Conventions
Hardware
1.4 Presentation of Supporting Information
Bold Menu commands, buttons, labels of the product
Italic Emphasis on content and newly introduced terms
NOTE
Contains additional supporting information.

ETAS About this Manual
ES595.1 -User Guide 8
2 About this Manual
This chapter contains information about the following topics:
• “Scope of Supply” on page 8
• “Additional information” on page 8
2.1 Scope of Supply
Prior to the initial commissioning of the module, please check whether the
module was delivered with all required components and cables (see chapter
10.1 on page 73).
Additional cables and adapters can be obtained separately from ETAS. A list of
available accessories and their order designation is located in chapter “Cable
and Accessoires” on page 74 of this manual or in the ETAS product catalog.
2.2 Additional information
The configuration instructions for the module under INCA can be found in the
corresponding software documentation.

ETAS Basic Safety Notices
ES595.1 -User Guide 9
3 Basic Safety Notices
This chapter contains information about the following topics:
• “General Safety Information” on page 9
• “Requirements for Users and Duties for Operators” on page 9
• “Intended Use” on page 9
3.1 General Safety Information
Please observe the Product Safety Notices ("ETAS Safety Notice") and the fol-
lowing safety notices to avoid health issues or damage to the device.
ETAS GmbH does not assume any liability for damages resulting from
improper handling, unintended use or non-observance of the safety precau-
tions.
3.2 Requirements for Users and Duties for Operators
The product may be assembled, operated and maintained only if you have the
necessary qualification and experience for this product. Improper use or use by
a user without sufficient qualification can lead to damages or injuries to one's
health or damages to property.
General safety at work
The existing regulations for safety at work and accident prevention must be
followed. All applicable regulations and statutes regarding operation must be
strictly followed when using this product.
3.3 Intended Use
Application area of the product
This product was developed and approved for applications in the automotive
sector. The module is suitable for use in interiors, in the passenger cell or in the
trunk of vehicles. The module is not suitable for installation in the engine com-
partment and similar environments. For use in other application areas, please
contact your ETAS contact partner.
Requirements for the technical state of the product
The product is designed in accordance with state-of-the-art technology and
recognized safety rules. The product may be operated only in a technically flaw-
less condition and according to the intended purpose and with regard to safety
NOTE
Carefully read the documentation (Product Safety Advice and this User's
Guide) that belongs to the product prior to the startup.

ETAS Basic Safety Notices
ES595.1 -User Guide 10
and dangers as stated in the respective product documentation. If the product
is not used according to its intended purpose, the protection of the product
may be impaired.
Requirements for operation
• Use the product only according to the specifications in the correspond-
ing User's Guide. With any deviating operation, the product safety is no
longer ensured.
• Observe the requirements on the ambient conditions.
• Do not use the product in a wet or damp environment.
• Do not use the product in potentially explosive atmospheres.
Electrical safety and power supply
• Observe the regulations applicable at the operating location concerning
electrical safety as well as the laws and regulations concerning work
safety!
• Connect only current circuits with safety extra-low voltage in accordance
with EN 61140 (degree of protection III) to the connections of the mod-
ule.
• Ensure that the connection and setting values are being followed (see
the information in the chapter "Technical data").
• Do not apply any voltages to the connections of the module that do not
correspond to the specifications of the respective connection.
Power supply
• The power supply for the product must be safely disconnected from the
supply voltage. For example, use a car battery or a suitable lab power
supply.
• Use only lab power supplies with double protection to the supply net-
work (with double insulation/reinforced insulation (DI/ RI)).
• The lab power supply must be approved for an operating altitude of
5000 m and for an ambient temperature of up to 70 °C.
• In regular operation of the modules as well as very long standby opera-
tion, a discharge of the vehicle battery is possible.

ETAS Basic Safety Notices
ES595.1 -User Guide 11
Connection to the power supply
• The power cable must not be connected directly to the vehicle battery or
lab power supply, but via a fuse of up to 20 A.
• Ensure that the connections of the lab power supply, the power supply at
the module and the vehicle battery are easily accessible!
• Route the power cord in such a way that it is protected against abrasion,
damages, deformation and kinking. Do not place any objects on the
power cord!
Disconnecting from the power supply
The module does not have an operating voltage switch. The module can be de-
energized as follows:
• Disconnecting the module from the lab power supply
– Separating device is the lab plug of the power cord or
– Separating device is the plug of the power cord at the connection of
the module
• Disconnecting the module from the vehicle battery
– Separating device is the lab plug of the power cord or
– Separating device is the plug of the power cord at the connection of
the module
• Disconnecting the vehicle battery.
Approved cables
• Use exclusively ETAS cables at the connections of the module!
• Adhere to the maximum permissible cable lengths!
• Do not use any damaged cables! Cables may be repaired only by ETAS!
• Never apply force to insert a plug into a socket. Ensure that there is no
contamination in and on the connection, that the plug fits the socket, and
that you correctly aligned the plugs with the connection.
Requirements for the location
• Position the module or the module stack on a smooth, level and solid
underground.
• The module or the module stack must always be securely fastened.
DANGER
Dangerous electrical voltage!
Connect the power cable only with a suitable vehicle battery or with a suitable
lab power supply! The connection to power outlets is not allowed!
To prevent an inadvertent insertion in power outlets, ETAS recommends to
equip the power cables with safety banana plugs in areas with power outlets.

ETAS Basic Safety Notices
ES595.1 -User Guide 12
Fixing the modules on a carrier system
• When selecting the carrier system, observe the static and dynamic
forces that could be created by the module or the module stack on the
carrier system.
Requirements on the ventilation
• Keep the module away from heat sources and protect it against direct
exposure to the sun.
• The free space above and behind the module must be selected so that
sufficient air circulation is ensured.
Assembling (interconnecting) the modules
• Prior to assembling (interconnecting) or separating a module stack, the
modules must be disconnected from the supply voltage or they have to
be in the standby operating mode.
Transport
• Stack and connect the modules only at the location of the startup!
• Do not transport the modules at the cable of the module or any other
cables.
Maintenance
The product is maintenance-free.
Repair
If an ETAS hardware product should require a repair, return the product to
ETAS.
Cleaning the module housing
• Use a dry or lightly moistened, soft, lint-free cloth for cleaning the module
housing.
• Do not user any sprays, solvents or abrasive cleaners which could dam-
age the housing.
• Ensure that no moisture enters the housing. Never spray cleaning agents
directly onto the module.
Ambient conditions
The housing and the connectors of the module as well as the plug connectors
of the cables meet the degree of protection IP30.

ETAS Basic Safety Notices
ES595.1 -User Guide 13
Opening the module
Potential equalization
Cabling
For detailed information about cabling, see the User's Guide of the module.
CAUTION
Damage to the module and loss of properties based on IP30!
Do not open or change the module housing!
Work on the module housing may only be performed by ETAS.
CAUTION
Potential equalization in the vehicle is possible via the shield of the
connecting cables of the modules!
Install the modules only at locations with the same electrical potential or iso-
late the modules from the installation location.

ETAS Hardware Description
ES595.1 -User Guide 14
4 Hardware Description
This chapter provides you with an overview of the ES595.1 with information on
the housing, serial number, ports and LEDs.
4.1 Overview
The ES59x line is a range of powerful ECU and bus interface modules. The
ES59x modules have an upstream Ethernet interface that guarantees data
exchange with the host PC or with a Drive Recorder.
The ES595.1 module has a downstream Ethernet interfaces that can be con-
nected with ES59x, ES600, measurement and interface modules.
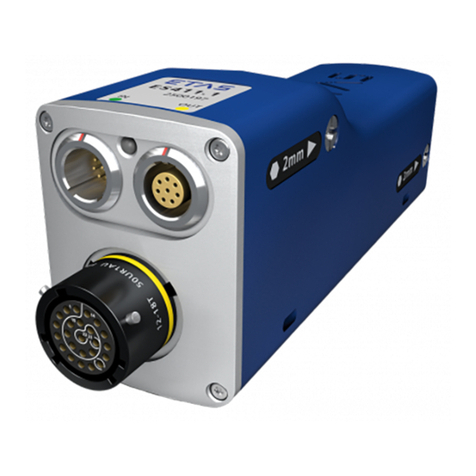
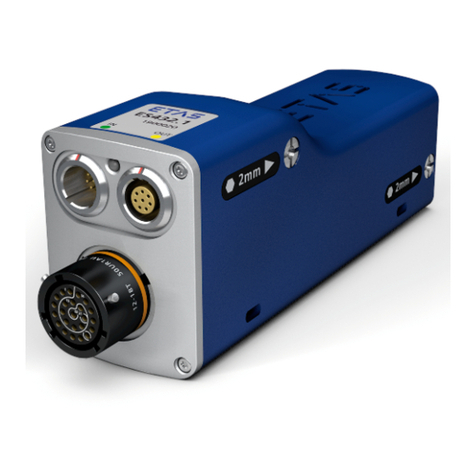
Fig. 4-1View of the Device
Individual measurement, calibration and rapid prototyping modules are easy to
combine with ES59x line modules. ECUs that have an XETK, or ECUs that have
their own Ethernet interface can be connected directly with an ES595.1 module
and communicate with INCA via Ethernet. The ES595.1 has the ECU interfaces
ETK, CAN, LIN and FlexRay.
If necessary, systems can be cascaded using ES59x nodes. The Ethernet
switch guarantees the time-synchronous sampling of all measurement chan-
nels – even in sizeable module networks.
The ES595.1 module and the relevant cables are intended for use in the lab, on
the test bench and in the passenger cell of vehicles.
4.2 Features
Overview of the major features of the ES595.1:
• Ethernet switch with a 10/100 Mbit/s data rate:
– One host port (upstream)
– One portfor compatible modules (downstream)
– Can be cascaded up to 15 modules
– Automatic standby function
– Precise synchronization of all connected modules and their measure-
ment channels
• ETK interface

ETAS Hardware Description
ES595.1 -User Guide 15
– Measure and calibration applications
• Two independent CAN interfaces:
– CAN High Speed (max. 1 MBaud) or CAN Low Speed
– CAN IP Controller
– CAN protocols CAN V2.0a (Standard Identifier with 11-bit) and CAN
V2.0b (Extended Identifier with 29-bit)
– Baud rate can be configured by software
• Two independent LIN interfaces:
– LIN specification LIN V2.1
– Operating mode Slave (monitoring)
• One FlexRay node with two FlexRay channels which can be used redun-
dantly:
– BOSCH E-Ray IP Module based FlexRay Communication Controller,
compatible with the FlexRay Protocol Specification V2.1
– Support of future FlexRay versions with firmware update
– The FlexRay node is configured in the calibration software, e.g. in
INCA by importing a FIBEX file
• One internal FlexRay node with two FlexRay channels:
– Usage exclusively as an internal FlexRay node
– BOSCH E-Ray IP Module based FlexRay Communication Controller,
compatible with the FlexRay Protocol Specification V2.1
– The FlexRay node is configured in the calibration software, e.g. in
INCA
Additional features of the module:
• Module suitable for use in automotive applications; suitable for use in
the development environment and in the vehicle on test drives.
– Channels galvanically isolated from each other, from the device
ground and from the supply voltage
– Not sensitive to environmental conditions (temperature, EMC)
– Wide supply voltage range
– High mechanical stability and durability
• Part of the ETAS Tool Suite
For the complete technical data of the ES595.1, refer to the chapter “Technical
Data” on page 45.
4.3 Housing
Standard housing with interfaces on the front and rear of the device is used for
the ES595.1. The sturdy metal housing of the ES595.1 has nonskid plastic feet.
It can be easily screwed onto a carrier system for installation in a vehicle or in
the lab. The housings of this device family can also quickly and easily be con-
nected to one another (see the chapter 6.1 on page 28).
The ES595.1 is intended for use in the lab, on the test bench and in the passen-
ger cell of vehicles.

ETAS Hardware Description
ES595.1 -User Guide 16
4.4 Interfaces
4.4.1 Front Panel
The following interfaces are on the front panel of the ES595.1:
• HOST (Ethernet, SYNC-IN)
• ETH1 (Ethernet, SYNC-OUT)
• ETK (1 x ETK)
• CAN1/LIN1 (1 x CAN und 1 x LIN)
• CAN2/LIN2 (1 x CAN und 1 x LIN)
• FLX1/FLX2
Fig. 4-2Front Panel
4.4.2 Back Panel
The interface 7-29V (power supply) is on the back panel of the ES595.1.
Fig. 4-3Back Panel
4.5 LEDs
4.5.1 Flash Codes
The ES595.1 is equipped with LEDs, which indicate the operational state of the
module, as well as with LEDs which display the function of individual interfaces.
The following flash codes are used for the LEDs:
HOST ETK ETH1
POUT
CAN2 CAN1
ON ER °C SYNC
FLX1
ES595.1
LIN2 LIN1 FLX2
7‐29V 5A

ETAS Hardware Description
ES595.1 -User Guide 17
Fig. 4-4Flash Codes
4.5.2 Operational State of the Module
Four LEDs can be found top left on the front panel of the ES595.1(see Fig. 4-2
on page 16). They indicate operational, error and synchronization states.
•ON: power supply and operational state
•ER: error states or firmware update
•°C: temperature inside the housing
•SYNC: synchronization function of the module (master or slave) and the
synchronization state
LED Display Operational State
ON Green The module is powered on.
Green, flashing
(Flash code 3)
The module is on “Standby”, the power
consumption is minimal. The module
needs a wakeup event to enter the nor-
mal operation mode.
Off The module is not powered.
ER Red Module is currently booting or booting
was unsuccessful.
Red, flashing
(Flash code 1)
Internal device software error, core file
created.
Red, flashing
(Flash code 2)
Firmware update is being executed.
Off No error
Flash code 1
On
Off
Off
On
LED
1342t(s)
Off
On
Off
On
Off
On
Flash code 2
Flash code 4
Flash code 5
Flash code 3

ETAS Hardware Description
ES595.1 -User Guide 18
4.5.3 Functional State of Individual Interfaces
LEDs assigned to the interfaces of the module can be found on the front panel
of the device (see Fig. 4-2 on page 16). If the ES595.1 is powered on (opera-
tional state "On") they indicate the following functional states at the assigned
interfaces:
HOST Interface
An LED HOST is assigned to the interface HOST.
ETK Interface
An LED ETK is assigned to the interface ETK.
ETH1 Interface
An LED ETH1 and an LED POUT are assigned to the interface ETH1.
°C Red Temperature inside the housing has
exceeded the critical level and the mod-
ule powered down; the module is pow-
ered on again if the temperature inside
the housing has reached the normal
operational range
Red
(Flash code 2)
Temperature inside the housing has
reached a critical level. The module
does not shut down any functionality.
Off Temperature inside the housing is in
normal operational range.
SYNC Blue, flashing
(Flash code 4),
fully bright
The module is a synchronization mas-
ter; the module is not synchronized
externally
Blue, flashing
(Flash code 5),
semi and fully
bright alternately
The module is a synchronization slave;
the module is synchronized externally at
the HOST or at the ETH1 port
Off No synchronization
LED Display Functional State
HOST Yellow, flashing Communication at the interface HOST
Off Communication interrupted
LED Display Functional State
ETK Yellow, flashing Communication at the interface ETK
Off Communication interrupted
LED Display Functional State
ETH1 Yellow, flashing Communication at the interface ETH1
Off Communication interrupted
LED Display Operational State

ETAS Hardware Description
ES595.1 -User Guide 19
CAN2/LIN2 Interface
An LED CAN2 is assigned to the interface CAN2 and an LED LIN2 is assigned
to the interface LIN2.
CAN1/LIN1 Interface
An LED CAN1 is assigned to the interface CAN1 and an LED LIN1 is assigned
to the interface LIN1.
FLX1/FLX2 Interface
Each FlexRay channel is assigned a LED which displays the functional state of
the FlexRay node (LEDs FLX1 and FLX2).
POUT Green Power supply output at the interface
ETH1 is switched on
Red Overload by connected module at the
power supply output at the interface
ETH1
Off Power supply output at the interface
ETH1 is switched off
LED Display Functional State
CAN2 Yellow, flashing Communication at the interface CAN2
Off Communication interrupted
LIN2 Yellow, flashing Communication at the interface LIN2
Off Communication interrupted
LED Display Functional State
CAN1 Yellow, flashing Communication at the interface CAN1
Off Communication interrupted
LIN1 Yellow, flashing Communication at the interface LIN1
Off Communication interrupted
LED FLX1 LED FLX2 Functional State
Off Off FlexRay node inactive (FlexRay control-
ler not configured)
Yellow, flashing Off FlexRay channel A active, waiting for
synchroniziation
Yellow Off FlexRay channel A active, synchronized,
ready to exchange data
Off Yellow, flashing FlexRay channel B active, waiting for
synchroniziation
Off Yellow FlexRay channel B active, synchronized,
ready to exchange data
Yellow, flashing Yellow, flashing FlexRay node active (channel A and
channel B), waiting for synchroniziation
Yellow Yellow FlexRay node active (channel A and
channel B), synchronized, ready to
exchange data
LED Display Functional State

ETAS Functional Description
ES595.1 -User Guide 20
5 Functional Description
This chapter describes the block diagram, power supply, Ethernet switch, mod-
ule network, time synchronization, ECU interfaces and the firmware update.
5.1 Block Diagram
Fig. 5-1Block Diagram
To fulfill the operation demands in the vehicle, the interfaces of the ES595.1 are
each routed to an Lemo socket.
5.2 Power Supply (7-29V DC)
The power supply interface (7-29V DC) is routed to a 2-pin connector (Lemo
socket) on the back panel of the module. Power is supplied to the module via
an external power supply or vehicle battery.
When the ES595.1 is connected to the operating voltage and there is an Ether-
net connection at HOST, the module boots. If there is no Ethernet connection,
the module changes to “Standby.”
5.3 Ethernet Switch
The integrated Ethernet switch is used for the connection of the ES595.1 mod-
ule and other measurement or interface modules to a user PC. Data from the
connected modules is acquired synchronously (ETAS device synchronization,
see chapter 5.5 on page 22). The Ethernet switch can be cascaded with other
network modules so that you can create larger blocks of measurement and
interface modules.
NOTE
The ES595.1 must be physically disconnected from all supply voltages so the
module is not supplied with power.
FlexRay A/B
FlexRay
Transceiver
FlexRay
Controller
ES595
ETH 1
10/100 MBit
HOST
CPU Flash
DDR2
RAM
ETK
Transceiver
8/100 MBit/s
ETK
Controller
Time Synchronization Unit
SYNC OU T
SYNC IN
Power
Supply
Ethernet
Traffic
Detection
LED
CAN
Controller
CAN Transceiver
High Speed
Low Speed
CAN2/LIN2
LIN
Transceiver
LIN
Controller
CAN
Controller
CAN Transceiver
High Speed
Low Speed
LIN
Transceiver
LIN
Controller CAN1/LIN1
Ethernet
Phy
Ethernet
Phy
FlexRay
StartUp
Node
7..29V DC
Ethernet Switch
Other manuals for ES595.1
1
Table of contents
Other ETAS Control Unit manuals