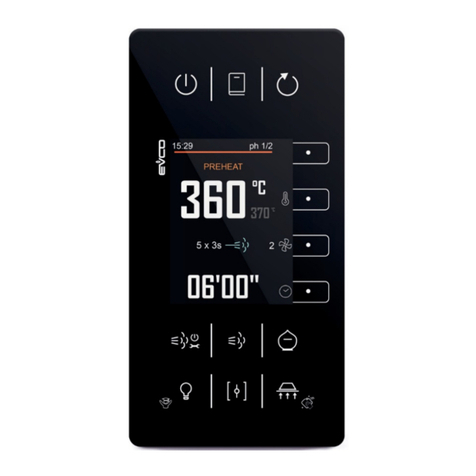
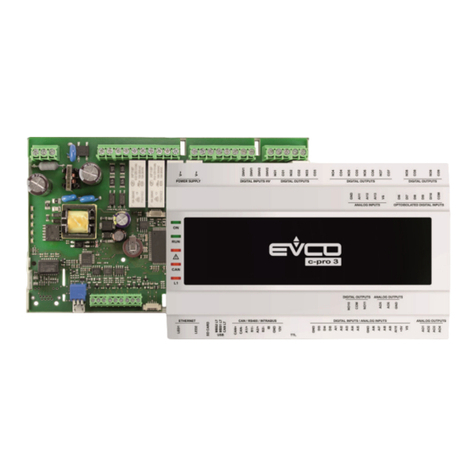
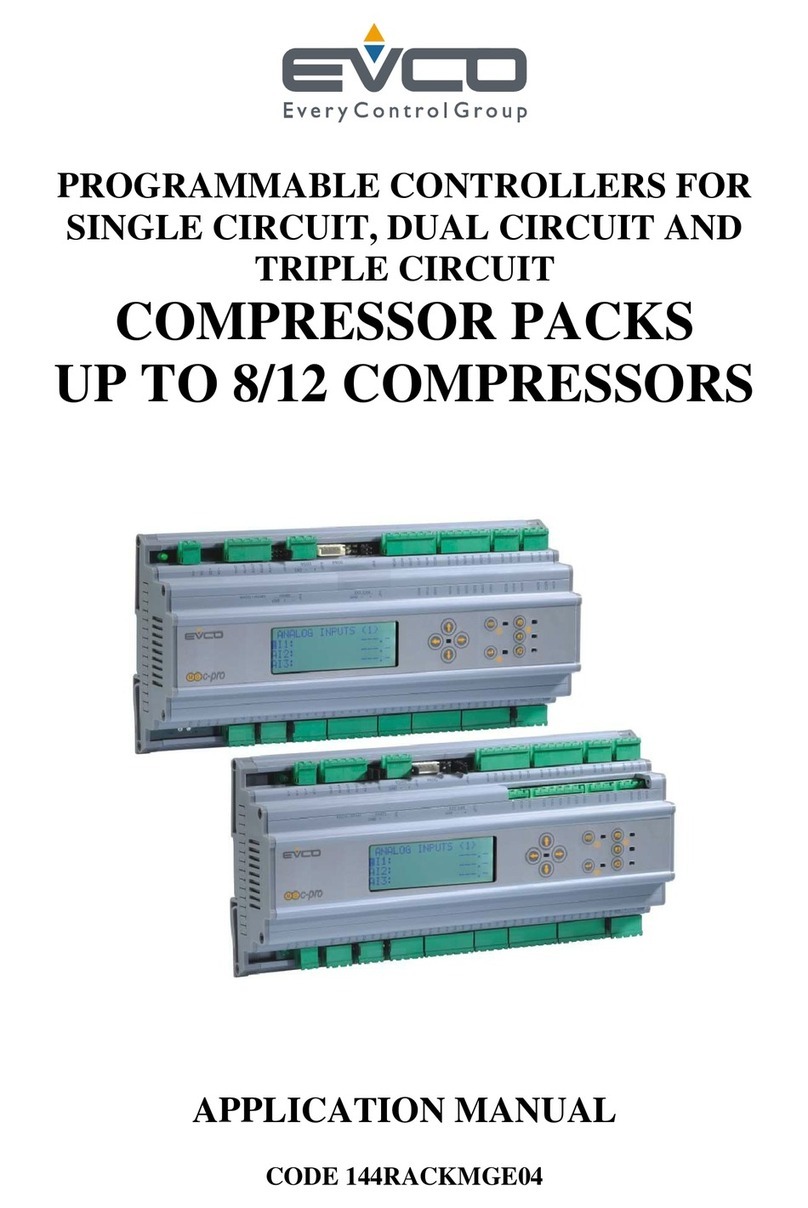
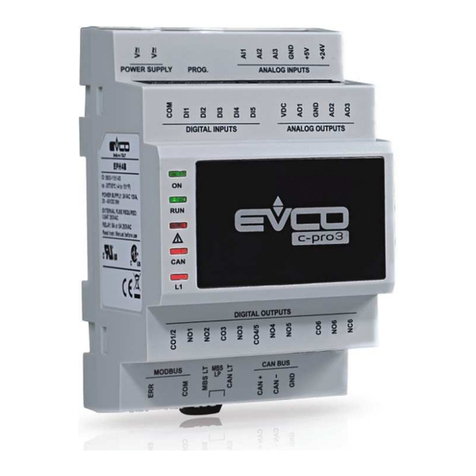
Evco c-pro 3 Series User manual

EVCO S.p.A. c-pro 3 | Hardware manual ver. 2.0 | Code 114CP3E204
page 1 of 86
c-pro 3
PROGRAMMABLE CONTROLLERS
ENGLISH
HARDWARE MANUAL ver. 2.0
CODE 114CP3E204

EVCO S.p.A. c-pro 3 | Hardware manual ver. 2.0 | Code 114CP3E204
page 2 of 86
Important
Important
Read this document carefully before the installation and before the use and follow all the additional information for the installation and
for the electrical connection; keep this document close to the devices for future consultations.
The following symbols support the reading of the document:
it indicates a suggestion
it indicates an additional information to be followed.
The devices must be disposed according to the local legislation about the collection for electrical and electronic equipment.

EVCO S.p.A. c-pro 3 | Hardware manual ver. 2.0 | Code 114CP3E204
page 3 of 86
Index
INTRODUCTION ..................................................................................................................................................................................... 5
1.1. Introduction.............................................................................................................................................................................. 5
2. DESCRIPTION ........................................................................................................................................................................ 7
2.1. Description c-pro 3 hecto and c-pro 3 hecto+ ........................................................................................................................... 7
2.2. Description c-pro 3 mega ......................................................................................................................................................... 8
2.3. Description c-pro 3 NODE mega .............................................................................................................................................. 9
2.4. Description c-pro 3 EXP hecto and c-pro 3 EXP hecto+......................................................................................................... 10
3. SIZE AND INSTALLATION .................................................................................................................................................... 11
3.1. Size c-pro 3 hecto, c-pro 3 hecto+, c-pro 3 EXP hecto and c-pro 3 EXP hecto+.................................................................... 11
3.2. Size c-pro 3 mega.................................................................................................................................................................. 11
3.3. Size c-pro 3 NODE mega....................................................................................................................................................... 12
3.4. Installation.............................................................................................................................................................................. 13
3.5. Additional information for installation...................................................................................................................................... 13
4. ELECTRICAL CONNECTION ................................................................................................................................................ 14
4.1. Electrical connection c-pro 3 hecto and c-pro 3 hecto+ .......................................................................................................... 14
4.1.1. Meaning of the connectors of c-pro 3 hecto and of c-pro 3 hecto+............................................................................... 14
4.1.2. Example of electrical connection of c-pro 3 hecto ........................................................................................................ 21
4.2. Electrical connection c-pro 3 mega and c-pro 3 NODE mega ................................................................................................. 22
4.2.1. Meaning of the connectors of c-pro 3 mega and of c-pro 3 NODE mega ..................................................................... 22
4.2.2. Example of electrical connection of c-pro 3 mega........................................................................................................ 30
4.3. Electrical connection c-pro 3 EXP hecto and c-pro 3 EXP hecto+ .......................................................................................... 31
4.3.1. Meaning of the connectors of c-pro 3 EXP hecto and of c-pro 3 EXP hecto+............................................................... 31
4.3.2. Example of electrical connection of c-pro 3 EXP hecto ................................................................................................ 36
4.4. Additional information for electrical connection....................................................................................................................... 37
5. USER INTERFACE................................................................................................................................................................ 38
5.1. Keyboard ............................................................................................................................................................................... 38
5.2. Signalling LEDs...................................................................................................................................................................... 38
5.2.1. LEDs at the front of the device..................................................................................................................................... 38
5.2.2. LEDs on the RS-485 ports........................................................................................................................................... 39
6. CONFIGURATION................................................................................................................................................................. 40
6.1. Configuring a programmable controller .................................................................................................................................. 40
6.1.1. Configuring a built-in programmable controller............................................................................................................. 40
6.1.2. Configuring a blind programmable controller................................................................................................................ 42
6.2. Configuring an I / O expansion............................................................................................................................................... 43
6.3. Configuring a device through an user interface (Vgraph, Vtouch or Vroom) .......................................................................... 44
6.4. List of configuration parameters ............................................................................................................................................. 45
6.4.1. List of configuration parameters of c-pro 3 hecto and of c-pro 3 hecto+ ....................................................................... 45
6.4.2. List of configuration parameters of c-pro 3 mega and of c-pro 3 NODE mega.............................................................. 52
6.4.3. List of configuration parameters of c-pro 3 EXP hecto and of c-pro 3 EXP hecto+ ...................................................... 62
7. USER INTERFACES ............................................................................................................................................................. 66
7.1. Preliminary information .......................................................................................................................................................... 66
7.2. Vgraph ................................................................................................................................................................................... 66
7.2.1. Introduction ................................................................................................................................................................. 66
7.2.2. Summarizing table of the main features and available models..................................................................................... 66
7.2.3. Size............................................................................................................................................................................. 67
7.3. Vtouch ................................................................................................................................................................................... 68
7.3.1. Introduction ................................................................................................................................................................. 68
7.3.2. Summarizing table of the main features and available models..................................................................................... 68
7.3.3. Size............................................................................................................................................................................. 69
7.4. Vroom .................................................................................................................................................................................... 70
EVCO S.p.A. c-pro 3 | Hardware manual ver. 2.0 | Code 114CP3E204
page 4 of 86
7.4.1. Introduction ................................................................................................................................................................. 70
7.4.2. Summarizing table of the main features and available models..................................................................................... 70
7.4.3. Size............................................................................................................................................................................. 71
8. ACCESSORIES..................................................................................................................................................................... 72
8.1. Programming kit EVIF20TUXI ................................................................................................................................................ 72
8.1.1. Introduction ................................................................................................................................................................. 72
8.1.2. Description .................................................................................................................................................................. 72
8.1.3. Size............................................................................................................................................................................. 73
8.1.4. Connection to the Personal Computer ......................................................................................................................... 73
8.2. Programming key EVKEY10 .................................................................................................................................................. 73
8.2.1. Introduction ................................................................................................................................................................. 73
8.2.2. Description .................................................................................................................................................................. 73
8.2.3. Size............................................................................................................................................................................. 74
8.2.4. Connection to the controller......................................................................................................................................... 74
9. TECHNICAL DATA ................................................................................................................................................................ 75
9.1. Technical data ....................................................................................................................................................................... 75

EVCO S.p.A. c-pro 3 | Hardware manual ver. 2.0 | Code 114CP3E204
page 5 of 86
INTRODUCTION
1.1. Introduction
c-pro 3 is a family of programmable controllers.
The family consists of:
- programmable controllers (c-pro 3 hecto, c-pro 3 hecto+, c-pro 3 mega and c-pro 3 NODE mega)
- I / O expansions (c-pro 3 EXP hecto and c-pro 3 EXP hecto+).
c-pro 3 hecto is available in blind version and can be used for example with an user interface such as Vgraph, Vtouch or Vroom.
The controllers have got:
- real time clock
- 3 analog inputs configurable via configuration parameter for PTC / NTC / Pt 1000 probes / 0-20 mA / 4-20 mA / 0-5 V
ratiometric / 0-10 V transducers
- 5 non optoisolated free of voltage digital inputs
- 3 analog outputs of which 1 non optoisolated PWM output and 2 non optoisolated outputs configurable via configuration
parameter for 0-20 mA / 4-20 mA / 0-10 V signal
- 6 digital outputs (electromechanical relays) of which five 5 res. A @ 250 VAC SPST outputs and one 8 res. A @ 250 VAC
SPDT output
- 3 non optoisolated communication ports of which 1 CAN port with CANbus communication protocol, 1 RS-485 port with
Modbus master / slave communication protocol (configurable via application software) and 1 programming and debugging
port.
Through the I / O expansion c-pro 3 EXP hecto or c-pro 3 EXP hecto+ it is possible to increase the number of inputs and outputs.
c-pro 3 hecto+ is available in the following versions:
- with 128 x 64 pixel single colour LCD graphic display (black with rearlighting through white LEDs) and with a 6 buttons (with
preset functions) keyboard made of silicone rubber integrated in the controller, hereinafter also called “built-in versions”
- blind (can be used for example with an user interface such as Vgraph, Vtouch or Vroom), hereinafter also called “blind
versions”.
The controllers have got:
- real time clock
- alarm buzzer (not available in the blind versions)
- 4 analog inputs of which 3 configurable via configuration parameter for PTC / NTC / Pt 1000 probes / 0-20 mA / 4-20 mA /
0-5 V ratiometric / 0-10 V transducers and 1 for NTC probes
- 5 optoisolated digital inputs at 24 VAC / DC
- 3 analog outputs of which 1 non optoisolated PWM output and 2 non optoisolated outputs configurable via configuration
parameter for 0-20 mA / 4-20 mA / 0-10 V signal
- 6 digital outputs (electromechanical relays) of which five 3 res. A @ 250 VAC SPST outputs and one 5 res. A @ 250 VAC
SPDT output
- 3 non optoisolated communication ports of which 1 CAN port with CANbus communication protocol, 1 RS-485 port with
Modbus master / slave communication protocol (configurable via application software) and 1 programming and debugging
port.
Through the I / O expansion c-pro 3 EXP hecto or c-pro 3 EXP hecto+ it is possible to increase the number of inputs and outputs.
c-pro 3 mega and c-pro 3 NODE mega are available in the following versions:
- with 122 x 32 pixel single colour LCD graphic display (black with rearlighting through white LEDs) and with a 6 buttons (with
preset functions) keyboard made of silicone rubber integrated in the controller, hereinafter also called “built-in versions”
- blind (can be used for example with an user interface such as Vgraph, Vtouch or Vroom), hereinafter also called “blind
versions”.
The controllers have got:
- real time clock
- alarm buzzer (not available in the blind versions)

EVCO S.p.A. c-pro 3 | Hardware manual ver. 2.0 | Code 114CP3E204
page 6 of 86
- 5 analog inputs configurable via configuration parameter for PTC / NTC / Pt 1000 probes / 0-20 mA / 4-20 mA / 0-5 V
ratiometric / 0-10 V transducers
- 7 optoisolated digital inputs at 24 VAC / DC
- 3 analog outputs of which 1 non optoisolated PWM output and 2 non optoisolated outputs configurable via configuration
parameter for 0-20 mA / 4-20 mA / 0-10 V signal
- 8 digital outputs (electromechanical relays) of which three 5 res. A @ 250 VAC SPST outputs, four 8 res. A @ 250 VAC SPST
outputs and one 8 res. A @ 250 VAC SPDT output
- 4 non optoisolated communication ports of which 1 CAN port with CANbus communication protocol, 1 RS-485 port with
Modbus slave communication protocol, 1 RS-485 port with Modbus master / slave communication protocol (configurable via
application software) and 1 programming and debugging port
- 1 non optoisolated communication port for gateway c-pro 3 plug-in (available in c-pro 3 NODE mega only).
Through the I / O expansion c-pro 3 EXP hecto or c-pro 3 EXP hecto+ it is possible to increase the number of inputs and outputs.
c-pro 3 EXP hecto is available in blind version and can be used for example with a programmable controller such as c-pro 3 hecto,
c-pro 3 hecto+, c-pro 3 mega or c-pro 3 NODE mega.
The expansion has got:
- 3 analog inputs configurable via configuration parameter for PTC / NTC / Pt 1000 probes / 0-20 mA / 4-20 mA / 0-5 V
ratiometric / 0-10 V transducers
- 5 non optoisolated free of voltage digital inputs
- 3 analog outputs of which 1 non optoisolated PWM output and 2 non optoisolated outputs configurable via configuration
parameter for 0-20 mA / 4-20 mA / 0-10 V signal
- 6 digital outputs (electromechanical relays) of which five 5 res. A @ 250 VAC SPST outputs and one 8 res. A @ 250 VAC
SPDT output
- 2 non optoisolated communication ports of which 1 CAN port with CANbus communication protocol and 1 port to update the
firmware of the instrument.
c-pro 3 EXP hecto+ is available in blind version and can be used for example with a programmable controller such as c-pro 3 hecto,
c-pro 3 hecto+, c-pro 3 mega or c-pro 3 NODE mega.
The expansion has got:
- 4 analog inputs of which 3 configurable via configuration parameter for PTC / NTC / Pt 1000 probes / 0-20 mA / 4-20 mA /
0-5 V ratiometric / 0-10 V transducers and 1 for NTC probes
- 5 optoisolated digital inputs at 24 VAC / DC
- 3 analog outputs of which 1 non optoisolated PWM output and 2 non optoisolated outputs configurable via configuration
parameter for 0-20 mA / 4-20 mA / 0-10 V signal
- 6 digital outputs (electromechanical relays) of which five 3 res. A @ 250 VAC SPST outputs and one 5 res. A @ 250 VAC
SPDT output
- 2 non optoisolated communication ports of which 1 CAN port with CANbus communication protocol and 1 port to update the
firmware of the instrument.
Through the development environment UNI-PRO 3 (to order separately) it is possible to realize the application software and through the
programming kit EVIF20TUXI (to order separately) it is possible to program the controllers.
The devices look in case 4 DIN modules (c-pro 3 hecto, c-pro 3 hecto+, c-pro 3 EXP hecto and c-pro 3 EXP hecto+), 10 DIN modules
(c-pro 3 mega) or 14 DIN modules (c-pro 3 NODE mega).
Installation is in electrical panel, on DIN rail.
Through the programming key EVKEY 10 (to order separately) it is also possible to make the upload and the download of the
configuration parameters.

EVCO S.p.A. c-pro 3 | Hardware manual ver. 2.0 | Code 114CP3E204
page 7 of 86
2. DESCRIPTION
2.1. Description c-pro 3 hecto and c-pro 3 hecto+
The following drawing shows the aspect of c-pro 3 hecto and of c-pro 3 hecto+.
The following table shows the meaning of the parts of the controller.
Part Meaning
1 RS-485 port with Modbus master / slave communication protocol
2
micro-switch to:
- plug in the termination of the RS-485 port
- polarize the network of the RS-485 port
- plug in the termination of the CAN port
3 CAN port
4 digital outputs
5 display and keyboard (available in c-pro 3 hecto+ only, not available in the blind versions)
6 analog outputs in c-pro 3 hecto, analog inputs and analog outputs in c-pro 3 hecto+
7 analog inputs
8 programming and debugging port
9 power supply
10 digital inputs
11 signalling LEDs

EVCO S.p.A. c-pro 3 | Hardware manual ver. 2.0 | Code 114CP3E204
page 8 of 86
2.2. Description c-pro 3 mega
The following drawing shows the aspect of c-pro 3 mega.
The following table shows the meaning of the parts of the controller.
Part Meaning
1 RS-485 port with Modbus slave communication protocol (hereinafter also called first RS-485 port)
2 RS-485 port with Modbus master / slave communication protocol (hereinafter also called second RS-485 port)
3
micro-switch to:
- plug in the terminations of the RS-485 ports
- polarize the network of the second RS-485 port
- plug in the termination of the CAN port
4 CAN port
5 digital outputs
6 display and keyboard (not available in the blind versions)
7 analog outputs
8 digital inputs
9 analog inputs
10 programming and debugging port
11 power supply
12 signalling LEDs

EVCO S.p.A. c-pro 3 | Hardware manual ver. 2.0 | Code 114CP3E204
page 9 of 86
2.3. Description c-pro 3 NODE mega
The following drawing shows the aspect of c-pro 3 NODE mega.
The following table shows the meaning of the parts of the controller.
Part Meaning
1 RS-485 port with Modbus slave communication protocol (hereinafter also called first RS-485 port)
2 RS-485 port with Modbus master / slave communication protocol (hereinafter also called second RS-485 port)
3
micro-switch to:
- plug in the terminations of the RS-485 ports
- polarize the network of the second RS-485 port
- plug in the termination of the CAN port
4 CAN port
5 digital outputs
6 display and keyboard (not available in the blind versions)
7 slot for gateway c-pro 3 plug-in
8 analog outputs
9 digital inputs
10 analog inputs
11 programming and debugging port
12 power supply
13 signalling LEDs

EVCO S.p.A. c-pro 3 | Hardware manual ver. 2.0 | Code 114CP3E204
page 10 of 86
2.4. Description c-pro 3 EXP hecto and c-pro 3 EXP hecto+
The following drawing shows the aspect of c-pro 3 EXP hecto and of c-pro 3 EXP hecto+.
The following table shows the meaning of the parts of the expansion.
Part Meaning
1 micro-switch to plug in the termination of the CAN port
2 CAN port
3 digital outputs
4 analog outputs in c-pro 3 EXP hecto, analog inputs and analog outputs in c-pro 3 EXP hecto+
5 analog inputs
6 port to update the firmware of the expansion
7 power supply
8 digital inputs
9 signalling LEDs

EVCO S.p.A. c-pro 3 | Hardware manual ver. 2.0 | Code 114CP3E204
page 11 of 86
3. SIZE AND INSTALLATION
3.1. Size c-pro 3 hecto, c-pro 3 hecto+, c-pro 3 EXP hecto and
c-pro 3 EXP hecto+
4 DIN modules; size in mm (in).
3.2. Size c-pro 3 mega
10 DIN modules; size in mm (in).

EVCO S.p.A. c-pro 3 | Hardware manual ver. 2.0 | Code 114CP3E204
page 12 of 86
3.3. Size c-pro 3 NODE mega
14 DIN modules; size in mm (in).

EVCO S.p.A. c-pro 3 | Hardware manual ver. 2.0 | Code 114CP3E204
page 13 of 86
3.4. Installation
On DIN rail 35.0 x 7.5 mm (1.377 x 0.295 in) or 35.0 x 15.0 mm (1.377 x 0.590 in).
To install the devices operate as shown in the following drawing.
12
To remove the devices remove possible extractable screw terminal blocks plugged at the bottom first, then operate on the DIN rail clips
with a screwdriver as shown in the following drawing.
34
To install the devices again press the DIN rail clips to the end first.
3.5. Additional information for installation
- working conditions (working temperature, humidity, etc.) must be between the limits indicated in the technical data
- do not install the devices close to heating sources (heaters, hot air ducts, etc.), equipments provided with big magnetos (big
speakers, etc.), locations subject to direct sunlight, rain, humidity, dust, mechanical vibrations or bumps
- according to the safety legislation, the protection against electrical parts must be ensured by a correct installation of the
devices; the parts that ensure the protection must be installed so that you can not remove them if not by using a tool.

EVCO S.p.A. c-pro 3 | Hardware manual ver. 2.0 | Code 114CP3E204
page 14 of 86
4. ELECTRICAL CONNECTION
4.1. Electrical connection c-pro 3 hecto and c-pro 3 hecto+
4.1.1. Meaning of the connectors of c-pro 3 hecto and of c-pro 3 hecto+
The following drawing shows the connectors of c-pro 3 hecto and of c-pro 3 hecto.
The following tables show the meaning of the connectors.
MODBUS
RS-485 port with Modbus master / slave communication protocol (configurable via application software).
The following drawing shows the aspect of the RS-485 port.
The following table shows the meaning of the pins of the RS-485 port.
Pin Meaning
1 common
2 not connected
3 not connected
4 D0 = B = - (terminal 0 of the transceiver)
5 D1 = A = + (terminal 1 of the transceiver)
6 not connected
7 not connected

EVCO S.p.A. c-pro 3 | Hardware manual ver. 2.0 | Code 114CP3E204
page 15 of 86
8 not connected
The maximum length of the connecting cables of the RS-485 port is 1,000 m (3,280 ft); also look at the Modbus specifications
and implementation guides manual (the document is available on the internet site www.modbus.org).
Connect the RS-485 port using a twisted pair.
The following table shows the function codes supported by the controller.
Function
code Meaning
FC 01 read coils
FC 02 read discrete inputs
FC 03 read multiple registers
FC 04 read input registers
FC 05 write single coil
FC 06 write single register
FC 08 diagnostic
FC 15 write multiple coils
FC 16 write multiple registers
FC 23 read write multiple registers
For the settings about the RS-485 port look at chapter 6 “CONFIGURATION”.
MICRO-SWITCH
Micro-switch to:
- plug in the termination of the RS-485 port (120 Ω, 0.25 W); position micro-switch 1 on position ON to plug in the termination of
the RS-485 port (plug in the termination of the first and of the last element of the network)

EVCO S.p.A. c-pro 3 | Hardware manual ver. 2.0 | Code 114CP3E204
page 16 of 86
- polarize the network of the RS-485 port (560 Ω, 0.25 W); position micro-switches 2 and 3 on position ON to polarize the
network of the RS-485 port (the network must be polarized by an element of the network same).
- plug in the termination of the CAN port (120 Ω, 0.5 W); position micro-switch 4 on position ON to plug in the termination of the
CAN port (plug in the termination of the first and of the last element of the network).
CAN BUS
CAN port.
Terminal Meaning
CAN + signal +
CAN - signal -
GND ground
The maximum number of devices that can make a CAN network (32) depends on the bus load; the bus load depends on the baud rate
of the CANbus communication and on the kind of device in the network.
For example: a CAN network can be made of a programmable controller, of four I / O expansions and of four user interfaces
with baud rate 500,000 baud.
The maximum length of the connecting cables of the CAN port depends on the baud rate of the CANbus communication, as
follows:
- 1,000 m (3,280 ft) with baud rate 20,000 baud
- 500 m (1,640 ft) with baud rate 50,000 baud
- 250 m (820 ft) with baud rate 125,000 baud
- 50 m (164 ft) with baud rate 500,000 baud.
Connect the CAN port using a twisted pair.
For the settings about the CAN port look at chapter 6 “CONFIGURATION”.
DIGITAL OUTPUTS
In c-pro 3 hecto.
Digital outputs 1, 2, 3, 4 and 5 (electromechanical relays).
Terminal Meaning
CO1/2 common digital outputs 1 and 2
NO1 normally open contact digital output 1

EVCO S.p.A. c-pro 3 | Hardware manual ver. 2.0 | Code 114CP3E204
page 17 of 86
NO2 normally open contact digital output 2
CO3 common digital output 3
NO3 normally open contact digital output 3
CO4/5 common digital outputs 4 and 5
NO4 normally open contact digital output 4
NO5 normally open contact digital output 5
Digital output 6 (electromechanical relay).
Terminal Meaning
CO6 common digital output 6
NO6 normally open contact digital output 6
NC6 normally closed contact digital output 6
The maximum length of the connecting cables of the digitalhecto:ʖcuts is 100 m (328 ft).
The maximum current allowed on the loads is 10 A.
DIGITAL OUTPUTS
In c-pro 3 hecto+.
Digital outputs 1, 2, 3, 4 and 5 (electromechanical relays).
Terminal Meaning
CO1/2 common digital outputs 1 and 2
NO1 normally open contact digital output 1
NO2 normally open contact digital output 2
NO3 normally open contact digital output 3
CO3/4/5 common digital outputs 3, 4 and 5
NO4 normally open contact digital output 4
NO5 normally open contact digital output 5

EVCO S.p.A. c-pro 3 | Hardware manual ver. 2.0 | Code 114CP3E204
page 18 of 86
Digital output 6 (electromechanical relay).
Terminal Meaning
CO6 common digital output 6
NO6 normally open contact digital output 6
NC6 normally closed contact digital output 6
The maximum length of the connecting cables of the digital outputs is 100 m (328 ft).
ANALOG OUTPUTS (in c-pro 3 hecto only)
Analog outputs.
Terminal Meaning
VDC power supply driving analog output 1 (24 VDC, 50 mA max.)
AO1 analog output 1 (PWM signal)
GND ground
AO2 analog output 2 (configurable via configuration parameter for 0-20 mA / 4-20 mA / 0-10 V signal)
AO3 analog output 3 (configurable via configuration parameter for 0-20 mA / 4-20 mA / 0-10 V signal)
The maximum length of the connecting cables of the PWM analog output is 1 m (3.280 ft); the one of the connecting cables of
the 0-20 mA / 4-20 mA / 0-10 V analog outputs is instead of 30 m (98 ft).
For the settings about the analog outputs look at chapter 6 “CONFIGURATION”.
The analog output 1 is usable on condition that the controller is powered in alternate current and the phase powering the controller is the
same powering the user driven by the output.
ANALOG INPUTS/OUTPUTS (in c-pro 3 hecto+ only)
Analog inputs and analog outputs.
Terminal Meaning
AI4 analog input 4 (NTC probes)
AO1 analog output 1 (PWM signal)
GND ground
AO2 analog output 2 (configurable via configuration parameter for 0-20 mA / 4-20 mA / 0-10 V signal)
AO3 analog output 3 (configurable via configuration parameter for 0-20 mA / 4-20 mA / 0-10 V signal)

EVCO S.p.A. c-pro 3 | Hardware manual ver. 2.0 | Code 114CP3E204
page 19 of 86
The maximum length of the connecting cables of the PWM analog output is 1 m (3.280 ft); the one of the connecting cables of
the 0-20 mA / 4-20 mA / 0-10 V analog outputs is instead of 30 m (98 ft).
For the settings about the analog outputs look at chapter 6 “CONFIGURATION”.
The analog output 1 is usable on condition that the controller is powered in alternate current and the phase powering the controller is the
same powering the user driven by the output.
The analog output 1 and the analog output 2 are not independent each other but they work in the same way.
DIGITAL INPUTS
Free of voltage digital inputs.
Terminal Meaning
COM common digital inputs
DI1 digital input 1
DI2 digital input 2
DI3 digital input 3
DI4 digital input 4
DI5 digital input 5
The maximum length of the connecting cables of the digital inputs is 100 m (328 ft).
ANALOG INPUTS
Analog inputs.
Each analog input is configurable via configuration parameter for PTC / NTC / Pt 1000 probes / 0-20 mA / 4-20 mA / 0-5 V ratiometric /
0-10 V transducers.
Terminal Meaning
AI1 analog input 1
AI2 analog input 2
AI3 analog input 3
GND ground
+5V power supply 0-5 V ratiometric transducers (5 VDC, 40 mA max.)
+24V power supply 0-20 mA / 4-20 mA / 0-10 V transducers (24 VDC, 120 mA max.)
The maximum length of the connecting cables of the analog inputs and the one of the power supply of the transducers is
100 m (328 ft).
The controller incorporates a restorable thermal protection of the power supplies against the short circuit and the overload.
For the settings about the analog inputs look at chapter 6 “CONFIGURATION”.

EVCO S.p.A. c-pro 3 | Hardware manual ver. 2.0 | Code 114CP3E204
page 20 of 86
PROG
Programming and debugging port.
POWER SUPPLY
Power supply.
Terminal Meaning
V≅power supply controller (24 VAC / 20... 40 VDC)
The maximum length of the connecting cables of the power supply of the controller is 30 m (98 ft).
Protect the power supply with a fuse rated 0.8A-T 250 V.
If the controller is powered in direct current, one will not have to respect the polarity of the power supply voltage.
This manual suits for next models
4
Table of contents
Other Evco Controllers manuals

Evco
Evco Vcolor 819 User guide

Evco
Evco c-pro 3 micro AHU User manual

Evco
Evco C-pro 3 giga User manual

Evco
Evco EV3 HRV Instructions for use

Evco
Evco Vcolor 818 User guide

Evco
Evco Vcolor 229 Series User manual

Evco
Evco Vcolor 348 Series User guide

Evco
Evco Vcolor 338 User guide

Evco
Evco C-PRO MEGA Instructions for use

Evco
Evco EVF205 User manual

Evco
Evco Vcolor 379 User guide

Evco
Evco EV3 HP User guide

Evco
Evco EVJ825P9VX3 User guide

Evco
Evco EV3 CHIL User guide

Evco
Evco EV3271 User manual

Evco
Evco EV3221 User manual

Evco
Evco EV3221 User manual

Evco
Evco EVXV 800 Series User guide

Evco
Evco EVBOX Light J500 Series User manual

Evco
Evco EVD EXP User manual