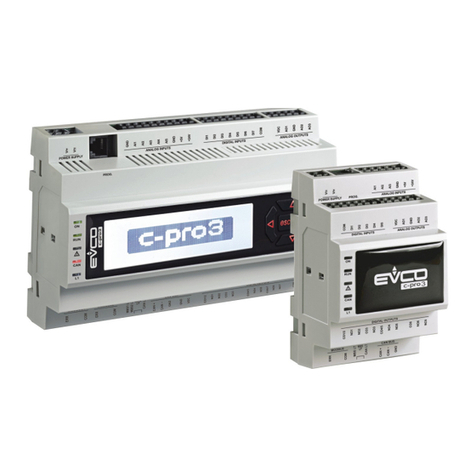
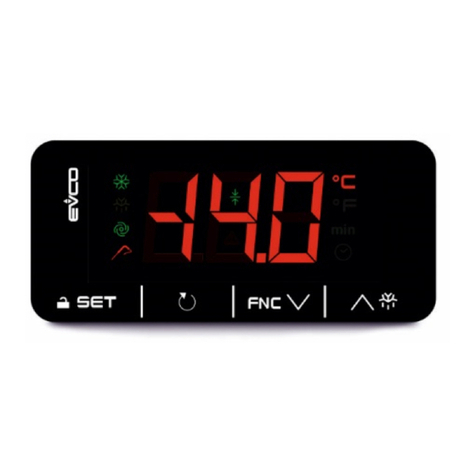
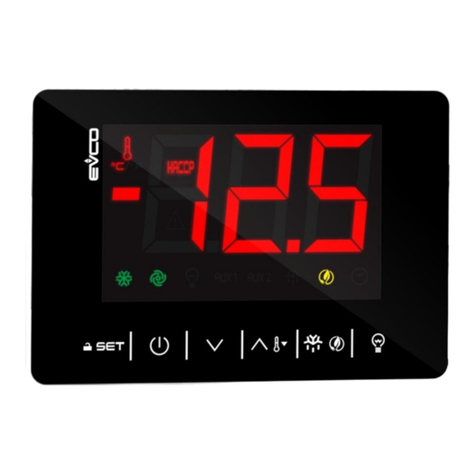
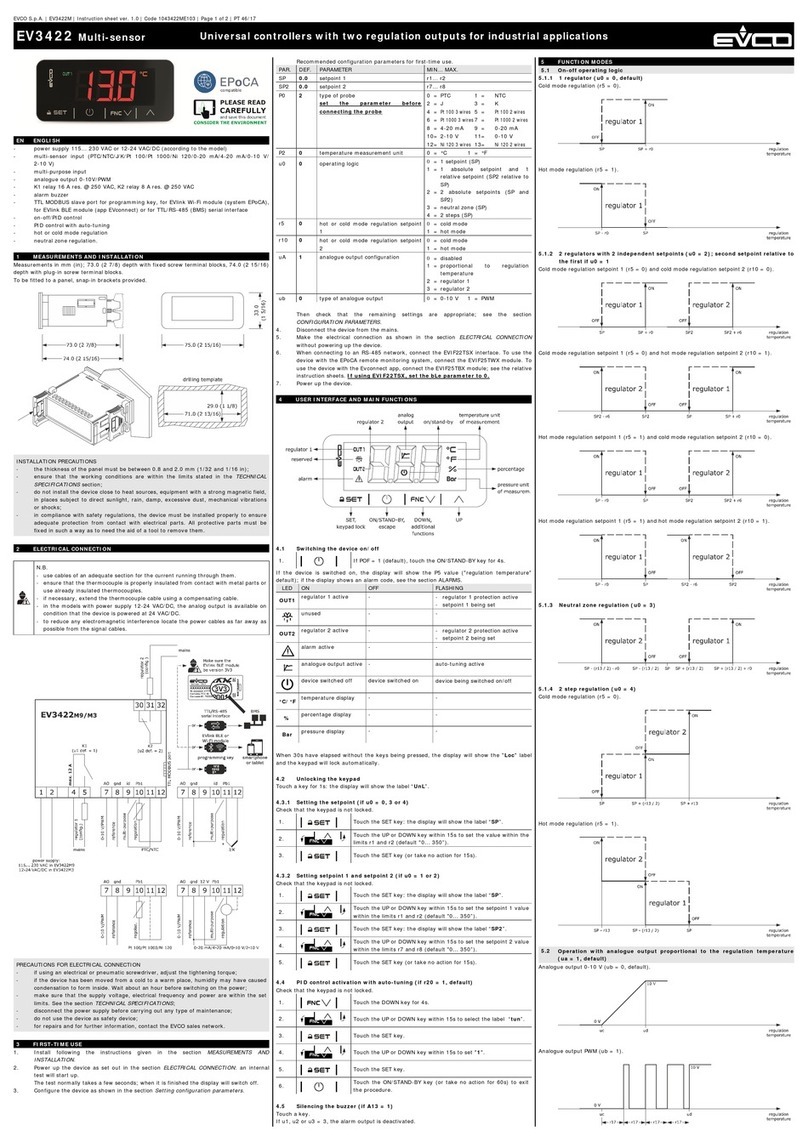
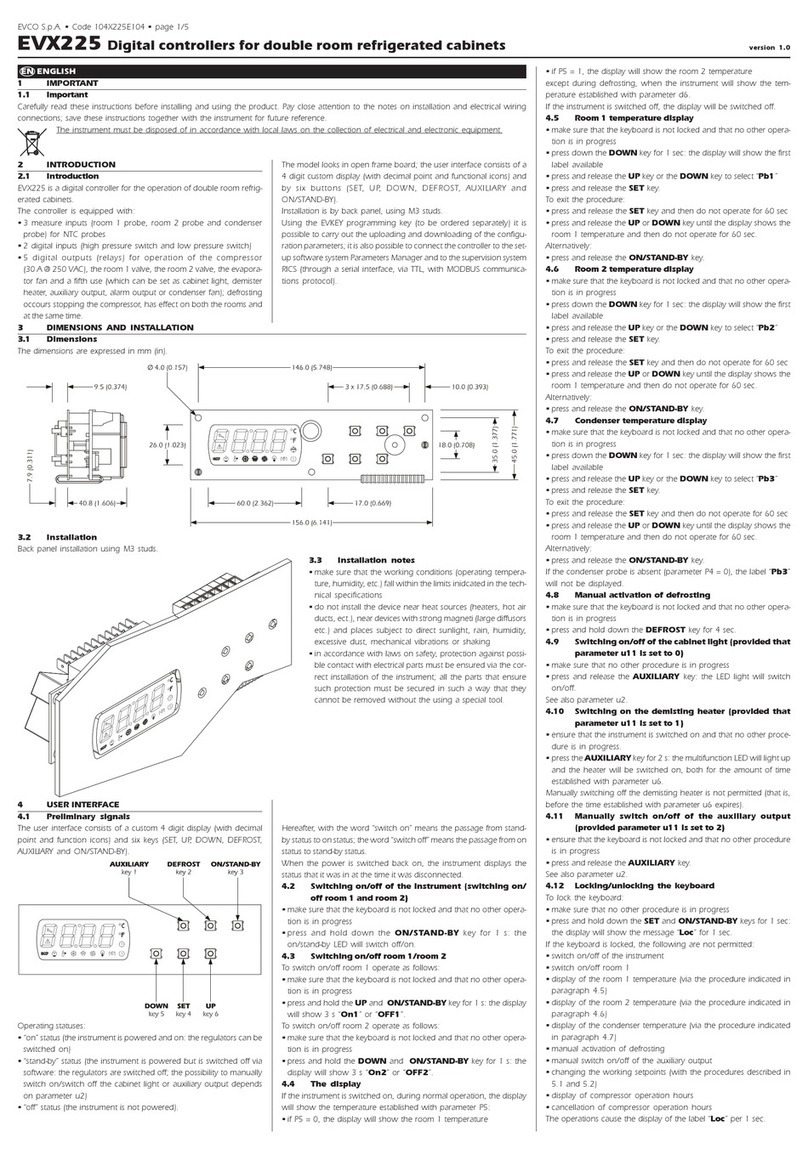
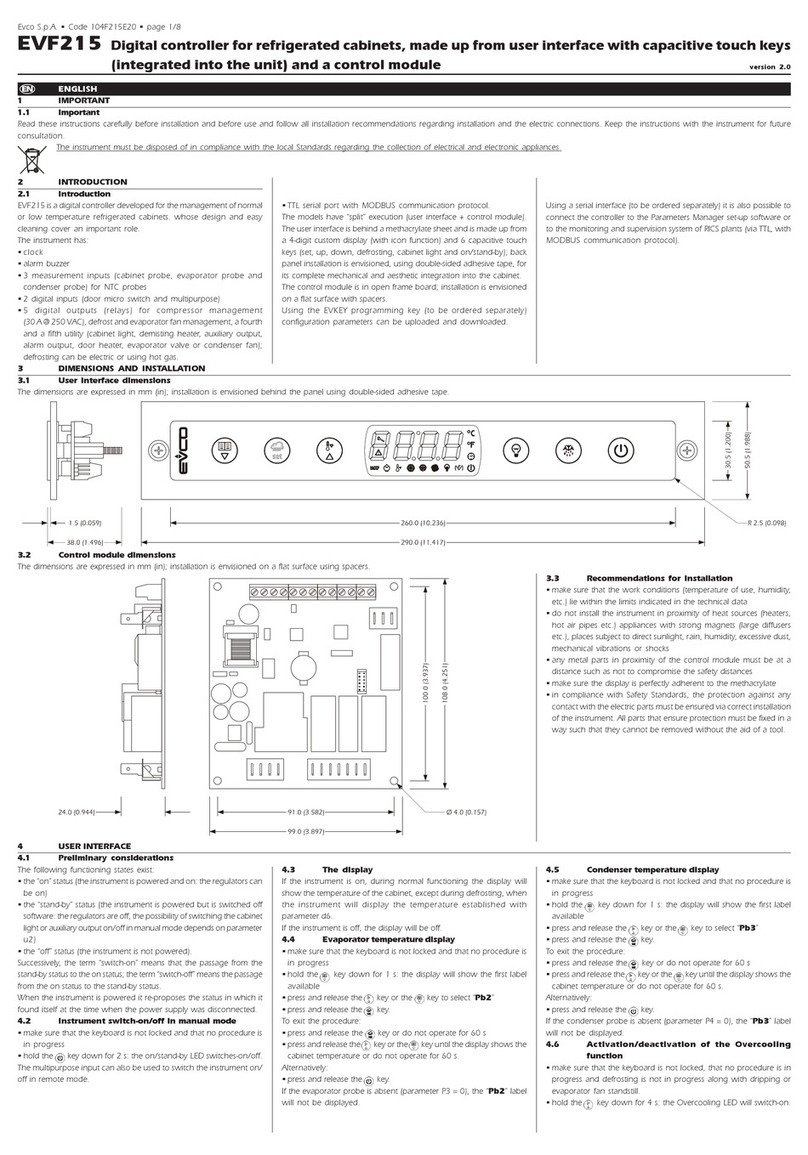
Evco EVF205 User manual

Evco S.p.A. • Code 104F205E20 • page 1/8
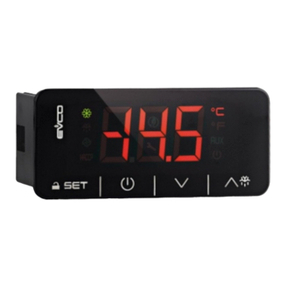
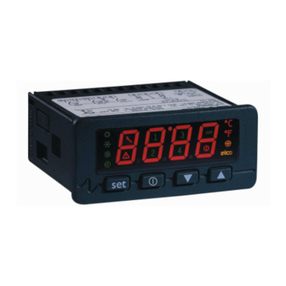
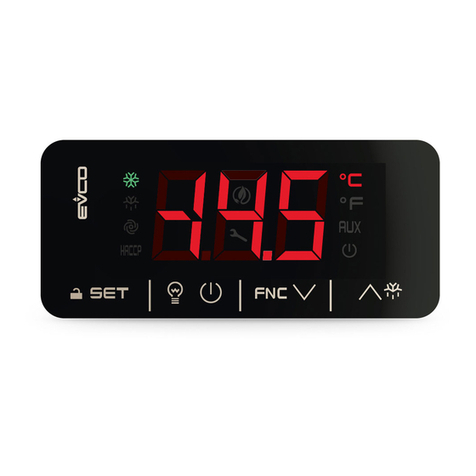
EVF205 Digital controller for refrigerated cabinets, made up from user interface with capacitive touch keys
(integrated into the unit) and a control module version 2.0
EN
ENGLISH
1 IMPORTANT
1.1 Important
Read these instructions carefully before installation and before use and follow all installation recommendations regarding installation and the electric connections. Keep the instructions with the instrument for future
consultation.
The instrument must be disposed of in compliance with the local Standards regarding the collection of electrical and electronic appliances.
2 INTRODUCTION
2.1 Introduction
EVF205 is a digital controller developed for the management of normal
or low temperature refrigerated cabinets. whose design and easy
cleaning cover an important role.
The instrument has:
• alarm buzzer
•3 measurement inputs (cabinet probe, evaporator probe and
condenser probe) for NTC probes
• 2 digital inputs (door micro switch and multipurpose)
•5 digital outputs (relays) for compressor management
(30 A @ 250 VAC), defrost and evaporator fan management, a fourth
and a fifth utility (cabinet light, demisting heater, auxiliary output,
alarm output, door heater, evaporator valve or condenser fan);
defrosting can be electric or using hot gas.
• TTL serial port with MODBUS communication protocol.
The models have “split” execution (user interface + control module).
The user interface is behind a methacrylate sheet and is made up from
a 4-digit custom display (with icon function) and 6 capacitive touch
keys (set, up, down, defrosting, cabinet light and on/stand-by); back
panel installation is envisioned, using double-sided adhesive tape, for
its complete mechanical and aesthetic integration into the cabinet.
The control module is in open frame board; installation is envisioned
on a flat surface with spacers.
Using the EVKEY programming key (to be ordered separately)
configuration parameters can be uploaded and downloaded.
Using a serial interface (to be ordered separately) it is also possible to
connect the controller to the Parameters Manager set-up software or
to the monitoring and supervision system of RICS plants (via TTL, with
MODBUS communication protocol).
3 DIMENSIONS AND INSTALLATION
3.1 User interface dimensions
The dimensions are expressed in mm (in); installation is envisioned behind the panel using double-sided adhesive tape.
3.2 Control module dimensions
The dimensions are expressed in mm (in); installation is envisioned on a flat surface using spacers.
3.3 Recommendations for installation
• make sure that the work conditions (temperature of use, humidity,
etc.) lie within the limits indicated in the technical data
• do not install the instrument in proximity of heat sources (heaters,
hot air pipes etc.) appliances with strong magnets (large diffusers
etc.), places subject to direct sunlight, rain, humidity, excessive dust,
mechanical vibrations or shocks
• any metal parts in proximity of the control module must be at a
distance such as not to compromise the safety distances
• make sure the display is perfectly adherent to the methacrylate
• in compliance with Safety Standards, the protection against any
contact with the electric parts must be ensured via correct installation
of the instrument. All parts that ensure protection must be fixed in a
way such that they cannot be removed without the aid of a tool.
4 USER INTERFACE
4.1 Preliminary considerations
The following functioning states exist:
• the “on” status (the instrument is powered and on: the regulators can
be on)
• the “stand-by” status (the instrument is powered but is switched off
software: the regulators are off, the possibility of switching the cabinet
light or auxiliary output on/off in manual mode depends on parameter
u2)
• the “off” status (the instrument is not powered).
Successively, the term “switch-on” means that the passage from the
stand-by status to the on status; the term “switch-off” means the passage
from the on status to the stand-by status.
When the instrument is powered it re-proposes the status in which it
found itself at the time when the power supply was disconnected.
4.2 Instrument switch-on/off in manual mode
• make sure that the keyboard is not locked and that no procedure is
in progress
• hold the key down for 2 s: the on/stand-by LED switches-on/off.
The multipurpose input can also be used to switch the instrument on/
off in remote mode.
4.3 The display
If the instrument is on, during normal functioning the display will
show the temperature of the cabinet, except during defrosting, when
the instrument will display the temperature established with
parameter d6.
If the instrument is off, the display will be off.
4.4 Evaporator temperature display
• make sure that the keyboard is not locked and that no procedure is
in progress
• hold the key down for 1 s: the display will show the first label
available
• press and release the key or the key to select “Pb2”
• press and release the key.
To exit the procedure:
• press and release the key or do not operate for 60 s
• press and release the key or the key until the display shows the
cabinet temperature or do not operate for 60 s.
Alternatively:
• press and release the key.
If the evaporator probe is absent (parameter P3 = 0), the “Pb2” label
will not be displayed.
4.5 Condenser temperature display
• make sure that the keyboard is not locked and that no procedure is
in progress
• hold the key down for 1 s: the display will show the first label
available
• press and release the key or the key to select “Pb3”
• press and release the key.
To exit the procedure:
• press and release the key or do not operate for 60 s
• press and release the key or the key until the display shows the
cabinet temperature or do not operate for 60 s.
Alternatively:
• press and release the key.
If the condenser probe is absent (parameter P4 = 0), the “Pb3” label
will not be displayed.
4.6 Activation/deactivation of the Overcooling
function
• make sure that the keyboard is not locked, that no procedure is in
progress and defrosting is not in progress along with dripping or
evaporator fan standstill.
• hold the key down for 4 s: the Overcooling LED will switch-on.
During the Overcooling function, the work set-point is decreased
from the temperature established by parameter r5; the function will
last for the time established by parameter r6.
Defrosting is never activated during the Overcooling function; if the
defrosting interval expires when the function is in progress, defrosting
will be activated on conclusion of the function.
4.7 Activation of defrosting in manual mode
• make sure that the keyboard is not locked, that no procedure is in
progress and the Overcooling function is not in progress
• hold the key down for 4 s.

Evco S.p.A. • Code 104F205E20 • page 2/8
If the function of the evaporator probe is that of defrosting probe
(parameter P3 = 1) and on activation of defrosting the temperature of
the evaporator is above that established with parameter d2, defrosting
will not be activated.
4.8 Functioning due to low or high relative humidity
percentage (only if parameter F0 is set at 5)
During functioning due to low relative humidity percentage, the
evaporator fan will be switched-on if the compressor is on and is
switched-on cyclically if the compressor is off (parameter F4 establishes
the duration of evaporator fan switch-off and parameter F5 that
regarding switch-on).
During functioning due to the high relative humidity percentage, the
evaporator fan is always on.
4.8.1 Activation of the functioning due to low or high
relative humidity percentage (only if parameter
F0 is set at 5)
• make sure that the keyboard is not locked and that no procedure is
in progress
• press and hold the and key for 4 s: the display will show “rhL”
(functioning due to low relative humidity percentage) or “rhH”
(functioning due to high relative humidity percentage) for 10 s.
To restore normal display in advance:
• press a key.
It is also possible to activate functioning due to low or high relative
humidity percentage using parameter F6.
If parameter F0 is not set at 5, pressing the and key will cause the
“- - - -“ indication to be displayed for 1 s.
4.8.2 Learning of the type of functioning in progress
(due to low or high relative humidity percentage
only if parameter F0 is set at 5)
• make sure no procedure is in progress
• press and release the key and the key: the display will show
“rhL” (functioning due to low relative humidity percentage) or “rhH”
(functioning due to high relative humidity percentage) for 10 s.
To restore normal display in advance:
• press a key.
If parameter F0 is not set at 5, pressing the and key will cause:
• the display of the “- - - -“ indication for 1 s if the keyboard is not locked
• the display of the “Loc” label for 1 s if the keyboard is locked.
4.9 Switch-on/off of the cabinet light in manual mode
(only if parameter u1 and/or parameter u11 is set
at 0)
• make sure no procedure is in progress
• press and release the key: the light LED will switch-on/off.
Using the door micro switch input, the cabinet light can also be
switched-on/off in remote mode; see also parameter u2.
If parameter u1 is set at 0 (i.e. the utility managed by the fourth output
is the cabinet light) and parameter u11 is set at 2 (i.e. the utility managed
by the fifth output is the auxiliary output), holding the key down
for 2 s will cause the switch-on/off of the multipurpose LED and of the
auxiliary output.
4.10 Switch-on of the demisting heaters (only if
parameter u1 and/or parameter u11 is set at 1)
• make sure that the instrument is on and that no procedure is in
progress
• hold the key down for 2 s: the multipurpose LED will switch-on
and the heaters will be switched on, both for the time established
with parameter u6.
The demisting heaters cannot be switched off in manual mode (i.e.
before the time established with parameter u6 has passed).
4.11 Switch-on/off of the auxiliary output in manual
mode (only if parameter u1 and/or parameter u11
is set at 2)
• make sure that the keyboard is not locked and that no procedure is
in progress
• press and release the key.
The multipurpose input can also be used to switch the auxiliary output
on/off in remote mode.
If parameter u1 is set at 2 (i.e. the utility managed by the fourth output
is the auxiliary output) and parameter u11 is set at 0 (i.e. the utility
managed by the fifth output is the cabinet light), holding the key
down for 2 s will cause the switch-on/off of the cabinet light LED and
of the cabinet light.
If the auxiliary output has been switched on in manual mode, sit can
only be switched off in the same way (also, if the auxiliary output has
been switched off in remote mode, it can only be switched off in the
same way); see also parameter u2.
4.12 Energy Saving
During the Energy Saving function, the work set-point is increased of
the temperature established with parameter r4 and the evaporator fan
is switched on cyclically, on condition that the parameter F0 is set at 1
or 2 (parameter F13 establishes the duration of fan switch-off and
parameter F14 that regarding switch-on).
When the time established with parameter i10 has passed without
activation of the door micro switch (after the cabinet temperature has
reached the work set-point) the Energy Saving function is activated
automatically (until the input is activated again).
4.12.1 Activation/deactivation of the Energy Saving
function with effect only on the compressor
The multipurpose input can also be used to switch the Energy Saving
function on/off in remote mode.
4.13 Lock/unlock of the keyboard
To lock the keyboard:
• make sure no procedure is in progress
• press and hold the and key for 1 s: the display will show “Loc”
for 1 s.
If the keyboard is locked, the following is not allowed:
• to switch the instrument on/off in manual mode
• to display the evaporator temperature (with the procedure indicated
in paragraph 4.4)
• to display the condenser temperature (with the procedure indicated
in paragraph 4.5)
• activated/deactivate the Overcooling function
• activate defrosting in manual mode
•to activate functioning due to high or low relative humidity
percentage and to learn the type of functioning
• to switch the auxiliary output on/off in manual mode
• to display the information regarding the HACCP alarms
• to delete the list of HACCP alarms
•to modify the work set-point (with the procedure indicated in
paragraph 5.1)
• to display the compressor functioning hours
• to cancel the compressor functioning hours.
These operations cause the “Loc” label to be displayed for 1 s.
To unlock the keyboard:
• press and hold the and key for 1 s: the display will show
“UnL” for 1 s.
4.14 Silencing the buzzer
• make sure no procedure is in progress
• press a key (the first time the key is pressed does not cause the associated
effect).
If parameter u1 and/or parameter u11 is set at 3 and parameter u4 is
set at 1, pressing the key will also cause the alarm output to be
deactivated.
If parameter u9 is set at 0, the buzzer will not be enabled.
5 SETTINGS
5.1 Setting the work set-point
• make sure that the keyboard is not locked and that no procedure is
in progress
• press and release the key: the compressor LED will flash
• press and release the key or the key within 15 s; see also
parameters r1, r2 and r3
• press and release the key or do not operate for 15 s the compressor
LED will switch-off, after which the instrument will exit the procedure.
To exit the procedure in advance:
• do not operate for 15 s (any modifications will be saved).
It is also possible to set the work set-point via parameter SP.
5.2 Setting the configuration parameters
To access the procedure:
• make sure no procedure is in progress
• press and hold the and key for 4 s: the display will show “PA”
• press and release the key
• press and release the key or the key within 15 s. to set “-19”
• press and release the key or do not operate for 15 s
• press and hold the and key for 4 s: the display will show “SP”.
To select a parameter:
• press and release the key and the key.
To modify a parameter:
• press and release the key
• press and release the key or the key within 15 s.
• press and release the key or do not operate for 15 s.
To exit the procedure:
• press and hold the key and the key for 4 s or do not operate
for 60 s (any modifications will be saved).
Cut off the power supply to the instrument after modification
of the parameters.
5.3 Restoring factory settings
To access the procedure:
• make sure no procedure is in progress
• press and hold the and key for 4 s: the display will show “PA”
• press and release the key
• press and release the key or the key within 15 s. to set “149”
• press and release the key or do not operate for 15 s
• press and hold the and key for 4 s: the display will show “dEF”
• press and release the key
• press and release the key or the key within 15 s. to set “1”
• press and release the key or do not operate for 15 s the display
will show flashing “dEF” for 4 s, after which the instrument will exit
the procedure
• cut the instrument power supply off.
To exit the procedure in advance:
• press and hold the key and the key for 4 s during the procedure
(i.e. before setting “1”: restore will not be performed).
Check that the factory settings are appropriate (see
chapter 12).
6 HACCP FUNCTION
6.1 Preliminary considerations
The instrument is able to store up to 3 HACCP alarms.
The instrument provides the following inoformation:
• the critical value
• the alarm duration (from 1 min to 99 hours and 59 min, partial if the
alarm is in progress).
CODE ALARM TYPE (CRITICAL VALUE)
AL minimum temperature alarm (the minium cell tempera-
ture during any alarm of this type)
AH maximum temperature alarm (the maximum cell tempera-
ture during any alarm of this type)
id door microswitch input alarm (the maximum cell tempera-
ture during any alarm of this type; see also parameter i4
Important Notes:
•the codes are displayed in the order shown in the table
•the instrument stores the minimum and maximum tem-
perature alarms provided the temperature associated
with the alarm is that of the cell (parameter A0 = 0)
•the instrument updates the information regarding the
the alarm provided the critical value of the new alarm is
more critical than that stored alarm or provided the infor-
mation has already been displayed.
•if the instrument is switched off, no alarms will be stored.
When the problem that caused the alarm disappears, the display is
restored to normal operation.
The HACCP LED provides information regarding the HACCP alarm
storage status; see paragraph 8.1.
6.2 Display of the information regarding the HACCP
alarms
To start the procedure:
• ensure that the keyboard is not locked and that no other procedure
is in progress
• hold down the key for 1 sec: the display will show the first label
available
• press and release the or key to select “LS”
• press and release the key: the display will show one of the codes
included in the table in paragraph 6.1.
To select an alarm:
• press and release the or key (to select, for example, “AH”).
To view the information about the alarm:
• press and release the key: the HACCP LED will stop flashing and
remain permanently on and the display will show the following
sequence of information (for example):
INFO. MEANING
8.0 the critical value is 8.0 °C/8 °F
dur the display is about to show the duration of the alarm
h01 the alarm has been going off for 1 hour (data continues ...)
n15 the alarm lasted for 1 hour and 15 min
AH the alarm selected
The display shows each message for 1 sec.
To exit the sequence of information:
• press and release the key: the display will show the alarm selected
(in the example “AH”).
To exit the procedure:
• exit the sequence of information
• press and release the or key until the display shows the cell
temperature and then do not operate for 60 sec.
Alternatively:
• exit the sequence of information.
• press and release the key.
If the instrument does not have any alarms stored, the label “LS” will
not be displayed.
6.3 Deletion of the list of HACCP alarms
• make sure that the keyboard is not locked and that no procedure is
in progress
• hold the key down for 1 s: the display will show the first label
available
• press and release the key or the key to select “rLS”
• press and release the key
• press and release the key or the key within 15 s. to set “149”
• press and release the key or do not operate for 15 s the display
will show flashing “- - - -” for 4 s. and the HACCP LED will switch-off,
after which the instrument will exit the procedure.
If the instrument has no alarm in the memory, the “rLS” label will not
be displayed.
7 COUNTING THE COMPRESSOR FUNCTIONING
HOURS
7.1 Preliminary considerations
The instrument can memorise up to 9.999 compressor functioning
hours, after which the number “9999” flashes.
7.2 Display of the compressor functioning hours
• make sure that the keyboard is not locked and that no procedure is
in progress
• hold the key down for 1 s: the display will show the first label
available
• press and release the key or the key to select “CH”
• press and release the key.
To exit the procedure:
• press and release the key or do not operate for 60 s
• press and release the key or the key until the display shows the
cabinet temperature or do not operate for 60 s.
Alternatively:
• press and release the key.
7.3 Deletion of the compressor functioning hours
• make sure that the keyboard is not locked and that no procedure is
in progress
• hold the key down for 1 s: the display will show the first label
available
• press and release the key or the key to select “rCH”
Evco S.p.A. • Code 104F205E20 • page 3/8
• press and release the key
• press and release the key or the key within 15 s. to set “149”
• press and release the key or do not operate for 15 s the display
will show flashing “- - - -” for 4 s, after which the instrument will exit
the procedure.
8 SIGNALS AND INDICATIONS
8.1 Signals
LED MEANING
compressor LED
if on, the compressor will be on
if flashing:
• the work set-point modification will be in progress (with
the procedure indicated in paragraph 5.1)
• a compressor protection will be in progress:
- parameters C0, C1, C2
- parameter i7
defrosting LED
if it is on:
• defrosting will be in progress
• pre-dripping will be in progress
- parameter d16
if flashing:
• defrosting will be requested but a compressor protection
will be in progress:
- parameters C0, C1 and C2
• dripping will be in progress:
- parameter d7
• refrigerant fluid heating will be in progress:
- parameter d15
evaporator fan LED
if on, the evaporator fan will be on
if it flashes, the evaporator fan standstill is in progress
- parameter F3
cabinet light LED
if on, the cabinet light will have been switched-on in
manual mode (only if parameter u1 and/or parameter u11
is set at 0)
if flashing, the cabinet light will have been switched on in
remote mode:
- parameter i0 (only if parameter u1 and/or parameter
u11 is set at 0)
multipurpose LED
if it is on:
• the demisting heaters will be on (only if parameter u1
and/or parameter u11 is set at 1)
• the auxiliary output will have been switched-on in manual
mode (only if parameter u1 and/or parameter u11 is set
at 2)
• the door heaters will be on (only if parameter u1 and/or
parameter u11 is set at 4)
• the evaporator valve will be activated (only if parameter
u1 and/or parameter u11 is set at 5)
• the condenser fan will be on (only if parameter u1 and/or
parameter u11 is set at 6)
if flashing:
• the auxiliary output will have been switched-on in remote
mode:
- parameter i5 (only if parameter u1 and/or parameter
u11 is set at 2)
• the condenser fan switch-off delay will be in progress:
- parameter F12 (only if parameter u1 and/or parameter
u11 is set at 6)
HACCP HACCP LED (only if parameter A13 is set at 1)
id it is on, all of the information regarding the HACCP alarms
has not been displayed
if it flashes, the instrument will have memorised at least one
new HACCP alarm
if it is off, all of the information regarding the HACCP alarms
will have been displayed or the list of HACCP alarms will
have been deleted
Energy Saving LED
if on, the Energy Saving function will be in progress:
- parameters r4, F13, F14, i5 and i10
maintenance LED
if on, compressor maintenance will be requested:
- parameter C10
Overcooling LED
if on, the Overcooling function will be in progress
- parameters r5 and r6
alarm LED
if it is on, an alarm or an error is in progress
°Cdegree Celsius LED
if it is on, the unit of measurement of the temperatures will
be the degree Celsius:
- parameter P2
°Fdegree Fahrenheit LED
if it is on, the unit of measurement of the temperatures will
be the degree Fahrenheit:
- parameter P2
on/stand-by LED
if it is on, the instrument is in the stand-by status
When the cause of the alarm has disappeared, the instrument will go
back to normal functioning, except for the following alarms:
• the pressure switch alarm (“iSd” code), which requires the instrument
to be switched off or the power supply to be cut-off
• the compressor blocked due to condenser temperature alarm (“CSd”
code), which requires the instrument to be switched off or the power
supply to be cut-off
• the defrosting concluded due to maximum duration alarm (“dFd”
code), which requires a key to be pressed.
10 ERRORS
10.1 Errors
CODE MEANING
Pr1 Cabinet probe error
Solutions:
• check that the probe is the NTC type
• check the integrity of the probe
• check the instrument-probe connection
• verify the temperature of the cabinet
Main consequences:
• the activity of the compressor will depend on parameters
C4 and C5
• defrosting will never be activated
• the alarm output will be activated (only if parameter u1
and/or parameter u11 is set at 3)
• the door heaters will be switched-off (only if parameter u1
and/or parameter u11 is set at 4)
•the evaporator valve will be deactivated (only if
parameter u1 and/or parameter u11 is set at 5)
Pr2 Evaporator probe error
Solutions:
• the same as the previous case but relative to the evaporator
probe
Main consequences:
• if parameter P3 is set at 1, defrosting will last for the time
established with parameter d3
• if parameter P3 is set at 1 and parameter d8 is set at 2 or 3,
the instrument will function as if parameter d8 is set at 0
• if parameter F0 is set at 3 or 4, the instrument will function
as if parameter is set at 2
• the alarm output will be activated (only if parameter u1
and/or parameter u11 is set at 3)
Pr3 Condenser probe error
Solutions:
• the same as the previous case but relative to the condenser
probe
Main consequences:
•the overheated condenser alarm (“COH” code) will
never be activated
• the compressor blocked due to condenser temperature
alarm (“CSd” code) will never be activated
• the alarm output will be activated (only if parameter u1
and/or parameter u11 is set at 3)
• if parameter u1 and/or parameter u11 is set at 6, the
condenser fan will function in parallel to the compressor
ErC Error of compatibility user interface-control module
Solutions:
• check the compatibility user interface-control module
(check the data related in the labels)
Main consequences:
• the control module will keep working correctly
ErL Error of communication user interface-control module
Solutions:
• check the connection user interface-control module
Main consequences:
• the control module will keep working correctly
When the cause of the alarm disappears, the instrument restores normal
functioning.
11 TECHNICAL DATA
11.1 Technical data
User interface container: open frame board behind a methacrylate
sheet.
Control module container: open frame board.
User interface protection rating (front): IP 65.
Control module protection rating: IP 00.
User interface connections: screw terminal board (at the control
module).
The user interface connects to the control module via a 4-way cable:
the maximum length allowed for the connection cable is 20 m
(65.614 ft; the cable is not supplied with the instrument).
Control module connections: 6.3 mm faston (0.248 in, power
supply and outputs), screw terminal board (to the user interface and
inputs), 6-pole connector (serial port).
Temperature of use: from 0 to 55 °C (from 32 to 131 °F, 10 ... 90%
relative humidity without condensate).
User interface power supply: the user interface is powered by the
control module.
Control module power supply: 115 ... 230 VCA, 50/60 Hz, 10 VA.
Alarm buzzer: incorporated (in the user interface).
Measurement inputs: 3 (cabinet probe, evaporator probe and
condenser probe) for NTC probes
Digital inputs: 2 (door micro switch and multipurpose) for normally
open/normally closed contact (potential free contact, 5 V 1 mA).
Range of measurement: from -40 to 105 °C (from 40 to 220 °F).
8.2 Indications
CODE MEANING
rhL functioning due to low relative humidity percentage is in
progress
rhH functioning due to high relative humidity percentage is in
progress
Loc the keyboard is locked:
- see paragraph 4.13
the work set-point is blocked:
- parameter r3
- - - - the functioning requested is not available
9 ALARMS
9.1 Alarms
CODE MEANING
AL Minimum temperature alarm (HACCP alarm)
Solutions:
• check the temperature associated to the alarm
• see:
- see parameters A0, A1 and A2
Main consequences:
• the instrument memorises the alarm, on condition that
parameter A0 is set at 0
• the alarm output will be activated (only if parameter u1
and/or parameter u11 is set at 3)
AH Maximum temperature alarm (HACCP alarm)
Solutions:
• verify the temperature of the cabinet
• see:
- parameters A4 and A5
Main consequences:
• the instrument memorises the alarm
• the alarm output will be activated (only if parameter u1
and/or parameter u11 is set at 3)
id Door micro switch input alarm (HACCP alarm)
Solutions:
• check the causes that brought about the activation of the
input
• see parameters i0, i1 and i4
Main consequences:
• the effect established with parameter i0
• if parameter i4 is set at 1, the instrument memorises the
alarm, on condition that parameter i2 is not set at -1
• the alarm output will be activated (only if parameter u1
and/or parameter u11 is set at 3)
iA Multipurpose input alarm
Solutions:
• check the causes that brought about the activation of the
input
• see parameters i5 and i6
Main consequences:
• the effect established with parameter i5
• the alarm output will be activated (only if parameter u1
and/or parameter u11 is set at 3)
iSd Pressure switch alarm
Solutions:
• check the causes that brought about the activation of the
input
• see parameters i5, i6, i7, i8 and i9
• switch the instrument off and back on again or cut the
power supply off
Main consequences:
• the regulators will be switched off
• the alarm output will be activated (only if parameter u1
and/or parameter u11 is set at 3)
COH Overheated condenser alarm
Solutions:
• verify the temperature of the condenser
• see parameter C6
Main consequences:
• the alarm output will be activated (only if parameter u1
and/or parameter u11 is set at 3)
• if parameter u1 and/or parameter u11 is set at 6, the
condenser fan will be on
CSd Blocked compressor alarm
Solutions:
• verify the temperature of the condenser
• see parameter C7
• switch the instrument off and back on again: when the
instrument is switched back on, if the condenser
temperature is still above that established with parameter
C7, the power supply must be disconnected and the
condenser cleaned.
Main consequences:
• the evaporator compressor and fan will be switched off
• the alarm output will be activated (only if parameter u1
and/or parameter u11 is set at 3)
dFd Defrosting concluded due to maximum duration alarm
Solutions:
• check the integrity of the evaporator probe
• see parameters d2, d3 and d11
• press a key to restore normal display
Main consequences:
• the instrument continues to function regularly

Evco S.p.A. • Code 104F205E20 • page 4/8
PT • 27/15
Resolution: 0.1 °C/1 °C/1 °F.
Digital outputs: 5 relays:
•compressor relay: 30 A res. @ 250 VCA (NO
contact)
•defrosting relay: 16 A res. @ 250 VCA (contact
in exchange)
•evaporator fan relay: 8 A res. @ 250 VCA (NO
contact)
•fourth output relay: 16 A res. @ 250 VCA (NO
contact)
•fifth output relay: 8 A res. @ 250 VCA (contact
in exchange).
The maximum current allowed on the loads is 20 A.
Serial port: port for communication with the Parameters Manager
set-up software system or to the monitoring and supervision system of
RICS plants (via TTL, with MODBUS communication protocol) or with
the EVKEY programming key.

Evco S.p.A. • Code 104F205E20 • page 5/8
12 WORK SET-POINT AND CONFIGURATION PARAMETERS
12.1 Work set-point
MIN. MAX. U. M. DEF.
r1 r2 °C/°F (1) -18.0
12.2 Configuration parameters
DEF. MIN. MAX. U. M. PAR.
SP r1 r2 °C/°F (1) -18.0
DEF. MIN. MAX. U. M. PAR.
CA1 -25.0 25.0 °C/°F (1) 0.0
CA2 -25.0 25.0 °C/°F (1) 0.0
CA3 -25.0 25.0 °C/°F (1) 0.0
P1 0 1 - - - - 1
P2 0 1 - - - - 0
P3 0 2 - - - - 1
P4 0 1 - - - - 1
P8 0 250 ds 5
P9 0 2 - - - - 1
DEF. MIN. MAX. U. M. PAR.
r0 0.1 15.0 °C/°F (1) 2.0
r1 -99.0 r2 °C/°F (1) -50.0
r2 r1 99.0 °C/°F (1) 50.0
r3 0 1 - - - - 0
r4 0.0 99.0 °C/°F (1) 0.0
r5 0.0 99.0 °C/°F (1) 0.0
r6 0 240 min 30
r7 0.0 99.0 °C/°F (1) 10.0
DEF. MIN. MAX. U. M. PAR.
C0 0 240 min 0
C1 0 240 min 5
C2 0 240 min 3
C3 0 240 s 0
C4 0 240 min 10
C5 0 240 min 10
C6 0.0 199.0 °C/°F (1) 80.0
C7 0.0 199.0 °C/°F (1) 90.0
C8 0 15 min 1
C10 0 9999 h 0
DEF. MIN. MAX. U. M. PAR.
d0 0 99 h 8
d1 0 2 - - - - 0
d2 -99.0 99.0 °C/°F (1) 2.0
d3 0 99 min 30
d4 0 1 - - - - 0
d5 0 99 min 0
d6 0 1 - - - - 1
d7 0 15 min 2
d8 0 3 - - - - 0
d9 -99.0 99.0 °C/°F (1) 0.0
d1 1 0 1 - - - - 0
d15 0 99 min 0
d16 0 99 min 0
d1 7 1 1 0 - - - - 1
d18 0 3,000 min 40
d19 0.0 40.0 °C/°F (1) 3.0
d20 0 500 min 180
WORK SET-POINT
work set-point; see also r0
WORK SET-POINT
work set-point; see also r0
MEASUREMENT INPUTS
cabinet probe offset
evaporator probe offset
condenser probe offset
degree Celsius decimal point (for the sizes displayed during normal functioning)
1 = YES
temperature unit of measurement (2)
0=°C
1=°F
evaporator probe function
0 = no probe
1 = defrosting probe and probe for the temperature control system of the evaporator fan
2 = probe for the temperature control system of the evaporator fan
enabling of the condenser probe
1 = YES
display delay of the temperature variation detected by the probes
type of backlight
0 = off during the on status and active keys with low light intensity
1 = with low light intensity during the on state and active keys with high light intensity
2 = with high light intensity during the on state and all keys with high light intensity
MAIN REGULATOR
work set-point differential
minimum work set-point
maximum work set-point
block of work set-point modification (with the procedure indicated in paragraph 5.1)
1 = YES
temperature increases during Energy Saving function; see also i5 and i10
temperature decrease during Overcooling function; see also r6
duration of the Overcooling function; see also r5
minimum “cabinet temperature - work set-point” difference (on instrument switch-on) such to cause the exclusion of the consequent evaporator temperature value from those
used for the calculation of the relative average (for the activation of defrosting; only if d8 = 3); see also d17 (3)
COMPRESSOR PROTECTIONS
compressor switch-on delay from instrument switch-on (3)
minimum time between two consecutive switch-ons of the compressor; also pressure switch-on delay from the conclusion of the cabinet probe error (“Pr1”code) (4) (5)
minimum duration of compressor switch-off (4)
minimum duration of compressor switch-on
compressor switch-off duration during cabinet probe error (“Pr1” code); see also C5
compressor switch-on duration during cabinet probe error (“Pr1” code); see also C4
condenser temperature over which the overheated condenser alarm is activated (“COH” code) (6)
condenser temperature over which the compressor blocked alarm is activated (“CSd” code)
compressor blocked alarm delay (“CSd” code) (7)
number of compressor functioning hours above which a maintenance request is signalled
0 = no function
DEFROSTING
if d8 = 0, 1 or 2, defrosting interval (8)
0 = defrosting at intervals will never be activated
if d8 = 3, maximum defrosting interval
type of defrosting
0=ELECTRIC - during defrosting the compressor will remain off and the defrosting output will be activated; the evaporator fan activity will depend on parameter F2
1=WITH HOT GAS - during defrosting the compressor will be switched-on and the defrosting output will be activated; the evaporator fan activity will depend on parameter
F2
2=DUE TO COMPRESSOR STOPPING - during defrosting the compressor will remain off and the defrosting output will be deactivated; the evaporator fan activity will depend
on parameter F2
temperature of defrosting end (only if P3 = 1); see also d3
if P3 = 0 or 2, duration of defrosting
if P3 = 1, maximum duration of defrosting; see also d2
0 = defrosting will never be activated
defrosting on instrument switch-on (only if d8 = 0, 1, 2 or 3) (3)
1 = YES
if d4 = 0, minimum time between switch-on of the instrument and the activation of defrosting; see also i5 (3)
if d4 = 1, defrosting activation delay from instrument switch-on; see also i5 (3)
temperature displayed during defrosting
0 = cabinet temperature
1 = if, on activation of defrosting, the cabinet temperature is below “work set-point + r0”, at maximum “work set-point + r0”; if, on activation of defrosting, the cabinet
temperature is above “work set-point + r0”, at maximum the temperature of the cabinet on activation of defrosting (9)
during dripping (during dripping the compressor will remain off and the defrosting output will remain deactivated. If d16 = 0, the evaporator fan activity will depend on
parameter F2; if d16 ≠0, the evaporator fan will remain off)
defrosting activation method
0=AT INTERVALS - defrosting will be activated when the instrument has remained on completely for time d0
1=AT INTERVALS - defrosting will be activated when the compressor has been left on completely for time d0
2=AT INTERVALS - defrosting will be activated when the evaporator temperature as remained below temperature d9 completely for time d0 (10)
3=ADAPTIVE - defrosting will be activated when one of the following conditions occurs; see also d0: (10)
- condition 1: the evaporator temperature will be below temperature d22 and the compressor will have remained on totally for time d18
- condition 2: the evaporator temperature will drop below temperature d19
temperature of the evaporator over which the defrosting interval count is suspended (only if d8 = 2)
enabling of the defrosting alarm concluded due to maximum duration (“dFd” code; only if P3 = 1 and without evaporator probe error (“Pr2” code))
1 = YES
minimum duration of the compressor switch-on on activation of defrosting so that this can be activated (only if d1 = 1) (11)
duration of pre-dripping (during pre-dripping the compressor will remain off, the defrosting output will be activated and the evaporator fan will remain off)
number of evaporator temperature values used to calculate the relative average (for the activation of defrosting; only if d8 = 3); see also r7, i11 and i12
defrosting interval (only if d8 = 3 and for condition 1)
0 = defrosting due to condition 1 will never be activated
temperature of the evaporator below which defrosting is activated (relative to the average temperatures of the evaporator, i.e. “average of the evaporator temperatures +
d19) (only if d8 = 3 and due to condition 2); see also d17
minimum consecutive duration of the compressor, such to cause activation of defrosting
0 = defrosting will never be activated due to the effect of compressor switch-on

Evco S.p.A. • Code 104F205E20 • page 6/8
d21 0 500 min 200
d22 0.0 10.0 °C/°F (1) 2.0
d23 0.0 10.0 °C/°F (1) 1.0
DEF. MIN. MAX. U. M. PAR.
A0 0 1 - - - - 0
A1 -99.0 99.0 °C/°F (1) -10.0
A2 0 2 - - - - 1
A4 -99.0 99.0 °C/°F (1) 10.0
A5 0 2 - - - - 1
A6 0 240 min 120
A7 0 240 min 15
A8 0 240 min 15
A9 0 240 min 15
A11 0.1 15.0 °C/°F (1) 2.0
A1 3 0 1 - - - - 0
DEF. MIN. MAX. U. M. PAR.
F0 0 5 - - - - 1
F1 -99.0 99.0 °C/°F (1) -1.0
F2 0 2 - - - - 0
F3 0 15 min 2
F4 0 240 s 60
F5 0 240 s 10
F6 0 1 - - - - 0
F7 -99.0 99.0 °C/°F (1) 5.0
F8 0.1 15.0 °C/°F (1) 2.0
F9 0 240 s 0
F11 0.0 99.0 °C/°F (1) 15.0
F12 0 240 s 30
F13 0 240 min 5
F14 0 240 min 5
DEF. MIN. MAX. U. M. PAR.
i0 0 5 - - - - 3
i1 0 1 - - - - 0
i2 -1 120 min 30
i3 -1 120 min 15
i4 0 1 - - - - 0
i5 0 6 - - - - 2
i6 0 1 - - - - 0
i7 0 120 min 0
minimum consecutive duration of compressor switch-on from instrument switch-on (on condition that the “cabinet temperature - work set-point” difference is over
temperature r7) and from the activation of the Overcooling function, such to cause activation of defrosting
0 = defrosting will never be activated due to the effect of compressor switch-on
temperature of the evaporator above which the defrosting interval count will be suspended (relative to the average temperatures of the evaporator, i.e. “average of the
evaporator temperatures + d22”) (only if d8 = 3 and due to condition 1); see also d17
increase of the average evaporator temperatures during the Energy Saving function (for activation of defrosting; only if d8 = 3); see also d17
TEMPERATURE ALARMS
temperature associated to the minimum temperature alarm (“AL” code)
0 = cabinet temperature
1 = evaporator temperature (12)
temperature below which the minimum temperature alarm is activated (“AL” code); see also A0, A2 and A11
type of minimum temperature alarm (“AL” code)
0 = no alarm
1 = relative to the work set-point (i.e. ”work set-point - A1”; consider A1 without sign)
2 = absolute (i.e. A1)
temperature above which the maximum temperature alarm is activated (“AH” code); see also A5 and A11
type of maximum temperature alarm (“AH” code)
0 = no alarm
1 = relative to the work set-point (i.e. “work set-point + A4”; consider A4 without sign)
2 = absolute (i.e. A4)
maximum temperature alarm delay (“AH” code) from instrument switch-on (3)
temperature alarm delay (“AL” code and “AH” code)
maximum temperature alarm delay (“AH” code) from conclusion of the evaporator fan standstill (13)
maximum temperature alarm delay (“AH” code) from deactivation of the door micro switch input (14)
differential of parameters A1 and A4
enabling of the HACCP LED
1 = YES
EVAPORATOR FAN
evaporator fan activity during normal functioning
0 = off
1 = on; se also F13, F14 and i10
2 = parallel to the compressor; se also F9, F13, F14 and i10
3 = depending on F1 (15)
4 = off if the compressor is off, depending on F1 if the compressor is on; see also F9 (15)
5 = depending on F6; see also F9
evaporator temperature over which the evaporator fan is switched off (sonly if F0 = 3 or 4); see also F8
activity of the evaporator fan during defrosting and dripping
0 = off
1 = on (it is recommended to set parameter d7 at 0)
2 = depending on F0
maximum duration of the evaporator fan standstill; see also F7 (during evaporator fan standstill, the compressor may be on, the defrosting output will remain deactivated
and the evaporator fan will remain off)
duration of evaporator fan switch-off during functioning due to low relative humidity percentage when the compressor is off; see also F5 (only if F0 = 5)
duration of evaporator fan switch-on during functioning due to low relative humidity percentage when the compressor is off; see also F4 (only if F0 = 5)
functioning due to low or high relative humidity percentage (only if F0 = 5) (16)
0=LOW RELATIVE HUMIDITY - the evaporator fan will function in parallel to the compressor; see also F4 and F5
1=HIGH RELATIVE HUMIDITY - the evaporator fan will always be on
evaporator temperature below which the evaporator fan standstill is concluded (relative to the work set-point, i.e. “work set-point + F7”); see also F3
parameter F1 differential
evaporator fan switch-off delay from switch-off of the compressor (only if F0 = 2, 4 and 5)
condenser temperature over which the condenser fan will be switched-on (“F11 + 2,0 °C/4 °F, only if u1 and/or u11 = 6 and on condition that the compressor is on); see
also F12 (17)
condenser fan switch-off delay from switch-off of the compressor (only if u1 and/or u11 = 6); see also F11
duration of evaporator fan switch-off during the Energy Saving function; see also F14 and i10 (only if F0 = 1 or 2)
duration of evaporator fan switch-on during the Energy Saving function; see also F13 and i10 (only if F0 = 1 or 2)
DIGITAL INPUTS
effect caused by the activation of the door micro switch input; see also i4
0 = no effect
1 = the compressor and the evaporator fan will be switched-off (at maximum for time i3 or until when the input is deactivated) (18)
2 = the evaporator fan will be switched-off (at maximum for time i3 or until when the input is deactivated)
3 = the cabinet light will be switched on (only if u1 and/or u11 = 0, until the input is deactivated)
4 = the compressor and the evaporator fan will be switched-off (at maximum for time i3 or until the input is deactivated) and the cabinet light will be switched on (only
if u1 and/or u11 = 0, until the input is deactivated) (18)
5 = the evaporator fan will be switched-off (at maximum for time i3 or until the input is deactivated) and the cabinet light will be switched on (only if u1 and/or u11 = 0,
until the input is deactivated)
type of door micro switch input contact
0 = normally open (active input with closed contact)
1 = normally closed (input open with contact open)
door micro switch input alarm signalling delay (“id” code)
-1= the alarm will not be signalled
maximum duration of the effect caused by activation of the door micro switch input on the compressor and on the evaporator fan
-1= the effect will last until the input is deactivated
door micro switch input alarm memorisation (“id” code) (19)
1 = YES
effect caused by the activation of the multipurpose input
0 = no effect
1=SYNCHRONISATION OF DEFROSTING - on expiry of time d5 defrosting will be activated
2=ACTIVATION OF THE ENERGY SAVING FUNCTION - the Energy Saving function will be activated (until the input is deactivated), on condition that the Overcooling function
is not in progress; see also r4
3=ACTIVATION OF THE MUTIPURPOSE INPUT ALARM - when time i7 has expired, the display will show “iA” flashing and the buzzer will be activated (up to when the input
is deactivated)
4=ACTIVATION OF THE PRESSURE SWITCH ALARM - the compressor will be off, if u1 and/or u11 = 6 the condenser fan will be on, the display will show the flashing “iA”
code and the buzzer will be activated (until the input is deactivated): when the input has been activated the number of times established by parameter i8 the regulators
will be switched off, if u1 and/or u11 = 6 the condenser fan will be switched on, the display will show the flashing “iSd” code and the buzzer will be activated (until
the input is deactivated and the instrument is switched off and back on again or the power supply is cut-off); see also i7 and i9
5=AUXILIARY OUTPUT SWITCH-ON - the auxiliary output will be switched-on (only if u1 and/or u11 = 2, until the input is deactivated)
6=INSTRUMENT SWITCH-OFF - the instrument will be switched off (until the input is deactivated)
type of multipurpose input contact
0 = normally open (active input with closed contact)
1 = normally closed (input open with contact open)
if i5 = 3, multipurpose input alarm signal delay (“iA” code)
if i5 = 4, compressor switch-on delay from the activation of the multipurpose input (20)

Evco S.p.A. • Code 104F205E20 • page 7/8
i8 0 15 - - - - 0
i9 1 999 min 240
i10 0 999 min 0
i11 0 240 s 15
i12 0 240 s 60
i1 3 0 240 - - - - 180
i14 0 240 min 32
DEF. MIN. MAX. U. M. PAR.
u1 0 6 - - - - 0
u2 0 1 - - - - 0
u4 0 1 - - - - 1
u5 -99.0 99.0 °C/°F (1) -1.0
u6 1 120 min 5
u7 0.0 99.0 °C/°F (1) 2.0
u8 0 1 - - - - 0
u9 0 1 - - - - 1
u1 1 0 6 - - - - 3
DEF. MIN. MAX. U. M. PAR.
LA 1 24 7 - - - - 247
Lb 0 3 - - - - 2
LP 0 2 - - - - 2
PARAM. MIN. MAX. U.O.M. DEF.
E9 0 1 - - - - 1
(1) the unit of measurement depends on parameter P2
(2) appropriately set the parameters relative to the regulators after modification of parameter P2
(3) the parameter only has effect after a power cut that occurs when the instrument is on
(4) the time established with the parameter is counted also when the instrument is off
(5) if parameter C1 is set at 0, the delay from the conclusion of the cabinet probe error will be 2 min
(6) the parameter differential is 2.0 °C/4 °F
(7) on instrument switch-on, the temperature of the condenser is already above that established with parameter C7, parameter C8 will have no effect
(8) the instrument memorises the defrosting interval count every 30 min. The modification of parameter d0 has effect from the conclusion of the previous defrosting interval or from the activation of defrosting in manual
mode
(9) the display restores normal functioning when, on conclusion of evaporator fan standstill, the cabinet temperature drops below that which has blocked the display (or if a temperature alarm occurs)
(10) if parameter P3 is set at 0 or 2, the instrument will function as if parameter d8 is set at 0
(11) if, on activation of defrosting, the switch-on duration of the compressor is less than the time established with parameter d15, the compressor will remain on for the fraction of time required to complete it
(12) if parameter P3 is set at 0, the instrument will function as if parameter A0 is set at 0 but will not memorise the alarm
(13) during defrosting, dripping and evaporator fan standstill, the temperature alarms are not present as long as these have occurred after activation of defrosting
(14) during the activation of the door micro switch input, the maximum temperature alarm is absent on the condition that these occur after activation of the input
(15) if parameter P3 is set at 0, the instrument will function as if parameter F0 is set at 2
(16) the parameter is also modified by operating with the procedure given in paragraph 4.8.1
(17) if parameter P4 is set at 0, the condenser fan will function in parallel to the compressor
(18) the compressor is switched-off after 10 s from activation of the input. If the input is activated during defrosting or standstill of the evaporator fan, the activation will not have any effect on the compressor
(19) the instrument memorises the alarm on expiry of the time established with parameter i2. If parameter i2 is set at -1, the instrument does not memorise the alarm
(20) make sure that the time established with parameter i7 is lower than that established with parameter i9
(21) to prevent damage to the utility connected, modify the parameter when the instrument is off
(22) if parameter u2 is set at 0, instrument switch-off will cause the cabinet light and/or auxiliary output to switch off (on successive switch-on of the instrument, the utility will remain off); if the parameter u2 is set at 1,
instrument switch-off will not cause the cabinet light and/or auxiliary output to switch off (on successive switch-on of the instrument, the utility will remain on).
number of multipurpose input alarms (“iA” code) such to cause the pressure switch alarm (“iSd” code) (only if i5 = 4)
0 = no alarm
time that must pass in absence of multipurpose input alarms (“iA” code) so that the alarms contactor is reset (only if i5 = 4)
time that must pass without activation of the door micro switch input (after the cabinet temperature has reached the work set-point) so that the Energy Saving function is
activated automatically (it affects the evaporator fan only if F0 = 1 or 2)
0 = the function will never be activated automatically
minimum duration of door micro switch activation such to cause the exclusion of the consequent evaporator temperature value from those used for the calculation of the
relative average (for the activation of defrosting; only if d8 = 3); see also d17
minimum total duration of door micro switch activation such to cause the exclusion of the consequent evaporator temperature value from those used for the calculation
of the relative average (for the activation of defrosting; only if d8 = 3); see also d17
number of door micro switch input activations such to cause the activation of defrosting
0 = defrosting will never be activated due to the effect of door micro switch input activation
minimum duration of door micro switch input activations such to cause the activation of defrosting
0 = defrosting will never be activated due to the effect of door micro switch input activation
DIGITAL OUTPUTS
utility managed by the fourth output (21)
0=CABINET LIGHT - in this case the key, parameters i0 and u2 will have meaning
1=DEMISTING HEATERS - in this case the key and parameter u6 will have meaning
2=AUXILIARY OUTPUT - in this case the key, parameters i5 and u2 will have meaning
3=ALARM OUTPUT - in this case, parameter u4 will have meaning
4=DOOR HEATERS - in this case, parameter u5 will have meaning
5=EVAPORATOR VALVE - in this case, parameters u7 and u8 will have meaning
6=CONDENSER FAN - in this case, parameters P4, F11 and F12 will have meaning
enabling of cabinet light or auxiliary output switch-on/off in manual mode when the instrument is off (only if u1 and/or u11 = 0 or 2) (22)
1 = YES
enabling deactivation of the alarm output with silencing of the buzzer (only if u1 and/or u11 = 3)
1 = YES
cabinet temperature below which the door heaters are switched-on (“u5 - 2.0 °C/4 °F, only if u1 and/or u11 = 4) (6)
duration of demisting heaters switch-on (only if u1 and/or u11 = 1)
cabinet temperature below which the evaporator valve is disabled (relative to the work set-point, i.e. “work set-point + u7”) (only if u1 and/or u11 = 5) (6)
type of evaporator valve contact (only if u1 and/or u11 = 5)
0 = normally open (active valve with closed contact)
1 = normally closed (active valve with open contact)
enabling of the buzzer
1 = YES
utility managed by the fifth output (21)
0=CABINET LIGHT - in this case the key, parameters i0 and u2 will have meaning
1=DEMISTING HEATERS - in this case the key and parameter u6 will have meaning
2=AUXILIARY OUTPUT - in this case the key, parameters i5 and u2 will have meaning
3=ALARM OUTPUT - in this case, parameter u4 will have meaning
4=DOOR HEATERS - in this case, parameter u5 will have meaning
5=EVAPORATOR VALVE - in this case, parameters u7 and u8 will have meaning
6=CONDENSER FAN - in this case, parameters P4, F11 and F12 will have meaning
SERIAL NETWORK (MODBUS)
instrument address
baud rate
0 = 2,400 baud
1 = 4,800 baud
2 = 9,600 baud
3 = 19,200 baud
parity
0 = none (no parity)
1 = odd
2 = even
RESERVED
reserved

EVCO S.p.A. This document belongs to Evco; unless you are authorized by Evco, you cannot publish this document.
Via Feltre 81, 32036 Sedico Belluno ITALY Evco does not take any responsibility about features, technical data and possible mistakes related in this document.
Phone +39-0437-8422 • Fax +39-0437-83648 Evco does not take any responsibility about damages coming by the non-observance of additional information.
[email protected] • www.evco.it Evco reserves the right to make any change without prior notice and at any time without prejudice the basic safety and operating features.
Evco S.p.A. • Code 104F205E20 • page 8/8
13 ELECTRIC CONNECTION
13.1 Preliminary considerations
With reference to the wiring diagram:
• the utility managed by the fourth output will depend on parameter u1
• the utility managed by the fifth output will depend on parameter u11
• the serial is the port for communication with the Parameters Manager set-up software system or to the monitoring and supervision system of RICS plants (through a serial interface, via TTL, with MODBUS communication
protocol) or with the EVKEY programming key. The port must not be used simultaneously for three purposes.
13.2 Electric connection
13.3 Recommendations for the electric connection
• do not operate on the terminal boards using electric or pneumatic screwdrivers
• if the instrument has been taken from a old place to a hot one, the humidity could condense inside. Wait about one hour before applying power
• make sure that the power supply voltage, frequency and operational electric power correspond to those of the local power supply
• disconnect the power supply before performing any type of maintenance
• do not use the instrument as a safety device
• for repairs and information regarding the instrument, contact the Evco sales network.
Table of contents
Other Evco Controllers manuals

Evco
Evco Vcolor 318 M User guide

Evco
Evco EVJ 700 User guide

Evco
Evco Vcolor 318 M User guide

Evco
Evco EV3422 User manual

Evco
Evco Vcolor 579 User guide

Evco
Evco EV3 CHIL User manual

Evco
Evco EVF215 User manual

Evco
Evco EVJ 200 User manual

Evco
Evco EVBOX Light JS200 User manual

Evco
Evco EVJ 700 Instructions for use
Popular Controllers manuals by other brands

CEStronics
CEStronics AccessOne TSG8 Assembly and operating manual

Allen-Bradley
Allen-Bradley MicroLogix 1400 instruction manual

Vaillant
Vaillant auroMATIC VRS 570 Wiring Diagram Book

Carrier
Carrier 40VMD 006 Installation and maintenance instructions

Deskontrol Electronics
Deskontrol Electronics deskontroller 64 user manual

Hunter
Hunter Hydrawise Pro-HC quick start