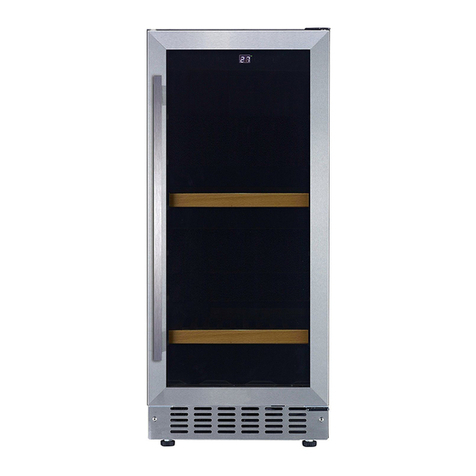
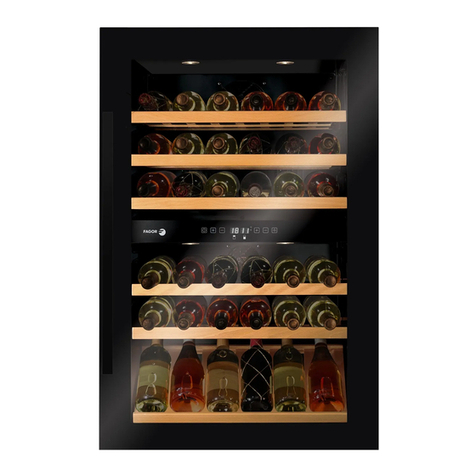
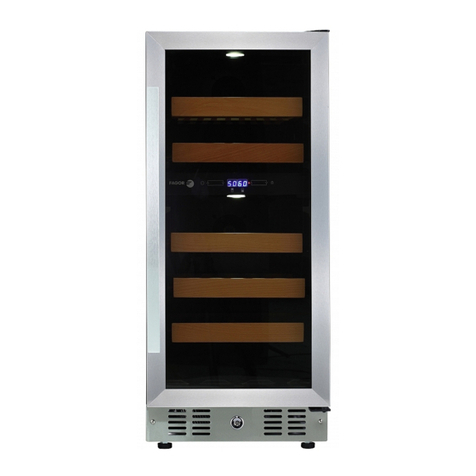
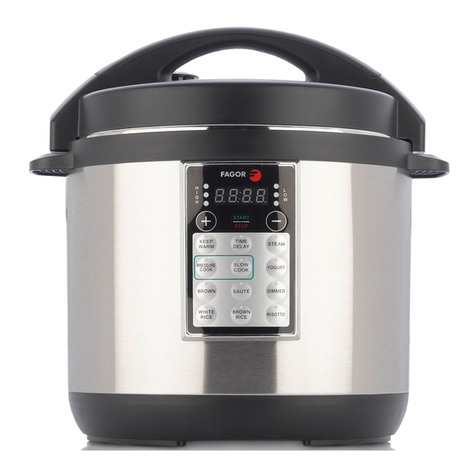
Fagor FSV-144US User manual

1
INSTRUCTION MANUAL
MANUEL D’INSTRUCTION
MANUAL DE INSTRUCCIONES
FSV-144US
BEFORE USE, PLEASE READ AND FOLLOW ALL SAFETY RULES AND OPERATING
INSTRUCTIONS.
AVANT D’UTILISER L’APPAREIL, VEUILLEZ LIRE ATTENTIVEMENT LES RÈGLES DE
SÉCURITÉ ET LES INSTRUCTIONS.
LEA Y SIGA TODAS LAS INSTRUCCIONES Y ADVERTENCIAS DE SEGURIDAD DE ESTE
MANUAL ANTES DE UTILIZAR EL APARATO.
FAGOR has a policy of continuous improvement on its products and reserves the right to change materials and specifications
without notice.
FAGOR a une politique d‟amélioration continue de ses produits et se réserve le droit de changer les matériaux el les
spécifications sans préavis.
FAGOR sigue una política de mejora continua en sus productos y se reserva el derecho a hacer cambios en los materiales y
especificaciones del mismo sin previo aviso.

2
TABLE OF CONTENTS
IMPORTANT SAFETY INSTRUCTIONS
3
WINE COOLER SAFETY
3
IMPORTANT SAFEGUARDS
4
PARTS AND FEATURES
5
INSTALLATION INSTRUCTIONS
6
Before using your wine cooler
6
Installation of your wine cooler
6
Built-in cabinet instructions
6
Electrical connection
7
Extension cord
7
Surge protector
7
OPERATING YOUR WINE COOLER
8
Recommended temperature settings
8
ON/OFF power
8
Control panel lock
8
Setting the temperature control
8
Interior Light
8
Storage
9
Shelves
9
Charcoal filtration system
9
CARE AND MAINTENANCE
10
Defrost
10
Cleaning your wine cooler
10
Power failure
10
Moving your wine cooler
10
Energy saving tips
10
TROUBLESHOOTING GUIDE
11
WIRING DIAGRAM
12

3
IMPORTANT SAFETY INSTRUCTIONS
WARNING
To reduce the risk of fire, electrical shock,
or injury when using your appliance, follow
these basic precautions:
Read all instructions before using the wine cooler.
DANGER or WARNING: To avoid the possibility of child entrapment, please take the
following precautions before throwing out the appliance.
- Remove all doors from the unit.
- Leave the shelves in place so that children may not easily climb inside.
Never allow children to operate, play with, or crawl inside the appliance.
Never clean appliance parts with flammable fluids. The fumes can create a fire
hazard or explosion.
Do not store or use gasoline or any other flammable vapors and liquids in the vicinity
of this or any other appliance. The fumes can create a fire hazard or explosion.
-Save these instructions-
WINE COOLER SAFETY
Your safety and the safety of others are very important.
We have provided many important safety messages in this manual and on your appliance. Always
read and obey all safety messages.
This is the Safety Alert Symbol. This symbol alerts you to potential hazards that
can kill or injure you and others. All safety messages will follow the Safety
Alert Symbol and either the words “DANGER”, “WARNING”or “CAUTION”.
Danger means that failure to heed this
safety statement may result in severe
personal injury or death.
Warning means that failure to heed this
safety statement may result in extensive
product damage, serious personal injury, or
death.
Caution means that failure to heed this
safety statement may result in minor or
moderate personal injury, or property or
equipment damage.
All safety messages will alert you do what the potential hazard is, tell you how to reduce the chance of
injury, and let you know what can happen if the instructions are not followed.

4
IMPORTANT SAFEGUARDS
Before the appliance is used, it must be properly positioned and installed as
described in this manual, so read the manual carefully. To reduce the risk of fire,
electrical shock or injury when using the appliance, follow basic precaution,
including the following:
Plug into a grounded 3-prong outlet, do not remove grounding prong, do not use an adapter, and
do not use an extension cord.
Replace all panels before operating.
It is recommended that a separate circuit, serving only your appliance be provided. Use
receptacles that cannot be turned off by a switch or pull chain.
Never clean appliance parts with flammable fluids. These fumes can create a fire hazard or
explosion. And do not store or use gasoline or other flammable vapors and liquids in the vicinity of
this or any other appliance. The fumes can create a fire hazard or explosion.
Before proceeding with cleaning and maintenance operations, make sure the power line of the
unit is disconnected.
Do not connect or disconnect the electric plug when your hands are wet.
Unplug the appliance or disconnect power before cleaning or servicing. Failure to do so can result
in electrical shock or death.
Do not attempt to repair or replace any part of your appliance unless it is specifically
recommended in this material. All other servicing should be referred to a qualified technician.
Use two or more people to move and install appliance. Failure to do so can result in back or other
injury.
To ensure proper ventilation for your appliance, the front of the unit must be completely
unobstructed. Choose a well-ventilated area with temperatures above 60°F (16°C) and below
90°F (32°C). This unit must be installed in an area protected from the element, such as wind, rain,
water spray or drips.
The appliance should not be located next to ovens, grills or other sources of high heat.
The appliance must be installed with all electrical, water and drain connections in accordance with
state and local codes. A standard electrical supply (115 V AC only, 60 Hz), properly grounded in
accordance with the National Electrical Code and local codes and ordinances is required.
Do not kink or pinch the power supply cord of appliance.
The fuse (or circuit breaker) size should be 15 amperes.
It is important for the appliance to be leveled in order to work properly. You may need to make
several adjustments to level it.
Never allow children to operate, play with or crawl inside the appliance.
Do not use solvent-based cleaning agents of abrasives on the interior. These cleaners may
damage or discolor the interior.
Do not use this apparatus for other than its intended purpose.

5
PARTS & FEATURES
1. Interior light –Upper Zone
2. Interior fan –Upper Zone
3. Temperature Control Panel
4. Interior light –Lower Zone
5. Interior fan –Lower Zone
6. Front grille
7. Glass door with stainless steel Frame
8. Stainless steel handle
9. Security lock (some models)
10. Leveling legs
11. Large shelves –Upper Zone (2)
12. Large shelves –Lower Zone (2)
13. Small shelf –Lower Zone (1)

6
INSTALLATION INSTRUCTIONS
BEFORE USING YOUR WINE COOLER
Remove the exterior and interior packing.
Before connecting this appliance to the power source, let it stand upright for approximately 2
hours. This will reduce the possibility of a malfunction in the cooling system from handling during
transportation.
Clean the interior surface with lukewarm water using a soft cloth.
INSTALLATION OF YOUR WINE COOLER
This appliance is designed to be for free standing installation or built-in (fully recessed).
Place your Wine Cooler on a floor that is strong enough to support it when it is fully loaded. To
level your Wine Cooler, adjust the front leveling legs at the bottom of the Wine Cooler.
Locate the Wine Cooler away from direct sunlight and sources of heat (stove, heater, radiator,
etc.). Direct sunlight may affect the acrylic coating and heat sources may increase electrical
consumption. Extreme cold ambient temperatures may also cause the unit not to perform
properly. Because of these factors this unit is not designed for use in a garage or any other
outside installation.
Avoid locating the unit in moist areas.
Plug the Wine Cooler into an exclusive, properly installed-grounded wall outlet. Do not under any
circumstances cut or remove the third (ground) prong from the power cord. Any questions
concerning power and/or grounding should be directed toward a certified electrician or an
authorized service center. This unit is not designed to be installed in a motor home or used with
an inverter.
After plugging the appliance into an outlet, the unit should be allowed to cool for 3 ~ 4 hours
before placing bottles in the appliance to ensure it reaches an appropriate, stable temperature.
BUILT –IN CABINET INSTRUCTIONS
This unit is designed for both built-in or free standing installation. If you plan to use this unit in a built-
in application please follow the requirements shown below.
← Figure shown
Cabinet Opening Dimensions
IN (min)
MM (min)
Width
24”
610 mm
Depth
24”
610 mm
Height
35”
889 mm
Figure shown →
Unit Dimensions
IN (min)
MM (min)
Width
23 2/5”
589 mm
Depth
(without handle)
20 4/5”
528 mm
Depth
(with Handle)
22 ¾”
578 mm
Height
34 1/4”
870 mm

7
The cutout dimension illustrated allows for a normal door opening clearance and access to the racks
when installed as a built-in appliance. If installing between frameless cabinets, a ½” wide filler strip or
side panel may be needed on the side with the hinge. This strip will act as a spacer between the
appliance case and adjacent cabinet door. The width of the opening must include the filter panels.
Note: The door should protrude at least 1” beyond the surrounding cabinets. The clearance is: 2”.
ELECTRICAL CONNECTION
This appliance should be properly grounded for your safety. The power cord of this appliance is
equipped with a three-prong plug which mates with standard three prong wall outlets to minimize the
possibility of electrical shock.
Do not under any circumstances cut or remove the third ground prong from the power cord supplied.
For personal safety, this appliance must be properly grounded.
This appliance requires a standard 115/120 Volt AC ~/60Hz electrical ground outlet with three-prong.
Have the wall outlet and circuit checked by a qualified electrician to make sure the outlet is properly
grounded. When a standard 2-prong wall outlet is encountered, it is your responsibility and obligation
to have it replaced with a properly grounded 3-prong wall outlet.
The cord should be secured behind the appliance and not left exposed or dangling to prevent
accidental injury.
The appliance should always be plugged into its own individual electrical outlet which has a voltage
rating that matches the rating label on the appliance. This provides the best performance and also
prevent overloading house wiring circuits that could cause a fire hazard from overheated. Never
unplug the appliance by pulling the power cord. Always grip the plug firmly and pull straight out from
the receptacle. Repair or replace immediately all power cords that have become frayed or otherwise
damaged. Do not use a cord that shows cracks or abrasion damage along its length or at either end.
When moving the appliance, be careful not to damage the power cord.
EXTENSION CORD
Because of potential safety hazards under certain conditions, it is strongly recommended that you do
not use an extension cord with this appliance. However, if you must use an extension cord it is
absolutely necessary that it be a UL/CUL-Listed, 3-wire grounding type appliance extension cord
having a grounding type plug and outlet and that the electrical rating of the cord be 115 volts and at
least 10 amperes.
SURGE PROTECTOR
Like the majority of electronics, you could need a surge protector (power bar). When there are
variations in electricity, the wine cooler shuts off in order to protect itself. To avoid damaging the
electronics components, you can connect a surge protector (power bar).
Warning
Improper use of the grounded plug can result in the risk of electrical shock. If the power cord is
damaged, have it replaced by an authorized service agent.

8
OPERATING YOUR WINE COOLER
It is recommended you install the wine cooler in a place where the ambient temperature is between
19ºC-24ºC (66ºF-75ºF). If the ambient temperature is above or below recommended temperatures,
the performance of the unit may be affected. For example, placing your unit in extreme cold or hot
conditions may cause interior temperatures to fluctuate. The range of 4ºC-20ºC (39ºF-68ºF) may not
be reached.
RECOMMENDED TEMPERATURE SETTINGS
Red Wine: 15℃-- 18℃/ 58°F -- 65°F
White Wine: 9°C -- 14°C / 48°F -- 57°F
Rose Wine: 10°C -- 11°C / 49°F -- 51°F
Sparkling Wine: 5℃-- 8℃/ 40°F -- 47°F
ON/OFF POWER
To turn ON/OFF the appliance, push and hold the button for 3 seconds.
CONTROL PANEL LOCK
Your wine cooler is equipped with an automatic control panel lock function. This function will prevent
any unwanted changes to your temperature or power settings. The lock function will activate
automatically 12 seconds after the last time a button is pushed on the control panel.
To unlock the control panel lock, press and hold both the buttons for 3 seconds, the control
panel will beep and blink once indicating that the control panel is active and the settings can be
changed. You must unlock the control panel every time you want to set the temperature, change the
display setting (°F - °C) turn on or off the light and to power off the cooler.
SETTING THE TEMPERATURE CONTROL
You can select temperature display setting from Fahrenheit to Celsius degree by touching the
button. Fahrenheit or Celsius degrees indicator will appear in the temperature display window.
If you desire to change the temperature, set the temperature as you desire by touching the or
button. The temperature that you desire to set will increase 1ºF or 1ºC if you touch the button
once; on the contrary the temperature will decrease 1ºF or 1ºC if you touch the button once.
NOTE: If the unit is unplugged, if the power is lost, or turned off, you must wait 3 to 5 minutes before
restarting the unit. If you attempt to restart before this time delay, the wine cooler will not start.
When you use the wine cooler for the first time or restart the wine cooler after having been shut off for
a long time, there could be a few degrees variance between the temperature you select and the one
indicated on the LED readout. This is normal and it is due to the length of the activation time. Once
the wine cooler is running for a few hours everything will be back to normal.
INTERIOR LIGHT
To turn the interior light ON or OFF, unlock the control panel then press the button. The light will
be turned off automatically if it remains ON for 10 minutes. To turn it on again, unlock the panel then
press the button again and the light will turn back on.

9
STORAGE
Many bottles may differ in size and dimensions. As such the actual number of bottles you may be able
to store may vary. You can place 44 standard bottles in this wine cooler. The upper zone can hold as
many as 16 wine bottles (2 rows of 8 bottles) and the lower zone can hold as many as 28 wine bottles
(2 rows x 8 bottles, plus 1 row x 12 bottles (6+6 stacked up)).
SHELVES
To prevent damaging the door gasket, make sure to have the door all the way opened (beyond 90
degrees) when pulling shelves out of the rail compartment. For easy access to the bottles, you must
pull the shelves approximately 1/3 out of the rail compartment.
To remove the shelves out of the rail pull each shelf approximately 1/3 out. Use a long flat screwdriver
to press down the right plastic notch as shown in Figure A and at the same time lift the left plastic
notch as shown in Figure B. Then proceed to pull out the shelf slowly.
To replace a shelve place the sides of the shelves back onto the supporting guides of the cabinet and
push back until the shelf tabs slide into place. NOTE: ENSURE THAT THE TABS ARE FIRMLY
LOCKED IN PLACE BEFORE STORING ANY BOTTLES.
CHARCOAL FILTRATION SYSTEM
Your wine is a living object that breathes through the cork of its bottle. In order to preserve the quality
and taste of your fine wines, they must be stored at the ideal temperature and ambient conditions.
Your cooler is equipped with an active charcoal filtration system to ensure air purity, cooling
efficiency, and to maintain an odor free cabinet for the storage of your wines. The filter assembly is
located at the rear panel inside your cooler. Keep in mind, that this filter must be changed every 12
months.
Remove the bottles of wine stored on the two (2) shelves in front of the filter.
Remove the shelves and set aside to be replaced once you have changed the filter.
Hold the filter and turn it at 45 degrees in the counter-clockwise direction and then pull it out.
Remove the existing filter and replace with a new one.
Put the new filter into the hole and then turn the filter at 45 degrees in clockwise direction.
Figure A
Figure B

10
CARE AND MAINTENANCE
DEFROST
Any ice build-up on the inner back wall during compressor operation will be automatically defrosted in
a compressor off cycle. When defrosting is in process, only the circulation fans for both zones run.
Defrost water will drain into the drip pan (on the compressor), and the water will be evaporated by the
compressor.
CLEANING YOUR WINE COOLER
Turn off the power, unplug the appliance, and remove all items including shelves.
Wash the inside surfaces with a warm water and baking soda solution. The solution should be
about 2 tablespoons of baking soda to a quart of water.
Wash the shelves with a mild detergent solution.
Wring excess water out of the sponge or cloth when cleaning area of the controls, or any
electrical parts.
Wash the outside cabinet with warm water and mild liquid detergent. Rinse well and wipe dry with
a clean soft cloth.
Do not use steel wool or steel brush on the stainless steel. These will contaminate the stainless
steel with steel particles and rusting may occur.
POWER FAILURE
Most power failures are corrected within a few hours and should not affect the temperature of your
appliance if you minimize the number of times the door is opened. If the power is going to be off for a
longer period of time, you need to take the proper steps to protect your contents.
MOVING YOUR WINE COOLER
Remove all items (bottles).
Securely tape down all loose items (shelves) inside your appliance.
Turn the adjustable leg up to the base to avoid damage.
Tape the door shut.
Be sure the appliance stays secure in the upright position during transportation. Also protect
outside of appliance with a blanket, or similar item.
ENERGY SAVING TIPS
The Wine Cooler should be located in the coolest area of the room, away from heat producing
appliances, and out of the direct sunlight.

11
TROUBLESHOOTING GUIDE
You can solve many common Wine Cooler problems easily, saving you the cost of a possible service
call. Try the suggestions below to see if you can solve the problem before calling the servicer.
PROBLEM
POSSIBLE CAUSE
SOLUTION
Cooler does not
operate.
Not plugged in.
The appliance is turned off.
The circuit breaker tripped or a blown fuse.
Plug the unit in.
Press to turn on the unit.
Check the breaker and/or fuses.
Cooler is not cold
enough.
External environment may require a higher
setting.
The door is opened too often.
The door is not closed completely.
The door gasket does not seal properly.
Check the temperature control setting.
Close the door properly.
Check the door gasket.
The compressor
turns on and off
frequently.
The room temperature is hotter than normal.
A large amount of contents has been added
to the cooler.
The door is opened too often.
The door is not closed completely.
The temperature control is not set correctly.
The door gasket does not seal properly.
Close the door properly.
Check the door gasket.
The light does not
work.
Not plugged in.
The circuit breaker tripped or a blown fuse.
The light button is “OFF”.
Plug in the unit.
Check the breaker and/or fuses.
Vibrations.
The cooler is not levelled.
The bottles are vibrating.
There is an object under the cooler.
Check to assure that the cooler is level.
Make sure the bottles don‟t touch each
other.
Remove the object.
The cooler seems to
make too much
noise.
The cooler is not level.
Level the cooler.
The rattling noise may come from the flow
of the refrigerant, which is normal. As each
cycle ends, you may hear gurgling sounds
caused by the flow of refrigerant in your
cooler. Contraction and expansion of the
inside walls may cause popping and
crackling noises.
The door will not
close properly.
The cooler is not level.
The door was reversed and not properly
installed.
The gasket is dirty.
The shelves are out of position.
Level the cooler.
Close the door properly.
Clean the door gasket.
Place the shelves properly.
Error Code:
E0-E1-E2
HH-LL
Error codes.
Contact us for a service call.

12
WIRING DIAGRAM

13
TABLE DES MATIÈRES
CONSIGNES DE SÉCURITÉ IMPORTANTS
14
SÉCURITÉ RELATIVE À L‟APPAREIL
14
CONSEILS DE SÉCURITÉ IMPORTANTS
15
PIÈCES ET CARACTÉRISTIQUES
16
PRÉPARATION ET INSTALLATION DU CELLIER
17
Préparation du cellier
17
Installation du cellier
17
Encastrement
17
Branchement au réseau électrique
18
Rallonge
18
Parasurtenseur (Powerbar)
18
FONCTIONNEMENT DE L‟APPAREIL
19
Recommandations relatives à la température
19
Interrupteur Marche/Arrêt
19
Déverrouillage du tableau de commande
19
Réglage de la température
19
Éclairage intérieur
20
Capacité d‟entreposage
20
Tablettes
20
Système de filtre au charbon
20
ENTRETIEN DE L‟APPAREIL
21
Decongélation
21
Nettoyage de l‟appareil
21
Panne de courant
21
Déplacement de l‟appareil
21
Conseils éconergétiques
21
GUIDE DE DÉPANNAGE
22
SCHÉMA DE CÂBLAGE
23

14
CONSIGNES DE SÉCURITÉ IMPORTANTES
AVERTISSEMENT
Pour diminuer les risques d‟incendie, d‟électrocution ou
d‟accident pendant l‟utilisation de votre appareil, veuillez
suivre les mesures de sécurité suivantes:
Veuillez lire toutes les instructions avant d‟utiliser l‟appareil.
DANGER ou AVERTISSEMENT: Les risques d‟enfermement ou de suffocation pour les
enfants demeurent une réalité. Les appareils abandonnés ou jetés demeurent un
danger, même s‟ils ne sont placés dans le garage que pour quelques jours.
Avant de jeter votre ancien appareil, enlevez les portes et laissez les tablettes à leur
place afin que les enfants ne puissent pas se glisser facilement à l‟intérieur.
Ne laissez pas d‟enfants jouer avec l‟appareil.
Ne nettoyez jamais les pièces de l‟appareil avec des liquides inflammables. Les vapeurs
provoquées par ces liquides risquent de déclencher un incendie ou une explosion
dangereuse.
Ne placez pas l‟appareil près d‟essence ou de tout autre produit liquide ou gazeux
inflammable. La fumée que ces produits dégagent pourrait déclencher un incendie ou
une explosion dangereuse. - Conservez ces instructions -
SÉCURITÉ RELATIVE À L’APPAREIL
Votre sécurité et celle des autres nous importent au plus haut point.
Ce manuel ainsi que votre appareil contiennent des symboles de sécurité dont vous devez tenir
compte et que vous devez respecter en tout temps.
Voici le symbole de sécurité. Ce symbole vous prévient des dangers potentiels
susceptibles de vous tuer ou de vous blesser ainsi que votre entourage. Tous les
signaux de sécurité seront précédés de ce symbole ainsi que des termes
« DANGER », « AVERTISSEMENT » et « ATTENTION ».
Danger » signifie que le fait de ne pas
tenir compte de ce signal de sécurité pourrait
entraîner des blessures corporelles ou la mort.
Avertissement » signifie que le fait de
ne pas tenir compte de ce signal peut causer
des dommages matériaux importants au
produit, des blessures corporelles graves et
même la mort.
Attention » signifie que le fait de ne
pas tenir compte de ce signal peut causer des
blessures corporelles mineures et des
dommages à la propriété ou à l‟équipement.
Les signaux de sécurité vous serviront à repérer les dangers potentiels, à réduire les risques de
blessure et à comprendre ce qui pourrait se produire si les instructions n‟étaient pas suivies.

15
CONSEILS DE SÉCURITÉ IMPORTANTS
Avant toute utilisation, le cellier doit être convenablement positionné et installé
comme il est décrit dans ce manuel, il est donc nécessaire de le lire attentivement.
Pour réduire les risques d‟incendie, d‟électrocution ou de blessure lors de
l‟utilisation de l‟appareil, nous vous recommandons de suivre les mesures de
sécurité suivantes:
Branchez l‟appareil à une prise triphasée mise à la terre, ne retirez pas la broche de masse, ne
pas utiliser d‟adaptateur ni de rallonge.
Replacez tous les panneaux avant de mettre en marche l‟appareil.
Il est recommandé de ne pas brancher cet appareil dans la prise d‟un autre appareil ni dans une
prise qui peut être éteinte par un interrupteur ou par une chaîne de traction.
Ne nettoyez jamais les pièces de l‟appareil avec des liquides inflammables. Les vapeurs
provoquées par ces liquides risquent de déclencher un incendie ou une explosion dangereuse.
Ne placez pas l‟appareil près d‟essence ou de tout autre produit liquide ou vaporeux inflammable.
La fumée que ces produits dégagent pourrait déclencher un incendie ou une explosion
dangereuse.
Évitez les risques d‟électrocution en débranchant l‟appareil avant de procéder à son nettoyage ou
à sa réparation.
Lorsque vous branchez ou débranchez l‟appareil, assurez-vous que vos mains sont bien sèches.
Ne tentez pas de réparer l‟appareil ni d‟en remplacer une pièce à moins que ce ne soit
spécifiquement recommandé dans ce manuel. Laisser à un technicien qualifié le soin de procéder
à toute réparation non recommandée.
Déplacez l‟appareil à deux ou à plusieurs personnes afin d‟éviter les blessures.
Pour assurer la ventilation convenable de l‟appareil, laissez-en le devant complètement dégagé.
Choisissez une pièce bien aérée d‟une température entre 60°F (16°C) à 90°F (32°C), à l‟abri des
éléments tels que le vent et la pluie ainsi que l‟eau pulvérisée et en gouttes.
Ne placez pas l‟appareil à proximité d‟un four, d‟une cuisinière ou de toute autre source de
chaleur.
Installez l‟appareil avec tous les branchements électriques requis par les codes provinciaux. Une
alimentation électrique standard (115 Volts CA uniquement et 60Hz) convenablement reliée à la
terre et conforme au Code canadien de l‟électricité et aux codes et aux ordonnances locaux est
requise.
Faites attention de ne pas plier ni coincer le cordon d‟alimentation de l‟appareil.
L‟intensité du fusible (ou du disjoncteur) doit être de 15 ampères.
Il est important que l‟appareil soit à niveau afin qu‟il fonctionne correctement. Il se peut que vous
deviez faire plusieurs ajustements pour y arriver.
Ne laissez pas d‟enfants jouer avec l‟appareil.
Pour nettoyer l‟appareil, n‟utilisez pas d‟agents abrasifs à base de solvant qui pourraient en
endommager ou en décolorer les surfaces.
N‟utilisez l‟appareil qu‟aux fins auxquelles il a été conçu.

16
PIÈCES ET CARACTÉRISTIQUES
1. Lumière intérieure –zone supérieure
2. Ventilateur intérieur –zone supérieure
3. Panneau de contrôle de la température
4. Lumière intérieure –zone inférieure
5. Ventilateur intérieur –zone inférieure
6. Coup-de-pied
7. Porte vitrée en acier inoxydable
8. Poignée en acier inoxydable
9. Serrure (certains modèles)
10. Pattes ajustables
11. Grandes tablettes –zone supérieure (2)
12. Grandes tablettes –zone inférieure (2)
13. Petite tablette –zone inférieure (1)

17
PRÉPARATION ET INSTALLATION DU CELLIER
PREPARATION DU CELLIER
Retirez l„emballage extérieur et intérieur. Lisez le mode d‟emploi.
Placez l‟appareil à l‟endroit qui lui est réservé puis attendez environ deux heures avant de le
brancher. Vous éviterez ainsi des troubles de fonctionnement au niveau du système de
refroidissement possiblement occasionnés lors du transport.
Nettoyez les surfaces intérieures avec un chiffon doux imbibé d‟eau tiède.
INSTALLATION DU CELLIER
Cet appareil autoportant est aussi encastrable.
Il doit être placé sur une surface solide qui en supportera le poids une fois rempli. Mettez-le à
niveau en ajustant les pieds réglables à l‟avant de l‟appareil.
Placez l‟appareil à l‟abri des rayons du soleil et de sources de chaleur (four, chauffage, radiateur,
etc.). Une exposition directe à la lumière du soleil peut affecter le revêtement acrylique de
l‟appareil et les sources de chaleur peuvent en faire augmenter la consommation d‟électricité.
Des températures ambiantes extrêmement froides peuvent aussi causer des problèmes de
fonctionnement. En raison de ces facteurs, cet appareil n'est pas conçu pour une utilisation dans
un garage ou dans toute autre installation à l'extérieur.
Évitez d‟installer l‟appareil dans des endroits.
Branchez l‟appareil seul dans une prise murale mise à la terre. Ne coupez ni enlevez sous aucun
prétexte la troisième broche du cordon d‟alimentation. Adressez toute question concernant
l‟électricité ou la mise à la terre à un électricien certifié ou à un centre de service autorisé. Cet
appareil ne convient pas pour un usage avec un convertisseur de courant, ni dans un véhicule
récréatif
Après avoir branché l'appareil dans une prise, l'appareil doit être laissé à refroidir pendant 3 à
4 heures avant de placer les bouteilles dans l'appareil pour s'assurer qu'il atteint une température
appropriée et stable.
ENCASTREMENT
Cet appareil est prévu pour une installation autoportante ou encastrée. Si vous pensez l‟utiliser
encastré, veuillez suivre les conditions présentées ci-dessous.
← Figure
Dimensions de l‟encastrement
IN (min)
MM (min)
Largeur
24”
610 mm
Profondeur
24”
610 mm
Hauteur
35”
889 mm
Figure →
Dimensions de l‟appareil
IN (min)
MM (min)
Largeur
23 2/5”
589 mm
Profondeur (without
handle)
20 4/5”
528 mm
Profondeur (with
Handle)
22 ¾”
578 mm
Hauteur
34 1/4”
870 mm

18
Si l'installation se fait entre des armoires sans cadre, une fourrure d‟un ½ " de large ou une bande
panneau latérale pourra être nécessaire du côté charnière. La bande agira comme un espacement
entre le boitier de l'appareil et la porte du cabinet adjacent. La largeur de l‟ouverture doit inclure le
panneau ou la fourrure.
Note: La porte doit excéder d‟au moins 1 "au-delà des armoires environnantes et il doit y a avoir au
moins 2” de dégagement autour.
BRANCHEMENT AU RESEAU ELECTRIQUE
Pour votre sécurité, l‟appareil doit être convenablement mis à la terre. Afin de minimiser les risques
d‟électrocution, le cordon d‟alimentation de cet appareil est muni d‟une prise à trois broches qui se
branche dans une prise murale standard à trois broches.
Ne coupez pas et n‟enlevez pas, sous aucun prétexte, la troisième broche du cordon d‟alimentation.
Pour votre sécurité, l‟appareil doit être convenablement mis à la terre.
Cet appareil est conçu pour fonctionner avec une prise de courant mise à la terre standard à trois
broches de 115/120 V c.a. et 60 Hz. Faîtes vérifier la prise murale et le circuit électrique par un
électricien qualifié pour vous assurer que la prise de courant est bien mise à la terre. Si la prise
murale comporte deux broches, vous devez la remplacer ou la faire remplacer par une prise murale à
trois broches mise à la terre.
Gardez le cordon d‟alimentation derrière l‟appareil ou enroulé de façon à éviter les blessures
accidents.
L‟appareil doit toujours être branché seul à une prise murale dont la tension correspond à celle
indiquée afin d‟offrir le meilleur fonctionnement possible, mais aussi d‟éviter une surchauffe des
circuits électriques qui pourrait provoquer un incendie. Ne débranchez jamais l‟appareil en tirant sur le
cordon d‟alimentation. Tenez plutôt fermement la fiche. Réparez ou remplacez immédiatement le
cordon d‟alimentation s‟il est effilé ou abîmé. N‟utilisez jamais de cordon d‟alimentation fissuré ou usé
au niveau de la gaine ou de la fiche. Lorsque vous devez déplacer l‟appareil, assurez-vous de ne pas
abîmer le cordon d‟alimentation.
RALLONGE
En raison des dangers potentiels qu‟elles présentent dans certaines circonstances, il est fortement
recommandé de ne pas utiliser de rallonge avec cet appareil. Cependant, s‟il est nécessaire d‟en
utiliser une, il est indispensable qu‟elle soit homologuée par la CSA/CUL/UL de 115 volts, à trois
conducteurs avec prise triphasée mise à la terre et d‟au moins 10 ampères.
PARASURTENSEUR (Powerbar)
Comme la plupart des appareils munis de composantes électroniques, vous pourriez avoir besoin
d‟un parasurtenseur (powerbar). Lorsqu‟il y a des variations dans l‟électricité, le cellier se ferme afin
de se protéger. Pour éviter d‟endommager les composantes électroniques, vous pouvez brancher un
parasurtenseur (powerbar).
AVERTISSEMENT
Une mauvaise utilisation de la prise mise à la terre peut présenter des risques d‟électrocution. Si
le cordon d‟alimentation est endommagé, faîtes-le remplacer par un centre de service autorisé
agréé.

19
FONCTIONNEMENT DE L’APPAREIL
Il est recommandé de placer l‟appareil dans un endroit où la température ambiante se situe entre 19°
et 24°C (66°F-75°F). Si la température ambiante est supérieure ou inférieure à la température
recommandée, il se peut que le fonctionnement de l‟appareil en soit affecté. Par exemple, exposer
votre appareil à un froid extrême ou à de fortes chaleurs peut faire fluctuer les températures
intérieures et empêcher l‟atteinte de l‟amplitude de 4° à 20°C (39°F-68°F).
RECOMMENDATIONS RELATIVES A LA TEMPERATURE
Vins Rouges: 15℃-- 18℃/ 58°F -- 65°F
Vins Blancs: 9°C -- 14°C / 48°F -- 57°F
Vins Roses: 10°C -- 11°C / 49°F -- 51°F
Vins Mousseux: 5℃-- 8℃/ 40°F -- 47°F
INTERRUPTEUR MARCHE/ARRET
Pour éteindre l'appareil, déverrouillez le panneau de contrôle et appuyez sur pendant 3
secondes.
DEVERROUILLAGE DU TABLEAU DE COMMANDE
L‟appareil est équipé d‟un dispositif automatique de verrouillage de tableau de commande. Ce
dispositif empêche tout changement indésirable des paramètres de température ou d‟alimentation. La
fonction de verrouillage s‟active automatiquement 12 secondes après la dernière pression d‟une
touche au tableau de commande.
Pour déverrouiller le tableau de commande, maintenez enfoncé les boutons pendant 3
secondes; le tableau de commande émettra un signal sonore et clignotera une fois pour indiquer qu‟il
est actif et prêt à accepter de nouveaux paramètres. Vous devez déverrouiller le panneau de
commande à chaque fois que vous voulez régler la température, changer l‟affichage (C° - °F), allumer
ou éteindre la lumière ainsi que pour éteindre le cellier.
REGLAGE DE LA TEMPERATURE
Vous pouvez choisir d‟afficher la température en Fahrenheit ou en Celsius en touchant le bouton .
La sélection apparaîtra dans la fenêtre d‟affichage. Si vous désirez changer la température, appuyer
sur un des 2 boutons suivants : ou . La température augmentera 1°F ou 1°C si vous touchez
le bouton une fois. En touchant le bouton , la température diminuera 1ºF ou 1ºC.
REMARQUE: Si l‟appareil est débranché, éteint ou qu‟il y a une panne de courant, il faudra attendre
entre 3 et 5 minutes avant de redémarrer l‟appareil. Si vous tentez de le faire avant ce délai, l‟appareil
ne redémarrera pas.
Si vous utilisez l‟appareil pour la première fois ou que vous le redémarrez après qu‟il ait été arrêté
pendant une longue période, il pourrait y avoir un décalage de quelques degrés entre la température
que vous avez sélectionnée et celle indiquée sur l‟affichage à DEL. Ceci est normal étant donné la
durée du temps d‟activation. Lorsque l‟appareil aura fonctionné quelques heures, tout rentrera dans
l‟ordre.

20
ÉCLAIRAGE INTERIEUR
S‟il est laissé allumer, l‟éclairage intérieur s‟éteindra automatiquement au bout de dix minutes. Vous
devrez alors déverrouiller le panneau de contrôle et appuyer sur l‟icône représentant l‟éclairage
pour le rétablir.
CAPACITE D’ENTREPOSAGE
Les bouteilles peuvent varier en taille et en dimension. Ainsi, le nombre réel de bouteilles qu‟il vous
sera possible d‟entreposer variera également. Ce cellier à vin peut contenir 44 bouteilles de taille
standard. Dans la zone du haut, 2 tablettes de 8 bouteilles, dans la zone du bas, 2 tablettes de
8 bouteilles plus 1 tablette de 12 bouteilles (6+6 empilées).
TABLETTES
Pour éviter d‟endommager le coupe-froid de la porte, assurez-vous d'ouvrir la porte complètement
(au-delà de 90 degrés) quand vous retirez une tablette. Pour prendre les bouteilles aisément, il faut
tirer les étagères d‟environ le tiers de leurs rails.
Pour sortir une tablette de son rail, tirez-en environ le tiers vers l‟extérieur. Prenez un long tournevis
plat pour appuyer sur l‟encoche en plastique de gauche, tel qu‟indiqué à la Figure A, et soulevez
simultanément l‟encoche en plastique de droite tel qu‟indiqué à la Figure B. Tirez ensuite doucement
la tablette.
Pour replacer une tablette, posez les côtés de la tablette sur les rails de soutien de l‟armoire et
repoussez-la jusqu'à ce que les onglets de la tablette se mettent en place. REMARQUE: VÉRIFIER
QUE LES ONGLETS SOIENT SOLIDEMENT EN PLACE AVANT DE STOCKER DES BOUTEILLES.
SYSTÈME DE FILTRE AU CHARBON
Votre vin est un produit vivant qui respire par le bouchon de sa bouteille. Afin de préserver la qualité
et le goût de vos grands vins, ces derniers doivent être entreposés à des températures et à des
conditions ambiantes idéales.
Votre cellier est équipé d‟un filtre au charbon, veillant à assurer la pureté de l‟air et à éliminer les
odeurs pendant l‟entreposage de vos vins. N‟oubliez pas que le filtre doit être remplacé tous les
12 mois.
Retirer les bouteilles dans les 2 tablettes devant le filtre.
Retirer les tablettes et laisser les côtés.
Tener et tourner le filtre à 45° dans le sens des aiguilles d‟une montre et tirer.
Remplacer le filtre par un nouveau.
Remettre le nouveau filtre en tournant à 45° dans le sens contraire des aiguilles d‟une montre.
Figure A
Figure B
Table of contents
Languages:
Other Fagor Kitchen Appliance manuals

Fagor
Fagor SW-200-400 User manual

Fagor
Fagor CF-200 - 2008 User manual

Fagor
Fagor CF-150 User manual

Fagor
Fagor NC-200 PB - V0111 User manual

Fagor
Fagor BC-79 User manual

Fagor
Fagor VT-6 User manual

Fagor
Fagor Electric Multi-Cooker User manual

Fagor
Fagor CF-172 User manual

Fagor
Fagor LUX User manual

Fagor
Fagor IO-RFW-0051/6 User manual

Fagor
Fagor LC-190 User manual

Fagor
Fagor LC-300 User manual

Fagor
Fagor PRES-05 User manual

Fagor
Fagor CF-200 - 2003 User manual

Fagor
Fagor 3WCI-4540N User manual

Fagor
Fagor NC-200 PB - V0111 User manual

Fagor
Fagor FDD24 User manual

Fagor
Fagor NC-200 PB - V0111 User manual

Fagor
Fagor LC-500 User manual

Fagor
Fagor Electric Multi-Cooker User manual