manuals.online logo
Brands
  1. Home
  2. •
  3. Brands
  4. •
  5. FARFISA INTERCOMS
  6. •
  7. Intercom System
  8. •
  9. FARFISA INTERCOMS Agora AG100TS User manual

FARFISA INTERCOMS Agora AG100TS User manual

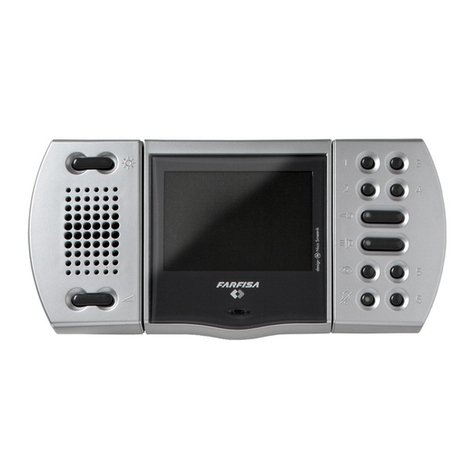
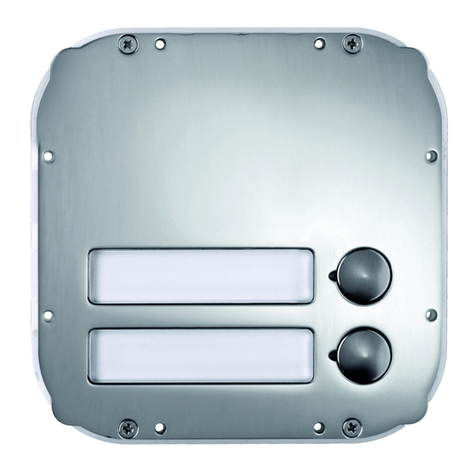
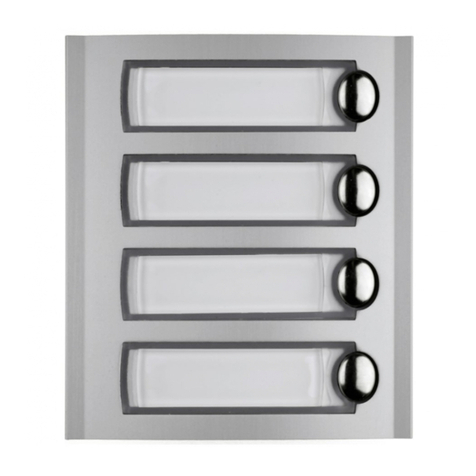
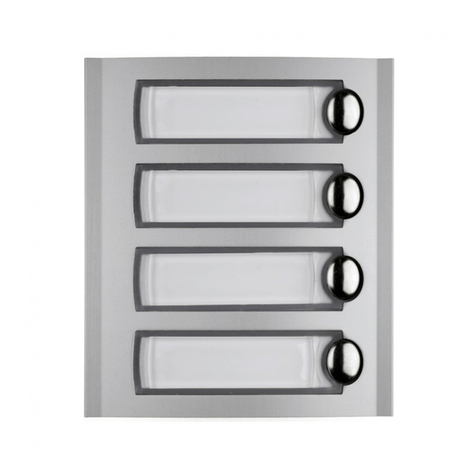
AG100TS AGL100TS
Mi 2418
AG100TS
AGL100TS VD2121CAG
VD2121CAGL
AG100TS
AGL100TS
VD2121CAG
VD2121CAGL
1
2
3
PulsantiereserieAgoràpersistemadigitaleDUO
Agoràexternalpush-buttonpanelsfordigitalsystemDUO
PlaquesderuesérieAgoràpoursystèmedigitalDUO
PlacasdecalleserieAgoràparasistemadigitalDUO
BotoneirassérieAgoràparasistemadigitalDUO
TürstationenSerieAgoràfürDUOBussystem
Cod. 52704520
ACIsrlFarfisa Intercoms
Via E. Vanoni, 3 • 60027 Osimo (AN) • Italy
Tel:+39 0717202038 (r.a.)• Fax:+39 0717202037
e-mail:[email protected]•www.acifarfisa.it
Smaltireil dispositivosecondoquanto prescrittodalle normeperla tuteladell'ambiente.
Disposeofthedevice inaccordancewithenvironmental regulations.
Écouler le dispositif selon tout ce qu'a été prescrit par les règles pour la tutelle du milieu.
Eliminar el aparato según cuánto prescrito por las normas por la tutela del entorno.
Disponhadodispositivoconformeregulamentosambientais.
DasGerätmußgemäßdengeltendenUmweltregelungenentsorgtwerden.
La ACI Srl Farfisa Intercoms si riserva il diritto di modificare in qualsiasi momento i prodotti qui illustrati.
La ACI Srl Farfisa Intercoms se réserve le droit de modifier à tous moments les produits illustrés.
E’ reservada à ACI Srl Farfisa intercoms o direito de modificar a qualquer momento os produtos aqui ilustrados.
ACI Srl Farfisa Intercoms reserves the right to modify the products illustrated at any time.
ACI Srl Farfisa intercoms se reserva el derecho de modificar en cualquier momento los productos ilustrados aquí
Änderungenvorbehalten.
Codificadellepulsantiere-
Codingthepush-buttonpanels
-Coderlesplaquesderue
Codificacióndelasplacas-Decodificaçãodasbotoneiras-
KodierungderKlingelplatten
Posizione dei microinterruttori
Microswitchposition
Position des micro-interrupteurs
Posicióndelosmicrointerruptores
Posição dos microinterruptores
PositionderMikroschalter
Numero di fila
Row number
Numéroderangée
Número de fila
Número de fila
Reihennummer
1
2
3
4
5
6
7
8
0
9
10
11
12
13
14
15
(*)Non utilizzare. Riservato alle VD2121CAGe VD2121CAGL
(*) Ne pas utiliser. Réservé aux VD2121CAG et VD2121CAGL
(*) No utilizar. Reservado a las VD2121CAG y VD2121CAGL
Posizione dei microinterruttori
Microswitchposition
Position des micro-interrupteurs
Posicióndelosmicrointerruptores
Posição dos microinterruptores
PositionderMikroschalter
Numero di fila
Row number
Numéroderangée
Número de fila
Número de fila
Reihennummer
(*) Do not use. Reserved for VD2121CAG and VD2121CAGL
(*) Não utilizar. Reservado as VD2121CAG e VD2121CAGL
(*) Nicht verwenden. VD2121CAG und VD2121CAGL vorbehalten
(*)
AG100TS
AGL100TS
VD2121CAG
VD2121CAGL
AG21
AGL21
AG20
AGL20
AG100TS
AGL100TS
VD2121CAG
VD2121CAGL
AG100TS
AGL100TS
45
6
SEQUENZAMONTAGGIOMODULI
ASSEMBLY MODULE SEQUENCE
SÉQUENCE DE MONTAGE DES MODULES
SECUENCIA MONTAJE MÓDULOS
SEQUÊNCIA DE MONTAGEM DE MÓDULOS
REIHENFOLGE BEI DER MODULMONTAGE
CODIFICACIÓN PLACA
Las placas AG100TS y AGL100TS tienen que
codificarse para asignar a los pulsadores una
numeración progresiva, en particular se
necesitaasignaracadaplacasupropionúmero
de fila actuando sobre los microinterruptores
SW1.
Por defecto están codificadas con número de
fila 1(codificación recomendada para la
primera placa adicional); modificar el número
de fila de las placas siguientes moviendo
correctamente los microinterruptores SW1
segúnindicadoenlatabladelapáginaanterior.
Para asignar la dirección del primer pulsador
delaprimeraplacaadicionalsenecesitaseguir
las indicaciones de programación del
codificador VD2121CAG o VD2121CAGL
(código de programación 113).
Notas:
- No utilizar el número de fila 0 (cero) puesto
que está reservado a la placa de calle
VD2121CAG o VD2121CAGL.
- Cada placa adicional tiene que tener un
número de fila diferente.
- Paratener una numeración progresiva de los
pulsadores se necesita aplicar números de
fila progresivos (1, 2, 3, etc.).
- Los números de eventuales pulsadores no
instalados en la placa quedarán inutilizados.
Códigos 112 y 113.
Códigos de acceso para
programar el 1° pulsador (Pn) de
las placas de calle VD2121CAG,
VD2121CAGL, AG100TS y
AGL100TS.Estaprogramaciónse
realiza desde la placa de calle de
videoportero VD2121CAG o
VD2121CAGL.
Pn-P1 y Pn÷P7. Direcciones de
los usuarios internos llamados
desde estos pulsadores.
Ejemplosdedirección-Exemplosdeendereço
-Adressenbeispiele
DECODIFICAÇÃO BOTONEIRA
As botoneiras AG100TS e AGL100TS devem
ser codificadas para atribuir aos botões uma
numeração progressiva, em particular, é
necessário atribuir a cada botoneira o próprio
número de fila agindo sobre os microinter-
ruptoresSW1.
Defábrica, asbotoneirassãocodificadascom
númerodefila1
(codificaçãoaconselhadapara
aprimeirabotoneiraadicional)
;alteraronúmero
de fila das botoneiras sucessivas deslocando
corretamenteosmicrointerruptoresSW1como
indicado na tabela da página precedente.
Para atribuir o endereço do primeiro botão da
primeira botoneira adicional, é necessário
seguir as indicações de programação do
codificador VD2121CAG ou VD2121CAGL
(
código de programação 113
).
Notas:
- Nãoutilizaronúmerodefila0(zero)umavez
que é reservado ao posto externo
VD2121CAG ou VD2121CAGL.
- Cada botoneira adicional deve possuir um
númerodefila diferentedaoutra.
- Para obter uma numeração progressiva dos
botões, é necessário aplicar números de fila
progressivos(1,2,3, etc.).
- Os números de eventuais botões não
instaladosna placaserãoinutilizados.
Códigos 112 e 113. Códigos de
acessoparaprogramaro 1°botão
(Pn) dos postos externos
VD2121CAG, VD2121CAGL,
AG100TS e AGL100TS.
Esta programação efetua-se do
posto externo vídeo-porteiro
VD2121CAG ou VD2121CAGL.
Pn-P1 e Pn÷P7. Endereços dos
utilizadoresinternoschamadospor
estesbotões.
KODIERUNG DER KLINGELPLATTE
Die Klingelplatten AG100TS und AGL100TS
müssen programmiert werden, um den Tasten
fortlaufende Nummern zuzuweisen;
insbesondere muss jeder Klingelplatte mithilfe
der Mikroschalter SW1 ihre jeweilige
Reihennummer zugeteilt werden.
Werkseitig sind sie mit Reihennummer 1
(empfohlene Kodierung für die erste
Zusatzklingelplatte)kodiert;dieReihennummern
der folgenden Klingelplatten werden durch
Umstecken der Mikroschalter SW1 gemäß der
TabelleaufdervorhergehendenSeitegeändert.
Um der Ersten Taste der ersten Zusatzklingel-
platte eine Adresse zuzuweisen, sind die
Anweisungen zur Programmierung der
Kodiereinheit VD2121CAG oder VD2121CAGL
(Programmierungs-code113)
zubeachten.
Hinweise:
- DieReihennummer0(null)darfnichtverwendet
werden, da sie der Türstation VD2121CAG
oder VD2121CAGL vorbehalten ist.
- Jede Zusatzklingelplatte muss ihre eigene
Reihennummer besitzen.
- Zur fortlaufenden Nummerierung der Tasten
müssen fortlaufende Reihennummern (1, 2, 3
usw.)verwendetwerden.
- Die Nummern der eventuell nicht installierten
Tasten auf der Klingelplatte dürfen nicht
verwendetwerden.
Code 112 und 113. Zugangs-
codes zur Programmierung der
ErstenTaste(Pn)derTürstationen
VD2121CAG, VD2121CAGL,
AG100TS und AGL100TS.
Diese Programmierung wird von
der Videosprechanlagen-Tür-
station VD21121CAG oder
VD2121CAGLausvorgenommen
Pn-P1 und Pn÷P7. Adressen der
internen Teilnehmer, die mit
diesenTasten angerufen werden.
VD2121CAG - VD2121CAGL 1° AG100TS 2° AG100TS 3° AG100TS
AGL100TS AGL100TS AGL100TS
Programación Programación
Programação Programação
Programmierung Programmierung
(cod.112) (Pn-P1) (cod.113) (Pn÷P7) (Pn÷P7) (Pn÷P7)
001 1-2 003 3 ÷ 10 11 ÷ 18 19 ÷ 26
050 50-51 052 52 ÷ 59 60 ÷ 67 68 ÷ 75
100 100-101 102 102 ÷ 109 110 ÷ 117 118 ÷ 125
100 100-101 110 110 ÷ 117 118 ÷ 125 126 ÷ 133
125 125-126 127 127 ÷ 134 135 ÷ 142 143 ÷ 150
9
AG21
AGL21
AG21
AGL21
7
10
11
8
CODIFICA PULSANTIERA
LepulsantiereAG100TSedAGL100TSdevono
esserecodificateperassegnareaipulsantiuna
numerazione progressiva, in particolare è ne-
cessarioattribuireaciascunapulsantierailpro-
prio numero di fila agendo sui microinterruttori
SW1.
Difabbrica esse sono codificate connumero di
fila 1
(codifica consigliata per la prima
pulsantiera aggiuntiva)
; cambiare il numero di
filadellepulsantieresuccessivespostandocor-
rettamenteimicrointerruttoriSW1comeindica-
tonellatabella dellapaginaprecedente.
Perassegnarel'indirizzodelprimopulsantedel-
laprimapulsantiera aggiuntivaoccorreseguire
leindicazionidiprogrammazionedelcodificatore
VD2121CAG o VD2121CAGL (
codice di pro-
grammazione 113
).
Note:
- Nonutilizzareilnumerodifila0(zero)inquanto
riservato al posto esterno VD2121CAG o
VD2121CAGL.
- Ogni pulsantiera aggiuntiva deve avere un
numerodifiladiversodall'altra.
- Per avere una numerazione progressiva dei
pulsanti occorre applicare numeri di fila
progressivi(1, 2, 3, ecc.).
- Inumeridieventualipulsantinoninstallatisulla
placcasarannoinutilizzati.
VD2121CAG - VD2121CAGL 1° AG100TS 2° AG100TS 3° AG100TS
AGL100TS AGL100TS AGL100TS
Programmazione Programmazione
Programming Programming
Programmation Programmation
(cod.112) (Pn-P1) (cod.113) (Pn÷P7) (Pn÷P7) (Pn÷P7)
001 1-2 003 3 ÷ 10 11 ÷ 18 19 ÷ 26
050 50-51 052 52 ÷ 59 60 ÷ 67 68 ÷ 75
100 100-101 102 102 ÷ 109 110 ÷ 117 118 ÷ 125
100 100-101 110 110 ÷ 117 118 ÷ 125 126 ÷ 133
125 125-126 127 127 ÷ 134 135 ÷ 142 143 ÷ 150
Codici 112 e 113. Codici di ac-
cesso per programmare il 1° pul-
sante (Pn) dei posti esterni
VD2121CAG, VD2121CAGL,
AG100TS e AGL100TS. Questa
programmazionesieffettuadalpo-
sto esterno videocitofonico
VD2121CAG o VD2121CAGL.
Pn-P1 e Pn÷P7. Indirizzi degli
utenti interni chiamati da tali pul-
santi.
Esempidiindirizzo-
Codingthepush-buttonpanels-
Exemplesd’adresses
CODING THE PUSH-BUTTON
PANEL
The AG100TS and AGL100TS push-button
panels must be coded to assign a progressive
numbering to the buttons, therefore it is
necessary to assign to each push-button panel
its own row number setting correctly the
microswitchesSW1.
By default the push-button panels are coded
with row number 1
(code recommended for the
first additional push-button panel)
; change the
row number of the next push-button panels by
setting the microswitches SW1 as indicated in
the previous page table.
To assign the address of the first button of the
firstadditionalpush-buttonpanelyoumustfollow
the programming instructions of the
VD2121CAG or VD2121CAGL encoder
(programmingcode113)
.
Notes:
- Do not use row number 0 (zero) since it is
reserved for the VD2121CAG or
VD2121CAGL external door station.
- Each additional push-button panel must have
adifferentrow number.
- To have a progressive numbering of the
buttons you must assign progressive row
numbers (1, 2, 3, etc.).
- The numbers of any buttons not installed in
the plate will not be used.
Codes 112 and 113. Access
codes to programme the first
button (Pn) of the VD2121CAG,
VD2121CAGL, AG100TS and
AGL100TSexternaldoorstations.
This setting is made from the
VD2121CAG or VD2121CAGL
external videointercom station.
Pn-P1 and Pn÷P7. Addresses of
internal users called from these
buttons.
CODER LA PLAQUE DE RUE
Les plaques de rue AG100TS et AGL100TS
doivent être codées afin d’affecter une
numérotation progressive aux boutons-
poussoirs, notamment il faut affecter à chaque
plaquederuesonnuméroderangéeenagissant
surlesmicro-interrupteursSW1.
D’usine, elles sont codées sous le numéro de
rangée 1
(codage conseillé pour la première
plaque de rue supplémentaire);
changer le
numéro de rangée des plaques de rue
successives en déplaçant correctement les
micro-interrupteurs SW1 comme indiqué dans
le tableau de la page précédente.
Pour affecter l’adresse du premier bouton-
poussoir de la première plaque de rue
supplémentaire,ilfautsuivreles indications de
programmation du codeur VD2121CAG ou
VD2121CAGL (
code de programmation 113
).
Note:
- Nepasutiliserlenuméroderangée0(zéro)car
ilestréservéaupostede rueVD2121CAGou
VD2121CAGL.
- Lenuméroderangéedechaqueplaquederue
supplémentairedoitêtredifférentdel’autre.
- Pourobtenirunenumérotationprogressivedes
boutons-poussoirs, il faut appliquer des
numérosderangéeprogressifs(1,2,3,etc.).
- Lesnumérosdeséventuelsboutons-poussoirs
non installés sur la plaque de rue seront
inutilisés.
Codes112et113.Codesd’accès
pour programmer le 1er bouton-
poussoir (Pn) des postes de rue
VD2121CAG, VD2121CAGL,
AG100TS et AGL100TS. Cette
programmation s’effectue sur le
poste externe vidéophonique
VD2121CAG ou VD2121CAGL.
Pn-P1 et Pn÷P7. Adresses des
utilisateurs externes appelés
moyennantcesboutons-poussoirs.
1°pulsante
-poussoir-
pulsador
1
st
button -
botão
- Ruftaste
2°pulsante
-poussoir-
pulsador
2
nd
button -
botão
- Ruftaste
3°pulsante
-poussoir-
pulsador
3
rd
button -
botão
- Ruftaste
4°pulsante
-poussoir-
pulsador
4
th
button -
botão
- Ruftaste
5°pulsante
-poussoir-
pulsador
5
th
button -
botão
- Ruftaste
6°pulsante
-poussoir-
pulsador
6
th
button -
botão
- Ruftaste
7°pulsante
-poussoir-
pulsador
7
th
button -
botão
- Ruftaste
8°pulsante
-poussoir-
pulsador
8
th
button -
botão
- Ruftaste
SW1 -microinterruttoriperlacodificadellapulsantiera
- microswitches for push-button encoding
-micro-interrupteurs pourcoderlaplaque derue
- microinterruptores para la codificación de la placa
- microinterruptores para a codificação da botoneira
- Mikroschalter zur Kodierung der Klingelplatte
A+A- morsettiperl'alimentazioneesternadeiLedillumina-cartellini
- terminals for external power supply of name-plate LEDs
- bornes pour l’alimentation externe des leds préposés à éclairer les
étiquettes
- terminales para la alimentación externa de los led tarjeteros
-terminais paraaalimentação externadosled ilumina-cartõezinhos
- Klemmen zur externen Versorgung der LEDs für die
Namensschilderbeleuchtung
J1 - Ponticello mobile per selezionare l'alimentazione dei led illumina-
cartellinidapulsantiera precedente o appositotrasformatore
- Mobile jumper to select power supply of name plate LEDs from
previous push-button panel or specific transformer
- Pontet mobile pour sélectionner l’alimentation des leds préposés à
éclairerles étiquettesdeplaque derueprécédente oumoyennantun
transformateurprévuàceteffet
- Puente móvil para seleccionar la alimentación de los led tarjeteros
de placa anterior o transformador
- Pontinho móvel para selecionar a alimentação dos led ilumina-
cartõezinhosda botoneiraprecedenteorespectivotransformador
-UmsteckbarerJumper zur EinstellungderVersorgungderLEDs für
die Namensschilderbeleuchtung durch vorhergehende Klingelplatte
oder speziellen Transformator
JP1 -connessioneal posto esternoopulsantieraprecedente
-connectiontoexternaldoorstationorpreviouspush-buttonpanel
-connexionau poste de rue ou à la plaquederueprécédente
- conexión a la placa de calle o placa anterior
-conexãoaopostoexternoou botoneira precedente
- Anschluss an Türstation oder vorhergehende Klingelplatte
JP2 -connessioneallapulsantierasuccessiva
- connection to next push-button panel
-connexionàla plaque de ruesuccessive
- conexión a la placa siguiente
-conexãoàbotoneirasucessiva
- Anschluss an nächste Klingelplatte
Illuminazioneporta-cartellini
L'alimentazionedeiLedillumina-cartellinideve
essere fornita da un apposito trasformatore.
Usando il PRS210 si possono alimentare 6
pulsantiere.
Per il collegamento procedere come segue:
-togliere il ponticello che unisce i 2 poli di J1
dellaprimapulsantierachesivuolalimentare
esternamente;
- collegare ai morsetti A+/A- i 2 conduttori di
alimentazione;
VD2121CAG
AG100TS
230V
127V
0
A+
A-
2220S
J1
J1
- le pulsantiere successive devono avere il
ponticello inserito ed i morsetti liberi essendo
alimentatedaicavetti di connessione.
Name-platelighting
Thepowersupplyofthename-plateLEDsmust
be provided by a specific transformer. The
PRS210 can power 6 push-button panels.
To make the connection, you must:
-removethejumperthatconnectsthetwopoles
ofJ1ofthefirstpush-buttonpanelyouwantto
powerexternally;
-connectthetwopowercablesto terminalsA+/
A;
- the next push-button panels must have the
jumper inserted and the free terminals, being
powered by the connection cables.
Éclairagedesporte-étiquette
L’alimentation des leds prédisposés à éclairer
les étiquettes doit être fournie par un
transformateurprévuàceteffet.Onpeutalimenter
jusqu’à6plaquesderueseninstallantlePRS210.
Pourlaconnexion,procédercommesuit:
-enlever le pontet qui unitles 2 pôles de J1 de
la première plaque de rue que l’on veut
alimenterdemanièreexterne;
-brancherles2conducteursd’alimentationaux
bornesA+/A-;
- lesplaquesderuesuccessivesdoiventavoirle
pontetinséréetlesborneslibrescaralimentées
parlescâblesde connexion.
Iluminacióntarjeteros
La alimentación de los led tarjeteros tiene que
ser suministrada por un transformador
específico.PRS210permitealimentar6placas.
Para la conexión se necesita:
-quitar elpuente que une los 2 polos deJ1 de
la primera placa que se quiere alimentar
externamente;
- conectar los 2 conductores de alimentación a
los terminales A+/A-;
- lasplacassiguientestienequetenerelpuente
insertado y los terminales libres siendo
alimentadas por los cables de conexión.
Namensschilderbeleuchtung
Die LEDs für die Namensschilderbeleuchtung
müssen mit einem speziellen Transformator
gespeist werden. Mit dem PRS210 können bis
zu 6 Klingelplatten gespeist werden.
Das Bauteil ist wie folgt anzuschließen:
- Jumper zur Verbindung der beiden Pole von
J1 der ersten Klingelplatte entfernen, die
extern gespeist werden soll;
Iluminaçãoporta-cartõezinhos
Aalimentaçãodosledilumina-cartõezinhosdeve
serfornecidaporumrespectivotransformador.
Usando o PRS210 podem-se alimentar 6
botoneiras.
Para a ligação, proceder como segue:
-retiraropontinhoqueuneos2pólosdeJ1da
primeira botoneira que se deseja alimentar
externamente;
- Die beiden Speiseleiter an die Klemmen A+/
A- anschließen;
- Bei den nächsten Klingelplatten muss der
JumpereingestecktunddieKlemmenmüssen
frei sein, da sie über die Anschlusskabel
gespeistwerden.
- ligar aos terminais A+/A- os 2 condutores de
alimentação;
- asbotoneirassucessivasdevemteropontinho
inserido e os terminais livres, sendo
alimentadospeloscabinhos de conexão.
Note: in case of a single additional AG100TS
push-buttonpanelthepowersupplyofthename-
plate LEDs can be provided by the transformer
art.2220SthatpowerstheVD2121CAGexternal
door station, as shown in the figure.
Nota:incasodiun'unicapulsantieraaggiuntiva
AG100TSl'alimentazionedeiledillumina-cartelli-
nipuòesserefornitadaltrasformatoreart.2220S
chealimentailpostoesternoVD2121CAGcome
riportatoinfigura.
Note: en cas d'une plaque de rue unique addi-
tionnel AG100TS l'alimentation de led éclairer-
étiquettes elle peut être fournie par le transfor-
mateurart.2220Squ'ilalimentelaplaquederue
VD2121CAGcommereportéenillustration.
Nota: en caso de una única placa de calle
adicional AG100TS la alimentación de led ilu-
minar-etiquetaspuedeserprovistaporeltrans-
formador art.2220S que alimenta el puesto
exterior VD2121CAG como indicado en figura.
Hinweise: bei einer einzigen Klingelplatte zu-
sätzlicherAG100TSdieErnährungvonledsfür
die Namensschilderbeleuchtung können vom
Transformatorart.2220Sgeliefert werden, daß
es den Klingelplatte ernährt, äußere ich
VD2121CAG wie bringt wieder in Figur.
Nota:nocasodeumaúnicabotoneiraadicional
AG100TS a alimentação dos LED ilumina-
cartõezinhospodeserprovidopelotransforma-
dor art.2220S que alimenta a botoneira
VD2121CAG, como mostrado na figura.
This manual suits for next models

1

Other FARFISA INTERCOMS Intercom System manuals

FARFISA INTERCOMS Kit 2PEXD User manual

FARFISA INTERCOMS

FARFISA INTERCOMS Kit 2PEXD User manual

FARFISA INTERCOMS VIDEOKIT DUO EX3262AG User manual

FARFISA INTERCOMS

FARFISA INTERCOMS VIDEOKIT DUO EX3262AG User manual

FARFISA INTERCOMS TD4100MAS User manual

FARFISA INTERCOMS

FARFISA INTERCOMS TD4100MAS User manual

FARFISA INTERCOMS EX362 User manual

FARFISA INTERCOMS

FARFISA INTERCOMS EX362 User manual

FARFISA INTERCOMS EH9262CT User manual

FARFISA INTERCOMS

FARFISA INTERCOMS EH9262CT User manual

FARFISA INTERCOMS myLogic one ML2002PLC User manual

FARFISA INTERCOMS

FARFISA INTERCOMS myLogic one ML2002PLC User manual

FARFISA INTERCOMS Project Series User manual

FARFISA INTERCOMS

FARFISA INTERCOMS Project Series User manual

FARFISA INTERCOMS CD4134PL User manual

FARFISA INTERCOMS

FARFISA INTERCOMS CD4134PL User manual

FARFISA INTERCOMS EH9160PLCW User manual

FARFISA INTERCOMS

FARFISA INTERCOMS EH9160PLCW User manual

FARFISA INTERCOMS CD4130MAS User manual

FARFISA INTERCOMS

FARFISA INTERCOMS CD4130MAS User manual

FARFISA INTERCOMS Exhito Series User manual

FARFISA INTERCOMS

FARFISA INTERCOMS Exhito Series User manual

FARFISA INTERCOMS TD4100PL User manual

FARFISA INTERCOMS

FARFISA INTERCOMS TD4100PL User manual

FARFISA INTERCOMS TD2100MAS User manual

FARFISA INTERCOMS

FARFISA INTERCOMS TD2100MAS User manual

FARFISA INTERCOMS myLogic ML2262PLC User manual

FARFISA INTERCOMS

FARFISA INTERCOMS myLogic ML2262PLC User manual

FARFISA INTERCOMS 1PXFED User manual

FARFISA INTERCOMS

FARFISA INTERCOMS 1PXFED User manual

FARFISA INTERCOMS myLogic ML2262C User manual

FARFISA INTERCOMS

FARFISA INTERCOMS myLogic ML2262C User manual

FARFISA INTERCOMS Profilo TD6100PL User manual

FARFISA INTERCOMS

FARFISA INTERCOMS Profilo TD6100PL User manual

FARFISA INTERCOMS EX3111PLC User manual

FARFISA INTERCOMS

FARFISA INTERCOMS EX3111PLC User manual

FARFISA INTERCOMS EX3160PL User manual

FARFISA INTERCOMS

FARFISA INTERCOMS EX3160PL User manual

FARFISA INTERCOMS EX3262 User manual

FARFISA INTERCOMS

FARFISA INTERCOMS EX3262 User manual

FARFISA INTERCOMS Exhito Series User manual

FARFISA INTERCOMS

FARFISA INTERCOMS Exhito Series User manual

FARFISA INTERCOMS MD 10D User manual

FARFISA INTERCOMS

FARFISA INTERCOMS MD 10D User manual

FARFISA INTERCOMS EH9161PLCT User manual

FARFISA INTERCOMS

FARFISA INTERCOMS EH9161PLCT User manual

FARFISA INTERCOMS MAS10PED User manual

FARFISA INTERCOMS

FARFISA INTERCOMS MAS10PED User manual

Popular Intercom System manuals by other brands

Bpt OPHERAKIT series Instructions for use and installation

Bpt

Bpt OPHERAKIT series Instructions for use and installation

Sebury S Touch-s user manual

Sebury

Sebury S Touch-s user manual

Bticino AXOLUTE Nighter installation manual

Bticino

Bticino AXOLUTE Nighter installation manual

Rocom Doortello Business FW T2.05W2.04 user guide

Rocom

Rocom Doortello Business FW T2.05W2.04 user guide

Telex RadioCom BTR-700 operating instructions

Telex

Telex RadioCom BTR-700 operating instructions

Bticino 342981 instruction sheet

Bticino

Bticino 342981 instruction sheet

Vingtor Stentofon ITSV-1 Quick installation and configuration guide

Vingtor Stentofon

Vingtor Stentofon ITSV-1 Quick installation and configuration guide

KOCOM KC-MC35 user manual

KOCOM

KOCOM KC-MC35 user manual

PS Engineering PDA360EX Pilot's guide and operation manual

PS Engineering

PS Engineering PDA360EX Pilot's guide and operation manual

Profile wireless + manual

Profile

Profile wireless + manual

TMEZON MZ-IP-V1026TW manual

TMEZON

TMEZON MZ-IP-V1026TW manual

Dahua DHI-VTO2311R-WP quick start guide

Dahua

Dahua DHI-VTO2311R-WP quick start guide

Telex RadioCom TR-300 operating instructions

Telex

Telex RadioCom TR-300 operating instructions

SCS Sentinel VisiDoor 7+ Installation and user manual

SCS Sentinel

SCS Sentinel VisiDoor 7+ Installation and user manual

PS Engineering Avidyne PMA8000B Pilot's guide and operation manual

PS Engineering

PS Engineering Avidyne PMA8000B Pilot's guide and operation manual

SSS Siedle Siedle Steel STLM 645-02 Product information

SSS Siedle

SSS Siedle Siedle Steel STLM 645-02 Product information

Bticino 367111 Instructions for use

Bticino

Bticino 367111 Instructions for use

Vimar ELVOX 13F1 Installer's guide

Vimar

Vimar ELVOX 13F1 Installer's guide

manuals.online logo
manuals.online logoBrands
  • About & Mission
  • Contact us
  • Privacy Policy
  • Terms and Conditions

Copyright 2025 Manuals.Online. All Rights Reserved.