manuals.online logo
Brands
  1. Home
  2. •
  3. Brands
  4. •
  5. FARFISA INTERCOMS
  6. •
  7. Intercom System
  8. •
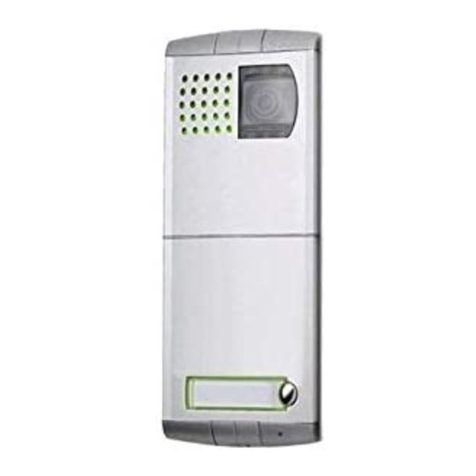
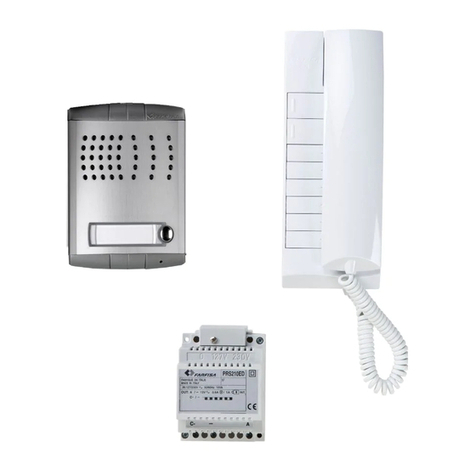
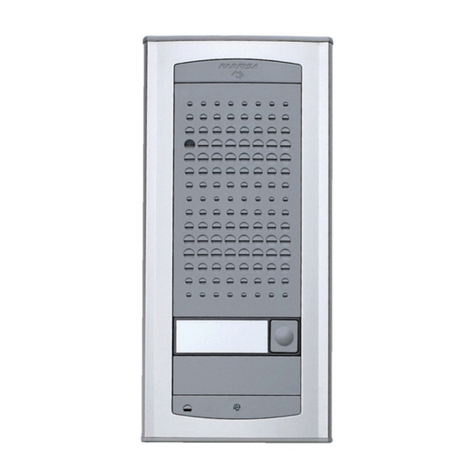
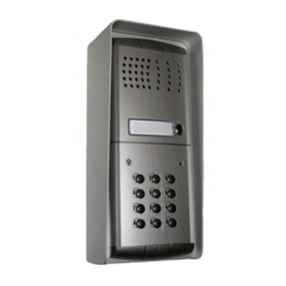
  9. FARFISA INTERCOMS EH9161FPLCW User manual

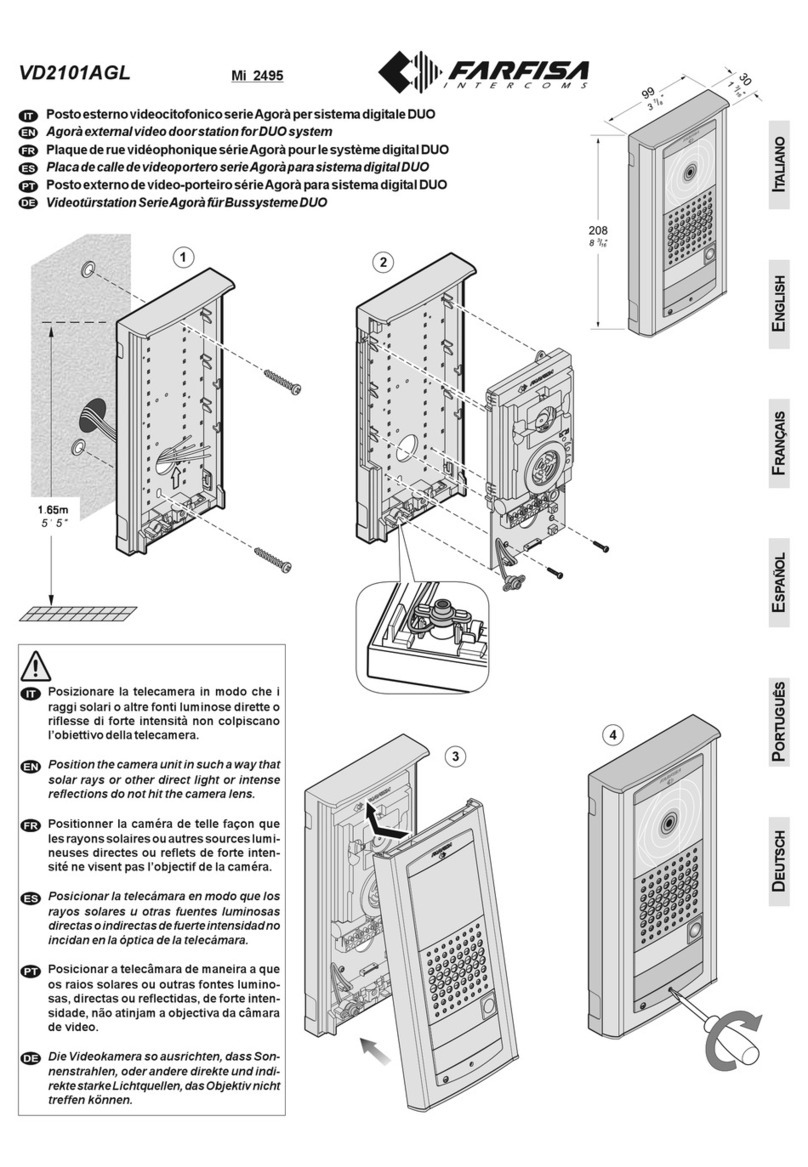
FARFISA INTERCOMS EH9161FPLCW User manual

- 1 -
123
456
789
0BA
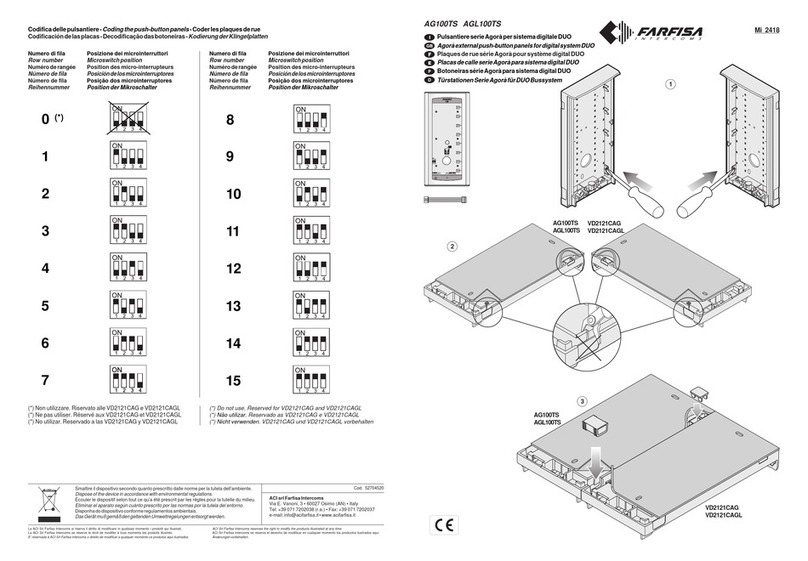
Mountingmodules.
Fixlowerpartoftheframetothe
rainshelterandmaketheelec-
tricalconnections.
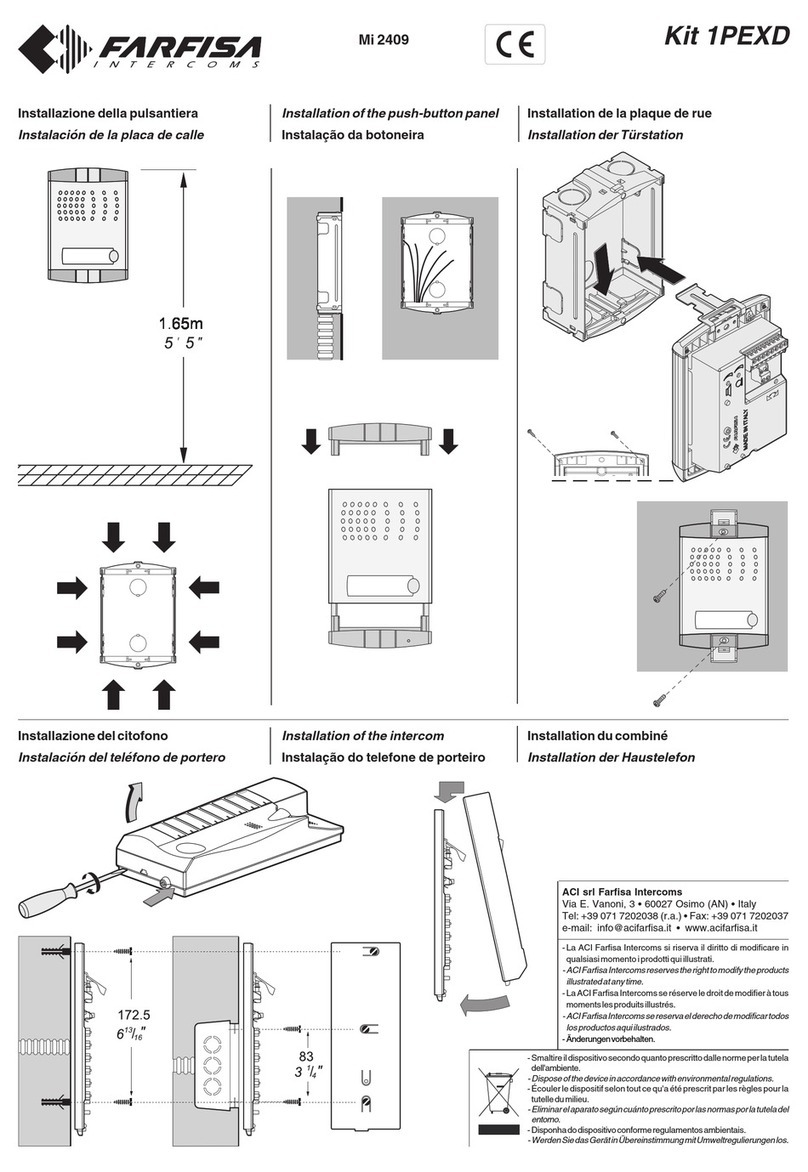
Installation of the push-button panel
123
456
789
0BA
Fixingofframetorainshel-
ter.Aligntheframebefore
tighteningthescrews.
ONE-WAYVIDEOKIT
Fixingofthemoduleframesonthe
upper side by the 2 small screws
includedin the rainshelter.
SL+ YFHX
P1 P2
NC2 NA2 NC1 NA1
C2 C1
Receiver
volume
adjustable
Transmitter adjustable
volume
Anti-feedback adjust-
ment (Larsen effect)
Pan-tilt of the camera
(±15°)
FC52PL
PL41PCED
ADJUSTMENTS
Disposeof the device in accordance
with environmental regulations.
ACI Farfisa Intercoms reserves the right to modify the products illustrated at any time.
ACI srl Farfisa Intercoms
Via E. Vanoni, 3 • 60027 Osimo (AN) • Italy
Tel: +39 071 7202038 (r.a.) • Fax: +39 071 7202037
e-mail: [email protected] • www.acifarfisa.it
1
2
3
4
EH9161FPLCW
MI 2498
- 2 -
INSTALLATIONDIAGRAMS
127V0230V
110-127Vac 220-230Vac
127V0230V
1181E
VERYIMPORTANT
TocomplywiththeEuropeanStandardsonElectromagneticCompat-
ibility and to increase the reliability of the product, it is necessary to
connect a suppression device when switching inductive loads i.e.
electricreleasesandelectriclocks.
Theenclosedsuppressiondevices
(transil)mustbeconnectedasclose
as possible to the loads (ideally
acrossthe terminals.See figure).
VIDEOINTERCOM
PUSHBUTTON
PANEL
POWER SUPPLY
230V
127V
0
1181E
AH
FC4
X
Y
H
F
10
4
X
Y
H
F
1 2 3
4 5 6
7 8 9
0 BA
FC52PL PL41PCED
PL92
TO AUTO-
MATIC GATE
EXIT PUSH-
BUTTON
(optional)
NA1
C1
P1
1
A
S
P
C
E
EH9161CW +
back-box or
surface adaptor
ELECTRIC DOOR
LOCK (12Vac - 1A)
EXIT
PUSHBUTTON
(optional)
VIDEOINTERCOM
PUSHBUTTON
PANEL
AH
FC4
1
NC1
A
S
X
Y
H
F
10
4
X
Y
H
F
P
C
E
EH9161CW +
back-box or
surface adaptor
1 2 3
4 5 6
7 8 9
0 BA
C1
NA1
FC52PL PL41PCED
PL92
POWER SUPPLY
230V
127V
0
1181E
127V0230V
110-127Vac 220-230Vac
127V0230V
1181E
- 3 -
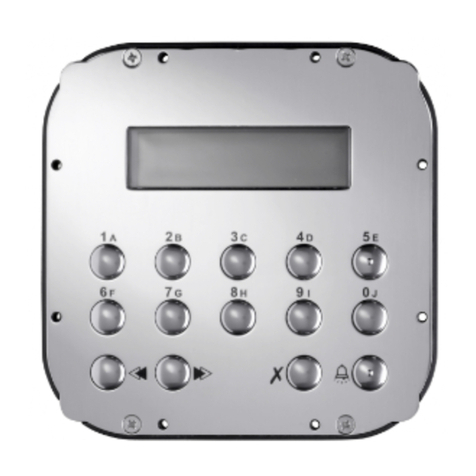
The keypad allows for the activation of 2
relayswithprogrammablecodes.
Technicaldata
Powersupply 12Vac/dc±10%
Stand-bycurrent 0.06A
Maximum current consumption 0.15A
Contact ratings 12Vac - 2A
Number of codes for relay 1 12 (+direct
activation)
Number of codes for relay 2 12 (+direct
activation)
Activation time for each relay from1to99sec.
(or bistable)
Operating temperature 0° ÷ +40°C
Maximum allowable humidity 85% RH
Terminals
NC2 normally closed contact of relay 2
NA2 normally open contact of relay 2
C2 common contact of relay 2
NC1 normally closed contact of relay 1
NA1 normally open contact of relay 1
C1 common contact of relay 1
ground or alternate voltage input
positive or alternate voltage input
P2 activation of the relay 2; if momentarily
connectedtogrounditallowstheactiva-
tion for the programmed time
P1 activation of the relay 1; if momentarily
connectedtogrounditallowstheactiva-
tion for the programmed time
PROGRAMMING
Defaultprogramming
The article is supplied from the factory with
thefollowingcodes:
Programmingcode: 11
Activation code 1 of relay 1: 12345678
Other activation codes of relay 1
(from 2 to 12): none
Activation time code of relay 1: 01 (1 sec.)
Operatingmodeofrelay1: 00(monostable)
Activation code 1 of relay 2: 90
Other activation codes of relay 2
(from 2 to 12): none
ACCESSCONTROLKEYPAD
Activation time code of relay 2: 01 (1 sec.)
Operatingmodeofrelay2:00(monostable)
Allcodesareuser-modifiable.
Operatingmodesandprogrammingcodes
Monostable 00
Bistable 01
Monostable and direct activat. by key A02
Bistable and direct activation by key A03
Changingtheprogrammingcode
Tochangetheprogrammingcode:
- entertheactualprogrammingcode
- press key A(red LED flashes)
- enter00
- press key A(red LED on)
- enterthenewprogrammingcodewith1to8
digits(from0to99999999)
- press key A(red LED flashes)
- enter55
- press key A(red LED off).
Changingtheactivationcodesofrelay1
Tochangetheactivationcodesofrelay 1:
- entertheprogrammingcode
- press key A(red LED flashes)
- enter 01 (identification code of relay 1)
- press key A(red LED on)
- enter a number with 1 to 8 digits to pro-
grammecode1(from0to99999999)
- press key A
- enter a number with 1 to 8 digits to pro-
grammecode2(from0to99999999)
- press key A
- enter a number with 1 to 8 digits to pro-
grammecode3(from0to99999999)
- press key A
- repeattheoperationtoprogrammeallcodes
as necessary (max.12). When program-
mingiscompleted press keyA repeatedly
until the red LED starts flashing
- enter55
- press A(red LED off).
Changingtheactivationcodesofrelay2
To change the activation codes of relay 2
followtheproceduredescribedabove,chang-
ingtherelayidentificationcode(02insteadof
01).
Changingonerelayactivationcode
Tochangeonerelayactivationcode,without
modifyingtheothers:
- entertheprogrammingcode
- press key A(red LED flashes)
- enter01or02(forrelay1or2,respectively)
- press key A(red LED on)
- presskeyArepeatedlytoreachthecodeto
bechanged
- entera number with1 to 8digits (from 0to
99999999)
- press key A repeatedly until the red LED
startsflashing
- enter55
- press key A(red LED off).
Example
Tochange activationcode7ofrelay 2:
- entertheprogrammingcode
- press key A(red LED flashes)
- enter02
- press key A(red LED on)
- press key A six times
- enter a number with 1 to 8 digits
- press key A six times (red LED flashes)
- enter55
- press key A(red LED off).
Deletingonerelayactivationcode
Todeleteone relay activationcode, without
modifyingtheothers:
- entertheprogrammingcode
- press key A(red LED flashes)
- enter90
- press key A(red LED on)
- entera3-digitnumber“nxx”;nindicatesthe
relayassociatedwiththecodetobedeleted
(1or2);xxindicatesthecodetobedeleted
(from 01 to 12)
- press key A(red LED flashes)
- enter55
- press key A(red LED off).
Changingtherelayactivationtimeandmode
Tochangetherelayactivationtimeandmode:
- entertheprogrammingcode
- press key A(red LED flashes)
- enter03
- press key A(red LED on)
(*) Cable in bold face type.
X . Y
F . H . C . 4 . 10
(*) F . H
(*) A . -
Terminals Distance
50m
(mm²)
0.35
0.5
0.75
1.5
165 Ft
(AWG)
22
20
18
16
CABLES
100m
(mm²)
0.35
0.75
1
2.5
330 Ft
(AWG)
22
18
16
14
200m
(mm²)
0.35
1
2
-
660 Ft
(AWG)
22
16
14
-
Note. For distances longer than 100m (330ft) max 200m
(660ft)usetwisted pair wireforconductoresX and Y.
- 4 -
Tone table
Acknowledge
Dissuasion
012345
012345
Table of codes
Master pro-
gramming code
1st code
2nd code
3rd code
4th code
5th code
6th code
7th code
8th code
9th code
10th code
11th code
12th code
Activation time
Activation mode
1st code
2nd code
3rd code
4th code
5th code
6th code
7th code
8th code
9th code
10th code
11th code
12th code
Activation time
Activation mode
r
e
l
a
y
1
r
e
l
a
y
2
Red LED.
Indication of program-
ming mode. Green LED.
Indication of code
accepted.
Key A.
Enter and direct acti-
vationofrelays(ifpro-
grammed).
Key B.
Clear.
- enteranumberfrom00to99toprogramme
activationtimeofrelay1(enter00todeac-
tivate the relay)
- press key A
- enteranumberfrom00to99toprogramme
activationtimeofrelay2(enter00todeac-
tivate the relay)
- press key A
- enteranumberfrom00to03toprogramme
activationmode of relay 1 (forcode selec-
tionreferto“operatingmodesandprogram-
mingcodes”)
- press key A
- enteranumberfrom00to03toprogramme
activationmode of relay 2 (forcode selec-
tionreferto“operatingmodesandprogram-
mingcodes”)
- press key A(red LED flashes)
- enter55
- press key A(red LED off)
Restoringthedefaultprogramming
To delete all the programmed codes and
restorethekeypaddefaultprogramming(for
thecodesreferto“defaultprogramming”):
- switch off the keypad
- switch on the keypad again holding key B
pressed until you hear the confirmation
tone.
Notes:
- Writedowntheprogrammingcodeandthe
relay activation codes in the table.
- The relay activation codes can only be
changedbyknowingtheprogrammingcode.
- Anacousticsignalindicates key pressing.
- Iftheenteredcodeisnotcorrect,youhear
adissuasiontone(keysaredeactivatedfor
2seconds).
- Press Aduring programming if you do not
want to change a code. This allows you to
gotothenextprogrammingoperationwith-
outchangingthecode.
- Theprogrammingcodeandtherelayactiva-
tion codes must be different.
- PressBtocancelthelastnumberyouhave
entered.
OPERATION
-Enter the code of the relay to be activated.
-PresskeyAtoconfirmthecode.Ifthecode
iscorrect,therelayactivates(greenLEDon)
with the programmed time and operating
mode.
Notes:
-Press key B to delete an incorrect code
beforeconfirmingit.
-Ifyouenteranincorrectcodeandconfirmit
withkeyAyouhearadissuasiontone(keys
aredeactivatedforapprox.3seconds).This
time increases up to a max. of 30 seconds
each time an incorrect code is entered.
-Thenumbersenteredandnotconfirmedwith
keyAaredeletedautomatically25seconds
after the last key you have pressed.
BISTABLEOPERATION
This function is possible only if the keypad
hasbeenprogrammedproperly.See“Chang-
ingtherelayactivationtimeandmode”.
To activate the relays for indefinite time:
- enter one of the codes for the relay to be
activated
- press key A (green LED on). The relay
activatesfor indefinitetime.
- enterthecodeagaintodeactivatetherelay
- presskeyA(greenLEDoffandrelaydeac-
tivation).
DIRECTACTIVATION
Press key Ato activate the relays directly
(this function is possible only if the keypad
hasbeenprogrammedproperly.See“Chang-
ingtherelayactivationtimeandmode”).Both
thetworelaysareactivatedifbothofthemare
programmedtobedirectlyactivatedbykeyA.
EXITPUSH-BUTTONS
Twobuttonscanbeconnectedbetweenter-
minalsP1,P2andgroundinordertoactivate
thetworelaysaccordingtotheprogrammed
activationtimeandmode.
EMERGENCY
In case of power failure all the data are
recordedinanonvolatilememoryandwillnot
be lost.
P2 P1
Exit push-buttons
for direct activation of
and relaisRL1 RL2
Code52705350

Other FARFISA INTERCOMS Intercom System manuals

FARFISA INTERCOMS myLogic ML2262PLC User manual

FARFISA INTERCOMS

FARFISA INTERCOMS myLogic ML2262PLC User manual

FARFISA INTERCOMS TD4100MAS User manual

FARFISA INTERCOMS

FARFISA INTERCOMS TD4100MAS User manual

FARFISA INTERCOMS PL24S User manual

FARFISA INTERCOMS

FARFISA INTERCOMS PL24S User manual

FARFISA INTERCOMS EH9160PLCW User manual

FARFISA INTERCOMS

FARFISA INTERCOMS EH9160PLCW User manual

FARFISA INTERCOMS Agora AG100TS User manual

FARFISA INTERCOMS

FARFISA INTERCOMS Agora AG100TS User manual

FARFISA INTERCOMS myLogic ML2262C User manual

FARFISA INTERCOMS

FARFISA INTERCOMS myLogic ML2262C User manual

FARFISA INTERCOMS PDX 2000 User manual

FARFISA INTERCOMS

FARFISA INTERCOMS PDX 2000 User manual

FARFISA INTERCOMS TD4100PL User manual

FARFISA INTERCOMS

FARFISA INTERCOMS TD4100PL User manual

FARFISA INTERCOMS Agora Series User manual

FARFISA INTERCOMS

FARFISA INTERCOMS Agora Series User manual

FARFISA INTERCOMS myLogic PL72 User manual

FARFISA INTERCOMS

FARFISA INTERCOMS myLogic PL72 User manual

FARFISA INTERCOMS EXHITO EX322 User manual

FARFISA INTERCOMS

FARFISA INTERCOMS EXHITO EX322 User manual

FARFISA INTERCOMS H9160PLCT User manual

FARFISA INTERCOMS

FARFISA INTERCOMS H9160PLCT User manual

FARFISA INTERCOMS ZHEROS ZH1252B User manual

FARFISA INTERCOMS

FARFISA INTERCOMS ZHEROS ZH1252B User manual

FARFISA INTERCOMS myLogic one ML2002PLC User manual

FARFISA INTERCOMS

FARFISA INTERCOMS myLogic one ML2002PLC User manual

FARFISA INTERCOMS EX3111PLC User manual

FARFISA INTERCOMS

FARFISA INTERCOMS EX3111PLC User manual

FARFISA INTERCOMS VIDEOKIT COMPACT Series User manual

FARFISA INTERCOMS

FARFISA INTERCOMS VIDEOKIT COMPACT Series User manual

FARFISA INTERCOMS Mi 2464 User manual

FARFISA INTERCOMS

FARFISA INTERCOMS Mi 2464 User manual

FARFISA INTERCOMS DM2444 User manual

FARFISA INTERCOMS

FARFISA INTERCOMS DM2444 User manual

FARFISA INTERCOMS CD4134PL User manual

FARFISA INTERCOMS

FARFISA INTERCOMS CD4134PL User manual

FARFISA INTERCOMS ZHERO ZH1262AGLB User manual

FARFISA INTERCOMS

FARFISA INTERCOMS ZHERO ZH1262AGLB User manual

FARFISA INTERCOMS ECHOS User manual

FARFISA INTERCOMS

FARFISA INTERCOMS ECHOS User manual

FARFISA INTERCOMS EH9262CT User manual

FARFISA INTERCOMS

FARFISA INTERCOMS EH9262CT User manual

FARFISA INTERCOMS TD2100MAS User manual

FARFISA INTERCOMS

FARFISA INTERCOMS TD2100MAS User manual

FARFISA INTERCOMS MAS10PED User manual

FARFISA INTERCOMS

FARFISA INTERCOMS MAS10PED User manual

Popular Intercom System manuals by other brands

Fermax DUOX MARINE 9788 Installer manual

Fermax

Fermax DUOX MARINE 9788 Installer manual

WRT IZM-212CS4-IPM manual

WRT

WRT IZM-212CS4-IPM manual

Comelit Mini 6701 Technical manual

Comelit

Comelit Mini 6701 Technical manual

urmet domus MATIBUS 1752/20D user manual

urmet domus

urmet domus MATIBUS 1752/20D user manual

Aiphone GT-2H Operation guide

Aiphone

Aiphone GT-2H Operation guide

Comelit MT SB 01 Technical manual

Comelit

Comelit MT SB 01 Technical manual

FAAC FCI4000 installation instructions

FAAC

FAAC FCI4000 installation instructions

DoorBird D10 Series installation manual

DoorBird

DoorBird D10 Series installation manual

AYR 761DD user manual

AYR

AYR 761DD user manual

urmet domus IPerVoice 1039 manual

urmet domus

urmet domus IPerVoice 1039 manual

SCS Sentinel AudioKit 150 Installation and user manual

SCS Sentinel

SCS Sentinel AudioKit 150 Installation and user manual

Axis I8116-E user manual

Axis

Axis I8116-E user manual

Coopers 9243 instructions

Coopers

Coopers 9243 instructions

4tronix Multi-Apartment Video Door Entry System user guide

4tronix

4tronix Multi-Apartment Video Door Entry System user guide

Dahua VTO Series quick start guide

Dahua

Dahua VTO Series quick start guide

Moman H3 user manual

Moman

Moman H3 user manual

Extel LUKA 12-2014 V2 Installation and user guide

Extel

Extel LUKA 12-2014 V2 Installation and user guide

Hyundai HYU-559 quick start guide

Hyundai

Hyundai HYU-559 quick start guide

manuals.online logo
manuals.online logoBrands
  • About & Mission
  • Contact us
  • Privacy Policy
  • Terms and Conditions

Copyright 2025 Manuals.Online. All Rights Reserved.