Assembly instructions (en)
748 105 / 2009-08NH
†‡
Blanking plug
VABD-…-B
Festo AG & Co. KG
Postfach
D-73726 Esslingen
++49/(0)711/347-0
www.festo.com
1. Parts list
14139d_1
1Blanking plug
VABD-…-B
The blanking plug VABD-…-B 1has been designed to serve as:
–Separator in channels to form pressure zones.
–Sealing plug for channels.
2. Assembly
2a. Preparing
•Choose the correct blanking plug 1!Table.
VABD-4,2-B VABD-6-B VABD-8-B VABD-10-B
Channel @[mm] 4.2 6 8 10
MA
1) [Nm] 0.3 0.7 1.3 1.3
2b. Assembly example with 4 blanking plugs
14139d_2
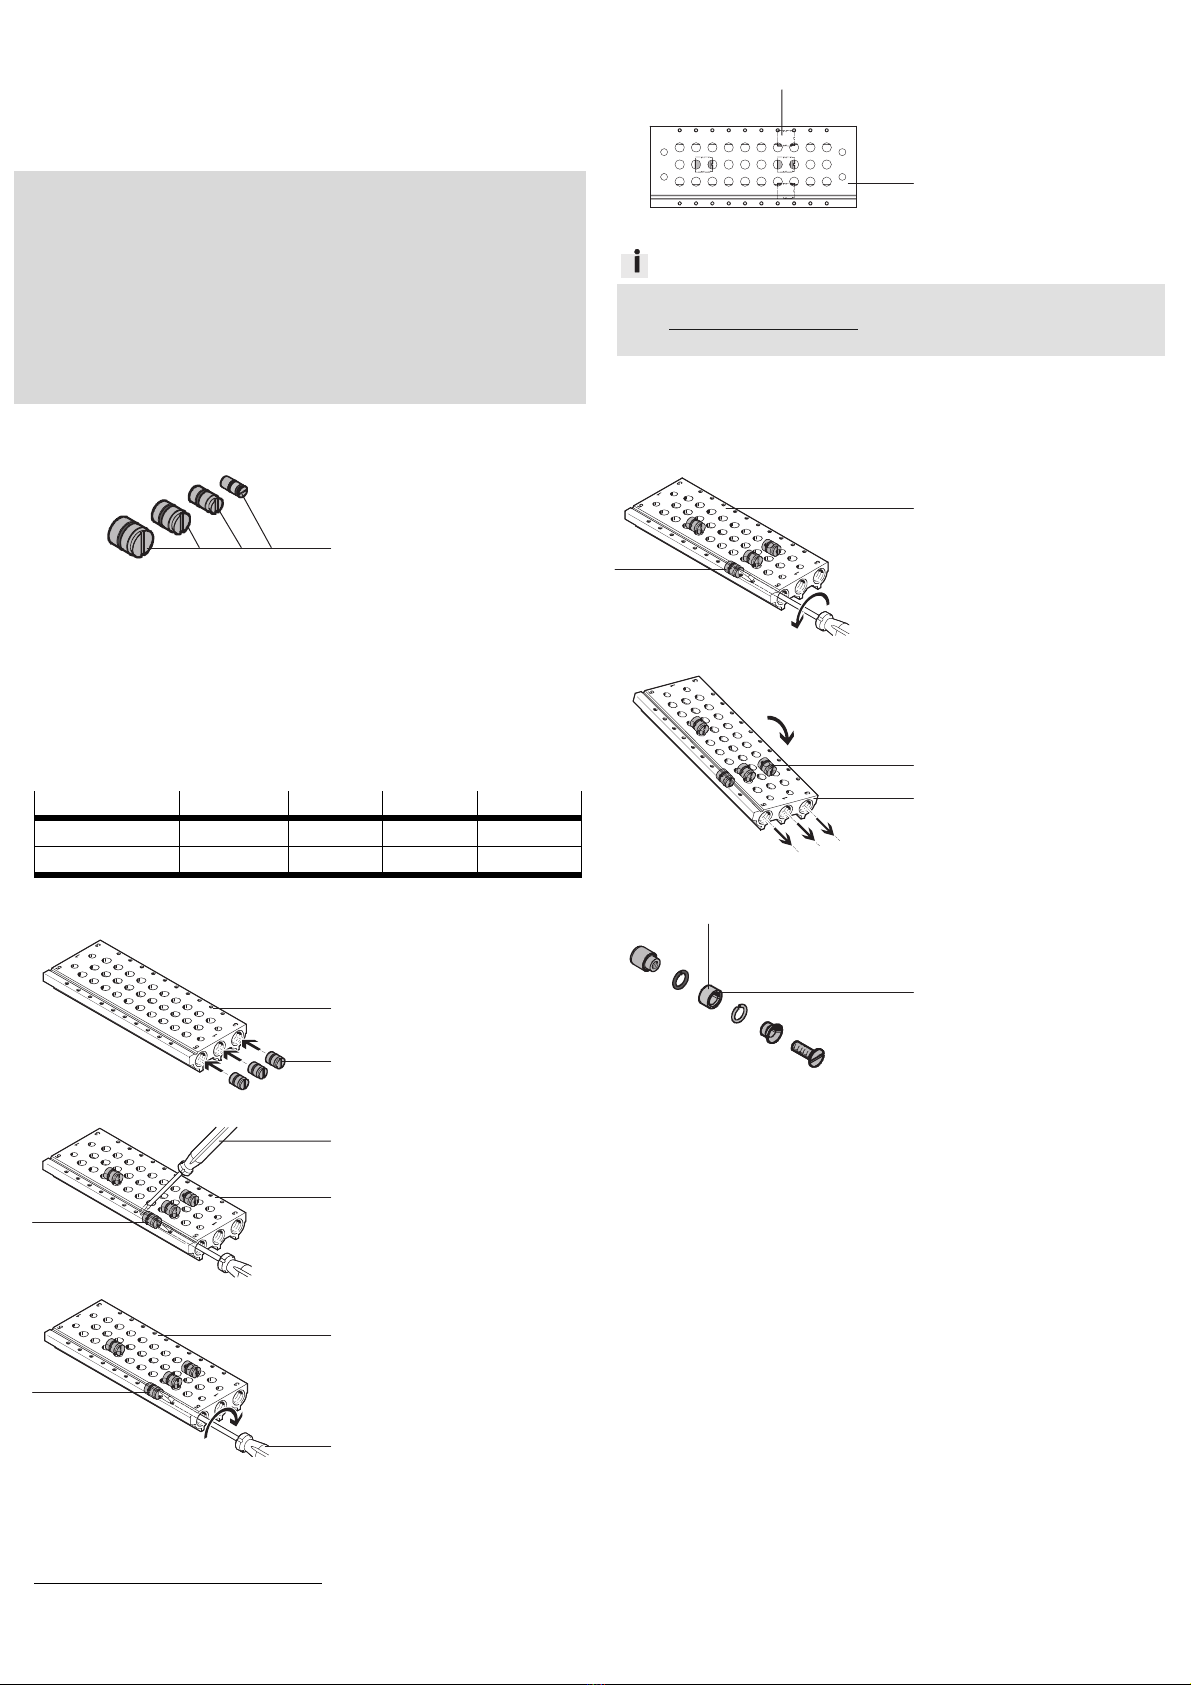
•Push the correct blanking
plug 1into the compressed
air channels.
14139d_3
•Position the blanking plug 1
in the middle between two
valve ports.
•Stick a small screwdriver (B),
for example, at the desired
spot in one of the ports (di-
agonal in channel 3/5) to
stop the blanking plug 1.
14139d_8
•Turn to tighten the blanking
plug 1with a slotted head
screwdriver (C).
•Maintain the permitted
tightening torque
!Table.
1) Tolerance for non-toleranced tightening torques MA
MA> 0. 25 …1 Nm: ± 30%
MA> 1 Nm: ± 20%
3. After assembly
14139d_4
•Mark the position of the
blanking plugs 1at a suit-
able spot with the accompa-
nying label.
Information
•Select additional accessories from our catalogue
!www.festo.com/catalogue, e.g. supply plates for additional power
supply with several pressure zones.
4. Disassembly
•Make sure that you do not turn the blanking plug 1too far out during
disassembly, since otherwise it will fall apart.
14139d_6
•Open the blanking plug 1
only about 1 turn.
14139d_7
•Remove the blanking plug 1
by tilting the manifold
rail (A).
If the blanking plug falls apart, put it together as follows:
14139d_5
•Pay attention to correct posi-
tion of the chamfer (X) of the
sleeve (D).
B
C
X
D


