manuals.online logo
Brands
  1. Home
  2. •
  3. Brands
  4. •
  5. Fiamma
  6. •
  7. Automobile Accessories
  8. •
  9. Fiamma Carry-Bike VW T5 D Setup guide

Fiamma Carry-Bike VW T5 D Setup guide

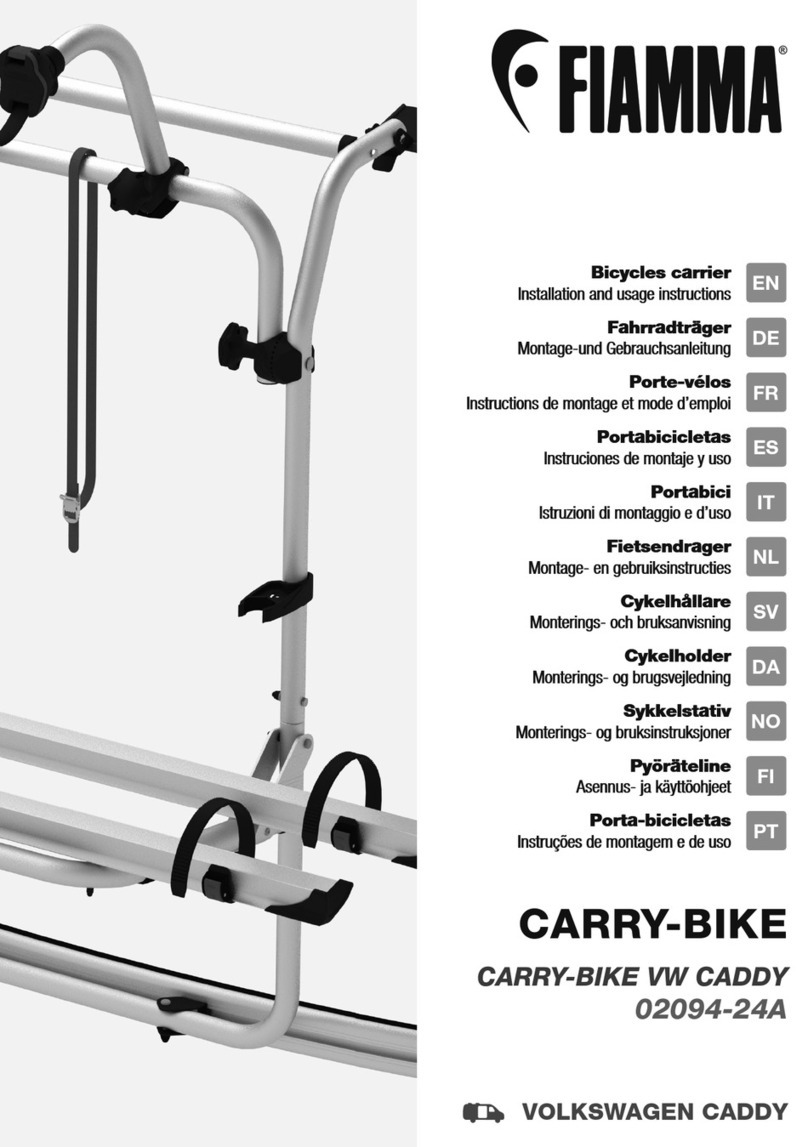
CARRY-BIKE
VW T5 D / T6 D
02093B79A
02093C79A
VOLKSWAGEN T5 D / T6 D
Bicycles carrier
Installation and usage instructions EN
Fahrradträger
Montage-und Gebrauchsanleitung DE
Porte-vélos
Instructions de montage et mode d’emploi FR
Portabicicletas
Instruciones de montaje y uso ES
Portabici
Istruzioni di montaggio e d’uso IT
Fietsendrager
Montage- en gebruiksinstructies NL
Cykelhållare
Monterings- och bruksanvisning SV
Cykelholder
Monterings- og brugsvejledning DA
Sykkelstativ
Monterings- og bruksinstruksjoner NO
Pyöräteline
Asennus- ja käyttöohjeet FI
Porta-bicicletas
Instruções de montagem e de uso PT
235kg
18kg 17kg18kg 17kg
M6x95 2X M6x45 2X
M6x55 6X
6.4X12.5X1.6 6X
M6 8X
M5
M6x95 2X M6x45 2X
M6x55 6X
6.4X12.5X1.6 6X
M6 8X
M5
M6x95 2X M6x45 2X
M6x55 6X
6.4X12.5X1.6 6X
M6 8X
M5
M6x95 2X M6x45 2X
M6x55 6X
6.4X12.5X1.6 6X
M6 8X
M5
M6x95 2X M6x45 2X
M6x55 6X
6.4X12.5X1.6 6X
M6 8X
M5
CARRY-BIKE
2
A
C
F
D
G
L
B
E
H
M
V
4x
JW
M5x50
2x M6x80
4x
M6x50
2x
K
U
Z Y
X
I
O
TS
RQ
P2x
2x
2x
K1
Z1Y1
X1
6,4X12,5X1,6
9x
5,3X10X1
2x
M6
9x
M5
2x
M6
9x
M5
2x
M10
1x
M6x45
2x
M6x40
1x
N
30 cm
144 cm
46,5 cm
128 cm
28 cm
Carry-Bike VW T5 D /T6 D 02093B79A 7,7 kg
Carry-Bike VW T5 D /T6 D - Deep Black 02093C79A 7,7 kg
30 cm
144 cm
46,5 cm
128 cm
28 cm
CARRY-BIKE
3
Package contents / Verpackungsinhalt / Contenu de l’emballage / Contenido del embalaje /
Contenuto dell’imballo / Inhoud van de verpakking / Förpackningens innehåll / Pakkens indhold /
Innholdet i pakningen / Pakkauksen sisältö / Conteúdo da embalagem p. 2
Installation instructions / Montageanleitung / Instructions de montage / Instrucciones de montaje /
Istruzioni di montaggio / Montage-instructies / Monteringsanvisningar / Monteringsvejledning /
Monteringsinstruksjoner / Asennusohjeet / Instruções de montagem p. 5
Instructions for use / Gebrauchsanleitung / Instructions d’installation / Instrucciones de uso /
Istruzioni di utilizzo / Gebruiksinstructies / Bruksanvisning / Brugsvejledning / Bruksinstruksjoner /
Käyttöohjeet / Instruções de utilização p. 12
Safety instructions / Sicherheitshinweise / Consignes de sécurité / Instrucciones de seguridad /
Avvertenze di sicurezza / Veiligheidswaarschuwingen / Säkerhetsföreskrifter / Sikkerhedsforan-
staltninger / Sikkerhetsadvarsler / Turvallisuusvaroitukset / Advertências de segurança p. 13
Accessories / Zubehör / En option / Accesorios / Accessori / Benodigdheden / Tillbehör / Tilbehør /
Tilbehør / Lisävarusteet / Acessórios p. 25
Warranty / Garantie / Garantie / Garantía / Garanzia / Garantie / Garanti / Garanti / Garanti /
Takuu / Garantia p. 26
DE
EN
FR
ES
IT
NL
SV
DA
NO
FI
PT
Bitte kontrollieren Sie, dass alle Einzelteile einwandfrei sind und nicht während dem Transport beschädigt
wurden. Im Zweifelsfall oder bei Fragen zur Montage, Verwendung oder zu Einschränkungen des
Produkts wenden Sie sich bitte an Ihren Händler. Wir empfehlen die Anbringung durch Fachpersonal in
Übereinstimmung mit den geltenden lokalen Vorschriften vornehmen zu lassen.
Check that nothing has been damaged or deformed during transport.
In the event of doubts or questions concerning the installation, use or limitations of the product, contact
the dealer. We recommend that the installation is carried out by qualified personnel and in compliance
with current local regulations.
Contrôler le contenu du colis et vérifier qu’aucune pièce n’ait été cassée ou déformée durant le transport.
En cas de doutes ou de questions relatives à l’installation, l’utilisation du produit, contactez votre
concessionnaire. L’installation doit être réalisée par des personnes dûment qualifiées et conformément aux
normes en vigueur dans le pays d’installation.
Controlar que ningún detalle se haya roto o deformado durante el transporte.
En caso de dudas o si tiene alguna pregunta sobre el montaje, uso y limitaciones del producto,
póngase en contacto con el distribuidor. Recomendamos que la instalación se realice por personal
cualificado en conformidad con las regulaciones locales.
Controllare che nessun particolare sia rotto o deformato a causa di errori di trasporto.
In caso di dubbi o domande relative al montaggio, utilizzo e limiti del prodotto, contattare il rivenditore.
Consigliamo di far eseguire l’installazione da parte di personale qualificato ed in conformità alle vigenti
normative locali.
Controleer of er geen onderdelen zijn gebroken of vervormd als gevolg van het transport.
Neem contact op met uw dealer als u vragen of opmerkingen hebt over de montage, het gebruik en de
beperkingen van het product. Wij raden u aan de montage te laten uitvoeren door gekwalificeerd personeel
en in overeenstemming met de geldende plaatselijke voorschriften
.
Kontrollera att inga delar har skadats eller deformerats under transporten.
Kontakta försäljaren om du har frågor om monteringen, användningen och produktens gränser.
Vi rekommenderar att kvalificerad personal utför installationen i överensstämmelse med gällande
lokala standarder.
Kontrollér, at ingen del er ødelagt eller deformeret grundet fejl under transport.
I tvivlstilfælde, eller hvis du har spørgsmål vedrørende montering eller produktets brug og
begrænsninger, bedes du kontakte forhandleren. Vi anbefaler, at monteringen udføres af kvalificeret
personale og i overensstemmelse med gældende lokale regler.
Kontroller at ingen deler er ødelagt eller deformert som følge av feil under transporten.
Hvis du er i tvil eller har spørsmål knyttet til montering, bruk eller begrensninger for produktet, ta
kontakt med forhandleren.
Vi anbefaler at installasjonen gjennomføres av kvalifisert personale og i samsvar med gjeldende lokale
regler.
Tarkasta, että mikään osa ei ole kuljetusvirheiden vuoksi rikkoutunut tai vääntynyt.
Epäselvissä tapauksissa tai jos sinulla on tuotteen asennusta, käyttöä tai rajoituksia koskevia
kysymyksiä, ota yhteys jälleenmyyjään. Anna asennus tehtäväksi ammattitaitoiselle henkilöstölle ja
siinä on noudatettava paikallisia voimassa olevia määräyksiä.
Controlar que nenhuma peça tenha ficado partida ou deformada devido a erros de transporte.
Em caso de dúvida ou perguntas relativas à montagem, utilização e limites do produto, contactar o
revendedor. Aconselhamos a fazer executar a instalação por pessoal qualificado e em conformidade com
as normas locais em vigor
.
CARRY-BIKE
4
ATENÇÃO!
Não apertar completamente a forquilha ao tubo, deixar 2 mm de espaço.
DE
EN
FR
ES
IT
NL
SV
DA
NO
FI
PT
HUOMIO!
Älä kiristä haarukkaa kokonaan putkeen, jätä 2 mm tilaa.
ADVARSEL!
Ikke stram gaffelen helt til røret, la det være et mellomrom på 2 mm.
ADVARSEL!
Stram ikke gaflen helt til røret. Efterlad et mellemrum på 2 mm.
VARNING!
Dra inte åt gaffeln till röret helt och hållet, lämna ett utrymme på 2 mm.
OPGELET!
Draai de vork niet helemaal vast op de buis, laat 2 mm ruimte vrij.
ATTENZIONE!
Non stringere completamente la forcella al tubo, lasciare 2 mm di spazio.
ADVERTENCIA!
No apretar totalmente la horquilla al tubo, dejar 2 mm de espacio.
ATTENTION!
Ne pas serrer complètement la fourche au tube, laisser un espace de 2 mm.
ACHTUNG!
Die Gabel nicht komplett am Rohr festziehen, 2 mm Abstand lassen.
WARNING!
Do not fully tighten the fork to the tube, leave 2mm space.
CARRY-BIKE
5
A
C
B
N
X1
YZ
J
2x
1 2
CARRY-BIKE
6
D
E
H
4x
K1
F
G
X1YZV
X1 Y Z
X
34
5
CARRY-BIKE
7
Q
S
X1YZ
W
6
7
CARRY-BIKE
8
2x
T
R2x
8
9
T
CARRY-BIKE
9
10
DE
EN
FR
ES
IT
NL
SV
DA
NO
FI
PT
To fix the lower brackets, it is necessary to pull down the structure.
Make sure that the fastening of the Carry-Bike is steady.
Zur Befestigung der Halterung die Struktur nach unten ziehen. Stellen Sie sicher, dass die
Befestigung des Fahrradträgers fest und sicher ist.
Pour fixer les étriers inférieurs, il est nécessaire de tirer vers le bas la structure.
S’assurer que la fixation du porte-vélos soie solide.
Para fijar los soportes inferiores es necesario tirar hacia abajo la estructura.
Asegurarse que la fijación sea firma.
Per fissare le staffe inferiori è necessario tirare verso il basso la struttura.
Assicurarsi che il fissaggio del portabici sia saldo.
Om de onderste beugels te bevestigen, moet de structuur omlaag worden getrokken.
Controleer of de fietsdrager stevig bevestigd is.
Dra strukturen nedåt för att fästa de nedre fästkonsolerna.
Se till att cykelhållaren fästs riktigt på plats.
For at fastgøre de nederste beslag, skal man trække strukturen nedad.
Sørg for at cykelstativet er ordentligt fastgjort.
For å feste den nedre stangen må du trekke strukturen nedover.
Kontrollere at festet for sykkelstativet er solid.
Alatukien kiinnittämistä varten rakennetta on vedettävä alaspäin.
Varmista, että pyöräteline on kiinnitetty tukevasti.
Para fixar os suportes inferiores é necessário puxar para baixo a estrutura.
Certificar-se de que a fixação do porta-bicicletas esteja sólida.
2 mm
CARRY-BIKE
10
P
2x
U
K
Y1
Z1
11
Ø 30 mm
Ø 35 mm
M
I
CARRY-BIKE
11
LM I
Ø 30 mm
Ø 35 mm
Ø 30 mm
Ø 35 mm
12
O
L
M I
In case of problems please contact your local dealer indicating the data on the
nameplate. Consult our website for spare parts drawing.
Bei Problemen bitte den Händler kontaktieren und die auf dem Etikett aufgeführten Daten
mitteilen. Auf der Homepage finden Sie die Explosionszeichnung
En cas de problème, contacter le revendeur et lui communiquer les informations reportées
sur la plaquette. Consulter le site Internet pour une vue éclatée des pièces de rechange.
En caso de cualquier problema, ponerse en contacto con su distribuidor local facilitando los
datos sobre la placa. Consultar el sitio web para el despiece de los repuestos.
In caso di problemi contattare il rivenditore di zona, comunicando i dati riportati sulla targhetta.
Consultare il sito web per l’esploso ricambi.
Raadpleeg uw lokale dealer in geval van problemen onder vermelding van de gegevens
op het typeplaatje. Raadpleeg de website voor de detailtekening met onderdelen.
Vid problem, kontakta en lokal återförsäljare och uppge uppgifterna som står på typskylten.
Gå till webbplatsen för en sprängskiss över reservdelar.
Kontakt din lokale forhandler i tilfælde af problemer, og angiv oplysningerne på skiltet.
Rådfør med webstedet for listen over reservedele.
Ved problemer ta kontakt med den lokale forhandleren, og oppgi informasjonen på
merkeplaten. Se nettsidene for detaljert tegning av reservedelene.
Mikäli ilmenee ongelmia, ota yhteys alueen jälleenmyyjään ja ilmoita kilvessä
olevat tiedot. Varaosien irto-osakuvat löytyvät nettisivuilta.
Em caso de problemas contactar o revendedor de zona, comunicando os dados
gravados na chapa. Consultar o sítio web para a vista explosiva das peças sobresselentes.
DE
EN
FR
ES
IT
NL
SV
DA
NO
FI
PT
CARRY-BIKE
12
FP: 999999 M00
Carry-Bike®
S/N: N 2000001
18kg 17kg18kg 17kg
15°
MAX
30° 30°
Km/h
130
110
Km/h
110
Km/h
45°
45°
235kg
OK
CARRY-BIKE
13
CARRY-BIKE
14
Read the following instructions and warnings carefully; failure to observe these installation and
usage instructions as well as the Highway Code in the relevant country may cause severe harm
or damage for which the manufacturer declines all responsibility. Before installation, ensure
compatibility with the vehicle on which the product must be installed.
Checking that the wall/rear door is sufficiently solid and suitable for guaranteeing the resistance of
the anchoring points is always mandatory. If not, strength and compliance with the maximum load
indicated in the instructions are not guaranteed and it will be necessary to reinforce these points.
After having positioned the Carry-Bike on the rear axle of the vehicle, the normal weight
distribution on both axles is modified. This variation must not exceed the maximum permissible
axle load.
Never exceed the maximum permitted length and the total weight of the full-loaded vehicle.
Make sure that the weight is correctly distributed while loading; a uniform distribution (the heaviest
bike must be placed in the rail guide near the wall of the vehicle) ensures better stability.
Always warn about the presence of the Carry-Bike on your vehicle, using a sign for protruding
loads and, in case of limited rear visibility, use the additional rear-view mirrors.
Take into account the presence of the Carry-Bike, paying attention while driving and especially
during reversing manoeuvres, particularly if you have a parking assist system.
Always comply with speed limits and the Highway Code. The speed should always be suitable
to traffic conditions and transported load. When using the bike carrier with trailer make sure that
the tow hook is always accessible and the corner mobility of the trailer is guaranteed (volume
measuring DIN 74058).
Check periodically the bicycle rack to make sure it is firmly attached, especially during the first
kilometres from the installation and always before and after long trips, to avoid damage of the
Carry-Bike/vehicle. Regularly check rubber parts under the upper and/or lower brackets, as well
as the belts; if they are porous or worn, replace them immediately.
Make sure that the support brackets are located where they cannot move or shift sideways.
They also must not touch the roof of the vehicle, the hinges and the corresponding bolts or
screws.
While assembling, pay attention not to close the rear door if screws and brackets of the
Carry-Bike are not tightened.
Make sure that, during roar door opening, the Carry-Bike and/or the Bike-Block do not touch the
roof of the vehicle (raised roof) and/or its opening systems (pop-up roofs).
During Carry-Bike installation, verify that there is enough distance between handlebars and/or
pedals and the vehicle’s rear windows in order to avoid any damages of the window van; do not
leave accessories attached (bay seats, baskets, etc) because vibrations could disengage bikes.
In some cases, the rear windscreen wiper may not work due to the presence of bicycles. Be
aware of the brush radius before operating the windscreen wiper.
On this type of Carry-Bike, bike covers are not allowed (Bike Cover).
EN

This manual suits for next models

3

Other Fiamma Automobile Accessories manuals

Fiamma F65L Setup guide

Fiamma

Fiamma F65L Setup guide

Fiamma 200 D Setup guide

Fiamma

Fiamma 200 D Setup guide

Fiamma CARRY-BIKE VW T3 T25 Quick start guide

Fiamma

Fiamma CARRY-BIKE VW T3 T25 Quick start guide

Fiamma 02094-22A Setup guide

Fiamma

Fiamma 02094-22A Setup guide

Fiamma 98655A910 Setup guide

Fiamma

Fiamma 98655A910 Setup guide

Fiamma 08753-03 Setup guide

Fiamma

Fiamma 08753-03 Setup guide

Fiamma Magic Privacy Front Short Setup guide

Fiamma

Fiamma Magic Privacy Front Short Setup guide

Fiamma CARRY-BIKE VW T2 Product manual

Fiamma

Fiamma CARRY-BIKE VW T2 Product manual

Fiamma 08452-01P Setup guide

Fiamma

Fiamma 08452-01P Setup guide

Fiamma 98655Z034 User manual

Fiamma

Fiamma 98655Z034 User manual

Fiamma CARRY-BIKE 02094-38A Setup guide

Fiamma

Fiamma CARRY-BIKE 02094-38A Setup guide

Fiamma 98655-278 User manual

Fiamma

Fiamma 98655-278 User manual

Fiamma CARRY-BIKE 200 DJ DUCATO Setup guide

Fiamma

Fiamma CARRY-BIKE 200 DJ DUCATO Setup guide

Fiamma KIT FORD CUSTOM L2 User manual

Fiamma

Fiamma KIT FORD CUSTOM L2 User manual

Fiamma KIT TURBO-VENT 28 F Setup guide

Fiamma

Fiamma KIT TURBO-VENT 28 F Setup guide

Fiamma ROLLO VENT 50 Setup guide

Fiamma

Fiamma ROLLO VENT 50 Setup guide

Fiamma MOTOR KIT PLUS F80s Setup guide

Fiamma

Fiamma MOTOR KIT PLUS F80s Setup guide

Fiamma 02093A54A Setup guide

Fiamma

Fiamma 02093A54A Setup guide

Fiamma Carry-Bike Lift 77 Operating and maintenance manual

Fiamma

Fiamma Carry-Bike Lift 77 Operating and maintenance manual

Fiamma 98655Z035 User manual

Fiamma

Fiamma 98655Z035 User manual

Fiamma F40VAN Setup guide

Fiamma

Fiamma F40VAN Setup guide

Fiamma CARRY-BIKE CARAVAN XL A PRO 200 Operating and maintenance manual

Fiamma

Fiamma CARRY-BIKE CARAVAN XL A PRO 200 Operating and maintenance manual

Fiamma 98655-713 User manual

Fiamma

Fiamma 98655-713 User manual

Fiamma CARAVAN XL A PRO Setup guide

Fiamma

Fiamma CARAVAN XL A PRO Setup guide

Popular Automobile Accessories manuals by other brands

Thule Railing Load Carrier 754 instructions

Thule

Thule Railing Load Carrier 754 instructions

Metra Electronics 99-7893 installation instructions

Metra Electronics

Metra Electronics 99-7893 installation instructions

NavLinkz RL-UCON-D1 manual

NavLinkz

NavLinkz RL-UCON-D1 manual

Hella 2PS 008 643-011 installation instructions

Hella

Hella 2PS 008 643-011 installation instructions

Jotto Desk 425-6190 installation instructions

Jotto Desk

Jotto Desk 425-6190 installation instructions

Cruz Evo Rack Module E35 Assembly instructions

Cruz

Cruz Evo Rack Module E35 Assembly instructions

Rola 59004 instructions

Rola

Rola 59004 instructions

Whispbar K129W Fitting instructions

Whispbar

Whispbar K129W Fitting instructions

Stoneridge ELD1.0 Driver users manual

Stoneridge

Stoneridge ELD1.0 Driver users manual

Federal Signal Corporation SIFMH Installation maintenance and service manual

Federal Signal Corporation

Federal Signal Corporation SIFMH Installation maintenance and service manual

JKS HD X-Member installation instructions

JKS

JKS HD X-Member installation instructions

in2digi D-JV-2 manual

in2digi

in2digi D-JV-2 manual

Yakima 1032045 quick start guide

Yakima

Yakima 1032045 quick start guide

Thule DockGrip instructions

Thule

Thule DockGrip instructions

Silverline 317703 manual

Silverline

Silverline 317703 manual

MVG 2030-M operating instructions

MVG

MVG 2030-M operating instructions

Blueant SUPERTOOTH 3 user manual

Blueant

Blueant SUPERTOOTH 3 user manual

DFI VC230-BT user manual

DFI

DFI VC230-BT user manual

manuals.online logo
manuals.online logoBrands
  • About & Mission
  • Contact us
  • Privacy Policy
  • Terms and Conditions

Copyright 2025 Manuals.Online. All Rights Reserved.