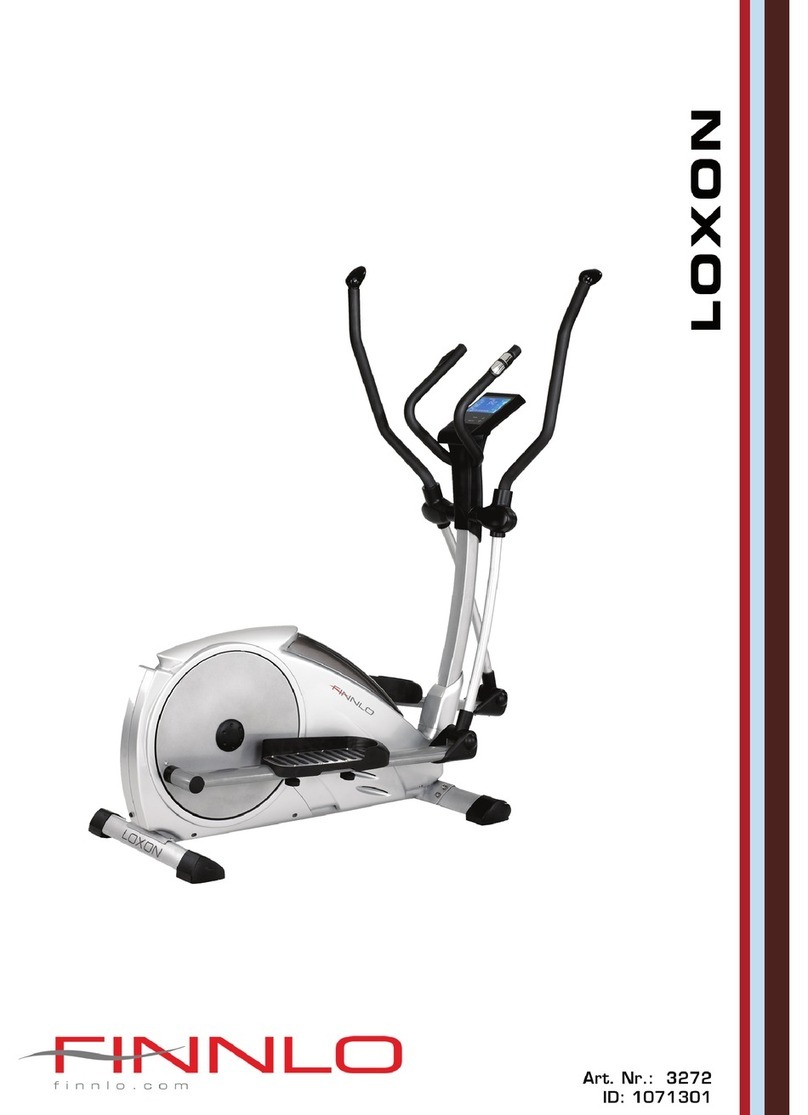
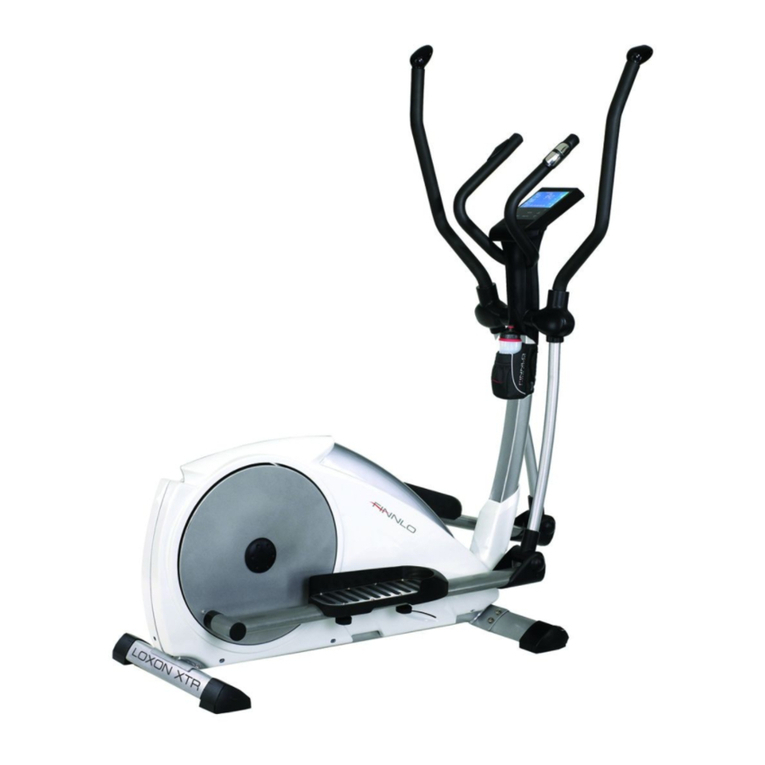
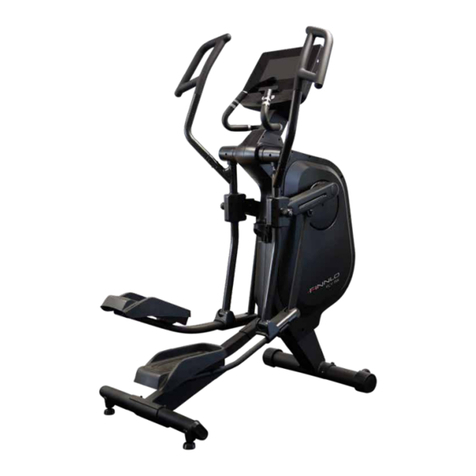
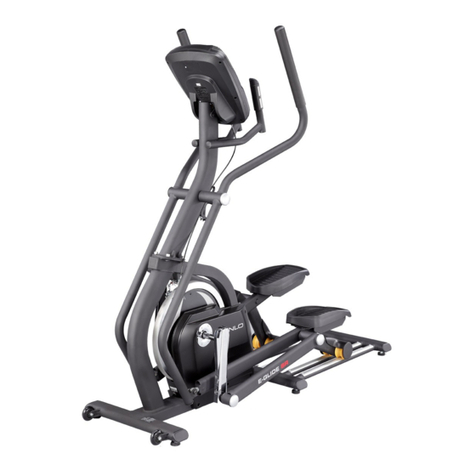
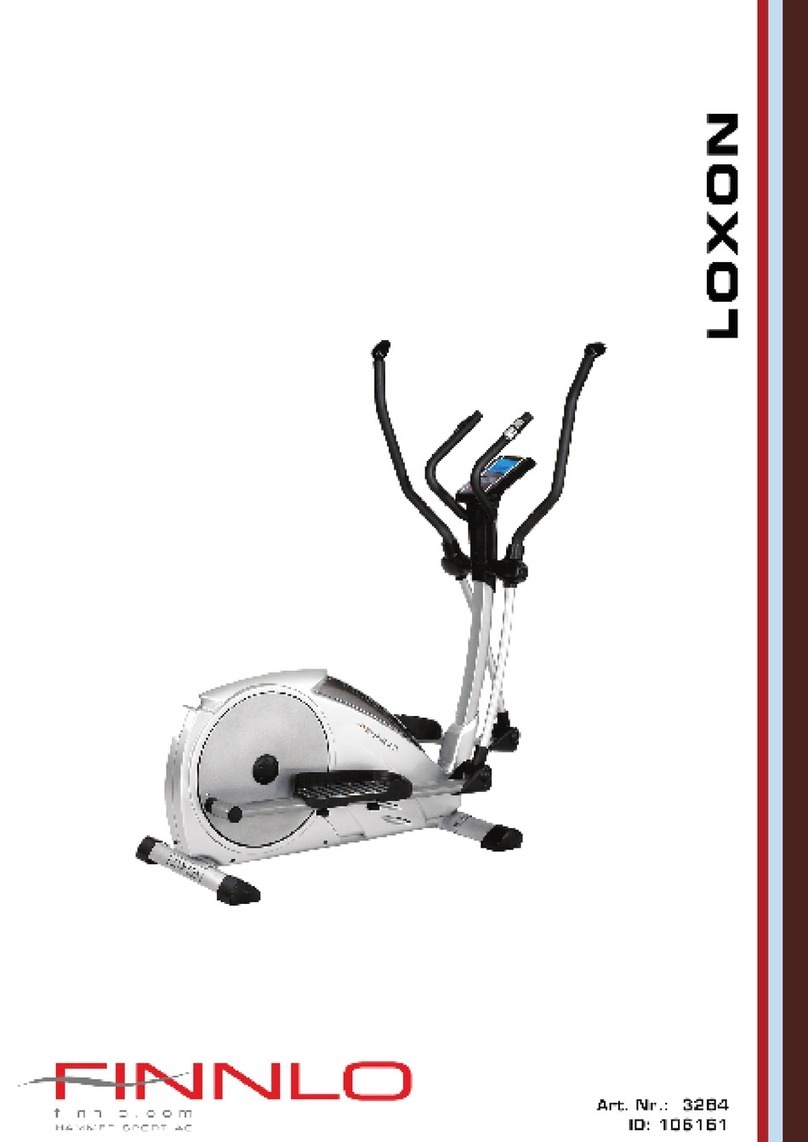
Finnlo LOXON XTR User manual


1. Sicherheitshinweise
2. Allgemeines
2.1 Verpackung
2.2 Entsorgung
2.3 Symbolerklärung
3. Montage
3.1 Montageschritte
4. Pflege und Wartung
5. Computer (D)
5.1 Functietoetsen
5.2 Kalenderfunctie
5.3 Persoonlijke gegevens
5.3.1 Opslaan van de trainingsgegevens
5.4 Pulsmeting
5.5 Inbedrijfstelling computer
5.5.1 Training zonder gegevensspecicatie
5.5.2 Training met gegevensspecicatie
5.5.2.1 Manual
5.5.2.2 Programma’s
5.5.2.3 Zelf instelbaar programma
5.5.2.4 Pulsprogramma
5.5.2.4.1 Pulsprogramma IND
5.5.2.5 RECOVERY
5.6 Foutdiagnose en foutopsporing
6. Technische Details
6.1 Netzgerät (im Lieferumfang enthalten)
7. Trainingsanleitung
7.1 Trainingshäufigkeit
7.2 Trainingsintensität
7.3 Pulsorientiertes Training
7.4 Trainings-Kontrolle
7.5 Trainingsdauer
8. Explosionszeichnung
9. Teileliste
10. Garantie
11. Service-Hotline &
Ersatzteilbestellformular
1. Safety instructions 02
2. General 03
2.1 Packaging 03
2.2 Disposal 03
2.3 Explanation of symbols 03
3. Assembly 03
3.1 Assembly Steps 04
4. Care and Maintenance 10
5. Computer (UK) 10
5.1 Computer keys 10
5.2 Calendar function 11
5.3 Personal data 11
5.3.1 Record of your exercise data 11
5.4 Pulse measurement 12
5.5 Start your exercise 12
5.5.1 Exercise without setting 12
5.5.2 Exercise with settings 13
5.5.2.1 Manual 13
5.5.2.2 Preset programs 14
5.5.2.3 Custom user dened program 17
5.5.2.4 Heart rate programs 18
5.5.2.4.1 Heart rate program IND 19
5.5.2.5 RECOVERY 19
5.6 Diagnostic and troubleshooting 20
6. Technical details 21
6.1 Adapter 21
7. Training manual 22
7.1 Training frequency 22
7.2 Training intensity 22
7.3 Heartrate orientated training 22
7.4 Training control 23
7.5 Trainings duration 24
8. Explosion drawing 26
9. Parts list 28
10. Warranty (Germany only) 30
11. - 31
Inhaltsverzeichnis Index Seite/Page
01

WICHTIG!
Es handelt sich bei diesem Elliptical um ein drehzahlunab-
hängiges Trainingsgerät der Klasse HA, nach
DIN EN 957-1/9.
Max. Belastbarkeit 150 kg.
Der Elliptical darf nur für seinen bestimmungsgemäßen
Zweck verwendet werden!
Jegliche andere Verwendung ist unzulässig und
möglicherweise gefährlich. Der Importeur kann nicht
für Schäden verantwortlich gemacht werden, die durch nicht
bestimungsgemäßen Gebrauch verursacht werden.
Sie trainieren mit einem Gerät, das sicherheitstechnisch
nach neuesten Erkenntnissen konstruiert wurde. Mögliche
Gefahrenquellen, die Verletzungen verursachen könnten,
wurden bestmöglich ausgeschlossen.
Um Verletzungen und/oder Unfälle zu vermeiden,
lesen und befolgen Sie bitte diese einfachen Regeln:
1. Erlauben Sie Kindern nicht, mit dem Gerät oder in dessen
Nähe zu spielen.
2. Überprüfen Sie regelmäßig, ob alle Schrauben, Muttern,
Handgriffe und Pedale fest angezogen sind.
3. Tauschen Sie defekte Teile sofort aus und nutzen Sie das
Gerät bis zur Instandsetzung nicht. Achten Sie auch auf
eventuelle Materialermüdungen.
4. Hohe Temperaturen, Feuchtigkeit und Wasserspritzer
sind zu vermeiden.
5. Vor Inbetriebnahme des Gerätes die Bedienungsanleitung
genau durchlesen.
6. Das Gerät braucht in jede Richtung genügend Freiraum
(mindestens 1,5m).
7. Stellen Sie das Gerät auf einen festen und
ebenen Untergrund.
8. Trainieren Sie nicht unmittelbar vor bzw. nach den
Mahlzeiten.
9. Lassen Sie sich vor Beginn eines Fitness-Trainings immer
zuerst von einem Arzt untersuchen.
10. Das Sicherheitsniveau des Gerätes kann nur gewährleistet
werden, wenn Sie in regelmäßigen Abständen die
Verschleißteile überprüfen. Diese sind mit * in der Teileliste
gekennzeichnet.
11. Trainingsgeräte sind auf keinen Fall als Spielgeräte zu
verwenden.
12. Stehen Sie sich nicht auf das Gehäuse.
13. Tragen Sie keine lose Kleidung, sondern geeignete
Trainingskleidung wie z.B. einen Trainingsanzug.
14. Tragen Sie Schuhe und trainieren Sie nie barfuß.
15. Achten Sie darauf, dass sich nicht Dritte in der Nähe des
Gerätes befinden, da weitere Personen durch die
beweglichen Teile verletzt werden könnten.
16. Das Trainingsgerät darf nicht in feuchten Räumen (Bad)
oder auf dem Balkon aufgestellt werden.
IMPORTANT!
The Elliptical is produced according to DIN EN 957-1/9
class HA.
Max. user weight is 150 kg.
The Elliptical should be used only for its intended purpose.
Any other use of the item is prohibited and maybe
dangerous. The importeur cannot be held liable for
damage or injury caused by improper use of the
equipment.
The Elliptical has been produced according to the latest
safety standards.
To prevent injury and / or accident, please read and
follow these simple rules:
1. Do not allow children to play on or near the equipment.
2. Regularly check that all screws, nuts, handles and pedals
are tightly secured.
3. Promptly replace all defective parts and do not use the
equipment until it is repaired. Watch for any material
fatigue.
4. Avoid high temperatures, moisture and splashing water.
5. Carefully read through the operating instructions before
starting the equipment.
6. The equipment requires sufficient free space in all
directions (at least 1.5 m).
7. Set up the equipment on a solid and flat surface.
8. Do not exersice immediately before or after meals.
9. Before starting any fitness training, let yourself examined
by a physician.
10. The safety level of the machine can be ensured only if you
regularly inspect parts subject to wear. These are
indicacated by an * in the parts list. Levers and other
adjusting mechanisms of the equipment must not obst
ruct the range of movement during training.
11. Training equipment must never be used as toys.
12. Do not step on the housing but only on the steps provi-
ded for this purpose.
13. Do not wear loose clothing; wear suitable training
gear such as a training suit, for example.
14. Wear shoes and never exercise barefoot.
15. Make certain that other persons are not in the area of
the home trainer, because other persons may be injured
by the moving parts.
16. It is not allowed to place the item in rooms with high
humidity (bathroom) or on the balcony.
1. Sicherheitshinweise 1. Safety instructions
02

Der Anwendungsbereich dieses Trainingsgerätes ist der
Heimbereich. Das Gerät entspricht den Anforderungen der DIN
EN 957-1/9 Klasse HA. Die CE-Kennzeichnung bezieht sich
auf EG Richtlinie 2006/95/EG und die 2004/108/EWG. Bei
unsachgemäßem Gebrauch dieses Gerätes (z. B. übermäßigem
Training, falsche Einstellungen, etc.) sind Gesundheitsschäden
nicht auszuschließen.
Vor Beginn des Trainings sollte eine allgemeine Untersuchung
von Ihrem Arzt durchgeführt werden, um eventuelle vorhandene
Gesundheitsrisiken auszuschließen.
2.1 Verpackung
Die Verpackung besteht aus umweltfreundlichen und wieder
verwertbaren Materialien:
Außenverpackung aus Pappe
Formteile aus geschäumtem, FCKW-freiem Polystyrol (PS)
Folien und Beutel aus Polyäthylen (PE)
Spannbänder aus Polypropylen (PP)
2.2 Entsorgung
Dieses Produkt darf am Ende seiner
Lebensdauer nicht über den normalen
Haushaltsabfall entsorgt werden, sondern
muss an einem Sammelpunkt für das
Recyclingvonelektrischenundelektronischen
Geräten abgegeben werden. Die Werkstoffe
sind gemäß ihrer Kennzeichnung wiederver-
wertbar. Mit der Wiederverwendung, der
stofflichen Verwertung oder anderen
Formen der Verwertung von Altgeräten leis-
ten Sie einen wichtigen Beitrag zum Schutze unserer Umwelt.
Bitte erfragen Sie bei der Gemeindeverwaltung die zuständige
Entsorgungsstelle.
This training equipment is for use at home. The equipment
complies with the requirements of DIN EN 957-1/9 Class HA.
The CE marking refers to the EU Directive 2006/95/EEC and
2004/108/EEC. Damage to health cannot be ruled out if
this equipment is not used as intended (for example, excessive
training, incorrect settings, etc.).
Before starting your training, you should have a complete phy-
sical examination by your physician, in order to rule out any
existing health risks.
2.1 Packaging
Environmentally compatible and recyclable materials:
External packaging made of cardboard
Molded parts made of foam CFS-free polystyrol (PS)
Sheeting and bags made of polyethylene (PE)
Wrapping straps made of polypropylene (PP)
2.2 Disposal
Please be sure to keep the packing
for the event of repairs / warranty
matters. The equipment should not be
disposed of in the household rubbish!
2. Allgemeines 2. General
03
Um den Zusammenbau des Ellipticals für Sie so einfach wie
möglich zu gestalten, haben wir die wichtigsten Teile bereits
vormontiert. Bevor Sie das Gerät zusammenbauen, sollten Sie
bitte diese Aufbauanleitung sorgfältig lesen und danach Schritt
für Schritt, wie beschrieben, fortfahren.
Packungsinhalt
Entnehmen Sie alle Einzelteile aus der Styroporform
und legen Sie diese nebeneinander auf den Boden.
Stellen Sie den Hauptrahmen auf eine bodenschonen-
de Unterlage, da ohne montierte Standfüße Ihr
Boden beschädigt/verkratzt werden könnte. Diese
Unterlage sollte flach und nicht zu dick sein, sodass
der Rahmen einen stabilen Stand hat.
Achten Sie darauf, dass Sie während des Zusammen-
baus in jede Richtung hin genügend Bewegungsfrei-
raum (mind. 1,5 m) haben.
In order to make assembly of the Elliptical as easy as possible
for you, we have preassembled the most important parts.
Before you assemble the equipment, please read these instruc-
tions carefully and then continue step by step as described
Contents of packaging
Unpack all individual parts and place them alongside
each other on the floor.
Place the main frame on a pad protecting the floor,
because without its assembled base feet it can
damage / scratch your floor. The pad should be
flat and not too thick, so that the frame has a
stable stand.
Make certain that you have adequate room for
movement (at least 1.5 m) on all sides during
assembly.
3. Aufbau 3. Assembly

04
3.1 Montageschritte/Assembly steps

05

06

07

08

09

Wartung
Grundsätzlich bedarf das Gerät keiner Wartung
Kontrollieren Sie regelmäßig alle Geräteteile und den
festen Sitz aller Schrauben und Verbindungen
Tauschen Sie defekte Teile über unseren Kunden-
service sofort aus. Das Gerät darf dann bis zur
Instandsetzung nicht verwendet werden.
Pflege
Zur Reinigung verwenden Sie bitte nur ein feuchtes
Tuch ohne scharfe Reinigungsmittel. Achten Sie darauf,
dass keine Flüssigkeit in den Computer gelangt.
Bauteile, welche mit Schweiß in Kontakt kommen, brau-
chen nur mit einem feuchten Tuch gereinigt werden.
Maintenance
In principle, the equipment does not require
maintenance.
Regularly inspect all parts of the equipment and the
secure seating of all screws and connections.
Promptly replace any defective parts through our
customer service. Until it is repaired, the equipment
must not be used.
Care
When cleaning, use only a moist cloth and avoid harsh
cleaning agents. Ensure that no moisture penetrates
into the computer.
Components that come into contact with perspiration,
need cleaning only with a damp cloth.
4. Pflege und Wartung 4. Care and Maintenance
10
5. Computer 5. Computer
5.1 Computer keys
arrow keys:
Program selection or increase/decrease of values as well the
resistance. A longer press will start the automatic value nder.
ROGRAMS:
Each button stands for a special program.
ENTER
By pressing this key, a function will be conrmed.
HR1, HR2, IND:
There is already a percentage of your exercise heartrate saved.
HR1= 65%, HR2: 90% and for IND you are able to set your own
trainings heartrate.
DATA:
Exercise data, like odometer or single data can be checked.
5.1 Functietoetsen
Pijltjestoetsen:
Verhoging/ verlaging van functiewaarden en
weerstandsniveaus. Langer indrukken activeert de
automatische waardezoeker.
Programmatoetsen:
Elke programmatoets is aan een proel toegewezen.
ENTER:
Door indrukken kan een functie worden bevestigd.
HR1, HR2, IND:
In de hartslagprogramma’s zijn al hartslagpercentages voor uw
training opgeslagen. HR1: 65%, HR2: 90% en bij IND kunt u de
maximale waarde zelf bepalen.
DATA:
Ukunt trainingsgegevensopvragen,zoalsde totaletrainingsduur
of gegevens van de individuele trainingseenheden.

RESET:
Pressing RESET, will cause a step backwards.
RECOVERY:
After you nished your exercise press RECOVERY and stop
pedalling. The computer will measure the heartrate for the next
60 seconds. If the dierence between the starting and end
heartrate is around 20%, you will get the grade F1 (very good).
RESET:
Deze toets dient om één stap terug te gaan.
RECOVERY:
Druk bij het einde van de training op “RECOVERY” en stop met
trappen. De computer meet gedurende 60 seconden uw puls.
Bij een pulsverschil van ca. 20% krijgt u het cijfer F1 (zeer goed).
5.2 Kalenderfunctie
Om correcte gegevens in het trainingsdagboek weer te geven,
moet aan het begin van de eerste training de datum worden
ingevoerd. Als u de datum/tijd moet veranderen, druk dan
gedurende twee seconden beide pijltjestoetsen tegelijkertijd
in en wijzig datum/tijd. Als na verloop van tijd bij elke training
datum/tijd worden gevraagd, moet de batterij CR 2032 in de
computer worden vervangen. Open daarvoor de achterkant
van de computer door de schroeven los te draaien en vervang
de batterij.
5.3 Persoonlijke gegevens
USER: Het is mogelijk USER (gebruikers) op te slaan. Bij USER
“0”kunnen geen gegevens opgeslagen worden, bij USER 1-4
kunnen gegevens opgeslagen worden. Ook kunnen de namen
van USER 1-4 worden gewijzigd.
Invoer van persoonlijke gegevens:
Om een naam te wijzigen, selecteert u in een willekeurig
programma de USER (1-4) die u wilt aanpassen. Drukken
de ENTER-toets langer dan twee seconden in. De eerste
positie knippert. Met de pijltjestoetsen kan de letter worden
gewijzigd. Met de ENTER-toets wordt dit bevestigd en knippert
de volgende letter. Als de invoer klaar is, drukt u opnieuw
gedurende twee seconden op de ENTER-toets.
De leeftijd (AGE) knippert. Met de pijltjestoetsen kunt u uw
leeftijd invoeren en met ENTER bevestigen.
Gewicht (weight) knippert. Met de pijltjestoetsen kunt u uw
gewicht invoeren en met ENTER bevestigen.
5.3.1 Opslaan van de trainingsgegevens
Na elke training (USER 1-4) wordt gevraagd of u de
trainingsgegevens wilt opslaan. Selecteer“YES”en bevestig dit
met ENTER. Indien u de gegevens niet wilt opslaan, selecteert u
NO en bevestigt u dit met ENTER.
Om de trainingsgegevens op te vragen, drukt u op DATA
en selecteert u met de pijltjestoetsen de gewenste USER.
Bevestig met ENTER. De volgende gegevens kunnen worden
weergegeven: EXERCISES (afzonderlijke trainingseenheden)-
ODOMETER (totale trainingstijd)- Longest Time (langste
trainingseenheid)- en de reeds verbrande calorieën (CALORIES).
Selecteer de gewenste rubriek en bevestig met ENTER.
Met de pijltjestoetsen worden in de rubriek“EXERCISES”
uw trainingseenheden weergegeven. Selecteer een
trainingseenheid en bevestig met ENTER. Met de pijltjestoetsen
kunt u tussen de maximale en de gemiddelde waarden
switchen. De laatste trainingseenheid staat altijd op“EX 1”, de
oudere worden altijd een plaats naar achteren verschoven. Om
het trainingsdagboek te sluiten drukt u opnieuw op DATA.
5.2 Calendar function
To give you a correct exercise memory, you need to set the
calendar and time at the rst beginning. If you need to change
the date/time, press both arrow keys at the same time for
two seconds. After a long time, the memory battery need to
be replaced. Please open the computerhousing and replace it
through and new CR 2032 battery.
5.3 Personla data
USER: There is the option to save your exercise data for USER
1-4, but not for USER„0“. As well the n ame of USER1-4 can
be changed.
Setting of USER data:
Changing of the name: If you select a program, a USER will be
shown. Selct the USER, (1-4) which should be changed. Press
ENTER for longer than 2 seconds. The rst letter is blinking.
With the arrow-keys, the letter can be changed, with ENTER, it
will be conrmed and the next letter is blinking. All letters need
to be overwritten!. If you nished the setting, press ENTER
again for 2 seconds.
AGE is blinking. With the arrow-keys, you can set the Age and
conrm it by pressing ENTER.
Weight is blinking. With the arrow-keys, you can set the weight
and conrm it by pressing ENTER. the personal data have been
stored.
5.3.1 Record of your exercise data
After each exercise (only USER 1-4), you will be asked, if you
want to safe your exercise data. the display shows YES, press
ENTER, if you don´t want to safe it, use arrow-keys to select
„NO“ and press ENTER.
To activate the exercise storage, press DATA and select
by using the arrow-keys the USER, who want to be checked
and press ENTER. No you have the possibility to choose:
EXERCISES- ODOMETER- Longest exercise time- Calories.
Choose the value, which you want to check by using arrow
-keys and conrm with ENTER. In EXERCISES, you have the
possibility to check the single trainings data by using arrow
-keys. If you select one excercise, conrm with ENTER. Now you
can jump between the max or the average valuues by pressing
arrow-keys. The latest exercise will be shown on EX 1 and the
older data will be moved backwards. To leave the exercise
storage, press DATA again.
11

12
5.5 Inbedrijfstelling computer
5.5.1 Training zonder gegevensspecificatie
1) Sluit de meegeleverde AC-adapter aan op de daarvoor
voorziene bus aan de achterkant van de behuizing.
2) Op de computer verschijnt kort een testbeeld. Wanneer
er vijf minuten lang geen invoer is, wordt de stand-by modus
geactiveerd.
Druk de toets van het geselecteerde programma in en begin te
trappen. De gegevens worden niet opgeslagen.
5.5 Start your exercise
5.5.1 Exercise without settings
1) Connect the cable from the adapter to the plug at the rear
side of the housing
2) The display will show a full display for a short period of time.
If there is no input into the console for fünf minutes, the console
will go into stand-by mode.
Press the button of the selected program and start pedalling,
the exercise values, won´t be saved!
5.4 Pulsmeting
Pulsmeting met borstgordel: De computer is uitgerust met
een chip die draadloze pulstransmissie met een borstgordel
mogelijk maakt (5,0 - 5,5 kHz).
Handpulsmeting De pulsfrequentie wordt gemeten via twee
contactpunten (ovale sensoren) aan de binnenkant van de hand.
Om de puls op te nemen moeten beide contactpunten altijd
goed door de handpalmen zijn omsloten.
Gebruik voor een pulsgestuurde training altijd de optioneel
verkrijgbare borstgordel.
WAARSCHUWING: Systemen voor hartfrequentiebewaking
kunnen onnauwkeurig zijn. Overmatige training kan ernstige
schade aan de gezondheid of de dood veroorzaken. Stop
onmiddellijk met trainen bij duizeligheid of een gevoel van
zwakte!
5.4 Pulse measurement
Pulse measurement with the chest strap: The computer is
equipped with a chip, which makes wireless pulse transmission
possible using a chest strap (5.0 – 5.5 kHz).
Handpulse measurement: Please put both hands on the sensors,
which are assembled on the handlebar. If you lift off one hand
off the sensor during measuring, it will take some time to reach
the correct watt value.
Both hands have to be kept on the hand pulse sensors.
For a heartrate controlled exercise, please use the chestbelt,
which can be bought at the Finnlo Service.
WARNING: Systems with heartrate control can be
incorrect. To much exercise could injure your body or
can cause dead. If you feel light theaded or weak, stop
your exercise immediately!

13
5.5.2 Training met standaardinstelling gegevens
1) Sluit de meegeleverde AC-adapter aan op de daarvoor
voorziene bus aan de achterkant van de behuizing.
2) Op de computer verschijnt kort een testbeeld.
5.5.2.1 Manual:
Als u de trainingsfunctie “MANUAL” gebruikt, kunt u de
moeilijkheidsgraad (trapweerstand) in 40 stappen instellen door
op de pijltjestoetsen te drukken.
Druk op MANUAL en bevestig met de ENTER-toets.
USER 0 wordt weergegeven. Met de pijltjestoetsen kunt u de
user selecteren.
Druk op de ENTER-toets.
Nu verschijnt“TIME”. Met de pijltjestoetsen
kunt u de gewenste trainingstijd (in stappen van minuten)
invoeren. De tijd hoeft u niet in te voeren. Door te trappen
begint uw training.
Druk op ENTER om de afstand in te voeren die u wilt afleggen.
Met de pijltjestoetsen kunt u de waarde aanpassen en met ENTER
bevestigen. Om de training te starten, begint u te trappen.
Daarna wordt gevraagd hoeveel calorieën u wilt verbranden. Met
de pijltjestoetsen kunt u de waarde aanpassen en met ENTER
bevestigen. Om de training te starten, begint u te trappen.
Voor tijd, afstand en calorieënverbruik wordt slechts één waarde
opgeslagen. Als u bijvoorbeeld een tijd invoert en vervolgens de
afstand, wordt de tijd op nul gezet.
Nu verschijnt THR. Met de pijltjestoetsen kunt u de maximale
hartslag invoeren. Als uw puls de vooraf ingestelde pulswaarde
overschrijdt, klinkt alleen een geluidssignaal en is er geen
weerstandsaanpassing.
Door te trappen begint uw training.
Na het trappen heeft u de mogelijkheid de trainingsgegevens
op te slaan. Selecteer daarvoor met de pijltjestoetsen “YES”.
Indien u de gegevens niet wilt opslaan, selecteert u“NO”.
5.5.2 Exercise with settings
1) Connect the cable from the adapter to the plug at the rear
side of the housing
2) The display will show a full display for a short period of time.
5.5.2.1 Manual:
If you choose “MANUAL”, you can change the resistance by
pressing the arrow-keys in 40 resistance levels.
Press MANUAL and confirm it with ENTER. You are entering the
setting mode of MANUAL.
The display shows USER 0, by pressing the arrow-keys you can
choose your user.
Press ENTER to confirm.
Next is Time. You may adjust the Time with arrow-keys and
press Enter to continue. It is not a must to set the the time.
START pedalling and your excercise beginns.
Press ENTER, and set the distance, which you want to finish
with the arrow-keys. It is not a must to set the distance. START
pedalling and your excercise beginns.
Now you insert the calorie value by pressing the arrow-keys and
conrm the value, by pressing ENTER or start pedalling to start
your exercise.
For Time, Distance or Calories, you are able to set only one of
these. If you try to set a second value, the first one will be reset.
After you pressed ENTER, the THR will be appear. You may insert
the max trainings heartrate, but pay attention, the computer will
only beep and won´t adjust the resistance!
Start pedalling and you training start
After you finished your exercise, you can save the exercise data
by selecting „yes“ with the arrow-keys, if not select „NO“ and
press ENTER.

14
5.5.2.2 Programma’s:
De computer is geprogrammeerd voor verschillende work-outs
die elk een ander doel hebben.
HILL (berg-profiel)
Het HILL-programma is een piramideprogramma en begint met
een belasting van 10% van de maximale belasting, die wordt
ingevoerd voordat de training begint en stijgt tot 100%.
Fat Burn (vetverbrandingsprogramma)
Het programma heeft een steile stijging tot ongeveer 2/3 van de
maximale ingestelde weerstand. Dit niveau wordt bijna tijdens
de gehele training aangehouden.
CARDIO
Het programma wordt bepaald door een steile stijging
tot ongeveer het maximale niveau. Het weerstandsniveau
fluctueert totdat het tegen het einde snel gemakkelijker gaat.
Het programma is vooral bedoeld voor de cardiovasculaire
training.
5.5.2.2 Preset programs
The computer has dierent programs that have been designed
for a variety of workouts. These ve programs have factory
preset work level proles for achieving dierent goals.
Hill
This program follows a triangle or pyramid type of gradual
progression from approximately 10% of maximum eort (the
level that you chose before starting this program) up to a
maximum eort which lasts for 10% of the total workout time,
then a gradual regression of resistance back to approximately
10% of maximum eort.
Fat Burn
This program follows a quick progression up to the maximum
resistance level (default or user input level) that is sustained for
2/3 of the workout. This program will challenge your ability to
sustain your energy output for an extended period of time.
Cardio
This program presents a quick progression up to near maximum
resistance level (default or user input level). It has slight
uctuations up and down to allow your heart rate to elevate, and
then recover repeatedly, before beginning a quick cool down.
This will build up your heart muscle and increase blood ow and
lung capacity.

15
Strength (uithoudingsvermogen)
Steile, lange stijging tot 100% van de vooraf ingestelde
maximale weerstand. Het programma bevordert het
uithoudingsvermogen en de lactaattolerantie.
Intervall
Het programma wordt gekenmerkt door een aantal hoge
intensiteitspieken met korte pauzes met minder belasting. Het
bevordert het snel uitvoeren van intensieve en korte taken.
Watt
In de WATT-modus zal de weerstand worden aangepast
overeenkomstig het RPM, dat wil zeggen: hoe hoger het RPM,
hoe lager de weerstand, hoe lager het RPM, hoe hoger de
weerstand.
Strengh
This program has a gradual progression of resistance up to
100% of maximum eort that is sustained for 25% of workout
duration.This will help build strength and muscular endurance in
the lower body and glutes. A brief cool down follows.
Intervall
This program takes you through high levels of intensity followed
by recovery periods of low intensity. This program utilizes and
develops your“Fast Twitch”muscle bers which are used when
performing tasks that are intense and short in duration.
Watt
In the WATT mode, the resistance will be adjusted according to
the rpm, means if the rpm are becoming higher, the resistance
becomes lower, otherwise rpm low, the resitance will be higher..

16
Invoeren van gegevens bij voorgedefinieerde programma’s
Selecteer het gewenste programma en druk ter bevestiging op
ENTER.
USER 0 wordt weergegeven. Met de pijltjestoetsen kunt u de
user selecteren.
Druk op de ENTER-toets.
Nu verschijnt“TIME”. Met de pijltjestoetsen
kunt u de gewenste trainingstijd (in stappen van minuten)
invoeren. De tijd hoeft u niet in te voeren. Door te trappen
begint uw training.
Druk op ENTER om de afstand in te voeren die u wilt afleggen.
Met de pijltjestoetsen kunt u de waarde aanpassen en met ENTER
bevestigen. Om de training te starten, begint u te trappen.
Daarna wordt gevraagd hoeveel calorieën u wilt verbranden. Met
de pijltjestoetsen kunt u de waarde aanpassen en met ENTER
bevestigen. Om de training te starten, begint u te trappen.
Voor tijd, afstand en calorieënverbruik wordt slechts één waarde
opgeslagen. Als u bijvoorbeeld een tijd invoert en vervolgens de
afstand, wordt de tijd op nul gezet.
Er wordt gevraagd naar het maximale wattvermogen, dat in het
profiel moet worden bereikt. Met de pijltjestoetsen kunt u de
waarde aanpassen en met ENTER bevestigen. Om de training te
starten, begint u te trappen.
Nu verschijnt THR. Met de pijltjestoetsen kunt u de maximale
hartslag invoeren. Als uw puls de vooraf ingestelde pulswaarde
overschrijdt, klinkt alleen een geluidssignaal en is er geen
weerstandsaanpassing.
Door te trappen begint uw training.
Na het trappen heeft u de mogelijkheid de trainingsgegevens
op te slaan. Selecteer daarvoor met de pijltjestoetsen “YES”.
Indien u de gegevens niet wilt opslaan, selecteert u“NO”.
Programming preset programs
Select the desired program button then press the Enter key.
The display shows USER 0, by pressing the arrow-keys you can
choose your user.
Press ENTER to confirm.
Next is Time. You may adjust the Time with arrow-keys and
press Enter to continue. It is not a must to set the the time.
Start pedalling and your excercise beginns.
Press ENTER, and set the distance, which you want to finish
with the arrow-keys It is not a must to set the distance. Start
pedalling and your excercise beginns.
Now you insert the calorie value by pressing the arrow-keys and
conrm the value, by pressing ENTER or start pedalling to start
your exercise.
For Time, Distance or Calories, you are able to set only one of
these. If you try to set a second value, the first one will be reset.
Now you can set the max Watt value, which should be reached
during your exercise. With arrow-keys, the value can be set,
press Enter to continue or start pedalling and your excercise
beginns.
After you pressed ENTER, the THR will be appear. You may insert
the max trainings heartrate, but pay attention, the computer will
only beep and won´t adjust the resistance!
Start pedalling and you training start
After you finished your exercise, you can save the exercise data
by selecting „yes“ with the Uarrow-keys, if not select „NO“ and
press ENTER.

17
5.5.2.3 Zelf instelbaar programma
Het is mogelijk zelf een profiel aan te maken. Ga als volgt te werk:
Druk op INDIVIDUAL en bevestig met ENTER.
USER 0 wordt weergegeven. Met de pijltjestoetsen kunt u de
user selecteren en met ENTER bevestigen.
Nu verschijnt “TIME”. Met de pijltjestoetsen kunt u de gewenste
trainingstijd (in minuten) invoeren. De tijd hoeft u niet in te
voeren. Door te trappen begint uw training.
Druk op ENTER om de afstand in te voeren die u wilt afleggen.
Met de pijltjestoetsen kunt u de waarde aanpassen en met
ENTER bevestigen. Om de training te starten, begint u te trappen.
Daarna wordt gevraagd hoeveel calorieën u wilt verbranden. Met
de pijltjestoetsen kunt u de waarde aanpassen en met ENTER
bevestigen. Om de training te starten, begint u te trappen.
Voor tijd, afstand en calorieënverbruik wordt slechts één waarde
opgeslagen. Als u bijvoorbeeld een tijd invoert en vervolgens de
afstand, wordt de tijd op nul gezet.
Voor elke weerstandsbalk wordt gevraagd naar het maximale
wattvermogen, dat in het profiel moet worden bereikt. Met
de pijltjestoetsen kunt u de waarde aanpassen en met ENTER
bevestigen. Om de training te starten, begint u te trappen.
Nu verschijnt THR. Met de pijltjestoetsen kunt u de maximale
hartslag invoeren. Als uw puls de vooraf ingestelde pulswaarde
overschrijdt, klinkt alleen een geluidssignaal en is er geen
weerstandsaanpassing.
Door te trappen begint uw training.
Na het trappen heeft u de mogelijkheid de trainingsgegevens
op te slaan. Selecteer daarvoor met de pijltjestoetsen “YES”.
Indien u de gegevens niet wilt opslaan, selecteert u“NO”.
5.5.2.3 Custom user dened program
You can design your own profile, please follow the following
instruction:
Press INDIVIDUAL and confirm with ENTER.
The display shows USER 0, by pressing the arrow-keys you can
choose your user and confirm by pressing ENTER.
Next is Time. You may adjust the Time with arrow-keys and
press Enter to continue. It is not a must to set the the time.
Start pedalling and your excercise beginns.
Press ENTER, and set the distance, which you want to finish
with the arrow-keys. It is not a must to set the distance. Start
pedalling and your excercise beginns.
Now you insert the calorie value by pressing the arrow-keys and
conrm the value, by pressing ENTER or start pedalling to start
your exercise.
For Time, Distance or Calories, you are able to set only one of
these. If you try to set a second value, the first one will be reset.
Now you can set the max Watt value for each bar, which should
be reached during your exercise. With arrow-keys, the value
can be set, press Enter to continue or start pedalling and your
excercise beginns.
After you pressed ENTER, the THR will be appear. You may insert
the max trainings heartrate, but pay attention, the computer will
only beep and won´t adjust the resistance!
Start pedalling and you training start
After you finished your exercise, you can save the exercise data
by selecting „yes“ with the arrow-keys, if not select „NO“ and
press ENTER.

18
5.5.2.4 Pulsprogramma
LET OP: Voor dit programma moet een borstgordel worden
gebruikt!
HR1 en HR2 werken hetzelfde; het enige verschil zijn de
trainingsfrequenties. HR1 is ontworpen voor optimale
vetverbranding (60% van de maximale trainingspuls) en HR2
is 90% voor de cardiovasculaire training. De computer past de
weerstand aan op basis van uw hartslag, zodat u altijd 3-5 slagen
rond uw limiet traint.
Druk op HR1 of HR2 om te starten en bevestig met ENTER.
USER 0 wordt weergegeven. Met de pijltjestoetsen kunt u de
user selecteren en met ENTER bevestigen.
Nu verschijnt “TIME”. Met de pijltjestoetsen kunt u de gewenste
trainingstijd (in stappen van minuten) invoeren. De tijd hoeft u
niet in te voeren. Door te trappen begint uw training.
Druk op ENTER om de afstand in te voeren die u wilt afleggen.
Met de pijltjestoetsen kunt u de waarde aanpassen en met ENTER
bevestigen. Om de training te starten, begint u te trappen.
Daarna wordt gevraagd hoeveel calorieën u wilt verbranden. Met
de pijltjestoetsen kunt u de waarde aanpassen en met ENTER
bevestigen. Om de training te starten, begint u te trappen.
Voor tijd, afstand en calorieënverbruik wordt slechts één waarde
opgeslagen. Als u bijvoorbeeld een tijd invoert en vervolgens de
afstand, wordt de tijd op nul gezet.
Er wordt naar het start-wattvermogen gevraagd. Met de
pijltjestoetsen kunt u de waarde aanpassen en met ENTER
bevestigen.
Nu verschijnt THR. De berekende trainingspuls wordt getoond.
Met de pijltjestoetsen kunt u de waarde echter wijzigen.
Door te trappen begint uw training.
Na de training heeft u de mogelijkheid de trainingsgegevens op
te slaan. Selecteer daarvoor met de pijltjestoetsen “YES”. Indien
u de gegevens niet wilt opslaan, selecteert u “NO”.
5.5.2.4 Heart rate programs
Note: You must wear the heart rate transmitter strap for these
programs.
Both programs operate the same, the only dierence is that
HR1 is set to 60% and HR2 is set to 90% of the maximum
heart rate. 60% is dened for fat burning and 90% for a
cardiovascular exercise. After selecting your heart rate target
the program will attempt to keep you at or within 3-5 heart
beats per minute of this value.
Press the HR 1 or HR 2 key then press the Enter key.
The display shows USER 0, by pressing the arrow-keys you can
choose your user and confirm by pressing ENTER.
Next is Time. You may adjust the Time with arrow-keysand press
Enter to continue. It is not a must to set the the time. Start
pedalling and your excercise beginns.
Press ENTER, and set the distance, which you want to finish
with the arrow-keyss. It is not a must to set the distance. Start
pedalling and your excercise beginns.
Now you insert the calorie value by pressing the arrow-keys and
conrm the value, by pressing ENTER or start pedalling to start
your exercise.
For Time, Distance or Calories, you are able to set only one of
these. If you try to set a second value, the first one will be reset.
Now you can set the starting Watt value. With arrow-keys, the
value can be set, press Enter to continue.
After you pressed ENTER, the THR will be appear. the trainings
heartrate will be shown in the middle of the diplay, but can be
adjusted with the arrow-keys.
Start pedalling and you training start
After you finished your exercise, you can save the exercise data
by selecting „yes“ with the arrow-keys, if not select „NO“ and
press ENTER.

19
5.5.2.4.1 Pulsprogramma IND
LET OP: Voor dit programma moet een borstgordel worden
gebruikt!
Bij het pulsprogramma IND kunt u uw eigen pulswaarde
instellen. De computer past de weerstand aan op basis van uw
hartslag, zodat u altijd 3-5 slagen rond uw limiet traint.
Druk op IND om te starten en bevestig met ENTER.
USER 0 wordt weergegeven. Met de pijltjestoetsen kunt u de
user selecteren en met ENTER bevestigen.
Nu verschijnt “TIME”. Met de pijltjestoetsen kunt u de gewenste
trainingstijd (in minuten) invoeren. De tijd hoeft u niet in te
voeren. Door te trappen begint uw training.
Druk op ENTER om de afstand in te voeren die u wilt afleggen.
Met de pijltjestoetsen kunt u de waarde aanpassen en met ENTER
bevestigen. Om de training te starten, begint u te trappen.
Daarna wordt gevraagd hoeveel calorieën u wilt verbranden. Met
de pijltjestoetsen kunt u de waarde aanpassen en met ENTER
bevestigen. Om de training te starten, begint u te trappen.
Voor tijd, afstand en calorieënverbruik wordt slechts één waarde
opgeslagen. Als u bijvoorbeeld een tijd invoert en vervolgens de
afstand, wordt de tijd op nul gezet.
Er wordt naar het start-wattvermogen gevraagd. Met de
pijltjestoetsen kunt u de waarde aanpassen en met ENTER
bevestigen.
Er wordt naar de maximale trainingspuls gevraagd. Er zijn twee
opties:
1) Alleen bovengrens: De weerstand wordt zo geregeld, dat de
trainingspuls rond de maximale puls ligt.
2) Bij de invoer van een onder- en bovengrens, wordt de
weerstand zo lang verhoogd tot uw trainingspuls boven de
bovengrens komt. Daarna wordt deze zo lang verlaagd tot uw
trainingspuls onder de onderste pulsgrens ligt.
Door te trappen begint uw training.
Na de training heeft u de mogelijkheid de trainingsgegevens op
te slaan. Selecteer daarvoor met de pijltjestoetsen “YES”. Indien
u de gegevens niet wilt opslaan, selecteert u “NO”.
5.5.2.5 RECOVERY
Druk bij het einde van de training op “RECOVERY” en stop met
trappen. De computer meet gedurende 60 seconden uw puls.
Bij een pulsverschil van ca. 20% krijgt u het cijfer F1 (zeer goed).
5.5.2.4.1 Heart rate program IND
Note: You must wear the heart rate transmitter strap for these
programs.
The program IND allows you to set your own target heart rate.
After selecting your heart rate target the program will attempt
to keep you at or within 3-5 heart beats per minute of this value.
Press the IND, then press the Enter key.
The display shows USER 0, by pressing the arrow-keys you can
choose your user and confirm by pressing ENTER.
Next is Time. You may adjust the Time with arrow-keys and
press Enter to continue. It is not a must to set the the time.
Start pedalling and your excercise beginns.
Press ENTER, and set the distance, which you want to finish
with the arrow-keys. It is not a must to set the distance. Start
pedalling and your excercise beginns.
Now you insert the calorie value by pressing the arrow-keys and
conrm the value, by pressing ENTER or start pedalling to start
your exercise.
For Time, Distance or Calories, you are able to set only one of
these. If you try to set a second value, the first one will be reset.
Now you can set the starting Watt value. With arrow-keys, the
value can be set, press Enter to continue.
Now you can set the max trainings heartrate. There are two
options:
1) Set only max limit. The resistance will be controlled, that your
exercise heartrate will be around the max set limit.
2) Setting of min and max limit. the resistance will be increased,
till your exercise heartrate is over the max set target. After that,
the resistance will be decreased till your exercise heartrate is
lower than the min set value. So there is a range, in which the
resistance will be changed according to your heartrate range.
Start pedalling and you training start
After you finished your exercise, you can save the exercise data
by selecting „yes“ with the arrow-keys, if not select „NO“ and
press ENTER.
5.5.2.5 RECOVERY
After you nished your exercise press RECOVERY and stop
pedalling. The computer will measure the heartrate for the next
60 seconds. If the dierence between the starting and end
heartrate is around 20%, you will get the grade F1 (very good).
Other manuals for LOXON XTR
2
This manual suits for next models
1
Table of contents
Other Finnlo Elliptical Trainer manuals

Finnlo
Finnlo E3000 User manual

Finnlo
Finnlo FLY RX User manual

Finnlo
Finnlo Loxon Installation instructions

Finnlo
Finnlo maximum Series User manual

Finnlo
Finnlo maximum Series User manual

Finnlo
Finnlo Cross Flow User manual

Finnlo
Finnlo 3955V2 User manual

Finnlo
Finnlo EGLIDE SR User manual

Finnlo
Finnlo LOXON 3272 User manual

Finnlo
Finnlo FINUM 2009 User manual