If you are installing the device for the first time, please read this manual in advance and configure it step by step. Reboot the device once you finish the
configuration is required, including change the network environments, account number and so on. If you need more info, please go to our website
(www.flyingvoice.com) and download the user manual.
P22P / P22G
www.flyingvoice.com
Quick Installation Guide
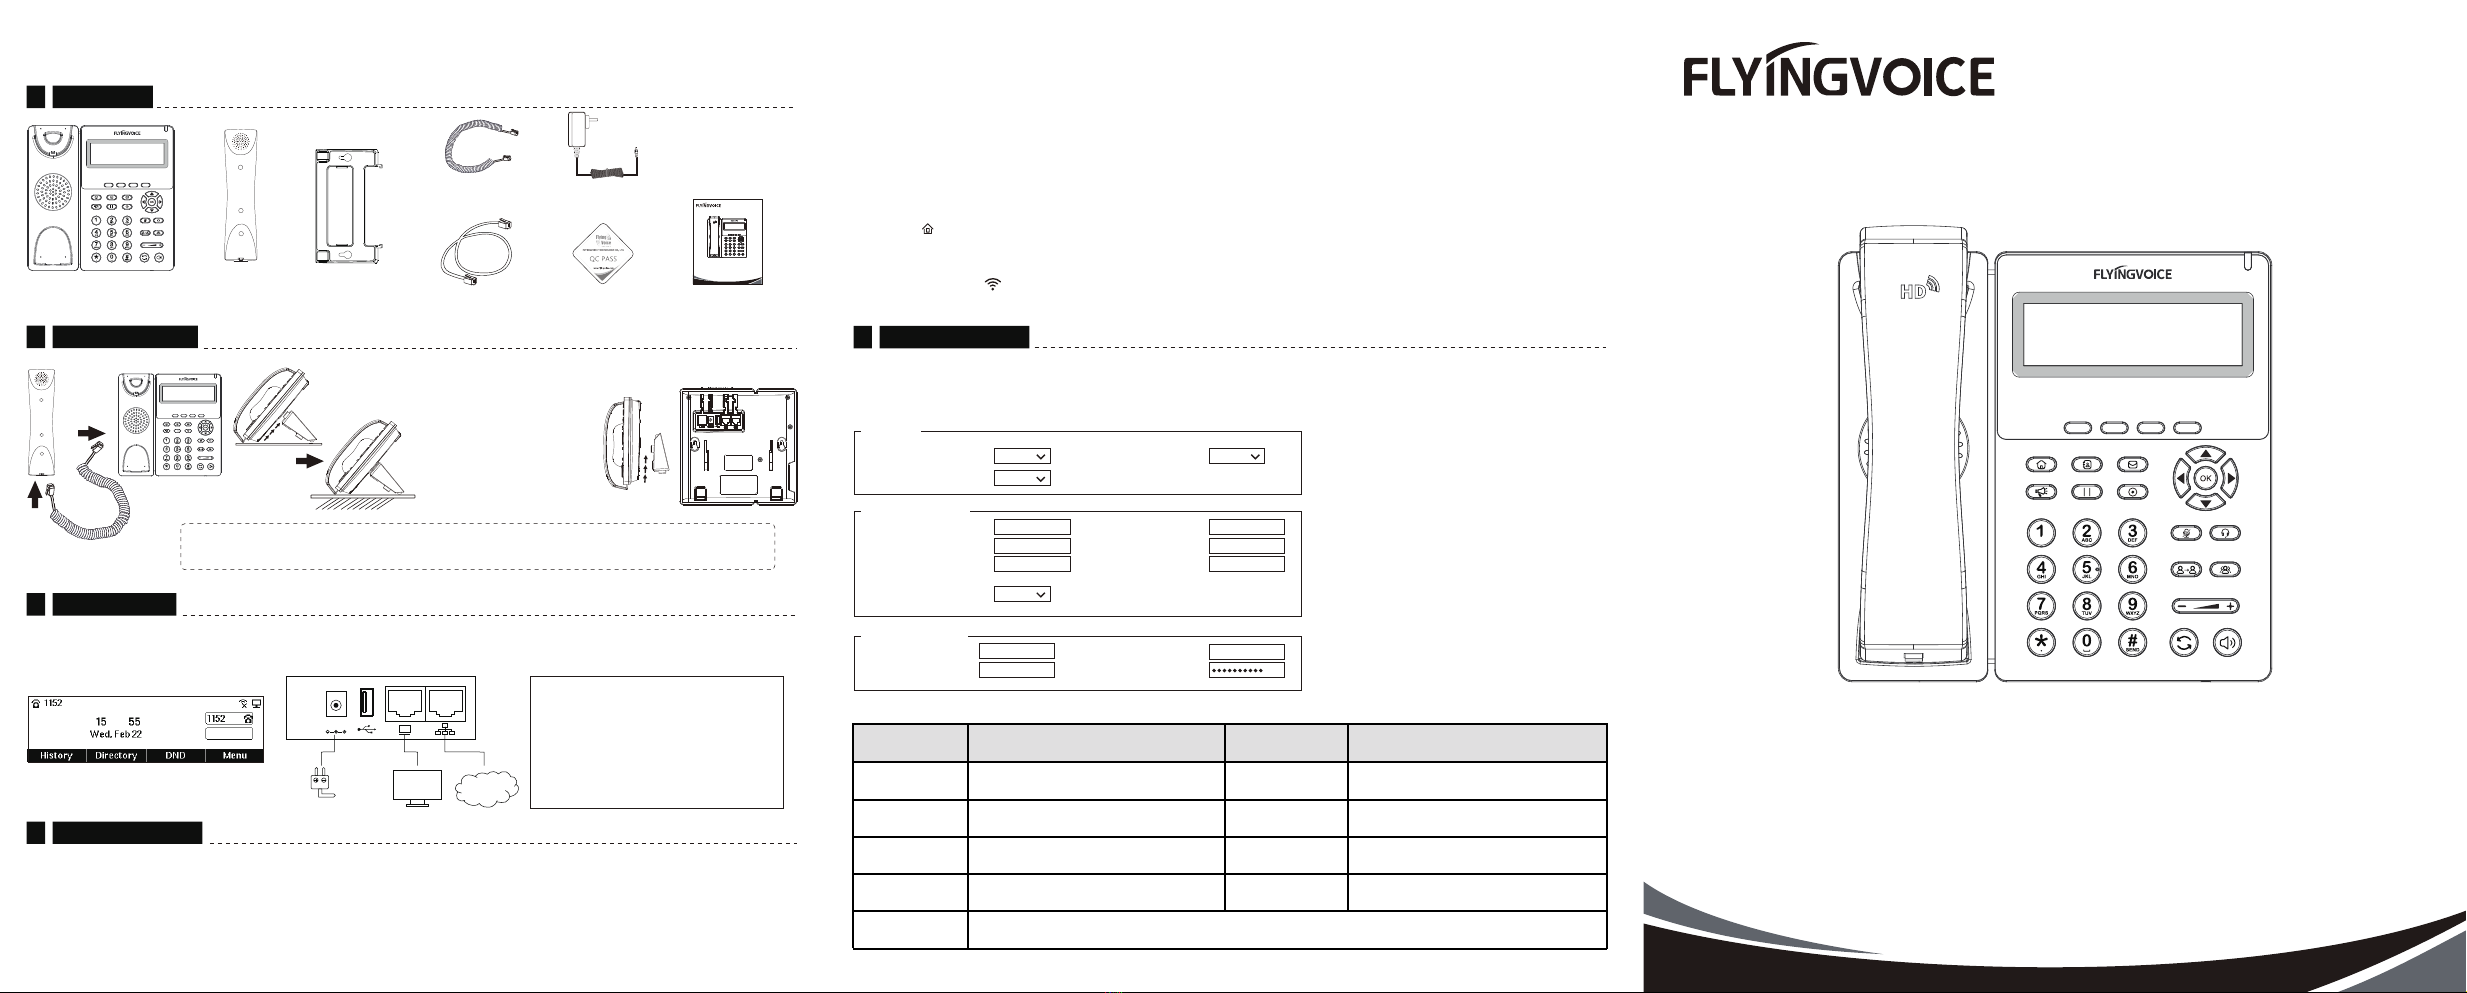
IP Phone Handset
Handset Cord Power Adapter
Stand Ethernet Cable QC PASS Quick Installation Guide
4.3 Connect via wired network
Step1. Power on the phone.
Step2. Connect the Internet port of phone tothe available network adapters (switches or routers) with Ethernet cable.
Step3. If there is DHCPserver in network, you can find the IP address by pressing Menu >My Status.
Step1. Connect the phone tothe Internet via the Internet port of the phone, connect your PCtothe PC port of the phone with Ethernet cable.
Step2.
Step3. Enter the username (Default: admin) and password (Default: admin) in the login page and click Confirm.
Open web browser on your computer, enter the IP address (find the IP address by pressing Menu >My Status) into the address bar, and then press Enter key.
4.2 Accessing the web management
Input the device's IP address in the address bar of the browser. Then you can login SIP Account configure of the phone. Choose Enable on Line
Enable,input SIP Account parameters.
SIP Account Parameters
Configure information
Line Enable Enable
192.168.1.1
621
621
Proxy Port
Outbound Port
Backup Outbound Port
Proxy Server
Display Name
Account
Phone Number
Password
Outbound Server
Backup Outbound Server
Allow DHCP Option 120 to
Override SIP Server
Outgoing Call without
Registration
5060
5060
5060
621
Basic Setup
Proxy and Registration
Subscriber Information
Name Description Name Description
Enable Line Enable Line or not
Outbound Proxy
Proxy Server Domain name or IP address of SIP server
Outbound proxy IP or domain name
Outbound Port Service port of outbound proxy
Phone Number Number of telephone provided by SIP proxy
Account SIP account provided by SIP proxy
Password SIP password provided by SIP proxy
Display Name The number displayed in callee
Proxy Port The port which SIP server supports of VoIP service. (Default: 5060)
Sync Clock Time Disable
Disable
Disable
4.4 Connect via Wi-Fi
Step1. Press button, then choose Basic Settings >Wi-Fi via ▲ or ▼ button.
Step2. Choose “Available Network”.
Step3. Use ▲ or ▼ button to select the network and press soft key “Con” toconnect with it. Input the password if Wi-Fi authentication is required.
Note: If AP is connected, will appear in the status bar on the main interface.
4.1 Network Settings
There are two ways to configure the network settings.
DHCP: By default, the phone attempts to contact a DHCP server in your network to obtain its valid network settings. e.g., IP address, subnet mask,
gateway address and DNS address.
Static IP Address: If the phone can’t connect with DHCP server, please configure IP address, subnet mask, gateway address, primary
DNS address and secondary DNS address manually.
Packaging list
(Optional)
Connect the stand
If you are using an external power supply, please connect the power supply, and plug the power supply into the
DC 5V supply hub on the back of the phone. Note: Only the power supply from Flyingvoice is available.
After the phone is connected the power supply, it will start the intialization process automatically. After that, the LCD will display “Flyingvoice” logo and
the phone will be ready to use.
Note: If the phone does not show any above
information on the screen, please re-confirm
installation steps and the connections.
If it still doesn’t work, please replug the phone.
If there still no display on screen, please
contact the administrator or service provider.
1
Assembling the phone
2
Starting the phone
3
Registering your phone
5
Configuring your phone
4
Wall mount the phone
Fix two appropriate screws on
the wall, and leave them about
1/4 distance from the wall.
Attach the mounting bracket to
the position to be installed, then
align and insert the mounting
hole and slide down, ensuring
the bottom slot has engaged.
DC5V
Power Adapter
PC Internet
P22P / P22G
www.flyingvoice.com
Quick Installation Guide
Connect the handset


