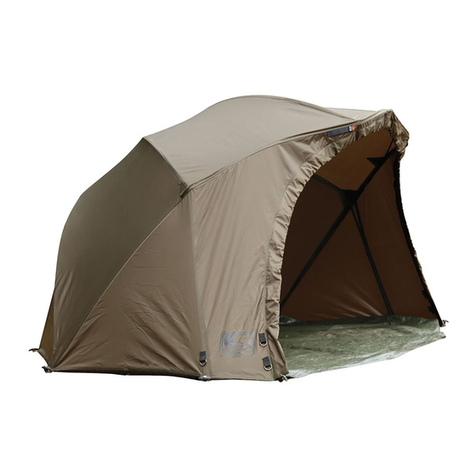
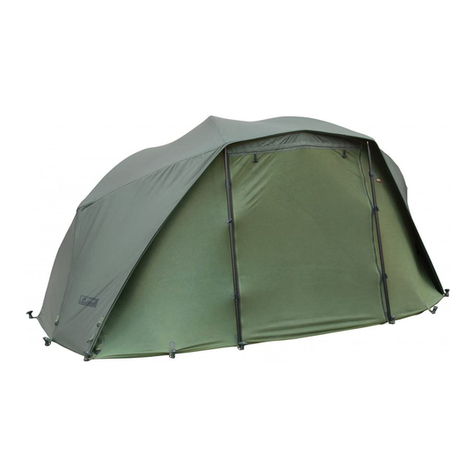
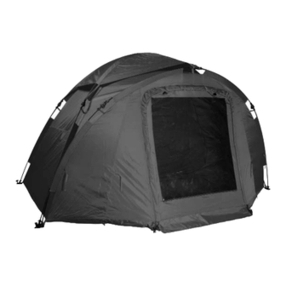
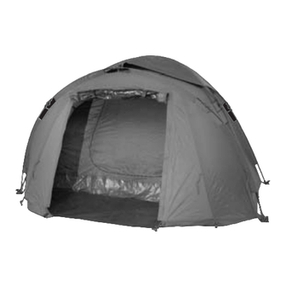
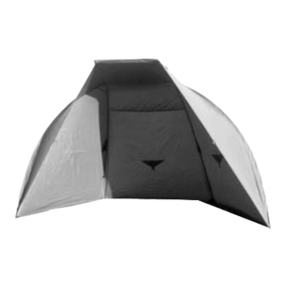
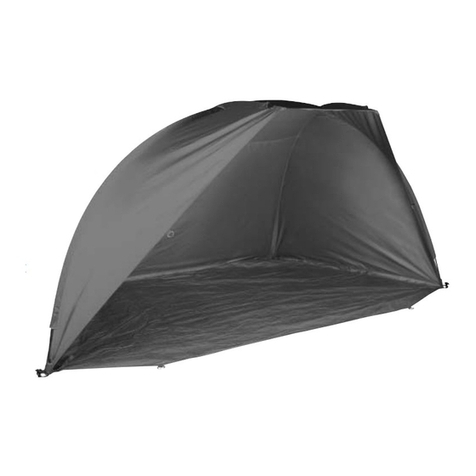
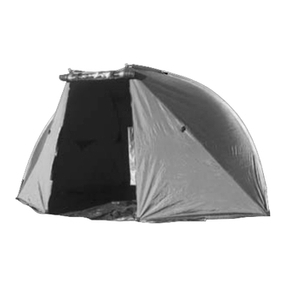
Fox Evolution Classic X User manual

Evolution
Classic X
The
EVOLUTION CLASSIC X 17/5/06 4:22 pm Page 1

EVO CLASSIC X
GB
EVO CLASSIC X
GB
About your
Congratulations on purchasing the Fox Evolution
Classic X, one of the most versatile umbrella
systems ever produced! Your Evolution Classic
X has been manufactured from the highest
quality 420D/6oz Nylon with a 3000mm
Hydrostatic Head. Treated properly and
maintained correctly, it will provide you with
outstanding performance season after season.
This leaflet details some of the things you
should know about your Evolution Classic X.
Evolution Classic X Material
1. All fabrics are affected by temperature. For example, the amount of
moisture in the air or the colder the temperature, the worse the
condensation will become and the harder it will be for the material
to deal with it.
2. Cold damp conditions will cause the material to go slack, whilst
hot/dry temperatures will cause the material to tighten. This is
normal. Use the elastic loops around the base to help control the
covers tension by hooking them over the claws on the mouldings at
the end of each rib. In extreme cases, the loops can be pegged out
separately if the cover goes very slack.
3. To maintain its performance, we recommend that the cover is treated
with a reputable re-proofing agent specifically designed to be
compatible with PU coated nylons. When it needs doing is really a
matter of how often you use your Evolution Classic X. As a rule of
thumb, any water should ‘bead up’ and run off rather than soaking
into the material.
Maintenance of my
Evolution Classic X
How do I store my
Evolution Classic X?
You should ensure the
Evolution Classic X is dry
before being stored away. If
this is not possible at the end
of a session, you should allow
it to dry out thoroughly when
you get home.
PE Groundsheet
To compliment your Evolution
Classic X, a heavy duty PE
groundsheet is available,
featuring corresponding
buckles to match the Evolution
Classic X to allow easy
assembly. Supplied in a PU
sleeve for protection and
storage.
Evolution Classic X
EVOLUTION CLASSIC X 17/5/06 4:22 pm Page 2

EVO CLASSIC X
GB
EVO CLASSIC X
GB Assembly
2. The moulded bosses
should be fitted to the tip
of each of the side poles
3. Taking the short centre pole,
place it into the socket on the
block opposite to where the
side pole is connected
4. Tension the
Evo and connect
the centre pole
into the
other boss
Instructions
1. Holding the tips of the
composite poles, fan the
Evo out as shown
5. Insert the two rear poles into
the boss sockets
6. Standing at the front of the Evo,
take hold of one of the short front
poles and placing downward pressure
onto the boss, insert the pole into the
socket. This is best done using a light
downward pressure on the boss, while
lifting and inserting the pole with the
other hand
EVOLUTION CLASSIC X 17/5/06 4:22 pm Page 4

EVO CLASSIC X
GB
EVO CLASSIC X
GB
NOTE: Like all materials, the cover to the Evolution Classic X may be affected by hot or wet weather.
This may cause the cover to go slack in wet conditions or tighten during warm weather. To allow you
additional flexibility, you will see that above each moulded foot there is an elastic loop fitted to the cover.
These may be hooked over the claws on each moulded pivot which will take up any slack in the cover.
TIP: In windy conditions, you will find it easier to loosely peg your Evolution Classic X down with one of
the rear peg down points and erect it ‘side into the wind’.
7. Repeat the process for the
remaining front pole 8. The Evo is now fully erected - peg down the two rear pegging
points. A unique feature of the Evo is that it can be set at a range of
different heights and widths. To alter the size and shape simply
move the two side poles outwards to lower and increase coverage
in bad weather, or move them inwards to increase the height and
narrow the shelter to fit tight swims
9. To dismantle the Evo, unhook the tension elastics if they have been
used, and remove all pegs. Standing at the front of the Evo place a
hand on top of the boss and apply gentle downward pressure, tilting
the boss towards you. At the same time lift the front pole slightly
upwards and slide out. Repeat for the other front pole
10. Disconnect the rear poles 11. Remove the short centre pole. This should be done by lightly
pressing down on boss and centre pole to decrease the tension.
As the centre pole straightens it is simply disconnected from the two
bosses. Store the pole inside one of the front mesh tunnels
12. Gather all of the poles together and roll the Evo up, storing it in the supplied sleeve
EVOLUTION CLASSIC X 17/5/06 4:22 pm Page 6

EVO CLASSIC X
F
EVO CLASSIC X
FVotre
Félicitations d’avoir acheté la tente Evolution
Classic X de Fox, issue d’un matériau Nylon
210D/4oz de qualité supérieure entièrement
respirant et doté d’une tête hydrostatique de
3000mm. Traitée et entretenue correctement,
elle fera preuve d’une performance
incomparable saison après saison. Ce livret
couvre tout ce que vous devez savoir à propos
de votre Evolution Classic X.
Evolution Classic X Evolution Classic X Matériau respirant
1. All breathable fabrics are affected by temperature. For example, the
amount of moisture in the air or the colder the temperature, the
worse the condensation will become and the harder it will be for the
material to deal with it.
2. Le froid et l’humidité peuvent contribuer à l’assouplissement du
matériau, tandis que le chaud et le sec causent un resserrement
des fibres. Ceci est tout à fait normal. Pour plus de
flexibilité, vous remarquerez qu’il y a une boucle élastique au dessus
de chaque pied. Celles-ci permettent de tendre la toile en les
passant sur les crochets des pivots.
3. Pour prolonger sa performance, il est conseillé de traiter la toile
externe avec un imperméabilisant conçu spécialement pour les
matériaux respirants. La fréquence de cette opération dépend de la
fréquence d’utilisation de votre Evolution Classic X. L’humidité
devrait former des gouttelettes plutôt que de pénétrer la toile.
L’entretien de ma
Evolution Classic X
Le rangement de ma
Evolution Classic X?
Il est nécessaire de s’assurer
que votre Evolution Classic X
est sèche avant de la ranger. Si
vous n’avez pas eu l’occasion
de la sécher à la fin de votre
session, il est conseillé de le
faire en rentrant chez soi.
Tapis de sol en PE
Pour compléter votre Evolution
Classic X, un tapis de sol
résistant est disponible
séparément. Il est doté
d’attaches pour le fixer sur le
modèle Evolution Classic X. Le
tapis de sol est rangé dans
une housse en PU pour la
protection et le rangement.
EVOLUTION CLASSIC X 17/5/06 4:22 pm Page 8
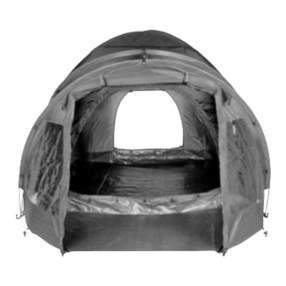
EVO CLASSIC X
F
EVO CLASSIC X
FAssembly
2. Les cônes moulés
doivent être fixés à l’ex-
trémité de chacun des
piquets latéraux.
Instructions
1. Etendez l’Evo en éventail
en tenant les extrémités des
arceaux, comme indiqué.
3. Insérez le piquet court du
milieu dans la douille opposée
au piquet latéral.
4. Tendez l’Evo et
connectez l’autre
extrémité du
piquet du milieu
dans la douille
opposée.
5. Insérez les deux piquets
arrières dans les douilles
comme indiqué.
6. Tenez-vous face à l’Evo et prenez
l’un des piquets avants (courts). En
appuyant sur le cône, insérez le piquet
dans la douille dotée d’une encoche.
La meilleure méthode de faire ceci est
d’appuyer sur le cône d’une main et
d’insérer le piquet de l’autre.
EVOLUTION CLASSIC X 17/5/06 4:22 pm Page 10

EVO CLASSIC X
F
EVO CLASSIC X
F
7. Répétez l’opération avec l’autre
piquet avant.
8. Le montage de l’Evo est terminé, vous pouvez maintenant arrimer
les deux points à l’arrière. La particularité unique de l’Evo est que sa
hauteur et sa largeur peuvent être réglées selon les besoins du
pêcheur. Pour altérer la taille et la forme, il suffit d’écarter les deux
piquets latéraux pour réduire la hauteur et agrandir l’espace intérieur
par mauvais temps. Pour les berges étroites, l’on peut rapprocher les
deux piquets de manière à accroître la hauteur de l’abri et occuper
moins d’espace.
9. Pour démonter l’ Evo, décrochez les élastiques de tension (s’ils ont
servi) et retirez toutes les sardines. En vous tenant devant l’Evo, posez
une main sur le cône et exercez une pression légère vers le bas en
l’inclinant vers vous. Soulevez simultanément le piquet du milieu et
faites le glisser hors de la douille. Répétez avec l’autre piquet avant.
N.B.: Comme tous les matériaux, la toile extérieure de la tente Evolution Classic X peut être susceptible
au temps chaud ou pluvieux. Elle peut s’étirer par temps humide ou se resserrer par temps chaud. Pour
plus de flexibilité, vous remarquerez qu’il y a une boucle élastique au dessus de chaque pied.
Celles-ci permettent de tendre la toile en les passant sur les crochets des pivots.
ASTUCE: Par temps venteux, il est plus facile d’arrimer grossièrement l’arrière puis de monter votre
Evolution Classic X de côté.
10. Démontez les piquets arrière. 11. Retirez le piquet du milieu. Pour ce faire, exercez une légère pres-
sion vers le bas sur le cône et le piquet du milieu pour réduire la pres-
sion. Le piquet se déconnecte ensuite facilement des deux cônes.
Rangez-le dans l’une des poches en mailles filet.
12. Rassemblez tous les piquets et roulez la toile de l’Evo. Rangez le tout dans la housse fournie.
EVOLUTION CLASSIC X 17/5/06 4:22 pm Page 12

EVO CLASSIC X
NL
EVO CLASSIC X
NL Over uw
Gefeliciteerd met de aanschaf van de Fox
Evolution Classic X gemaakt van de hoogste
kwaliteit 210D/4oz volledig ademend nylon met
een hydrostatische druk van 3000mm. Op een
normale manier gebruikt en onderhouden zal
deze seizoen na seizoen een comfortabel
verblijf aan de waterkant garanderen.
Zie de folder voor meer informatie over de
Evolution Classic X.
Evolution Classic X Materiaal
1. Alle ademende materialen worden beinvloed door temperatuur.
Voorbeelden hiervan zijn de luchttemperatuur en de hoeveelheid
vocht in de lucht. Hoe vochtiger de lucht des te groter de
condensatie.
2. Onder koude en natte omstandigheden rek het doek op, terwijl met
warm en droog weer het materiaal krimpt. Dit is normaal. Net als
ander materiaal wordt het doek van de Evolution Classic X beïnvloed
door het weer. Onder natte omstandigheden wordt het doek wat
slapper terwijl met droog en heet weer de stof krimpt. Met behulp
van de elastieken kan dit worden gecompenseerd.
3. Om de werking van het materiaal ook op langere termijn te
garanderen, adviseren we om het doek na verloop van tijd te
behandelen met een speciaal voor ademend doek materiaal.
Wanneer dit dient te gebeuren hangt af van het gebruik. In de regel
is dit pas nodig wanneer het water niet meer van het doek afrolt
maar wordt opgenomen.
Onderhoud van
mijn Evolution
Classic X
Hoe berg ik mijn
Evolution Classic X op?
De Evolution Classic X moet
altijd droog worden
opgeborgen. Wanneer dit aan
het eind van een sessie niet
mogelijk is dient de tent bij
thuiskomst goed te worden
gedroogd.
PE Grondzeil
Om uw Evolution Classic X
compleet te maken is er een
zwaar PVC grondzeil verkrijgbaar.
Dit zeil bevat gespen die op de
Evolution Classic X passen.
Wordt in een beschermende PU
tas geleverd.
Evolution Classic X
EVOLUTION CLASSIC X 17/5/06 4:22 pm Page 14

EVO CLASSIC X
NL
EVO CLASSIC X
NL
Montage
2. De voorgevormde knop
moet aan de uiteinden wor-
den gemonteerd van alle
stokken die aan de zijkanten
worden bevestigd.
3. Plaats de korte centrale stok
in de uitsparing van het blok
tegenover het punt waar de
zijstok is bevestigd.
4. Breng de Evo
op spanning en
plaats het andere
uiteinde van de
centrale stok in
de andere
uitsparing.
Instructies
1. Vouw de Evo uiteen zoals
afgebeeld terwijl u de uitein-
den van de composiet
stokken beethoudt.
5. Monteer de twee achterste
steunen zoals afgebeeld in de
uitsparingen van de knoppen.
6. Pak vanaf de voorzijde van de Evo
een van de korte stokken beet, duw
de knop langzaam naar beneden en
steek de stok in de holte met
afgevlakte kant. Duw de knop hiervoor
zachtjes naar beneden terwijl u met de
andere hand de stok optilt en in de
holte plaatst.
EVOLUTION CLASSIC X 17/5/06 4:22 pm Page 16

EVO CLASSIC X
NL
EVO CLASSIC X
NL
LET OP: net als ander materiaal wordt het doek van de Evolution Classic X beïnvloed door het weer. Onder natte
omstandigheden wordt het doek wat slapper terwijl met droog en heet weer de stof krimpt. Met behulp van de elastieken kan
dit worden gecompenseerd.
TIP: wanneer het hard waait wordt het aanbevolen tijdens het opzetten een punt van de Evolution Classic X met een haring
vast te zetten, zodanig dat de dichte achterkant naar de wind wijst. Hierdoor kan de tent eenvoudiger worden opgezet.NB: De
Evolution Classic X dient aan het eind van de sessie droog te worden opgeborgen. Wanneer dit aan het eind van een sessie
niet mogelijk is dient de tent bij thuiskomst goed te worden gedroogd.
7. Doe hetzelfde met de andere
stok aan de voorzijde. 8. De Evo staat nu overeind, zet de achterzijde vast met behulp van
twee haringen. Uniek aan de Evo is dat deze op verschillende
breedtes en hoogtes kan worden ingesteld. Om de vorm te veran-
deren, duw de buitenste stokken simpelweg naar buiten om meer
beschutting te bieden bij slecht weer. Duw ze naar binnen om de
hoogte binnenin te vergroten en om hem in smalle stekken te kun-
nen plaatsen.
9. Om de Evo op te ruimen, haal de elastieken los indien deze zijn
gebruikt en verwijder de haringen uit de grond. Plaats vanaf de voorzi-
jde van de Evo één hand bovenop een van de knoppen en duw
voorzichtig naar beneden zodat deze naar u toe kantelt. Duw de
voorste stok tegelijkertijd lichtjes naar boven en schuif deze uit de tent.
Herhaal de handeling voor de andere stok.
10. Haal de achterste stokken los. 11. Verwijder de korte centrale stok. Dit kan worden gedaan door de
centrale stok en knop lichtjes naar beneden te duwen en zo de span-
ning te verminderen. Als de centrale stok zijn rechte stand weer heeft
aangenomen zal deze los komen van de twee uitstulpingen. Bewaar
de stok in één van de hoezen aan de voorkant van de Evo.
12. Vouw alle stokken bij elkaar, rol de Evo op en berg alles op in de meegeleverde
opberghoes.
EVOLUTION CLASSIC X 17/5/06 4:22 pm Page 18

EVO CLASSIC X
D
EVO CLASSIC X
DÜber Ihr
Wir beglückwünschen Sie zum Kauf des
Fox Evolution Classic X. Das Produkt wird
aus voll atmungsfähigem 210D/4oz Nylon
hergestellt, das mit einer 3000mm
Wassersäule hydrostatisch belastbar ist.
Wenn Sie mit dem Produkt sachgerecht
umgehen und es richtig pflegen, werden
Sie viele Jahre Freude daran haben.
Dieses Blatt enthält einige wichtige
Informationen über Ihr Evolution Classic X.
Evolution Classic X Material
1. Alle atmungsfähigen Materialien werden durch die Temperatur
beeinflusst. Je höher die Luftfeuchtigkeit oder je niedriger die
Temperatur, desto gravierender ist die Kondensation und umso
schwieriger wird das Material damit fertig.
2. Bei Kälte und Feuchtigkeit wird das Material schlaff, bei Hitze und
Trockenheit hingegen zieht es sich zusammen. Das ist normal.
Wie alle Materialien ist das Evolution Classic X gegenüber Hitze
oder Nässe empfindlich. Dies kann dazu führen, dass das Material
bei Nässe schlaff wird oder sich bei warmem Wetter
zusammenzieht. Sie werden feststellen, dass sich zugunsten einer
höheren Flexibilität über jedem Fuss eine Gummischlaufe an dem
Gewebe befindet. Diese können über die Pratzen an jedem Stift
gehakt werden. Damit wird gegebenenfalls eine Schlaffheit
ausgeglichen.
3. Um die Funktion zu erhalten, empfehlen wir, das Material mit einem
guten Imprägniermittel zu behandeln, das sich speziell für
atmungsfähige Materialien eignet. Wann dies erforderlich ist, richtet
sich danach, wie häufig Sie Ihr Evolution Classic X verwenden. Als
Faustregel gilt, dass das Wasser als Tropfen ablaufen und nicht vom
Material aufgesaugt werden soll.
Pflege meines
Evolution Classic X
Wie bewahre ich mein
Evolution Classic X auf?
Achten Sie darauf, dass Ihr
Evolution Classic X vollständig
trocken ist, bevor Sie es
wegpacken. Wenn dies bei
Ende der Session nicht möglich
war, sollten Sie es zuhause
gründlich trocknen lassen.
PE Bodenplane
Zur Ergänzung Ihres
Evolution
Classic X
ist eine
strapazierfähige PVC-
Bodenplane lieferbar. Sie ist mit
Schnallen ausgestattet, die
zum
Evolution Classic X
passen
und die Befestigung
erleichtern. Die PLane wird in
einer PU-Schutzhülle geliefert.
Evolution Classic X
EVOLUTION CLASSIC X 17/5/06 4:22 pm Page 20

EVO CLASSIC X
D
EVO CLASSIC X
DAufbau
2. Die Stangenblöcke
müssen jeweils an die
Spitze der Seitenstangen
angebracht werden.
3. Nehmen Sie die kurze
Mittelstange und stecken
diese in die Stecköffnung am
Block gegenüber der
Stecköffnung für die
Seitenstange.
4. Spannen Sie
das Evo und
stecken die
Mittelstange in
das andere
Verbindungselem
ent.
Anleitung
1. Halten Sie die Spitzen der
Composit-Stangen und bre-
iten das Evo, wie abgebildet,
aus.
5. Stecken Sie die beiden hinteren
Stangen, wie abgebildet, in die
Stecköffnungen des
Verbindungselements.
6. Stellen Sie sich vor das Evo,
nehmen Sie eine der kurzen vorderen
Stangen und stecken Sie die Stange
in die Stecköffnung mit der
Schnittdarstellung, indem sie auf das
Verbindungselement Druck ausüben.
Dies tun sie am besten mit einem
leichten Druck nach unten auf das
Verbindungselement, während Sie die
Stange mit der anderen Hand
anheben und einstecken.
EVOLUTION CLASSIC X 17/5/06 4:22 pm Page 22

EVO CLASSIC X
D
EVO CLASSIC X
D
BEACHTEN SIE: Wie alle Materialien ist das Evolution Classic X gegenüber Hitze oder Nässe empfindlich. Dies
kann dazu führen, dass das Material bei Nässe schlaff wird oder sich bei warmem Wetter zusammenzieht. Sie
werden feststellen, dass sich zugunsten einer höheren Flexibilität über jedem Fuss eine Gummischlaufe an dem
Gewebe befindet. Diese können über die Pratzen an jedem Stift gehakt werden. Damit wird gegebenenfalls eine
Schlaffheit ausgeglichen. TIPP: Sie werden feststellen, dass es einfacher ist, Ihr Evolution Classic X bei Wind an
einer der hinteren Häringsösen locker zu befestigen und es mit der Seite zum Wind aufzubauen. NB. Das Evolution
Classic X sollte am Ende einer Session trocken verstaut werden. Wenn dies nicht möglich ist, lassen Sie es
gründlich trocknen, wenn sie wieder zuhause sind.
7. Wiederholen Sie den Vorgang
für die andere vordere Stange. 8. Das Evo ist jetzt vollständig aufgebaut - stecken Sie die beiden
hinteren Häringsösen mit Häringen fest. Eine Besonderheit des Evo
ist, dass es in verschiedenen Höhen und Breiten aufgebaut werden
kann. Um die Form zu verändern, bewegen Sie die beiden
Seitenstangen nach außen. Das Evo wird niedriger und bietet mehr
Schutz bei schlechtem Wetter. Oder bewegen Sie sie nach innen,
damit das Zelt an beengten Angelplätzen höher und schmaler wird.
9. Um das Evo abzubauen, haken Sie die Spannbänder aus, falls sie
verwendet wurden, und entfernen alle Häringe. Stellen Sie sich vor
das Evo und legen eine Hand oben auf das Verbindungselement.
Üben Sie einen leichten Druck nach unten aus und neigen das
Verbindungselement in Ihre Richtung. Heben Sie gleichzeitig die
vordere Stange etwas hoch und ziehen sie raus. Wiederholen Sie
diesen Vorgang mit der anderen Stange auf der Vorderseite.
10. Entfernen sie die hinteren
Stangen. 11. Entfernen sie die kurze Mittelstange. Dies tun Sie am besten,
indem Sie einen leichten Druck auf Verbindungselement und
Mittelstange ausüben, um die Spannung zu verringern. Wenn sich die
Mittelstange gerade richtet, wird sie einfach aus den beiden
Verbindungselementen herausgezogen. Bewahren Sie die Stange in
einer der vorderen Röhren auf.
12. Sammeln Sie alle Stangen zusammen. Rollen Sie das Evo auf und verwahren es in der mitgelieferten Hülle.
EVOLUTION CLASSIC X 17/5/06 4:22 pm Page 24

EVO CLASSIC X
IT
EVO CLASSIC X
IT Riguardo al vostro
Congratulazioni per l'acquisto di un Fox
Evolution Classic X fabbricato con nylon
della miglior qualità da 210D/4oz,
completamente traspirante, con 3000mm
di colonna idrostatica. Trattato e mantenuto
correttamente, continuerà a fornirvi le sue
grandi capacità, stagione dopo stagione.
Questo libretto illustra alcune delle cose
che dovete conoscere relativamente al
vostro Evolution Classic X.
Evolution Classic X Materiale
1. Tutti i materiali traspiranti sono soggetti agli effetti della temperatura.
Per esempio, più elevato è il tasso di umidità dell'aria o più bassa è
la temperatura, tanto peggiore sarà il livello di condensa e tanto più
difficile sarà per il materiale non risentirne.
2. Condizioni di freddo umido causeranno l'allentamento del materiale,
mentre un clima caldo e asciutto al contrario determinerà un
restringimento dello stesso. Come tutti i materiali, la copertura del
Evolution Classic X può essere soggetta agli effetti di clima caldo o
umido. Questo può causare un allentamento del materiale in caso di
umidità o un restringimento in caso di caldo secco. Per consentirvi
di avere flessibilità addizionale, vedrete che sopra ad ogni piede c'è
un anello elastico agganciato alla copertura. Questi possono essere
agganciati in ogni perno stampato per garantire una tensione
migliore della copertura.
3. Per mantenere inalterate le prestazioni nel tempo, noi
raccomandiamo che la copertura sia trattata con un agente
impermeabilizzante di buona qualità, sviluppato per essere
compatibile con materiali traspiranti. La frequenza con la quale
ripetere il trattamento dipende fondamentalmente dall'utilizzo che
viene fatto del vostro Evolution Classic X. Come regola generale,
una copertura in buono stato deve consentire all'acqua di formare
delle “perline” che scivolano verso il basso, senza penetrare nel
materiale.
Manutenzione del
mio Evolution
Classic X
Come devo conservare il
mio Evolution Classic X?
Dovete accertarvi che il
Evolution Classic X sia ben
asciutto prima di riporlo dopo
l'uso. Se ciò non è fattibile
appena terminata la sessione,
dovrete assicurarvi che
l'operazione venga eseguita
una volta arrivati a casa.
Tappeto in PE
Per completare il vostro
Evolution Classic X, un robusto
tappeto in PVC è disponibile,
caratterizzato da fibbie
predisposte per adattarsi al
profilo dell'Bivvy consentendo
un facile assemblaggio. Fornito
con custodia in PU per
protezione e
immagazzinamento.
Evolution Classic X
EVOLUTION CLASSIC X 17/5/06 4:22 pm Page 26

EVO CLASSIC X
IT
EVO CLASSIC X
IT
Istruzioni di
2. La basi in plastica stam-
pata devono essere con-
nesse alle estremità di
ciascuno dei pali laterali
3. Prendendo il palo corto
centrale, posizionarlo nella
cavità del blocco opposto,
dove il palo laterale è congiun-
to.
4. Mettere in ten-
sione l'Evo e
congiungere il
palo centrale nel-
l'altra base.
Montaggio
1. Tenendo le estremità dei
pali compositi, aprire l' EVO
come mostrato
5. Inserire i due pali posteriori
nelle cavità della base come
illustrato.
6. Stando di fronte all'Evo, tenere stret-
to uno dei pali corti frontali e facendo
pressione all'indietro sulla base,
inserire il palo nella cavità. Questa
operazione si ottiene al meglio effet-
tuando una leggera pressione della
base verso il basso, mentre si solleva
e si infila il palo con l'altra mano.
EVOLUTION CLASSIC X 17/5/06 4:22 pm Page 28

EVO CLASSIC X
IT
EVO CLASSIC X
IT
NOTA: Come tutti i materiali, la copertura del Evolution Classic X può essere soggetta agli effetti di clima caldo o umido.
Questo può causare un allentamento del materiale in caso di umidità o un restringimento in caso di caldo secco. Per
consentirvi di avere flessibilità addizionale, vedrete che sopra ad ogni piede c'è un anello elastico agganciato alla copertura.
Questi possono essere agganciati in ogni perno stampato per garantire una tensione migliore della copertura. Consiglio: in
condizioni di vento, troverete più agevole erigere il vostro Evolution Classic X picchettando al suolo uno dei punti di
ancoraggio posteriori e alzandolo disponendovi in favore di vento. NB. Il Evolution Classic X dovrebbe essere riposto asciutto
alla fine della sessione di pesca. Se ciò non è possibile, eseguite questa importante operazione una volta giunti a casa.
7. Ripetere il processo con l'altro
palo frontale. 8. L'Evo è adesso completamente eretto - picchettare i due punti
di ancoraggio posteriori. Una caratteristica unica dell'Evo è che può
essere montato con larghezze e altezze variabili. Per modificare le
dimensioni e la forma, è sufficiente spostare i due pali laterali verso
l'esterno per abbassare l'altezza e aumentare la copertura in caso
di maltempo, oppure spostarli verso l'interno per aumentare l'altezza
e rendere più stretto lo shelter.
9. Per smontare l'Evo, sganciare gli elastici (se installati) e rimuovere
tutti i picchetti. Stando di fronte all'Evo, piazzare una mano sulla parte
superiore della base e gentilmente spingere verso il basso, piegando
la base verso di voi. Al tempo stesso, sollevare il palo frontale verso
l'alto e farlo scivolare fuori. Ripetere l'operazione per l'altro palo
frontale.
10. Staccare i pali posteriori. 11. Rimuovere il palo centrale corto. Questo dovrebbe essere fatto
effettuando una leggera pressione verso il basso sulla base e sul palo
centrale per diminuire tensione. Non appena il palo centrale si sarà
raddrizzato, sarà facile sganciarlo dalle due basi. Riporre il palo all'inter-
no di uno dei tunnel frontali in rete.
12. Raccogliere tutti i pali assieme e avvolgere l'EVO, quindi riporre il tutto nella borsa di trasporto fornita.
EVOLUTION CLASSIC X 17/5/06 4:22 pm Page 30

Fox International Ltd.
Fowler Road, Hainault Industrial Estate, Hainault, Essex, 1G6 3UT
www.foxint.com
Fox International reserve the right to modify or alter specifications in any respect without prior notice.
Technical data and specification correct at time of going to press.
All weights and dimensions are approximate.
European Community Trade Mark 446,492 ISSUE DC/06/05
EVOLUTION CLASSIC X 17/5/06 4:22 pm Page 32
Table of contents
Languages:
Other Fox Tent manuals

Fox
Fox Warrior Bivvy User manual

Fox
Fox EOS 1 Man Bivvy Skin User manual

Fox
Fox Retreat+ User manual

Fox
Fox Explorer X Installation and operation manual

Fox
Fox Evo Hideout User manual

Fox
Fox Evo Winter Skin X User manual

Fox
Fox Supa Brolly Mozzi Mesh User manual

Fox
Fox Euro Easy Dome T3 User manual

Fox
Fox Continental X User manual

Fox
Fox Easy Dome X User manual

Fox
Fox Royale User manual

Fox
Fox Stalker Shelter X User manual

Fox
Fox Carp Plus X User manual

Fox
Fox Evo Bivvy XS User manual

Fox
Fox Evo XS User manual

Fox
Fox Royale User manual

Fox
Fox Xtreme Brolly X User manual

Fox
Fox Stalker Bivvy X User manual

Fox
Fox 1 Man XL R Series User manual

Fox
Fox Reflex User manual