manuals.online logo
Brands
  1. Home
  2. •
  3. Brands
  4. •
  5. Fox
  6. •
  7. Tent
  8. •
  9. Fox Retreat+ User manual

Fox Retreat+ User manual

For more information visit
WWW.FOXINT.COM
Designed & Developed in the UK • FOX is a Registered Trade Mark • Made in China
INSTRUCTIONS
F INSTRUCTIONS
 INSTRUCTIES
D ANLEITUNG
I ISTRUZIONI
H UTASÍTÁS
 ИНСТРУКЦИИ
 NÁVOD
 INSTRUKCJA
 NÁVOD
44
Attach and tension the frame support poles from the rear. Start at the front rib and work towards the back.
F
Attachez et mettez en tension les barres de tension du cadre en partant de l’arrière. Partez de l’arceau avant et avancez vers l’arrière.
Bevestig de frame support stokken en zet ze op spanning. Start bij de voorste rib en werk zo naar de achterkant.
D
Befestigen und spannen Sie die Rahmenstützstangen von hinten. Beginnen Sie an der vorderen Rippe und arbeiten Sie nach hinten.
I
Fissate e tensionate i pali di supporto del telaio dalla parte posteriore. Partite dalla stecca frontale e procedete verso la parte posteriore.
H A sátor mögé állva helyezze be a feszítő pálcákat. Az első pálcával kezdje, aztán haladjon hátrafelé.
 Прикрепите и натяните несущие стойки рамы сзади. Начните с передней части и продвигайтесь к задней.

Stoupněte si k zadní části bivaku, připevněte a napněte tyče podpůrné konstrukce. Začněte od přední části a pokračujte směrem dozadu.
 Zamocuj i rozłóż rozpórki podtrzymujące pałąki. Zacznij od przedniego pałąka i idź w kierunku tyłu.

Postavte sa k zadnej časti bivaku, pripevnite a napnite tyče podpornej konštrukcie. Začnite od prednej časti a pokračujte smerom dozadu
.
3
Peg the back pegging points to secure the bivvy in position.
FArrimez le bivvy au sol aux points d’ancrage arrière.
 Zet de achterkant vast met haringen.
DBefestigen Sie die hinteren Laschen mit Häringen um das Bivvy in seiner Position zu sichern.
IPiantate i picchetti posteriori per assicurare il bivvy in posizione.
H
A hátsó rögzítési pontok lecövekelésével fixálja a sátor pozícióját.

Пришпильте колышками заднюю часть палатки к земле для закрепления палатки в рабочем положении.

Zajistěte kolíky fixační body v zadní části přístřešku.

Aby ustawić namiot, wkręć wkręty w punkty mocujące z tyłu namiotu.

Zaistite kolíky fixačnými bodmi v zadnej časti prístrešku.
2
Attach the two tension straps.
FAttachez les deux sangles de tension.
Bevestig de twee tension straps.
DBefestigen Sie die beiden Spanngurte.
I Fissate le due cinghie di pensionamento.
H Csatlakoztassa a két feszítő pántot.
 Прикрепите два натяжных ремня.
 Připněte napínací popruhy.
 Zamocuj dwa paski napinające.
 Pripnite napínacie popruhy.
1
Lay the bivvy out and join the poles ensuring they are fully pushed together.
FEtalez le bivvy et joignez les sections arceaux en s’assurant de les pousser à fond.
 Spreid de bivvy uit en verbind de stokken, zorg dat ze volledig in elkaar zitten.
D Legen Sie das Bivvy auf den Boden und stecken Sie die Stangen zusammen, wichtig ist, dass diese vollständig ineinandergeschoben werden.
IDispiegare il bivvy sul terreno e unire i i pali, assicurandosi che siano perfettamente inseriti l'uno nell'altro.
H Fektesse a sátrat a földre illessze össze a csöveket meggyőződve arról, hogy azok teljesen össze legyenek dugva.

Разложите палатку и соедините опоры, убедившись, что они соединились правильно.
 Vyjměte bivak z obalu a spojte bezpečně tyče dohromady.
 Rozłóż namiot i połącz pałąki, upewniając się, że są one wsunięte do końca.
 Vytiahnite bivak z obalu a bezpečne spojte tyče dohromady.
For more information visit
WWW.FOXINT.COM
Designed & Developed in the UK • FOX is a Registered Trade Mark • Made in China
INSTRUCTIONS
F INSTRUCTIONS
 INSTRUCTIES
D ANLEITUNG
I ISTRUZIONI
H UTASÍTÁS
 ИНСТРУКЦИИ
 NÁVOD
 INSTRUKCJA
 NÁVOD
1
To fit the optional inner dome start by laying it in the bivvy and clip and toggle it around the edges starting at the back working forward.
F Pour fixer le dôme interne commencez par l’étendre à l’intérieur du bivvy puis arrimez-le à l’aide des crochets en commençant par les angles, d’abord à
l’arrière puis à l’avant.
 Om de optionele binnentent te monteren, leg deze in de bivvy en clip deze vast op de randen, begin achteraan en werk zo naar voren.
D Um das optionale Innenzelt zu montieren, dieses im Bivvy auslegen und dann mit den Clips und Bändern an den Ecken befestigen, dabei von der
Rückseite ausgehend nach vorne arbeiten.
I
Per posizionare la cellula interna opzionale, partite stendendola all’interno del bivvy, fissandola ai punti del perimetro esterno partendo dal retro verso la parte frontale.
H
A megfelelő felhelyezéshez fektesse a belső részt a sátorba és csatlakoztassa a peckeket a helyükre az alsó élek mentén hátulról kezdve és előrefelé haladva.

Чтобы собрать внутренний купол, вложите его в палатку и начните пристёгивать его вдоль кромок, начиная с задней части и продвигаясь вперёд.
 Pro připnutí vnitřní ložnice do přístřešku, položte ložnici na zem a začněte ji postupně připínat po švech zezadu směrem dopředu.
 Aby dopasować opcjonalną wewnętrzną kopułę, rozłóż ją wewnątrz namiotu i przymocuj wzdłuż brzegów, zaczynając od tyłu i przechodząc do przodu.
 Pre pripnutie vnútornej spálne do prístrešku, položte spálňu na zem a začnite ju postupne pripínať po švoch zozadu smerom dopredu.
3
The inner dome can be used with or without the front of the bivvy. If using without the front pull the front of the inner dome out and peg into position.
F
Le dôme interne peut être utilisé avec ou sans le panneau avant du bivvy. Si vous l’utilisez sans, tirez le panneau avant du dôme vers l’avant et arrimez-le au sol.
 De binnentent kan met of zonder de voorkant van de bivvy worden gebruikt. Zonder voorkant trek je de voorzijde van de binnentent naar buiten en zet
vast met haringen.
DDas Innenzelt kann mit oder ohne die Vorderseite des Bivvys verwendet werden. Bei der Verwendung ohne Vorderseite den vorderen Teil des
Innenzeltes nach vorne ziehen und mit Häringen in die richtige Position bringen.
I
La cellula interna può essere utilizzata con o senza la parte frontale del bivvy. In caso di utilizzo senza la stessa, tirate il frontale della cellula interna in fuori e picchettate in posizione.
H A belső rész a sátor elejével együtt és anélkül is használható. Ha nem használja a sátor első részét, feszítse meg majd cövekelje le a belső rész elejét.
 Внутренний купол может быть использован с или без передней части тента. Если использовать без передней части, натяните переднюю часть
внутреннего купола и приколите его, как показано на рисунке.

Vnitřní ložnici lze používat společně s předním panelem bivaku, ale i bez něj. Pokud ji používáte bez předního panelu bivaku, pak její přední část napněte a zakolíkujte.
 Wewnętrzną kopułę można stosować wraz z przednim panelem lub bez niego. Jeśli używamy namiotu bez przedniego panelu, należy pociągnąć przód
wewnętrznej kopuły i przymocować ją do podłoża.
 Vnútornú spálňu je možné používať aj spoločne s predným panelom bivaku, ale aj bez neho. Pokiaľ ju používate bez predného panelu bivaku, potom jej
prednú časť dobre napnite a zakolíkujte
Work up along the seams of the inner dome connecting the remaining toggles to the loops on the bivvy.
FContinuez l’arrimage en suivant les arêtes vers le haut.
Bevestig de extra clips langs de naden aan de lussen van de bivvy.
DArbeiten Sie entlang den Nähten des Innenzeltes nach oben und verbinden Sie die restlichen Bänder mit den Schlaufen am Bivvy.
I Lavorate seguendo le cuciture della cellula interna, collegando i rimanenti punti di ancoraggio agli anelli del bivvy.
H A varrások mentén fölfelé haladva csatlakoztassa a maradék peckeket a sátron található fülekbe.
 Работайте вдоль швов, подсоединяя оставшиеся пуговицы к петлям на палатке.
 Připínejte kolíky do smyček, které se nacházejí na švech vnitřní ložnice.
 Następnie przymocuj kopułę specjalnymi kołeczkami wzdłuż szwów namiotu do pętelek namiotu.
 Pripínajte kolíky do slučiek, ktoré sa nachádzajú na švoch spálne.
2
If using with the front clip and toggle the inner dome to the front panel.
F Si vous utilisez le panneau avant du bivvy, fixez le dôme sur celui-ci.
 Gebruik je de voorkant wel, clip de binnentent dan vast aan het voorpaneel.
D Wenn mit der Bivvyfront gearbeitet wird, das Innenzelt mit Bändern und Schlaufen an der Front befestigen.
I In caso di utilizzo con la parte frontale del bivvy, fissate la cellula interna con gli appositi punti di ancoraggio al pannello frontale.
H Amennyiben használja a sátor első részét, rögzítse a belsőt a csat és a pecek segítségével.
 Если используете с передней частью, пристегните внутренний купол к передней панели.
 Pokud ložnici používáte společně s předním panelem, připněte ji pomocí kolíčků a smyček k přednímu panelu.
 Jeśli z kolei używamy namiotu z przednim panelem, należy przymocować wewnętrzną kopułę do przedniego panelu.
 Pokiaľ spálňu používate spoločne s predným panelom, pripnete ju za pomoci kolíkov a slučiek k prednému panelu.
4
1 Man 2 Man
INNER DOME
11
 Zip on the front panel and peg out.
FAttachez le panneau avant du bivvy et arrimez-le au sol.
Rits het voorpaneel in en zet vast met haringen.
DSetzen Sie das Vorderteil mit dem Reißverschluss ein und befestigen es mit Häringen.
IFissate il pannello frontale tramite cerniera e picchettate.
HCipzárazza fel és cövekelje le a sátor elejét.
 Пристегните переднюю панель.
 Připněte pomocí zipu přední panel a zajistěte kolíky.
 Przypnij na zamek przedni panel i przymocuj go do podłoża.
 Pripnite za pomoci zipsov predný panel a zaistite ho kolíkmi.
14

In extreme weather conditions attach the anchor straps by threading the strap around the frame and through the metal loop on the end of the strap.
F
Dans les conditions climatiques extrêmes attachez les sangles d’arrimage en enfilant les sangles autour du cadre et à travers la boucle métal en terminaison de sangle.
In extreem weer bevestig de anchor straps door ze rond het frame te wikkelen en door de metalen ring te halen aan het einde van de strap.
D
Bei extremen Wetterbedingungen befestigen Sie die Befestigungsschnüre durch Winden um den Rahmen und durch die Metallschlaufe am Ende des Bandes.
I
In condizioni meteo estreme, fissate gli elementi di ancoraggio legando la cinghia attorno al telaio e attraverso l’anello in metallo all’estremità della cinghia.
H
Szélsőséges időjárás esetén használja a rögzítő pántokat úgy, hogy azokat a vázra tekeri és meghúzza a végükön található fém karika segítségével.

В экстремальных погодных условиях прикрепите якорные ремешки, продев ремень вокруг рамы и через металлическую петлю на конце ремешка.
 V extrémních povětrnostních podmínkách je možno připevnit kotevní popruhy tak, že je na jedné straně omotáme okolo zadního žebra a
protáhneme ocelovou sponou na konci popruhu.
 W przypadku wystąpienia ekstremalnych warunków pogodowych należy przymocować paski odciągów przez przełożenie paska przez pałąki
oraz metalową pętle na końcu paska.
 V extrémnych podmienkach je možné pripevniť tzv. kotevné popruhy tak, že ich na jednej strane omotáme okolo zadného rebra a pretiahneme
ocelovou sponou na konci popruhu.
15
Peg the shorter buckle strap to the ground and thread the anchor strap through the buckle.
FArrimez la boucle de sangle la plus courte au sol et passez la sangle d’arrimage à travers cette boucle.
 Zet de korte riem met een haring vast in de grond en rijg de anchor strap door de riem.
DBefestigen Sie den kürzeren Schnallenriemen mit Häringen am Boden und ziehen Sie den Riemen durch die Schnalle.
IPicchettate la fibbia della cinghia tenendola il più possibile corta e legate la cinghia di ancoraggio attraverso la fibbia stessa.
H Cövekelje le a rövidebb pántot, majd fűzze át a csaton a sátorhoz rögzített feszítőt.
 Приколите короткий ремешок с пряжкой к земле и проденьте якорный ремень через пряжку.
 Zakolíkujte kratší popruh k zemi a připevněte druhý konec dlouhého popruhu do spony kratšího popruhu.
 Przymocuj krótszy pasek z klamrą do podłoża i przełóż pasek odciągu przez klamrę.
 Zakolíkujte kratší popruh k zemi a pripevnite druhý koniec dlhého popruhu do spony kratšieho popruhu.
16
Tension the strap to hold the frame secure.
FRéglez ensuite la tension de ces sangles pour maintenir fermement le cadre en place.
Breng de riem op spanning om het frame stevig vast te zetten.
DSpannen Sie den Riemen um den Rahmen sicher zu halten.
ITensionare la cinghia per mantenere il telaio in sicurezza.
HFeszítse meg a pántot a keret biztonságos rögzítéséhez.
 Чтобы каркас надёжно держался, натяните ремень.
 Dopněte popruh tak, aby držel bezpečně konstrukci bivaku.
 Napnij pasek, aby mógł pewnie utrzymać pałąk.
 Dopnite popruh tak, aby držal bezpečne konštrukciu bivaku.
12

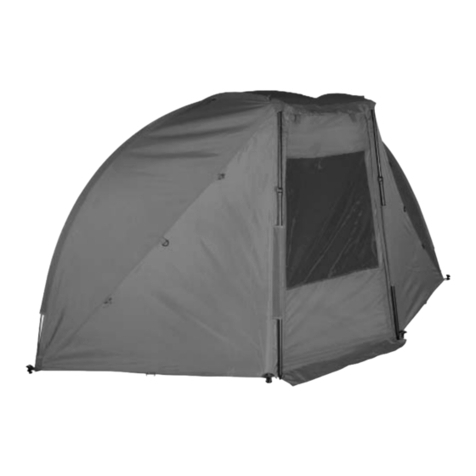
The front panel has mozzy mesh sides and a removable door with mozzy mesh, solid or PVC options.
F Le panneau avant est équipé de fenêtres avec moustiquaires et d’une porte amovible avec panneau plein, panneau moustiquaire
et panneau PVC transparent.
 Het voorpaneel heeft muggengaas zijkanten, en een verwijderbare deur met mozzy mesh, dichte of PVC opties.
D Die Vorderseite hat Mückennetzseiten und eine abnehmbare Tür mit den Optionen Mückennetz, fester Stoff oder PVC.
I
Picchettare il pannello frontale.
H Az első panel oldalsó szúnyoghálós ablakokkal és levehető ajtóval rendelkezik, melyhez szúnyoghálós, PVC és teli panelt is találhat
a csomagban.

Передняя панель имеет боковые москитные сетки и съёмную дверь с москитной сеткой, возможны сплошной или ПВХ – варианты.
 Přední panel má dvě postranní moskytiérové okna a odnímatelný vchody z moskytiéry, PVC nebo pevného materiálu.

Przedni panel ma boki z moskitiery oraz wyjmowane drzwi z moskitiery, pełnego materiału oraz PVC.
 Predný panel má dve postranné moskytierové okná a odnímateľné vchody z moskytiery, PVC, alebo pevného plastu.
10
 Clip in the groundsheet if required.
F Clipsez la toile de sol si nécessaire.
 Clip indien gewenst het grondzeil vast.
D Den Zeltboden einklippen falls erforderlich.
I Agganciare il tappeto se richiesto.
H Csatolja be az aljzatot ha szükséges.
 Если нужно, пристегните пол.
 V případě potřeby připevněte podlážku pomocí klipů.
 Jeśli to jest konieczne, przypnij podłogę.
 V prípade potreby upevnite podlahu za pomoci klipov.
9

To release the tension lift the plastic buckle. Always release the tension before packing away.
F Pour détendre la toile soulever la plaque de serrage des sangles. Toujours détendre la toile avant rangement.

Om de spanning op te heffen, til de plastic sluiting op. Haal altijd de spanning eraf voor je inpakt.
D Zum Lösen der Spannung die Kunststoffschnalle anheben. Immer vor dem Verpacken die Spannung lösen.
I Per diminuire la tensione, sollevare le fibbie in plastica. Eliminare sempre la tensione prima di riporre il bivvy smontato.
H
A lazítás hoz emelje fel a műanyag kapcsot. Összecsukás előtt mindíg lazítsa ki a pántot.
 Для ослабления напряжения, поднимите пластиковую пряжку. Всегда ослабляйте напряжение перед упаковкой.

K uvolnění napětí stačí zvednout plastovou přesku směrem nahoru. Vždy uvolněte při balení.
 Aby zmniejszyć napięcie namiotu, należy podnieść plastikową klamrę. Zawsze przed spakowaniem namiotu należy zmniejszyć jego naprężenie.

K uvoľnenia napätia stačí zdvihnúť plastovú pracku smerom nahor. Vždy uvoľnite pri balení
6
Peg the remaining pegging points starting from the back working towards the front.
F Arrimez maintenant l’ensemble du bivvy au sol, de l’arrière vers l’avant.
Plaats van achteren naar voren de rest van de haringen rondom.
D
Befestigen Sie die verbleibenden Häringslaschen von hinten beginnend nach vorne.
I
Fissare i punti di ancoraggio rimanenti partendo dalla parte posteriore verso quella frontale.
H Hátulról előre haladva cövekelje le a maradék rögzítési pontot.
 Приколите остальные точки крепления палатки, начиная сзади и продвигаясь по направлению к передней части.
 Zajistěte kolíky zbývající fixační body přístřešku. Začněte od zadní části a pokračujte dopředu.
 Wkręć wkręty w pozostałe punkty mocujące, zaczynając od tyłu w kierunku przodu.
 Zaistite kolíky zostávajúce fixačné body prístrešku. Začnite od zadnej časti a pokračujte smerom dopredu.
8
Additional tension can be added by pulling on the straps at the bottom of the poles.
FAjustez si nécessaire la tension à l’aide des petites sangles des arceaux.

Extra spanning kan worden opgebouwd door de banden onderaan de stokken aan te trekken.
D Zusätzliche Spannung kann durch Ziehen an den Laschen an den Unterseiten der Stangen erzeugt werden.
I
Tensionamento addizionale può essere aggiunto tirando le cinghie presenti alla base dei pali.
H
A csövek aljánál található feszítő pánt meghúzásával extra feszességet biztosíthátunk.

Дополнительное натяжение может быть добавлено натяжением ремешков снизу опор.
 Lepšího vypnutí docílíte díky dotažení napínacích pásů na obou bocích přístřešku.
 Dodatkowe napięcie namiotu możliwe jest poprzez naciągnięcie pasków napinających w dolnej części pałąków.

Lepšieho vypnutia dosiahnete vďaka dotiahnutiu napínacích pásov na oboch bokoch prístrešku.
7

Attach and tension the front peak side support poles
FAttachez et mettez en tension les barres de support de la capuche.

Bevestig de support poles van de luifel en breng op spanning.
DBefestigen und spannen Sie die vorderen Seitenstützstangen.
I
Collegate e tensionate i pali di supporto laterali dell’elemento centrale.
H
Csatlakoztassa és húzza ki az előtető oldalsó merevítő pálcáit.

Присоедините и натяните переднюю верхнюю часть несущих опор.
 Umístěte a napněte v přední části bivaku napínací tyče.
 Zamocuj i rozłóż boczne rozpórki daszka.

Umiestnite a napnite v prednej časti bivaku napínacie tyče.
Pull the frame forward and peg the front of the bivvy.
FTirez le cadre vers l’avant puis arrimez l’avant du bivvy au sol.
Trek het frame naar voren en zet de voorkant van de bivvy vast met haringen.
D
Ziehen Sie den Rahmen nach vorn und befestigen Sie die Vorderseite des Bivvys mit Häringen.
I
Tirate il telaio in avanti e picchettate la parte frontale del bivvy.
H Húzza a vázat előrefelé és cövekelje le a sátor elejét.
 Потяните каркас вперёд и закрепите палатку колышками спереди.
 Natáhněte spodek přední části přehozu co nejvíce dopředu a zajistěte kolíky.
 Pociągnij pałąk do przodu i przymocuj przód namiotu do podłoża.
 Natiahnite spodnú časť prednej časti prehozu čo najviac dopredu a zaistite kolíkmi.
5
 For additional airflow unzip the side and rear vents and roll back the panels.
F Pour plus de ventilation dézippez les panneaux arrières et roulez-les sur l’arrière.
 Voor extra luchtdoorvoer rits de achterste panelen los en rol ze op.
D Für zusätzliche Luftzirkulation die hinteren Abdeckungen lösen und zurückrollen.
I
Per avere un migliore passaggio di aria, aprite le zip delle prese posteriori e avvolgete i pannelli.
H
A jobb szellőzés érdekében cipzárazza ki a hátsó ablakokat, majd csavarja fel a paneleket.

Для дополнительного проветривания раскройте задние вентиляционные окна закрепив задние панели.
 Pro zvýšení cirkulace vzduchu, rozepněte zadní ventilační okna a vyrolujte je.

Aby zwiększyć przepływ powietrza, otwórz otwory wentylacyjne z tyłu i zroluj zakrywające je panele.
 Na zvýšenie cirkulácie vzduchu rozopnite zadné ventilačné okna a vyrolujte si ich.
13
Other Fox Tent manuals

Fox Royale User manual

Fox

Fox Royale User manual

Fox Carp Plus X User manual

Fox

Fox Carp Plus X User manual

Fox Easy Dome X User manual

Fox

Fox Easy Dome X User manual

Fox 1 Man XL R Series User manual

Fox

Fox 1 Man XL R Series User manual

Fox Warrior Shelter User manual

Fox

Fox Warrior Shelter User manual

Fox Xtreme Brolly X User manual

Fox

Fox Xtreme Brolly X User manual

Fox Evo Bivvy XS User manual

Fox

Fox Evo Bivvy XS User manual

Fox Easy Dome XS User manual

Fox

Fox Easy Dome XS User manual

Fox Evo XS User manual

Fox

Fox Evo XS User manual

Fox Stalker 2 Man Dome X User manual

Fox

Fox Stalker 2 Man Dome X User manual

Fox Royale User manual

Fox

Fox Royale User manual

Fox Stalker Shelter X User manual

Fox

Fox Stalker Shelter X User manual

Fox Reflex User manual

Fox

Fox Reflex User manual

Fox Explorer X Installation and operation manual

Fox

Fox Explorer X Installation and operation manual

Fox Stalker Bivvy X User manual

Fox

Fox Stalker Bivvy X User manual

Fox Supa Brolly User manual

Fox

Fox Supa Brolly User manual

Fox Warrior Bivvy User manual

Fox

Fox Warrior Bivvy User manual

Fox EOS 1 Man Bivvy Skin User manual

Fox

Fox EOS 1 Man Bivvy Skin User manual

Fox Evo Winter Skin X User manual

Fox

Fox Evo Winter Skin X User manual

Fox Supa Brolly Mozzi Mesh User manual

Fox

Fox Supa Brolly Mozzi Mesh User manual

Fox Evolution Plus X User manual

Fox

Fox Evolution Plus X User manual

Fox Evolution Classic X User manual

Fox

Fox Evolution Classic X User manual

Fox Continental X User manual

Fox

Fox Continental X User manual

Fox Evo Hideout User manual

Fox

Fox Evo Hideout User manual

Popular Tent manuals by other brands

BigTop 92721 Assembly instructions

BigTop

BigTop 92721 Assembly instructions

Eureka OTC manual

Eureka

Eureka OTC manual

DREMCOR Select Series Instructions and owner's manual

DREMCOR

DREMCOR Select Series Instructions and owner's manual

Coleman TACOMA 9277-139 instructions

Coleman

Coleman TACOMA 9277-139 instructions

Rowlinson Sienna Assembly instructions

Rowlinson

Rowlinson Sienna Assembly instructions

Eureka Apex XT Assembly instructions

Eureka

Eureka Apex XT Assembly instructions

skandika outdoor DROBAK Setup Instruction

skandika outdoor

skandika outdoor DROBAK Setup Instruction

Tentipi Half inner-tent Assembling manual

Tentipi

Tentipi Half inner-tent Assembling manual

Outbound 076-5456-6 owner's manual

Outbound

Outbound 076-5456-6 owner's manual

Letos YC0004 user manual

Letos

Letos YC0004 user manual

Bell Tent Deluxe manual

Bell Tent

Bell Tent Deluxe manual

Outsunny A20-020 Assembly instruction

Outsunny

Outsunny A20-020 Assembly instruction

Zempire Canvaslite Pitching instructions

Zempire

Zempire Canvaslite Pitching instructions

Extreme marquees CREST instructions

Extreme marquees

Extreme marquees CREST instructions

Gorilla 10x10 Grow Tent instructions

Gorilla

Gorilla 10x10 Grow Tent instructions

E-Z UP Eclipse II Professional owner's manual

E-Z UP

E-Z UP Eclipse II Professional owner's manual

Alpkit ORDOS 2 manual

Alpkit

Alpkit ORDOS 2 manual

Quest Engineering Screen House 6 instructions

Quest Engineering

Quest Engineering Screen House 6 instructions

manuals.online logo
manuals.online logoBrands
  • About & Mission
  • Contact us
  • Privacy Policy
  • Terms and Conditions

Copyright 2025 Manuals.Online. All Rights Reserved.