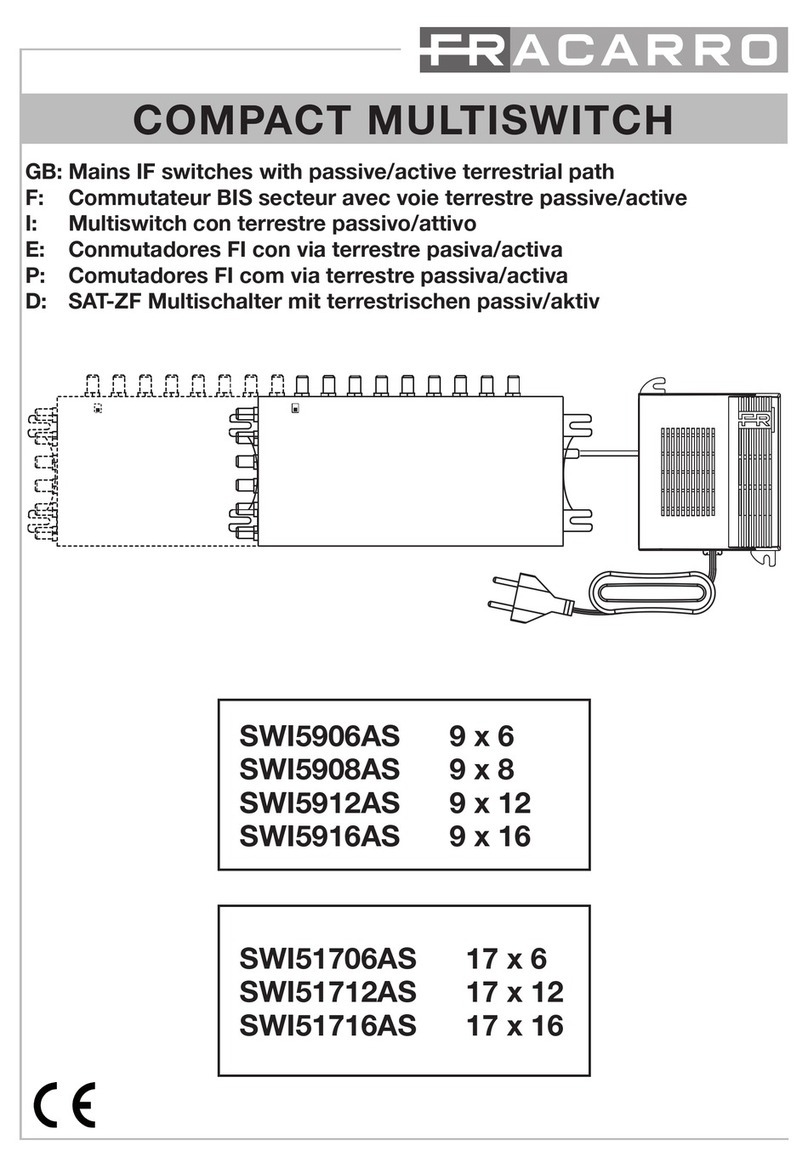
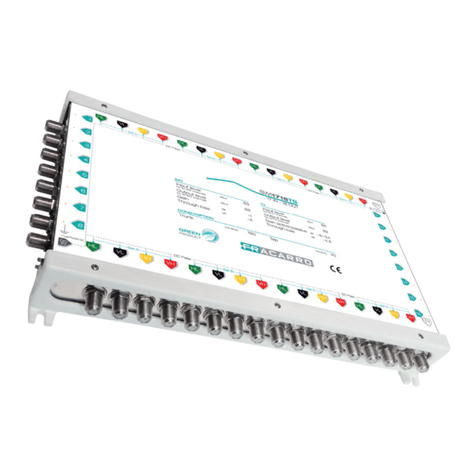
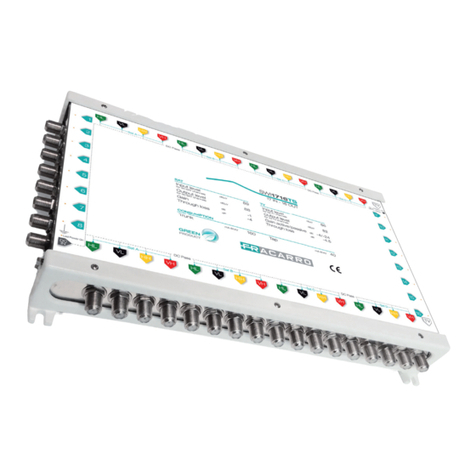
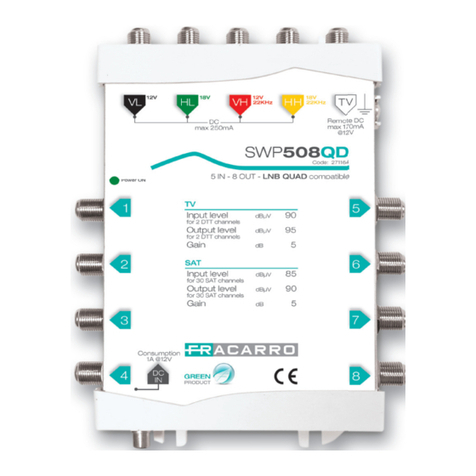
manuals.online logo
Brands
  1. Home
  2. •
  3. Brands
  4. •
  5. Fracarro
  6. •
  7. Switch
  8. •
  9. Fracarro SCD2-5416 User manual

Fracarro SCD2-5416 User manual

MULTISWITCH
SCD2-5416 / SCD2-5816
I: ISTRUZIONI PER L’USO
GB: OPERATING INSTRUCTIONS
F: INSTRUCTIONS D’EMPLOI
D: BETRIEBSANLEITUNG
2
I: DESCRIZIONE DEL PRODOTTO
GB: PRODUCT DESCRIPTION
F: DESCRIPTION DU PRODUIT
D: PRODU TBESCHREIBUNG
I: Multiswitch SCD2 (dCSS) in cascata con 5 ingressi e 4 o
8 derivate utente; in ingresso è presente un Controllo
Auto atico del Guadagno (CAG) grazie al quale viene
antenuto un deter inato livello di uscita, nonostante le
variazioni del segnale di ingresso. Il prodotto per ette di
gestire fino a 4 utenze SCR (EN50494) o 16 utenze SCD2
(EN50607) indipendenti su ciascuna delle 4 o 8 derivate
ediante distribuzione onocavo; in alternativa, su
ciascuna derivata, è possibile collegare un STB
tradizionale.
GB: Cascade Multiswitch SCD2 (dCSS) with 5 outputs and
4 user derivatives; there is an Auto atic Gain Control
(AGC) on the input which aintains a predeter ined
output level, despite any changes in the input signal. The
product enables anaging up to 4 SCR users or 16
independent SCD2 users on each of the 4 or 8 derivatives
through single-cable distribution. Alternatively a
traditional STB can be connected to each derivative.
F: Multiswitch SCD2 (dCSS) en cascade avec 5 entrées et
4 ou 8 dérivées utilisateur ; à l’entrée, présence d’un
Contrôle Auto atique de Gain (CAG) grâce auquel un
certain niveau desortie est aintenu, algré les
variations du signal d’entrée. Le produit per et de gérer
jusqu’à 4 utilisateurs SCR ou 16 utilisateurs SCD2
indépendants sur chacune des 4 ou 8 dérivées par le biais
d’une distribution onocâble ; co e alternative, il est
possible de connecter un STB traditionnel sur chaque
dérivée.
D: Multischalterkaskade SCD2 (dCSS) it 5 Eingängen
und 4 oder 8 Abneh ern; i Eingang ist eine
auto atische Kontrolle der Verstärkung (CAG)
vorhanden, dank der ein besti ter Ausgangspegel trotz
der Variationen des Eingangssignals erhalten wird. Das
Produkt er öglicht die Steuerung von bis zu 4
Abneh ern SCR oder 16 unabhängigen Abneh ern SCD2
auf jeder der 4 oder 8 Abzweigungen durch Einkabel-
Verteilung; alternativ kann auf jeder Abzweigung ein
traditioneller STB angeschlossen werden.
Figura 1
Figure 1
Figure 1
Figur 1
Figura 2
Figure 2
Figure 2
Figur 2
I: Vite di essa a terra da verificare
GB: Grounding screw
F: Vis de ise à la terre
D: Erdungsschraube
I: Ali entazione del Multiswitch intera ente attraverso le
derivate utente; ali entazione del solo LNB ediante
l’apposito connettore F DC-IN. In alternativa,
l’ali entazione può essere fornita attraverso le linee VL,
HL, VH o HH.
GB: The ultiswitch is powered entirely though the user
derivative; only the LNB is powered through the specific F
DC-IN connector. Alternatively, it can be powered through
the VL, HL, VH or HH lines.
F: Ali entation du Multiswitch entière ent à travers les
dérivées utilisateur ; ali entation du LNB au oyen d’un
connecteur F DC-IN spécifi que. Co e alternative,
l’ali entation peut être fournie à travers les lignes VL, HL,
VH ou HH.
D: Stro versorgung des Multischalters ko plett über die
Abneh er; die Stro versorgung des LNB erfolgt über
den entsprechenden Steckverbinder F DC-IN. Alternativ
kann die Speisung über die Linien VL, HL, VH oder HH
erfolgen.
3
I: AVVERTENZE PER LA SICUREZZA GB: SAFETY WARNINGS
IT: L’installazione del prodotto deve essere eseguita da personale
qualificato in confor ità alle leggi e nor ative locali sulla sicurezza.
Fracarro Radioindustrie di conseguenza è esonerata da qualsivoglia
responsabilità civile o penale conseguente a violazioni delle nor e
giuridiche vigenti in ateria e derivanti dall’uso del prodotto da parte
dell’installatore, dell’utilizzatore o di terzi. L'installazione del prodotto
deve essere eseguita secondo le indicazioni di installazione fornite, al
fine di preservare l'operatore da eventuali incidenti e il prodotto da
eventuali danneggia enti.
Avvertenze per l’installazione
Il prodotto non deve essere esposto a gocciola ento o a spruzzi
d’acqua e va pertanto installato in un a biente asciutto,
all’interno di edifici.
U idità e gocce di condensa potrebbero danneggiare il prodotto.
In caso di condensa, pri a di utilizzare il prodotto, attendere che
sia co pleta ente asciutto.
Maneggiare con cura. Urti i propri potrebbero danneggiare il
prodotto.
Lasciare spazio attorno al prodotto per garantire una ventilazione
sufficiente.
L’eccessiva te peratura di lavoro e/o un eccessivo riscalda ento
possono co pro ettere il funziona ento e la durata del
prodotto.
Non installare il prodotto sopra o vicino a fonti di calore o in luoghi
polverosi o dove potrebbe venire a contatto con sostanze
corrosive.
In caso di ontaggio a uro utilizzare tasselli ad espansione
adeguati alle caratteristiche del supporto di fissaggio. La parete ed
il siste a di fissaggio devono essere in grado di sostenere al eno
4 volte il peso dell’apparecchiatura.
Attenzione: per evitare di ferirsi, questo apparecchio deve essere
assicurato alla parete/pavi ento secondo le istruzioni di
installazione. Per “APPARECCHIATURE INSTALLATE
PERMANENTEMENTE”, un dispositivo di seziona ento facil ente
accessibile deve essere incorporato all’esterno dell’apparecchiatura;
per “APPARECCHIATURE CON SPINA DI CORRENTE”, la presa deve
essere installata vicino all’apparecchiatura ed essere facil ente
accessibile. Il prodotto deve essere collegato all’elettrodo di terra
dell’i pianto d’antenna confor e ente alla nor a EN 60728-11. La
vite predisposta per tale scopo è contrassegnata con il si bolo.
Si racco anda di attenersi alle disposizioni della nor a EN 60728-11
e di non collegare tale vite alla terra di protezione della rete elettrica
di ali entazione.
•
Si bolo di terra dell’i pianto d’antenna
Avvertenze generali: In caso di guasto non tentate di riparare il
prodotto altri enti la garanzia non sarà più valida. Utilizzare
esclusiva ente l’ali entatore fornito in dotazione con il prodotto. Le
infor azioni riportate in questo anuale sono state co pilate con
cura, tuttavia Fracarro Radioindustrie S.r.l. si riserva il diritto di
apportare in ogni o ento e senza preavviso, igliora enti e/o
odifiche ai prodotti descritti nel presente anuale. Consultare il sito
www.fracarro.co per le condizioni di assistenza e garanzia.
EN: The product ust only be installed by qualified persons,
according to the local safety standards and regulations. Fracarro
Radioindustrie is free fro all civil and cri inal responsibilities due to
breaches of the current legislation derived fro the i proper use of
the product by the installer, user or third parties. The product ust
be used in full co pliance with the instructions given in this anual
in order to protect the operator against all possible injuries and the
product fro being da aged.
Installation warnings
The product ust not be exposed to any dripping or splashing and
thus it should be installed indoors and in a dry location.
Hu idity and condensation could da age the product. In case of
condensation, wait until the product is dry before using it.
Handle the product carefully. I pacts can da age the product.
Leave enough space around the product to ensure sufficient
ventilation.
Excessive te peratures and/or an overheating ay affect the
perfor ance and the life of the product.
Don’t install the product above or near any heat sources, in dusty
places or where it ight co e into contact with corrosive
substances..
In the event that the unit is fixed to the wall, use the proper screw
anchors suitable to the characteristics of the fixing support. The
wall and the anchoring syste ust be able to support at least 4
ti es the weight of the unit.
Warning: to avoid injury, this appliance ust be secured to the wall /
floor depending on the installation instructions. For "PERMANENTLY
INSTALLED APPLIANCES", an easily accessible cutting device ust be
added to the exterior of the appliance; for "APPLIANCES WITH A
POWER PLUG", the socket ust be installed close to the appliance
and easily accessible. The product ust be connected to the
grounding electrode of the antenna syste in co pliance with
standard EN 60728-11. The screw provided for this purpose is arked
with the sy bol
We reco end that you co ply with the provisions of standard EN
60728-11 and do not connect this screw to the Protective Earth of the
electricity supply.
Earth screw/Faston connector sy bol
General warnings: In the event of a alfunctioning, do not try to fix
the product as the guarantee would be invalidated. Only use the
power supply supplied with the product. Although the infor ation
given in this anual has been prepared carefully and thoughtfully,
Fracarro Radioindustrie S.r.l. reserves the right to odify it without
notice and to i prove and/or odify the product described in this
anual. See the website www.fracarro.co to have infor ation
relevant to the technical support and product guarantee.
4
F: AVERTISSEMENT DE SÉCURITÉ DE: SICHERHEITSHINWEISE
F: L’installation du produit doit être effectuée par du personnel
qualifié confor é ent aux lois et aux nor es locales sur la sécurité.
Par conséquent, Fracarro Radioindustrie décline toute responsabilité
civile ou pénale dérivant de violations des nor es juridiques en
vigueur et de l’utilisation incorrecte du produit de la part de
l’installateur, de l’utilisateur ou de tiers. Le produit doit être installé
en suivant les indications fournies, afin de préserver l’opérateur
d’éventuels accidents et le produit d’éventuels endo age ents.
Précautions d’installation
Le produit ne doit pas être exposé à l’égoutte ent ou aux
éclaboussures d’eau et il doit donc être installé dans un endroit
sec, à l’intérieur.
L’hu idité et les gouttes de condensation, pourraient
endo ager l’appareil. En cas de condensation, attendre que le
produit soit co plète ent sec avant de l’utiliser.
Manier avec soin. Les chocs pourraient endo ager le produit.
Laisser de l’espace autour du produit pour garantir une
ventilation suffisante.
La te pérature excessive de fonctionne ent et/ou un
réchauffe ent excessif peuvent nuire au fonctionne ent et à la
durée du produit.
Ne pas installer le produit sur ou près des sources de chaleur,
dans des endroits très poussiéreux ou en contact avec des
substances corrosives.
En cas de ontage ural, utiliser des chevilles à expansion
correspondant aux caractéristiques du support de fixation. La
paroi et le systè e de fixation doivent être en esure de
supporter au oins 4 fois le poids de l’appareil.
Attention: Pour ne pas se blesser, fixer le produit au ur/sol en
suivant les instructions de ontage. Installer le produit de façon que
la fiche d'ali entation de secteur soit facile ent accessible. Le
produit doit être connecté à l’électrode de terre de l’installation de
l’antenne en confor ité avec la nor e EN 60728-11. La vis prévue à
cet effet est caractérisée par le sy bole
Il est conseillé de respecter les dispositions de la nor e EN60728-11
et de ne pas relier cette vis (borne) (produit) à la terre de protection
du secteur.
Vis à terre / sy bole du connecteur Faston
Avertissements généraux
En cas de panne, ne pas tenter de réparer le produit, sans quoi la
garantie ne sera plus valable. Utilisez unique ent le bloc
d’ali entation fourni avec le produit. Les infor ations indiquées dans
ce ode d’e ploi ont été renseignées soigneuse ent ; toutefois,
Fracarro Radioindustrie S.r.l. se réserve le droit d’a éliorer et/ou de
odifier à tout o ent et sans préavis les produits décrits dans ce
ode d’e ploi. Consulter le site www.fracarro.co pour connaître
les conditions d’assistance et de garantie.
DE: Die Installation des Produkts uss von Fachpersonal in
Übereinsti ung it den Gesetzen und lokalen
Sicherheitsvorschriften vorgeno en werden. Fracarro
Radioindustrie ist daher von einer zivil- oder strafrechtlichen Haftung
gleich welcher Art entbunden, die sich aus der Verletzung der
diesbezüglich geltenden Rechtsnor en oder de unsachge äßen
Einsatz des Produkts durch den Installateur, den Benutzer oder Dritte
ergeben. Die Installation des Produkts uss in Übereinsti ung it
den bereitgestellten Installationshinweisen erfolgen, u den
Benutzer vor Unfällen und das Produkt vor öglichen
Beschädigungen zu schützen.
Installationshinweise
Das Produkt darf nicht Spritzwasser ausgesetzt werden und
uss in eine trockenen Rau i Gebäudeinneren installiert
werden.
Feuchtigkeit und Kondenswasser können das Produkt
beschädigen. Falls sich Kondenswasser gebildet hat, warten Sie
vor Einsatz des Produktes, bis dieses vollständig getrocknet ist.
Mit Sorgfalt handhaben. Stöße können das Produkt beschädigen.
U das Produkt heru Platz lassen, u eine ausreichende
Belüftung zu gewährleisten. Eine zu hohe Arbeitste peratur
und/oder eine über äßige Erhitzung können den Betrieb und
die Lebensdauer des Produktes beeinträchtigen.
Installieren Sie das Produkt nicht oberhalb oder in der Nähe von
Wär equellen und staubigen Orten oder an Orten, an denen es
it korrosiven Stoffen in Berührung ko en könnte.
Bei Wand ontage für den Befestigungshintergrund geeignete
Spreizdübel verwenden. Die Wand und das Befestigungssyste
üssen i Stande sein, indestens 4 Mal das Gewicht des Geräts
zu tragen.
Achtung: Zur Ver eidung von Verletzungen uss dieses Gerät an
der Wand/a Boden nach den Installationsanleitungen gesichert
werden.Für “DAUERHAFT INSTALLIERTE GERÄTE” uss ein einfach
zugänglicher Trennungsschalter außen a Gerät angebracht
werden; für “GERÄTE MIT STROMSTECKER” uss die Steckdose
neben de Gerät installiert werden und einfach zugänglich sein. Das
Produkt uss an den Erder der Antennenanlage in Konfor ität it
der Richtlinie EN 60728-11 angeschlossen werden. Die für diesen
Zweck vorgesehene Schraube ist it de Sy bol gekennzeichnet.
Es wird e pfohlen, sich an die Verordnungen der Richtlinie EN
60728-11 zu halten und nicht diese Schraube an die Schutzerdung
des Stro netzes anzuschließen.
Erdschraube / Faston Stecker Sy bol
Allgemeine Hinweise
I Störungsfall versuchen Sie bitte nicht, das Produkt zu reparieren,
andernfalls verfällt der Garantieanspruch. Verwenden Sie nur das
Netzteil it de Produkt geliefert. Die i vorliegenden Handbuch
enthaltenen Infor ationen wurden sorgfältig zusa engestellt.
Fracarro Radioindustrie S.r.l. behält sich dennoch das Recht vor,
jederzeit und ohne Vorankündigung Verbesserungen und/oder
Veränderungen an den i Handbuch beschriebenen Produkten
vorzuneh en. Infor ationen zu Kundendienst und
Garantiebedingungen finden Sie auf unsere Webseite
www.fracarro.co .
5
I: INSTALLAZIONE DEL PRODOTTO
GB: PRODUCT INSTALLATION
F: INSTALLATION DU PRODUIT
DE: INSTALLATION DES ERZEUGNISSES
I: Per un corretto funziona ento il ultiswitch deve
essere ali entato tra ite decoder. L’LNB può essere
ali entato attraverso un ali entatore connesso alla
porta DC-IN, oppure con un ali entatore esterno posto in
testa o a valle dell’i pianto e connesso ad una qualsiasi
delle 4 porte satellite Verticale Basso (Nero), Orizzontale
basso (Verde), Verticale Alto (Rosso) o Orizzontale Alto
(Giallo). Utilizzare decoder che supportino il protocollo
SCD2 dCSS (EN50602), SCR (EN50494) o un decoder
classico. Possibilità di integrazione con i pianti già
esistenti. Non è presente il passaggio delle ali entazioni
sulla linea TV, ne eno in presenza dell’apposito
ali entatore. Ricordarsi di installare i carichi a 75Oh su
tutti gli ingressi e le uscite non utilizzati.
GB: For proper operation the ultiswitch ust be
supplied by the decoder. The LNB can be powered by a
dedicated power supply or an external power supply
located at the top or downstrea of the plant; it can be
connected to any of the 4 ports Satellite Vertical Low
(black), Horizontal low (Green), Vertical High (Red) or
Landscape High (Yellow). Use a decoder that supports
DiSEqC SCR protocol (interface SCIF in co pliance with
the regulations EN50494) or a decoder classic. It can be
integrated with existing syste s . There isn‘t the passage
of the power supply on the TV line, even if there is the
power supply unit.
F: Pour un bon fonctionne ent du ultiswitch, il doit
être ali enté par le décodeur. Le LNB peut être ali enté
par une ali entation dédiée ou une ali entation externe
situé en en a ont ou en aval du systè e, il peut être
connecté à l’un des 4 ports satellite Vertical Low (Noir),
Horizontal faible (vert), Vertical (rouge) ou de paysage de
(jaune). Utilisez le décodeur qui supportent le protôcole
DiSEqC SCR (interface SCIF en confor ité avec la
régle entation EN50494) ou un décodeur classique. Il
peut s’integrer avec les systè es existants. Il n’y a pas le
passage des ali entations sur la ligne TV, ê e en
présence de l’ali entateur.
DE: Für den ordnungsge äßen Betrieb uss der
Multischalter durch den Decoder geliefert werden. Der
LNB kann durch eigene Stro versorgung oder eine
externe Stro versorgung an der Spitze gelegen Oder
hinter der Anlage it Stro versorgt werden, kann es zu
eine der 4 Ports Satelliten Aufnah e von
(angeschlossen warden Schwarz), Horizontal Low (Grün),
Vertikal High (Rot) oder Querfor at High (Gelb).
Verwenden Sie den Decoder, DiSEqCProtokoll SCR-
Schnittstelle (SCIF in Übereinsti ung it den
Vorschriften EN50494) oder Decoder classic unterstützt.
Die Fähigkeit, it bestehenden Syste en zu integrieren.
Es ist der Durchgang der Fernseher eingeschaltet, die
Leitung selbst in der Gegenwart von Feeder
I: Funzione dei Led
Led Off: Decoder non collegato
Led on: Funzione Legacy
(decoder classico collegato)
Led La peggiante: Funzione SCD2/SCR Attiva
(Decoder SCD2 dCSS o SCR collegato)
GB: Led functions
Led Off: Decoder not connected
Led on: Legacy function (classic decoder connected)
Led flashing: SCR/CCS function active (SCR decoder
connected)
FR: Fonction des Diodes
Led Off : Décodeur non raccordé
Led on : Fonction Legacy
(décodeur classique raccordé)
Diode Clignotante : Fonction SCR/CCS Active
(Décodeur SCR raccordé)
DE: Funktion der Leuchtdioden
LED aus: Decoder ist nicht angeschlossen
LED an: Legacy-Funktion
(klassische Decoder angeschlossen)
LED blinkt: Funktion SCR / CCS aktivieren
(Decoder SCR collegato)
6
I: Ese pi di applicazione dello switch. La odalità
predefinita è quella Legacy; il ultiswitch passa
auto atica ente alla odalità SCR o SCD2 (dCSS) al
pri o co ando DiSEqC ricevuto da un decoder collegato.
GB: Exa ple of switch application. The default ode is
Legacy; the ultiswitch switches to SCR or SCD2 ode
(DCSS) to the first DiSEqC co and received fro a
connected set-top box.
F: Exe ples d’application du co utateur. Le ode par
défaut est hérité; les co utateurs ultiswitch à SCR ou
SCD2 Mode (DCSS) à la pre ière co ande de DiSEqC
reçus d’un boîtier décodeur connecté.
DE: Anwendungsbeispiele für den Schalter. Der
Standard odus ist Ver ächtnis; Der Multischalter
schaltet in den SCR oder SCD2 Modus (DCSS) an den
ersten DiSEqC-Befehl e pfangen von eine
angeschlossenen Set- Top-Box.
7
I: Grazie all’elevato livello di uscita, si possono servire
diversi piani con un unico prodotto.
Classificazione di impianto CEI100-7 A PLUS.
GB: Given the high output level, a nu ber of floors can
be served with a single product.
Plant classification CEI100-7 A PLUS.
F: Grâce au niveau élevé de sortie, il est possible de desservir
plusieurs étages avec un seul produit.
Classification d’installation CEI100-7 A PLUS.
DE: Dank des hohen Ausgangspegels können ehrere Etagen
it eine einzigen Produkt bedient werden.
Anlagenklassifikation CEI100-7 A PLUS.
8
I: I pianto a 5 piani cascata. Grazie al CAG (Controllo
Auto atico del Guadagno) in ingresso, si possono
servire fino a 5 piani senza alcun a plificatore di
rilancio, antenendo il segnale di uscita ben
equalizzato
Classificazione di impianto CEI100-7 A PLUS.
GB: 5 floor cascade syste . Thanks to the input AGC
(Auto atic Gain Control), up to 5 floors can be served
without a pick-up a plifier, keeping the output signal
well equalized.
Plant classification CEI100-7 A PLUS.
F: installation à 5 étages cascade. Grâce au CAG (Contrôle
Auto atique de Gain) en entrée, il est possible de desservir
jusqu’à 5 étages sans aucun a plificateur de relance, en
aintenant le signal de sortie bien égalisé.
Classification d’installation CEI100-7 A PLUS.
DE: Anlagen-Kaskade it 5 Etagen. Dank der CAG
(auto atische Kontrolle der Verstärkung) a Eingang
können bis zu 5 Etagen ohne Startverstärker bedient werden;
das Ausgangssignal bleibt nivelliert.
Anlagenklassifikation CEI100-7 A PLUS.
9
I: Ese pio i pianto 5 piani con ali entazione dell’LNB
da porta DC-IN. l’LNB può essere ali entato anche
inserendo un ali entatore adeguato su una delle
porte DC-IN presenti in ciascun prodotto.
Classificazione di impianto CEI100-7 A PLUS.
GB: Exa ple of 5 floor syste with LNB powered fro
the DC-IN SCR port The LNB can also be powered by
incorporating an appropriate power pack on one of the
DC-IN ports found on each product.
Plant classification CEI100-7 A PLUS.
F: Exe ple installation 5 étages avec ali entation du LNB par
un port DC-IN Légende: le LNB peut aussi être ali enté en
insérant une ali entation adéquate sur un des ports DC-IN
présents dans chaque produit.
Classification d’installation CEI100-7 A PLUS.
DE: Anlagenbeispiel 5 Etagen it Stro versorgung des LNB
durch Port DC-IN. Bildlegende: Der LNB kann auch durch die
Integration eines ange essenen Netzgeräts auf einer der
Ports DC-IN, die bei jede Produkt vorhanden sind, gespeist
werden.
Anlagenklassifikation CEI100-7 A PLUS.
10
I: ISTRUZIONI PER L’UTILIZZO
GB: USER’S INSTRUCTIONS
F: INSTRUCTIONS POUR L’UTILISATION
DE: BETRIEBSANLEITUNG
I: Per un corretto funziona ento del CAG (controllo auto atico del guadagno) accertarsi di entrare con un livello
corretto del segnale. Per dividere il segnale in più parti utilizzare partitori Es. PA4 o PP4.
ATTENZIONE: NON utilizzare Derivatori perché non per ettono il passaggio dei toni di co ando dal decoder al
Multiswitch. Se si usano decoder classici tra presa e Multiswitch deve essere fatto un collega ento diretto, in questo
caso non possono essere utilizzati i partitori.
Quando un decoder non eroga corrente sufficiente per ali entare il ultiswitch, può essere utilizzata la porta DC IN,
sulla quale è sufficiente inserire un ali entatore da 20V per escludere l’ali entazione da decoder (PSU2032 287423).
GB: For the AGC (auto atic gain control) to work correctly, ensure the signal entry level is correct. To divide the signal
into parts, use dividers, e.g. PA4 or PP4.
ATTENTION: DO NOT USE shunts because they do not allow trans itting the co and tones fro the decoder to the
ultiswitch. If classic decoders are used, a direct connection ust be ade between the socket and the ultiswitch
but in this case the dividers cannot be used.
The switch and the LNB can be fed through DC-IN port using a 20V power supply unit (PSU2032 287423)
F: Pour un fonctionne ent correct du CAG (contrôle auto atique de gain), s’assurer d’entrer avec un niveau correct
du signal. Pour diviser le signal en plusieurs parties, utiliser des diviseurs Es. PA4 ou PP4.
ATTENTION : NE PAS utiliser de dérivateurs parce qu’ils ne per ettent pas le passage des tonalités de co ande du
décodeur au Multiswitch. En cas d’utilisation de décodeurs classiques entre prise et Multiswitch, il faut réaliser un
raccorde ent direct ; dans ce cas, les diviseurs ne peuvent pas être utilisés.
D: Für einen korrekten Betrieb des CAG (auto atische Kontrolle der Verstärkung) den Eingang it eine korrekten
Signalpegel kontrollieren. Zu Teilen des Signals in ehrere Teile Spannungsteiler benutzen Bsp. PA4 oder PP4.
ACHTUNG: KEINE Abzweiger benutzen, weil sie den Durchlass der Steuersignale vo Decoder zu Multischalter nicht
erlauben. Wenn klassische Decoder zwischen Steckdose und Multischalter benutzt werden, uss ein direkter
Anschluss vorgeno en werden; in diese Fall können keine Spannungsteiler benutzt werden.
RX
OUT RX
OUT
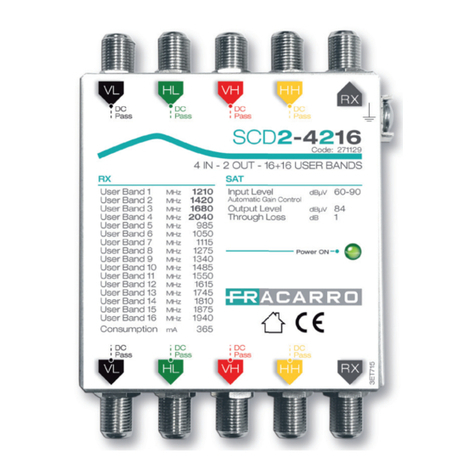
RX1 1210 MHz RX9 1340 MHz
RX2 1420 MHz RX10 1485 MHz
RX3 1680 MHz RX11 1550 MHz
RX4 2040 MHz RX12 1615 MHz
RX5 985 MHz RX13 1745 MHz
RX6 1050 MHz RX14 1810 MHz
RX7 1115 MHz RX15 1875 MHz
SCD2-5416
SCD2-5816
RX8 1275 MHz RX16 1940 MHz
I: Banda usata per utenza
GB: Bandwidth used for user
F: Bande passante utilisée pour
l’utilisateur.
DE: Bandbreite für Benutzer
verwendet
IN
OUT
SCD2-5416
SCD2-5816 70-100dBμV SCD2 (dCSS) or SCR
85dBμV
I: Per 30 canali sat
GB: For 30 sat channels
F: Pour 30 canaux satellites
DE: Für 30 sat kanäle
11
I: SPECIFICHE TECNICHE
GB: TECHNICAL SPECIFICATIONS
F: SPECIFICATIONS TECHNIQUES
D: TECHNISCHE SPEZIFI ATIONEN
SCD2-5416 SCD2-5816
I: Nu ero d’ingressi
GB: Nu ber of inputs 4 SAT, 1 TV F: No bre d’entrées
DE: Anzahl der Eingänge
I: Nu ero d’uscite
GB: Nu ber of outputs 4 8 F: No bre de sorties
DE: Anzahl der Ausgänge
I: Larghezza di banda
GB: Bandwidth 950-2150MHz F: Bande passante
DE: Bandbreiten
I: Livello di ingresso
GB: Input Level 70-100 dBμV F: Niveau d’entrée
DE: Eingäng
I: Livello di uscita
GB: Output Level
Legacy: 76 dBμV, SCR: 85 dBμV,
SCD2 (dCSS): 85 dBμV F: Niveau de sortie
DE: Ausgangspegel
I: Perdita di passaggio
GB: Tap loss -1,5dB -2,5dB F: Niveau ax d’entrée
DE: Max Eingäng
I: Larghezza di banda
GB: Bandwidth 5-1000MHz F: Bande passante
DE: Bandbreiten
I: Perdita di passaggio
GB: Tap loss -16dB -20dB F: Perte de passage
DE: Verlust der
Durchgang
I: Perdita di inserzione
GB: Through loss -3dB -6dB F: Perte de passage
DE: Verlust der
Durchgang
I: Larghezza di banda
GB: Bandwidth 5-790MHz F: Bande passante
DE: Bandbreiten
RX
I: Banda usata per utenze
GB: Band used for utilities
SCR (EN50494)
1210; 1420; 1680; 2040MHz
SCD2 (dCSS) (EN50607)
985; 1050; 1115; 1275; 1340; 1485; 1550;
1615; 1745; 1810; 1875; 1940MHz
F: Bande utilisée pour les
services
DE: Band für Versor-
gungsunterneh en
verwendet
RX
I: Consu o
GB: Consu ption
360@14V,
280@18V
380@14V,
300@18V F: Conso ation
DE: Verbrauch
I: Ali entazione LNB
GB: LNB power 500 A F: Ali entation LNB
DE: LNB-Leistung
I: Di ensioni
GB: Di ensions 220x140x50 220x220x50 F: Di ensions
DE: Ab essungen
GB: Operating te perature
I: Te peratura di funziona ento -10 to +55°C F: Te pérature fonctionnelle
DE: Betriebsu gebungste peratur
I: I dati tecnici sono no inali e riferiti alla te peratura di 25° C.
GB: The technical data are no inal values and refer to an operating te perature of 25° C.
F: Les caratéristiques techniques sont no inales et se réfèrent à une te pérature de fonctionne ent de 25° C.
DE: Die technischen Daten sind Nenndaten und beziehen sich auf eine Betriebste peratur von 25° C.
12
I:CONFORMITÀ ALLE DIRETTIVE EUROPEE
GB: CONFORMITY TO EUROPEAN LAWS F: CONFORMITÉ AUX DIRECTIVES EUROPÉENNES
GB: CONFORMITY TO EUROPEAN LAWS
I: Fracarro dichiara che il prodotto è confor e alle direttive 2014/53/UE e 2011/65/UE. Il testo co pleto della dichiarazione di confor ità UE è
disponibile al seguente indirizzo internet ce.fracarro.co .
GB: Fracarro declares that the product co plies with EU Directive 2014/53 and 2011/65/UE. The full text of the EU Declaration of Confor ity is
available on the following website ce.fracarro.co .
F: Fracarro déclare que le produit est confor e à la directive 2014/53/UE et 2011/65/UE. Le texte co plet de la déclaration de confor ité UE
est disponible à l’adresse internet suivante : ce.fracarro.co .
DE: Fracarro erklärt, dass das Produkt it der Richtlinie 2014/53/EU und 2011/65/UE konfor ist. Der ko plette Test der
EUKonfor itätserklärung ist unter der folgenden Internetadresse ce.fracarro.co verfüENar.
INFORMAZIONE AGLI UTENTI
A sensi dell’art. 26 del Decreto Legislativo 14 marzo 2014, n. 49 "Attuazione della direttiva 2012/19/UE sui rifiuti di apparecchiature elettriche
ed elettroniche (RAEE)"
Il simbolo del cassonetto barrato riportato sull’apparecchiatura indica che il prodotto alla fine della propria vita utile deve essere raccolto
separatamente dagli altri rifiuti. L’utente dovrà, pertanto, conferire l’apparecchiatura giunta a fine vita agli idonei centri di raccolta
differenziata dei rifiuti elettronici ed elettrotecnici, oppure riconsegnarla al rivenditore al momento dell’acquisto di una nuova
apparecchiatura di tipo equivalente, in ragione di uno a uno. L’adeguata raccolta differenziata per l’avvio successivo
dell’apparecchiatura dismessa al riciclaggio, al trattamento e allo smaltimento ambientalmente compatibile contribuisce ad evitare
possibili effetti negativi sull’ambiente e sulla salute e favorisce il riciclo dei materiali di cui è composta l’apparecchiatura.
USER’S INFORMATION
Disposal of Old Electrical & Electronic Equipment (Applicable in the European Union and other European countries with separate collection
system
This symbol on the product or on its packaging indicates that this product shall not be treated as household waste. Instead it shall be
handed over to the applicable collection point for the recycling of electrical and electronic equipment. By ensuring this product is
disposed of correctly, you will help prevent potential negative consequences for the environment and human health, wich could
otherwise be caused by inappropriate waste handling of this product. The recycling of materials will help to conserve natural resources.
For more detailed information about recycling of this product, please contact your local city office, your household waste disposal
service or the shop where you purchased the product.
INFORMATION AUX UTILISATEURS
Traitement des appareils électriques et électroniques en fin de vie (Applicable dans les pays de l’Union Européenne et aux autres pays
européens disposant de systèmes de collecte sélective)
Ce symbole, apposé sur le produit ou sur son emballage, indique que ce produit ne doit pais être traité avec les déchets ménagers. Il
doit être remis à un point de collecte approprié pour le recyclage des équipments électriques et électroniques. En s’assurant que ce
produit est bien mis au rebus de manière appropriée, vous aiderez à prévenir les conséquences négatives potentielles pour
l’environnement et la santé humaine. Le recyclage des matérieux aidera à conserver les resources naturelles. Pour toute information
supplémentaire au sujet du recyclage de ce produit, vous pouvez contacter votre municipalité, votre déchetterie ou le magasin où vous
avez acheté le produit.
BENUTZERINFORMATIONEN
Entsorgung von gebrauchten elektrischen und elektronicschen Geräten (Anzuwenden in den Ländern der Europäischen Union und anderen
europäischen Ländern mit einem separaten Sammelsystem für diese Geräte)
Das Symbol auf dem Produkt oder seiner Verpackung weist darauf hin, dass dieses Produkt nicht als normaler Haushaltsabfall zu
behandeln ist, sondern an einer Annahmestelle für das Recycling von elektrischen und elektronischen Geräten abgegeben werden
muss. Durch Ihren Beitrag zum korrekten Entsorgen dieses Produkts schützen Sie die Umwelt und die Gesundheit Ihrer Mitmenschen.
Umwelt und Gesundheit werden durch falsches Entsorgen gefährdet. Materialrecycling hilft den Verbrauch von Rohstoffen zu
verringern. Weitere Informationen über das Recycling dieses produkts erhalten Sie von Ihrer Gemeinde, den kommunalen
Entsorgungsbetrieben oder dem Geshäft, in dem Sie das Produkt gekauft haben.
Garantito da/ Guaranteed by/ Garanti par/ Garantizado por/ Garantido por/ Garantiert durch
Fracarro Radioindustrie SRL Via Cazzaro n. 3, 31033 Castelfranco Veneto (Tv) – Italy
Fracarro Radioindustrie SRL
Via Cazzaro n.3 - 31033 Castelfranco Veneto (TV) - ITALIA - Tel: +39 0423 7361 - Fax: +39 0423 736220
Fracarro France S.A.S.
7/14 rue du Fossé Blanc Bâti ent C1 - 92622 Gennevilliers Cedex - FRANCE Tel: +33 1 47283400 - Fax: +33 1 47283421
Fracarro (U ) - Ltd
Unit A, Ibex House, Keller Close, Kiln Far , Milton Keynes MK11 3LL UK - Tel: +44(0)1908 571571 - Fax: +44(0)1908 571570
www.fracarro.co - [email protected] - [email protected] - chat whatsapp +39 335 7762667
SCD2-5416 / SCD2-5816
06-11-2017 - rev.01

This manual suits for next models

1

Other Fracarro Switch manuals

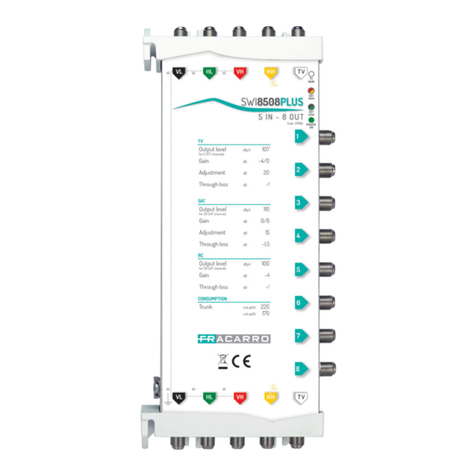
Fracarro Smart Switchline SWI85 STPLUS Series User manual

Fracarro

Fracarro Smart Switchline SWI85 STPLUS Series User manual

Fracarro MULTISWITCH SWI504SA User manual

Fracarro

Fracarro MULTISWITCH SWI504SA User manual

Fracarro SWI5906AS User manual

Fracarro

Fracarro SWI5906AS User manual

Fracarro XS5+ User manual

Fracarro

Fracarro XS5+ User manual

Fracarro SWI908TS User manual

Fracarro

Fracarro SWI908TS User manual

Fracarro SWP524TS User manual

Fracarro

Fracarro SWP524TS User manual

Fracarro GALAXIA User manual

Fracarro

Fracarro GALAXIA User manual

Fracarro SCD2-4216LTP User manual

Fracarro

Fracarro SCD2-4216LTP User manual

Fracarro SWP908TS User manual

Fracarro

Fracarro SWP908TS User manual

Fracarro SCD2-4216 User manual

Fracarro

Fracarro SCD2-4216 User manual

Fracarro SWI4532DT User manual

Fracarro

Fracarro SWI4532DT User manual

Fracarro SCD2-5416W User manual

Fracarro

Fracarro SCD2-5416W User manual

Fracarro SCD2-5216W User manual

Fracarro

Fracarro SCD2-5216W User manual

Fracarro SWI1732TS User manual

Fracarro

Fracarro SWI1732TS User manual

Fracarro SWP508TS User manual

Fracarro

Fracarro SWP508TS User manual

Fracarro SCD2-5216W User manual

Fracarro

Fracarro SCD2-5216W User manual

Fracarro SWP1708TS User manual

Fracarro

Fracarro SWP1708TS User manual

Fracarro SWP508QD User manual

Fracarro

Fracarro SWP508QD User manual

Fracarro AMP435SA User manual

Fracarro

Fracarro AMP435SA User manual

Fracarro XS4 Series User manual

Fracarro

Fracarro XS4 Series User manual

Fracarro SMART SWITCHLINE SWI85 PLUS Series User manual

Fracarro

Fracarro SMART SWITCHLINE SWI85 PLUS Series User manual

Fracarro SWI1308TS User manual

Fracarro

Fracarro SWI1308TS User manual

Popular Switch manuals by other brands

Sky now user manual

Sky

Sky now user manual

Jasco ZW4105 manual

Jasco

Jasco ZW4105 manual

Belden Hirschmann MICE MS20 user manual

Belden

Belden Hirschmann MICE MS20 user manual

IBM N Series installation guide

IBM

IBM N Series installation guide

Belkin OmniView SOHO F1DD102L user manual

Belkin

Belkin OmniView SOHO F1DD102L user manual

Wizard ON-S5700-48GP-4TF installation manual

Wizard

Wizard ON-S5700-48GP-4TF installation manual

CIE-Group MPS1 User instructions

CIE-Group

CIE-Group MPS1 User instructions

Siemens SIMATIC NET RUGGEDCOM RST2228P installation manual

Siemens

Siemens SIMATIC NET RUGGEDCOM RST2228P installation manual

Chauvet M-Mover supplementary guide

Chauvet

Chauvet M-Mover supplementary guide

Briggs & Stratton 71057 installation manual

Briggs & Stratton

Briggs & Stratton 71057 installation manual

Allied Telesis AT-FS709 installation guide

Allied Telesis

Allied Telesis AT-FS709 installation guide

3Com Baseline 2226-PWR Plus user guide

3Com

3Com Baseline 2226-PWR Plus user guide

KROHNE OPTISWITCH 5200C operating instructions

KROHNE

KROHNE OPTISWITCH 5200C operating instructions

Marmitek Connect TS41 user manual

Marmitek

Marmitek Connect TS41 user manual

Lindy 39300 User manual addendum

Lindy

Lindy 39300 User manual addendum

Cabletron Systems MMAC-Plus 9H423-26 supplementary guide

Cabletron Systems

Cabletron Systems MMAC-Plus 9H423-26 supplementary guide

Palmer TRIAGE quick start guide

Palmer

Palmer TRIAGE quick start guide

Leviton Decora L5614 Installation

Leviton

Leviton Decora L5614 Installation

manuals.online logo
manuals.online logoBrands
  • About & Mission
  • Contact us
  • Privacy Policy
  • Terms and Conditions

Copyright 2025 Manuals.Online. All Rights Reserved.