manuals.online logo
Brands
  1. Home
  2. •
  3. Brands
  4. •
  5. Fracarro
  6. •
  7. Switch
  8. •
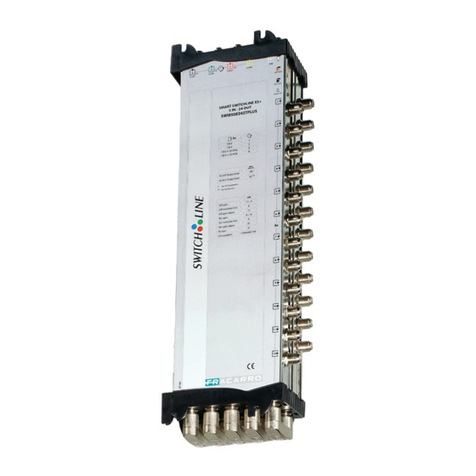
  9. Fracarro Smart Switchline SWI85 STPLUS Series User manual

Fracarro Smart Switchline SWI85 STPLUS Series User manual

1
SMART SWITCHLINE SWI85..STPLUS
MULTISWITCH IN CASCATA
CASCADABLE IF SWITCH
COMMUTATEUR BIS
KASKADIERBARER MULTISCHALTER
ISTRUZIONI PER L’USO - OPERATING INSTRUCTIONS
INSTRUCTIONS D’EMPLOI - GEBRAUCHSANWEISUNG
2
EN: SAFETY WARNINGS
F: AVERTISSEMENT DE SÉCURITÉ I: AVVERTENZE PER LA SICUREZZA
DE: SICHERHEITSHINWEISE
EN: Safety warnings
The product must only be installed by qualied persons, according to the
local safety standards and regulations. Fracarro Radioindustrie is free
from all civil and criminal responsibilities due to breaches of the current
legislation derived from the improper use of the product by the installer,
user or third parties.
The product must be used in full compliance with the instructions given
in this manual in order to protect the operator against all possible injuries
and the product from being damaged.
Installation warnings
Humidity and condensation could damage the product. In case of
condensation, wait until the product is dry before using it.
Handle the product carefully. Impacts can damage the product.
Leave enough space around the product to ensure sufcient ventilation.
Excessive temperatures and/or an overheating may affect the
performance and the life of the product.
Don’t install the product above or near any heat sources, in dusty places or
where it might come into contact with corrosive substances.
In the event that the unit is xed to the wall, use the proper screw anchors
suitable to the characteristics of the xing support. The wall and the
anchoring system must be able to support at least 4 times the weight of
the unit.
ATTENTION: To avoid being hurt, the unit must be xed to the wall/oor in
accordance with the installation instructions.
The product must not be exposed to any dripping or splashing and thus it
should be installed indoors and in a dry location.
The product must be connected to the earth electrode of the antenna
system, in accordance with standard EN60728-11.
The screw arranged for this scope is marked by the symbol
It is recommended to follow the provisions of the standard EN60728-
11 and not to connect this screw (terminal) (product) to the protective
ground of the supply mains.
Earth screw/Faston connector symbol
General warnings
In the event of a malfunctioning, do not try to x the product as the
guarantee would be invalidated.
Although the information given in this manual has been prepared
carefully and thoughtfully, Fracarro Radioindustrie S.r.l. reserves the right
to modify it without notice and to improve and/or modify the product
described in this manual. See the website www.fracarro.com to have
information relevant to the technical support and product guarantee.
F:
L’installation du produit doit être effectuée par du personnel qualié
conformément aux lois et aux normes locales sur la sécurité. Par conséquent,
Fracarro Radioindustrie décline toute responsabilité civile ou pénale dérivant
de violations des normes juridiques en vigueur et de l’utilisation incorrecte du
produit de la part de l’installateur, de l’utilisateur ou de tiers.
Le produit doit être installé en suivant les indications fournies, an de
préserver l’opérateur d’éventuels accidents et le produit d’éventuels
endommagements.
Précautions d’installation
L’humidité et les gouttes de condensation, pourraient endommager l’appareil.
En cas de condensation, attendre que le produit soit complètement sec avant
de l’utiliser.
Manier avec soin. Les chocs pourraient endommager le produit.
Laisser de l’espace autour du produit pour garantir une ventilation sufsante.
La température excessive de fonctionnement et/ou un réchauffement
excessif peuvent nuire au fonctionnement et à la durée du produit.
Ne pas installer le produit sur ou près des sources de chaleur, dans des
endroits très poussiéreux ou en contact avec des substances corrosives.
En cas de montage mural, utiliser des chevilles à expansion correspondant
aux caractéristiques du support de xation. La paroi et le système de xation
doivent être en mesure de supporter au moins 4 fois le poids de l’appareil.
ATTENTION :Pour ne pas se blesser, xer le produit au mur/sol en suivant les
instructions de montage.
Installer le produit de façon que la che d’alimentation de secteur soit
facilement accessible.
Le produit ne doit pas être exposé à l’égouttement ou aux éclaboussures d’eau
et il doit donc être installé dans un endroit sec, à l’intérieur.
Le produit doit être connecté à l’électrode de terre de l’installation de
l’antenne en conformité avec la norme EN 60728-11.
La vis prévue à cet effet est caractérisée par le symbole
Il est conseillé de respecter les dispositions de la norme EN60728-11 et de ne
pas relier cette vis (borne) (produit) à la terre de protection du secteur.
Vis à terre / symbole du connecteur Faston
Avertissements généraux
En cas de panne, ne pas tenter de réparer le produit, sans quoi la garantie ne
sera plus valable.
Les informations indiquées dans ce mode d’emploi ont été renseignées
soigneusement ; toutefois, Fracarro Radioindustrie S.r.l. se réserve le droit
d’améliorer et/ou de modier à tout moment et sans préavis les produits
décrits dans ce mode d’emploi. Consulter le site www.fracarro.com pour
connaître les conditions d’assistance et de garantie.
I: L’installazione del prodotto deve essere eseguita da personale
qualicato in conformità alle leggi e normative locali sulla sicurezza.
Fracarro Radioindustrie di conseguenza è esonerata da qualsivoglia
responsabilità civile o penale conseguente a violazioni delle norme
giuridiche vigenti in materia e derivanti dall’uso improprio del prodotto da
parte dell’installatore, dell’utilizzatore o di terzi.
L’installazione del prodotto deve essere eseguita secondo le indicazioni di
installazione fornite, al ne di preservare l’operatore da eventuali incidenti
e il prodotto da eventuali danneggiamenti.
Avvertenze per l’installazione
Umidità e gocce di condensa potrebbero danneggiare il prodotto. In
caso di condensa, prima di utilizzare il prodotto, attendere che sia
completamente asciutto.
Maneggiare con cura. Urti impropri potrebbero danneggiare il prodotto.
Lasciare spazio attorno al prodotto per garantire una ventilazione
sufciente.
L’eccessiva temperatura di lavoro e/o un eccessivo riscaldamento
possono compromettere il funzionamento e la durata del prodotto.
Non installare il prodotto sopra o vicino a fonti di calore o in luoghi
polverosi o dove potrebbe venire a contatto con sostanze corrosive.
In caso di montaggio a muro utilizzare tasselli ad espansione adeguati
alle caratteristiche del supporto di ssaggio. La parete ed il sistema
di ssaggio devono essere in grado di sostenere almeno 4 volte il peso
dell’apparecchiatura.
Attenzione: per evitare di ferirsi, questo apparecchio deve essere
assicurato alla parete/pavimento secondo le istruzioni di installazione.
Il prodotto non deve essere esposto a gocciolamento o a spruzzi d’acqua e
va pertanto installato in un ambiente asciutto, all’interno di edici.
Il prodotto deve essere collegato all’elettrodo di terra dell’impianto
d’antenna conformemente alla norma EN 60728-11.
La vite predisposta per tale scopo è contrassegnata con il simbolo
Si raccomanda di attenersi alle disposizioni della norma EN 60728-11
e di non collegare tale vite alla terra di protezione della rete elettrica di
alimentazione.
Simbolo di terra dell’impianto d’antenna
3
Avvertenze generali
In caso di guasto non tentate di riparare il prodotto altrimenti la garanzia
non sarà più valida. Le informazioni riportate in questo manuale sono
state compilate con cura, tuttavia Fracarro Radioindustrie S.r.l. si riserva
il diritto di apportare in ogni momento e senza preavviso, miglioramenti
e/o modiche ai prodotti descritti nel presente manuale. Consultare il sito
www.fracarro.com per le condizioni di assistenza e garanzia.
DE: Die Installation des Produkts muss von Fachpersonal in
Übereinstimmung mit den Gesetzen und lokalen Sicherheitsvorschriften
vorgenommen werden. Fracarro Radioindustrie ist daher von einer zivil-
oder strafrechtlichen Haftung gleich welcher Art entbunden, die sich
aus der Verletzung der diesbezüglich geltenden Rechtsnormen oder
dem unsachgemäßen Einsatz des Produkts durch den Installateur, den
Benutzer oder Dritte ergeben.
Die Installation des Produkts muss in Übereinstimmung mit den
bereitgestellten Installationshinweisen erfolgen, um den Benutzer vor
Unfällen und das Produkt vor möglichen Beschädigungen zu schützen.
Installationshinweise
Feuchtigkeit und Kondenswasser können das Produkt beschädigen. Falls
sich Kondenswasser gebildet hat, warten Sie vor Einsatz des Produktes,
bis dieses vollständig getrocknet ist.
Mit Sorgfalt handhaben. Stöße können das Produkt beschädigen.
Um das Produkt herum Platz lassen, um eine ausreichende Belüftung zu
gewährleisten.
Eine zu hohe Arbeitstemperatur und/oder eine übermäßige Erhitzung
können den Betrieb und die Lebensdauer des Produktes beeinträchtigen.
Installieren Sie das Produkt nicht oberhalb oder in der Nähe von
Wärmequellen und staubigen Orten oder an Orten, an denen es mit
korrosiven Stoffen in Berührung kommen könnte.
Das Gerät muss immer so installiert sein, dass der Netzstecker immer
leicht zugänglich ist.
Bei Wandmontage für den Befestigungshintergrund geeignete
Spreizdübel verwenden. Die Wand und das Befestigungssystem müssen
im Stande sein, mindestens 4 Mal das Gewicht des Geräts zu tragen.
ACHTUNG: Zur Vermeidung von Verletzungen muss dieses Gerät an der
Wand/am Fußboden entsprechend der Sicherheitsanleitungen gesichert
werden.
Das Produkt muss gemäß der Norm EN 60728-11 an die Erdungselektrode
der Antennenanlage angeschlossen werden.
Die hierzu vorgesehene Schraube ist mit dem folgenden Symbol
gekennzeichnet
.
Wir bitten nachdrücklich darum, die Vorschriften der Norm EN 60728-11
zu berücksichtigen und die Schraube (Klemme) (Produkt) auf keinen Fall
an die Schutzerdung des Stromversorgungsnetzes anzuschließen.
Erdschraube / Faston Stecker Symbol
Allgemeine Hinweise
Im Störungsfall versuchen Sie bitte nicht, das Produkt zu reparieren,
andernfalls verfällt der Garantieanspruch.
Die im vorliegenden Handbuch enthaltenen Informationen wurden
sorgfältig zusammengestellt. Fracarro Radioindustrie S.r.l. behält
sich dennoch das Recht vor, jederzeit und ohne Vorankündigung
Verbesserungen und/oder Veränderungen an den im Handbuch
beschriebenen Produkten vorzunehmen. Informationen zu Kundendienst
und Garantiebedingungen nden Sie auf unsere Webseite www.fracarro.
com.
4°
EN: Power on LED. If the LED is on, power is present. If there is a short
circuit the power supply LED stays off. Disconnect the product from the
mains. Remove the short circuit. Plug the product back in to the mains.
The LED should come on.
F: Indicateur de présence secteur. Si la LED es allumée, le secteur est
présent. Si il y a un court-circuit, la Led est éteinte. Dans ce cas, il est
nécessaire de débrancher le produitet ensuite supprimer le court-
circuit. Ensuite, rebrancher le produit sur le secteur. La led devrait être
allumée à nouveau.
I: Led Alimentazione, se il multiswitch viene opportunamente alimenta-
to il led sarà acceso. In caso di cortocircuito sulle linee di alimentazione il
led sarà spento. Disconnettere l’alimentazione. Rimuovere il corto circu-
ito.Riconnettere l’alimentazione. Il led sarà nuovamente acceso.
DE: LED Anzeige Strom. Wenn die LED leuchtet, liegt Strom an. Bei Kurzschluss bleibt die LED erloschen. Abschalten des Bauteils vom Netz. Beseiti-
gung des Kurzschlusses. Bauteil wieder an das Netz anschließen. Die LED sollte aueuchten.
1°
EN: TV Gain Adjustment
F: Réglage du gain voie terrestre
I: Regolazione di guadagno TV
DE: Verstärkungs-Regelung TV Band
2°
EN: SAT gain adjustment high band
F: Réglage du gain Sat bande haute
I: Regolaz. di guadagno SAT banda Alta
DE: Verstärkungs-Regelung SAT Band
3°
EN: SAT gain adjustment low band
F: Réglage du gain Sat bande basse
I: Regolaz. di guadagno SAT banda Bassa
DE: Verstärkungs-Regelung SAT Band
EN: ADJUSTMENT
F: REGLAGE I: REGOLAZIONI
DE: ANPASSUNG
1
2
3
4
4
RX IN
14V V/Low I: Nero EN: Black F: Noir DE: Schwarz
18V H/Low I: Verde EN: Green F: Vert DE: Grün
14V + 22kHz V/High I: Rosso EN: Red F: Rouge DE: Rot
18V + 22kHz H/High I: Giallo EN: Yellow F: Jaune DE: Gelb
TV + R.P. I: Bianco EN: White F: Blanc DE: Weiß
dBµV
IN RX IN RX
SWI8524STPLUS 100 1-12 98 93 1-12 87
13-24 96 13-24 85
SWI8532STPLUS 97 1-16 96 91 1-16 84
17-32 94 17-32 82
EN: FOR 30 SAT CHANNELS, 42 PAL CHANNELS
F: POUR 30 CANAUX SATELLITES
I: PER 30 TRASPONDER SAT, 42 CANALI TV
DE: FÜR 30 SAT KANÄLE
EN: OPERATING LEVEL
F: NIVEAU DE TRAVAIL
I: LIVELLO DI FUNZIONAMENTO
DE: BETRIEBSPEGEL
EN: The switch can be powered from 3 polarities, vertical low (black), horizontal low (green)
and vertical high (red). The maximum current per line is 1.5A. If the maximum current could
exceed 1.5A, power the switch using more than 1 line.
F: Le commutateur peut être alimenté par 3 polarités, Verticale Basse (noire), Horizontale
Basse (verte) et Verticale haute (rouge). Le courant maxi par ligne est de1, 5A. Si le courant dé-
passe 1,5 A, il est impératif de répartir l’alimentation des commutateurs sur plusieurs lignes.
I: Il multiswitch può essere alimentato tramite le 3 linee passanti Verticale Basso (Nero), Oriz-
zontale basso (Verde) e Verticale Alto (Rosso). Il massimo carico per linea non deve superare
1,5A. Se in una sola linea possono esserci più di 1,5A dividere il carico sulle altre linee.
DE: Der Multiswitch kann über 3 Polaritäten versorgt werden, vertikal unten (schwarz), ho-
rizontal unten (grün) und vertikal oben (rot). Sollte der Strom 1,5 A übersteigen, dann ist der
Schalter über mehr als eine Leitung zu versorgen.
Input Sat with DC
Output Sat with DC
EN: SWITCHING
F: COMMUTATION I: COMMUTAZIONE
DE: SCHALTERSTELLUNGEN
EN: EARTHING SCREW
I: VITE MESSA A TERRA
F: UNE VIS DE MISE À LA TERRE
D: ERDUNGSSCHRAUBE
5
EN: INSTALLATION EXAMPLE 1
The trunk output of the nal switch must be terminated using an
isolated load. In a small system the switches can be installed with-
out a headend amplier. In this case, the LNB and switches must be
powered by an external power supply e.g. AMP2000 or PSU3001.
F: EXEMPLE D’INSTALLATION 1
Les sorties « passage » du dernier amplicateur doivent être équi-
pées d’une charge isolée. Dans les petits systèmes, les commuta-
teurs peuvent être installés sans amplicateur de tête. Dans ce cas
les LNB et les commutateurs doivent être alimentés par une alimen-
tation extérieure de type AMP2000 or PSU3001
I: ESEMPIO DI CONFIGURAZIONE 1
Nell’ultimo switch chiudere le uscite passanti con carichi isolati. Per
piccoli impianti è possibile installare i multiswitch senza l’amplica-
tore di testa. In questo caso bisogna utilizzare un alimentatore ester-
no AMP2000 o PSU3001 per alimentare l’LNB e i multiswitch, MAX 3
Switch (vedi esempio).
DE: INSTALLATIONS BEISPIEL 1
Der Linienausgang des letzten Schalters muss mit einem isoliertem
Abschlusswiderstand abgeschlossen werden. In kleineren Anlagen
können die Multischalter ohne zusätzlichen Verstärker an der Kopf-
stelle eingesetzt werden. In diesem Fall muss LNB und die Schalter
durch ein externes Netzteil, z.B. AMP2000 oder PSU3001 versorgt
werden.
EN: EXAMPLES OF INSTALLATION
F: EXAMPLES D’INSTALLATION
I: ESEMPI DI INSTALAZIONE
DE: INSTALLATIONS BEISPIEL
5m
5m
FR
PENTA85
UX-QT LTE
IN
OUT
TV
H.b.
L.b.
TV
IN
OUT
TV
H.b.
L.b.
TV
IN
OUT
TV
H.b.
L.b.
TV
TVSAT
PDM00
TVSAT TV SAT
TVSAT TVSAT
TVSAT
TVSAT
TVSAT
TVSAT
PDM00
TVSAT TVSAT
TVSAT TVSAT
TVSAT
TVSAT
TVSAT
TVSAT
PDM00
TVSAT TV SAT
TVSAT TVSAT
TVSAT
TVSAT
TVSAT
20m
20m
20m
85dBµV @ 47-862MHz
15m
AMP2000
T75IF
SWI8516PLUS
SWI8516PLUS
SWI8516PLUS
EN: OPERATING INSTRUCTIONS
I: ISTRUZIONI PER L’UTILIZZO
F: INSTRUCTIONS D’EMPLOI
DE: BETRIEBSANLEITUNG
EN: To avoid interference between TV and Sat signals, a TV amplier
with an adequate pass band lter is recommended (MAP.., MBX.., JB..).
Alternatively, an MXST can be used as a lter (see example) between
the amplier and the switch. If the multiswitches are installed after a
headend amplier e.g. AMP9254A, AMP9254 or AMP9294 you do not
need to use a lter. It is recommended to disable the switching com-
mand of 60Hz from the decoder’s menu in order to avoid interference.
I: Allo scopo di evitare eventuali interferenze, tra la banda tv e satellite
si consiglia l’utilizzo di amplicatori TV con un adeguato ltro passa
basso(MAP.., MBX..,B), in alternativa interporre un MXST utilizzato
come ltro (Vedi Esempio). Se nell’impianto si utilizza un amplicatore
di partenza AMP9254A, AMP9254 o AMP9294 il ltro passa basso è già
presente tra l’ingresso e l’uscita TV. Disabilitare sul menu del ricevitore
eventuali toni di commutazione a 60Hz perché non necessari e possi-
bili cause di interferenze.
F: A n d’éviter des interférences éventuelles entre la bande TV et
Sat, on conseille l’utilisation d’un amplicateur fournit d’un ltre avec
la bande passante adéquate (par exemple : MAP..., MBX..., JB...). Sinon,
vous pouvez installer le MXST (utilisé comme ltre, comme suggéré
dans le schéma ci-dessous) entre l’amplicateur et le SWI.... Si –par
contre- les ltre BIS commutée sont appliqués derrière des ampli-
cateurs comme l’AMP9254A, l’AMP9254 ou AMP9294, vous n’avez pas
besoin de ltres. Désactivez l’éventuel interrupteur de commutation
60Hz du décodeur parce qu’il peutcauser des interférences et la fonc-
tion en question n’est pas nécessaire en ce cas-ci.
DE: Um eventuelle Interferenzen zwischen TV- und Satellitenfre-
quenzen zu vermeiden, wird der Einsatz von TV-Verstärkern mit
geeignetem Tiefpasslter (MAP.., MBX.., B) empfohlen, als Alternative
kann ein als Filter eingesetztes MXST zwischengeschaltet werden (si-
ehe Beispiel). Sollte ein Verstärker in der Kopfstelle, AMP9254 oder
AMP9294 verwendet werden, so ist der Tiefpasslter bereits vorhan-
den. Im Menü des Empfängers eventuell vorhandene 60 Hz abschal-
ten.
6
EN: INSTALLATION EXAMPLE 3
In this case 2 AMP2000 or PSU3001 power supply
are used along the cascade (max 10 Switches).
F: EXEMPLE D’INSTALLATION 3
Dans ce cas deux alimentations AMP2000 or
PSU3001 sont utilisées le long de la cascade (10
interrupteurs maximum).
I: ESEMPIO DI CONFIGURAZIONE 3
In questo caso si utilizzano 2 alimentatori AMP2000
o PSU3001 lungo la cascata (max 10 Switch).
DE: INSTALLATIONS BEISPIEL 3
In diesem Fall kommen entlang der Kaskade (max.
10 Schalter) 2 Netzgeräte AMP2000 oder PSU3001
zum Einsatz.
EN: INSTALLATION EXAMPLE 2
It is possible to power switches (max. 7) using an
AMP2000 or PSU3001 connected to an AMP9254A
amplier.
F : EXEMPLE D’INSTALLATION 2
Il est possible d’alimenter jusqu’à 7 commutateurs
en utilisant une alimentation AMP2000 or PSU3001
connectée à un amplicateur AMP9254A.
I: ESEMPIO DI CONFIGURAZIONE 2
Utilizzando l’amplicatore AMP9254A si può colle-
gare l’alimentatore AMP2000 o PSU3001 per ali-
mentare gli switch in cascata, max 7 switch.
DE: INSTALLATIONS BEISPIEL 2
Es können bis zu 7 Multischalter mit einem Netzteil
AMP2000 oder PSU3001 verbunden mit dem Ver-
stärker AMP9254A versorgt werden.
FR
PENTA85
UX-QT LTE
IN
OUT
TV H.b.
L.b.
TV
H.b.
L.b.
TV
SWI8524STPLUS
TVSAT
TVSAT
TVSAT
TVSAT
TVSAT
TVSAT
TVSAT
TVSAT
TVSAT
TVSAT
TVSAT
TVSAT
TVSAT
TVSAT
TVSAT
TVSAT
TVSAT
TVSAT
TVSAT
TVSAT
TVSAT
TVSAT
TVSAT
TVSAT
IN
OUT
TV H.b.
L.b.
TV
H.b.
L.b.
TV
SWI8524STPLUS
TVSAT
TVSAT
TVSAT
TVSAT
TVSAT
TVSAT
TVSAT
TVSAT
TVSAT
TVSAT
TVSAT
TVSAT
TVSAT
TVSAT
TVSAT
TVSAT
TVSAT
TVSAT
TVSAT
TVSAT
TVSAT
TVSAT
TVSAT
TVSAT
5m
25m
25m
IN
OUT
25m
IN
OUT
TV H.b.
L.b.
TV
H.b.
L.b.
TV
SWI8524STPLUS
TVSAT
TVSAT
TVSAT
TVSAT
TVSAT
TVSAT
TVSAT
TVSAT
TVSAT
TVSAT
TVSAT
TVSAT
TVSAT
TVSAT
TVSAT
TVSAT
TVSAT
TVSAT
TVSAT
TVSAT
TVSAT
TV
SAT
TVSAT
TVSAT
5m
IN
OUT
TV
dc
5m
TV Amplifier
AMP9254A
AMP2000
FR
PENTA85
UX-QT LTE
IN
OUT
TV
H.b.
L.b.
TV
H.b.
L.b.
TV
SWI8524STPLUS
TV AMPLIFIER
S TV
MXST
TVSAT
TVSAT
TVSAT
TVSAT
TVSAT
TVSAT
TVSAT
TVSAT
TVSAT
TVSAT
TVSAT
TVSAT
TVSAT
TVSAT
TVSAT
TVSAT
TVSAT
TVSAT
TVSAT
TVSAT
TVSAT
TVSAT
TVSAT
TVSAT
IN
OUT
TV
H.b.
L.b.
TV
H.b.
L.b.
TV
SWI8524STPLUS
TVSAT
TVSAT
TVSAT
TVSAT
TVSAT
TVSAT
TVSAT
TVSAT
TVSAT
TVSAT
TVSAT
TVSAT
TVSAT
TVSAT
TVSAT
TVSAT
TVSAT
TVSAT
TVSAT
TVSAT
TVSAT
TVSAT
TVSAT
TVSAT
5m
IN
OUT
25m
25m
AMP2000
FR
PENTA85
UX-QT LTE
IN
OUT
TV H.b.
L.b.
TV
H.b.
L.b.
TV
SWI8524STPLUS
TVSAT
TVSAT
TVSAT
TVSAT
TVSAT
TVSAT
TVSAT
TVSAT
TVSAT
TVSAT
TVSAT
TVSAT
TVSAT
TVSAT
TVSAT
TVSAT
TVSAT
TVSAT
TVSAT
TVSAT
TVSAT
TVSAT
TVSAT
TVSAT
IN
OUT
TV H.b.
L.b.
TV
H.b.
L.b.
TV
SWI8524STPLUS
TVSAT
TVSAT
TVSAT
TVSAT
TVSAT
TVSAT
TVSAT
TVSAT
TVSAT
TVSAT
TVSAT
TVSAT
TVSAT
TVSAT
TVSAT
TVSAT
TVSAT
TVSAT
TVSAT
TVSAT
TVSAT
TVSAT
TVSAT
TVSAT
5m
25m
25m
25m
5m
25m
IN
OUT
TV H.b.
L.b.
TV
H.b.
L.b.
TV
SWI8524STPLUS
TVSAT
TVSAT
TVSAT
TVSAT
TVSAT
TVSAT
TVSAT
TVSAT
TVSAT
TVSAT
TVSAT
TVSAT
TVSAT
TVSAT
TVSAT
TVSAT
TVSAT
TVSAT
TVSAT
TVSAT
TVSAT
TVSAT
TVSAT
TVSAT
IN
OUT
TV H.b.
L.b.
TV
H.b.
L.b.
TV
SWI8524STPLUS
TVSAT
TVSAT
TVSAT
TVSAT
TVSAT
TVSAT
TVSAT
TVSAT
TVSAT
TVSAT
TVSAT
TVSAT
TVSAT
TVSAT
TVSAT
TVSAT
TVSAT
TVSAT
TVSAT
TVSAT
TVSAT
TVSAT
TVSAT
TVSAT
IN
OUT
TV
dc
TV DC
TV TV
SWI85SP2
TV Amplifier
AMP9254A
IN
OUT
AMP2000
IN
OUT
AMP2000
7
SWI8524STPLUS SWI8532STPLUS
EN: Number of outputs
F: Nombre de sorties 24 32 I: Número d’uscite
DE: Anzahl der Ausgänge
EN: Number of inputs
F: Nombre d’entrées
5
(4 SAT+1 TV)
5
(4 SAT+1 TV)
I: Numero d’ingressi
DE: Anzahl der Eingänge
EN: Bandwidth
F: Bande passante 950-2150MHz 950-2150MHz I: Larghezza di banda
DE: Bandbreiten
EN: Gain
F: Gain -2dB to 5dB
950MHz to 2150MHz
-2dB to 4dB
950MHz to 2150MHz
I: Guadagno
DE: Verstärkung
EN: Gain adjustment
F:
Réglage du
gain 15dB 15dB I: Regolazione di guadagno
DE: Pegelstell-Berereich
EN: Output Level
F: Niveau de sortie 110dBµV
(-35dBc 2 tones)
108dBµV
(-35 dBc 2 tones)
I: Livello d’uscita
DE: Ausgangspegel
EN: Loop-through attenuation
F: Passage -4dB -5dB I: Passaggio
DE: Durchgang
EN: Switching command
F: Commande commutation 14/18V
0/22KHz
14/18V
0/22KHz
I: Toni di commutazione
DE: Steuerspannungen
EN: Bandwidth
F: Bande passante 85-862MHz 85-862MHz I: Larghezza di banda
DE: Bandbreiten
EN: Gain
F: Gain -7dB to -2dB
85Mhz to 862Mhz
-10dB to -4dB
85Mhz to 862Mhz
I: Guadagno
DE: Verstärkung
EN: Gain adjustment
F:
Réglage du
gain 20dB 20dB I: Regolazione di guadagno
DE: Pegelstell-Berereich
EN: Output Level
F: Niveau de sortie 105dBµV
(-35dBc 3 tones)
102dBµV
(-35dBc 3 tones)
I: Livello d’uscita
DE: Ausgangspegel
EN: Loop-through attenuation
F: Passage -3dB -4dB I: Passaggio
DE: Durchgang
R.C.
EN: Bandwidth
F: Bande passante 5-65MHz 5-65MHz I: Larghezza di banda
DE: Bandbreiten
R.C.
EN: Gain
F: Gain -5dB -6dB I: Guadagno
DE: Verstärkung
EN: Output Level
F: Niveau de sortie 100dBµV (>20 MHz)
(-35dBc 2 tones)
100dBµV (>20 MHz)
(-35dBc 2 tones)
I: Livello d’uscita
DE: Ausgangspegel
EN: Loop-through attenuation
F: Passage -2.0dB -2.0dB I: Passaggio
DE: Durchgang
EN: Power Supply
F: Alimentation secteur 14-18V 14-18V I: Alimentazione
DE: Stromversorgung
EN: Consumption
F: Consommation
440mA(14Vdc)
340mA(18Vdc)
440mA(14Vdc)
340mA(18Vdc)
I: Consumo
DE: Verbrauch
EN: Max curent per trunk line
F: Courant maxi par colonne
1.5A 1.5A
I: Corrente massima per linea passanteDE: Max. Strom für
die Durchgangsleitung
EN: Dimensions
F: Dimensions 355 x 120 x 60mm 440 x 120 x 60mm I: Dimensioni
DE: Abmessungen
EN: Operating temperature
F: Température fonctionnelle -10 to +55°C I: Temperatura di funzionamentoDE:
Betriebsumgebungstemperatur
EN: The technical data are nominal values and refer to an operating temperature of 25° C.
F: Les caratéristiques techniques sont nominales et se réfèrent à une température de fonctionnement de 25° C.
I: I dati tecnici sono nominali e riferiti alla temperatura di 25° C.
DE: Die technischen Daten sind Nenndaten und beziehen sich auf eine Betriebstemperatur von 25° C.
EN: SPECIFICATIONS
F:SPÉCIFICATIONS
I:SPECIFICHE
DE: TECHNISCHE DATEN
3IS541 rev.03 15/11/2019
EN: Fracarro declares that the product complies with EU Directive 2014/53 and 2011/65/UE. The full text of the EU Declaration of
Conformity is available on the following website ce.fracarro.com;
F: Fracarro déclare que le produit est conforme à la directive 2014/53/UE et 2011/65/UE. Le texte complet de la déclaration de
conformité UE est disponible à l’adresse internet suivante : ce.fracarro.com.
I: Fracarro dichiara che il prodotto è conforme alle direttive 2014/53/UE e 2011/65/UE. Il testo completo della dichiarazione di
conformità UE è disponibile al seguente indirizzo internet ce.fracarro.com.
DE: Fracarro erklärt, dass das Produkt mit der Richtlinie 2014/53/EU und 2011/65/UE konform ist. Der komplette Test der EU-
Konformitätserklärung ist unter der folgenden Internetadresse ce.fracarro.com verfüENar.
Garantito da/ Guaranteed by/ Garanti par/ Garantizado por/ Garantido por/ Garantiert durch/ Zajamčena od/ Garantirano od/ Garantovano od/ Gwarantowane przez / Εγγυημένο από/
Гарантировано - Fracarro Radioindustrie SRL Via Cazzaro n. 3, 31033 Castelfranco Veneto (Tv) – Italy
USER’S INFORMATION
Disposal of Old Electrical & Electronic Equipment (Applicable in the European Union and other European countries with separate
collection system
This symbol on the product or on its packaging indicates that this product shall not be treated as household waste. Instead it
shall be handed over to the applicable collection point for the recycling of electrical and electronic equipment. By ensuring
this product is disposed of correctly, you will help prevent potential negative consequences for the environment and human
health, wich could otherwise be caused by inappropriate waste handling of this product. The recycling of materials will help to
conserve natural resources. For more detailed information about recycling of this product, please contact your local city ofce,
your household waste disposal service or the shop where you purchased the product.
INFORMATION AUX UTILISATEURS
Traitement des appareils électriques et électroniques en n de vie (Applicable dans les pays de l’Union Européenne et aux autres pays
européens disposant de systèmes de collecte sélective)
Ce symbole, apposé sur le produit ou sur son emballage, indique que ce produit ne doit pais être traité avec les déchets ménagers.
Il doit être remis à un point de collecte approprié pour le recyclage des équipments électriques et électroniques. En s’assurant
que ce produit est bien mis au rebus de manière appropriée, vous aiderez à prévenir les conséquences négatives potentielles
pour l’environnement et la santé humaine. Le recyclage des matérieux aidera à conserver les resources naturelles. Pour toute
information supplémentaire au sujet du recyclage de ce produit, vous pouvez contacter votre municipalité, votre déchetterie ou
le magasin où vous avez acheté le produit.
INFORMAZIONE AGLI UTENTI
A sensi dell’art. 26 del Decreto Legislativo 14 marzo 2014, n. 49 “Attuazione della direttiva 2012/19/UE sui riuti di apparecchiature
elettriche ed elettroniche (RAEE)”
Il simbolo del cassonetto barrato riportato sull’apparecchiatura indica che il prodotto alla ne della propria vita utile deve essere
raccolto separatamente dagli altri riuti. L’utente dovrà, pertanto, conferire l’apparecchiatura giunta a ne vita agli idonei centri
di raccolta differenziata dei riuti elettronici ed elettrotecnici, oppure riconsegnarla al rivenditore al momento dell’acquisto di
una nuova apparecchiatura di tipo equivalente, in ragione di uno a uno. L’adeguata raccolta differenziata per l’avvio successivo
dell’apparecchiatura dismessa al riciclaggio, al trattamento e allo smaltimento ambientalmente compatibile contribuisce ad
evitare possibili effetti negativi sull’ambiente e sulla salute e favorisce il riciclo dei materiali di cui è composta l’apparecchiatura.
BENUTZERINFORMATIONEN
Entsorgung von gebrauchten elektrischen und elektronicschen Geräten (Anzuwenden in den Ländern der Europäischen Union und
anderen europäischen Ländern mit einem separaten Sammelsystem für diese Geräte)
Das Symbol auf dem Produkt oder seiner Verpackung weist darauf hin, dass dieses Produkt nicht als normaler Haushaltsabfall
zu behandeln ist, sondern an einer Annahmestelle für das Recycling von elektrischen und elektronischen Geräten abgegeben
werden muss. Durch Ihren Beitrag zum korrekten Entsorgen dieses Produkts schützen Sie die Umwelt und die Gesundheit Ihrer
Mitmenschen. Umwelt und Gesundheit werden durch falsches Entsorgen gefährdet. Materialrecycling hilft den Verbrauch von
Rohstoffen zu verringern. Weitere Informationen über das Recycling dieses produkts erhalten Sie von Ihrer Gemeinde, den
kommunalen Entsorgungsbetrieben oder dem Geshäft, in dem Sie das Produkt gekauft haben.
EN: CONFORMITY TO EUROPEAN LAWS
F: CONFORMITÉ AUX DIRECTIVES EUROPÉENNES I: CONFORMITÀ ALLE DIRETTIVE EUROPEE
DE: ÜBEREINSTIMMUNG MIT DEN EUROPÄISCHEN RICHTLINIEN
Fracarro Radioindustrie SRL
Via Cazzaro n.3 - 31033 Castelfranco Veneto (TV) - ITALIA - Tel: +39 0423 7361 - Fax: +39 0423 736220
.
Fracarro France S.A.S.
7/14 rue du Fossé Blanc Bâtiment C1 - 92622 Gennevilliers Cedex - FRANCE Tel: +33 1 47283400 - Fax: +33 1 47283421
Fracarro (UK) - Ltd
Suite F9A, Whiteleaf Business Centre, Little Balmer, Buckingham, MK18 1TF UK - Tel: +44(0)1908 571571 - Fax: +44(0)1908 571570
www.fracarro.com - [email protected] - supportot[email protected] - chat whatsapp +39 335 7762667
fracarro.com

This manual suits for next models

2

Other Fracarro Switch manuals

Fracarro SWP1708TS User manual

Fracarro

Fracarro SWP1708TS User manual

Fracarro SCD2-5216W User manual

Fracarro

Fracarro SCD2-5216W User manual

Fracarro SWP908TS User manual

Fracarro

Fracarro SWP908TS User manual

Fracarro SWI5906AS User manual

Fracarro

Fracarro SWI5906AS User manual

Fracarro SWI1732TS User manual

Fracarro

Fracarro SWI1732TS User manual

Fracarro SWP524TS User manual

Fracarro

Fracarro SWP524TS User manual

Fracarro SCD2-4216 User manual

Fracarro

Fracarro SCD2-4216 User manual

Fracarro SWP508QD User manual

Fracarro

Fracarro SWP508QD User manual

Fracarro SCD2-5416W User manual

Fracarro

Fracarro SCD2-5416W User manual

Fracarro MULTISWITCH SWI504SA User manual

Fracarro

Fracarro MULTISWITCH SWI504SA User manual

Fracarro SCD2-5416 User manual

Fracarro

Fracarro SCD2-5416 User manual

Fracarro SCD2-5216W User manual

Fracarro

Fracarro SCD2-5216W User manual

Fracarro GALAXIA User manual

Fracarro

Fracarro GALAXIA User manual

Fracarro SWI4532DT User manual

Fracarro

Fracarro SWI4532DT User manual

Fracarro SWI1308TS User manual

Fracarro

Fracarro SWI1308TS User manual

Fracarro AMP435SA User manual

Fracarro

Fracarro AMP435SA User manual

Fracarro SCD2-4216LTP User manual

Fracarro

Fracarro SCD2-4216LTP User manual

Fracarro SMART SWITCHLINE SWI85 PLUS Series User manual

Fracarro

Fracarro SMART SWITCHLINE SWI85 PLUS Series User manual

Fracarro XS5+ User manual

Fracarro

Fracarro XS5+ User manual

Fracarro SWI908TS User manual

Fracarro

Fracarro SWI908TS User manual

Fracarro SWP508TS User manual

Fracarro

Fracarro SWP508TS User manual

Fracarro XS4 Series User manual

Fracarro

Fracarro XS4 Series User manual

Popular Switch manuals by other brands

Matchmaster 04MM-HMH01 instructions

Matchmaster

Matchmaster 04MM-HMH01 instructions

IBM 8265 Nways ATM Switch user guide

IBM

IBM 8265 Nways ATM Switch user guide

Siemens 3KD Series operating instructions

Siemens

Siemens 3KD Series operating instructions

Murphy Single Set Point Switch OS77 Series Installation and operation instructions

Murphy

Murphy Single Set Point Switch OS77 Series Installation and operation instructions

Toa CC-3011B instruction manual

Toa

Toa CC-3011B instruction manual

D-Link DES-1228 - Web Smart Switch Quick installation guide

D-Link

D-Link DES-1228 - Web Smart Switch Quick installation guide

Dell 5500 Series Specifications

Dell

Dell 5500 Series Specifications

Vimar 03906 manual

Vimar

Vimar 03906 manual

ABB 3299H-A02182 Installation and usage manual

ABB

ABB 3299H-A02182 Installation and usage manual

Nortel NN47220-101 user guide

Nortel

Nortel NN47220-101 user guide

schmersal AZM201Z-ST2-T-SD2P Instructions for operation

schmersal

schmersal AZM201Z-ST2-T-SD2P Instructions for operation

StarTech.com StarView SV431USB user manual

StarTech.com

StarTech.com StarView SV431USB user manual

Intermatic T105 supplementary guide

Intermatic

Intermatic T105 supplementary guide

Transition Networks SISPM1040-3248-L Quick start guides

Transition Networks

Transition Networks SISPM1040-3248-L Quick start guides

Kolver SWBX88 manual

Kolver

Kolver SWBX88 manual

Telldus TZWP-102 user manual

Telldus

Telldus TZWP-102 user manual

NTI SE-15V-2-2U1C-TTL installation guide

NTI

NTI SE-15V-2-2U1C-TTL installation guide

MaxiiPower Vi2202 installation manual

MaxiiPower

MaxiiPower Vi2202 installation manual

manuals.online logo
manuals.online logoBrands
  • About & Mission
  • Contact us
  • Privacy Policy
  • Terms and Conditions

Copyright 2025 Manuals.Online. All Rights Reserved.