manuals.online logo
Brands
  1. Home
  2. •
  3. Brands
  4. •
  5. FRAME IT ALL
  6. •
  7. Lawn And Garden Equipment
  8. •
  9. FRAME IT ALL Alamo 8' x 8' User manual

FRAME IT ALL Alamo 8' x 8' User manual

800002174, 800002174-AB1, 800002174-AB2
800003174, 800003174-AB1, 800003174-AB2
800004174, 800004174-AB1, 800004174-AB2
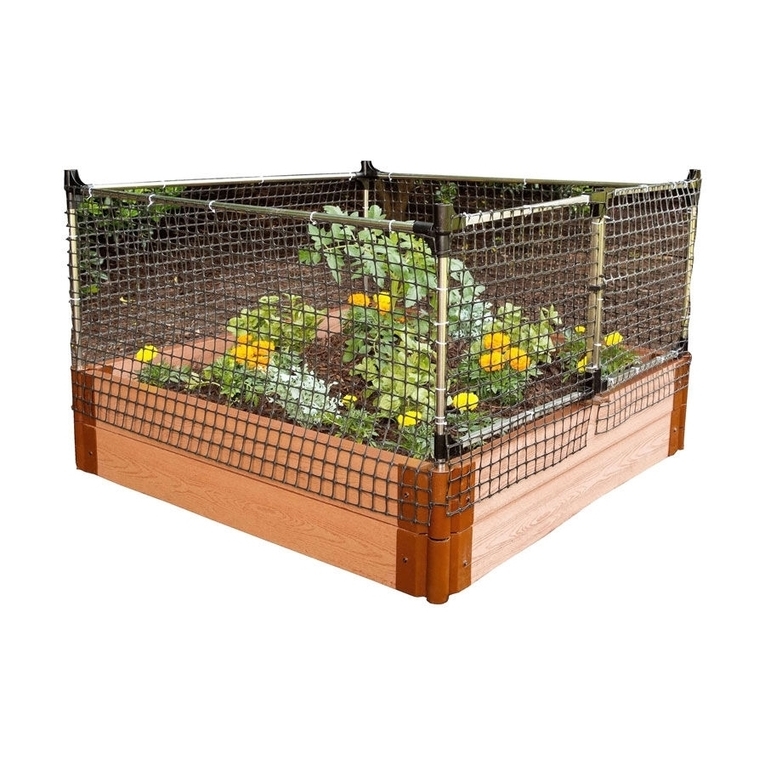
RAISED GARDEN BED
8’ x 8’ Alamo
Layout your Boards along the borderline and connect each
Board together by inserting the top of the stake through the
bracket loops with the stake pointing to the sky. This enables
you to freely position your border to get your desired location.
Customer Service: 1800-914-9835 |
[email protected]m
© Frame It All. All Rights Reserved.
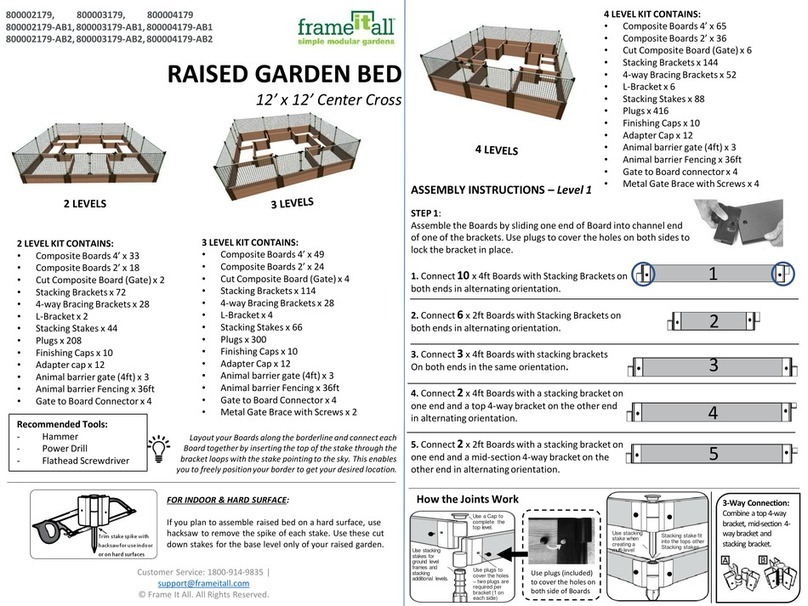
2 LEVEL KIT CONTAINS:
•Composite Boards 4’ x 17
•Composite Boards 2’ x 16
•Cut Composite Board (Gate) x 2
•Stacking Brackets x 44
•4-way Bracing Brackets x 24
•Stacking Stakes x 28
•Plugs x 144
•Caps x 4
•Adapter cap x 10
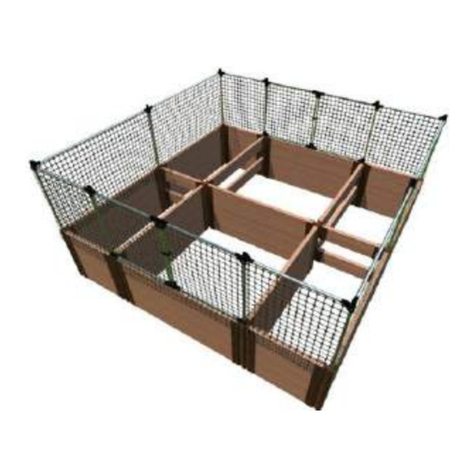
•Animal barrier gate (4ft) x 1
•Animal barrier Fencing x 28ft
•Gate to Board Connector x 4
ASSEMBLY INSTRUCTIONS –Level 1
STEP 1:
Assemble the Boards by sliding one end of Board into channel end
of one of the brackets. Use plugs to cover the holes on both sides to
lock the bracket in place.
1. Connect 7x 4ft Boards with Stacking Brackets on
both ends in alternating orientation.
2. Connect 4x 2ft Boards in the same pattern
3. Connect 2x 4ft Boards with a stacking bracket on
one end and a top 4-way bracket on the other end
in alternating orientation.
4. Connect 2x 2ft Boards with a stacking bracket on
one end and a mid-section 4-way bracket on the
other end in alternating orientation.
FOR INDOOR & HARD SURFACE:
If you plan to assemble raised bed on a hard surface, use
hacksaw to remove the spike of each stake. Use these cut
down stakes for the base level only of your raised garden.
Trim stake spike with
hacksawfor use indoor
or on hard surfaces
How the Joints Work
Use plugs (included)
to cover the holes on
both side of Boards
Use plugs to
cover the holes
–two plugs are
required per
bracket (1 on
each side)
Use a Capto
complete the
top level.
Use stacking
stakes for
ground level
frames and
stacking
additional levels.
Use stacking
stake when
creating a
multi-level
Stacking stake fit
into the tops other
Stacking stakes
3-Way Connection:
Combine a top 4-way
bracket, mid-section 4-
way bracket and
stackingbracket.
2 LEVELS
3 LEVEL KIT CONTAINS:
•Composite Boards 4’ x 25
•Composite Boards 2’ x 22
•Cut Composite Board (Gate) x 4
•Stacking Brackets x 70
•4-way Bracing Brackets x 28
•Stacking Stakes x 42
•Plugs x 212
•Caps x 4
•Adapter Cap x 10
•Animal barrier gate (4ft) x 1
•Animal barrier Fencing x 28ft
•Gate to Board Connector x 4
•Metal Gate Brace with Screws x 2
4 LEVEL KIT CONTAINS:
•Composite Boards 4’ x 33
•Composite Boards 2’ x 32
•Cut Composite Board (Gate) x 6
•Stacking Brackets x 88
•4-way Bracing Brackets x 48
•Stacking Stakes x 56
•Plugs x 296
•Caps x 4
•Adapter Cap x 10
•Animal barrier gate (4ft) x 1
•Animal barrier Fencing x 28ft
•Gate to Board connector x 4
•Metal Gate Brace with Screws x 4
1
2
3
4
Recommended Tools:
- Hammer
- Power Drill
- Flathead Screwdriver
ASSEMBLY INSTRUCTIONS –Level 1 Continued
1
1
2
3
4
Step 2: Layout the Boards for the first level according to the number of the
board in Step 1.
Note: It is especially important to layout Boards 3 & 4in the exact orientation
shown in the diagram below.
The gate Board (Board 1) on level 1 is kept uncut to act as a level surface for the
gate to swing on. You can choose to cut this Board if you want it to be apart of the
swinging gate.
IMPORTANT: If you connect any brackets incorrectly, they can be removed by
inserting a flathead screwdriver into the opening of the snap-lock plugs, pushing into
the nub and twisting upwards.
Step 3: When connecting the boards for the first level, insert the stacking
stakes upside down so the stake is pointing to the sky. This will allow you to
adjust the shape of your frame before driving the stakes into the ground.
Step 3a: With the first level stacking stakes still facing the sky, use bracketed
2ft boards to ensure that the cross Boards will fit by placing the board over
the stacking stakes on the cross-board positions shown below.
1
1
1
4
1
3
1
2
22
Step 4: Once you finish with the adjustments of your base level frame,
remove the Boards sitting on level 2 and hammer the stacking stakes on level
1 into the ground.
STEP 5:
Connect the brackets and boards for the second level in the following pattern:
1. Connect 2x 4ft Boards with Stacking Brackets on
both ends in alternating orientation.
2. Connect 2x 4ft Boards with stacking brackets
on both sides, facing the same orientation.
3. Connect 4x 4ft Boards with a stacking bracket on
one end and a mid-section 4-way bracket on the
other end in alternating orientation.
4. Connect 2x 2ft Boards with a stacking bracket on
one end and a mid-section 4-way bracket on the
other end in alternating orientation.
5. Connect 2x 2ft Boards with a stacking bracket on
one end and a top 4-way bracket on the
other end in alternating orientation.
6. Connect 2x 2ft Boards with mid-section 4-way brackets
on both ends in alternating orientation.
7. Connect 4x 2ft Boards with top 4-way brackets
on both ends, facing the same orientation.
8. Connect 2 x Cut gate Boards with a stacking bracket
on the board end with pre-drilled holes.
NOTE: The gate Boards will only have pre-drilled holes on one end.
ASSEMBLY INSTRUCTIONS –Level 2
1
2
3
4
5
6
7
8
Step 6: Before stacking your boards, lay them out around your 1st level frame.
NOTE: Stacking stakes will be used for all additional levels and can insert into
the top of existing stakes.
2
2
4 4
3
77
66
3
77
11
55
33
88
Step 7. Start your 2nd level by connecting the 3/5/8 joint first.
Have the bracket for the gate board (8) on the bottom of the
joint as shown in the picture to the left. Then continue from
this point stacking the remaining 2nd level boards.
Skip to step 1 of the Animal Barrier assembly if you are
assembling a 2-level bed design.
STEP 8:
Connect the brackets and boards for the third level in the following pattern:
1. Connect 4x 4ft Boards with Stacking Brackets on
both ends in alternating orientation.
2. Connect 2x 4ft Boards with stacking brackets
on both sides, facing the same orientation.
3. Connect 4x 2ft Boards with Stacking Brackets on
both ends in alternating orientation.
4. Connect 2x 4ft Boards with a stacking bracket on
one end and a top 4-way bracket on the other end
in alternating orientation.
5. Connect 2x 2ft Boards with a stacking bracket on
one end and a mid-section 4-way bracket on the
other end in alternating orientation.
6. Connect 2 x Gate Boards with a stacking bracket on
the board end with predrilled holes.
ASSEMBLY INSTRUCTIONS –Level 3
1
3
4
5
6
2
1
1
1
1
1
3
3
33
44
5
566
Step 9: Layout the boards for the third level around your frame.
Step 11: For a 4-level design, repeat steps 5, 6, &7.
2
2
Step 10. Start your 3rd level by connecting the 4/5/6 joint
first. Have the bracket for the gate board (6) on the bottom
of the joint as shown in the picture to the left. Then
continue from this point stacking the remaining 2nd level
boards.
ASSEMBLY INSTRUCTIONS –Animal Barrier Gate
Step 1: Install an adapter cap (Part 21) on top of each of the 10 joints on your final level.
Quantities doubled for 2 level Barrier
NOTE: Part 12 will not be used
if installing the gate to Board
connector
STEP 4a: Take 2 board to timber connectors and fasten them on either side of
the bottom animal barrier gate pole with the screws provided and a power drill.
This will allow the animal barrier gate and board gate to swing as a complete
door.
STEP 4b: For a 3-level design, take your metal gate brace and fasten it over 2 of
the left gate boards with the screws provided and a power drill. Install the gate
braces on the inside portion of the garden and make sure that the screw holes
are not over the edge where the 2 boards meet (see picture).
Repeat this step for the right gate. For a 4-level design, install
an additional gate brace on each door.

This manual suits for next models

9

Other FRAME IT ALL Lawn And Garden Equipment manuals
FRAME IT ALL Stack & Extend User manual

FRAME IT ALL

FRAME IT ALL Stack & Extend User manual

FRAME IT ALL 700001020-MD250 User manual

FRAME IT ALL

FRAME IT ALL 700001020-MD250 User manual

FRAME IT ALL 800002123 User manual

FRAME IT ALL

FRAME IT ALL 800002123 User manual

FRAME IT ALL 200001090 User manual

FRAME IT ALL

FRAME IT ALL 200001090 User manual

FRAME IT ALL 800001076 User manual

FRAME IT ALL

FRAME IT ALL 800001076 User manual

FRAME IT ALL 70001024-MD550 User manual

FRAME IT ALL

FRAME IT ALL 70001024-MD550 User manual

FRAME IT ALL 800002179 User manual

FRAME IT ALL

FRAME IT ALL 800002179 User manual

FRAME IT ALL Stack & Extend VEGGIE WALL User manual

FRAME IT ALL

FRAME IT ALL Stack & Extend VEGGIE WALL User manual

FRAME IT ALL Fort Bragg 8' x 8' User manual

FRAME IT ALL

FRAME IT ALL Fort Bragg 8' x 8' User manual

FRAME IT ALL Inner Roboto 800002114 User manual

FRAME IT ALL

FRAME IT ALL Inner Roboto 800002114 User manual

FRAME IT ALL Alamo User manual

FRAME IT ALL

FRAME IT ALL Alamo User manual

FRAME IT ALL 200001095 User manual

FRAME IT ALL

FRAME IT ALL 200001095 User manual
FRAME IT ALL 70001023-MD250 User manual

FRAME IT ALL

FRAME IT ALL 70001023-MD250 User manual

FRAME IT ALL 300001068 User manual

FRAME IT ALL

FRAME IT ALL 300001068 User manual

FRAME IT ALL Center Circle 16' x 16' User manual

FRAME IT ALL

FRAME IT ALL Center Circle 16' x 16' User manual

FRAME IT ALL 800001191 User manual

FRAME IT ALL

FRAME IT ALL 800001191 User manual

FRAME IT ALL Colosseum 800002109 User manual

FRAME IT ALL

FRAME IT ALL Colosseum 800002109 User manual

FRAME IT ALL 300000078 User manual

FRAME IT ALL

FRAME IT ALL 300000078 User manual

FRAME IT ALL 300001178 User manual

FRAME IT ALL

FRAME IT ALL 300001178 User manual

FRAME IT ALL Circle Keyhole Raised Garden Bed User manual
FRAME IT ALL

FRAME IT ALL Circle Keyhole Raised Garden Bed User manual

FRAME IT ALL 300001058 User manual

FRAME IT ALL

FRAME IT ALL 300001058 User manual

FRAME IT ALL 300001058 User manual

FRAME IT ALL

FRAME IT ALL 300001058 User manual

FRAME IT ALL Fort Bragg User manual

FRAME IT ALL

FRAME IT ALL Fort Bragg User manual

FRAME IT ALL Stack & Extend User manual
FRAME IT ALL

FRAME IT ALL Stack & Extend User manual

Popular Lawn And Garden Equipment manuals by other brands

Makita DUM604 instruction manual

Makita

Makita DUM604 instruction manual

Snapper 6-0990 Installation & operation

Snapper

Snapper 6-0990 Installation & operation

VEVOR LJY9001 user manual

VEVOR

VEVOR LJY9001 user manual

Oase FM-Master WLAN EGC Short manual

Oase

Oase FM-Master WLAN EGC Short manual

Earth Way SideSpred-Control manual

Earth Way

Earth Way SideSpred-Control manual

Ribimex PRCGTHB36 User and maintenance manual

Ribimex

Ribimex PRCGTHB36 User and maintenance manual

Troy-Bilt OEM-290-257 Operator's manual

Troy-Bilt

Troy-Bilt OEM-290-257 Operator's manual

CASARIA DBGB001 instructions

CASARIA

CASARIA DBGB001 instructions

New England Arbors Heartwood VA68897 Assembly guide

New England Arbors

New England Arbors Heartwood VA68897 Assembly guide

Grange URBAN SCREEN PLANTER Assembly instructions

Grange

Grange URBAN SCREEN PLANTER Assembly instructions

Gardena Easy 1887 Operator's manual

Gardena

Gardena Easy 1887 Operator's manual

Summers M94 Operator's manual

Summers

Summers M94 Operator's manual

Ross RPPHA150MM instruction manual

Ross

Ross RPPHA150MM instruction manual

ORBLON OPS30 user manual

ORBLON

ORBLON OPS30 user manual

DANA 2000-5 parts list

DANA

DANA 2000-5 parts list

Land Pride Grading Scrapers GS2584 parts manual

Land Pride

Land Pride Grading Scrapers GS2584 parts manual

Sunjoy L-PG080PST-W Assembly instructions

Sunjoy

Sunjoy L-PG080PST-W Assembly instructions

Craftsman 358.797110 Operator's manual

Craftsman

Craftsman 358.797110 Operator's manual

manuals.online logo
manuals.online logoBrands
  • About & Mission
  • Contact us
  • Privacy Policy
  • Terms and Conditions

Copyright 2025 Manuals.Online. All Rights Reserved.