manuals.online logo
Brands
  1. Home
  2. •
  3. Brands
  4. •
  5. FRAME IT ALL
  6. •
  7. Lawn And Garden Equipment
  8. •
  9. FRAME IT ALL 300001058 User manual

FRAME IT ALL 300001058 User manual

300001058/300002058/300003058/300004058
300001425/300002425/300003425/300004425
300001424/300002424/300003424/300004424
300001080/300001084/300003084/300004084
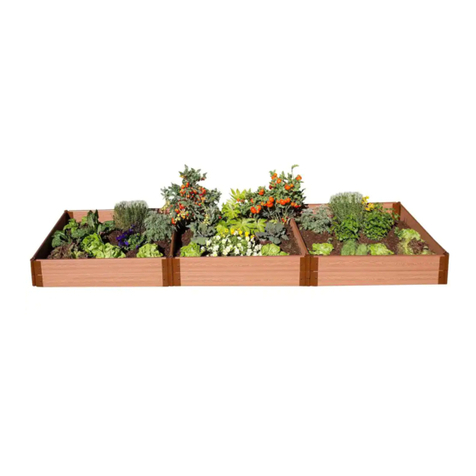
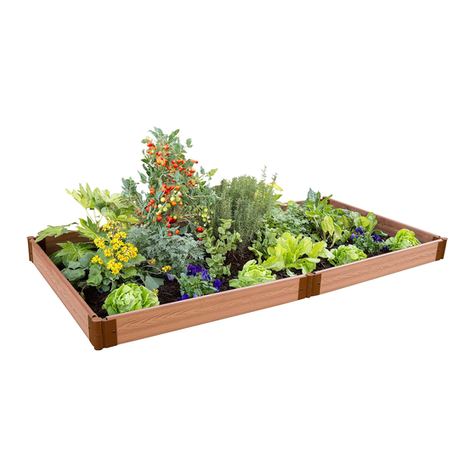
RAISED GARDEN BED
4’ x 4’
Layout your timbers along the borderline
and connect each timber together by
inserting the top of the stake through the
bracket loops with the stake pointing to
the sky. This enables you to freely position
your border to get your desired location.
Customer Service: 1800-914-9835 |
[email protected]m
© Frame It All. All Rights Reserved.
1 LEVEL KIT CONTAINS:
•Composite timbers 4’ x 4
•Brackets x 8
•**Stakes x 4
•Plugs x 16
•Caps x 4
ASSEMBLY INSTRUCTIONS –For the First Level
STEP 1:
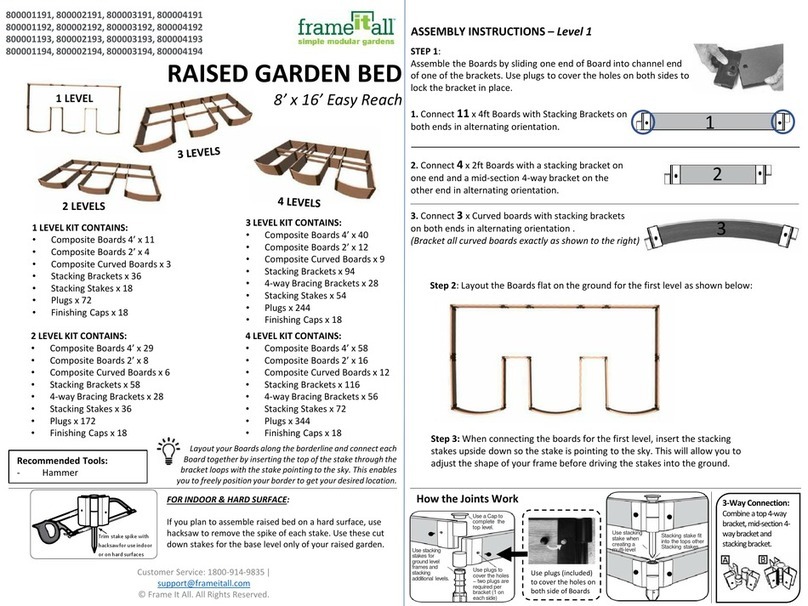
Assemble the timbers by sliding one end of timber into channel end
of one of the brackets. Use plugs to cover the holes on both sides to
lock the bracket in place.
Repeat this process on the opposite end of the timber flipping the bracket in the opposite
direction (see image). Repeat for all timbers.
STEP 2:
Layout the base level of your raised garden in a straight square shape, using 4 timbers.
Insert stake through the hole of the bracket and into each of the corners to lock all sides
in place.
How the Joints Work
Use plugs to
cover the holes
–two plugs are
required per
bracket (1 on
each side)
Use a Capto
complete the
top level.
Use stacking
stakes for
ground level
framesand
stacking
additional levels.
Use stacking
stake when
creating a
multi-level
Stacking stake fit
into the tops other
Stacking stakes
Use plugs (included)
to cover the holes on
both side of timbers
FOR INDOOR & HARD SURFACE:
If you plan to assemble raised bed on a hard surface, use
hacksaw to remove the spike of each stake. Use these cut
down stakes for the base level only of your raised garden.
Trim stake spike with
hacksawfor use indoor
or on hard surfaces
4 LEVELS
STEP 2a: For one level, add caps to each of the top
corner joints to finish off the raised garden.
HAPPY GARDENING!
ASSEMBLY INSTRUCTIONS –For Product with Two to Four Levels
STEP 3:
For the second level, use 4 timbers and the stacking stakes. Insert one stake through the
brackets into the hole on top of the stake beneath it to lock the second level in place.
LEVEL 3 & 4: Repeat step 3
Lastly, add the caps to each of the top corner joint.
**NOTE
Stacking stakes can be used on all levels
and when creating additional levels.
ONLY Stacking Stakes can stack!
300001063/300001064/300001066/300001067
300001421/300001423/300001442/300001443
300001420/300001442/300001440/300001441
300001090/300001091/300001097/300001098
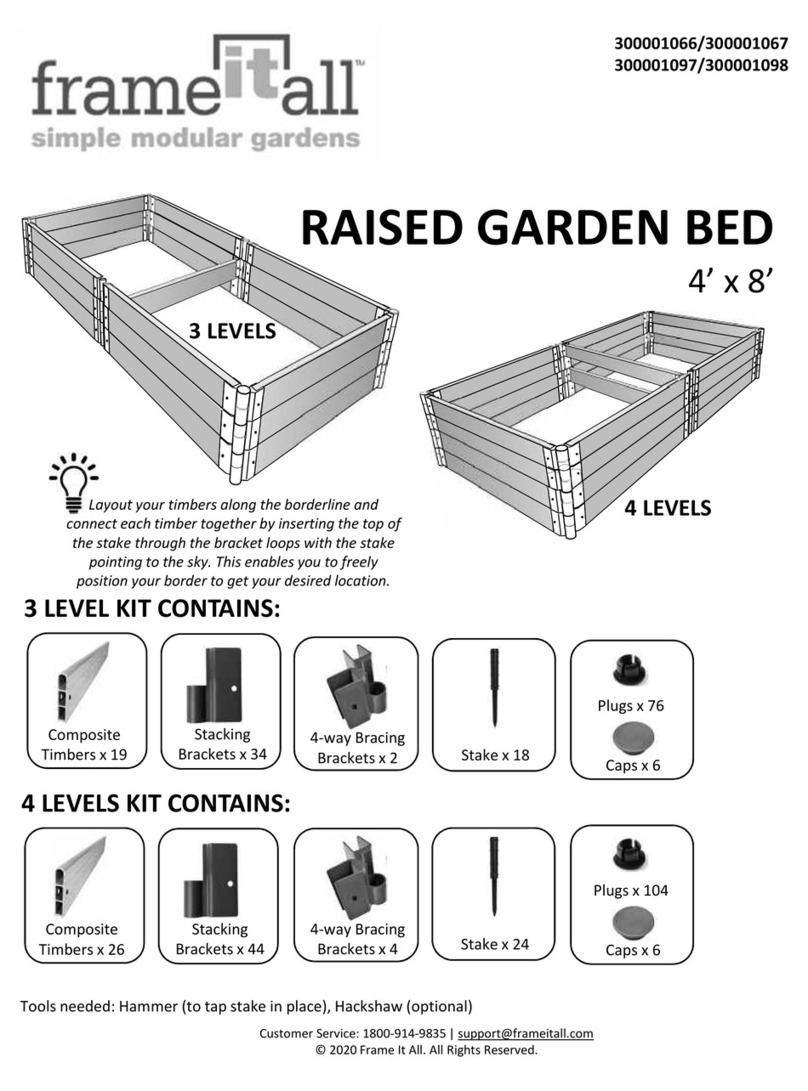
RAISED GARDEN BED
4’ x 8’
Layout your timbers along the borderline and connect each
timber together by inserting the top of the stake through the
bracket loops with the stake pointing to the sky. This enables
you to freely position your border to get your desired location.
Customer Service: 1800-914-9835 |
[email protected]m
© Frame It All. All Rights Reserved.
1 LEVEL KIT CONTAINS:
•Composite timbers 4’ x 6
•Brackets x 12
•**Stakes x 6
•Plugs x 24
•Caps x 6
ASSEMBLY INSTRUCTIONS –For the First Level
STEP 1:
Assemble the timbers by sliding one end of timber into channel end
of one of the brackets. Use plugs to cover the holes on both sides to
lock the bracket in place.
Repeat this process on the opposite end of the timber flipping the bracket in the opposite
direction (see image). Repeat for all timbers on
the first level.
STEP 2:
Layout the base level of your raised garden in a straight rectangular shape, using 6
timbers. Insert stake through the hole of the bracket and into each of the corners to lock
all sides in place.
FOR INDOOR & HARD SURFACE:
If you plan to assemble raised bed on a hard surface, use
hacksaw to remove the spike of each stake. Use these cut
down stakes for the base level only of your raised garden.
Trim stake spike with
hacksawfor use indoor
or on hard surfaces
1 LEVEL
STEP 2a: For one level, add caps to each of the top
corner joints to finish off the raised garden.
HAPPY GARDENING!
STEP 3b:
Assemble 1 x 4’ timber using 4-Way
brackets on each end flipping them in the
opposite direction
ASSEMBLY INSTRUCTIONS –For Product with Two to Four Levels
STEP 3:
For the second level, use 6 x 4’ and 1 x 4’ cross
timber (refer to 3b), plus the stacking stakes. Insert
one stake through the brackets into the hole on top
of the stake beneath it to lock the second level in
place.
For 2 levels, USE 3-Way timbers on 2nd level
ONLY, base level will not use 3-Ways.
Lastly, add the caps to each of the top brackets.
LEVEL 3 & 4: Repeat step 3.
The 4-Way timbers will be use on 2nd & 4th levels ONLY.
How the Joints Work
Use plugs (included)
to cover the holes on
both side of timbers
2 x 4’ timbers
with 4-way
brackets on
level 2 & 4.
1 x 4’ timbers
with 4-way
brackets on level 2.
3 LEVELS 4 LEVELS
1 x 4’ timber
with 4-way
brackets
**NOTE
Stacking stakes can be used on all levels
and when creating additional levels.
ONLY Stacking Stakes can stack!
Use plugs to
cover the holes
–two plugs are
required per
bracket (1 on
each side)
Use a Capto
complete the
top level.
Use stacking
stakes for
ground level
frames and
stacking
additional levels.
Use stacking
stake when
creating a
multi-level
Stacking stake fit
into the tops other
Stacking stakes
3-Way Connection:
Combining one half of a
4-way bracket and a
stacking bracket (A),will
result in a 3-way
junction (B).
300000400/300001400/300003400/300004400
300000434/300001434/300003434/300004434
300000450/300001450/300003450/300004450
300000075/300001075/300003075/300004075
RAISED GARDEN BED
4’ x 12’
Layout your timbers along the borderline and connect each
timber together by inserting the top of the stake through the
bracket loops with the stake pointing to the sky. This enables
you to freely position your border to get your desired location.
Customer Service: 1800-914-9835 |
[email protected]m
© Frame It All. All Rights Reserved.
1 LEVEL KIT CONTAINS:
•Composite timbers 4’ x 8
•Brackets x 16
•**Stakes x 8
•Plugs x 32
•Caps x 8
ASSEMBLY INSTRUCTIONS –For the first level
STEP 1:
Assemble the timbers by sliding one end of timber into channel end
of one of the brackets. Use plugs to cover the holes on both sides to
lock the bracket in place.
Repeat this process on the opposite end of the timber flipping the bracket in the opposite
direction (see image). Repeat for all timbers on the
First level.
STEP 2:
Layout the base level of your raised garden in a straight rectangular shape, using 8
timbers. Insert stake through the hole of the bracket and into each of the corners to lock
all sides in place.
FOR INDOOR & HARD SURFACE:
If you plan to assemble raised bed on a hard surface, use
hacksaw to remove the spike of each stake. Use these cut
down stakes for the base level only of your raised garden.
Trim stake spike with
hacksawfor use indoor
or on hard surfaces
1 LEVEL
4 LEVELS
STEP 2a: For one level, add caps to each of the
top corner joints to finish off the raised garden.
HAPPY GARDENING!
ASSEMBLY INSTRUCTIONS –For Product with Two to Four Levels
STEP 3:
For the second level, use 8 x 4’ timbers and 2 x 4’
cross timbers (refer to 3b) plus the stacking stakes.
Insert one stake through the brackets into the hole
on top of the stake beneath it to lock the second
level in place.
For 2 levels, USE 3-Way timbers on 2nd level
ONLY, base level will not use 3-Way connections.
Lastly, add the caps to each of the top corner joint.
LEVEL 3 & 4: Repeat step 3.
The 3-Way timbers will be use on 2nd & 4th levels ONLY.
How the Joints Work
Use plugs (included)
to cover the holes on
both side of timbers
4 x 4’ timbers
with 4-way
brackets on
level 2 & 4.
2 x 4’ timbers
with 4-way
brackets on level 2.
3 LEVELS 4 LEVELS
2 x 4’ timber
with 4-way
brackets
**NOTE
Stacking stakes can be used on all levels
and when creating additional levels.
ONLY Stacking Stakes can stack!
STEP 3b:
Assemble 2 x 4’ timber using 4-Way
brackets on each end flipping them in the
opposite direction
Use plugs to
cover the holes
–two plugs are
required per
bracket (1 on
each side)
Use a Capto
complete the
top level.
Use stacking
stakes for
ground level
frames and
stacking
additional levels.
Use stacking
stake when
creating a
multi-level
Stacking stake fit
into the tops other
Stacking stakes
3-Way Connection:
Combining one half of a
4-way bracket and a
stacking bracket (A),will
result in a 3-way
junction (B).
300000078/300001078/300003078/300004078
300000402/300001402/300003402/300004402
300000435/300001435/300003435/300004435
300000451/300001451/300003451/300004451
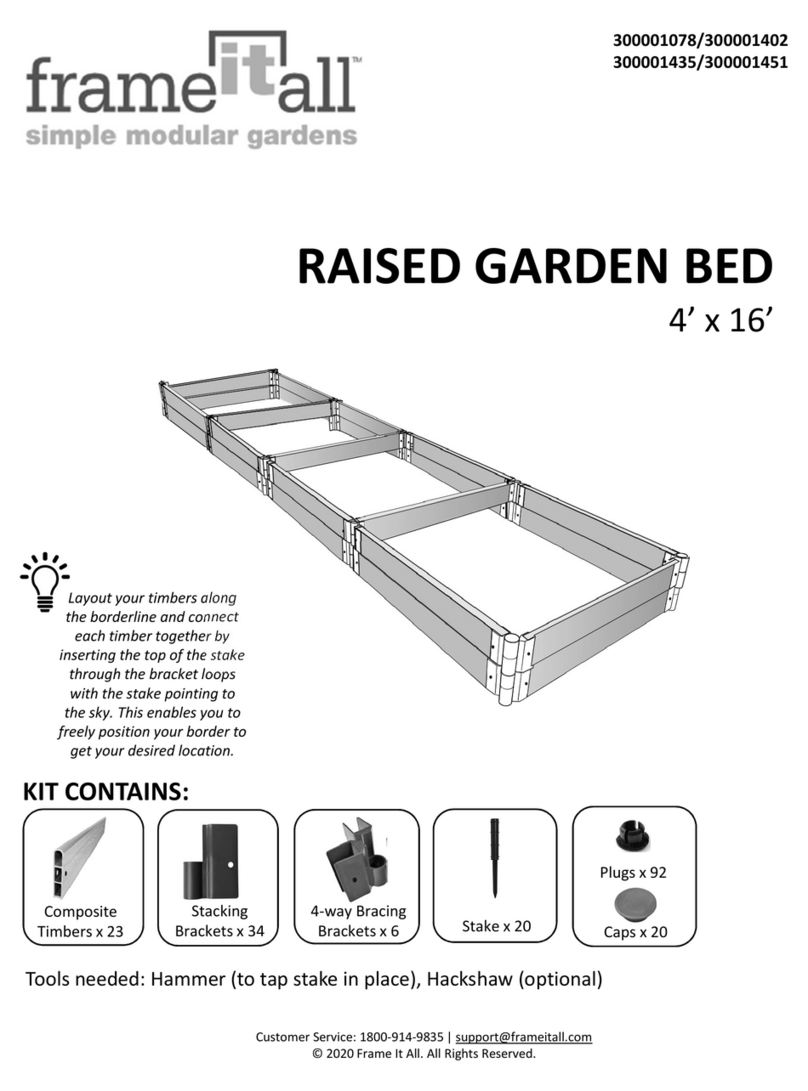
RAISED GARDEN BED
4’ x 16’
Layout your timbers along the borderline and connect each
timber together by inserting the top of the stake through the
bracket loops with the stake pointing to the sky. This enables
you to freely position your border to get your desired location.
Customer Service: 1800-914-9835 |
[email protected]m
© Frame It All. All Rights Reserved.
1 LEVEL KIT CONTAINS:
•Composite timbers 4’ x 10
•Brackets x 20
•**Stakes x 10
•Plugs x 40
•Caps x 10
ASSEMBLY INSTRUCTIONS –For the First Level
STEP 1:
Assemble the timbers by sliding one end of timber into channel end
of one of the brackets. Use plugs to cover the holes on both sides to
lock the bracket in place.
Repeat this process on the opposite end of the timber flipping the bracket in the opposite
direction (see image). Repeat for all timbers on the
First level.
STEP 2:
Layout the base level of your raised garden in a straight rectangular shape, using 10
timbers. Insert stake through the hole of the bracket and into each of the corners to lock
all sides in place.
FOR INDOOR & HARD SURFACE:
If you plan to assemble raised bed on a hard surface, use
hacksaw to remove the spike of each stake. Use these cut
down stakes for the base level only of your raised garden.
Trim stake spike with
hacksawfor use indoor
or on hard surfaces
1 LEVEL
4 LEVELS
STEP 2a: For one level, add caps to each
of the top corner joints to finish off the
raised garden. HAPPY GARDENING!
ASSEMBLY INSTRUCTIONS –For Product with Two to Four Levels
STEP 3:
For the second level, use 10 x 4’ timbers and 3 x 4’
cross timbers (refer to 3b) plus the stacking stakes.
Insert one stake through the brackets into the hole
on top of the stake beneath it to lock the second
level in place.
For 2 levels, USE 3-Way timbers on 2nd level
ONLY, base level will not use 3-Way connections.
Lastly, add the caps to each of the top corner joint.
LEVEL 3 & 4: Repeat step 3.
The 3-Way timbers will be use on 2nd & 4th levels ONLY.
How the Joints Work
Use plugs (included)
to cover the holes on
both side of timbers
6 x 4’ timbers
with 4-way
brackets on
level 2 & 4.
3 x 4’ timbers
with 4-way
brackets on level 2.
3 LEVELS 4 LEVELS
3 x 4’ timbers
with 4-way brackets
**NOTE
Stacking stakes can be used on all levels
and when creating additional levels.
ONLY Stacking Stakes can stack!
Use plugs to
cover the holes
–two plugs are
required per
bracket (1 on
each side)
Use a Capto
complete the
top level.
Use stacking
stakes for
ground level
frames and
stacking
additional levels.
Use stacking
stake when
creating a
multi-level
Stacking stake fit
into the tops other
Stacking stakes
3-Way Connection:
Combining one half of a
4-way bracket and a
stacking bracket (A),will
result in a 3-way
junction (B).
STEP 3b:
Assemble 3 x 4’ timber using 4-Way
Brackets on each end flipping them in
opposite directions

This manual suits for next models

62

Other FRAME IT ALL Lawn And Garden Equipment manuals
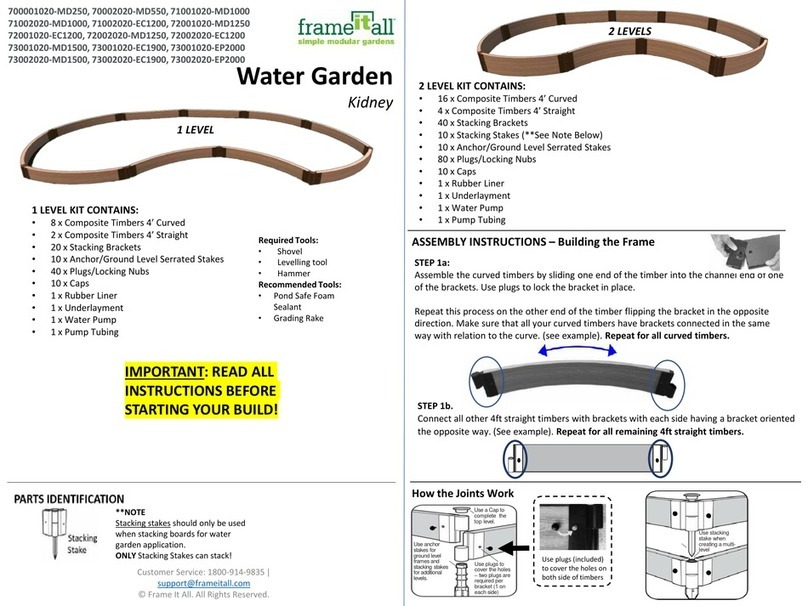
FRAME IT ALL Crooked Falls User manual

FRAME IT ALL

FRAME IT ALL Crooked Falls User manual

FRAME IT ALL 70001023-MD250 User manual

FRAME IT ALL

FRAME IT ALL 70001023-MD250 User manual

FRAME IT ALL 300001058 User manual

FRAME IT ALL

FRAME IT ALL 300001058 User manual

FRAME IT ALL Alamo 8' x 8' User manual

FRAME IT ALL

FRAME IT ALL Alamo 8' x 8' User manual

FRAME IT ALL Stack & Extend User manual

FRAME IT ALL

FRAME IT ALL Stack & Extend User manual

FRAME IT ALL 70001024-MD550 User manual

FRAME IT ALL

FRAME IT ALL 70001024-MD550 User manual

FRAME IT ALL Stack & Extend VEGGIE WALL User manual

FRAME IT ALL

FRAME IT ALL Stack & Extend VEGGIE WALL User manual

FRAME IT ALL 300001078 User manual

FRAME IT ALL

FRAME IT ALL 300001078 User manual

FRAME IT ALL 300001063 User manual

FRAME IT ALL

FRAME IT ALL 300001063 User manual

FRAME IT ALL Stack & Extend User manual

FRAME IT ALL

FRAME IT ALL Stack & Extend User manual

FRAME IT ALL Inner Roboto 800002114 User manual

FRAME IT ALL

FRAME IT ALL Inner Roboto 800002114 User manual

FRAME IT ALL 300000078 User manual

FRAME IT ALL

FRAME IT ALL 300000078 User manual

FRAME IT ALL 200001100 User manual

FRAME IT ALL

FRAME IT ALL 200001100 User manual

FRAME IT ALL Colosseum 800002109 User manual

FRAME IT ALL

FRAME IT ALL Colosseum 800002109 User manual

FRAME IT ALL Fort Bragg 8' x 8' User manual

FRAME IT ALL

FRAME IT ALL Fort Bragg 8' x 8' User manual

FRAME IT ALL Topolski User manual

FRAME IT ALL

FRAME IT ALL Topolski User manual

FRAME IT ALL 200001095 User manual

FRAME IT ALL

FRAME IT ALL 200001095 User manual

FRAME IT ALL Stack & Extend VEGGIE WALL User manual

FRAME IT ALL

FRAME IT ALL Stack & Extend VEGGIE WALL User manual

FRAME IT ALL RAISED GARDEN BED User manual

FRAME IT ALL

FRAME IT ALL RAISED GARDEN BED User manual

FRAME IT ALL Stack & Extend User manual

FRAME IT ALL

FRAME IT ALL Stack & Extend User manual

FRAME IT ALL 300001168 User manual

FRAME IT ALL

FRAME IT ALL 300001168 User manual

FRAME IT ALL 700001020-MD250 User manual
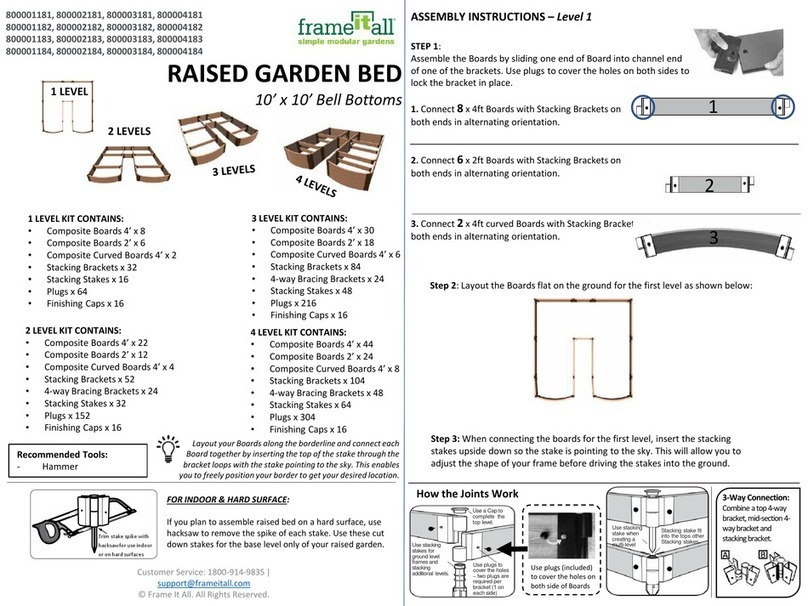
FRAME IT ALL

FRAME IT ALL 700001020-MD250 User manual

FRAME IT ALL 70001022-MD250 User manual
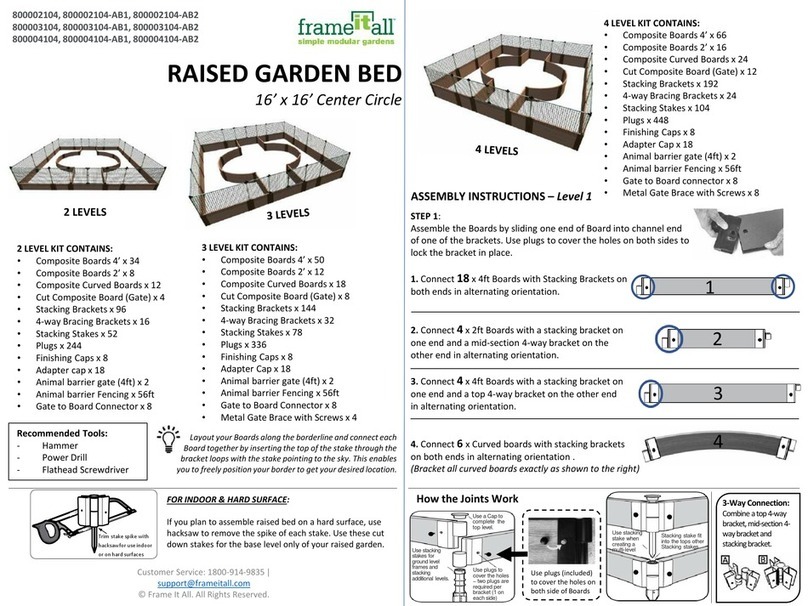
FRAME IT ALL

FRAME IT ALL 70001022-MD250 User manual

FRAME IT ALL Cumberland User manual

FRAME IT ALL

FRAME IT ALL Cumberland User manual

Popular Lawn And Garden Equipment manuals by other brands

Premier designs WindGarden 26829 Assembly instructions

Premier designs

Premier designs WindGarden 26829 Assembly instructions

BIOGROD 730710 user manual

BIOGROD

BIOGROD 730710 user manual

WaterUps Oasis 1680 Assembly guide

WaterUps

WaterUps Oasis 1680 Assembly guide

Masport MK II 4 WAY manual

Masport

Masport MK II 4 WAY manual

Fimco 530302 owner's manual

Fimco

Fimco 530302 owner's manual

Blagdon Liberty Pump & Barrel manual

Blagdon

Blagdon Liberty Pump & Barrel manual

EINHELL GE-SA 1433 Original operating instructions

EINHELL

EINHELL GE-SA 1433 Original operating instructions

ARDES AR6S03 Instructions for use

ARDES

ARDES AR6S03 Instructions for use

IRRIGLAD SDBS20 user guide

IRRIGLAD

IRRIGLAD SDBS20 user guide

Troy-Bilt TB2044 Operator's manual

Troy-Bilt

Troy-Bilt TB2044 Operator's manual

&Tradition Charging tray 2020 instructions

&Tradition

&Tradition Charging tray 2020 instructions

PrimAster PMLV 1700 operating instructions

PrimAster

PrimAster PMLV 1700 operating instructions

Snapper THATCHERIZER 6-0948 Operating & maintenance instructions

Snapper

Snapper THATCHERIZER 6-0948 Operating & maintenance instructions

Mantis 2224 DAHM Owner's manual and assembly instructions

Mantis

Mantis 2224 DAHM Owner's manual and assembly instructions

CPE 50075 Owner's manual & operating instructions

CPE

CPE 50075 Owner's manual & operating instructions

i4Technology GRAD A-1000 PRO + manual

i4Technology

i4Technology GRAD A-1000 PRO + manual

Tiger TWR-180 Operator's manual

Tiger

Tiger TWR-180 Operator's manual

Kinze 3000 Operator's manual

Kinze

Kinze 3000 Operator's manual

manuals.online logo
manuals.online logoBrands
  • About & Mission
  • Contact us
  • Privacy Policy
  • Terms and Conditions

Copyright 2025 Manuals.Online. All Rights Reserved.