Gator GR430EDR User manual

!
!
!
USER%G
UIDE%GR430EDR
!

Introduction
Thank you for purchasing the Gator GR430EDR. This product is designed to provide high definition
recording of your trips for security and evidence in the case of an incident.
Product Overview
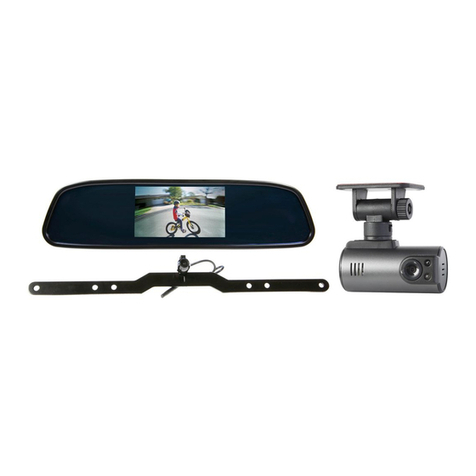
The GR430EDR is an OE Grade Mirror Monitor with a Full HD 1080P DVR. The dual function Mirror
Monitor/ DVR is just like a normal rear view mirror with a built in 4.3” screen allowing you to see
what is behind the vehicle when reverse gear is engaged (additional rear view camera needed).
With the 1080P DVR camera, it can record the front view image, to keep it as evidence for traffic
disputes and accidents. The GR430EDR has dual video inputs, allowing for connection to a car
DVD player or a video parking sensor system (not included)
Product Features:
OEM Look and OEM quality mirror.
4.3” High-Definition LCD Monitor with Auto-adjusting brightness
OEM wire harness cover for factory look
Two (2) Video inputs
Anti-Glare mirror
Built-in DVR
G-sensor function
170° view angle with fisheye correction (diagonal)
F2.0 large aperture, 6 glass lens for optimal night vision
Full HD - 1920*1080 (30f) recording.
Loop recording
SOS lock function
Easy Installation
Technical Specifications:
Image sensor: 3.2 Mega Pixel CMOS
Video segment: 1min/3min/5min/10min
Screen size: 4.3"
Exposure adjustment: EV-2 ~ EV+2
Lens: 120-degree A+ grade full-glass type
Frequency: 50HZ/60HZ
Picture pixels: 2-million pixels (dynamic)
Battery: Inbuilt Li-on battery, 3.7V, 200mA
3.2-million pixels (static)
OSD language: English/Spanish/Portuguese
Picture format: JPEG
Russian/Simplified Chinese/Japanese
Image resolution: 2048*1536(3M) 1920*1080 (2M)
1280*960(1.2M) 640*480 (VGA)
USB: USB2.0
Video format: AVI, supports H.264
Memory card: supports high-capacity TF card
Recording mode: Full HD -1920*1080 (30f)
up to 32GB
HD -1920*720 (30f)
Protection sensitivity: Off/Level 1/Level 2
HD -1920*720 (60f)
Level 3/Level 4
VGA -640*480 (30f)
Gyroscope: Video flicker compensation +
Digital zoom: 4 x Digital zoom in/out
image stabilization
Speaker: Inbuilt hi-fi speaker; Microphone: Inbuilt

Do not use the Mirror/DVR in a damp working environment, as it is not waterproof.
Do not open or try to repair the Mirror/DVR by yourself. If the unit or any accessories for the
Mirror/DVR have any problems, please take it to an authorized repair agent for repair.
Do not use chemicals, solventsor cleanersto clean the DVR, please use a moist soft cloth.
Please care for the environment, do not discard this machine randomly; do not throw the DVR
into a fire, as it may explode.
Please pay attention to cleaning the lens surface, use a moist soft cloth to clean the lens
before use, to avoid poor video footage.
Package Components:!
Mirror/DVR
Power cable with
fuse
User manual
Car Charger!
Glass mounting
metal button
Wiring cover
Adapter mounting brackets
(sold separately)
Allen key

Produ
c
t
S
tructure:
1) Record
2) UP /adjustment “-“/ Zoom
3) Ambient light sensor
4) Mode
5) Working indicator
6) DOWN /adjustment “+“/ Zoom
7) Menu
8) Adjustable DVR camera
9) Speaker
10) Micro SD Card slot
1 3 5 7
6
4
2
8
10
9

System and DVR Operation
1. This system has signal-sensing. When the Video 1 or 2 inputs see a signal, the display will
automatically turn on. When the signal is removed, it will automatically switch to movie mode. If
both inputs see a signal, Input 2 will override Input 1.
2. When powered on, the monitor turns on automatically, and DVR starts recording. To stop
Recording, simply press button.
3. When DVR is recording, the working indicator is green. When DVR is not recording, it is blue.
4. The screen will be LCD Power Save Mode in 10 seconds after the DVR is turned on. Press any
button to turn it on again, it will be LCD Power Save Mode again in 10 seconds. To turn off this
feature or select time, See DVR Menu Operation Instruction- General Settings-LCD Power
Save option,.
Auto–Adjusting Brightness Feature
The brightness of the 4.3” LCD screen will adjust automatically to its environment’s lighting
conditions. In brighter conditions, the display will brighten to increase the image’s view ability. In
darker conditions, it will decrease its brightness so as not to over-stimulate the driver’s eyesight.
Button Instructions:
Button name
ICON
Button Operation instruction
MENU
BUTTON
*Under DVR channel, press this button to enter sub-menus of DVR.
* Under V1 or V2 channel, press this button to adjust brightness, contrast,
saturation
MODE/POWER
*Long-press this button for 4 seconds to turn off the device.
*Under DVR channel, press this button to switch between Still Capture
mode, Playback mode and Movie mode
DOWN
BUTTON
*Adjust “+” under V1 or V2 channel.
*Under DVR channel, press this button to move downward on menu page,
to zoom in on Still Capture mode, and to turn on/off Sound Record on
movie mode
CONFIRM
BUTTON
*Quick switch to V1 by long-pressing this button for 1-second.
*Under DVR channel, press this button to start/pause movie recording or to
confirm the selection of a sub-menu.
UP BUTTON
*Adjust “-” under V1 or V2 channel.
*Under DVR channel, press this button to move upward on menu page, and
to zoom out on Still capture mode.

DVR Menu Operation Instruction
This device provides various menu settings for users to set up the system. Generally, five modes,
including Movie Mode, Still Capture, Playback, Media Tool, and General Settings. Before enter into
Main Menu interface, please turn off the video recording by short pressing button
Movie Mode
While in the movie mode, push button to access the Movie Mode menu interface, the
instructions as follows:
Movie Mode
Instructions
Submenu
Movie Mode
Select movie mode
FHD: Full High Definition 30fps,
HD:30fps,HD:HD60fps,VGA:VGA30fps
Movie Quality
Select movie quality
Super Fine/Fine
Movie Clip Time
Movie Clip Time
Off/1min/3min/5min/10min
Sound Record
Sound Record
On/Off
MIC Sensitivity
Adjust the microphone volume
Standard/Low
Scene
Select mode for various scenes
Auto/Sport/Portrait/Landscape/Snow/Beach/
Fireworks
Exposure
Adjust the brightness
-2~+2 , From brightness-2 to brightness+2
White Balance
Adjust the color balance
Auto/Daylight/Cloudy/Incandescent/
Fluorescent1~3
ISO Sensitivity
Select the sensor sensitivity
Auto/ ISO100/ISO200/ISO400

Still Capture
While in the mode of Still Capture, just push button to access the Still Capture menu
interface, the instructions as follows:
Still Capture
Instructions
Submenu
Still Image
Size
Select the still image size
14M/12M/8M/5M/3M/2M/1.2M/VGA
Still Quality
Select the still image quality
Super Fine/Fine
Scene
Select mode for various
scenes
Auto/Sport/Portrait/Landscape/Snow/Beach/Fireworks
Exposure
Adjust the brightness
-2~+2, From brightness-2 to brightness+2
White Balance
Adjust the color balance
Auto/Daylight/Cloudy/ Incandescent/ Fluorescent1~3
ISO Sensitivity
Select the sensor sensitivity
Auto//ISO100/ISO200/ISO400
Color
Adjust the color saturation
Natural/Vivid/Pale
Effect
Select the image effect method
Normal/Sepia/B&W/Emboss/Negative/Sketch/Oil/Crayon
Playback
While in the mode of Playback, just push button to access the Playback menu
interface, the instructions as follows:
Playback
Instructions
Submenu
Volume
Movie playback volume
1~10
Delete
Delete movies or photos
Delete One/ Delete All
Protect
Protect movies or photos
against delete
Protect One/Unprotect One/Protect All/Unprotect All

Media Tool
While in the mode of Media Tool, just push button to switch into the Media Tool
menu interface, the instructions as follows:
Media Tool
Instructions
Submenu
Format SD-Card
All data will be deleted
YES/NO
SD-Card Information
Movie Time Left, Photos Left
General Settings
In any mode, just push the MENU key and then push the MODE key to switch into the General
Settings menu interface, the instructions as follows:
General Settings
Instructions
Submenu
Beep
Turn the beep on/off
On/Off
Clock Settings
Select the clock setting
2015Y 4M 20D 0:00
Date Format
Select the date format
None/YYYY MM DD/MM DD YYYY/DD MM YYYY
Stamp
Date & logo on
recordings
Date + Logo, Date, Logo, Off
Language
Select language
English/Spanish/Portuguese/Russian/Simplified
Chinese/Japanese
Flicker
Flicker Frequency
50HZ/60HZ
LCD Rotate
LCD Rotate
On/Off
LCD Power Save
LCD Power Save
Off/10sec/30sec
Protect Level
G-Sensor
Off/Level0~4
Reset Setup
All settings will be
deleted
YES/NO
FW Version
FW Version
Version

F
M
Moulded
splitter
+
(Camera priority)
(Video1 input)
(Video2 input)
(Red-Accessory)
(Black- Ground)
(Yellow B+ to the fuse
of the car battery)
Inline
fuse
Installation Notes
This system is has signal sensing, there is no “reverse trigger wire” in the wire harness. Be sure to
use a relay with CANBUS vehicles (not included) to power your camera, as most vehicles’ reverse
lamp wires are now variable voltage wires, and will cause a fuzzy or distorted image. (PIC 2)
Installation
1. Remove OEM mirror and replace with supplied LCD mirror. LCD mirror can be mounted to the
vehicles existing window mounts, or by using the adapter and glass mounting metal button
included. Glue the mounting metal button to the vehicles window glass using rear view mirror
glue (not included). Tighten mount to metal button with Allen key provided.
2. Adapters for other vehicles can also be purchased separately. (www.aerpro.com.au)
3. Run your wiring harness into the headliner and down the vehicles A-Pillar, making sure to
avoid any factory airbags. Secure your wiring with zip-ties.
4. Make all necessary wiring connections (See wiring diagram PIC 1)
PIC 1
PIC 2
Black (Ground) – Locate a suitable location to ground (negative) the Black wire in the wiring
harness. You may connect this wire to a factory ground point in the vehicle, or attach a ring terminal
to the black wire and screw into the body of the vehicle. If you choose to screw into the body, clean
the area of any paint or adhesives to allow for good metal-to-metal contact.

Buttery Camera
Power connector
(Positive wire connects to
reversing lamp/ Negetive wire
connects to chassis or negative of lamp)
(Connects to video input source)
F
M
FM
F
Moulded
splitter
M
M
+
6 Metres
1.5 Metres
Adding a reverse camera
Installing optional reversing camera (not included)(Gator G30C model)
Frequently Asked Questions
Under normal operating conditions, if thereare problems with the device, please refer to the
following methods to resolve.
Cannot take pictures?
Please check whether there is enough space on the micro SD card.
Stopping automatically while recording
Due to the high amount of HD video data being recorded, please use a high
speed micro SD card. To tell if you have the required high speed card, check if it
has the ‘Micro SDHC’ logo on the SD card and the C4, C6 or C10 somewhere on
the card.
Fuzzy/dirty image
Please check if the lens is filled with dirt or fingerprints and clean carefully. Please clean lens with
cloth before shooting.
Horizontal stripes interference in the image
This is due to the wrong setting of light frequency error, please set the frequency to 50HZ as it is
the Australian standard frequency.
Why does the time and date reset?
The time resets when the vehicles battery is flat.
Why is the battery not charging in the car?
Check that yellow B+ cable is connected to cars battery & inline fuse has not blown.

Why does the DVR turn off automatically?
The DVR is programmed to turn off the screen display after 10 or 20 seconds. This is called LCD
power save, in the settings menu.
Micro SD card not recognised by DVR
Format card in the DVR’s menu setting’s before use.
A coloured tinge showing up in the video?
Make sure to peel off the transparent protective sticker on the front of the DVR lens.
Infringement of copyright warning
Please note that this product is for personal use only, the method of use shall not violate the goods
infringe on domestic or international copyright laws. Even recorded images for personal use only,
please note that in some cases to use this product to record performances, exhibitions or business
activities of the images may infringe the copyright or other legal rights and interests of others.
Technical Assistance
If youneed assistance setting up orusing your Gator product nowor in the future, call
Gator Support.
Australia
TEL: 03 – 8587 8898
FAX: 03 – 8587 8866
Mon-Fri 9am – 5pm AEST
Please retain this user guide for futurereference.
If you would like to download a digital copy of this manual, or other Gator manuals/software, please
visit the TDJ.com.au website and click ‘Help/Downloads’ for information on where to find the
manuals/software.

Table of contents
Other Gator Dashcam manuals
Gator
Gator HDDVR 186 User manual
Gator
Gator GDVR110 User manual
Gator
Gator G4KDVR20 User manual
Gator
Gator HDVR303 User manual
Gator
Gator GRV43SKT User manual
Gator
Gator Rv43MKT Operational manual
Gator
Gator HDDVR427 User manual
Gator
Gator GHDVR370 User manual
Gator
Gator GHDVR410 Operational manual
Gator
Gator GHDVR72W Operational manual

Gator
Gator GHDVR380 User manual
Gator
Gator GHDVR360 User manual
Gator
Gator C05EV00009 Operational manual
Gator
Gator GHD5MR User manual

Gator
Gator GHDVR80W User manual
Gator
Gator HDVR245H User manual
Gator
Gator GDVR190 User manual
Gator
Gator GHDVR210 Operational manual
Gator
Gator HDDVR250 User manual
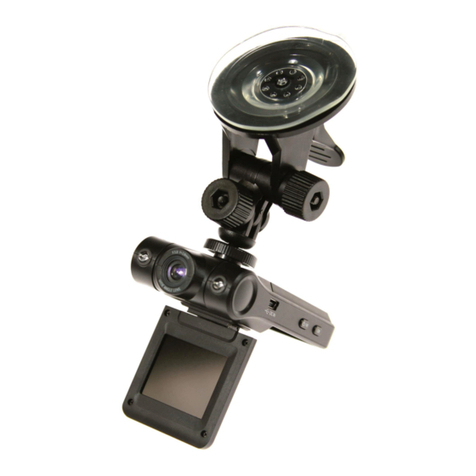
Gator
Gator HDDVR186 User manual
