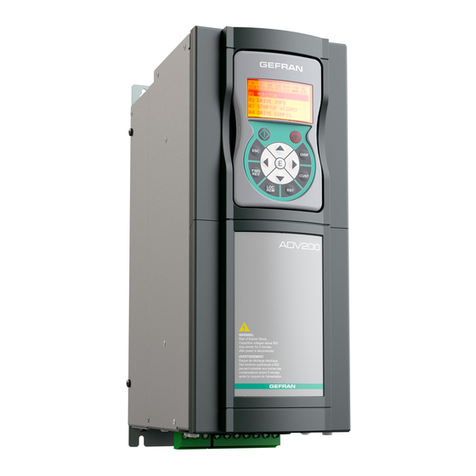
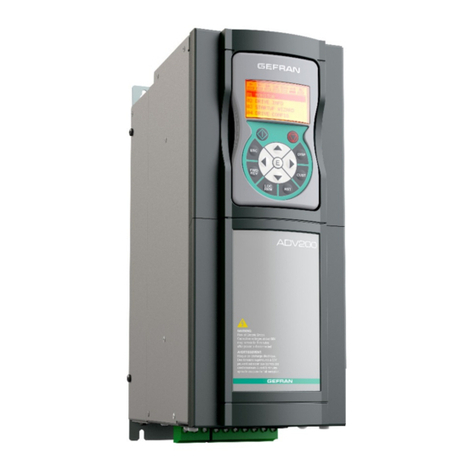
gefran ADV200 WA User manual

...... Quick start up guide
Specification and installation
SIEIDrive
Field oriented vector AC Drive
for syncronous/asyncronous motors
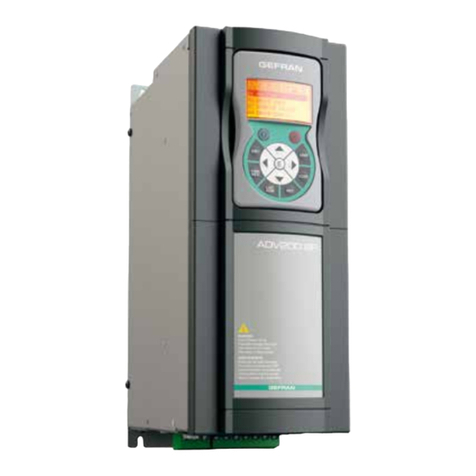
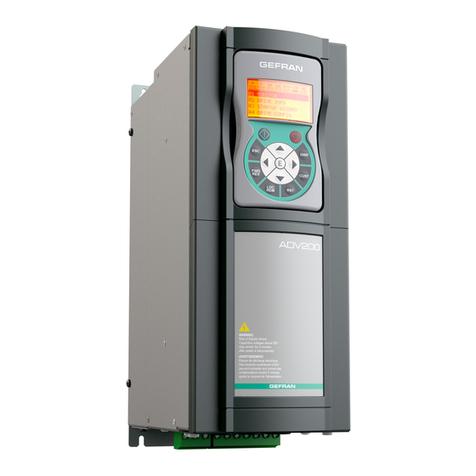
ADV200 WA
ADV200 WA-...-DC

2 ADV200 WA • Quick start up guide - Specification and installation
Information about this manual
The ADV200 WA Quick start guide is a handy-sized manual for mechanical installation, electri-
cal connection and fast start-up.
The manual explaining the functions and a description of the parameters and the manuals of
the expansions and eld bus can be found on the CD provided with the drive.
Software version
This manual is updated according the software version V 2.X.0.
Variation of the number replacing “X” have no inuence on the functionality of the device.
The identication number of the software version is indicated on the identication plate of the
drive or can be checked with the Firmware ver.rel - PAR 490 parameter, menu 2.5.
General information
Note ! In industry, the terms “Inverter”, “Regulator” and “Drive” are sometimes interchanged. In this document, the
term “Drive” will be used.
Before using the product, read the safety instruction section carefully. Keep the manual in a
safe place and available to engineering and installation personnel during the product function-
ing period.
Gefran S.p.A has the right to modify products, data and dimensions without notice. The data
can only be used for the product description and they can not be understood as legally stated
properties.
Thank you for choosing this Gefran product.
We will be glad to receive any possible information which could help us improvingthis manual.
The e-mail address is the following: [email protected].
All rights reserved

ADV200 WA • Quick start up guide - Specification and installation 3
Table of contents
Information about this manual ................................................. 2
1 - Safety Precautions ............................................................... 6
1.1 Symbols used in the manual ............................................................................6
1.2 Safety precaution ..............................................................................................7
1.3 General warnings .............................................................................................7
1.4 Instruction for compliance with UL Mark (UL requirements), U.S. and Canadian
electrical codes .......................................................................................................9
2 - Introduction to the product ................................................ 11
2.1 Drive type designation ....................................................................................12
2.1.1 Parallel inverters ..............................................................................................................13
3 - Transport and storage ........................................................ 14
3.1 General ...........................................................................................................14
3.2 Permissible Environmental Conditions ...........................................................15
4 - Mechanical installation ...................................................... 16
4.1 Inclination and mounting clearance ................................................................16
4.2 Fastening positions .........................................................................................17
5 - Wiring Procedure ................................................................ 22
5.1 Power section .................................................................................................25
5.1.1 Cable Cross Section ........................................................................................................25
5.1.2 Connection of shielding ...................................................................................................27
5.1.3 EMC guide line ................................................................................................................28
5.1.4 Block diagram power section ...........................................................................................29
5.1.5 Internal EMC lter ............................................................................................................31
5.1.6 Power line connection ......................................................................................................32
5.1.7 Input mains choke (L1) ....................................................................................................35
5.1.8 Motor connection .............................................................................................................36
5.1.9 Braking unit connection (optional) ...................................................................................37
5.1.10 Parallel connection on the AC (Input) and DC (Intermediate Circuit) side of several
inverters ....................................................................................................................................38
5.1.11 Parallel DC connection...................................................................................................39
5.1.12 Connection of fans .........................................................................................................40
5.2 Regulation section ..........................................................................................42
5.2.1 Removing the terminal cover ...........................................................................................42
5.2.2 Cable Cross Section ........................................................................................................42
5.2.3 Regulation section connection .........................................................................................42
5.2.4 Switches, jumpers and LED .............................................................................................44
5.2.5 Power supply unit regulation card (only for sizes ≥ 72000) .............................................47
5.3 Braking ...........................................................................................................49
5.3.1 Braking unit ......................................................................................................................49
5.4 Serial interface (XS connector) .......................................................................51
5.4.1 Drive / RS 485 Port (not insulated) point-to-point connection ..........................................51
5.4.2 Drive / RS485 port point-to-point connection (with insulation) .........................................52
5.4.3 RS 485 multi-drop connection .........................................................................................53
5.5 Typical connection diagrams ..........................................................................54
6 - Use of the keypad ............................................................... 58
6.1 Description ......................................................................................................58
6.2 Navigation .......................................................................................................59
6.2.1 Scanning of the rst and second level menus .................................................................59
6.2.2 Display of a parameter .....................................................................................................59
6.2.3 Scanning of the parameters ............................................................................................60
6.2.4 List of the last parameters modied .................................................................................60
6.2.5 “Goto parameter” function ................................................................................................60
6.3 Parameter modication ...................................................................................61

4 ADV200 WA • Quick start up guide - Specification and installation
6.4 How to save parameters .................................................................................62
6.5 Conguration of the display ............................................................................63
6.5.1 Language selection ..........................................................................................................63
6.5.2 Selection of Easy / Export mode ......................................................................................63
6.5.3 Startup display .................................................................................................................63
6.5.4 Back-lighting of the display ..............................................................................................63
6.6 Alarms .............................................................................................................64
6.6.1 Alarm reset .......................................................................................................................64
6.7 Messages .......................................................................................................64
6.8 Saving and recovery of new parameter settings ............................................65
6.8.1 Selection of the keypad memory .....................................................................................65
6.8.2 Saving of parameters on the keypad ...............................................................................65
6.8.3 Load parameters from keypad .........................................................................................66
6.8.4 Transfer of parameters between drives ...........................................................................66
7 - Commissioning via keypad (STARTUP WIZARD) ............ 67
7.1 Startup Wizard ................................................................................................70
7.1.1 Startup Wizard for Asynchronous Motors ........................................................................70
7.2 First customized start-up ................................................................................79
7.3 Programming ..................................................................................................83
7.3.1 Menu display modes ........................................................................................................83
7.3.2 Programming of “function block” analog and digital input signals ....................................83
7.3.3 Variable interconnections mode .......................................................................................83
7.3.4 Multiple destination ..........................................................................................................85
8 - Troubleshooting .................................................................. 87
8.1 Alarms .............................................................................................................87
8.2 Messages .......................................................................................................91
9 - Specication ....................................................................... 96
9.1 Environmental Conditions ...............................................................................96
9.2 Standards .......................................................................................................96
9.3 Accuracy (Asyncronous) .................................................................................96
9.3.1 Current control .................................................................................................................96
9.3.2 Speed control ...................................................................................................................96
9.3.3 Speed control limits .........................................................................................................96
9.3.4 Torque control ..................................................................................................................97
9.3.5 Overload ..........................................................................................................................97
9.4 DC circuit ........................................................................................................97
9.5 Input electrical data ........................................................................................98
9.5.1 AC power supply ..............................................................................................................98
9.5.2 DC power supply .............................................................................................................99
9.6 Output electrical data ....................................................................................100
9.6.1 Output current derating factors ......................................................................................102
9.6.2 Overload for output frequency .......................................................................................104
9.7
Voltage level of the inverter for safe operations ...............................................105
9.8 Cooling .........................................................................................................106
9.9 Weight and dimensions ................................................................................107
10 - Options ............................................................................ 116
10.1 Optional external fuses ..............................................................................116
10.1.1 AC input side fuses (F1) .............................................................................................. 116
10.1.2 External fuses of the power section DC input side (F2) ............................................... 117
10.1.3 Optional internal fuses for the DC connection (F2) ...................................................... 118
10.2 Choke .........................................................................................................119
10.2.1 Optional input chokes (L1) ........................................................................................... 119
10.2.2 Input chokes for conformity to EN61000-3-12 for drives with input currents of between
16A and 75A ...........................................................................................................................120
10.2.3 Optional external choke (L2) ........................................................................................121
10.3 External EMC lter (optional) ......................................................................125
10.4 Braking resistor (optional) ...........................................................................127
10.5 Installation of optional cards .......................................................................128
ADV200 WA • Quick start up guide - Specification and installation 5
10.5.1 Procedure ...................................................................................................................128
10.5.2 Shielding of optional card connections ........................................................................130
Appendix 1 - Parallel connection (500 ... 1200kW sizes) .... 131
A 1.1 Introduction ................................................................................................131
A 1.2 MS-SL interface cable wiring sizes 400...800 kW .....................................133
A 1.2 MS-SL interface cable wiring sizes 900...1000 kW ...................................134
A 1.4 Jumpers and Switches ..............................................................................135
A 1.5 LEDs ..........................................................................................................135
A 1.6 Scheda EXP-SFTy-ADV ............................................................................137
Appendix 2 - Miscellaneous .................................................. 138
A 2.1 DC-link capacity ........................................................................................138

6 ADV200 WA • Quick start up guide - Specification and installation
1 - Safety Precautions
1.1 Symbols used in the manual
Indicates a procedure, condition, or statement that, if not strictly observed, could result
in personal injury or death.
Indique le mode d’utilisation, la procédure et la condition d’exploitation. Si ces consignes ne
sont passtrictement respectées, il y a des risques de blessures corporelles ou de mort.
Indicates a procedure, condition, or statement that, if not strictly observed, could result
in damage to or destruction of equipment.
Indique et le mode d’utilisation, la procédure et la condition d’exploitation. Si ces consignes
ne sont pas strictement respectées, il y a des risques de détérioration ou de destruction des
appareils.
Indicates that the presence of electrostatic discharge could damage the appliance.
When handling the boards, always wear a grounded bracelet.
Indique que la présence de décharges électrostatiques est susceptible d’endommager l’appa-
reil. Toujours porter un bracelet de mise à la terre lors de la manipulation des cartes.
Indicates a procedure, condition, or statement that should be strictly followed in order to
optimize these applications.
Indique le mode d’utilisation, la procédure et la condition d’exploitation. Ces consignes doivent
êtrerigoureusement respectées pour optimiser ces applications.
Note ! Indicates an essential or important procedure, condition, or statement.
Indiqueunmoded’utilisation,deprocédureetdeconditiond’exploitationessentielsouimportants
Qualied personnel
For the purpose of this Instruction Manual , a “Qualied person” is someone who
is skilled to the installation, mounting, start-up and operation of the equipment and
the hazards involved. This operator must have the following qualications:
- trained in rendering rst aid.
- trained in the proper care and use of protective equipment in accordance with
established safety procedures.
- trained and authorized to energize, de-energize, clear, ground and tag circuits
and equipment in accordance with established safety procedures.
Personne qualiée
Aux ns de ce manuel d’instructions, le terme « personne qualiée » désigne toute personne
compétente en matière d’installation, de montage, de mise en service et de fonctionnement
de l’appareil et au fait des dangers qui s’y rattachent. L’opérateur en question doit posséder
les qualications suivantes :
- formation lui permettant de dispenser les premiers soins
- formation liée à l’entretien et à l’utilisation des équipements de protection selon les consigne
de sécurité en vigueur
- formation et habilitation aux manoeuvres suivantes : branchement, débranchement,
Warning!
Caution
Attention

ADV200 WA • Quick start up guide - Specification and installation 7
vérication des isolations, mise à la terre et étiquetage des circuits et des appareils selon les
consignes de sécurité en vigueur
Use for intended purpose only
The power drive system (electrical drive + application plant) may be used only for
the application stated in the manual and only together with devices and compo-
nents recommended and authorized by Gefran.
Utiliser uniquement dans les conditions prévues
Le système d’actionnement électrique (drive électrique + installation) ne peut être utilisé que
dans les conditions d’exploitation et les lieux prévus dans le manuel et uniquement avec les
dispositifs et les composants recommandés et autorisés par Gefran.
1.2 Safety precaution
The following instructions are provided for your safety and as a means of prevent-
ing damage to the product or components in the machines connected. This sec-
tion lists instructions, which apply generally when handling electrical drives.
Specic instructions that apply to particular actions are listed at the beginning of
each chapters.
Les instructions suivantes sont fournies pour la sécurité de l’utilisateur tout comme pour éviter
l’endommagement du produit ou des composants à l’intérieur des machines raccordées. Ce
paragraphe dresse la liste des instructions généralement applicables lors de la manipulation
des drives électriques.
Les instructions spéciques ayant trait à des actions particulières sont répertoriées au début
de chaque chapitre.
Read the information carefully, since it is provided for your personal safety and will
also help prolong the service life of your electrical drive and the plant you connect
to it.
Lire attentivement les informations en matière de sécurité personnelle et visant par ailleurs à
prolonger la durée de vie utile du drive tout comme de l’installation à laquelle il est relié.
1.3 General warnings
This equipment contains dangerous voltages and controls potentially dangerous rotat-
ing mechanical parts. Non-compliance with Warnings or failure to follow the instructions
contained in this manual can result in loss of life, severe personal injury or serious
damage to property.
Cet appareil utilise des tensions dangereuses et contrôle des organes mécaniques en mou-
vement potentiellement dangereux. L’absence de mise en pratique des consignes ou le non-
respect des instructions contenues dans ce manuel peuvent provoquer le décès, des lésions
corporelles graves ou de sérieux dégâts aux équipements.
This equipment contains dangerous voltages and controls potentially dangerous rotat-
ing mechanical parts. Non-compliance with Warnings or failure to follow the instructions
contained in this manual can result in loss of life, severe personal injury or serious
damage to property.
Les drives occasionnent des mouvements mécaniques. L’utilisateur est tenu de s’assurer
que de tels mouvements mécaniques ne débouchent pas sur des conditions d’insécurité.
Les butées de sécurité et les seuils d’exploitation prévus par le fabricant ne doivent être ni
contournés ni modiés.
Only suitable qualied personnel should work on this equipment, and only after becom-
ing familiar with all safety notices, installation, operation and maintenance procedures
contained in this manual. The successful and safe operation of this equipment is
Warning!

8 ADV200 WA • Quick start up guide - Specification and installation
dependent upon its proper handling,installation, operation and maintenance.
Seul un personnel dûment formé peut intervenir sur cet appareil et uniquement après avoir
assimilé l’ensemble des informations concernant la sécurité, les procédures d’installation, le
fonctionnement et l’entretien contenues dans ce manuel. La sécurité et l’efcacité du fonction-
nement de cet appareil dépendent du bon accomplissement des opérations de manutention,
d’installation, de fonctionnement et d’entretien.
In the case of faults, the drive, even if disabled, may cause accidental movements if it
has not been disconnected from the mains supply.
En cas de panne et même désactivé, le drive peut provoquer des mouvements fortuits s’il n’a
pas été débranché de l’alimentation secteur.
Electrical Shock
The DC link capacitors remain charged at a hazardous voltage even after cutting off the
power supply.
Never open the device or covers while the AC Input power supplyis switched on. Mini-
mum time to wait before working on the terminals or inside the device is listed in section
9.7 .
Risque de décharge électrique
Les condensateurs de la liaison à courant continu restent chargés à une tension dangereuse
même après que la tension d’alimentation a été coupée.
Ne jamais ouvrir l’appareil lorsqu’il est suns tension. Le temps minimum d’attente avant de
pouvoir travailler sur les bornes ou bien àl’intérieur de l’appareil est indiqué dans la section 9.7 .
Electrical Shock and Burn Hazard:
When using instruments such as oscilloscopes to work on live equipment, the oscil-
loscope’s chassis should be grounded and a differential probe input should be used.
Care should be used in the selection of probes and leads and in the adjustment of the
oscilloscope so that accurate readings may be made. See instrument manufacturer’s
instruction book for proper operation and adjustments to the instrument.
Décharge Èlectrique et Risque de Brúlure : Lors de l’utilisation d’instruments (par example
oscilloscope) sur des systémes en marche, le chassis de l’oscilloscope doit être relié à la terre
et une sonde différentiel devrait être utilisé en entrée. Les sondes et conducteurs doivent être
choissis avec soin pour effectuer les meilleures mesures à l’aide d’un oscilloscope. Voir le
manuel d’instruction pour une utilisation correcte des instruments.
Fire and Explosion Hazard:
Fires or explosions might result from mounting Drives in hazardous areas such as loca-
tions where ammable or combustible vapors or dusts are present. Drives should be
installed away from hazardous areas, even if used with motors suitable for use in these
locations.
Risque d’incendies et d’explosions: L’utilisation des drives dans des zônes à risques (pré-
sence de vapeurs ou de poussières inammables), peut provoquer des incendies ou des
explosions. Les drives doivent être installés loin des zônes dangeureuses, et équipés de
moteurs appropriés.

ADV200 WA • Quick start up guide - Specification and installation 9
1.4 Instruction for compliance with UL Mark (UL require-
ments), U.S. and Canadian electrical codes
Short circuit ratings
ADV200 WA inverters must be connected to a grid capable of supplying a sym-
metrical short-circuit power of less than or equal to “xxxx A rms (at 480 V +10% V
max).
The values of the “xxxx” A rms short-circuit current, in accordance with UL require-
ments (UL 508 c), for each motor power rating (Pn mot in the manual) are shown
in the table below.
Short current rating
Pn mot (kW) SCCR ( A ) @480Vac
1.1...37.3 5000
39....149 10000
150....398 18000
299.....447 30000
448 ... 671 42000
672 ... 1193 85000
Note! Drive will be protected by semiconductor Fuse type as specified in the instruction manual.
Branch circuit protection
In order to protect drive against over-current use fuses specied in par. “10.1
Optional external fuses”, page 117.
Environmental condition
The drive has to be considered “Open type equipment”. Max surrounding air
temperature equal to 40°C. Pollution degree 2.
Wiring of the input and output power terminals
Use UL listed cables rated at 75°C and round crimping terminals. Crimp terminals
with tool recommended by terminal manufacturer.
Field wiring terminals shall be used with the tightening torque specied in par.
“5.1.1 Cable Cross Section”, page 26.
Over-voltage control
In compliance with CSA-requirements Overvoltage at mains terminal is achieved
installing an overvoltage protection device as for :
Type OVR 1N 15 320 from ABB or similar.
Minimum time required for safe DC-link voltage
Before removing drive cover in order to access internal parts, after mains discon-
nection wait 300 sec for time.
Over-speed; over-load/current limit; motor overload
Drive incorporate over-speed, over-current/current limit, motor overload protection.
Instruction manual specify degree of protection and detailed installation instruction.

10 ADV200 WA • Quick start up guide - Specification and installation
Solid State Motor Overload Protection
Drive incorporate motor overload protection. Protection is implemented as
software function. Instruction manual specify degree of protection and detailed
installation instruction. *
*Applicable up to 9 May 2013.
New requirement. Applicable as from 9 May 2013.
The drive is not provided with the internal motor overload protection (software
function) as required under UL 508c as from 9 May 2013.
The drive is designed for use with motors with integrated thermal overload protec-
tion.
The integrated thermal overload protection signal must be connected to the equip-
ment, starting from a contact, on the “digital input connector” terminal, pins 4 and
10, that accepts a maximum of 24 VDC, 5 mA. The nal result of this signal is the
switching of the motor control device output to solid state OFF.

ADV200 WA • Quick start up guide - Specification and installation 11
2 - Introduction to the product
The new inverter series “SIEIDrive ADV200 WA” represents an innovative concept
in drive technology, as a result of the constant technological research and of the
experience that the Gefran Group has acquired keeping a constant presence
aside that of the major sector players.
The new range has been engineered and developed to satisfy the real needs of
System Integrators and OEM’s in order to provide them the best innovations and
economical competitiveness in the international markets.
Based on full mechanical modularity and on a powerful, intuitive and “fully open”
programming platform, ADV200 WA offers absolute integration exibility with high-
end performance in any system architectures of the most advanced automation
environments.
Designed and built specically for the control of variable torque applications
such as centrifugal pumps and fans, ADV200 WA is the ideal inverter for
water treatment plants and HVAC systems.
• Modularity
An innovative concept of integrated technology that offers full modularity. Mountable
side by side and with accessories specically dedicated to system solutions, ADV200
WA has been engineered to make installation easy for any operator, both in existing
systems and in specic machine solutions, always offering a real reduction of required
space in the cabinet and the best manageability.
• Integrated Quality
ADV200 WA integrates the fundamental devices for an absolute quality level, such as
the DC choke that ensures maximum reliability in any conditions of working and the in-
put lter that renders the drive in compliance with the EMC normative EN61800-3. Note:
the choke and lter are not present in ADV200 WA-DC models.
• Fast Access
Structured to offer simple and fast management of the product in any situation of instal-
lation and mounting. From the terminal access to the rack assembling of the options,
each operation is quick and easy.
• Smart Connections
Dedicated accessories and fully removable terminals, ensure simple and fast installa-
tion and start-up in compliance with the EMC normative.
• Options
ADV200 WA manages up to 3 option cards. The following cards should be installed:
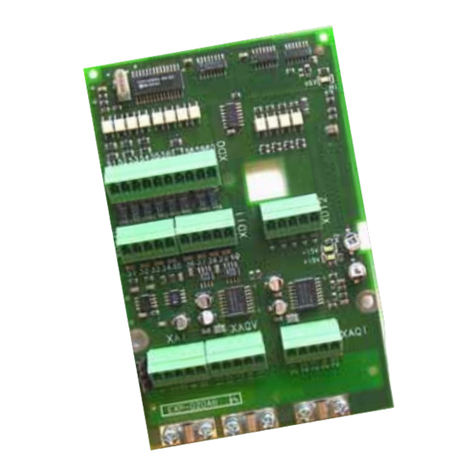
- EXP-IO-D6A4R1-ADV: 4 Digital inputs, 2 Digital Outputs, 2 Analog Inputs, 2 Analog
Outputs and 2 double contact Relays.
- EXP-IO-SEN-100-ADV and EXP-IO-SEN-1000-ADV: dedicated cards for direct read-
ing of PT100, PT1000 and NI1000 temperature sensors
- EXP-IO-D5R8-ADV: control of multi-pump systems.
- EXP-CAN-ADV, EXP-PDP-ADV, EXP-ETH-..., SBI-... : Field Bus expansion.

12 ADV200 WA • Quick start up guide - Specification and installation
• Safety Card
Integrated on board as the 4th option (ADV200 WA-...-SI models), the EXP- SFTy card
allows the motor to be disabled without the use of a safety contactor on the drive output,
guaranteeing compliance to the directive for machine safety EN61800-5-2 SIL3.
The EXP- SFTy card is integrated as standard in the master inverter of 500 to 1200 kW
parallel versions.
• Serial Line
Integrated standard RS485 serial line with Modbus RTU protocol, for peer-to-peer or
multidrop connections (with OPT-RS485-ADV card).
• Back-Up Supply
ADV200 WA can be supplied through an external +24Vdc supply in order to be kept ac-
tive in case of mains input loss, ensuring in this situation the operation of all monitoring
functions, programming and any connected eldbus network.
• Cables shield
OMEGA clamp to grounding 360° of shielded cables.

ADV200 WA • Quick start up guide - Specification and installation 13
2.1 Drive type designation
The main technical characteristic of the drive are showed in the product code and
in the nameplate. I.e. product code:
ADV200-WA 1 040 -K B X -4 -XX YY -DC -SI
Safety card EXP-SFTy-ADV included
DC bus power supply version
Parallel version only:
XX : MS = MASTER
SL = SLAVE YY :
05 = 500.0 kW
06 = 630.0 kW
07 = 710.0 kW
08 = 800.0 kW
10 = 1000.0 kW
12 = 1200.0 kW
Rated voltage :
4 = 400 Vac 4A = 460 Vac
Software: X = standard
Braking unit:
X = non included B = included
Keypad:
X = not included K = included
Drive power, in kW:
015 = 1.5 kW
022 = 2.2 kW
030 = 3.0 kW
040 = 4.0 kW
055 = 5.5 kW
075 = 7.5 kW
110 = 11.0 kW
150 = 15.0 kW
185 = 18.5 kW
220 = 22.0 kW
300 = 30.0 kW
370 = 37.0 kW
450 = 45.0 kW
550 = 55.0 kW
750 = 75.0 kW
900 = 90.0 kW
1100 = 110.0 kW
1320 = 132.0 kW
1600 = 160.0 kW
2000 = 200.0 kW
2500 = 250.0 kW
3150 = 315.0 kW
3550 = 355.0 kW
4000 = 400.0 kW
Mechanical drive sizes:
1 = size 1
2 = size 2
3 = size 3
4 = size 4
5 = size 5
6 = size 6
7 = size 7
Drive ADV200 WA series
Identication Nameplate
Type : ADV200-WA-1055 -KBX-4 S/N: 07012345
Inp: 400Vac-15% 500Vac +5% 50/60Hz 3Ph
11.1A@400Vac 10A@480Vac
Out : 0-480Vac 500Hz 3Ph 5,5kW@400Vac 7,5 Hp @ 460Vac
÷
5.5kW 13A @400V 11,7A@460V Ovld.110%-60s
4kW 9,5A @400V 8,6A@460V Ovld.150%-60s
Drive model
Serial number
Input (mains supply, frequency, AC Input
Current at constant torque)
Output (Output voltage, frequency, power,
current, CT and VT overloads)
Approvals Made in Italy
Firmware & cards revision level nameplate
Firmware HW release S/N 07012345 Prod.
Release D F P R S BU SW . CFG CONF
Cards revision
Firmware revision
Power
Regulation
Safety
Braking unit
Software
revision
Product
configuration
2.00 -.G -.L 10.10.10 A2

14 ADV200 WA • Quick start up guide - Specification and installation
The inverter must be selected according to the rated current of the motor.
The rated output current of the drive must be higher than or equal to the rated cur-
rent of the motor used.
The speed of the three-phase motor is determined by the number of pole pairs and
the frequency (nameplate, data sheet) of the motor concerned.
Operation above the rated frequency and speed of the motor must take into ac-
count the specications given by the manufacturer losses (bearings, unbalance
etc.). This also applies to temperature specications for continuous operation under
20 Hz (poor motor ventilation, not applicable to motors with external ventilation).
2.1.1 Parallel inverters
• Inverters of between 500 kW and 800 kW comprise one master and one
slave.
• Inverters of over 1000 kW comprise one master and two slaves.
When placing your order please give the code number of the master and slave
and number of these:
Power code Description (Designation) code Description (Designation)
500kW S9O25WM ADV200-WA-72500-KXX-4-MS 05 -SI S9O25WMC ADV200-WA-72500-KXX-4- MS 05-DC- SI
S9O25WS ADV200-WA-72500-XXX-4-SL S9O25SWMC ADV200-WA-72500-KXX-4- SL-DC
630kW S9O26WM ADV200-WA-73150-KXX-4-MS 06 -SI S9O26WMC ADV200-WA-73150-KXX-4-MS 06-DC-SI
S9O26WS ADV200-WA-73150-XXX-4-SL S9O26WSC ADV200-WA-73150-KXX-4-SL-DC
710kW S9O27WM ADV200-WA-73550-KXX-4-MS 07 -SI S9O27WMC ADV200-WA-73550-KXX-4-MS 07-DC-SI
S9O27WS ADV200-WA-73550-XXX-4-SL S9O27WSC ADV200-WA-73550-KXX-4-SL-DC
800kW S9O28WM ADV200-WA-74000-KXX-4-MS 08 -SI S9O28WMC ADV200-WA-74000-KXX-4- MS 08-DC-SI
S9O28WS ADV200-WA-74000-XXX-4-SL S9O28WSC ADV200-WA-74000-KXX-4- SL-DC
1000kW
S9O27WM1 ADV200-WA-73550-KXX-4-MS 10 -SI S9O27WM2 ADV200-WA-73550-KXX-4-MS 10-DC-SI
S9O27WS ADV200-WA-73550-XXX-4-SL S9O27WSC ADV200-WA-73550-KXX-4-SL-DC
1200kW
S9O28WM1 ADV200-WA-74000-KXX-4-MS 12 -SI S9O28WM2 ADV200-WA-74000-KXX-4- MS 12-DC-SI
S9O28WS ADV200-WA-74000-XXX-4-SL S9O28WSC ADV200-WA-74000-KXX-4- SL-DC
710kW S9O29WM ADV200-WA-73550-KXX-4A-MS 07-SI S9O29WMC ADV200-WA-73550-KXX-4A-MS 07-DC-SI
S9O29WS ADV200-WA-73550-KXX-4A -SL S9O29WSC ADV200-WA-73550-KXX-4A -SL-DC
800kW S9O30WM ADV200-WA-74000-KXX-4A- MS 08-SI S9O30WMC ADV200-WA-74000-KXX-4A- MS 08-DC-SI
S9O30WS ADV200-WA-74000-KXX-4A- SL S9O30WSC ADV200-WA-74000-KXX-4A- SL-DC
1000kW
S9O29WM1 ADV200-WA-73550-KXX-4A-MS 10-SI S9O29WM2 ADV200-WA-73550-KXX-4A-MS 10-DC-SI
S9O29WS ADV200-WA-73550-KXX-4A -SL S9O29WSC ADV200-WA-73550-KXX-4A -SL-DC
1200kW
S9O30WM1 ADV200-WA-74000-KXX-4A- MS 12-SI S9O30WM2 ADV200-WA-74000-KXX-4A- MS 12-DC-SI
S9O30WS ADV200-WA-74000-KXX-4A- SL S9O30WSC ADV200-WA-74000-KXX-4A- SL-DC

ADV200 WA • Quick start up guide - Specification and installation 15
3 - Transport and storage
Correct transport, storage, erection and mounting, as well as careful operation and
maintenance are essential for proper and safe operation of the equipment.
Protect the inverter against physical shocks and vibration during transport and storage.
Also be sure to protect it against water (rainfall) and excessive temperatures.
Le bon accomplissement des opérations de transport, de stockage, d’installation et de mon-
tage, ainsi que l’exploitation et l’entretien minutieux, sont essentiels pour garantir à l’appareil
un fonctionnement adéquat et sûr.
If the Drives have been stored for longer than two years, the operation of the DC link
capacitors may be impaired and must be “reformed”. Before commissioning devices
that have been stored for long periods, connect them to a power supply for two hours
with no load connected in order to regenerate the capacitors, (the input voltage has to
be applied without enabling the drive).
En cas de stockage des variateurs pendant plus de deux ans, il est conseillé de contrôler
l’état des condensateurs CC avant d’en effectuer le branchement. Avant la mise en service
des appareils, ayant été stockés pendant long temps, il faut alimenter variateurs à vide pen-
dant deux heures, pour régénérer les condensateurs : appliquer une tension d’alimentation
sans actionner le variateur.
3.1 General
A high degree of care is taken in packing the ADV Drives and preparing them for
delivery. They should only be transported with suitable transport equipment (see
weight data). Observe the instructions printed on the packaging. This also ap-
plieswhen the device is unpacked and installed in the control cabinet.
Upon delivery, check the following:
- the packaging for any external damage
- whether the delivery note matches your order.
Open the packaging with suitable tools. Check whether:
- any parts were damaged during transport
- the device type corresponds to your order
In the event of any damage or of an incomplete or incorrect delivery please notify
the responsible sales ofces immediately. The devices should only be stored in
dry rooms within the specied temperature ranges .
Note! A certain degree of moisture condensation is permissible if this arises from changes in temperature.
This does not, however, apply when the devices are in operation. Always ensure that there is no
moisture condensation in devices that are connected to the power supply!
Caution

16 ADV200 WA • Quick start up guide - Specification and installation
3.2 Permissible Environmental Conditions
Temperature
storage �������������������� -25…+55°C (-13…+131°F), class 1K4 per EN50178
-20…+55°C (-4…+131°F), for devices with keypad
transport ������������������� -25…+70°C (-13…+158°F), class 2K3 per EN50178
-20…+60°C (-4…+140°F), for devices with keypad
Air humidity
storage �������������������� 5% to 95 %, 1 g/m3 to 29 g/m3 (class 1K3 as per EN50178)
transport ������������������� 95 % (3), 60 g/m3 (4)
A light condensation of moisture may occur for a short time occasionally if the device is not in operation
(class 2K3 as per EN50178)
Air pressure:
storage �������������������� [kPa] 86 to 106 (class 1K4 as per EN50178)
transport ������������������� [kPa] 70 to 106 (class 2K3 as per EN50178)
(3) Greatest relative air humidity occurs with the temperature @ 40°C (104°F) or if the temperature of the
device is brought suddenly from -25 ...+30°C (-13°...+86°F).
(4) Greatest absolute air humidity if the device is brought suddenly from 70...15°C (158°...59°F).
The drive is suitable for use under the environmental service conditions (climate,
mechanical, pollution, etc.) dened as usual service conditions according to
EN61800-2.
Attention

ADV200 WA • Quick start up guide - Specification and installation 17
4 - Mechanical installation
The Drive must be mounted on a wall that is constructed of heat resistant material.
While the Drive is operating, the temperature of the Drive’s cooling ns can rise to a
temperature of 158° F (70°C).
Le drive doit être monté sur un mur construit avec des matériaux résistants à la chaleur.
Pendant le fonctionnement du drive, la température des ailettes du dissipateur thermique peut
arriver à 70°C (158° F).
Because the ambient temperature greatly affects Drive life and reliability, do not install
the Drive in any location that exceeds the allowable temperature.
Étant donné que la température ambiante inue sur la vie et la abilité du drive, on ne devrait
pasinstaller le drive dans des places ou la temperature permise est dépassée.
Be sure to remove the desicant dryer packet(s) when unpacking the Drive. (If not
removed these packets may become lodged in the fan or air passages and cause the
Drive to overheat).
Lors du déballage du drive, retirer le sachet déshydraté. (Si celui-ci n’est pas retiré, il em-
pêche la ventilation et provoque une surchauffe du drive).
Protect the device from impermissible environmental conditions (temperature, humidity,
shock etc.).
Protéger l’appareil contre des effets extérieurs non permis (température, humidité, chocs etc.).
4.1 Inclination and mounting clearance
The Drives must be mounted in such a way that the free ow of air is ensured see
paragraph “9.8 Cooling”, page 107.
Maximum angle of inclination �����������30° (referred to vertical position)
Minimum top and bottom distance �������150 mm (≥ADV200 WA-72000 = 400mm)
Minimum free space to the front ���������25 mm
Minimum distance between drives �������none
Minimum distance to the side with the cabinet
10 mm
10 mm [ 0.4" ]
≥
≥
400 mm [ 15.75" ] (ADV 7...)
150 mm [ 6" ]
≥
25 mm [ 0.98” ]
≥
10 mm [ 0.4" ]
≥
≥150 mm [ 6" ]
≥400 mm [ 15.75" ] (ADV 7...)
Caution

18 ADV200 WA • Quick start up guide - Specification and installation
4.2 Fastening positions
Taglia 3
Size 3
150 [5.91”]
500.1 [19.7”]
(A)
No. 4 screw 5MA
(B)
(A) 120 [4.72”]
Taglia 2
Size 2
376.6 [14.83”]
Taglia 1
Size 1
No. 4 screw 5MA
(B)
100 [3.94”]
306.4 [12.06”]
Fissaggio a muro
Wall mounting
(A)
126.2 [4.97”]
364.4 [14.33”]
320 [12.6”]
82 [3.23”]
(B)
No. 4 screw 5MA
156.2 [6.15”]
392 [15.43”]
440 [17.32”]
135 [5.31”]
187.6 [7.4”]
557 [21.93”]
517 [20.35”]
110 [4.33”]
Taglia 4
Size 4
220 [8.66”]
612 [24.09”]
595 [23.43”]
(A)
(B)
No. 4 screw 6MA
268 [10.55”]
682 [26.85”]
267 [10.51”]
Fissaggio a muro
Wall mounting
No. 5 screw 6MA
Taglia 6
Size 6
Taglia 5
Size 5
(B)
(A)
(B)
(A)
No. 4 screw 6MA
422 [16.61”]
350 [13.78”]
175 [6.89”]
836 [32.91”]
175 [6.89”]
853 [33.58”]
311 [12.24”]
220 [8.66”]
853 [33.58”]
748 [29.45”]
265 [10.43”]

ADV200 WA • Quick start up guide - Specification and installation 19
ADV200-...-DC
Taglia 3
Size 3
150 [5.91”]
500.1 [19.7”]
(A)
No. 4 screw 5MA
(B)
Fissaggio a muro
Wall mounting
187.6 [7.4”]
517 [20.35”]
ADV200-...-DC
Taglia 4
Size 4
220 [8.66”]
612 [24.09”]
595 [23.43”]
(A)
(B)
No. 4 screw 6MA
268 [10.55”]
616 [24.25”]
267 [10.51”]
ADV200-...-DC
Taglia 5
Size 5
(B)
(A)
No. 4 screw 6MA
311 [12.24”]
190 [7.48”]
730.4 [28.76”]
748 [29.45”]
265 [10.43”]
Fissaggio a muro
Wall mounting
No. 5 screw 6MA
ADV200-...-DC
Taglia 61320
Size 61320
(B)
421 [16.57”]
350 [13.78”]
175 [6.89”]
836 [32.91”]
853 [33.58”]
(B)
(A) (A)
350 [13.78”]
175 [6.89”]
275 [10.83”] 275 [10.83”]
421 [16.57”]
888 [34.96”]
No. 5 screw 6MA
924.5 [36.4”]
836 [32.91”]
865.5 [34.07”]
ADV200-...-DC
61600
Taglia 61600
Size

20 ADV200 WA • Quick start up guide - Specification and installation
Taglia 7
Size 7
417 [16.42”]
177.8 [7.00”]
355.6 [140”]
1264 [49.76”]
1209.5 [47.62”]
Fissaggio a muro
Wall mounting
(B)
(A)
6.5
[0.26”]
6.5
[0.26”]
Ø 13
[0.51”]
19
[0.75”]
17.45
[0.69”]
15.25
[0.6”]
(A)
(B)
1407 [55.4”]
(*) Protezione in policarbonato trasparente
(*) Protective trasparent policarbonate
(*)
(*)
ADV200-...-DC
Taglia 7
Size 7
417 [16.42”]
177.8 [7.00”]
355.6 [140”]
1264 [49.76”]
1209.5 [47.62”]
(A)
(B)
(B)(A)
7.25
[0.29”]
5.5 [0.21”]
5.5 [0.21”]
15
[0.59”]
Ø
10 [0.39”]
11.25
[0.44”]
6.5 [0.26”]
Ø
13
[0.51”]
19
[0.75”]
6.5 [0.26”]
12.5 [0.49”]
12
[0.47”]
Taglie 1-2-3
Sizes 1-2-3
Taglia 4
Size 4
(B)(A)
Taglia 5
Size 5
(B)(A)
6.5 [0.26”]
19
[0.75”]
Ø
13
[0.51”]
6.5 [0.26”]
12
[0.47”]
12.75 [0.50”]
(B)(A)
Taglia 6
Size 6
6.5 [0.26”]
6.5 [0.26”]
Ø
13
[0.51”]
19
[0.75”]
24.95 [0.98”]
12
[0.47”]
Recommended screws for fastening
Size 1 (ADV 1...) Size 2 (ADV 2...) Size 3 (ADV 3...) 4 x M5 x 12 mm screws + Grover (spring-lock) washer + Flat washer
Size 4 (ADV 4...) Size 5 (ADV 5...) 4 x M6 x 16 mm screws + Grover (spring-lock) washer + Flat washer
Size 6 (ADV 6...) 5 x M6 x 16 mm screws + Grover (spring-lock) washer + Flat washer
Size 7 (ADV 7...) 6 x M6 x 16 mm screws + Grover (spring-lock) washer + Flat washer
Note! Other dimensions see chapter “9.9 Weight and dimensions”, page 108.
Other manuals for ADV200 WA
1
This manual suits for next models
32
Table of contents
Other gefran DC Drive manuals

gefran
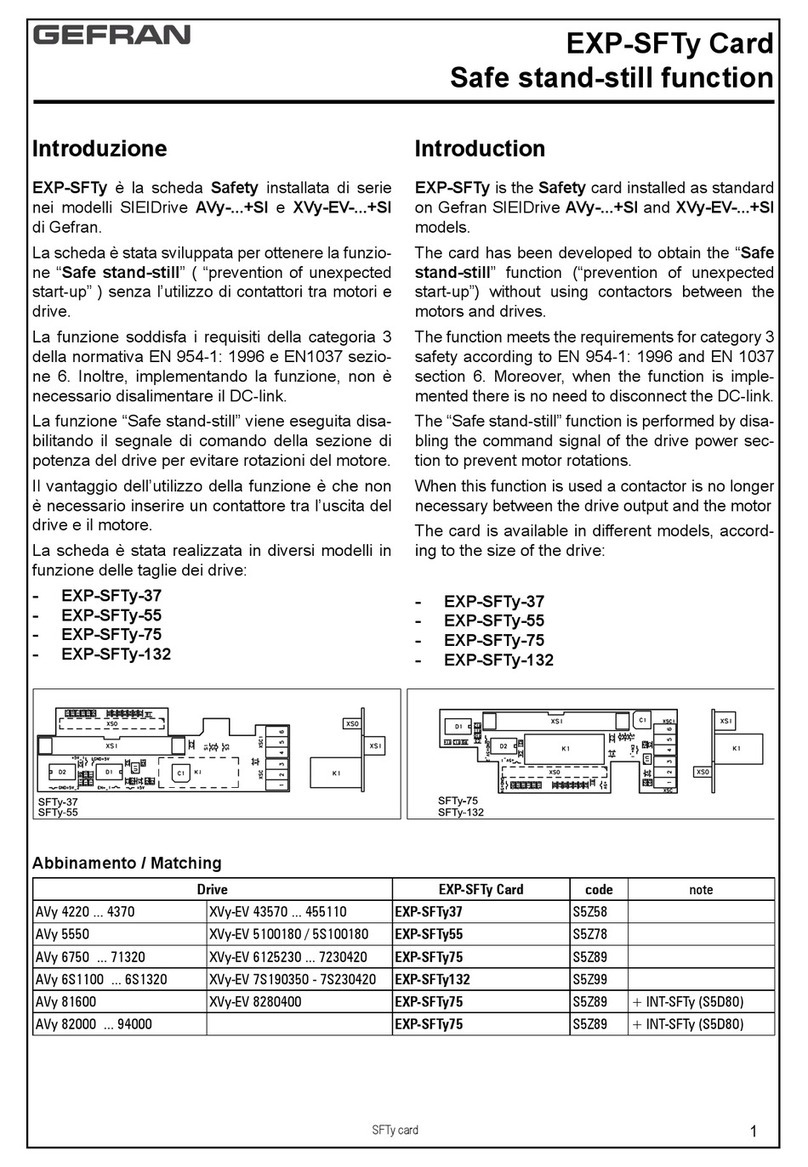
gefran EXP-SFTy User manual

gefran
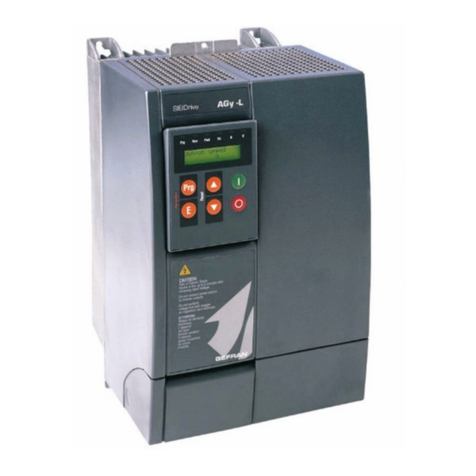
gefran AGy-L Series Guide

gefran
gefran ADV200 WA Parts list manual

gefran
gefran ADV200 Series Troubleshooting guide

gefran
gefran ADV200-...-DC Series Troubleshooting guide

gefran
gefran KFM LD User manual

gefran
gefran TPD32-EV-...-4B User manual

gefran
gefran EXP-D20A6 User manual

gefran
gefran ADV200-HC User manual

gefran
gefran ADV200-SI Series User manual