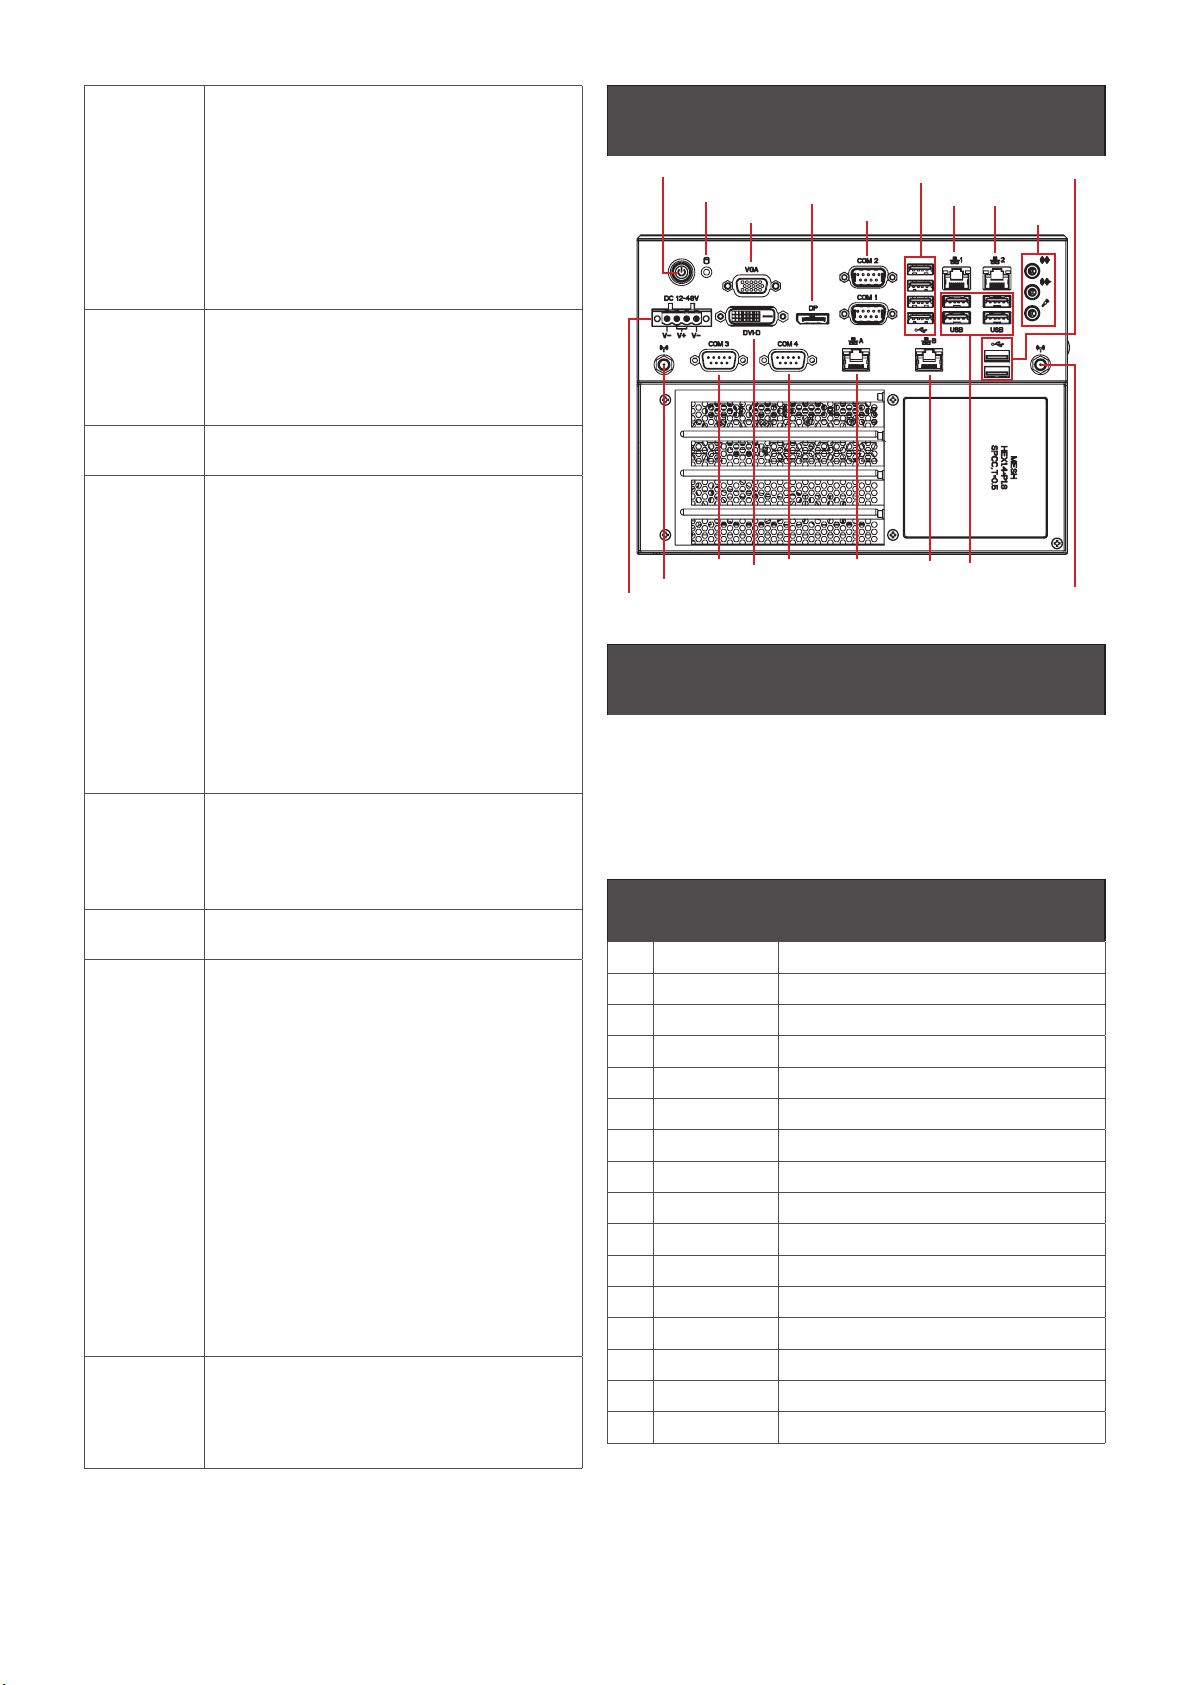
GIGAIPC QBiX-JMB-CMLA47EHG-B1 Installation and operation manual
Other GIGAIPC Industrial PC manuals

GIGAIPC
GIGAIPC QBiX-Lite-TGLA1135G7-A1 User manual

GIGAIPC
GIGAIPC QBiX-GLKB4125-A1 User manual

GIGAIPC
GIGAIPC QBiX-TGLA1135G7-A1 User manual

GIGAIPC
GIGAIPC QBiX-Pro-EHLA6412H-A1 User manual

GIGAIPC
GIGAIPC QBiX-Pro Series User manual

GIGAIPC
GIGAIPC QBiX-Pro Series User manual

GIGAIPC
GIGAIPC QBiX Jumbo Series User manual

GIGAIPC
GIGAIPC QBiX-WP Series User manual

GIGAIPC
GIGAIPC QBiX-Jetson-XavierAHP-A1 User manual

GIGAIPC
GIGAIPC QBiX-JMB-CMLA47EH-A1 Installation and operation manual

GIGAIPC
GIGAIPC QBiX-JMB-ADLA67EH-A1 Installation and operation manual

GIGAIPC
GIGAIPC QBiX-Pro Series User manual

GIGAIPC
GIGAIPC QP-8265A-SI User manual

GIGAIPC
GIGAIPC QBiX2-Pro-KBLB7100H-A1 User manual

GIGAIPC
GIGAIPC QBiX-Pro-KBLB7100H-A1 User manual

GIGAIPC
GIGAIPC QBiX-Pro-KBLB7200H-A2 User manual

GIGAIPC
GIGAIPC QBiX-Plus-KBLA7100-A1 User manual

GIGAIPC
GIGAIPC QBiX-WP Series User manual

GIGAIPC
GIGAIPC QBiX-Pro-EHLA6412H-A2 User manual

GIGAIPC
GIGAIPC QBiX-JMB-CMLA47EH-A1 Installation and operation manual


Popular Industrial PC manuals by other brands


Dell
Dell Embedded Box PC 5000 Installation and operation manual

IBASE Technology
IBASE Technology ASB200-918 Series user manual

Lenovo
Lenovo ThinkCentre M90q Hardware Maintenance Manual

IXXAT
IXXAT Econ 100 Hardware manual

Kontron
Kontron KBox A-151-TGL user guide

AXIOMTEK
AXIOMTEK ICO500-518 Series user manual