manuals.online logo
Brands
  1. Home
  2. •
  3. Brands
  4. •
  5. Gilis
  6. •
  7. Car Seat
  8. •
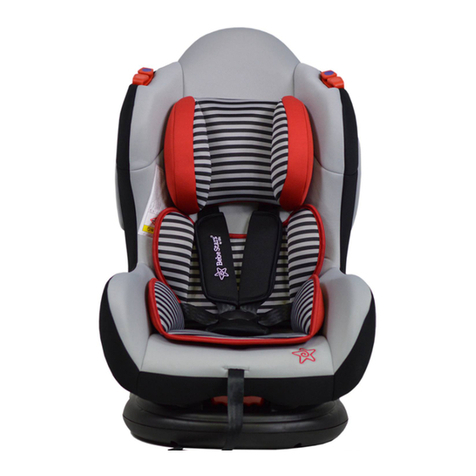
  9. Gilis BebeStars Monaco User manual

Gilis BebeStars Monaco User manual

User’s Manual / Οδηγίες Χρήσης
Your child’s safety depends on you. Proper baby car seat usage cannot
be assured unless you follow these instructions.
DO NOT USE YOUR BABY CAR SEAT UNTILL YOU READ AND UNDER
-
STAND THESE INSTRUCTIONS
Η ασφάλεια του παιδιού σας εξαρτάται από εσάς. Η σωστή χρήση του
καθίσματος αυτοκινήτου προϋποθέτει την ανάγνωση των οδηγιών χρήσης.
ΜΗΝ ΧΡΗΣΙΜΟΠΟΙΗΣΕΤΕ ΤΟ ΚΑΘΙΣΜΑ ΑΥΤΟΚΙΝΗΤΟΥ ΑΝ ΠΡΩΤΑ
ΔΕΝ ΔΙΑΒΑΣΕΤΕ ΚΑΙ ΚΑΤΑΝΟΗΣΕΤΕ ΠΛΗΡΩΣ ΤΙΣ ΟΔΗΓΙΕΣ ΑΥΤΕΣ
Group 1,2,3
From 9month-11years old
Suitable for 9-36kg
STANDARDS ECE R44/04
Car seat
Monaco
B
B
WARNINGS / ΠΡΟΕΙΔΟΠΟΙΗΣΕΙΣ
Παρακαλούμε διαβάστε αυτό το εγχειρίδιο πριν την
εγκατάσταση του παιδικού καθίσματος .
ΜΗΝ ΧΡΗΣΙΜΟΠΟΙΕΙΤΕ ΑΥΤΟ ΤΟ ΠΑΙΔΙΚΟ ΚΑΘΙΣΜΑ
ΣΤΗΝ ΘΕΣΗ ΤΟΥ ΣΥΝΟΔΗΓΟΥ ΕΑΝ ΕΧΕΙ ΑΕΡΟΣΑΚΟΥΣ
1. Το παιδικό κάθισμα μπορεί να χρησιμοποιηθεί με
την ζώνη μέχρι το βάρος του παιδιού να είναι 18kg
(group 1 9-18kg).
2. Αυτό το παιδικό κάθισμα μπορεί να τοποθετηθεί με
κατεύθυνση προς τα εμπρός, χρησιμοποιώντας τη
ζώνη ασφαλείας τριών σημείων (διαγώνια ζώνη)
3. Μην χρησιμοποιείτε αυτό το παιδικό κάθισμα στο
σπίτι. Δεν έχει σχεδιαστεί για οικιακή χρήση και
πρέπει να χρησιμοποιείται μόνο στο αυτοκίνητό σας.
4. Η ασφαλέστερη θέση για αυτό το παιδικό
κάθισμα είναι στο πίσω κάθισμα του οχήματος.
5. Ποτέ μην χρησιμοποιείτε το παιδικό κάθισμα
χωρίς να είναι δεμένο σωστά στο αυτοκίνητο.
6. Μην κάνετε οποιαδήποτε αλλαγή ή προσθήκη στο
παιδικό κάθισμα χωρίς την έγκριση της αρμόδιας
αρχής ή να μην αναφέρεται πιστά στις οδηγίες εγκα-
τάστασης που παρέχονται από τον κατασκευαστή.
7. Μην αφήνετε το παιδί σας, καμία στιγμή χωρίς
επίβλεψη στο κάθισμα.
8. Το κάθισμα πρέπει να φυλάσσεται μακριά από
το φως του ήλιου, εάν το κάθισμα δεν καλύπτεται
με ύφασμα. Μπορεί να είναι πολύ ζεστό για το
δέρμα του παιδιού.
9. Σε περίπτωση έκτακτης ανάγκης, είναι σημαντικό
το παιδί να μπορεί να απελευθερωθεί γρήγορα. Αυτό
σημαίνει ότι η πόρπη δεν πρέπει να είναι πλήρως
απαραβίαστη και έτσι το παιδί σας πρέπει να διδαχθεί
ότι δεν πρέπει να παίζει με την πόρπη.
10. Θα πρέπει να ασφαλίζετε τις αποσκευές ή άλλα
αντικειμένα που ενδέχεται να προκαλέσουν τραυματι-
σμούς σε περίπτωση σύγκρουσης.
11. Εξετάζετε περιοδικά τον ιμάντα για φθορά,
δίνοντας ιδιαίτερη προσοχή στα σημεία σύνδεσης.
12. Βεβαιωθείτε ότι όλα τα εξαρτήματα έχουν ασφαλί-
σει στη θέση τους σωστά και δεν έχουν σκαλώσει στα
καθίσματα του αυτοκινήτου ή στις πόρτες
13. Πάντα να είστε σίγουροι ότι οι ιμάντες που
συγκρατούν το κάθισμα στο όχημα πρέπει να είναι
σφιχτοί. Όλοι οι ιμάντες που συγκρατούν το παιδί
πρέπει να προσαρμόζονται στο σώμα του παιδιού,
και να ελέγχονται ότι δεν είναι στριμμένοι.
2
Please read this user guide carefully before
install the child seat and for future reference.
DO NOT USE THIS CHILD SEAT IN PASSENGER
SEATS EQUIPPED WITH AIRBAGS.
1.This child seat can only be used with the ha-
rness for children less than 18kg in weight
(group 1 9-18kg).
2.This child seat can be installed forward facing
using a three-point lap and diagonal seat belt.
3.Do not use this child seat in the home. It has
not been designed for home use and should
only be used in your car.
4.This safest seating position for this child car
seat is on the rear seat of a vehicle.
5.Never use the child seat without fastening it
into the car.
6.It is dangerous to make any alteration or
additions to the device without the approval of
the competent authority, and a danger of not
following closely the installation instructions
provided by the child restraint manufacturer.
7.Do not leave your child unattended in the seat
at any time.
8.The seat should be kept away from sunlight if
the seat is not provided with a textile, other
wise it may be too hot for the child's skin.
9.In the event of an emergency it is important
that the child can be releases quickly. This
means that the buckle is not fully tamper proof
and so your child must be taught never to play
with the buckle.
10.Any luggage or other objects liable to cause
injuries in the event of a collision shall be
properly secured.
11.Periodically inspect the harness for wear,
paying particular attention to attachment points.
Stitching and adjusting devices.
12.The rigid items and plastic parts of a child
restraint must be so located and installed that
they are not liable, during everyday use of the
vehicle to become trapped by a move able seat
or in a door of the vehicle.
13.Always make sure that any straps holding
the seat restraint to the vehicle shall be tight.
Any straps restraining the child should be
adjusted to the child's body, and check that the
straps shall not be twisted.
3
14. Το παιδικό κάθισμα πρέπει να αντικαθίσταται
όταν έχει υποστεί έντονη καταπόνηση σε περί-
πτωση ατυχήματος.
15. Αποθηκεύστε αυτό το παιδικό κάθισμα σε
ασφαλές μέρος όταν δεν χρησιμοποιείται. Απο-
φεύγετε να τοποθετείτε βαριά αντικείμενα πάνω
του ή να έρχεται σε επαφή με διαβρωτικές ουσίες.
Θέση καθίσματος
Μαξιλαράκι πόρπης
/ Οδηγοί ζώνης
/ Μαξιλαράκια
Ιμάντες
Πλάτη
/ Προσκέφαλο
Κλείδωμα ζώνης ασφαλείας
/ Ζώνη
/ Σύνδεσμος
/ Θέση
/ Τρύπες υποδοχής
PARTS / ΕΞΑΡΤΗΜΑΤΑ
14. The seat device should be changed when it has
been subject to violent stresses in an accident.
15.Store this child seat in a safe place when it is
not being used. Avoid placing heavy objects on top
of it. Do not allow your child seat to come into
contact with corrosive substances e.g. battery acid.
Οδηγός ζώνης
Σχισμή για τους ιμάντες
Πόρπη
Κουμπί για ρύθμιση ιμάντων
Ρύθμιση ιμάντα
Κουμπί (ρύθμιση ύψους)
Ιμάντες
Υποδοχές για να περάσουν
οι ιμάντες
Σύνδεσμος ιμάντων
VEHICLE APPLICATION / ΕΦΑΡΜΟΓΗ ΣΤΟ ΟΧΗΜΑ
Correct fing/suitable
Σωστή τοποθέτηση/κατάλληλο
Incorrect fing/not suitable
Λάθος τοποθέτηση/μη κατάλληλο
This child seat is suitable for convecon
use in all cars equipped with 3-point seat
belts that are fied in accordance with
European standard
(ECE44 or equivalent standards)
Αυτό το κάθισμα είναι κατάλληλο για όλα
τα αυτοκίνητα που είναι εξοπλισμένα με
ζώνες ασφαλείας 3 σημείων, σύμφωνα
τα Ευρωπαϊκά στάνταρντς ECE44
Important:
This child seat must only be installed using a lap and diagonal seat belt.
Σημαντικό:
Το κάθισμα πρέπει να τοποθετεθεί χρημοποιπωντας για δέσιμο την διαγώνια ζώνη
Not to be used on this seat if a
passenger front airbag is acve
Only use on this seat if a lap and
diagonal seat belt is fied
Μην το χρησιμοποιείτε στην θέση
του συνοδηγού εάν ο αερόσακος
είναι ενεργός
Να το χρησιμοποιείτε μόνο σε
κάθισμα που μπορεί να δεθεί με
την διαγώνια ζώνη.
4
Πάντα να ελέγχετε ότι οι ιμάντες ώμου είναι στο σωστό ύψος για το παιδί
σας. Oι ιμάντες θα πρέπει πάντα να είναι στο ύψος του ώμου του παιδιού σας.
NO - Too low NO - Too high Yes - Correct
Όχι - Πολύ χαμηλά Όχι - Πολύ ψηλά Ναι - Σωστό
CORRECT SHOULDER STRAP HEIGHT /
ΚΑΤΑΛΛΗΛΟ ΥΨΟΣ ΓΙΑ ΤΗΝ ΡΥΘΜΙΣΗ ΙΜΑΝΤΩΝ
Ρύθμιση των ιμάντων σύμφωνα με το ύψος του παιδιού σας
CHANGING THE SHOULDER STRAP HEIGHT /
ΑΛΛΑΓΗ ΥΨΟΥΣ ΓΙΑ ΤΗΝ ΡΥΘΜΙΣΗ ΙΜΑΝΤΩΝ
Βήμα 1.πατήστε το κουμπί
ρύθμισης των ιμάντων και
τραβήξτε και τους δυο ιμάντες
μπροστά ώστε να χαλαρώσουν
Βήμα 2.από την πίσω μεριά
αφαιρέστε τους ιμάντες από τον
σύνδεσμο και τραβήξτε τις
ζώνες μπροστά.
5
Βήμα 3.πρώτα ρυθμίστε το
προσκέφαλο στην επιθυμητή
θέση. Μετά βάλτε τους ιμάντες
στην κατάλληλη σχισμή που
υπάρχει στην πλάτη του
καθίσματος
Βήμα 4.Ξαναπεράστε τους ιμάντες
στον σύνδεσμο που υπάρχει στην
πλάτη της θέσης.
Να είστε σίγουροι ότι και οι δύο οι ιμάντες έχουν περάσει από τις σχισμές στο ίδιο ύψος και δεν είναι διπλωμένοι
REMOVE THE SAFETY HARNESS SHOULDER STRAPS /
ΑΦΑΙΡΕΣΤΕ ΤΟΥΣ ΙΜΑΝΤΕΣ ΩΜΩΝ
Press the harness adjuster and pull both harness straps forward to creang the slack.
Release the strap at the buon of the backrest cover to gain access to the harness.
Πατήστε το ρυθμιστή ιμάντα και τραβήξτε τους δύο ιμάντες προς τα εμπρός για να χαλαρώσουν.
Απελευθερώστε το λουρί στο κουμπί του καλύμματος της πλάτης
για να αποκτήσετε πρόσβαση στους ιμάντες.
6
Slide both of the harness straps off the harness connector at the back of the backrest
and pull the webbing through the slots in the seat’s backrest and fabric cover.
Αφαιρέστε τους δύο ιμάντες πρόσδεσης από τον σύνδεσμο στο πίσω μέρος της πλάτης
και τραβήξτε τους μέσα από τα ανοίγματα της πλάτης και του υφάσματος του καθίσματος.
REMOVE THE CROTCH AND SAFETY HARNESS LAP STRAPS /
ΑΦΑΙΡΕΣΤΕ ΤΟΥΣ ΙΜΑΝΤΕΣ ΑΠΟ ΤΗΝ ΘΕΣΗ ΤΟΥ ΚΑΘΙΣΜΑΤΟΣ
Turn both of the side webbing retainers on their
narrowest end and feed them through the slots in
the base of the seat and then through the slots in
the fabric cover
Γυρίστε τα μεταλλικά στηρίγματα των ιμάντων
από την στενή τους πλευρά και περάστε τα μέσα
από τα ανοίγματα της βάσης του καθίσματος και
στη συνέχεια μέσα από τις υποδοχές του
υφασμάτινου καλύμματος.
7
FITTING TOGETHER THE SEAT /
ΣΥΝΑΡΜΟΛΟΓΗΣΗ ΤΟΥ ΚΑΘΙΣΜΑΤΟΣ ΑΥΤΟΚΙΝΗΤΟΥ
/ Κάθισμα / Πλάτη
Step1. Prepare the fabric cover of the
booster, make sure it don’t cover the slots
Βήμα 1. Προετοιμάστε το υφασμάτινο
κάλυμμα του καθίσματος, βεβαιωθείτε
ότι δεν καλύπτει τις υποδοχές
Step2. Insert the backrest into the proper slots of the booster
in the horizontal posion, put your right (or le) hand on the
joint of the backrest and booster, then upward the backrest
using your other hand, see the upper picture.
Βήμα 2. Τοποθετήστε την πλάτη του στις κατάλληλες υποδοχές
του καθίσματος σε οριζόντια θέση. Στη συνέχεια με το χέρι σας
ανασηκώστε την πλάτη του καθίσματος προς τα πάνω κρατώντας
με το άλλο σας χέρι το κάθισμα, όπως δείχνει η εικόνα.
FASTENING THE SAFETY SEAT BUCKLE /
ΧΡΗΣΗ ΤΗΣ ΠΟΡΠΗΣ ΤΩΝ ΖΩΝΩΝ
Step1.Slot the two metal sections of the buckle connectors together.
Step2.Slot the two buckle connectors into the slot in the top of the buckle
until they “click” into place.
Step3.Always check the harness is correctly locked by pulling the shoulder
straps upwards.
8
Βήμα 1.Ενώστε τα δύο μεταλλικά τμήματα των συνδετήρων της πόρπης μαζί.
Βήμα 2.Βάλτε τους δύο συνδετήρες εντός της σχισμής, στην κορυφή της πόρπης
μέχρι να ακουστεί "κλικ" .
Βήμα 3.Να ελέγχεται πάντα ότι έχουν ασφαλίσει σωστά τραβώντας τους ιμάντες
προς τα πάνω.
To release the harness, press the red button on the buckle downwards.
Για να απελευθερώσετε τις ζώνες, πατήστε το κόκκινο κουμπί που βρίσκεται
στην πόρπη
TIGHTENING AND SLACKENING THE HARNESS /
ΤΕΝΤΩΜΑ ΚΑΙ ΧΑΛΑΡΩΜΑ ΤΩΝ ΖΩΝΩΝ
Tighten the shoulder harness / Τέντωμα της ζώνης
Pull the shoulder straps upwards to remove the slack from the lap
sections of the harness then pull the adjuster strap until the harness
is fully tightened. The harness should be adjusted as tightly as
possible without causing discomfort to your child. A loose harness
can be dangerous.Check the harness adjustment and tighten each
time the child is placed in the seat.
Τραβήξτε τους ιμάντες ώμου προς τα επάνω για να τεντώσετε τα
χαλαρά τμήματα της ζώνης, στη συνέχεια, τραβήξτε τον ιμάντα
ρύθμισης μέχρι το λουρί να σφίξει. Οι ιμάντες θα πρέπει να
προσαρμόζονται όσο πιο σφιχτά γίνεται χωρίς να προκαλεί δυσφορία
στο παιδί σας. Ένας χαλαρός ιμάντας μπορεί να είναι επικίνδυνος.
Να ελέγχεται το σύστημα των ζωνών κάθε φορά που το παιδί είναι να
τοποθετηθεί στο κάθισμα.
Loosening the shoulder straps / Χαλάρωμα της ζώνης
The harness is slackened by pressing the lever (under the seat
cover) on the front of the seat. Press down on the label marked
“Press” as you grip the two shoulder straps with your other hand.
Pull the shoulder straps towards you to loosen the harness. Take
care when you adjust the shoulder straps that you do not trap the
harness adjuster straps as you Press the lever down.
Για να χαλαρώσουν οι ιμάντες, πατήστε το κουμπί ρύθμισης (κάτω
από το κάλυμμα) στο μπροστινό μέρος του καθίσματος, και με το
άλλο σας χέρι τραβήξτε τους ιμάντες ώμου προς το μέρος σας για να
χαλαρώσει το λουρί. Προσέξτε όταν ρυθμίζετε τους ιμάντες των ώμων
να μην σκαλώσουν καθώς πιέζετε το κουμπί προς τα κάτω.
9
FITTING THE CAR SEAT WITH THE 3-POINT LAP & DIAGONAL SEAT BELT
/ ΤΟΠΟΘΕΤΗΣΗ ΤΟΥ ΚΑΘΙΣΜΑΤΟΣ ΜΕ ΤΗΝ ΔΙΑΓΩΝΙΑ ΖΩΝΗ
Χρήση για group 1 από 9 μηνών εώς 4 χρονών(9-18kg)
Step1. Place the child safety seat on the vehicle’s seat which is fied
with 3-point safety belts ensuring it is firmly pressed against the car
seat backrest.
Βήμα 1. Τοποθετήστε το παιδικό κάθισμα στο κάθισμα του οχήματος
που είναι εφοδιασμένο με ζώνες ασφαλείας 3 σημείων και βεβαιωθείτε
ότι ακουμπάει σταθερά στην πλάτη του καθίσματος.
Step2. Pull out the vehicle belt, thread the belt tongue (incl. vehicle
belt) through the adult belt route slot to the rear and through the
backrest, through the other adult belt route slot on the buckle side
and allow it to lock in place. You will hear “click”.
Βήμα 2. Τραβήξτε έξω τη ζώνη του οχήματος, περάστε τη γλώσσα
της ζώνης μέσα από τις υποδοχές που υπάρχουν στην πλάτη και στη
συνέχεια περάστε και από την άλλη υποδοχή της ζώνης από την
πλευρά της πόρπης και αφήστε το να ασφαλίσει στη θέση του.
Θα ακούσετε "κλικ".
Step3. Check the webbing of the seat belt has not become twisted or
tangled and that the lap belt under over the armrest and the diagonal
belts goes through the red belt guide on the side of the backrest
Βήμα 3. Ελέγξτε τους ιμάντες της ζώνης ασφαλείας να μην είναι
στριμμένοι ή μπερδεμένοι και ότι η ζώνη περνάει πάνω από το
υποβραχιόνιο και μέσα από το κόκκινο οδηγό στην πλευρά της
πόρπης.
Step4. Finish ghtening the webbing by pulling the diagonal strap
upwards unl there is no slack and the seat is held firmly in place.
Now you can strap your child into the seat.
Βήμα 4. Ολοκληρώστε το σφίξιμο του ιμάντα τραβώντας το διαγώνιο
ιμάντα προς τα πάνω μέχρι να μην υπάρχει χαλαρότητα και το
κάθισμα να συγκρατείται σταθερά στη θέση του. Τώρα μπορείτε
να δέσετε το παιδί σας στο κάθισμα.
10
Main load point must be up car seat buckle. The sasfactory posion of the adult safety belt
buckle relave to the child car seat is a photo. If in doubt about this point, please contact us.
Make sure the seat belt has not become twisted. Also check that the cover is not impeding the
movement or fit of the seat belt webbing in any way. To release your child seat follow the above
instrucons in reverse order.
Note: When the car seat used for group 1, the diagonal belt pass through the belt guide on the
side of the backrest but not pass through the belt guide on the side of headrest which suit for
group 2/3
Το κύριο σημείο που δέχεται όλο το φορτίο είναι η πόρπη του καθίσματος του αυτοκινήτου. Η
σωστή θέση της ζώνης ασφαλείας του αυτοκινήτου σε σχέση με το παιδικό κάθισμα φαίνεται στην
παραπάνω φωτογραφία. Σε περίπτωση αμφιβολίας σχετικά με αυτό το σημείο, παρακαλούμε
επικοινωνήστε μαζί μας. Βεβαιωθείτε ότι η ζώνη ασφαλείας δεν είναι στριμμένη. Επίσης,
βεβαιωθείτε ότι το κάλυμμα δεν εμποδίζει τη μετακίνηση ή τη τοποθέτηση της ζώνης ασφαλείας
με οποιονδήποτε τρόπο. Για να απελευθερώσετε το κάθισμα του παιδιού σας ακολουθήστε τις
παραπάνω οδηγίες με την αντίστροφη σειρά.
Σημείωση: Όταν χρησιμοποιείται το κάθισμα αυτοκινήτου για την Ομάδα 1, ο διαγώνιος ιμάντας
περνά μέσα από τις υποδοχές της ζώνης στην πλάτη, αλλά δεν περνούν μέσα από τον οδηγό της
ζώνης στην πλευρά του προσκέφαλου που ταιριάζουν για την ομάδα 2/3
χρήση για group 2 και 3 από 3 εώς 7 χρονών(15-25kg)
ADJUST THE HEADREST HEIGHT /
ΡΥΘΜΙΣΗ ΥΨΟΥΣ ΤΟΥ ΠΡΟΣΚΕΦΑΛΟΥ
IMPORTANT: Before fing the seat remove the shoulder straps, crotch strap and lap straps and
then fit the seat as shown in the instrucons.
ΣΗΜΑΝΤΙΚΟ: Πριν τοποθετήσετε το κάθισμα αφαιρέστε όλους τους ιμάντες του καθίσματος
αυτοκινήτου και στη συνέχεια τοποθετήστε το κάθισμα όπως φαίνεται στις οδηγίες.
11
According to children’s different height, the headrest can be
adjusted up and down
Step1. Put your le(or right) hand on the headrest
Step2. Pull the buon with your another hand
Step3. To make sure that the posion fits for your child properly.
Σύμφωνα με το ύψος των παιδιών, το προσκέφαλο μπορεί να
ρυθμιστεί πάνω και κάτω
Βήμα 1. Βάλτε το ένα χέρι σας στο προσκέφαλο
Βήμα 2. Τραβήξτε το κουμπί με το άλλο χέρι σας
Βήμα 3. Βεβαιωθείτε ότι η θέση ταιριάζει για το παιδί σας σωστά.
Step1. Place the child safety seat on the vehicle’s seat ensuring it is
firmly pressed against the car seat backrest.
Βήμα 1. Τοποθετήσ τε το παιδικό κάθισμα στο κάθισμα του
αυτοκινήτου και βεβαιωθείτε ότι είναι πιέζεται σταθερά στην
πλάτη του καθίσματος αυτοκινήτου.
Step2. Place the in the child safety seat
Βήμα 2. Τοποθετήστε το παιδί στο παιδικό κάθισμα αυτοκινήτου
Step3. Pull out the 3-point vehicle belt on the opposite side of the
buckle under the armrest, thread the belt tongue ( incl. vehicle belt)
and allow it to lock in place. you will hear “click”. Make sure that the
diagonal belt and the lap belt on the buckle side are both under the
arm rest. Check that the webbing has not become twisted and ghten
the seat belt by pulling the diagonal strap upwards.
Βήμα 3. Τραβήξτε έξω τη ζώνη του οχήματος στην αντίθετη πλευρά της
πόρπης κάτω από το υποβραχιόνιο, περάστε τη γλώσσα της ζώνης
και αφήστε το να ασφαλίσει στη θέση του. Θα ακούσετε "κλικ".
Βεβαιωθείτε ότι η διαγώνια ζώνη και η ζώνη της μέσης κουμπώνουν
στην πόρπη κάτω από το υποβραχιόνιο. Ελέγξτε ότι ο ιμάντας δεν
είναι στριμμένος και σφίξτε τη ζώνη ασφαλείας τραβώντας το διαγώνιο
ιμάντα προς τα πάνω.
12
Step4. Feed the diagonal poron of the seat belt through the belt
guide on the side of the headrest and check all of the slack has been
removed from the seat belt. Main load point must be up car seat buckle.
The sasfactory posion of the adult safety-belt buckle relave to the
child car seat is as photo. If in doubt about this point, please contact us.
Βήμα 4. Οδηγήστε το διαγώνιο τμήμα της ζώνης ασφαλείας να πάει στην
πλευρά του προσκέφαλου και ελέξτε όλα τα σημεία της ζώνης να είναι
καλά σφιγμένα.
Το κύριο σημείο που δέχεται όλο το φορτίο είναι η πόρπη του καθίσματος
του αυτοκινήτου. Η σωστή θέση της ζώνης ασφαλείας του αυτοκινήτου
σε σχέση με το παιδικό κάθισμα φαίνεται στην παραπάνω φωτογραφία.
Σε περίπτωση αμφιβολίας σχετικά με αυτό το σημείο, παρακαλούμε
επικοινωνήστε μαζί μας.
Make sure the seat belt has not become twisted. Also check that the cover is not impeding the
movement or fit of the seat belt webbing in any way. To release your child unfasten the seat belt
in the normal way.
Βεβαιωθείτε ότι η ζώνη ασφαλείας δεν είναι στριμμένη. Επίσης, βεβαιωθείτε ότι το κάλυμμα δεν
εμποδίζει τη μετακίνηση ή τη τοποθέτηση της ζώνης ασφαλείας με οποιονδήποτε τρόπο. Για να
απελευθερώσετε το παιδί σας τοποθετήστε την ζώνη στην φυσιολογική της θέση.
Χρήση για group 3 από 7 εώς 11 χρονών(22-36kg)
IMPORTANT: Removing the seats backrest.
ΣΗΜΑΝΤΙΚΟ: Αφαιρέστε την πλάτη του καθίσματος
/ σπρώξτε
/ πλάτη
/ κάθισμα
/ κλείδωμα ζώνης
Remove the backrest from the booster seat and place in a safe place with the other fings
Αφαιρέστε την πλάτη από το κάθισμα και τοποθετήστε σε ασφαλές μέρος για την επόμενη χρήση
IMPORTANT: The seat belt lock must be used
ΣΗΜΑΝΤΙΚΟ: Το κλείδωμα της ζώνης πρέπει να χρησιμοποιηθεί
13
The seat belt lock can be found inside the cover at the back of the booster cushion
Το κλείδωμα της ζώνης ασφαλείας βρίσκεται μέσα στο κάλυμμα στο πίσω μέρος της
θέσης του καθίσματος.
Step1. Place the booster seat on the seat of the car ensuring
it is firmly pressed against the car seat backrest.
Βήμα 1. Τοποθετήστε τη θέση του παιδικού καθίσματος
στο κάθισμα του αυτοκινήτου και βεβαιωθείτε ότι είναι
πιέζεται σταθερά στην πλάτη του καθίσματος αυτοκινήτου.
Step2. Place the child on the safety seat. Guide the belt lock (with belt)
to child shoulder which is near to car belt automac roll-up device. Pull
the belt lock from back side of child to child’s face side. The belt lock is
on the middle of child’s shoulder.
Step3. Pull out the 3-point vehicle belt on the opposite side of the buckle
under the arm rest, thread the belt tongue(incl. vehicle belt) and allow
it to lock in place. You will hear “click”. Make sure that the diagonal belt
and the lap belt on the buckle side are both under the arm rest. Check
that the webbing has not become twisted and ghten
the seat belt by pulling the diagonal strap upwards.
Step4. Adjust the length of the belt which jointed with the belt lock and
feed the diagonal belt through the belt lock. The strap lies on the
middle of child΄s shoulder and check all of the slack has been removed
from the seat belt
Βήμα 2. Τοποθετήστε το παιδί στο κάθισμα ασφαλείας. Οδηγήστε το
κλείδωμα της ζώνης (με ιμάντα)στον ώμο του παιδιού που βρίσκεται
κοντά στη ζώνη του αυτοκινήτου. Τραβήξτε το κλείδωμα από την πλάτη
του παιδιού στην πλευρική όψη του. Η κλειδαριά της ζώνης είναι στη
μέση του ώμου του παιδιού.
Βήμα 3. Τραβήξτε έξω τη ζώνη του οχήματος στην αντίθετη πλευρά της
πόρπης κάτω από το υποβραχιόνιο, περάστε τη γλώσσα της ζώνης
και αφήστε το να ασφαλίσει στη θέση του. Θα ακούσετε "κλικ".
Βεβαιωθείτε ότι η διαγώνια ζώνη και η ζώνη της μέσης κουμπώνουν
στην πόρπη κάτω από το υποβραχιόνιο. Ελέγξτε ότι ο ιμάντας δεν
είναι στριμμένος και σφίξτε τη ζώνη ασφαλείας τραβώντας το διαγώνιο
ιμάντα προς τα πάνω.
Βήμα 4. Ρυθμίστε το ύψος του ιμάντα (μαζί με το κλείδωμα) ώστε να
φτάνει στον ώμο του παιδιού.Το κλείδωμα πρέπει να είναι στην μέση
του ώμου και όλοι οι ιμάντες να είναι καλά σφιγμένοι
14
Main load point must be up car seat buckle. The sasfactory posion of the adult safety belt
buckle relave to the child car seat is a photo. If in doubt about this point, please contact us.
Make sure the seat belt has not become twisted. Also check that the cover is not impeding the
movement or fit of the seat belt webbing in any way.To release your child unfasten the seat belt
in the normal way.
Το κύριο σημείο που δέχεται όλο το φορτίο είναι η πόρπη του καθίσματος του αυτοκινήτου. Η
σωστή θέση της ζώνης ασφαλείας του αυτοκινήτου σε σχέση με το παιδικό κάθισμα φαίνεται στην
παραπάνω φωτογραφία. Σε περίπτωση αμφιβολίας σχετικά με αυτό το σημείο, παρακαλούμε
επικοινωνήστε μαζί μας. Βεβαιωθείτε ότι η ζώνη ασφαλείας δεν είναι στριμμένη. Επίσης,
βεβαιωθείτε ότι το κάλυμμα δεν εμποδίζει τη μετακίνηση ή τη τοποθέτηση της ζώνης ασφαλείας
με οποιονδήποτε τρόπο.Για να απελευθερώσετε το παιδί σας τοποθετήστε την ζώνη στην
φυσιολογική της θέση.
MAINTENANCE TIPS / ΣΥΜΒΟΥΛΕΣ ΣΥΝΤΗΡΗΣΗΣ
These instructions are important. Please read carefully and retain for future reference.
Seat part cover removal. First, release the elastic strap at the button of the backrest cover
Slide the cover off. The covers can now be cleaned.Headrest, booster seat cover removal.
Slide the cover off. The covers can now be cleaned.
Important: The cover is a safety feature. never use the child seat without it. Don’t put
your child’s safety at risk by using other makes of replacement cover, could stop the
child seat form protecting your child as well as it should.
Washing instruction:
The cover is removable and washable at 30°C, line dry only.
Use only a mild hand soap and warm water. Do not use chemical cleaners and never
attempt to bleach or dye the webbing. Αllow to dry naturally.
15
63200, NEA MOUDANIA, GREECE
www.bebestars.gr
Thank you for choosing
Bebe Stars products
Ευχαριστούμε για την προτίμηση
σας στα παιδικά προϊόντα
Bebe Stars
Οδηγίες πλυσίματος:
Το κάλυμμα αφαιρείται και πλένεται στους 30 ° C.
Χρησιμοποιείτε μόνο σαπούνι χεριών και ζεστό νερό. Μην χρησιμοποιείτε χημικά
καθαριστικά και ποτέ μην επιχειρήσετε να λευκάνετε ή να βάψετε το ύφασμα.
Αφήστε το να στεγνώσει φυσικά.
Αυτές οι οδηγίες είναι σημαντικές. Παρακαλώ διαβάστε προσεκτικά και φυλάξτε τες
για μελλοντική αναφορά.
Για να αφαιρέσετε το κάλυμμα του καθίσματος, πρώτον, ελευθερώστε το λάστιχο
στο πίσω μέρος του καλύμματος, από την πλάτη του καθίσματος. Βγάλτε το από το
πίσω μέρος της πλάτης. Σύρετε το κάλυμμα. Το καλύμμα μπορεί τώρα να καθαριστεί.
Αφαιρέστε την πλάτη από την θέση του καθίσματος. Τώρα μπορείτε να αφαιρέσετε
και το κάλυμμα από την θέση του καθίσματος για να το πλένεται
Σημαντικό: Το κάλυμμα είναι απαραίτητο για το κάθισμα. Μην χρησιμοποιείτε ποτέ το
παιδικό κάθισμα χωρίς αυτό. Μην βάζετε την ασφάλεια του παιδιού σας σε κίνδυνο
χρησιμοποιώντας άλλα υποκατάστατα καλύμματα, τα οποία δεν προστατεύουν όπως
πρέπει το παιδί σας.
16

Other Gilis Car Seat manuals

Gilis Bebe Stars MACAN 360 ISOFIX User manual

Gilis

Gilis Bebe Stars MACAN 360 ISOFIX User manual

Gilis BebeStars Magic isofix 942 User manual

Gilis

Gilis BebeStars Magic isofix 942 User manual

Gilis BebeStars TRANSPORTER 932 User manual

Gilis

Gilis BebeStars TRANSPORTER 932 User manual

Gilis Bebe Stars LEVANTE plus User manual

Gilis

Gilis Bebe Stars LEVANTE plus User manual

Gilis Bebe Stars EVO ISOFIX User manual

Gilis

Gilis Bebe Stars EVO ISOFIX User manual

Gilis Bebe Stars MACAN 360 ISOFIX User manual

Gilis

Gilis Bebe Stars MACAN 360 ISOFIX User manual

Gilis Bebe Stars User manual

Gilis

Gilis Bebe Stars User manual

Gilis Bebe Stars Booster Cindy User manual

Gilis

Gilis Bebe Stars Booster Cindy User manual

Gilis Bebe Stars Evolution User manual

Gilis

Gilis Bebe Stars Evolution User manual

Gilis Bebe Stars LEVANTE 910 User manual

Gilis

Gilis Bebe Stars LEVANTE 910 User manual

Gilis Bebe Stars Explore 911 User manual

Gilis

Gilis Bebe Stars Explore 911 User manual

Gilis BebeStars Leon 943 User manual

Gilis

Gilis BebeStars Leon 943 User manual

Gilis Bebe Stars Milano Isofix User manual

Gilis

Gilis Bebe Stars Milano Isofix User manual

Gilis Bebe Stars BABY plus User manual

Gilis

Gilis Bebe Stars BABY plus User manual

Gilis Bebe Stars Megan User manual

Gilis

Gilis Bebe Stars Megan User manual

Gilis Bebe Stars EVOQUE KBH-308 User manual

Gilis

Gilis Bebe Stars EVOQUE KBH-308 User manual

Gilis Bebe Stars User manual

Gilis

Gilis Bebe Stars User manual

Gilis Bebe Stars 007-110 User manual

Gilis

Gilis Bebe Stars 007-110 User manual

Gilis Bebe Stars Young Sport Plus User manual

Gilis

Gilis Bebe Stars Young Sport Plus User manual

Gilis Bebe Stars Leon Plus User manual

Gilis

Gilis Bebe Stars Leon Plus User manual

Gilis Bebe Stars KBH305 User manual

Gilis

Gilis Bebe Stars KBH305 User manual

Popular Car Seat manuals by other brands

Eddie Bauer surefit user guide

Eddie Bauer

Eddie Bauer surefit user guide

ISRI 6860/875 instruction manual

ISRI

ISRI 6860/875 instruction manual

Fisher-Price BGB26 owner's manual

Fisher-Price

Fisher-Price BGB26 owner's manual

RECARO KIO user guide

RECARO

RECARO KIO user guide

Britax KIDFIX -  2 User instructions

Britax

Britax KIDFIX - 2 User instructions

Axkid ENVIROKID instruction manual

Axkid

Axkid ENVIROKID instruction manual

Nuna REBL basq instructions

Nuna

Nuna REBL basq instructions

SafeGuard STAR Special Needs instruction manual

SafeGuard

SafeGuard STAR Special Needs instruction manual

BESAFE iZi flex flx i-Size user manual

BESAFE

BESAFE iZi flex flx i-Size user manual

The First Years B500 instruction manual

The First Years

The First Years B500 instruction manual

Britax BB0-651 user guide

Britax

Britax BB0-651 user guide

Silver Cross Balance manual

Silver Cross

Silver Cross Balance manual

RECARO AVAN user guide

RECARO

RECARO AVAN user guide

Britax First Class plus User instructions

Britax

Britax First Class plus User instructions

Nuna Pipa instruction manual

Nuna

Nuna Pipa instruction manual

Safety 1st elite 80 air + user manual

Safety 1st

Safety 1st elite 80 air + user manual

Chicco SEAT4FIX Instructions for use

Chicco

Chicco SEAT4FIX Instructions for use

Safeway Snug'n Safe Astra installation instructions

Safeway

Safeway Snug'n Safe Astra installation instructions

manuals.online logo
manuals.online logoBrands
  • About & Mission
  • Contact us
  • Privacy Policy
  • Terms and Conditions

Copyright 2025 Manuals.Online. All Rights Reserved.