manuals.online logo
Brands
  1. Home
  2. •
  3. Brands
  4. •
  5. gilles.tooling
  6. •
  7. Motorcycle Accessories
  8. •
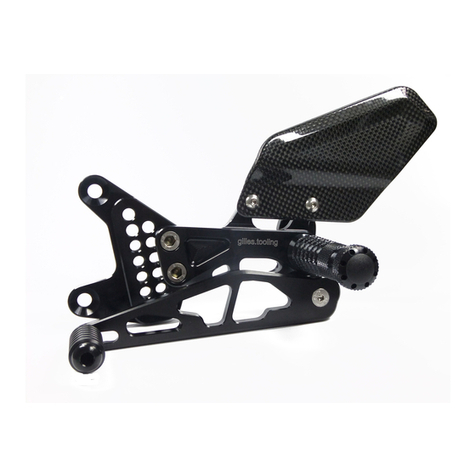
  9. gilles.tooling m2-MV01 User manual

gilles.tooling m2-MV01 User manual

Rev 00, 11/ 2015
µ2- MV01 rearset
Zertifikat
Certificate
Anbauanleitung
Owners manual
µ2-MV01 rearset
Sicherheitshinweise
Allgemeine Hinweise
-Ein unsicher aufgestelltes Motorrad kann bei den folgenden Arbeiten umfallen! Achten Sie darauf, dass
das Fahrzeug sicher steht.
-Verbrennungsgefahr bei heissem Motor und Auspuff! Vor Beginn der Arbeit heiße Fahrzeugteile abkühlen
lassen.
-Kinder und Tiere aus dem Arbeitsbereich fernhalten.
-Schmuck (Uhr, Ringe, Ketten, etc) vor Arbeitsbeginn ablegen.Es besteht Unfallgefahr durch Hängenbleiben
oder elektrischen Kurzschluss.
-Die Montage und Funktion bezieht sich ausschliesslich auf Serienmotorräder.
-Wir übenehmen keine Gewährleistung für die Verwendung an Sonderumbauten und von
Sonderzubehörteilen.
-Nach Montage des Produkts durch eine Werkstatt, ist diese Anbauanleitung dem Kunden auszuhändigen.
-Bewahren Sie die Anbauanleitung sorgfältig auf, und geben Sie dieses Produkt nur mit dieser
Anbauanleitung an Dritte weiter.
-Sollte die erforderliche Anleitung nicht mehr in Ihrem Besitz sein, wenden Sie sich bitte an:
info@gillestooling.com
Montagehinweise
-Alle Schrauben und Muttern werden mit Drehmoment nach DIN/ISO festgezogen. Abweichende
Drehmomente werden angegeben.
-Lagerungen und Schraubverbindungen sind mit einem geeigneten Schmiermittel einzusetzten, um ein
Festfressen zu verhindern.
-Arbeiten und Entlüftung am Bremssystems sind nur von fachkundigem Personal durchzuführen.
-Es ist unbedingt darauf zu achten, dass keine Züge, Kabel oder Leitungen (insbesondere Bremsleitungen)
andere Fahrzeugkomponenten berühren oder daran scheuern.
-Nach jeder Montage sind alle Schrauben auf festen Sitz und das vorgeschriebenes Drehmoment zu
überprüfen.
-Es ist unbedingt darauf zu achten, dass alle Teile immer einen Mindesabstand von 5mm zu beweglichen
Fahrzeugteilen haben.
Diese Anbauanleitung ist sorgfältig und vollständig vor Beginn der
Einbauarbeiten durchzulesen.
Wir bedanken uns für den Erwerb eines unserer Produkte und wünschen Ihnen viel Spaß. Machen
Sie aus einem Serienfahrzeug Ihre individuelle Maschine.
-Sicherheit ist oberstes Gebot.
-Haben Sie das erforderliche Werkzeug und genügend Mechanikerwissen und praktische Erfahrung?
-Unsere Produkte dürfen nur von fachkundigem Personal montiert werden.
-Nichtbeachtung der Anweisung kann zu Beschädigungen des Fahrzeuges, des Produktes bzw. zur
Gefährdung des Fahrers führen.
-Für Schäden, die aufgrund von Nichtbeachtung unserer Anweisungen entstanden sind, können wir keine
Haftung oder Gewährleistung übernehmen.
Betriebserlaubnis
-Beachten Sie die für Ihr Land geltenden Zulassungsbestimmungen.
-Für den Bereich der Bundesrepublik Deutschland gilt:
Ein Eintrag in die Fahrzeugpapiere ist nicht erforderlich!
µ2-MV01 rearset
Safety instructions
You must read these Installation Instructions carefully and make sure you
understand everything they contain, before commencing work.
Thank you for purchasing one of our products and we wish a lot of enjoyable riding. With Gilles you
make a standard bike - your bike.
-Safety always comes first.
-Do you have the correct tools?
-Do you have the ability and aptitude to confidently mount thes product. If in doubt consult a skilled
technican.
-We always advise fitment is carried out by skilled personal.
-Non-compliance with the instructions can be hazardous. For your own protection and the safety of the bike
please always follow the instructions.
-Any Gilles parts will not be covered by warranty it fitted incorrectly.
General instructions
-Please ensure the motorcycle is adequately secured before commencing work.
-Always make sure that the motorcycle is stable and firmly supported.
-A hot engine and exhaust system can burn. Allow all hot parts to cool before commencing work.
-Keep children and household pets well away from the work zone.
-Remove all items of personal jewellry (rings, chains,wristwatch, etc.) before commencing work.
-The fitment instructions relate only to the fitment on a standart motorcycles.
-We cannot warranty or legislate for interaction or interference with non standard or custom parts.
-If a technican is installing the parts please ensure these instructions are passed to the owner.
-Please keep the instruction manual at a safe place. In case of selling our product, please hand the
installation instructions over to the new owner.
-Consult info@gillestooling.com if the instructions in question are no longer in your possession.
Operating licence
-Always comply with the regulations regarding approval in the country of use.
-For the Federal Republic of Germany:
A entry in the vehicle´s registration papers is not necessary!
Assembling note
-Screws, bolts and nuts are tightened in accordance with the applicable DIN/ISO standarts. Tightening
torques that deviate from the standards are stated.
-All threaded connections and bearings must be greased with suitable grease. Please be careful with the
tools to avoid i.e. scratches.
-Mounting and bleeding at the brake system only by skilled personal.
-Take care that no wires and hoses (especially brake hoses) are too close or touching other components or
moving parts.
-After each mounting check all bolts for correct tightening and specified torque moment.
-Take care that any parts always have a minimum clearence of 5 mm to any moving parts.
partlist
MUE2-MV01-right
18
5
22
24
14
16
29
30
97 21258 23
19
131028174
27
20
6
3
26 31
28
19
15
12
11
2
1
pos.
article no.
description
qty.
1
MUE2-GR-MV01-*
right base plate
1
2
MUE2-GO-MV01-*
upper base plate
1
3
UV-06-*
adjustment plate
1
4
VST-04-R-GT-*
adjustment nut right
1
5
SPN-03-*
nut 1
6
UF-18-*
footrest
1
7
UB-35-*
brake lever
1
8
UEX-01-*
excenter
1
9
BL-01-*
cover
1
10
UTR01-*
brake lever toe piece
1
11
UL19R-*
bearing
1
12
UAH-16-*
exhaust holder
1
13
DS 15-6-6-*
spacer
1
14
DS12-6-9
distance
1
15
SFL16x0.8-2
plug
1
16
PSF 121 7224
rubber exhaust
1
17
VD-117S
spring
1
18
FDS-5
pressure piece
2
19
M8x20-14583-VA-TX
bolt
2
20
M8x40-7991-VA
bolt
1
21
M8x30-7991-VA
bolt
1
22
M8x20-7991-VA
bolt
1
23
M6x20-7991-VA-Pre10-1
bolt
1
24
M6x25-7380-VA
bolt
1
25
M6x20-7380-VA-TX-PRE10-1
bolt
2
26
M6x8-7380-VA
bolt
2
27
M8x20-912-VA
bolt
1
28
ULS-8,4-VA
washer
2
29
DS 14-6-4
distance
1
30
ULS-6,4-DIN9021-A2
washer
1
31
CAR06L-6,5-40
heelguard
1
partlist
MUE2-MV01-left
31 21 23 26
33
7
28
17
30
3
1420 1011 222485
166
4
27
12
25 9 18
32 29
15
13 19
pos.
article no.
description
qty.
1
MUE2-GL-MV01-*
left base plate
1
2
MUE2-GO-MV01-*
upper base plate
1
3
UV-06-*
adjustment plate
1
4
UF-18-*
footrest
1
5
HA-US-46*
holder gear lever
1
6
SPN-03-*
nut 1
7
VST-04-L-GT-*
adjustment nut left
1
8
US-46-*
gear lever
1
9
UTR-15-*
gear lever toe
piece
1
10
UEX-01-*
excenter
1
11
BL-01-*
cover
1
12
USW09-*
gear shaft
1
13
DS 20-10,5-10
collar
2
14
DS 15-6-6-*
spacer
1
15
DS 12-6-6-*
distance
1
16
FDS-5
pressure piece
2
17
VD-117S
spring
1
18
SFL16x0.8-2
plug
1
19
M8x40-7991-VA
bolt
1
20
M8x30-7991-VA
bolt
1
21
M8x20-7991-VA
bolt
1
22
M6x20-7991-VA-Pre10-1
bolt
1
23
M8x20-14583-VA-TX
bolt
2
24
M6x20-7380-VA-TX-PRE10-1
bolt
1
25
M6x16-7380-VA-Pre10-1
bolt
1
26
M6x8-7380-VA
bolt
2
27
M10x1,25x30-912-VA
bolt
1
28
M8x20-912-VA
bolt
1
29
M6x25-7380-VA
bolt
1
30
ULS-8,4-VA
washer
1
31
ULS-8,4-9021-A2
washer
2
32
M6x25-933-VA
bolt
1
33
CAR06-R 6,5-40
heel protector
1
2
1
µ2- MV01 rearset
Anbauanleitung/ Manual
-ES WIRD EMPFOHLEN DIE ANLAGE VON EINER FACHWERKSTATT INSTALLIEREN ZU LASSEN.
-INSTALLATION RECOMMENDED BY AN OFFICIAL DEALER.
A: Original Rastenanlage und Bremshebel demontieren wie im Bild dargestellt. (Den Auspuff, sowie
angrenzende Verkleidungsteile durch Abdecken mit Schutzfolie, gegen Beschädigungen schützen)
A: Detach the original rearset and brake lever like shown in the picture. (Use protective foil to cover the
exhaust and the fairing to avoid scratches)
A
Rechts/right side
DS14-6-4
B: Einsetzen der Buchse DS14-6-4 in das Hitzeschutzblech des Auspuffs.
C: Montieren Sie den Auspuffhalter UAH-16 wie dargestellt. Anziehen der Schraube M6x25-7380.
Anzugsdrehmoment: Gemäß OE- Herstellerangaben
B: Insert the the spacer DS14-6-4 in the exhaust`s heat protection plate.
C: Install the exhaust holder UAH-16 like shown in the picture. Tighten the bolt M6x25-7380.
Tightening torque: according to the OE- manufacturer
M6x25-7380
+
ULS-6,4-9021
B C
4
OE- Nm
D: Montieren Sie die Rastenanalage wie dargestellt mit den beiden Schrauben M8x20-14583 auf den
Hauptrahmen. Ziehen Sie diese abschließend mit dem angegebenen Wert fest!
Anzugsdrehmoment: 20 Nm
D: Install the rearset like shown in the picture with the bolts M8x20-14583 onto the frame. Finally tighten
both bolts with the marked specification!
Tightening torque: 20 Nm
E: Verbinden Sie gemäß Darstellung E den Bremshebel, mittels Gabeladapter, mit dem Bremszylinder.
Fetten Sie den originalen Clip- Bolzen (Normales, handelsübliches Industriefett)
E: Connect the brake lever according to picture E with the master cylinder. Grease the original brake clip-
bolt (standard, industrial grease)
E
FETT / GREASE !
2
1
µ2- MV01 rearset
Anbauanleitung/ Manual
TX40
20 Nm
M8x20-14583
D
µ2- MV01 rearset
Anbauanleitung/ Manual
F
F: Stecken Sie die Schraube M8x30-7991 durch die spezielle Abdeckung BL-01. Fügen Sie diese
anschließend durch die Lagerung des Bremshebels. Auf der Rückseite der Lagerung kommt die Scheibe
ULS-8,4 zum Einsatz.
G: Ziehen Sie die Schraube mit dem angegebenen Drehmoment fest! Nutzen Sie Flüssig- Schrauben-
sicherung (z.B. LOCTITE) zur Unterstützung!
Anzugsdrehmoment: 20 Nm + mittelfeste Schraubensicherung
F: Insert the bolt M8x30-7991 through the special cover BL-01. After that, put it through the break lever`s
bearing. On the backside of the bearing you need to add the washer ULS-8,4.
G: Tighten the bolt by using the specified tightening torque! Use a liquid threadlocker (LOCTITE)!
Tightening torque: 20 Nm + medium strength threadlocker
BL-01
M8x30-7991
ULS-8,4
5
20 Nm
G
-Zur Durchführung des folgenden Tests sollte das Hinterrad frei drehbar in der Luft sein!
-For the following test the rear wheel should be able to spin free!
Funktionsprüfung
der Bremse !!!
Check the function
of the brake !!!
H: Überprüfen des Bremsspieles durch
Drehen des Hinterrades und Betätigen der
Bremse mit der Hand (siehe Bild). Sollte das
Bremsspiel nicht ausreichen, (Bremsbeläge
liegen an/ schleifen) oder zu groß sein (zu viel
Leerweg bis Druckpunkt), wenden Sie sich an
eine Fachwerkstatt.
Der Bremshebel muss ein spürbares Spiel
aufweisen bevor der Bremskolben betätigt
wird!
H: Test the brake freeplay by spinning the
rear wheel and pressing the brake by hand
(like shown in the picture). If the brake
clearance/ freeplay is not enough (brake
linings fit/ grind) or too much (too much lever
travel until pressure point), please look for
support by an offical dealer .
The brake lever must have noticable
freeplay before the brake piston gets
pressed!
H
µ2- MV01 rearset
Anbauanleitung/ Manual
Links/left side
I: Demontieren Sie die originale Rastenanlage, die Schaltwelle und den Schaltarm.
I: Remove the original rearset system, the shift rod and the gear arm.
I
µ2- MV01 rearset
Anbauanleitung/ Manual
Seitenständer HOCH !!!
side stand UP !!!
J
J: Entfernen Sie die markierte Schraube (nur die markierte) der Seitenständer- Aufnahmeplatte!
K: Montieren Sie den Halter HA-US-46 wie dargestellt. Anziehen der Schraube M10x1,25x30-912.
Anzugsdrehmoment: Gemäß OE- Herstellerangaben + mittelfeste Schraubensicherung
J: Remove the marked bolt from the side stand`s basic holder (only the marked bolt)!
K: Install the holder HA-US-46 like shown in the picture. Tighten the bolt M10x1,25x30-912.
Tightening torque: according to the OE- manufacturer + medium strength threadlocker
HA-US-46
M10x1,25x30-912
8
OE- Nm
K
-Seitenständer muss unbelastet sein! Aufbocken mittels Hauptständer oder festhalten des Motor-
rades durch zweite Person während dieser beiden Arbeitgänge!
-The side stand needs to be unloaded! Use a paddock stand or use help by a second person which
keeps the motorcycle during that installation steps!
L: Stecken Sie die Schraube M8x30-7991 durch
die spezielle Abdeckung BL-01. Fügen Sie diese
anschließend durch die Lagerung des
Schalthebels.
L: Insert the bolt M8x30-7991 through the special
cover BL-01. After that, put it through the gear
lever`s bearing.
L BL-01
M8x30
-7991
N: Schrauben Sie den originalen Linksgewinde- Kugelkopf bis Anschlag in die Schaltwelle USW09 und
kontern Sie diese Einstellung.
O: Drehen Sie die Schaltwelle USW09 wie dargestellt bis Anschlag auf den Schaltautomaten. Die obere,
markierte Einstellung, von Schaltautomat und Rechtsgewinde- Kugelkopf, bleibt unangetastet!
Kontern Sie die Einstellung (Beide Gelenkköpfe müssen in einer Flucht liegen)!
N: Srew the original left hand- ball bearing until stop in the shift rod USW09 and counter the adjustment.
O: Turn the shift rod USW09 on the quick shifter until stop like the picture shows. The upper, original
adjustment of quick shifter and right hand- ball bearing (marked in the picture) stays untouched!
Counter the adjustment (Take care that both ball bearing are in alignment)!
ON
USW-09
USW-09
ORIGINAL!
Kein Verstellen.
Originalmaß!
No adjustment.
OE- setting!
µ2- MV01 rearset
Anbauanleitung/ Manual
M: Ziehen Sie die Schraube M8x30-7991 mit dem angegebenen Drehmoment fest!
Anzugsdrehmoment: 20 Nm
M: Tighten the bolt M8x30-7991 by using the specified tightening torque!
Tightening torque: 20 Nm
5
20 Nm
M
µ2- MV01 rearset
Anbauanleitung/ Manual
P: Verbinden Sie die Schaltwelle mit dem Schaltarm unter Nutzung der originalen Befestigungsschraube.
Setzen Sie den Schaltarm, in der dargestellten Ausrichtung, auf die Getriebeausgangswelle und nutzen
Sie die Schraube M6x25-933 zur Befestigung.
Anzugsdrehmomente: Gemäß OE- Herstellerangaben (beide Schrauben)
Q: Verbinden Sie die Schaltwelle wie dargestellt mit dem Schalthebel und ziehen Sie die Schraube fest!
Anzugsdrehmoment: 10 Nm
P: Connect the shift rod with the gear arm by using the original bolt and install the gear arm, in the shown
alignment, on the transmission output shaft. Use the replacement bolt M6x25-933 for the final tightening.
Tightening torques: according to the OE- manufacturer (both bolts)
Q: Install the shift rod on the gear lever like the picture shows. Tighten the bolt with a torque wrench.
Tightening torque: 10 Nm
M6x16-7380
4
10 Nm
Normalschaltung/ standard shifting
10
M6x25-933
P
Q
-Für kürzere Schaltwege und somit einer direkteren Getriebebetätigung ist die Schaltwelle
derzeitig am Befestigungpunkt F ("Fast"- Stellung) des Schalthebels montiert. Beachten Sie die
rückseitigen Gravuren.
Position S (Serie) kann auch zur Befestigung genutzt werden! (Längere Serien- Schaltwege)
-The shift rod is in the current status installed on the gear lever`s second installation point F
("Fast"- position) for shorter shifting travel and more direct gear box activating. Note the
engravings on the backside.
You can also use Position S (OE- position) to install the shift rod. (Longer, OE- shifting travel)
ORIGINAL
OE- Nm
µ2- MV01 rearset
Anbauanleitung/ Manual
R: Montieren Sie die Rastenanalage wie dargestellt! Die beiden Scheiben ULS-8,4-9021 werden dabei als
Distanzen zwischen Grundplatte und Rahmen eingesetzt.
Nutzen Sie die beiden Schrauben M8x20-14583 und ziehen Sie diese mit dem angegebenen Wert fest!
Anzugsdrehmoment: 20 Nm
R: Install the rearset like shown in the picture! Use both washer ULS-8,4-9021 as spacer between basic
plate and main frame. Use the bolts M8x20-14583 for installation and tighten with the marked
specification!
Tightening torque: 20 Nm
TX40
20 Nm
M8x20-14583
R
2x ULS-8,4-9021
µ2- MV01 rearset
Anbauanleitung/ Manual
~90°
~90°
S: Die Schaltwelle steht nun ungefähr in einem Winkel von 90 Grad zum Schaltarm und Schalthebel.
S: The shift rod has the optimal angle of 90 degrees to the gear arm and gear lever.
S
T: Schließen Sie den Schaltautomaten an (Stecker aus Schritt I)! Verlegen Sie die überschüssige Kabel-
länge gemäß Darstellung in einer Schlaufe/ Bogen am Rahmen entlang und nutzen Sie die originalen
Gummibänder zur Fixierung.
T: Connect the quick shifter (plug from step I)! Lay the surplus cable length in a loop parallel to the main
frame like the picture shows and use the original rubber bands for final fixation.
ORIGINAL! ORIGINAL!
ORIGINAL!
µ2- MV01 rearset
Anbauanleitung/ Manual
~90°
O: Fixieren Sie das Kabel im Bereich des Schaltautomaten mit dem kurzen Gummiband. Achten Sie auf
ausreichende Kabellänge! (Beim Schaltvorgang darf das Kabel nicht auf Spannung gezogen werden)
O: Fix the cable near the quickshifter by using the original, short rubber band. Take care for enough
cable length! (Otherwise the cable gets bad tension when the gear arm turns up and down)
O
Demontieren Sie die Schaltwelle von dem Schaltarm. Den Schaltarm um ungefähr 180 Grad gedreht und
gemäß Abbildung auf die Ausgangswelle setzen. Nutzen Sie die originale Schraube und ziehen Sie den
Schaltarm fest.
Montieren Sie die Schaltwelle unter Nutzung der Distanzscheibe DS 12-6-6 und Schraube M6x25-7380.
Detach the shift rod from the gear arm. Install the gear arm in a turned position of nearly 180 degrees
(according to the picture) on the transmission output shaft. Use the original bolt and tighten the gear arm.
Install the shift rod by using the spacer DS 12-6-6 an d bolt M6x25-7380.
-Die folgenden Schritte schildern den Umbau von Normal- auf Umkehrschaltung, sprich Gang 1
einlegen durch Anheben und Gänge 2 bis 6 durch Drauftreten! Bervorzugtes Schaltschema auf
Rennstrecken.
-The next steps describe the installation from normal- to reverse shifting. Actuating of gear 1 by
lifting and gear 2 until 6 by steping the lever! Preferred shifting style on race tracks.
Umkehrschaltung/ reverse shifting
4
OE- Nm
M6x25-7380
DS 12-6-6
ORIGINAL
OE- Nm
OPTION: Beim Entfernen des Seitenständers
für rennsportliche Zwecke kann der Abstand
zwischen Rahmen und Halter (HA-US-46)
durch die beiden Distanzbuchsen
DS 20-10,5-10 überbrückt werden.
OPTION: If you prefer to detach the sidestand
for racing use, you can use the included
spacer DS 20-10,5-10 to pass the space
between frame and holder (HA-US-46).
HA-US-46 M10x1,25x30-912
DS 20-10,5-10
ORIGINAL!
µ2- MV01 rearset
Anbauanleitung/ Manual
originales Gummiband
wie in Schritt O!
original rubber band
according to step O!
µ2- MV01 rearset
Einstellen/ Adjustment
Trittstückverstellung an Schalt- u. Bremshebel
3a: Zur Verstellung des Trittstückes ist die
Schraube M6x20-7380-TX zu lösen.
Trittstück drehbar einstellen und Schraube festziehen.
Anzugsdrehmoment: 10 Nm
3b: Die zweite Bohrung kann ebenfalls zur
Positionierung des Exzenters genutzt werden.
Toe piece adjustment on gear- and brake lever
3a: Loosen the bolt M6x20-7380-TX to adjust the
toe piece.
Turn the toe piece to desired position and
re-tighten bolt.
Tightening torque: 10 Nm
3b: The second hole can also be used and
offers more options to adjust.
M6x20-7380-TX
10 Nm
3b
3a
2
2: Verstellung vornehmen
-Stellen Sie die rechte und linke Fussrastenanlage
immer identisch ein. Die Lasergravuren helfen Ihnen
dabei.
-Anziehen der zentralen Klemmschraube M8x40!
Anzugsdrehmoment: 20 Nm
2: Make your individual adjustments
-Adjust the right and left side identicaly.
Laser engravings will help you
-Tighten the central clamping bolt M8x40!
Tightening torque: 20 Nm
1: Rastenposition verändern/ anpassen
-Lösen Sie die zentrale Klemmschraube M8x40-7991
so lange, bis der Zahnkranz des Verstellsteines VST-
04 den Rastenausleger UV-06 freigibt.
ACHTUNG: Schraube nicht komplett rausdrehen!
-Der Rastenausleger samt Raste kann nun der Länge
nach verschoben oder mittels Verzahnung in der
Höhe verstellt werden.
1: Change the footpeg`s position
-Loosen the central clamping bolt M8x40-7991 until
the teethed adjuster VST-04 releases the footpeg-
slider UV-06.
SPECIAL NOTE: Don`t remove the bolt!
1
UV-06
VST-04
5
20 Nm
M8x40-7991
Lösen! / unlock!
MAX
µ2- MV01 rearset
Einstellen/ Adjustment
A
B
BEISPIEL / EXAMPLE :
0/0
Position der Serienfußrastenanlage
position of the standard rearset system
mm
A B
µ2- MV01 rearset
Pos. Description Part-No. Qty. OK
1 special bolt
M10x1,25x30-912 1
2 bolt M6x25-933-VA 1
3 M6x16-7380-VA
Precote 10-1
4 bolt M6x25-7380-VA 2
5 bolt M8x30-7991-VA 2
6 bolt M8x20-14583-VA 4
7 washer
ULS-8,4-VA 1
8 washer
ULS-6,4-9021-VA 1
9 washer
ULS-8,4-9021-VA 2
10 spacer DS-12-6-6 1
11 spacer DS-14-6-4 1
12 spacer DS-20-10,5-10 2
13 cover BL01-* 2
14 shift rod USW09-* 1
15 holder HA-US-46-* 1
16 exhaust holder
UAH-16-* complete 1
17 certificate ABE 91506 1
18 manual µ2-MV01 rearset 1
MA :
Date:
Revision 00, Stand 11.2015
1
bolt
µ2-MV01 rearset
Packzettel/ packing list

Other gilles.tooling Motorcycle Accessories manuals

gilles.tooling Rct10gt- BM08 User manual

gilles.tooling

gilles.tooling Rct10gt- BM08 User manual

gilles.tooling RCT10GT-K02 User manual

gilles.tooling

gilles.tooling RCT10GT-K02 User manual

gilles.tooling Rct10gt-S02 User manual

gilles.tooling

gilles.tooling Rct10gt-S02 User manual

gilles.tooling fxr.rearsets-H05 User manual

gilles.tooling

gilles.tooling fxr.rearsets-H05 User manual

gilles.tooling MPCL-02 User manual

gilles.tooling

gilles.tooling MPCL-02 User manual

gilles.tooling FXR-Y03 User manual

gilles.tooling

gilles.tooling FXR-Y03 User manual

gilles.tooling AS31GT User manual

gilles.tooling

gilles.tooling AS31GT User manual

gilles.tooling FXR-Y07-B User manual

gilles.tooling

gilles.tooling FXR-Y07-B User manual

gilles.tooling AS 31 GT User manual

gilles.tooling

gilles.tooling AS 31 GT User manual

gilles.tooling 1D.GT Series User manual

gilles.tooling

gilles.tooling 1D.GT Series User manual

gilles.tooling K08 User manual

gilles.tooling

gilles.tooling K08 User manual

gilles.tooling AS 31 GT User manual

gilles.tooling

gilles.tooling AS 31 GT User manual

gilles.tooling factor-x-rearset.gt User manual

gilles.tooling

gilles.tooling factor-x-rearset.gt User manual

gilles.tooling AS 31 GT Series User manual

gilles.tooling

gilles.tooling AS 31 GT Series User manual

gilles.tooling AS 31 GT Series User manual

gilles.tooling

gilles.tooling AS 31 GT Series User manual

gilles.tooling rct10gt- Y02 User manual

gilles.tooling

gilles.tooling rct10gt- Y02 User manual

gilles.tooling MUE2-D01 User manual

gilles.tooling

gilles.tooling MUE2-D01 User manual

gilles.tooling VCR38GT User manual

gilles.tooling

gilles.tooling VCR38GT User manual

Popular Motorcycle Accessories manuals by other brands

PUIG 9873 Mounting instructions

PUIG

PUIG 9873 Mounting instructions

hepco & becker Easyrack 6617510 01 01 installation instructions

hepco & becker

hepco & becker Easyrack 6617510 01 01 installation instructions

CUSTOMACCES CUP0027 Mounting instructions

CUSTOMACCES

CUSTOMACCES CUP0027 Mounting instructions

Petzl ALVEO VENT manual

Petzl

Petzl ALVEO VENT manual

rizoma ZBW055 user manual

rizoma

rizoma ZBW055 user manual

PUIG 3757 Mounting instructions

PUIG

PUIG 3757 Mounting instructions

SHOEI GT-Air manual

SHOEI

SHOEI GT-Air manual

Memphis Shades 2321-0036 Mounting instructions

Memphis Shades

Memphis Shades 2321-0036 Mounting instructions

KTM 64108915044 Information

KTM

KTM 64108915044 Information

Memphis Shades 2321-0065 Mounting instructions

Memphis Shades

Memphis Shades 2321-0065 Mounting instructions

Memphis Shades 3508-0017 quick start guide

Memphis Shades

Memphis Shades 3508-0017 quick start guide

DAINESE D-AIR STREET SMART F INFORMATIVE NOTE

DAINESE

DAINESE D-AIR STREET SMART F INFORMATIVE NOTE

Wunderlich Krauser 501.6760004 quick guide

Wunderlich

Wunderlich Krauser 501.6760004 quick guide

hepco & becker 400556 00 01 quick start guide

hepco & becker

hepco & becker 400556 00 01 quick start guide

Malossi MACSI Assembly instructions

Malossi

Malossi MACSI Assembly instructions

ACEBIKES CapStrap manual

ACEBIKES

ACEBIKES CapStrap manual

Suzuki 990D0-31J01-065 installation instructions

Suzuki

Suzuki 990D0-31J01-065 installation instructions

Memphis Shades 2321-0226 quick start guide

Memphis Shades

Memphis Shades 2321-0226 quick start guide

manuals.online logo
manuals.online logoBrands
  • About & Mission
  • Contact us
  • Privacy Policy
  • Terms and Conditions

Copyright 2025 Manuals.Online. All Rights Reserved.