7
INSTALLATION & GROUNDING
6
10 HOW TO OPERATE
Ginnys.com • 1.800.544.1590
6 7
HOW TO OPERATE
Ca-
HOW TO OPERATE...cont.
THE MIXING BOWL
ATTACHMENT OPTIONS-
Fig. 2 Insert mixing
tool
Fig. 1 Raise mixer
head
Fig. 3 Attach splash
guard
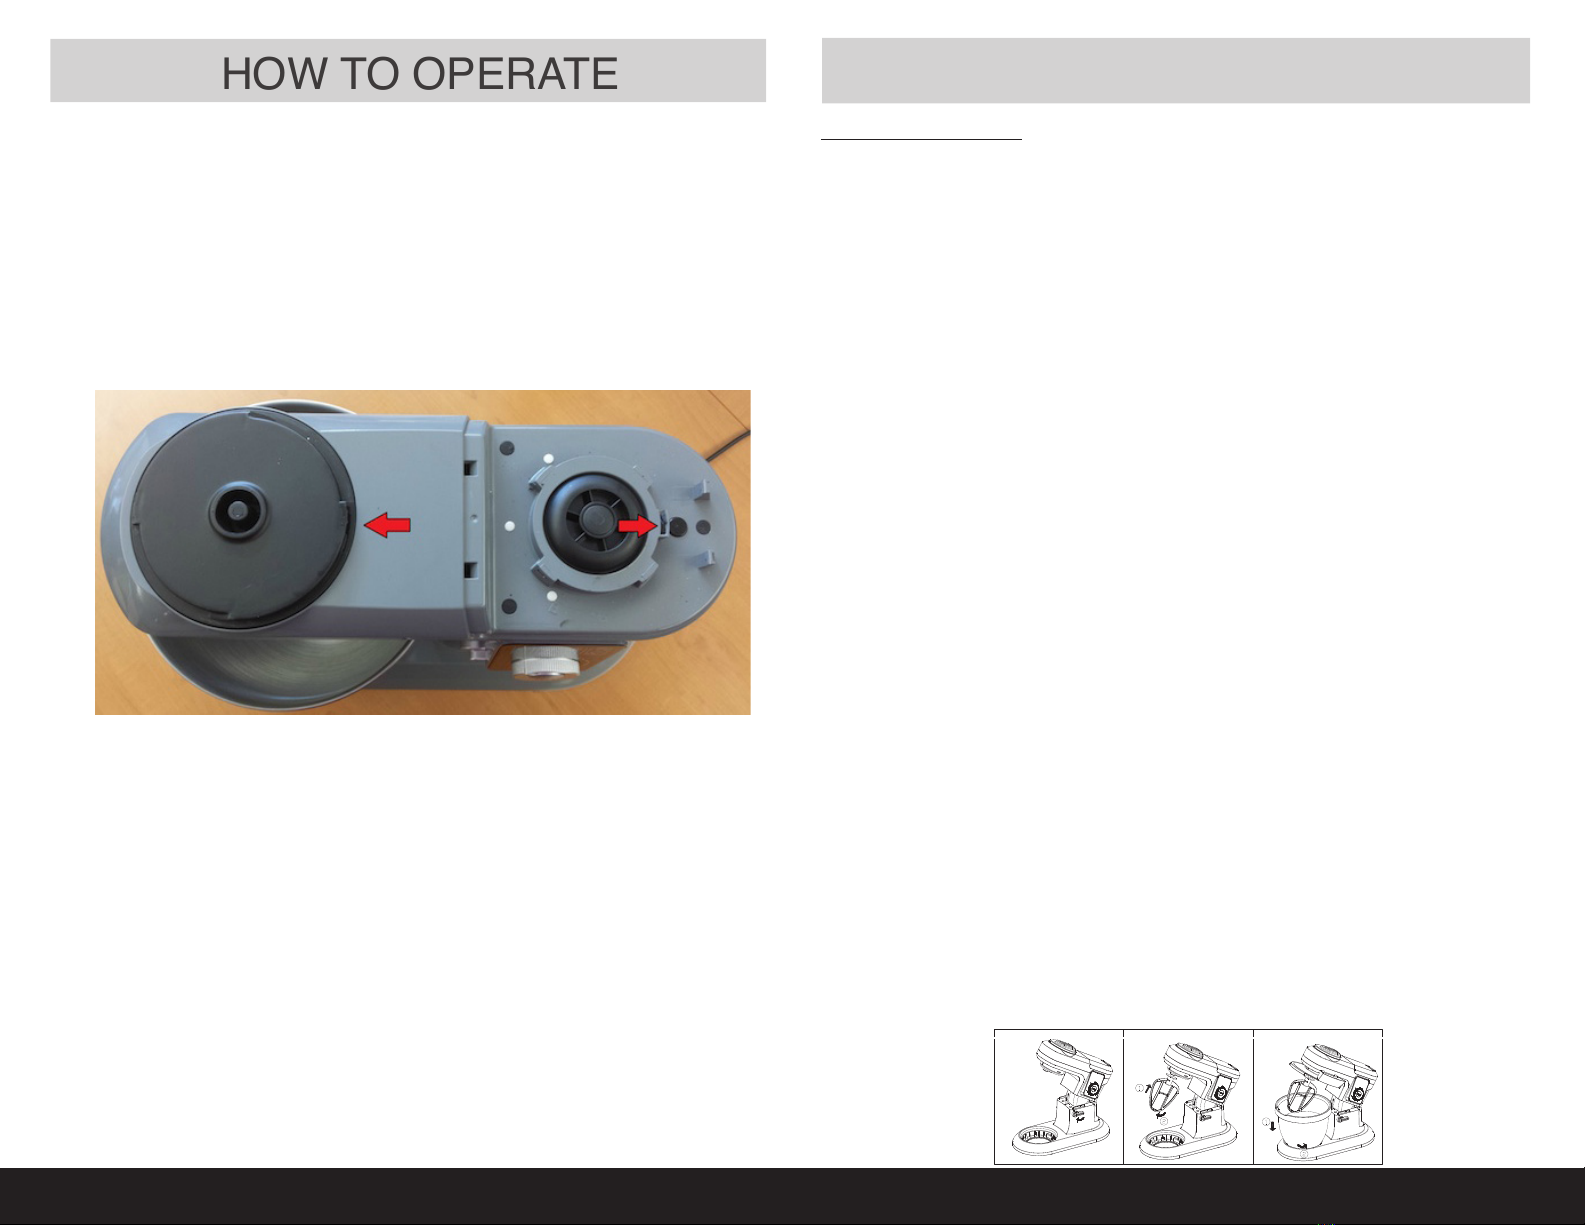
BEFORE FIRST USE:
NOTE: This machine has multiple safety switches that need to be
properly engaged for the machine to get power. Inspect your safety
switches often for debris or damage and take care when cleaning
these areas. We recommend the plates are in place until that
function will be used.
There are two safety switches located at the top of the machine.
See Fig.1
Fig.1
We recommend that the top plates are in place when the machine or
function is not in use. This will not only protect your safety switches
from damage, but will provide the most power to the function your
are using, therefore giving you the best possible results.
The following parts have safety tabs to activate the safety switch,
these parts should be inspected for damage or debris.
Part No. 3: Blender jar with base/blade assembly – tab is located on
the bottom
Part No. 5: Bowl Cover – tab is on the rim of the bowl and must align
properly with top of bowl handle to securely activate safety switch.
Part No. 6: Processing Bowl – tab is located on bottom of bowl
where the bowl meets the handle
Part No. 10: Juice Sieve – tab located on rim and must be locked
into bowl near top of handle.
Part No. 15: Blender Plate – located on the underside
Part No. 18: Processing Plate – located on the underside near rim
SPLASH GUARD:
Use to reduce workspace clean up time. To install, place food chute on
the same side as the control panel. Line up the arrow on the guard with
the tab on the mixing head. Press rmly to secure. (Fig.3).
BEATER: Speed setting recommendation 1-2. For making heavier
mixes: cakes, cookies, biscuits, pastry, icing, llings, eclairs and mashed
potatoes.
WHISK: Use any speed setting. Use this attachment for light, airy mixes
like batters, eggs, meringues, cheesecakes, etc.
DOUGH HOOK: Use any speed setting. Use this attachment for bread
doughs, biscuits or any heavy, thick mixes.
1. The top safety plates (Part No.15 Blender Plate AND Part No. 18
Processor Plate) MUST also be properly installed to activate the
safety mechanism to power the machine. (Refer to the Before First
Use for more info)
2. Press down on the release knob to raise the mixer head and push
up on the head until you hear it lock into place. (Fig.1)
3. Insert a mixing tool into the slot until it stops and turn it clockwise to
lock it into place.
4. Place the bowl properly in the base by lining up the tabs (Fig.2),
pressing down and turning counterclockwise until it stops.
5. Press down on the release knob to unlock the mixer head and push
head down until it the knob clicks back into place.
6. Turn machine on by selecting a speed setting between 1 and 10.
7. When job is done, turn machine off, unplug and remove
attachments.
8. Wipe machine with a damp cloth and wash attachments by hand or
in the dishwasher.
9. Store machine with both safety plates (Part No. 15 Blender Plate
AND Part No. 18 Processor Plate) in place.
HOW TO OPERATE THE MIXER: