2Contents of the box:
1. Scooter.
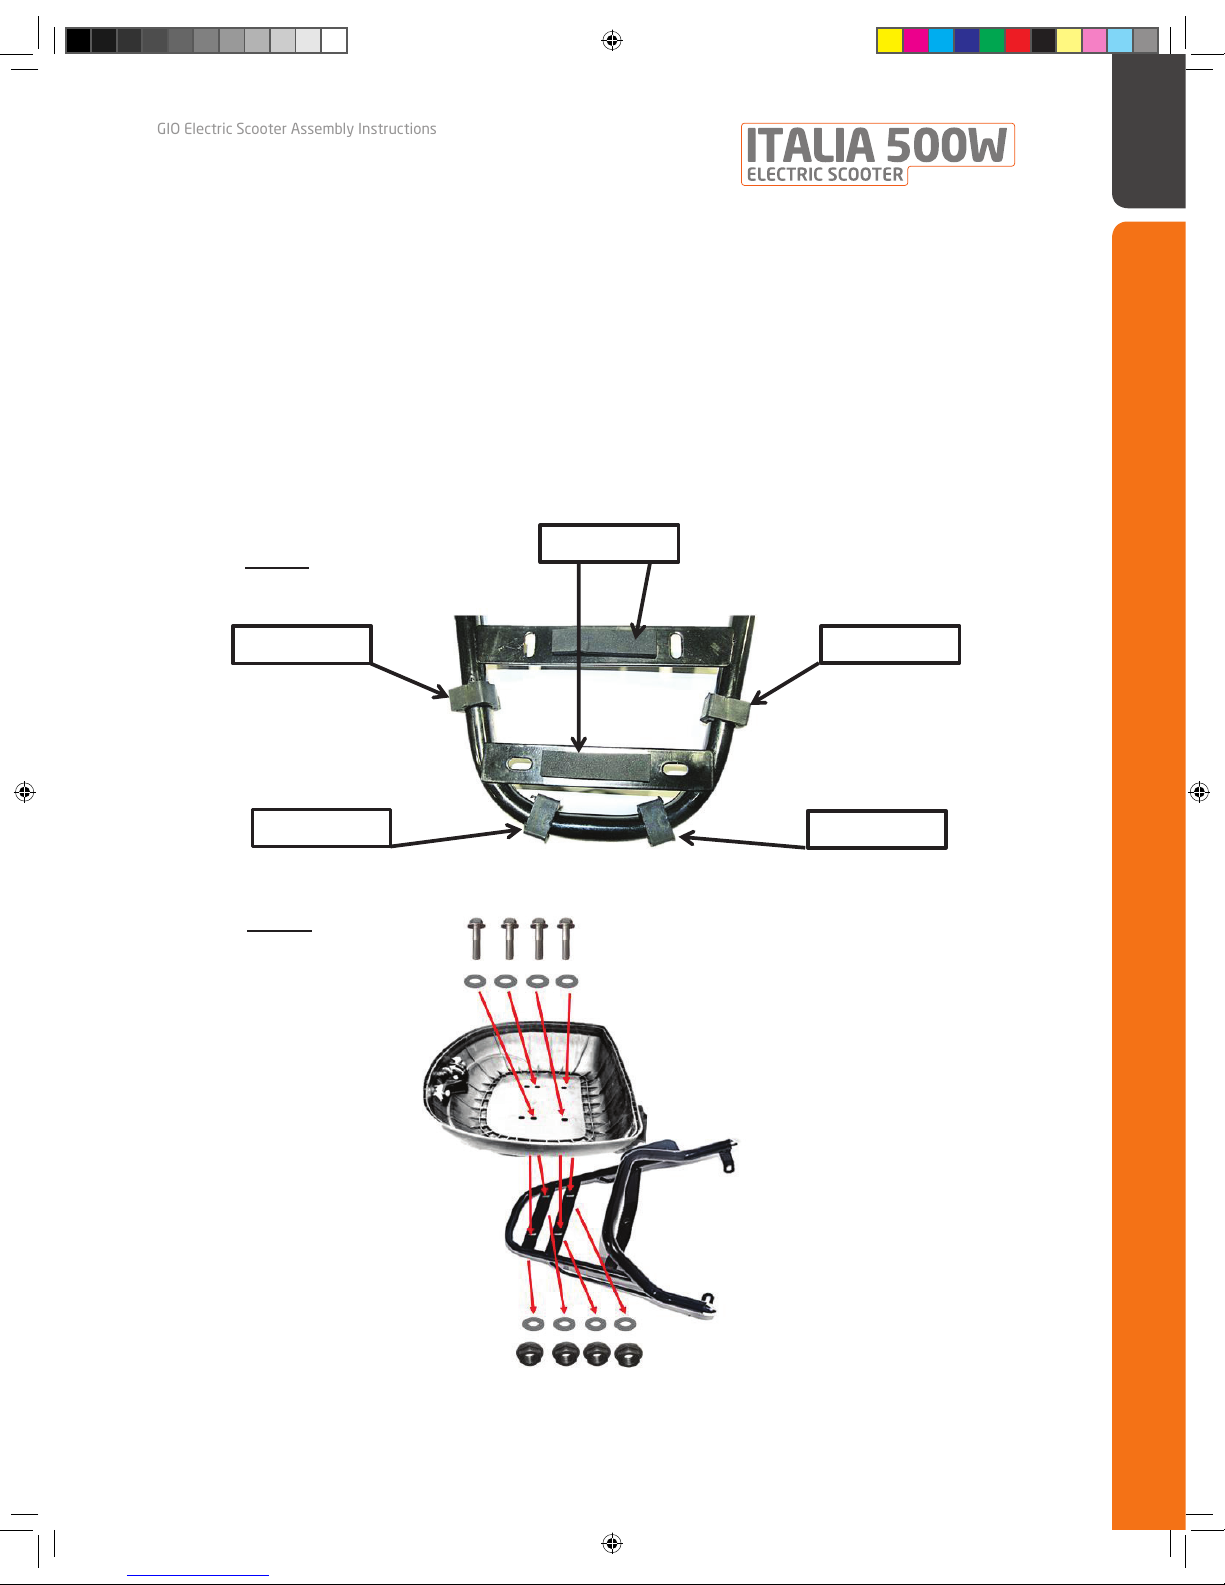
2. Rear storage trunk
3. Charger.
4. Rain Cover.
5. U shape lock
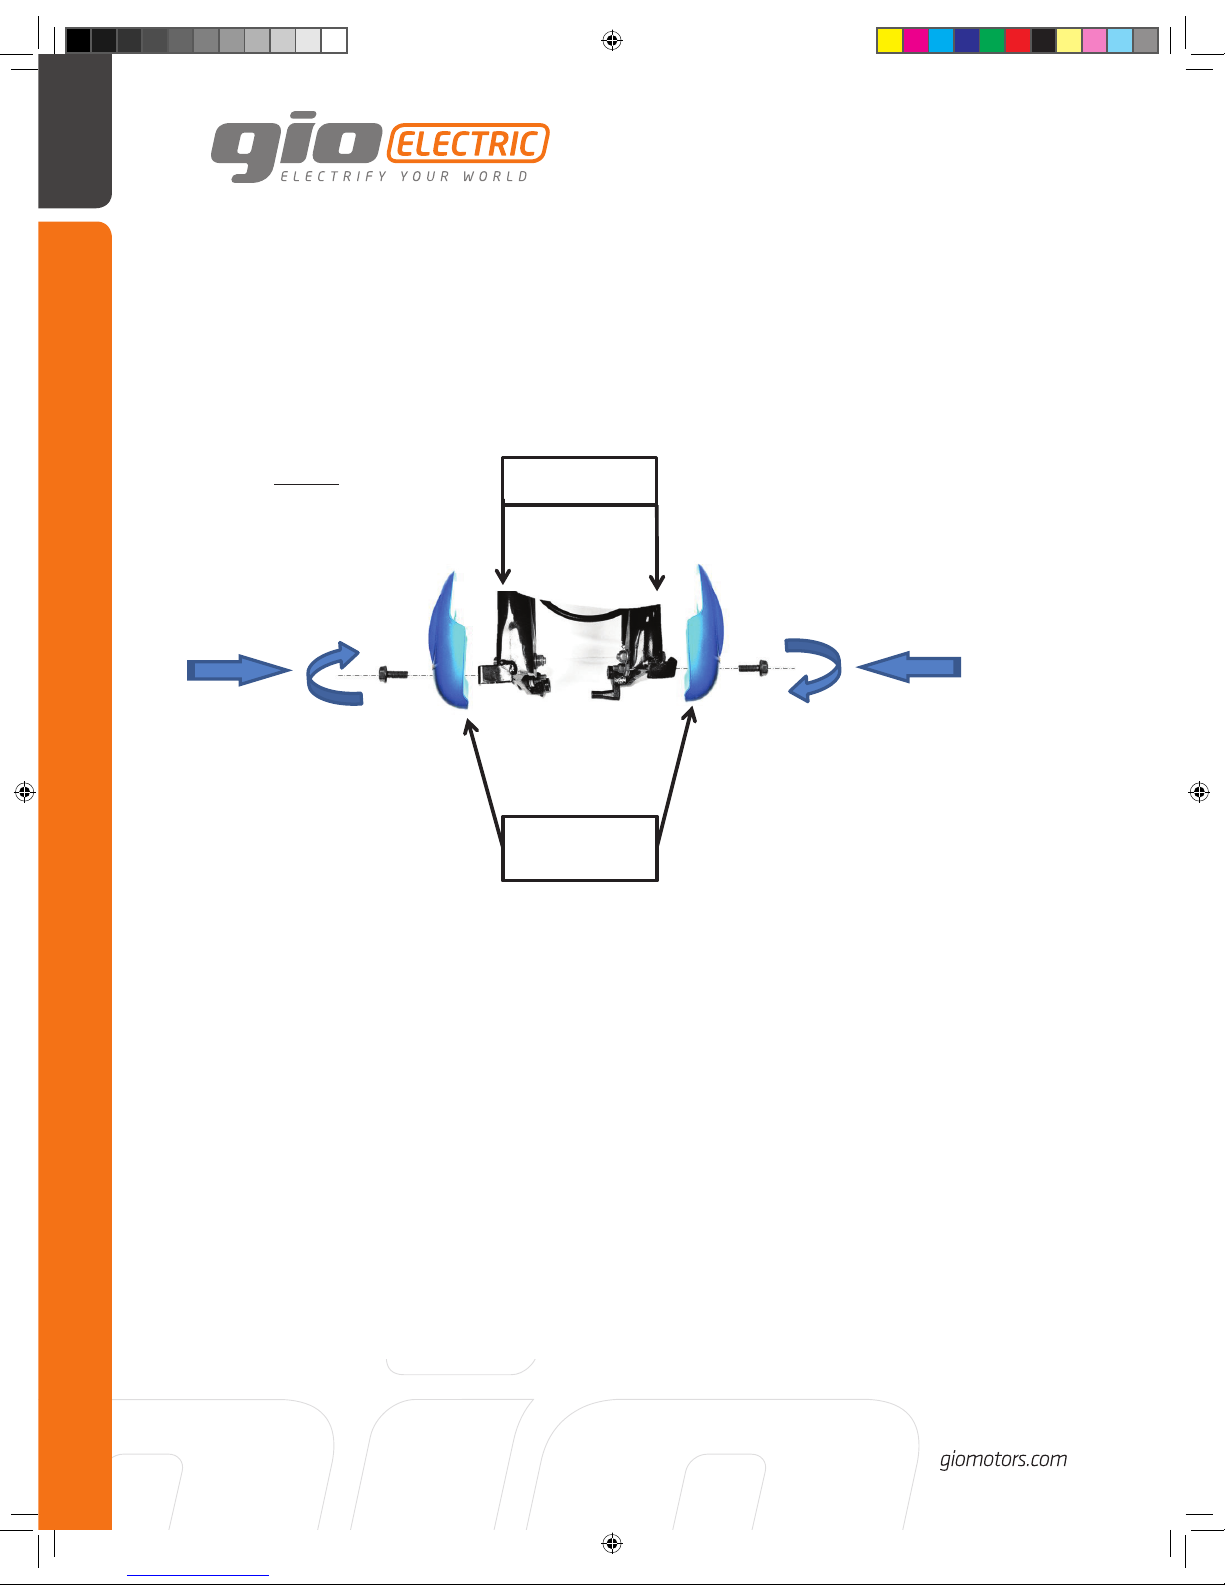
6. Mirrors.
7. Pedal cranks.
8. Foot pegs (pedals).
9. Hardware bag (inside the rear storage trunk).
10. Front axle (attached to the front forks).
11. User’s Manual
3Tools requirement:
Utility knife
Wrench: 15mm or 19/32” + 14mm or 17/32” + 12mm or 15/32” + 10mm or 3/8” (you
might use adjustable wrench as well).
Philips and flat screwdrivers
Hammer
Step 1: Uncrate the scooter and place it on a main kick stand.
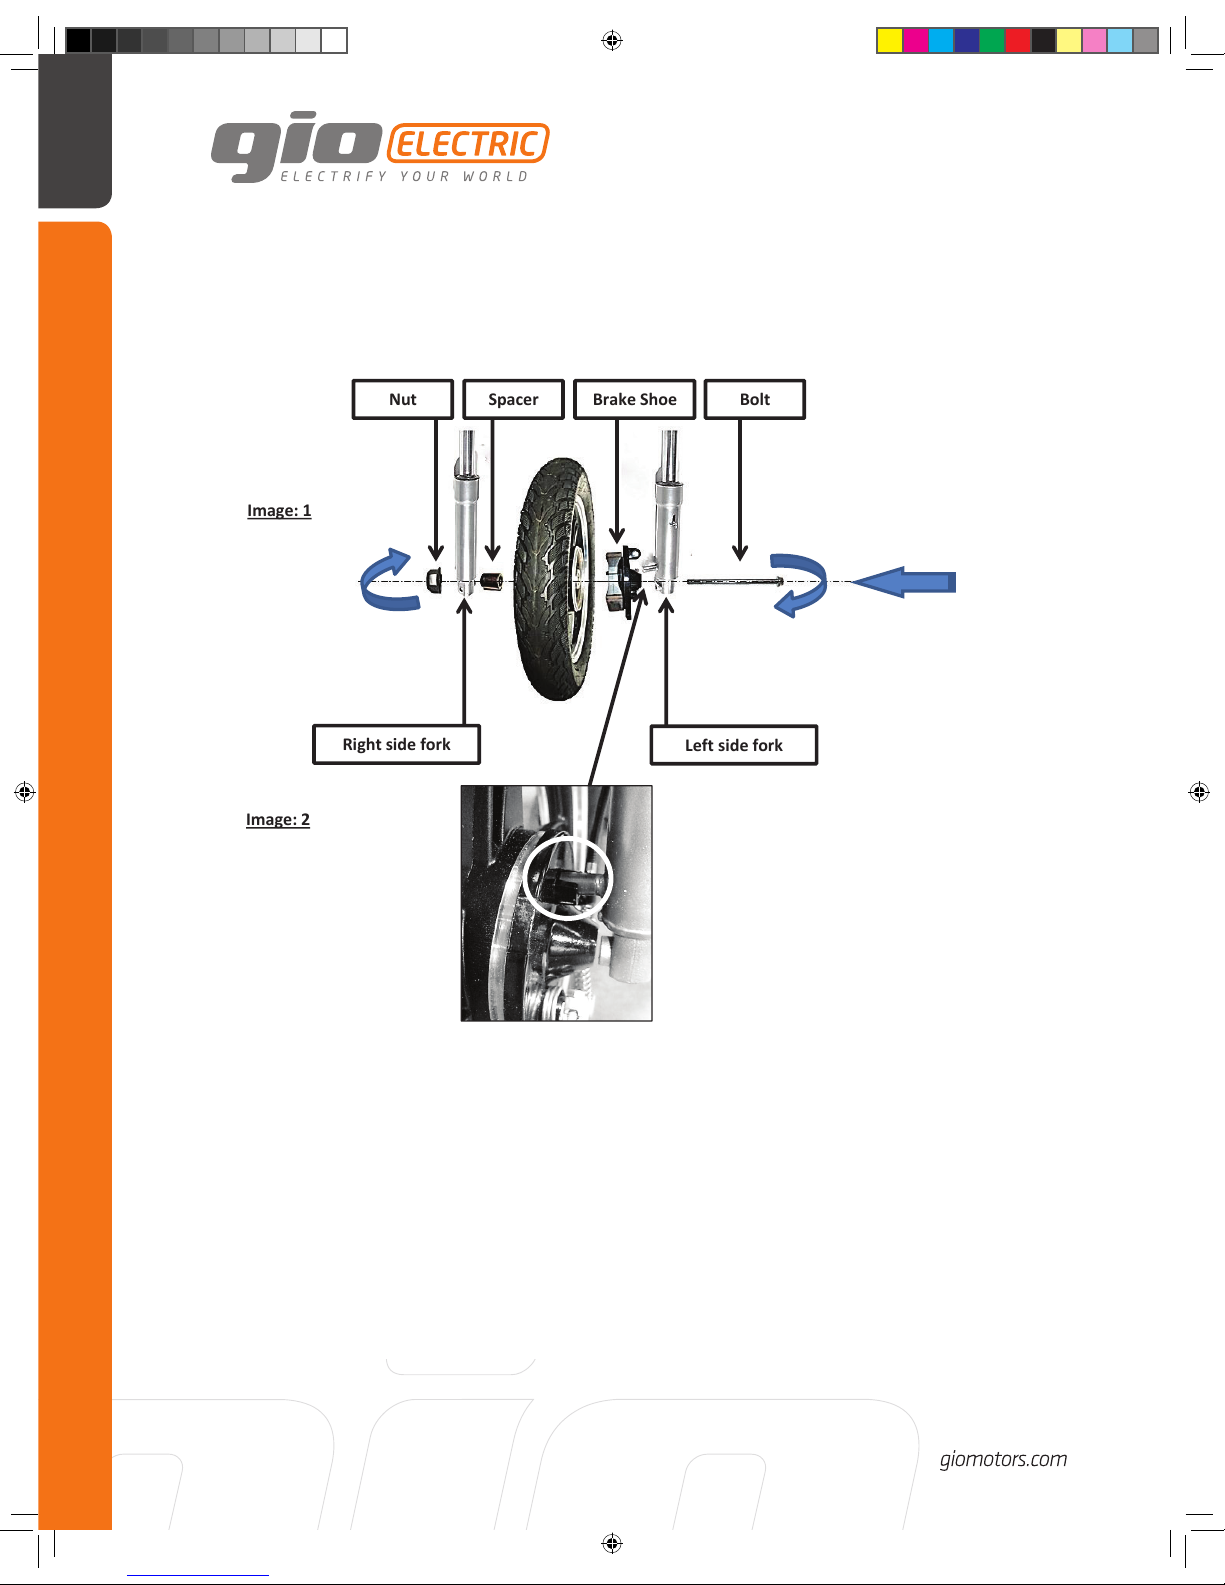
Step 2: Front wheel installation (Image 1):
1. Remove the wooden stand and dispose plastic nut attached to the axle. Use metal
nut included in the hardware bag.
2. Slide the brake shoe (brake drum) assembly into the wheel. Then slide this
assembly between the forks making sure that you position the brake assembly
correctly so that it fits directly into the lug on the left fork tube (Image 2). This
ensures that the brake hub will not spin when the brakes are applied. Then slide the
axle bolt through the left fork and into the brake hub and right through the wheel.
Now it must go through the spacer (attached to the right side handlebar or inside
the hardware bag) that goes on the opposite (right) side between the wheel and
the right fork. Once this is correct, you may carefully tap the bolt (front axle) the
rest of the way through the fork and attach the nut.
3
06 Italia 500w Electric Scooter Assembly Manual.indd 3 2/7/2014 11:24:56 PM