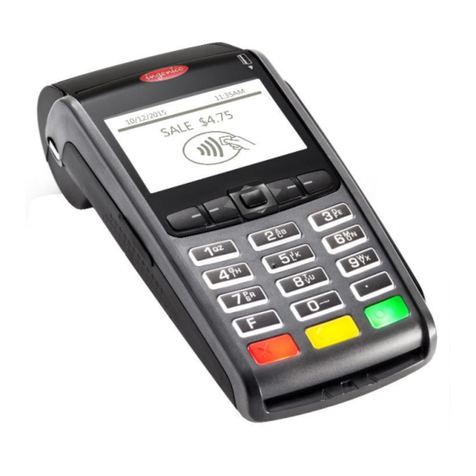
Global Payments VX 820 Duet User manual

Payments
Global Payments Countertop
Duet –VX 820
Quick Reference Guide
July 2019

Table of Contents
1 –Introduction...............................................................................5
2 –General Tips.............................................................................5
3 –Basic Terminal Operations.......................................................6
Before You Begin
How to Use This Guide
Accessing the Payment Application
Function Keys
Changing the Supervisor or Manager Password
Locking the Terminal Keyboard
Unlocking the Terminal Keyboard
Reprinting a Receipt
Find Feature
4 –Changing the Terminal Language............................................9
5 –Optional Prompt Features ........................................................9
Invoice Prompt
Employee Prompt
Tipping Prompt
Debit Cashback Prompt
Debit Surcharge Prompt
CVV Prompts
AVS Prompts
6 –Accepting Payment Cards......................................................13
To Conduct a Chip Transaction

To Conduct a Magnetic Stripe Transaction
To Conduct a Contactless Transaction
7 –Sale Transactions...................................................................15
Chip Error Processing
8 –Void (Credit Or Debit).............................................................16
UnionPay Refund Void
9 –Refund (Credit or Debit) .........................................................18
10 –Phone Order Sale (Credit Only) ...........................................18
11 –Pre-Authorization And Completion (Credit Only)..................19
12 –Performing a Settlement (Closing The Terminal).................22
13 –Offline Sale (Credit Only)......................................................23
14 –Demo Mode..........................................................................23
15 –Employee Setup ...................................................................24
Default Employee ID Table
16 –Receipt Samples...................................................................26
17 –Reports.................................................................................28
18 –Handshake............................................................................29
19 –Terminal Set-Up....................................................................29
Environment
Electrical Considerations
Unpacking the Shipping Carton
Global Payments Countertop Duet –VX820 Features
General Features
Connecting the Power Cord
Connecting the Telephone Line
Connecting the Ethernet Cable
Connecting an External Cash Register (Optional)
Installing the Paper Roll

20 –Troubleshooting....................................................................37
Blank Display
Terminal Does Not Connect to Global Payments
Printer Does Not Print
Printer Paper Jam
Other Common Messages
21 –Response Codes..................................................................38
22 –Abbreviations........................................................................40
23 –Other Features......................................................................41
24 –Terminal Specifications ........................................................41
25 –Service and Support.............................................................42
Returning a Terminal for Service

1 –Introduction
Global Payments offers merchants a wide variety of leading payment
technology solutions, all from one reliable source. As one of the world’s
largest and most trusted payment technology solution providers, Global
Payments combines industry-leading expertise with over 50 years of
Canadian-specific experience. This power combination allows us to
deliver comprehensive solutions that are personalized to your needs.
This guide is your primary source of information for operating, setting up
and installing the Global Payments Countertop Duet –VX820 point-of-
sale (POS) terminal. For terminal-related questions or support, please
contact Global Payments Customer Care.
2 –General Tips
The following tips provided will ensure you always continue to process
smoothly with Global Payments Canada:
1. This reference guide contains information on the features and
functions capable on your terminal, as well as basic troubleshooting
techniques. Keep this guide in an easy-to-find location.
2. Perform a settlement daily; this ensures that your funds are
deposited into your bank account on a regular basis.
3. Change your supervisor password frequently. Your supervisor
password is used to perform settlements and refunds; changing this
password frequently ensures you protect yourself from
unauthorized use of your terminal.
4. If you have a problem with your terminal, attempt a reboot by
powering off and powering on terminal.
5. If you have a communication problem with your terminal, verify that
there are currently no outages reported by your wireless service
provider.
6. The Global Payments Canada Customer Service line is open 24
hours a day, 7 days a week, to ensure there is always someone
available to assist you.
3 –Basic Terminal Operations
Before You Begin
For unpacking and set-up instructions, refer to Section 19.
CAUTION:
Due to risk of shock or terminal damage, do not use
the terminal near water, in a wet basement, bathtub,
washbowl, kitchen sink, laundry tub or near a
swimming pool. Do not use in flammable
environments.
How to Use This Guide
The Global Payments Countertop Duet –VX820 terminal contains both
ATM-style buttons for screen function keys for variable screen menu
selection options and pre-configured numeric key pad and function
buttons. Variable on-screen menus will appear in bold throughout this
guide. Use the 5-way navigation key to select that option. Pre-
configured buttons will appear in caps.
Accessing the Payment Application
Following power up, you may be requested to select SOFTPAY-
GLOBAL, use the 5-way navigation key to select and access the
payment application.
Function Keys
There are a total of 8 function keys built into the payment application: 4
on the right side of the screen and 4 on the bottom of the screen.
The four function keys to the right (F1 to F4) are used to select the
menu options.
The four function keys on the bottom are used for the following:
The Menu key: to scroll down
The Completion hot key: to quickly add a tip for pre-auth
transactions

The Reprint key: to find a transaction and reprint the receipt
The Reports key: to access the reports
Changing the Supervisor or Manager Password
Your supervisor number is an important security feature of your
terminal. It is used to access functions such as returns, voids and
settlements. You should change your password periodically for
maximum protection from fraud. The password is a 5 to 9-digit number.
Press the CANCEL to return to the main menu (see illustration).
1. From the main menu, press MENU until Other Setup is displayed
2. Select Other Setup by pressing the appropriate function key
3. Key in the current supervisor password and press ENTER
4. Press MENU until Terminal is displayed
5. Select Terminal
6. Press Next until you see Super Pwd (to change the supervisor
password) or,
7. Press Next until you see Manager Pwd (to change the Manager
password)
8. Select Edit
9. Enter the new password and press ENTER (5 to 9 digits)
10. Select Exit
11. Select OK to save changes
12. Press CANC/ANNUL (red cancel key) to return to the main menu
Locking the Terminal Keyboard
If leaving your terminal unattended, it is recommended to lock the
keyboard in order to prevent unauthorized use. For maximum security,
terminals and PIN Pads should be stored in a secure location when not
in use.
To lock the keyboard from the main menu:
1. Press 5
2. Key in the current supervisor password and press ENTER
3. Select Yes

Unlocking the Terminal Keyboard
Select any function to unlock the terminal. Entering the correct
password will unlock the terminal.
CAUTION:
You will be prompted to enter the supervisor password
for every function until the keyboard is unlocked.
To unlock the keyboard from the Main Menu:
1. Press 5
2. Key in the current supervisor password and press ENTER
3. Select No
Reprinting a Receipt
The REPRINT function can be used to reprint a duplicate copy of the
merchant and customer receipt.
The reprint function can be accessed by pressing the printer icon.
Select one of the following:
Last Receipt, or
Any Receipt, and enter the invoice number
Find Feature
The FIND Feature can be used to locate a transaction to void or reprint
a receipt.
From the main menu, press 2.
Search for the transaction based on employee #, transaction
amount, account # or invoice #:
Select one of the following:
Empl and enter the employee number
Amt and enter the transaction amount
Acct and enter the last 4 digits of the account number
Inv# and enter the invoice number
Once the transaction is located, you can select to void the transaction or
press the printer icon to reprint the merchant copy receipt.

4 –Changing the Terminal Language
There are two options for terminal language: English and French. To
select a language from the main menu:
1. Press 8
2. Select language (English, Français)
NOTE:
The cardholder language will be displayed as per the
language indicator on the card where available.
5 –Optional Prompt Features
The Global Payments Countertop Duet –VX820 terminal is capable of
utilizing specialized optional prompt features.
Invoice Prompt
The invoice number printed on the receipt is normally automatically
generated for each transaction processed; however, if a manual invoice
number is preferred, the Global Payments Countertop Duet –VX820
can be configured to allow a numeric number to be entered for each
transaction processed.
When enabled, a numeric invoice number, 1 to 9-digits long, can be
manually entered when the terminal prompts for invoice on the terminal
display.
NOTE:
When manual invoice prompting is enabled, the terminal will
perform a check for duplicates to prevent the same invoice
number from being used in the same batch.
Employee Prompt
When enabled, employee numbers allow the terminal to track the
employees that processed the transaction. The employee number will
also print on the receipt. Each employee ID can also have a named
programmed to also print on the receipt. When enabled, a numeric

employee number, 1 to 5-digits long, can be manually entered when the
terminal prompts for employee ID on the terminal display.
For more information on employee configuration, refer to Section 15.
Tipping Prompt
When enabled, tipping can be completed in one transaction using the
sale transaction. The sale transaction will prompt the cardholder for a tip
amount and send the full amount for authorization. This eliminates the
need to perform a pre-auth and completion to capture the tip amount.
Tipping can be completed by the cardholder by selecting either a
percentage or dollar amount option for the tip type.
When suggested tipping options are also enabled, the cardholder will be
presented with three default percentage amounts to choose from: 10%,
15% and 20%. These values can be customized by calling the Global
Payments help desk.

Percentage Tip Screen Dollar Tip Screen
Should cardholders not want to use any of the three optional tip options,
they can choose to select Other $ or Other % depending on the tip type
they selected in the previous screen.
Selecting Other will allow the cardholder to input their own value for
tipping.
Debit Cashback Prompt
Debit cashback is an added feature for debit transactions, which allows
a merchant to offer the convenience of cash redemption to cardholders,
added to their debit purchase.
All cashback prompts are for the merchant to select on the terminal.
Once selected, the cashback amount is added to the transaction total
before authorization on the Global Payments host.
Debit Surcharge Prompt
Debit surcharge is an added feature that allows a merchant to charge
an amount for a debit transaction in order to recover the processing
cost.
During the debit transaction, cardholders will be advised of the
applicable surcharge fee that will be applied to the transaction total, and
they have the option to agree to the fee to continue the transaction or to
reject the fee and cancel the transaction.

NOTE:
You MUST be approved by Global Payments before
using debit surcharge. The official debit surcharge
banners and prompts must be displayed advising
cardholders that a surcharge will be applied to their debit
transactions.
To apply for the debit surcharge program, contact your Global
Payments sales representative.
CVV Prompts
CVV prompts are an added security feature to assist in validating a card
against fraud. The V-Code is a 3 to 4-digit number printed on the back
of the card usually to the right of the signature. The CVV is especially
useful for merchants that perform manually keyed transactions where
the cardholder and card is not present to allow for a chip or magnetic
stripe read, usually a mail order or phone (MOPO) order transaction.
When CVV Prompting is enabled during a manually-keyed transaction,
a message prompt asking “Card Present?” will be displayed on the
terminal. If the physical card is not present for the transaction, then
answer NO. The Terminal will prompt for the CVV (V-Code) of the card;
selecting YES, will bypass the CVV prompt.
Refer to Section 21 for CVV response codes.
AVS Prompts
Address Verification Services (AVS) are an added security feature to
assist in validating a card against fraud. AVS is especially useful for
merchants that perform manually-keyed transactions where the
cardholder and card are not present to allow for a chip or magnetic
stripe read, usually during a MOPO transaction.
When AVS-prompting is enabled during a manually keyed transaction, a
message prompt will appear allowing a merchant to enter the address,
postal code or both, of a cardholder to perform an address lookup with
the card issuer. AVS will provide a response on the address lookup.
Refer to Section 21 for AVS response codes.

6 –Accepting Payment Cards
To Conduct a Chip Transaction
1. Select a transaction type and follow the prompts accordingly
2. Position the chip card with the contacts facing upward, as shown
below
3. Insert the chip card into the chip card reader slot in a smooth,
continuous motion until it seats firmly
4. Remove the card only when the application indicates the
transaction is complete
NOTE:
You MUST be approved by Global Payments before using
debit surcharge. The official debit surcharge banners and
prompts must be displayed advising cardholders that a
surcharge will be applied to their debit transactions.
To apply for the debit surcharge program, contact your Global
Payments sales representative.
To Conduct a Magnetic Stripe Transaction
1. Select a transaction type and follow the prompts accordingly
2. Position the magnetic card with the stripe in the card reader and
facing inward, toward the keypad
3. To ensure a proper read of the magnetic swipe card, the user
should insert the magnetic card from the top of the unit, as shown
below
4. Swipe the card through the magnetic card reader

NOTE:
When conducting a magnetic stripe transaction, it is best
practice for the merchant to swipe the card in order to
validate the last 4 digits of the card in addition to verifying
the signature on the back of the card to the receipt.
To Conduct a Contactless Transaction
1. Select a transaction type and follow the prompts accordingly
2. Position the contactless card in order to wave or tap the card in
close proximity to the contactless reader
3. To ensure a proper read of the contactless card, the user should
wave or tap the card so that the maximum surface area is parallel
to the antenna, as shown below
NOTE:
When conducting a contactless transaction, it is best
practice for cardholders to tap their card on the PIN Pad
or terminal.

7 –Sale Transactions
NOTE:
If you are presented with a chip-enabled card, have
the cardholder insert the card in the chip reader on
the terminal with the chip facing up. Leave the card in
the reader until the transaction is completed.
1. At the main menu, press MENU until Sale is displayed
2. Select Sale by pressing the appropriate function key
3. Enter the invoice number (optional).
4. Enter the employee number (optional)
5. Key in the total purchase amount and press ENTER
6. Hand the Terminal to the cardholder
7. If tipping is enabled, the cardholder will enter the tip amount on the
Terminal (optional)
8. Swipe/insert/tap the card on the Terminal
9. If prompted for cashback, select Yes if the cardholder would like
debit cashback; otherwise select No (optional for debit cards only)
10. If cashback is selected, choose the cashback amount or enter the
amount of cashback required on the terminal (optional for debit
cards only)
11. If prompted, enter the last four digits of the card number (this extra
step helps to reduce fraud and charge backs and is applicable for
mag swipe credit cards only)
12. Enter the V-Code (3 or 4-digit code from the back or front of the
card) (optional).
13. For debit purchases, if debit surcharge is enabled, the cardholder
must confirm the surcharge amount (optional)
14. For chip cards, cardholders must confirm the amount of the
transaction and, if required, enter their PIN on the Terminal
15. The terminal connects to Global Payments for an authorization and
the response will be displayed on the screen
16. Terminal prints the receipt
17. The first receipt (merchant’s copy) is signed by the cardholder and
retained by the merchant; a signature is not required for debit cards

NOTE:
For chip transactions, check the receipt to
determine if a signature is required. Some chip
cards may require:
a) PIN and signature b) signature only c) PIN
only
18. Provide the second copy of the receipt to the cardholder. It does
not need to be signed.
Chip Error Processing
For chip cards, alternative processing using magnetic stripe or manual
entry may be permitted under certain circumstances. Always follow the
terminal prompts.
1. If you have swiped a chip card and the terminal displays “Use Chip
Reader,” press CANCEL to restart the transaction. Select the
transaction type then instruct the cardholder to insert the card into
the chip reader.
2. If the terminal displays “Application Not Available” or “Use Mag
Stripe” during the chip transaction, remove the card and then press
CANCEL and proceed using the magnetic stripe. When the terminal
displays “Override Chip Requirement?” select YES.
8 –Void (Credit or Debit)
If you have entered the wrong amount or need to cancel a transaction,
use the void transaction (instead of refund) wherever possible.
NOTE:
Transactions can only be voided before
they are settled.
The customer must be present for a debit
void.
You can also search for transactions by
using the FIND feature.

1. From the main menu, press MENU until Void is displayed
2. Select Void by pressing the appropriate function key
3. Enter the supervisor password and press Enter
4. If you want to void the last transaction, select YES; otherwise select
NO to search for the transaction based on invoice # or account #,
selecting one of the following:
i. Inv # and enter the invoice number, or
ii. Acct # and enter the last four digits of the account number
5. Confirm that the screen displays the transaction you wish to void by
selecting YES
6. To void a debit transaction, pass the Terminal to the cardholder to
confirm
7. Printer prints the receipt and the merchant receipt is signed (for
credit cards) by the cardholder
8. Provide the unsigned customer copy to the cardholder
NOTE:
You can also search for transactions by using
the FIND feature.
NOTE:
If the terminal cannot read the card,
you must enter the card number
manually, and then use your imprinter
to take an imprint of the card. Retain a
signed copy for your records.
If the chip card is not supported, you
will see a message “Application not
supported” or “chip malfunction.” Press
Enter to continue. The following
prompt will appear on the screen:
“Override chip requirement”. Select
“yes” to continue. If “no” is selected, the
transaction will be cancelled. The next
message will be: “Please remove card”
then “use mag stripe.” You may then
attempt to process the transaction
using the magnetic stripe.

TIP:
To quickly reprint the last transaction, select
reprint and then select last receipt.
UnionPay Refund Void
It is not possible to perform a void of a refund processed on a UnionPay
card. If you need to cancel a refund processed to a UnionPay card,
please contact the Global Payments helpdesk.
9 –Refund (Credit or Debit)
Use the return transaction feature to credit a cardholder.
1. From the main menu, press MENU until Refund is displayed
2. Select Refund by pressing the appropriate function key
3. Enter the supervisor password and press Enter
4. Key in the refund amount and press Enter
5. Pass the Terminal to the cardholder
6. Swipe/insert card into the Terminal
7. If prompted, enter last four digits of the card number (this extra step
helps to reduce fraud and chargebacks) (credit card only)
8. For debit chip cards, cardholders must confirm the amount of their
transaction and, if required, enter their PIN on the Terminal
9. The terminal connects to Global Payments for an authorization and
the response will be displayed on the screen
10. Terminal prints the receipt
11. The first receipt (merchant’s copy) is signed by the cardholder and
retained by the merchant; a signature is not required for debit cards
10 –Phone Order Sale (Credit Only)
Use the phone order transaction to process a purchase that was
received by phone or mail order.
NOTE:
You must be approved by Global Payments before
accepting mail/telephone order (MOTO) purchases.

1. From the main menu, press MENU until Phone Order is displayed
2. Select Phone Order by pressing the appropriate function key
3. Enter the account number, followed by the card expiration date
4. Enter the supervisor password and press Enter
5. Enter the transaction amount and press Enter
6. Enter the invoice number (optional) and press Enter
7. Enter the employee number (optional) and press Enter
8. Enter the V-code if prompted (optional) and press Enter
9. Enter the address if prompted (optional) and press Enter
10. Enter the postal code if prompted (optional) and press Enter
11. The terminal connects to Global Payments for an authorization and
the response will be displayed on the screen
12. Terminal prints the receipt
NOTE:
It is possible that the transaction is authorized, but the
address and postal code did not match the information
the card issuer has. This transaction may represent
higher risk and you may choose to proceed as is or
void it.
Refer to Section 21 for more information on AVS and
CVV response codes.
11 –Pre-Authorization and Completion
(Credit Only)
Using the pre-auth transaction allows you to enter a different amount at
the end of the transaction. For restaurants, if a chip card is presented,
do not use pre-auth and completion. A SALE transaction with a tip is
recommended because the cardholder will need to enter his/her PIN
(similar to debit cards).
If you operate a restaurant, hotel or car rental, your terminal may be
configured to display Pre-auth and Completion on the first page of the
main menu.
Pre-Auth –Authorize the amount (before tip):
1. From the main menu, press MENU until Pre-Auth is displayed

2. Select Pre-Auth by pressing the appropriate function key
3. If an incremental auth is required for a previous pre-auth, select
YES; if not, then select NO
If YES is selected, select one of the following:
i. Inv#, or
ii. Acct#
Confirm that the screen displays the transaction you wish
to increment by selecting YES
New Amt: will show where you will enter the additional
amount required on top of the original pre-auth
4. Key in the invoice number (optional) and press ENTER
5. Key in the employee number (optional) and press ENTER
6. Key in the total purchase amount and press ENTER
7. Hand the terminal to the cardholder
8. Swipe/insert the card on/in the terminal
9. Key in the V-code (three or four-digit code from the back or front of
the card) (optional) and press ENTER
10. If prompted, enter last four digits of the card number (this extra step
helps to reduce fraud and chargebacks) (mag swipe credit card
only)
11. For chip cards, cardholders must confirm the amount of the
transaction and, if required, enter their PIN on the terminal, and
then pass the terminal back to the merchant
12. The terminal connects to Global Payments for an authorization and
the response will be displayed on the screen
13. Terminal prints the receipt
14. The first receipt (merchant’s copy) is signed by the cardholder and
retained by the merchant. After the cardholder has entered a tip
amount, do a Completion.
15. For hotels, attach this receipt to the guest folio. When the guest
checks out, do a Completion.
16. For car rentals, attach this receipt to the contract. You may be
asked to enter the V-code. (this extra step helps you to make a
better decision about the transaction). When the customer returns
the vehicle, do a Completion.
Completion –Complete the transaction for the final amount (including
tip):
1. From the main menu, press MENU until Completion is displayed
2. Select Completion by pressing the appropriate function key
Table of contents
Other Global Payments Payment Terminal manuals

Global Payments
Global Payments Desk/5000 User manual

Global Payments
Global Payments Desk/5000 User manual

Global Payments
Global Payments VX 520 User manual

Global Payments
Global Payments S1000F User manual

Global Payments
Global Payments V400m User manual

Global Payments
Global Payments Desk/5000 User manual

Global Payments
Global Payments Wireless - Move/5000 User manual

Global Payments
Global Payments Wireless - Move/5000 User manual

Global Payments
Global Payments Desk/5000 User manual

Global Payments
Global Payments Register User manual