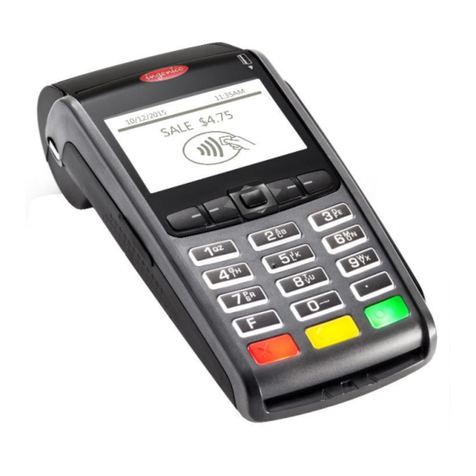
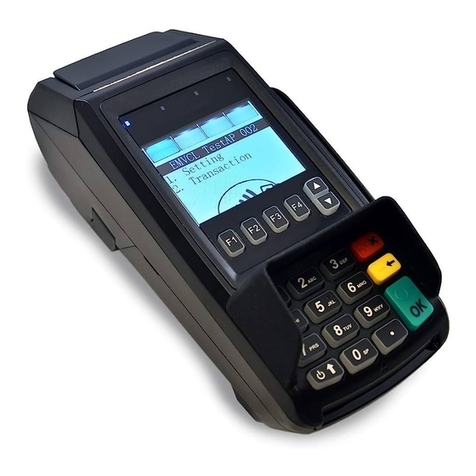
Global Payments Countertop P400 User manual

Countertop P400 Quick Start Guide
Follow the steps in this guide to set up your P400 to work with your POS.
THE PLATFORM
1 | Countertop P400 Quick Start Guide

HOW IT WORKS
SPECIFICATIONS
Power
4.8-5.2 W power consumption, power over
USB 5 V, 500 mA
Operating temperature
32°F to 122°F (0°C to 50°C)
Storage temperature
-4°F to 140°F (-20°C to 60°C)
Relative humidity
5% to 90%, non-condensing
WARNINGS
●Do not use liquids near your device. Spilling liquids onto your device may damage it and make it
unsafe to use.
●Do not use thinner, trichloroethylene or ketone-based cleaning products to clean your device;
they can corrode the plastic and rubber parts.
●Do not spray cleaning products directly onto your device.
●Use only the cables we provide for your device.
●Do not plug your power adapter into an outdoor power outlet.
●Do not disconnect power to your device while you are running a transaction.
2 | Countertop P400 Quick Start Guide

BEFORE YOU BEGIN
Find your Merchantware Credentials. We sent these in an email with “Merchantware Credentials” in
the subject line.
Make sure that your internet connection is working correctly and that your network is secure.
Depending on your connection type, you should do the following:
●Ethernet - Check that your router or switch has a free Ethernet port.
●Wi-Fi - Locate your wireless network details.
●Bluetooth - Check that Bluetooth tethering is activated on your POS.
3 | Countertop P400 Quick Start Guide

STEP 1: ATTACH THE UTILITY CABLE
1. Turn your device upside down and place it
on a flat, stable surface.
2. Remove the rear cover by sliding it up and
lifting it off.
3. Attach the utility cable to your device.
Push the connector straight down so that
you don’t bend the pins.
4. Slide the rear cover back onto your device
until it clicks.
STEP 2: ATTACH THE POWER ADAPTER
1. Insert the 12V DC power adapter into the power
port on the utility cable.
2. Plug the 12V DC power adapter into a power
socket. Your device will turn on.
4 | Countertop P400 Quick Start Guide

STEP 3: CONNECT THE DEVICE TO YOUR NETWORK
You can connect your P400 to your network using the following connection types:
●Ethernet
●Wi-Fi
●Bluetooth
Note:
●Your device is configured to receive a dynamic IP address by default. If you need to configure a
static IP address, go to the FAQs section.
●If you see “Power Interface?” on-screen, tap Yes.
Ethernet
1. Insert one end of the Ethernet cable into an
available port on your router or switch.
2. Insert the other end of the Ethernet cable into the
Ether port on the utility cable.
Wi-Fi
Important: If you are not using our Meet in the Cloud solution, connect your P400 to the
same network as your POS.
5 | Countertop P400 Quick Start Guide

Find your network
1. Use the keypad to press 1,5, and 9at the same time.
2. Tap Com Control.
3. Tap WiFi.
4. Tap Configuration, and then use the keypad to enter the
password. The default password is 200331
5. Tap OK.
6. Tap WiFi Scan.
Connect to your network
1. From the list of networks, tap the network you want to connect to.
2. Tap Add.
3. Select the type of authentication your network uses. If you don’t know the type of
authentication your network uses, contact your network administrator.
4. Enter your network details. The details you need to enter depend on whether you chose
pre-shared key (PSK) authentication or extensible authentication protocol (EAP) authentication.
a. For PSK authentication, in the Pre-Shared-Key (PSK) field, enter the authentication
password.
b. For EAP authentication, enter the following:
i. Identity
ii. Password
Note: For information about how to enter a special character, go to the FAQs section.
5. Tap OK.
6. Tap Save, and then tap OK.
7. Tap Yes.
8. Tap OK.
Apply your settings and return to the home screen
1. Tap .
2. Tap Exit, and then tap Yes.
6 | Countertop P400 Quick Start Guide

3. Tap the Genius icon.
Bluetooth
Important: By default, Bluetooth connection isn’t enabled on your P400. To enable
Bluetooth connection, contact our Support Team.
1. Turn on your P400. You must connect your P400 to your POS within 180 seconds. If you don’t
connect your P400 to your POS within 180 seconds, you must restart your P400.
2. Follow the instructions on your POS to connect your P400 to your POS.
STEP 4: CHECK YOUR CONNECTION
Ethernet/Wi-Fi
1. Use the keypad to press 1,5, and 9at the same time.
2. Tap Com Control.
3. Tap LAN or WiFi.
4. Tap Status.
5. Confirm that the Status field shows “Up.”
– If the Status field shows “Down,” contact our Support Team. For more information about
how to contact our Support Team, go to the FAQs section.
Bluetooth
1. Use the keypad to press 1,5, and 9at the same time.
2. Tap Com Control.
3. Tap More.
4. Tap Status.
5. Tap IP Addresses.
6. Tap BT LAN.
7. Confirm that the Status field shows “Up.”
– If the Status field shows “Down,” contact our Support Team. For more information about
how to contact our Support Team, go to the FAQs section.
7 | Countertop P400 Quick Start Guide

STEP 5: CHECK THAT YOUR DEVICE IS READY TO USE
Check that your device connects to the internet
1. From the home screen, use the keypad to press 000.
2. Use the keypad to enter the passcode, and then tap OK.
The default passcode is 9416557.
3. Check that there is an IP address next to the
IP address field.
Run a gateway connection test
1. From the home screen, use the keypad to press 000.
2. Use the keypad to enter the passcode, and then tap OK. The default password is 9416557.
3. Tap Options, and then tap Network.
4. Tap Options, and then tap Connection Test.
5. Check that all the tests have passed.
- If the tests do not pass, go to the FAQs section.
STEP 6: CONFIGURE YOUR POS
To configure your POS, you need:
●Your Merchantware credentials, including your:
○Merchantware name
○SiteID
○Key
●The IP address or host name of your device
8 | Countertop P400 Quick Start Guide

STEP 7: TEST A TRANSACTION
Run a test transaction on your POS to make sure you have correctly configured it with your device.
●If the test transaction successfully transfers to your device, cancel the test transaction and
start running live sales.
●If the test transaction does not successfully transfer, contact our Support Team. For more
information about how to contact our Support Team, go to the FAQs section.
FAQs
Why can’t I connect my P400 to my POS using Bluetooth?
Your P400 may not be Bluetooth-enabled. By default, Bluetooth connection isn’t enabled on your
P400. To enable Bluetooth connection, contact our Support Team.
Can my device remember my POS on startup?
When you enabled Bluetooth connection on your P400, you selected one of the following possible
connection modes:
●On startup, your P400 automatically searches for available POS devices.
●On startup, your P400 remembers the last POS device it was connected to and
automatically reconnects to it.
If you want to change your device’s connection mode, contact our Support Team.
How do I configure a static IP address?
Ethernet
1. Use the keypad to press 1,5, and 9at the same time.
2. Tap Com Control.
3. Tap LAN.
4. Tap Configuration, and then use the keypad to enter the password. The default password is
200331.
5. Tap OK.
6. Tap IPv4.
7. Tap DHCP, and then tap No.
9 | Countertop P400 Quick Start Guide
8. Tap IP Address, and then set values for the following fields:
a. IP address
b. Subnet mask
c. Gateway IP address
d. DNS 1
e. (Optional) DNS 2
Note: If you do not have 12 digits in your IP address, use zeros to complete your IP address. For
example, to use the IP address 192.168.2.35, enter 192.168.002.035.
Apply your settings and return to the home screen
1. Tap twice.
2. Tap Save, and then tap OK.
3. Tap Yes, and then tap OK.
4. Tap twice.
5. Tap Exit, and then tap Yes.
6. Tap the Genius icon.
Wi-Fi
1. Use the keypad to press 1,5, and 9at the same time.
2. Tap Com Control.
3. Tap WiFi.
4. Tap Configuration, and then use the keypad to enter the password. The default password is
200331.
5. Tap OK.
6. From the list of networks, select the network you want to configure, and then tap View/Edit.
7. Tap IP settings, and then tap IPv4.
8. Tap DHCP, and then tap No.
9. Tap IP Address and then set values for the following fields:
a. IP address
b. Subnet mask
c. Gateway IP address
10 | Countertop P400 Quick Start Guide
d. DNS 1
e. (Optional) DNS 2
Note: If you do not have 12 digits in your IP address, use zeros to complete your IP address. For
example, to use the IP address 192.168.2.35, enter 192.168.002.035.
Apply your settings and return to the home screen
1. Tap twice.
2. Tap Save, and then tap OK.
3. Tap Yes, and then tap OK.
4. Tap twice.
5. Tap Exit, and then tap Yes.
6. Tap the Genius icon.
Bluetooth
1. Use the keypad to press 1,5, and 9at the same time.
2. Tap Com Control.
3. Tap More.
4. Tap Configuration, and then use the keypad to enter the password. The default password is
200331.
5. Tap OK.
6. Tap Network Interface.
7. Tap BT_LAN.
8. Tap IPv4.
9. Tap DHCP, and then tap No.
10. Tap IP Address and then set values for the following fields:
a. IP address
b. Subnet mask
c. Gateway IP address
d. DNS 1
e. (Optional) DNS 2
Note: If you do not have 12 digits in your IP address, use zeros to complete your IP address. For
example, to use the IP address 192.168.2.35, enter 192.168.002.035.
11 | Countertop P400 Quick Start Guide
Apply your settings and return to the home screen
1. Tap .
2. Tap Save, and then tap OK.
3. Tap Yes, and then tap OK.
4. Tap three times.
5. Tap Exit, and then tap Yes.
6. Tap the Genius icon.
My gateway connection tests failed. What do I do?
Ethernet
1. Check that your router or switch has a working internet connection.
2. Check that you inserted the Ethernet cable into the Ether port. Don’t insert the cable into the
RS232 port.
3. Run the gateway connection tests again. If the tests fail, contact our Support Team.
Wifi
1. Check that your router or switch has a working internet connection.
2. Run the gateway connection tests again. If the tests fail, contact our Support Team.
Bluetooth
1. Check that your device is paired with the POS.
2. Make sure that Bluetooth tethering is activated on the POS.
3. Run the gateway connection tests again. If the tests fail, contact our Support Team.
How do I enter a special character?
Important: You can’t enter < or >.
To enter a special character, on the keypad press the 1button, the *button, the 0button or the #
button until you get the character you need.
Button
Special characters
1
.
*
*, ' "
0
+ - and whitespace
12 | Countertop P400 Quick Start Guide

#
# ! : ; @ = & / \ % $ ( ) ^ _
How can I find out more information about my Countertop P400?
For more information about your device, visit our Help Center at
help.globalpaymentsintegrated.com and search for “P400.”
How do I contact the Support Team?
Before you contact our Support Team, gather the following information:
●The serial number of your device. To find the serial number:
1. From the home screen, use the keypad to press 000.
2. Use the keypad to enter the passcode, and then tap OK. The default passcode is 9416557.
3. Note the number next to the Serial Number field.
●Your Merchantware credentials
●Your POS make and version
Contact our Support Team at 888.249.3220.
©2023 Global Payments Inc. Global Payments Integrated is a service mark of Global Payments Inc.® C9.3180-D01
13 | Countertop P400 Quick Start Guide
Table of contents
Other Global Payments Payment Terminal manuals

Global Payments
Global Payments Desk/5000 User manual

Global Payments
Global Payments Desk/5000 User manual

Global Payments
Global Payments Wireless - Move/5000 User manual

Global Payments
Global Payments Terminal Plus Parts list manual

Global Payments
Global Payments Desk/5000 User manual

Global Payments
Global Payments VX 520 User manual

Global Payments
Global Payments A920 User manual

Global Payments
Global Payments Wireless - Move/5000 User manual

Global Payments
Global Payments Desk/5000 User manual

Global Payments
Global Payments V400m User manual