GMC Elite Series User manual

G
M
Vending,s.a
.
C:\manuales\Elite\inglés\ELITEing10-02.DOC Pág 1 de 49 Edición:09/02
GM
Vending
SERIE
GM
Vending
Mepamsa
Group
COINS ACCEPTED
5-10-25-50-100-200
Y 500PTS
0.1-0.5-1-2-5DM
ALARM
NO CHANGE
SOLD OUT
Elite 16
SERVICE AND
SPARE MANUAL
Elite

G
M
Vending,s.a
.
C:\manuales\Elite\inglés\ELITEing10-02.DOC Pág 2 de 49 Edición:09/02
WORKING CHARACTERISTICS.
COINS ACCEPTED
5-10-25-50-100-200
Y 500PTS
0.1-0.5-1-2-5DM
ALARMA
NO CHANGE
SOLD OUT
•The alarm LED lights up every 5 seconds.
•The out of change LED indicates that the number of coins
available for change is under a predetermined level.
•The out of product LED will only light up if the whole machine is
empty.
•The external display can show the time or four zeros.
Elite 8Elite 8
•The advertising panel light can be programmed to turn on and off
at certain times during the day.
•When the machine is turned on, a self-check sequence takes
place and an error code will blink on the display if any fault is
detected.
•The machine admits a maximum of 20 coins for one purchase. If
more coins are introduced, they are automatically returned.
Elite 8
•If there is no product, the machine will not admit any coins.
•If there is no change available, the machine will accept coins but will return them when the purchase is
selected if the amount does not coincide exactly.
•Coins going to the coin box may be rejected if there is not sufficient change in the change chutes.
•The change chutes should not be filled or emptied manually. Programming options should always be
used for these operations.
•Depending on the way they have been programmed, the machines may not return change when there is
no money in the change chutes.
•Prices can be programmed in three different ways.
•If a coin is not accepted but the machine has enough change for a possible sale, check that that
particular coin size has not been inhibited through programming by the client..
•If the machine is programmed for free sales, it will reject all coins and will only move those extractors that
have product.

G
M
Vending,s.a
.
C:\manuales\Elite\inglés\ELITEing10-02.DOC Pág 3 de 49 Edición:09/02
MACHINE INSTALLATION
•Unpack the machine.
Remove outside and inside packing (Elite 24 models).
•Level the machine properly.
Using the levelling knobs at the bottom of the machine, adjust height until the machine is perfectly level.
•Plug into mains.
Connect to a 220 Volt / 50 Hertz source. Turn the main switch on (located inside the machine, on the left
hand side, at the level of the collector). If the process has been carried out properly, the V-retainer should
move its paddles and the display and fluorescent light should turn on.
•Insert tobacco and change coins.
Put at least one cigarette pack in any slide and use the 00.00
programming option to put coins in the coin assembly so that they are
available for change. To go to option 00.00 you need to push the
programming button located on the display card (the card located at
the top, left-hand side inside the door).
•Set prices.
Use one of the three ways for setting prices (see programming
instruction manual) to set a price for each slide depending on the
brand it holds. Place brand labels in the button panel and on the front
part of the extractor, as well as price labels with the adequate figures.
All these labels are located in an envelope inside the machine.
•Adjust the time.
Using option 01.02adjust machine clock time, month and year.
•Fill in machine warranty card..
Fill in machine warranty card giving the customer one copy and sending another copy to the factory.
VERY IMPORTANT
•Explain to the customer.
Explain to the customer the basic working of the machine and how to
use its basic functions; i.e., programming options 1 to 10.
This completes basic machine installation. Other options which may be of interest are:
•Joining slides.
Programming option 01.19 allows you to assign several buttons to several extractors and create the
combinations between slides and extractors that you wish.
•Machine lighting.
Option 01.06 allows you to control when the machine fluorescent light turns on and off. This allows you to
have it off outside opening hours.
•Customising the machine.
There are other programming options which allow clients to customise how the machine works.
BUTTON
PROGRAMMING

G
M
Vending,s.a
.
C:\manuales\Elite\inglés\ELITEing10-02.DOC Pág 4 de 49 Edición:09/02
TESTS
•Testing communication between cards.
The red LED on all cards should blink, while the green LED should be continuously lit.
If you press a selection the price should appear on the display.
Inserting a pack in any one slide will remove the out of product indication.
In all cards, the green LED indicates that there is a power supply and that it is receiving commands, while
the red LED indicates communication.
•Checking the coin assembly.
If when entering programming mode the options related to the coin assembly do not appear, this means that
it is not responding to machine commands and that the machine is unaware that it is in place.
Problem Possible cause
If there is product in the machine and the
coin assembly responds to return option 00
01 and does not admit coins.
Check the coin tester and coin separator for stuck
coins.
Check that the coin tester hinge is properly closed.
•Extractor test.
When an extractor does not work, to determine whether the problem is in the extractor or in the card that
controls it change its card connection with the next one and check both.
Problem Possible cause
An extractor does not stop in the correct
position.
The stop switch is not working properly.
If there is product and this is not indicated.
Check the product microswitch and the activation
lever.
•Entering programming mode..
Problem Possible cause
When you enter programming mode you
cannot get past the first option
A button, either from the selector panel or the return
switch is activated.
•Sale test.
The best way to check this is by buying a pack of cigarettes.

G
M
Vending,s.a
.
C:\manuales\Elite\inglés\ELITEing10-02.DOC Pág 5 de 49 Edición:09/02
CONTROL ELECTRONICS
Control electronics for the machines consists of several cards connected to one another through a
serial bus with MDB protocol. Three of these cards have their own microprocessor and their own program
that can write on the micro (Motor Card) or in a separate memory (Control and Display Cards).
Diagrama funcional de las tarjetas.
CARD FUNCTIONS.
•The Power Supply Card is connected to the transformer and provides the machine with the 24
V/DC current needed by the extractors, hoppers, V-retainer and other peripheral devices, 34 for
coin assembly and the 8 V/DC current needed by the cards. Drawing 57003 shows the function of
each of the connection pins. The card comes equipped with two fuses.
•The Control Card is the here the main program is located.
The program is in a 512-Kb EPROM memory. In order to write into this memory you need a PC,
software and a memory programmer.
This card has a RAM memory with a battery and a clock where all variables are stored (Pries,
sales, etc.) which the machine needs to work.
There are two control card models and the only difference is the number of motors each can
control. Obviously, the larger one can be installed in any machine and this is the only one supplied
as a spare.
There are three variants for drawing 57002 where the factory standard extractor, hopper and V-
retainer connections can be seen, depending on machine model.
This card also has a connection for a coin assembly with change using protocol A, but it does not
work in the machine program.
Each time we need to add options to the machine or modify its functioning, we need to modify and
substitute the program written into the EPROM.
Each time that a program is upgraded to a newer version, some variable may change in value. It is
therefore necessary to either initialise the machine or check it and re-program the variables.
Under normal machine working conditions the control card is continuously consulting the other
cards and the coin assembly in order to know what is going on. Each request is answered with a
report from each card and the coin assembly indicating what it is doing.
•The Display Card checks the machine buttons and controls the front display.
It has its own microprocessor and program which is totally independent of the machine.
Drawing 57001 shows the functions of each pin of each connector. This card is always the same in
all models.
•The Motor Card monitors the motors and micro-switches connected to it and reports to the main

G
M
Vending,s.a
.
C:\manuales\Elite\inglés\ELITEing10-02.DOC Pág 6 de 49 Edición:09/02
card.
It has its own microprocessor and program which are included in the same chip.
There are three variants for drawing 57000 where the factory standard extractor connections can
be seen, depending on machine model.
Working example:
•The machine is waiting for a sale ...
The Control Card is sending the Display Card information on the current time so that the Display Card
can show it. At the same time it is asking whether any button has been pushed. At the same time it is
asking the coin assembly if any coin has been inserted. At the same time, it is asking the Motor Card
to know its state. This cycle is repeated 20 times per second.
•Somebody arrives and pushes a button in the selector ...
The Control Card is sending the Display Card information on the current time so that the Display Card
can show it. At the same time it is asking whether any button has been pushed. When the Display
Card answers that a button has been pushed (1), the Control Card asks the Motor Card if there is
product in the corresponding extractor (2), checks in RAM memory for the price of this button (3) and
sends the Display Card (4) the price to be displayed and the information to light up or not the out of
product LED.
If one of the cards does not work properly, we will not be able to see the price when the button is pushed.
At this time, we would check the LEDs in the cards to find out which one does not work.
Tarjeta
Control
Tarjeta
Motores
1
2
2
4

G
M
Vending,s.a
.
C:\manuales\Elite\inglés\ELITEing10-02.DOC Pág 7 de 49 Edición:09/02
RETAINING HOOK
There are two parts with the same shape in the Elite machines:
The difference between the two machines is in the retaining hook length. The short retaining hook
part adapts to longer cigarette packs, such as Winston, Marlboro, Fortuna, Ducados, Camel etc.
The part with the long retaining hook(white) should be used for the slides that carry Lucky Strike
or similar packs.
Long Hook
Short
Packs
Short hook
Long
Packs
In the machines, all slides have part 70014 (black).
In a separate bag there are several units of part 70015 (white).

G
M
Vending,s.a
.
C:\manuales\Elite\inglés\ELITEing10-02.DOC Pág 8 de 49 Edición:09/02
PHOTOGRAPHY
Photography take apart.
1
2
4
3
Photography assembly.
Is the same but in inverse process.

G
M
Vending,s.a
.
C:\manuales\Elite\inglés\ELITEing10-02.DOC Pág 9 de 49 Edición:09/02
Programming
Manual
Elite SERIE

G
M
Vending,s.a
.
C:\manuales\Elite\inglés\ELITEing10-02.DOC Pág 10 de 49 Edición:09/02
PROGRAMMING PUSH
The programming push are the elements that allow us check and insert the
information when a programming operation is done. Example: change the price of
products.
Reject
Push Button
Programm
ing
Push Button
Selection Push
P1-P2-P3-P4
•Programming Push Button. This push is in the display board, inside the door. This push has
two functions:
1Enter and exit of programming mode.
2Change of programming option.
•Reject Push Button. Is below the coin insert canal. Its function is change the value of
programming options.
•Selection Push Button. Its function is the same that reject push button, cahnge the value of
aprogramming options.

G
M
Vending,s.a
.
C:\manuales\Elite\inglés\ELITEing10-02.DOC Pág 11 de 49 Edición:09/02
•Reloading return tubes.
(OPTION IS ONLY ACTIVATED WHEN THERE IS A CHANGE GIVER IN THE
MACHINE AND IT IS OPERATING)
By entering this option all types of coins which do not go to the return tubes are
inhibited. You only have to introduce coins to reload the tubes. The tubes
reload until they fill up, at which time the coin is inhibited and its value flashes
on the display. While the flashing continues any coin introduced will be
inhibited. This process continues until all the tubes are full or the
PROGRAMMING key is pressed to go to the next option. The total sum of
money in the tubes appears at all times. If you wish to know the number of
each type of coin in the tubes, just press the first channels (p1-p4), depending
on the number of tubes in the cash box. The total sum of money introduced
can be seen by pressing the next push-button on the last tube (p4 or p5).
•Unloading return tubes and hoppers.
(OPTION IS ONLY ACTIVATED WHEN THERE IS A CHANGE GIVER IN THE
MACHINE AND IT IS OPERATING)
To unload the coins in the return tubes, just press the channels (3 or 4
depending on the change giver coin mechanism) located top right in the
machine. Each one represents a tube with a type of coin.
When you press one of these the number of coins in that tube appears on the
display, in addition to the number of tubes separated by a full stop
(E.g. 100.1
100 coins in tube 1). To unload coins, just press on this channel again. The
change giver coin mechanism expels five coins each time. The display always
shows the number of coins remaining in the tube. The process can be repeated
until there is no coin left in the channel.
If you press ‘PROGRAMMING’ you move to the next programming option. If
you press another channel (containing a tube) the process is repeated. Once
all the coins are unloaded from the tubes you can only exit by pressing the
PROGRAMMING key.
If the machine has hoppers and these are activated, you can also unload these
with the channels next to the last tube (p4 and p5 or p5 and p6). In each case
the hopper will unload five coins and the display will indicate the total number
of coins unloaded.
•Deactivate visualisation of clock. (00.02)
•Activate visualisation of clock. (01.02)
In option 00.02 the clock is not visualised. Instead, the figure 0000 appears in
the display (while the machine is operating normally). To activate the
visualisation of the clock, just press ‘REJECT’ and the machine will change to
option 01.02. Within this option, in addition to allowing the visualisation of the
time in normal operation, we can see the hours and minutes on the clock. To
do this just press channel 1 (located top right in the machine). The hours and
minutes appear on the display with the minutes flashing. Channel 1 is used to
change the time 1, the minutes increasing as you press. If you press REJECT
the hours flash, you can increase in steps with channel 1 and decrease with
channel 2.
If you press REJECT again the current year flashes, and this can be changed
through channel 1 and 2.
Pressing REJECT once again, the current day and month appear. The day
flashes (change it with channel), pressing REJECT yet again will make the
month flash and this can be changed with channel 1 and 2. To exit this option,
press PROGRAMMING.
If you press REJECT instead of PROGRAMMING you start with hours and
minutes again.
•Programming of prices.

G
M
Vending,s.a
.
C:\manuales\Elite\inglés\ELITEing10-02.DOC Pág 12 de 49 Edición:09/02
(OPTION IS ONLY ACTIVATED WHEN THERE IS A CHANGE GIVER IN THE
MACHINE AND IT IS OPERATING)
To program prices of products in each channel, enter programming option
00.03. When you press a channel the product price appears on the display. If
you do not wish to change it, just press any other channel so that the price of
the pressed channel appears, or alternatively press the PROGRAMMING
button. This takes you to the next option within the programming mode. If the
price of a channel flashes this means that it is de-programmed and that the
machine cannot sell it. To correct this de-programmed state just program the
price of that channel.
To change a price just press the appropriate channel a second time. The price
of that product goes to the value determined by the user via the REJECT key
(default value: 30 B.M.U.) and each time you press it the figure rises until it
reaches the required price. If another channel or the PROGRAMMING button
is pressed before changing the price the price of the channel which was being
changed will be the last figure to appear on the display.
If you want to determine the basic figure (from which price increases in a
channel will be made) just press the REJECT push-button at any time. The
current value appears. Next time you press it resets to zero and each time it is
pressed afterwards it increases until the required price is reached.
•Programming prices from the keyboard.
(OPTION IS ONLY ACTIVATED WHEN THERE IS A CHANGE GIVER IN THE
MACHINE AND IT IS OPERATING)
To program the prices of the products in each channel, enter programming
option 01.03. By pressing a channel the price of the product appears on the
display. If you do not wish to change the price, just press any other channel so
that the price of the pressed channel appears, or press the PROGRAMMING
button. This will take you to the next option in the programming mode.
To change a price just press a number of up to 8 digits on the small keyboard.
Erase the last key pressed with the letter ‘C’. Once the new price is entered it is
stored, so you can change channel or exit the option with the PROGRAMMING
push-button. If the number entered is not a multiple of the scale factor of the
change giver coin mechanism it is cancelled and the previous value remains. If
values are entered with decimals, zeros at the end should also be entered.
•Programming of prices with money.
(OPTION IS ONLY ACTIVATED WHEN THERE IS A CHANGE GIVER IN THE
MACHINE AND IT IS OPERATING)
To program the prices of the products in each channel in this option, just enter
the price of a product (it is best to start with the lowest price). The display will
show the value entered at all times and the machine will return the inserted
coin. Any price shown on the display can be stored in any of the channels
simply by pressing the corresponding push-buttons.
To exit, just press the PROGRAMMING push-button.

G
M
Vending,s.a
.
C:\manuales\Elite\inglés\ELITEing10-02.DOC Pág 13 de 49 Edición:09/02
•Manual handling of motors.
To handle the motors in each channel manually, enter programming option
00.04. By pressing a channel the associated motors will move in sequence.
Each time a motor is moved the display will show the push-button number
which is being moved and the number of the motor (e.g. 07.07 push-button 7,
motor 7). This will flash slowly if the motor that is being moved is a slow one (if
it flashes stronger the motor is faster). If a slow motor has been replaced with a
fast one (or vice versa) this will be detected and the system will adapt to
operate with one or the other. This can be seen through the flashing, when the
motor moves a second or third time to check that the adjustment has been
made correctly. Once you stop moving a motor or fan, if this motor has
extracted a product incorrectly during a cycle the display will show this,
indicating the number of wrong cycles and the number of the motor (no
flashing). (E.g. 03.07 wrong cycles 3, motor 7). If this defective motor has
been replaced by another you can erase the number of errors by pushing the
REJECT push-button when the cycle is finished; The word Erase flashes on
the display, and if it is moved again you will see that its number of wrong cycles
is now 0. To exit this option and move on to the next one, press the
PROGRAMMING button.
.
•Manual handling of the hoppers and the escrow.
(OPTION WILL ONLY BE ACTIVATED WHEN THE HOPPER OR THE ESCROW ARE
ACTIVATED)
To handle the hoppers and the escrow ‘V’ manually, enter programming option
X1.04. ‘X’ is a value that indicates what is being moved at each moment
according to the following table:
01.04 Move hopper 1 (press p1).
11.04 Move hopper 2 (press p2).
21.04 Move escrow flap 1 (press p3).
31.04 Move escrow flap 2 (press p4).
We recommend not moving the hoppers to unload coins as this negatively
affects the accuracy of the sales data.
•Audit information of the machine.
This is used to visualise or print a ticket with the sales data of the machine,
broken down as follows: each product, change giver coin mechanism tubes,
money box ...
The following visualisation options are available:
00.05 Partial sales data on the number of products sold per channel:
These are sales made since the last time the partial sales data was reset.
Each time a channel is pressed, the number of products sold (corresponding to
that channel) appears on the display.
If the number is higher than 9999 (4 digits of the display) the figure will appear
in the display, advancing from right to left.
To pass to the next option, press the REJECT button.
•Partial sales data on product sales lost per channel:
These are sales lost since the last time partial sales data was reset.
Each time a channel is pressed the sales lost appear on the display (sales not
made) of the number of products corresponding to that channel.
If the number is higher than 9999 (the four digits on the display), the figure will
appear on the display , advancing from right to left.
To pass to the next option, press the REJECT button.
•Total sales data on the number of products sold per channel:

G
M
Vending,s.a
.
C:\manuales\Elite\inglés\ELITEing10-02.DOC Pág 14 de 49 Edición:09/02
These are sales made since the machine was purchased. They cannot be
reset to zero.
Each time a channel is pressed the number of products sold corresponding to
that channel appears on the display.
If the number is higher than 9999 (the four digits on the display), the figure will
appear on the display, advancing from right to left.
To pass to the next option, press the REJECT button.
•Total sales data of sales lost (products per channel):
These are sales lost since the machine was purchased. They cannot be reset
to zero.
Each time a channel is pressed the lost sale appears on the display (sale not
made) of the number of products corresponding to that channel.
If the number is higher than 9999 (the four digits on the display), the figure will
appear on the display, advancing from right to left.
To pass to the next option, press the REJECT button.
•Total and partial sales data on the number of products sold per
machine:
These are sales made since the machine was purchased and since the last
time that partial sales data was reset.
If channel 1 is pressed total sales appear on the display. Pressing channel 3
shows partial sales (always the number of products).
If the number is higher than 9999 (the four digits on the display), the figure will
appear on the display, advancing from right to left.
To pass to the next option, press the REJECT button.
•Total and partial sales data on sales made by the machine:
These are sales made since the machine was purchased and since the last
time a reset was made of partial sales data.
If channel 1 is pressed total sales appear on the display. Partial sales appear if
channel 2 is pressed (always in terms of value of the product).
If the number is higher than 9999 (the four digits on the display), the figure will
appear on the display, advancing from right to left.
To pass to the next option, press the REJECT button.
•Total and partial sales data of money stored in the cash box:
This represents the value of sales which have gone to the cash box.
If channel 1 is pressed the total value registered since the machine was
purchased appears on the display. If channel 2 is pressed the value
corresponds to the period since the last time a reset of partial sales data was
made. If the number is higher than 9999 (the four digits on the display), the
figure will appear on the display, advancing from right to left.
To pass to the next option, press the REJECT button.
•Sales data on money in the return tubes.
On pressing REJECT the total sum of money in the return tubes appears on
the display.
If the number is higher than 9999 (the four digits on the display), the figure will
appear on the display, advancing from right to left.
To pass to the next option, press the REJECT button.
•Reset of partial sales data on the machine.
By pressing channel 1 a reset is made (set to zero) of the partial sales data of
the machine. Once this is done the figure 08.05 flashes on the display.
To pass to the next option, press the REJECT button.
•Printing of a sales data ticket.

G
M
Vending,s.a
.
C:\manuales\Elite\inglés\ELITEing10-02.DOC Pág 15 de 49 Edición:09/02
Once in this option (and with the printer connected) press channel 1. The
display shows ‘r232’ flashing and starts to send characters to the printer. When
this is finished it shows the value 09.05 again. You can print as many tickets
as you like.
Exit the sales data option by pressing the PROGRAMMING button, or
start again by pressing REJECT.
Elite 8
Elite 8
•Deactivate machine lighting. (00.06)
•Activate machine lighting. (01.06)
If you are in option 00.06 the fluorescent light in the front panel of the machine
will always be switched off. To activate it, just press REJECT and the machine
will change to option 01.06. Within this option, by pressing channel 1 the time
the machine has been switched on will appear on the display (in hours and
minutes, the latter flashing). To change the value use the first and second
push-button located in the top right corner of the machine (Channel 1). The
value increases or discrease each time the button is pressed. If REJECT is
pressed the hours flash and increase with Channel 1 and discrease with
Channel 2.
If you press REJECT again the time (in hours and minutes) the machine has
been switched off appear (the minutes flash). Change the minutes through
channel 1 and 2 and press REJECT again, the hour flashes and this can be
changed with channel 1 and 2. If you want the machine to be switched on all
the time, the timetable for switching on and off should coincide i.e. show the
same time. To exit this option, press PROGRAMMING.
If REJECT is pressed instead of PROGRAMMING you start again with hours
and minutes switched on.
•Inhibiting coins.
(OPTION WILL ONLY BE ACTIVATED WHEN THE HOPPER OR THE ESCROW
ARE ACTIVATED)
When REJECT is pressed the first type of coin appears on the display. If it is
inhibited it flashes. To change from one state to another, just press and let go
the first channel of product located top right of the machine. To change the
type de coin, press REJECT again. After visualize the last type of coin, the list
starts again with the first. When there are two types of coin with the same
value, the oldest is shown with its value and a full stop.
To exit press the PROGRAMMING button.
•
•
•Access code to programming levels.
To access other programming options (located at a higher level) enter
programming option 00.10. When you press any channel or REJECT push-
button, the code 0000 appears in the display. The code is between 0 and
9999.
To enter an access code, use the first four push-buttons located in the top right
corner of the machine. Each one of these represents a digit on the display.
After each keystroke in each channel, the digit corresponding to that channel
in a unit increases (when it reaches 9 it goes to 0, etc.). Once the code you
want to enter appears on the display, press the REJECT button to validate it. If
the code is incorrect the machine allows you to try again up to three times.
After that it exits the programming mode. If the code is correct the machine
enters the first programming option of the next level. The code is 1111.
•
Programming of the codes in each product.
To program the codes of the products in each channel, enter programming
option 00.11. By pressing a channel the code of the product will appear on the

G
M
Vending,s.a
.
C:\manuales\Elite\inglés\ELITEing10-02.DOC Pág 16 de 49 Edición:09/02
display. This product code is a number between 0 and 9999. If you do not want
to change it just press REJECT or the PROGRAMMING button. This second
action will take you to the next option of those available in the programming
mode.
To see a new code just press another channel.
If you want to modify a code, once it appears on the display you can change its
value by using the first four push-buttons located in the top right corner of the
machine. Each one of these represents a digit on the display. After each
keystroke in each channel, the digit corresponding to that channel in a unit
increases (when it reaches 9 it goes to 0, etc.). Once the code you want
appears, press the REJECT button to change another code. If REJECT or
PROGRAMMING is pressed before finishing the code change the value of the
code in the channel being changed will be the last one that appears on the
display.
•Programming of the codes in each product using the keyboard.
To program the codes of the products in each channel, enter programming
option 01.11. By pressing a channel the code of the product appears on the
display. This product code is a number between 0 and 9999. If you do not want
to change it just press PROGRAMMING or another channel.
If you want to change a code, once it appears on the display you can change it
by using the numerical keyboard. If the number entered is greater than four
figures, the value is automatically cancelled and the display sets itself to 0000.
In this case you have to re-enter the required value. If you press a different
channel or PROGRAMMING before finishing the code change, the value of the
code in the channel that was being modified will be the last one that appears
on the display. To exit press PROGRAMMING.
•Programming of the type of sale to be made.
When you enter this option the value 0X.12 will appear on the display. The
value Xrepresents the current option of type of sale.
Each time REJECT is pressed, the type of sale to be made is changed
according to the following table:
00.12: Single sale.
500
+
01.12: Multiple sale.
300
300
+
02.12: Free sale.
.
To exit this option and pass to the next one after the value has been stored,
press PROGRAMMING. The stored value is the last one visualised on the
display.
•Programming for what the machine should do when change has run
out.
When you enter this option the value 0X.13 will appear on the display. X
represents the current option.
Each time REJECT is pressed the working mode of the machine is changed
when it has run out of change (according to the following table):

G
M
Vending,s.a
.
C:\manuales\Elite\inglés\ELITEing10-02.DOC Pág 17 de 49 Edición:09/02
00.13: Only
sale at exact
price
550
550
550
01.13:
Change is not
returned
550
02.13:
Maintain
change
temporarily
on the display
550
+
03.13:
Maintain
change
permanently
on the display
550
+
To exit this option and pass to the next one while storing the value, press
PROGRAMMING. The stored value is the last one indicated on the display.
Remember that in ‘multiple sales’ there is no exact price, so in this option the
machine automatically goes to ‘Sale registering credit temporarily’ at 02.13. If
you change to single sale this option stays at the value left for multiple sale.
•Programming of obliged sale.
When you enter this option, the display shows the value 0X.14. X represents
the current option i.e. an obliged sale.
Each time REJECT is pressed the type is changed according to the following
table:
00.14: No obliged sale. Money can be recovered if there is change in
the tubes.
01.14: Obliged sale. Money cannot be recovered if a sale is not
made.
To exit this option and pass to the next one, storing the value, press
PROGRAMMING, The stored value is the last one indicated on the display.

G
M
Vending,s.a
.
C:\manuales\Elite\inglés\ELITEing10-02.DOC Pág 18 de 49 Edición:09/02
15
26
8
•Programming of minimum coin levels.
Once inside option 00.15 (programming the minimum number of coins which
the coin return, below which the machine indicates that it has no change) just
press the channels (3 or 4 channels depending on the change giver coin
mechanism) located top right in the machine. Each one represents a tube with
a type of coin.
When you press one of them, the type of coin it contains appears on the
display (value of that coin). If you press again the minimum number currently
programmed appears. To change it just press that channel again, the minimum
goes to 4 coins and this figure increases by one each time the channel is
pressed until you reach the number of coins required (these values appear on
the display and are between 4 and 15 coins).
If you press the PROGRAMMING key you pass to the next programming
option. If you press another channel (containing a tube) the process is
repeated. The last value indicated on the display remains as the minimum.
•Escrow “V”
When you enter this option, the display shows the value 0X.16. X represents
the current option.
Each time REJECT is pressed the option is changed according to the following
table:
00.16: There is no
Escrow .
01.16: There is an
Escrow but it is not used.
02.16: There is
an Escrow and it is
used.
To exit this option and pass to the next one while storing the value, press
PROGRAMMING, The stored value is the last one indicated on the display.
•Maximum credit/return value of coins.
When you enter this option, the display shows the value 00.17. If you press
REJECT the maximum value of money that can be recovered or admitted as
credit in each operation appears on the display. If you want to change this
value, just press REJECT again to reset it to zero. In successive keystrokes
the value increases until the required value is reached. To exit this option and
pass to the next one while storing the value, press PROGRAMMING again.
•
Deactivate discount/surcharge on sales. (00.18)
•Activate discount/surcharge on sales. (01.18)
Programming of working hours and percentage of the discount/surcharge.
If you are in option 00.18 the machine will never apply discount/surcharge on
its sales. To activate this just press REJECT and the la machine will change to
01.18

G
M
Vending,s.a
.
C:\manuales\Elite\inglés\ELITEing10-02.DOC Pág 19 de 49 Edición:09/02
=500
=300
option 01.18. Within this option, when you press channel 1 the time (hours
and minutes) when the application of the discount/surcharge on sales will
appear (the minutes flash). To change the value, use the first push-button
located in the top right-hand corner of the machine (Channel 1). When you
press it its value increases. If you press REJECT the hours flash, and these
can be increased by using channel 1.
If you press REJECT again, the when the discount/surcharge on sales ends is
shown (the minutes flash). With channel 1 you can change the minutes, and by
pressing REJECT again the hour flashes (change the hours with channel 1).
If you want the machine to always sell at a discount/surcharge, the starting and
finish time should be the same. If you press REJECT again the
discount/surcharge percentage to be applied appears on the display. When
you press channel 1, this value increases one by one and with the channel you
discrease. This percentage admits values of up to 255. Discount is considered
up to 100, and above that figure it is considered a surcharge on sales.
To know the final price for the product the following formula is used:
Final price = Initial price * (percentage / 100)
To exit this option, press PROGRAMMING.
If you press REJECT instead of PROGRAMMING you start again, with the
time of application of the discount/surcharge on sales.
54
1
2
3
54
1
2
3
•Deactivate connection between channels and extractors. (00.19)
•Activate connection between channels and extractors. (01.19)
Programming of the connection between channels and extractors.
If you are in option 00.19 the machine will move (by default) the motors
associated to each push-button (in normal operation mode) according to the
type of machine (8, 12, 16 or 24 channels) i.e. following ex-works settings. To
see these settings, enter option 00.04. If, for any reason, you want to change
these settings just press REJECT and the machine will change to option
01.19. Within this option, when you press channel 1a vertical segment appears
on the display to indicate that the machine is in ‘reading’ mode. To link
channels just press the push-buttons corresponding to that channel, the
product detectors of the motors you want to connect (the order does not
matter, you can start with switches or push-buttons or mix them up) and
validate them by pressing REJECT. From the version of memory 2,21, it will
give a package of each channel that is united of alternative form. This process
is repeated until there are none left to connect, because if any motor or push-
button is overlooked they will not respond to any order to move. In normal
operation, if a channel has not been assigned instead of visualising its price,
the code E-__ appears on the display to indicate that it does not know which
extractor to move. The following is important to bear in mind: the machine
does not allow you to connect channels that have already been linked, nor
does it let you link channels with different prices.
IMPORTANT: Press PROGRAMMING to exit this option.
•Change of access code to programming levels.
To change the access code to other programming options at a higher level,
enter programming option 00.20. This option only allows you to change the
code entered in option 00.10. When you press any channel or the REJECT
push-button, code 0000 appears on the display. The code is a number
between 0 and 9999.
To enter an access code, use the first four push-buttons located in the top

G
M
Vending,s.a
.
C:\manuales\Elite\inglés\ELITEing10-02.DOC Pág 20 de 49 Edición:09/02
?
?
right-hand corner of the machine. Each one represents a digit on the display.
With each keystroke in each channel the digit corresponding to that channel in
a unit increases, and when it reaches 9 it goes to 0, etc. Once you have seen
the code you want to enter, press the REJECT button to validate it. The
machine does not ask for verification of that code so it is best not to make a
mistake when entering it. Once the code is entered the machine changes to
the next programming option. If you press PROGRAMMING without validating
it with REJECT the original code remains.
•Deactivate hopper 1. (00.21)
•Activate hopper 1. (10.21)
Programming of the coin value in hopper 1
If you are in option 00.21 the machine will not use hopper 1 for coin returns.
When REJECT is pressed you pass to option 10.21, which activates hopper 1.
By pressing p1 you visualise the coin programmed at the time. If you want to
change its value just press p1 repeatedly and the coins that can be assigned
will appear on the display. The last value visualised will be the one assigned to
the hopper.
Press PROGRAMMING to exit this option.
•Deactivate hopper 2. (01.21)
•Activate hopper 2. (11.21)
Programming of the coin value in hopper 2
If you are in option 01.21 the machine will not use hopper 2 for coin returns.
When REJECT is pressed you pass to option 11.21, which activates hopper 2.
By pressing p1 you visualise the coin programmed at the time. If you want to
change its value just press p1 repeatedly and the coins that can be assigned
will appear on the display. The last value visualised will be the one assigned to
the hopper.
Press PROGRAMMING to exit this option.
•Desactivate programming bill value (00.22).
•Activate programming bill value (10.22).
(OPTION IS ONLY ACTIVATED WHEN THERE IS A BILL VALIDATOR IN THE
MACHINE AND IT IS OPERATING)
This option allow change the value of a the bills.
When the option is activated (11.22), push p1. On the display appears “bILL”
to indicate that the machine is waiting a bill.
If you insert a bill appears the actual value. You can change with the first five
push. To validate push REJECT and “bILL” appears again.
Press PROGRAMMING to exit this option.
Table of contents
Other GMC Automobile Accessories manuals

GMC
GMC ME-9H3332G-01 User manual

GMC
GMC 2016 InTouch User guide

GMC
GMC AUX-GM4 Instruction Manual

GMC
GMC ANDROID INTERFACE User manual

GMC
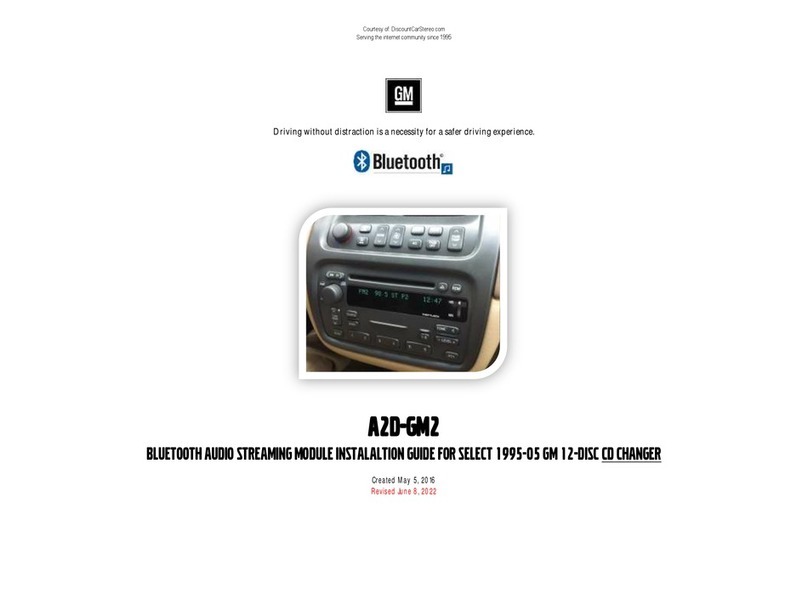
GMC A2D-GM1 User manual

GMC
GMC GMT900 User manual

GMC
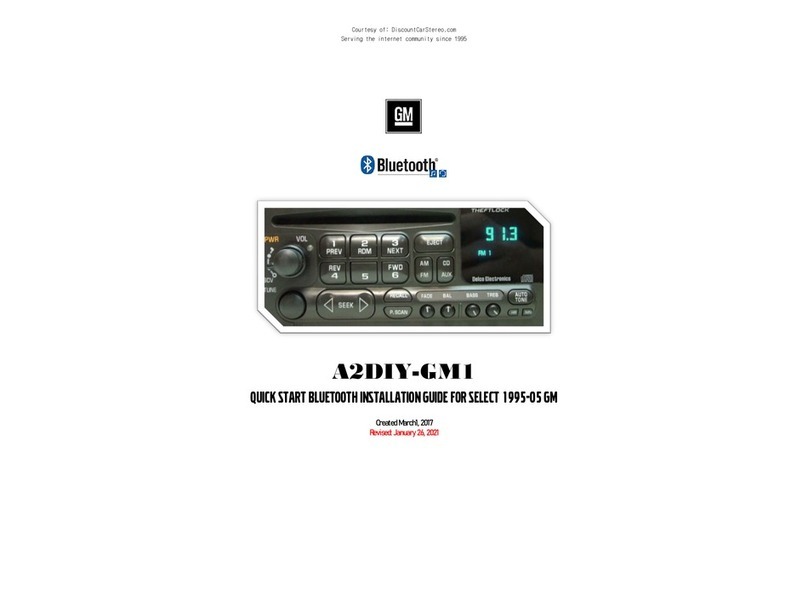
GMC A2DIY-GM1 User manual

GMC
GMC AUX-GM2 Instruction Manual

GMC
GMC AUX-GM3 GM CLASS II Instruction Manual

GMC
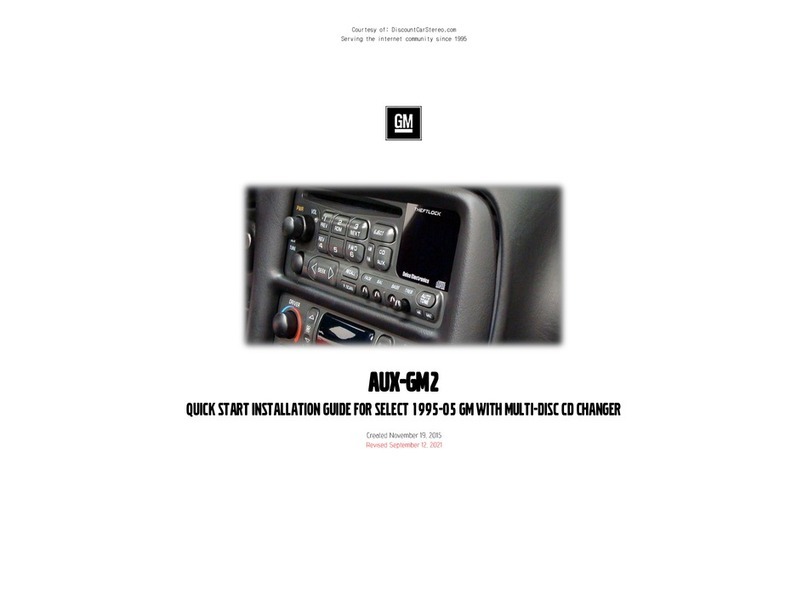
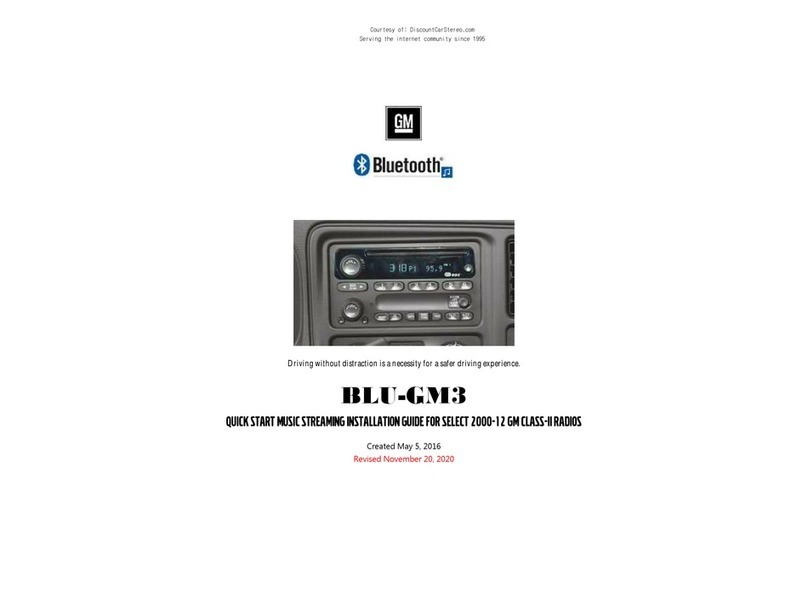
GMC BLU-GM3 User manual