Godox ML30Bi User manual

双色温LED摄影灯
Instruction Manual
说明手册
深圳市神牛摄影器材有限公司
地址: 深圳市宝安区福海街道塘尾社区耀川工业区厂房2栋
电话: 0755-29609320(8062) 传真: 0755-25723423 邮箱: [email protected]
godox.com Made in China
Add: Building 2, Yaochuan Industrial Zone, Tangwei Community, Fuhai Street, Bao’an
District, Shenzhen, 518103 China Tel: +86-755-29609320(8062)
GODOX Photo Equipment Co., Ltd.
合格证
QC PASS
BI-COLOR LED VIDEO LIGHT
ML30Bi
705-ML30BY-00
CCT
SET
DIM

- 01 - - 02 -
部件名称
灯体
前言
感谢您购买神牛产品!
ML30Bi是一款操作灵活便捷、体积小巧易携的补光LED灯。拥有双色温性能、
蓝牙无线调控、高亮度、高显指、输出光效多种多样,为拍摄创造出更多创意
光效,精确还原物体色彩。沿用了神牛卡口,能够与现有的神牛卡口灯光附
件通用,拓展更多的可能。该灯适用于直播、短视频、静物拍摄、户外拍摄等
场景。
• 灯体小巧轻便,专设两种供电方式,契合户外拍摄需求。
• 一灯多用,随心切换LED色温模式和21种情景光效模式。
• 0%~100%精确调节亮度。
• 静音非静音模式随心切换,创作无干扰。
• 体积轻巧,方便手持,自由布光。
• 自由调节色温(色温调节范围为2800~6500K)。
• 拥有低电量提示功能,安全易用。
• 蓝牙无线遥控,操作轻松便捷。
产品有以下亮点:
保持干燥;请勿用湿手接触产品,请勿将产品浸入水中或暴露于雨中。
请勿私自拆卸产品,如产品出现故障须由本公司或授权的维修人员进行检
查维修。
请勿让儿童接触本产品。
本产品没有防水功能,在雨天及潮湿环境下请注意防水。
请勿在化学品、可燃性气体或其他特殊物质附近使用摄影灯。在这些场合下
,请注意相关警告标识。
请使用专用的充电器进行充电,并且按正确的操作说明,在规定的电压、温
度范围内使用。
使用时,务必将灯头保护罩取出,否则灯头发生损坏。不使用时,套上灯头保
护罩,以达保护灯头效果。
警告
01. 机身
02. 开关按键
03. DC电源插孔
04. 控制面板
05. CCT/SET旋钮
06. DIM调节旋钮
07. 显示屏
08. 散热孔
09. 手柄支架固定螺孔
10. 卡口推制
11. LED灯珠
12. 散热器
⑧
⑤
③②
⑪
⑫
⑦
①
⑩
⑨
6500
49
%
K
6500
%
K
DC
16.8C
SET
CCT
DMI
④
⑥
CCT
SET
DIM

- 03 - - 04 -
电池盒
18. 电池背夹
19. 手柄电池盒固定孔
20. 手柄电池盒固定推制
21. 电池卡槽1和电池卡槽2
22. 电池电量显示按键/电池装卸推制
23. 电量指示灯
24. 电池盒站立支撑脚
25. 电池供电输出口
手柄
13. 手柄支架
14. 手柄方向调节旋钮
15. 手柄固定灯头旋钮
16. 灯架固定旋钮
17. 手柄电池盒固定扣
⑲
⑱
㉒
⑳
㉔
㉕
㉓
㉑
⑬
⑮
⑯
⑭
⑰
标配物品
反光罩 x1
AC电源线5M x1 说明书 x1
适配器 x1 灯头保护盖 x1手柄 x1
灯头ML30Bi x1
ML30Bi双灯套装(另购)
电池盒x1
电池盒x1
适配器固定座x2
AC电源线(5米)x2
DC电源线(0.2米 )x 1 DC电源线(1.5米)x 1
灯头ML30Bix2 反光罩x2 灯头保护罩x2 手柄x1
硅胶柔光箱x1 硅胶柔光球x1 适配器x2
三脚架转接座
说明书
四角柔光箱x2
便携包x1
DC电源线(1.5米)x 1 DC电源线(0.2米 )x 1
ML-CS1625 ML-CD15ML-SF3030
ML-TA1x2
ML-SF3030

- 05 - - 06 -
电源管理
适配器供电:输入:AC100-240V/1.3A,输出:14V/3.4A/50-60HZ 。
外置电池供电:电池盒上装2个NP-F970,用DC电源线连接电池盒跟灯体即
可供电。
备注:电池盒只供电池放电,不能给电池充电。使用电池盒供电必须两个电
池同时使用,不支持单个电池供电使用。
功能使用操作说明
电池电量:电量指示灯提示电池电量,四格绿点代表满电,三格绿点代表剩
余75%电量,两格绿点代表剩余50%电量,一格绿点代表剩余25%电 量 ,不
足一格绿点时,显示屏会显示低电提示。
1. 开关机
短按开关按键,控制机子的打开和关闭,OLED显示主机当前信息。
CCT
SET
DIM
6500
49
%
K
2. 模式选择:双色温模式/FX光效模式
Fx1
FX2
FX3
FX4
FX5
FX6
FX7
闪光灯
雷闪电
坏灯泡
电视机
蜡烛
火
烟花
闪光
间歇
间歇
慢速
间歇
柴火
短暂
发布会
频繁
频繁
中速
频繁
篝火
连续
狗仔队
持续
持续
快速
持续
火灾
演出
小提示:旋转DIM旋钮选择光效类型,然后短按DIM旋钮实现速率
切换。
2.1.1双色温模式:主界面即为双色温模式。
2.1.2双色温调节:在选择双色温模式后,主界面旋转CCT/SET旋钮,可进行
色温调节(2800~6500K)。正常旋转100个单元值,快速旋转500个单元值。
2.1.3选择FX光效模式:短按CCT/SET旋钮进入菜单,旋转CCT/SET旋钮至FX,
再旋转DIM调节旋钮切换模式。当FX选项出现光效场景图形即为FX光效模
式。
光效模式有7类21种,分别为闪光灯、雷闪电、坏灯泡、电视机、蜡烛、火、烟花
等模拟场景光效。
Fx3:
:
:
5BDB
ON
Ⅲ
序号 场景 显示 显示Ⅰ 显示Ⅱ 显示Ⅲ
选配物品
硅胶柔光箱 硅胶柔光球 四角柔光箱
ML-SF3030 ML-C1
ML-SF3030
D-TAP转DC公头转接线桌面可伸缩支架
ES-TMR

- 07 - - 08 -
3.亮度调节:
直接在主界面旋转DIM调节旋钮,调节亮度大小,正常旋转1个单元值,快速
旋转10个单元值。按一次DIM旋钮可关闭亮度,再按一次DIM旋钮可恢复上
次关闭的亮度。
5.装卸电池盒:
5.1装电池盒:电池盒固定孔卡入手柄电池盒固定扣,卡好后往下拉电池盒,
听到咔声表示已装好电池盒。
4.静音模式开启:
显示屏主界面显示 时为静音模式。
开启静音模式:按CCT/SET按钮进入菜单,旋转CCT/SET按钮至风扇,接着旋
转DIM调节旋钮选择打开或关闭风扇,设置为ON时为非静音模式,按钮设置
为OFF时为静音模式。静音模式时,亮度可调范围0%~50%。
6500
49
%
K
5.1
静音模式
6500
49
%
K
5.4电池盒装入2个NP-F970
电池即可通电。
5.3
5.4
5.3 连接电池盒和灯体:
用电源线直头一端插入电
池盒,另一端弯头插入灯体
DC插座。
5.2 拆卸电池盒:
扣住手柄电池盒固定推制往
上推电池盒,再往外拿。
LOCK
5.2
CCT
SET
DIM

- 09 - - 10 -
8. 高温报警功能
8.1当LED灯珠温度过高时,显示屏会显示高温报警符号 。
8.2当LED灯珠温度恢复正常,灯体会自动解除报警,此时可以旋转DIM旋钮
改变亮度。
8.3当显示屏出现温度传感器故障符号 ,即代表该机器高温报警功能失效。
Errl
SET
6. 低电提示:
当电量低于一格时,显示屏自动弹出低电量提示符号。
7. 锁定功能:
开机状态下,长按CCT/SET按键2秒,屏幕上方显示锁定符号可进行功能锁
定,再长按2秒可解锁。
注意: 仅锁定控制面板功能,
蓝牙远程控制不受影响。
6500
49
%
K
9. 蓝牙设置:
9.1按CCT/SET旋钮进入菜单,旋转CCT/SET旋钮至蓝牙符号 ,旋转DIM调节
旋钮(OFF/蓝牙MAC码/Reset选择),选择OFF时蓝牙关闭;选择蓝牙MAC码(
例如5BDB:)时,蓝牙打开,主界面出现蓝牙符号。选择 Reset再按DIM调节旋
钮可进行蓝牙重置功能。
注:首个移动设备(手机或平板电脑)可直接使用APP操控灯体。更换其他移
动设备(手机或平板电脑)时,灯体进行蓝牙重置后,方可正常使用APP连接。
9.2直接扫二维码即可下载“Godox Light”手机APP。(安卓和苹果系统都可以
使用)具体操作请参考手机APP“帮助”手册,里面有详情教程。
Reset

- 11 - - 12 -
产品参数
LED 摄影灯
适配器
功率
调光范围
CRI(≈)
≈)TLCI(
色温
模式
光效模式
控制方式
蓝牙传输距离
工作环境温度
重量
产品尺寸
ML 30Bi
输出14.0V 3.4A
40W
0%~100%
96
97
2800 ~ 6500K
色温模式、光效模式
共 类 种7 21
手机 无线控制APP /2.4G
米15
-10~40℃
602g (不含手柄和反光罩)
(不含手柄和反光罩)120*88*88mm
* 设计和规格如有变更,恕不另行通知。
lux
fc
lux
fc
lux
fc
lux
fc
lux
fc
测试参数色温
0.5m 1m 2m
2800K
3200K
4300K
5600K
6500K
4850
450
5230
485
5740
533
5650
525
5550
516
1250
116
1330
124
1460
136
1450
135
1430
133
361
33.6
392
36.4
424
39.4
418
38.8
414
38.5
照度数据
裸灯
lux
fc
lux
fc
lux
fc
lux
fc
lux
fc
测试参数色温
0.5m 1m 2m
2800K
3200K
4300K
5600K
6500K
34600
3220
37100
3440
41100
3820
40700
3780
40100
3730
6430
598
6840
636
7530
699
7470
694
7460
693
1540
143
1690
157
1830
170
1800
167
1780
165
ML系列
标准罩

- 14 -
- 13 -
维护保养
•为了防止灰尘的堆积影响到产品的性能,请定时用干净的湿布轻轻擦拭产
品外部。
•1年保修,消耗品电池,充电器,充电器电源线等配件不在此保修范围内。
• 对于不规范操作引起的机器故障不在保修范围内。
• 所有维修概由本厂指定的可供原配件的维修部负责。
• 经发现,擅自检修本品,将取消一年保修期,维修需要收取相关费用。
• 如果本品出现故障或者被水淋湿,在专业人员维修后方可继续使用。
• 如有技术更改,恕不另行通知。
本设备包含型号核准代码为:CMIIT ID:2020DP13510,为该产品的无线电
发射模块。
Foreword
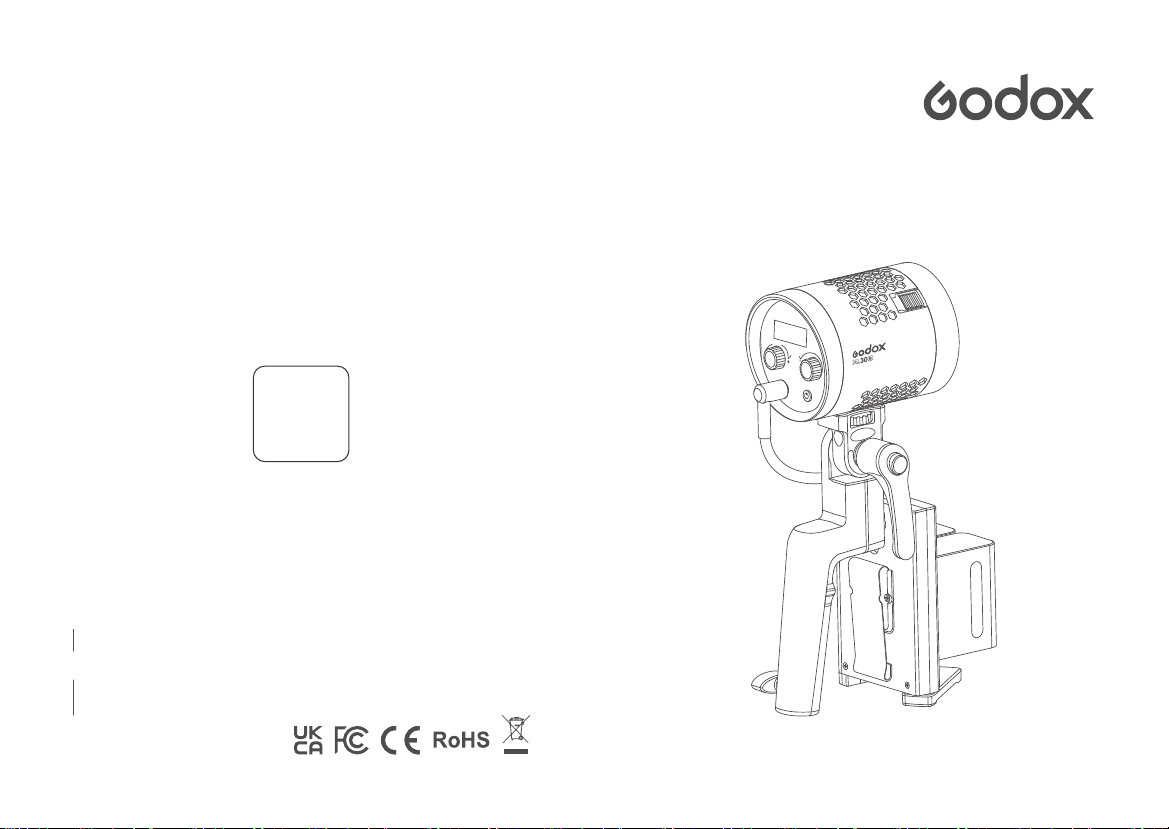
Thank you for purchasing!
ML30Bi LED light, a compact and portable LED light source, special with color
temperature adjustment, Bluetooth wireless and on-board control, high CRI and TLCI
scores to deliver vibrant natural light and reproduce accurate colors, Godox mount to
compatible with all Godox-mount modifiers for various lighting possibilities, is
suitable for live streaming, short video, product shooting and other scenarios.
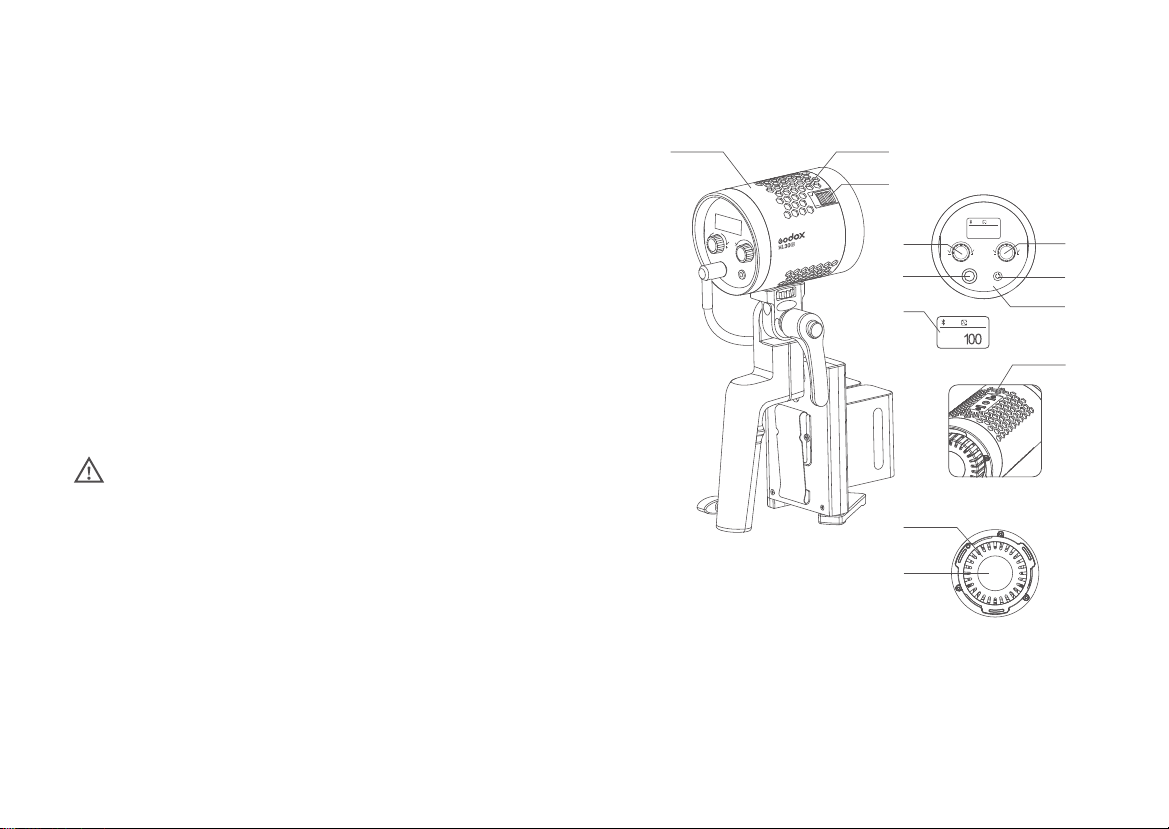
* Compact and portable, with 2 ways of power supply to meet the needs of outdoor
shooting.
* Switch freely between Bi-color mode and FX lighting effects mode.
* Adjust color temperature freely with range of 2800~6500K.
* 21 light effects for selection.
* Adjust thebrightness precisely from 0%-100%.
* Freely switchbetween silent mode and non-silent mode without interference.
* Bluetooth wireless remote control for extra convenience
* With low power prompt.
Features:
Always keep this product dry. Do not use in rain or in damp conditions.
Do not disassemble. Should repairs become necessary, this product must be
sent to an authorized maintenance center.
Keep out of reach of children.
As this product do not have waterproof function, please take measures of
waterproof in rainy or damp environment.
Do not use the light unit in the presence of flammable gases, chemicals and
other similar materials. In certain circumstance, these materials may be
sensitive to the strong light emitting from this light unit and fire or
electromagnetic interference may result.
Always remove the protection cover prior to turning on the light.Always re-install the
cover when packing it away.
Warning

- 15 - - 16 -
⑧
⑤
③②
⑪
⑫
⑦
①
⑩
⑨
6500
49
%
K
6500
%
K
DC
16.8C
SET
CCT
DMI
④
⑥
CCT
SET
DIM
01. Body
02. Power Switch
03. DC Power Socket
04. Control Panel
05. CCT/SET Select Dial
06. DIM Select Dial
07. Display
08. Ventilation Hole
09. Screw Hole for Handle
10. Accessory Slide Lock
11. LED Light Beads
12. Radiator
⑲
⑱
㉒
⑳
㉔
㉕
㉓
㉑
⑬
⑮
⑯
⑭
⑰
Handle
Battery Case
18. Clip
19. Handle Bar
20. Mounting Hole
21. Slide Lock
22. Battery Status Button / Battery Lock
23. Battery Status Indicator
24. Leg
25. Output Port
13. Handle Bar
14. Direction Adjusting Knob
15. Fixing Screw for Light Body
16. Fixing Screw for Light Stand
17. Battery Case Mounting Screw
Parts

- 17 - - 18 -
Operation
Power Management
Power supply
Adapter power supply: input: AC100-240V/1.3A, output: 14V/3.4A/50-60HZ.
External battery power supply: install two NP-F970 batteries into the battery
compartment. Then, use DC power cable to connect the battery case with the light
body to achieve power supply.
The battery case can only offer battery discharging instead of charging. When
powered by battery box, two batteries shall be used simultaneously. Please do not
use one battery individually.
Battery Power Indicator
The green light indicates the remaining power, the four green lights indicate the
remaining 100% power, the three green lights indicate the remaining 75% power, the
two bright green lights indicate the remaining 50% power, and the one green light
indicates the remaining 25% power. Less than 1 green light, the display will show low
power prompt.
1. Power on
Press the power switch to control the ON/OFF of the light, and the OLED display will
show the current information.
Optional Accessory
Telescopic Mounting Rod
ES-TMR
Collapsible Soft Tent
ML-CS1625
Collapsible Diffusion Dome
ML-CD15
Softbox
ML-SF3030
ML-SF3030
D-TAP to DC Male Connector Cable
ML-C1
Reflector
*1
Adapter
*1
Protect Cover
*1
Handle
*1
Light Body ML30
*1
Handle
*1
Adapter Holder
*2
5m AC Power
Cable*2
0.2m DC Power
Cable*1
1.5m DC Power
Cable*1
Light Body ML30
*2
Reflector
*2
Protect Cover
*2
Collapsible Soft Tent
ML-CS1625 *1
Collapsible Diffusion Dome
ML-CD15*1
Adapter
*2
Tripod Adapter
ML-TA1*2
Instruction Manual
*1
Battery Case
BC60 *1
Softbox
ML-SF3030*2
5m AC Power
Cable *1
Instruction Manual
*1
Battery Case
BC60 *1
1.5m DC Power
Cable*1
0.2m DC Power
Cable*1
What's in the Box
Two Light Kit for ML30Bi (Buy separately)
Carry Bag
*1
ML-SF3030

- 19 - - 20 -
Fx3:
:
:
5BDB
ON
Ⅲ
2.1.1 Bi-color Temperature Mode: The main interface diplays the color temperature
mode.
2.1.2 Color temperature adjustment: Rotate the CCT/SET select dial on the main
interface to adjust the color temperature (2800~6500K). Normally rotate 100 unit
values, and quickly rotate 500 unit values.
2.1.3 Select the FX light effect mode: short press the CCT/SET knob to enter the
menu, turn the CCT/SET knob to FX, and then turn the DIM select knob to switch
modes. When the light effect scene graph appears in the FX option, it is the FX light
effect mode. There are 21 kinds of light effect modes in 7 categories, which are
flashlight, thunder and lightning, broken light bulb, TV, candle, fire, fireworks and other
simulated scene light effects.
Note: Short press the DIM select dial to turn brightness 0%, and then press DIMselect
dial again to restore the brightness of the lasttime it was turned off.
Tip: Rotate DIM dial to select light effects type, and then press DIM dial to
realize speed switching.
Special Effects Situation Display
2
FX
1
FX
3
FX
4
FX
5
FX
6
FX
7
FX
Flash
Discontinuous
Discontinuous
Slow speed
Intermittently
Wood
fire
Short
Press conference
Frequent
Frequent
Medium speed
Frequent
Bonfire
Continuous
Paparazzi
Continuous
Continuous
Quick speed
Continuous
Fire
Performance
DisplayIII
DisplayII
Flash
lightning
Broken
bulb
TV
Candle
Fire
Fireworks
Display
CCT
SET
DIM
Fx1
6500
49
%
K
2. Mode selection: Bi-color mode/FX lighting effects mode
3. Brightness adjustment:
Rotate DIM select dial to adjust brightness, normally rotate 1 unit value, and quickly
rotate 10 unit value.
5. Install and detach battery case
5.1 Install battery case: Aim the handle's mounting screws into the battery case's
mounting holes, pull the batter case downwards until being tightened.
When is displayed, the silent mode is turned on.
Turn on the silent mode: press CCT/SET select dial to enter the menu. turn, rotate the
DIM select dial to turn on or off the fan. Set it to ON to enter non-silent mode while set
it to OFF to enter silent mode. In silent mode, the brightness adjustment range is from
0% to 50%.
6500
49
%
K
Press the DIM select dial to turn off brightness, and then press DIM select dial to
restore the brightness of the last time it was turned off.
5.1
6500
49
%
K
Silent mode
4. Silent mode:
Ⅰ

5.3
5.4
LOCK
5.2
CCT
SET
DIM
5.2 Detach battery case: Push the battery
case’ slide lock and push the battery case
upwards to take it out.
5.3 Connect the battery case with light
body: Insert one end of the power cord into
the battery box and the other end into the
DC socket of the lamp cap.
5.4 Insert two NP-F970 batteries and the
LED light can be put into usage.
SET
8.1 When the LED Light bead temperature is too high, the display screen will display
the high temperature alarm symbol .
8.2 When the LED Light temperature returns to normal, the lamp will automatically
release the alarm. At this time, the DIM dial can be rotated to change the brightness.
8.3 When the temperature sensor failure symbol appears on the display, it means
that the high temperature alarm function of the machine has failed.
Errl
6. Low Battery Indication
When the battery is below one grid, the low battery indicator will pop out.
7. Locking Function
In power-on state, long press the CCT/SET button for 2 seconds and the locking icon
will appear on the display. Long press the button for 2 seconds again to unlock.
Note: The locking function only works in panel function, the Bluetooth control
are not affected.
6500
49
%
K
8. High Temperature Alarm Function

Technical Data
* Product design and specifications are subject to change without notice.
9. Bluetooth Control
9.1 Press the CCT/SET select dial to enter the menu, turn the CCT/SET knob to the
Bluetooth icon ,turn the DIM select dial(OFF/Bluetooth MAC code/Reset ), When
OFF is selected,Bluetooth is turned off. When Bluetooth
MAC code (e.g.: 5BDB) is selected,Bluetooth is turned on, and the Bluetooth icon
appears on the main interface. When Reset is selected, short press the DIM Select
Dial to perform Bluetooth reset.
Note: The first mobile device (mobile phone or tablet) can directly use the APP to
control the light body. When replacing other mobile devices (mobile phones or
tablets),the lamp body can be connected normally after Bluetooth reset.
Scan the QR code to download the "Godox Light" mobile app. (It can be used on both
Android and Apple systems) (QR code diagram) . For specific operations, please refer
to the "Help" manual of the mobile APP, which contains detailed tutorials.
LED Light
Adapter
Power
Brightness Adjusting Range
CRI(≈)
TLCI(≈)
Color Temperature
Mode
Lighting effcts mode
Control method
BT Frequency Range
Max. Transmitting Power
Bluetooth transmission distance
Working Temperature
Weight
Dimension
ML30Bi
Output 14.0V 3.4A
40W
0%~100%
96
97
2800~6500K
Bi-color mode/ lighting effect mode
A total of 7 categories and 21 types
Mobile APP/2.4G wireless control
2402.0-2480.0MHz
5dbm
15m
-10~40℃
602g (not include handle and reflector)
120*88*88mm (not include handle and reflector)
Reset
GODOX Photo Equipment Co,Ltd. hereby declares that the This equipment are in
compliance with the essential requirements and other relevant provisions of EU
Directive 2014/53/EU. They are allowed to be used in all EU member states. For more
information of DoC, Please click this web link:http://www.godox.com/DOC/Godox-
_ML_Series_DOC.pdf.
Declaration of Conformity:

Illumination Data Maintenance
This product, except consumables e.g. charger and charger cable, is supported with a
one-year warranty.
Avoid sudden impacts and the product should be dedusted regularly.
Maintenance of the light must be performed by our authorized maintenance
department which can provide original accessories.
Unauthorized service will void the warranty.
If the product had failures or was wetted, do not use it until it is repaired by
professionals.
Changes made to the specifications or designs may not be reflected in this manual.
FCC Statement
This device complies with part 15 of the FCC Rules. Operation is subject to the
following two conditions: (1) This device may not cause harmful interference, and (2)
this device must accept any interference received, including interference that may
cause undesired operation.
Any Changes or modifications not expressly approved by the party responsible for
compliance could void the user's authority to operate the equipment.
Note: This equipment has been tested and found to comply with the limits for a Class
B digital device, pursuant to part 15 of the FCC Rules. These limits are designed to
provide reasonable protection against harmful interference in a residential
installation. This equipment generates uses and can radiate radio frequency energy
and, if not installed and used in accordance with the instructions, may cause harmful
interference to radio communications. However, there is no guarantee that
interference will not occur in a particular installation. If this equipment does cause
harmful interference to radio or television reception, which can be determined by
turning the equipment off and on, the user is encouraged to try to correct the
interference by one or more of the following measures:
- Reorient or relocate the receiving antenna.
- Increase the separation between the equipment and receiver.
- Connect the equipment into an outlet on a circuit different from that to which the
receiver is connected.
- Consult the dealer or an experienced radio/TV technician for help.
The device has been evaluated to meet general RF exposure requirement.
The device can be used in portable exposure condition without restriction.
1250
116
1330
124
1460
136
1450
135
1430
133
361
33.6
392
36.4
424
39.4
418
38.8
414
38.5
lux
fc
lux
fc
lux
fc
lux
fc
lux
fc
0.5m 1m 2m
2800K
3200K
4300K
5600K
6500K
Color
Temperature
Test
arameters
4850
450
5230
485
5740
533
5650
525
5550
516
lux
fc
lux
fc
lux
fc
lux
fc
lux
fc
Test
Parameters
Color
Temperature 0.5m 1m 2m
2800K
3200K
4300K
5600K
6500K
34600
3220
37100
3440
41100
3820
40700
3780
40100
3730
6430
598
6840
636
7530
699
7470
694
7460
693
1540
143
1690
157
1830
170
1800
167
1780
165
With Standard
Reflector
Bare Bulb

产品保修
本文件适用于相关《产品保修信息》(见后面说明)所列产品,其他非属此范围
的产品或部件(如促销品、赠品及其他出厂后附加的部件等)不在此保修承诺
内。
您可直接与产品销售商或授权服务机构联系,也可拨打神牛产品售后服务电
话,与我们联系,由我们的服务人员为您安排服务。申请保修时,您应提供有
效的保修卡作为保修凭证,方可获得保修。如您不能提供有效的保修卡,则在
我们确认产品或部件属于保修范围的情况下,也可以为您提供保修, 但这不
作为我们的义务。
如产品存在下列清况,本文件项下的保证和服务将不适用 ①产品或部件超
过相应保修期;②错误或不适当使用、维护或 保管导致的故障或损坏,如:不
当搬运;非按产品合理预期用途使用;不当插拨外接设备;跌落或外力挤压;
接触或暴露于不适当温度、溶剂、酸碱、水浸或潮湿环境;③由非神牛授权机
构或人员安装、修理、更改、添加或拆卸造成的故障或损坏;④产品或部件原
有识别信息被修改变更或除去;⑤无有效保修卡;⑥使用非合法授权、非标
准或非公开发行的软件造成的故障或损坏;⑦因不可抗力或意外事件造成
的故障或损坏;⑧其他非因产品本身质量问题导致的故障或损坏。遇上述情
况,您应向相关责任方寻求解决,神牛对此不承担任何责任。因非在保修期
或保修范围内的部件、附件或软件导致产品不能正常使用的,不是保修范围
内的故障。产品使用过程中正常的脱色,磨损和消耗,不是保修范围内的故
障。
产品及部件的相应保修期按相关的《产品保修信息》执行。保修期自产品首
次购买日起算,购买日以购买产品时保修卡登记日期为准。
尊敬的用户,本保修卡是申请保修服务的重要凭证,请您配合销售商填写并
妥善保管,谢谢!
用户信息 姓名 联系电话
通信地址
产品信息 型号 产品条码
销售商
信息
名称
联系电话
通信地址
销售日期
备注
注:此表应由销售商盖章确认。
适用产品
如何获得保修服务
不适用保修的情况
产品保修和服务支持信息
产品的保修期和服务类型按以下《产品保修信息》执行:
产品类别
部件
其他
选件名称
电路板
电池
如闪光管、造型灯泡、外壳、
保护罩、锁紧装置、包装等。
保修期
保修服务类型
客户送修
客户送修
客户送修
无保修
保修期 月( )
12
3
12
无
神牛产品售后服务电话 0755-29609320-8062
充电器、电源线,同步线等
带电性能的部件。

If maintenance service is needed, you can directly contact the product distributor or
authorized service institutions. You can also contact the Godox after-sale service
call and we will offer you service. When applying for maintenance service, you should
provide valid warranty card. If you cannot provide valid warranty card, we may offer
you maintenance service once confirmed that the product or accessory is involved in
the maintenance scope, but that shall not be considered as our obligation.
Warranty
The document applies to the products listed on the Product Maintenance lnformation
(see below for further information). Other products or accessories (e.g. promotional
items, giveaways and additional accessories attached, etc.) are not included in this
warranty scope.
The warranty period of products and accessories is implemented according to the
relevant Product Maintenance lnformation. The warranty period is calculated from
the day(purchase date) when the product is bought for the first time, And the
purchase date is considered as the date registered on the warranty card when buying
the product.
Dear customers, as this warranty card is an important certificate to apply for our
maintenance service, please fill in the following form in coordination with the seller
and safe-keep it. Thank you!
Customer
Information
Name
Address
Product
Information
Model Product Code Number
Contact Number
Seller
Information
Name
Contact Number
Address
Note:
Note: This form shall be sealed by the seller.
Applicable Products
Date of Sale
How to Get the Maintenance Service
The guarantee and service offered by this document are not applicable in the
following cases: ①. The product or accessory has expired its warranty period; ②.
Breakage or damage caused by inappropriate usage, maintenance or preservation,
such as improper packing, improper usage, improper plugging in/out external
equipment, falling off or squeezing by external force, contacting or exposing to the
improper temperature, solvent, acid, base, flooding and damp environments, etc; ③.
Breakage or damage caused by non-authorized institution or staff in the process of
installation, maintenance, alternation, addition and detachment; ④. The original
identifying information of product or accessory is modified, alternated, or removed;
⑤. No valid warranty card; ⑥. Breakage or damage caused by using illegally
authorized, nonstandard or non-public released software; ⑦. Breakage or damage
caused by force majeure or accident; ⑧. Breakage or damage that could not be
attributed to the product itself. Once met these situations above, you should seek
solutions from the related responsible parties and Godox assumes no responsibility.
The damage caused by parts, accessories and software that beyond the warranty
period or scope is not included in our maintenance scope. The normal discoloration,
abrasion and consumption are not the breakage within the maintenance scope.
Inapplicable Cases
Warranty Period
Table of contents
Other Godox Lighting Equipment manuals
Popular Lighting Equipment manuals by other brands

Lightolier
Lightolier Lytecaster 2090 specification

Raytec
Raytec vario2ip HYBRID Installation and setup guide

JB Systems
JB Systems LED PINSPOT Operation manual

SLV Elektronik
SLV Elektronik 160331 instruction manual

Barco
Barco SolaSpot LED user manual

Clore Automotive
Clore Automotive Light-N-Carry LNCPOD Operator's manual