manuals.online logo
Brands
  1. Home
  2. •
  3. Brands
  4. •
  5. Growatt
  6. •
  7. Measuring Instrument
  8. •
  9. Growatt ShineWiFi-S Instruction sheet

Growatt ShineWiFi-S Instruction sheet

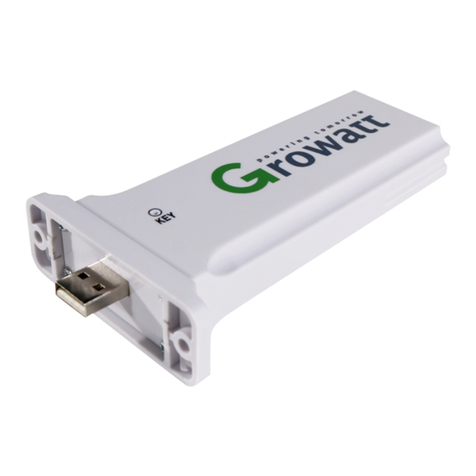
Growatt ShineWiFi-S
快速安装指导
扫描以下二维码,或在谷歌商店或苹果商店搜索“ShinePhone”,
下 并安装软件。载
注册添加设备
详细信息及最新用户手册,请到 http://server.growatt.com下载
备注:1. 确保安装的是最新版本的软件
2. 详情请参考http://server-cn.growatt.com上的内容 。
【安卓&苹果】
400-931-3122 F +86 755 2747 2131
Step1.
A 当RS-232接口的规格如下图的(A)所示时,先将 RS-232接口旁的拨码开关1置于”ON”位置,然后将ShineWiFi-S的RS-232接口与 的RS-232接口对接 ,
并用螺丝将ShineWiFi-S固定在光伏设备上。
B 当RS-232接口的规格为下图中的(B)时,先将防水垫片上的橡胶塞用螺丝刀戳开,然后将ShineWiFi-S的RS-232接口与 的RS-232 接口对接,并用螺丝将ShineWiFi-S固定在 上。
光伏设备 光伏设备 光伏设备
光伏设备 光伏设备 光伏设备
电气连接
Step3. 1. 首先将手机连接到有无线网络的路由器
5.填写手机所连接无线网络名称及密码,确认无误后点击“配置”,等待页面弹出“配置成功”后,自动跳转到“我
的电站”页面。如果APP提示配置超时,请查询附录故障快速排查表。排除故障后,登录之前所注册账户进入Shine
Phone 电站”页面点击右上角“+”选择“查看采集器” ,在“采集器列表”页面长按此采集器序列号,
选择“配置采集器”,重新对ShineWiFi-S进行配置。
注:观察ShineWiFi-S三色网络灯闪烁情况判断配置情况,配置过程中,红色指示灯闪烁表示ShineWiFi-S与
连 接正常,绿色指示灯闪烁表示ShineWiFi-S已连接到路由器,蓝色指示灯闪烁表示设备已通信正常,此时可
在ShinePhone查看设备上传信息及数据。
,在“我的
光伏
设备
2. 运行ShinePhone , 进入登录页面,点击一键建站;
用螺丝刀将光伏设备RS-232接口上的防水金属片卸下:
6. 在“我的电站”点击所监控设备,查看光伏设备信息;
E service@ W www.growatt.comginverter.com
开启光伏设备,并检查连接状态
Step2.
ShineWiFi-S安装完成后,开启光伏设备。初次安装时,ShineWiFi-S
上面的红色LED闪烁,表示和光伏设备通讯正常。
LED闪烁状态说明
LED闪烁状态
工作状况
三个灯都不亮
RS232端口没找到光伏设备
只有红色LED灯闪烁
ShineWiFi-S与 连接
正常
光伏设备
只有绿色LED灯闪烁
ShineWiFi-S与 、路
由器通讯正常
光伏设备
只有蓝色LED灯闪烁
ShineWiFi-S与 、路
由器、服务器通讯正常
光伏设备
a 路由器的无线名称应由英文和数组组成,不支持中文名称。
b为了安全考虑,请使用加密的无线网络。
c暂不支持需二次认证的网络。
d暂不支持桥接的无线信号。
)
)
)
)
3.扫描ShineWiFi-S外包装或设备外盒上的条形码后,
自动跳转到注册页面;
4. 填写用户真实手机号及账户密码,点击“注册”,提示“注册成功”
并自动跳转到“ShineWiFi-S配置”页面;
注:手机是找回密码等重要功能的凭证,请填写真实手机号码。
7. 如需添加采集器、查看采集器、删除采集器,配置采集器及添加电站,
请在ShinePhone “我的电站”页面点击右上角“+”进行操作。
Step4. 重置采集器
更换路由器,或路由器密码更换,都需重置采集器后再进行配置连接。
首先请按住采集器主体KEY键6秒以上,直至三色LED灯变为长亮后松
开,在ShinePhone “我的电站”页面点击右上角“+”进入采集器
列表,在“采集器列表”页面长按此采集器序列号选择“配置采集器”
进行配置。
Step5. 产品图片
附录:故障快速排查
LED闪烁状态
工作状况
快速排查
三个灯都不亮
RS232端口没找到光伏设备
光伏设备RS232拨码开关未拨开
长时间配置过程后,仍只有绿
色LED灯闪烁
ShineWiFi-S已连接到路由器,但无法连接服务器
(1检查路由器是否连接到互联网
(2对服务器和端口号进行限制,采集器需要使用
)
)路由器是否
5279,5280两个端口
只有蓝色LED灯闪烁
ShineWiFi-S与 、路由器、服务器通讯正常光伏设备
正常工作
红灯长亮
WiFi模块错误
模块错误,需更换ShineWiFi-S
绿灯长亮
ShineWiFi-S无法连接到路由器
(1检查路由器
a) 线名称应由英文和数字组成,不支持中文名称
b) 为了安全考虑,请使用加密的无线网络
c) 暂不支持需二次认证的网络
d) 暂不支持桥接的无线信号
(2检查配置过程中填写的路由器账户密码是否正确
)
路由器的无
)
蓝灯长亮
WiFi模块处于AP模式
调试模式,非专业人士请单击按钮退出次模式
Shine WiFi-S按钮说明
按钮操作
说明
ShineWiFi-S正常工作时,单击或双击
ShineWiFi-S上的按钮(ShineWiFi-S指示
灯会由闪烁状态变成长亮状态)
进入AP模式(AP模式为调试模式,
非专业人士不建议使用)
ShineWiFi-S在AP模式下,单击或双击
ShineWiFi-S上的按钮。(ShineWiFi-S指
示灯会由长亮状态变成闪烁状态)
退出AP模式
长按直至三个LED长亮起后松开
重置采集器,恢复出厂设置
Scan the QR code below to download ShinePhone, also you
search ShinePhone in iOS or Google Play Store,
install it.
can
download and
Registration and adding device
Note:1. Make sure you download the latest version
2. For further information please visit server.growatt.com
【 】Android & iOS
Step3. 1. Connect your mobile phone to the WiFi of your home
which the ShineWiFi-S module will be connected.
1) The router name should consist with English letters
numbers, it does not support special symbols.
For safety reason, please use an encrypted wireless network
It does not support a public network that uses a secondary
authentication.
It does not support bridge network.
2. Open ShinePhone APP, click “Register” on login page.
router
of
and
2)
3)
4)
After install the ShineWiFi-S module, turn on the inverter, red LED
flashing indicates the inverter and ShineWiFi-S communication is
normal.
LED State
Indication
ALL three LED off
ShineWiFi-S not connected well
with inverter RS232 port
Only Red LED flashes
ShineWiFi-S and inverter
communication is OK
Only Green LED flashes
ShineWiFi-S, inverter and router
communication is OK
Only Blue LED flashes
ShineWiFi-S, inverter, router and
ShineServer communication is OK
3.Select country and city, then click “Next” enter next page.
Note: If you select a wrong country and city, the system
time maybe wrong.
4.Fill out the required information, then click “Next”, it will guide
you to the “Add datalogger” page.
Appendix A: ShineWiFi-S KEY Button Description
LED State
Indicate
Troubleshooting
All three LEDs are dark
ShineWifi-S can not find inverter
via RS232 port
1.Check if the DIP switch beside inverters RS232 port is switched DIP1 to “ON”
2.Try to reconnect ShineWifi-S to the inverter RS232 port
After configuration,
Only Green LED flashes
ShineWiFi-S already connected to
The home router, but not connected
To Growatt ShineServer
(1)Check if home router is connected to the internet
(2)Check if the router firewall allows to select port 5279 and 5280
After configuration,
Only Blue LED flashes
ShineWiFi-S communication OK with inverter,
home router, and Growatt ShineServer
Normal working state
Red LED always ON
ShineWiFi -S module error
Need to replace with a new ShineWiFi-S
Green LED always ON
ShineWiFi-S can′t connect to the home router
(1)Check router information
a) Router name should consist of English letters and numbers, it does not
support special symbols
b) For safety reason, please use encrypted wireless network
c) It does not support public network that use secondary authentication
2)Check if you filled in the correct name and password of the home router
when configuring it
(
Blue LED always ON
ShineWiFi-S module is in AP mode
Debug mode, short press the KEY button to quit
Operation
Description
When ShineWiFi-S is powered on,
remove the rubber plug, and press the
KEY button. (ShineWiFi-S LED will
change from flash to always ON)
ShineWiFi-S will enter to AP
mode.(AP mode is a debug
mode, only allowed for
professional)
When ShineWiFi-S in AP mode, press
the KEY button of ShineWiFi-S
(ShineWiFi-S LED will change from
always ON to flash)
Quit AP mode
Long press the KEY button for
More than 6 sec (ShineWiFi-S
all LEDs always ON)
Reset ShineWiFi-S
to factory settings
Growatt ShineWiFi-S
Quick Installation Guideline
For more info, please download from http://server.growatt.com
+86 755 2747 1942 F +86 755 2747 2131
service@ginverter.com W www. growatt.com
E
Step1.
A If the inverter RS-232 port is like type A, switch the DIP1 switch to “ON”, then connect ShineWiFi-S to the inverter RS-232 port, and fix it with the screws
B If the inverter RS-232 port is like type B, remove the rubber plug, then connect ShineWiFi-S to the inverter RS-232 port, and fix it with the screws.
Connection between inverter and ShineWiFi-S module
Remove the RS-232 cover of the inverter, plug ShineWiFi-S to the RS-232 port.
Turn on inverter and check ShineWiFi-S state
Step2.
5. Scan or input the ShineWiFi-S barcode and checkcode,then
click “Register”, it will move you to the “Set ShineWifi-S”
page.
6.Fill out the wifi network and password, then click“Configuration”, after successful configuration, a note will pop up
“Configured successfully”, then it will move to the “my plant” page.
Note: There are 3 LEDs on ShineWiFi-S, only the blue LED flashing indicates the ShineWiFi-S module is successfully
connected to the router and Growatt Shine Server.
7.If the pop up a message says “Failed”, please refer to Appendix A of the troubleshooting guide
to solve the problem. After that, login to your account and click the “+” sign on the right top side
of the page, and select“Datalogger list”in the appearing dialog window. Push on the datalogger’s
serial number for 3 sec, until a small dialog window appears,select “Configure datalogger”. It
will move to the “Set ShineWifi-S”page,enter the home routers name and password, then click
“Set”, the connection configuration process will begin.
8. After successful configuration, it will move to the
plant” page, select the inverter in the device list to
inverter update information.
check
the
9.If you want to add/edit/delete/configure a datalogger, click the “+” sign on the right top side
“my plant” page. There are 4 options in the dialog window when push on the datalogger’s
click the one you need.
1) Add datalogger” is for adding a new ShineWiFi-S module to this account.
2) Edit datalogger” is used to assign an alias name for your ShineWiFi-S module.
3) Delete datalogger” is used to remove the ShineWiFi-S module from this account.
Configure datalogger” is used for configuring the connection of the ShineWiFi-S module to
of the
serial
number,
“
“
“
4) “ the
router.
“my
Reset ShineWiFi-S to Factory Settings
Step4.
When you have changed your home router password, or changed to
you need to reset ShineWiFi to factory settings and
rubber plug, and press the KEY button
up, then login to your
long press this
a new router,
reconfigure it. Remove the
for 6 sec, until all three LEDs long light
ShinePhone account, click the “+”on right top of this page,
datalogger serial number to reconfigure.
Troubleshooting
Other Growatt Measuring Instrument manuals

Growatt ShineMaster User manual

Growatt

Growatt ShineMaster User manual

Growatt Smart Meter-US User manual

Growatt

Growatt Smart Meter-US User manual

Growatt ShineWiFi-X User manual

Growatt

Growatt ShineWiFi-X User manual

Growatt ShineWiFi-X User manual

Growatt

Growatt ShineWiFi-X User manual

Growatt Shine GPRS-F User manual

Growatt

Growatt Shine GPRS-F User manual

Growatt MIN TL-X Manual

Growatt

Growatt MIN TL-X Manual

Growatt Shine3G Instruction sheet

Growatt

Growatt Shine3G Instruction sheet

Growatt ShineWiFi Instruction sheet

Growatt

Growatt ShineWiFi Instruction sheet

Growatt ShineLink-X User manual

Growatt

Growatt ShineLink-X User manual

Growatt Lucas User manual

Growatt

Growatt Lucas User manual

Growatt ShineWiFi-X User manual

Growatt

Growatt ShineWiFi-X User manual

Growatt SPH Series User manual

Growatt

Growatt SPH Series User manual

Growatt ShineLimit User manual

Growatt

Growatt ShineLimit User manual

Growatt TPM-CT-E-EU User manual

Growatt

Growatt TPM-CT-E-EU User manual

Growatt ShineLink-X Operating and maintenance instructions

Growatt

Growatt ShineLink-X Operating and maintenance instructions

Growatt TPM-E SDM630-Modbus V3 User manual

Growatt

Growatt TPM-E SDM630-Modbus V3 User manual

Growatt TPM-CT-E-US User manual

Growatt

Growatt TPM-CT-E-US User manual

Growatt TPM-CT-C-EU User manual

Growatt

Growatt TPM-CT-C-EU User manual

Growatt MOD 3-15KTL3-X User manual

Growatt

Growatt MOD 3-15KTL3-X User manual

Growatt ShineWiFi-X Instruction sheet

Growatt

Growatt ShineWiFi-X Instruction sheet

Growatt ShineVision User manual

Growatt

Growatt ShineVision User manual

Popular Measuring Instrument manuals by other brands

TESTO 174T Quick instruction manual

TESTO

TESTO 174T Quick instruction manual

HEDÜ TALMETER TM 2 m manual

HEDÜ

HEDÜ TALMETER TM 2 m manual

LaserLiner CompactPalm-Laser PowerBright Plus manual

LaserLiner

LaserLiner CompactPalm-Laser PowerBright Plus manual

East Tester ET1080A user manual

East Tester

East Tester ET1080A user manual

IET Labs 1409 Series Operation manual

IET Labs

IET Labs 1409 Series Operation manual

Walz PHYTO-PAM-II manual

Walz

Walz PHYTO-PAM-II manual

Maximum Merlin installation guide

Maximum

Maximum Merlin installation guide

PRESIDIUM Dial Gauge User handbook

PRESIDIUM

PRESIDIUM Dial Gauge User handbook

PROLEC PME 500 Operator's manual

PROLEC

PROLEC PME 500 Operator's manual

Associated 12-1015 rev-B user manual

Associated

Associated 12-1015 rev-B user manual

Aaronia SPECTRAN V6 quick start guide

Aaronia

Aaronia SPECTRAN V6 quick start guide

MGP Instruments DOSISYS LDM 210 user manual

MGP Instruments

MGP Instruments DOSISYS LDM 210 user manual

Valeport 106 operating manual

Valeport

Valeport 106 operating manual

Hastings 6600 Operating and maintenance manual

Hastings

Hastings 6600 Operating and maintenance manual

wtw Multi 3430 operating manual

wtw

wtw Multi 3430 operating manual

Osmetech Opti 1 Service manual

Osmetech

Osmetech Opti 1 Service manual

getemed CardioMem CM 100 XT user manual

getemed

getemed CardioMem CM 100 XT user manual

PCB Piezotronics P357B21 Installation and operating manual

PCB Piezotronics

PCB Piezotronics P357B21 Installation and operating manual

manuals.online logo
manuals.online logoBrands
  • About & Mission
  • Contact us
  • Privacy Policy
  • Terms and Conditions

Copyright 2025 Manuals.Online. All Rights Reserved.