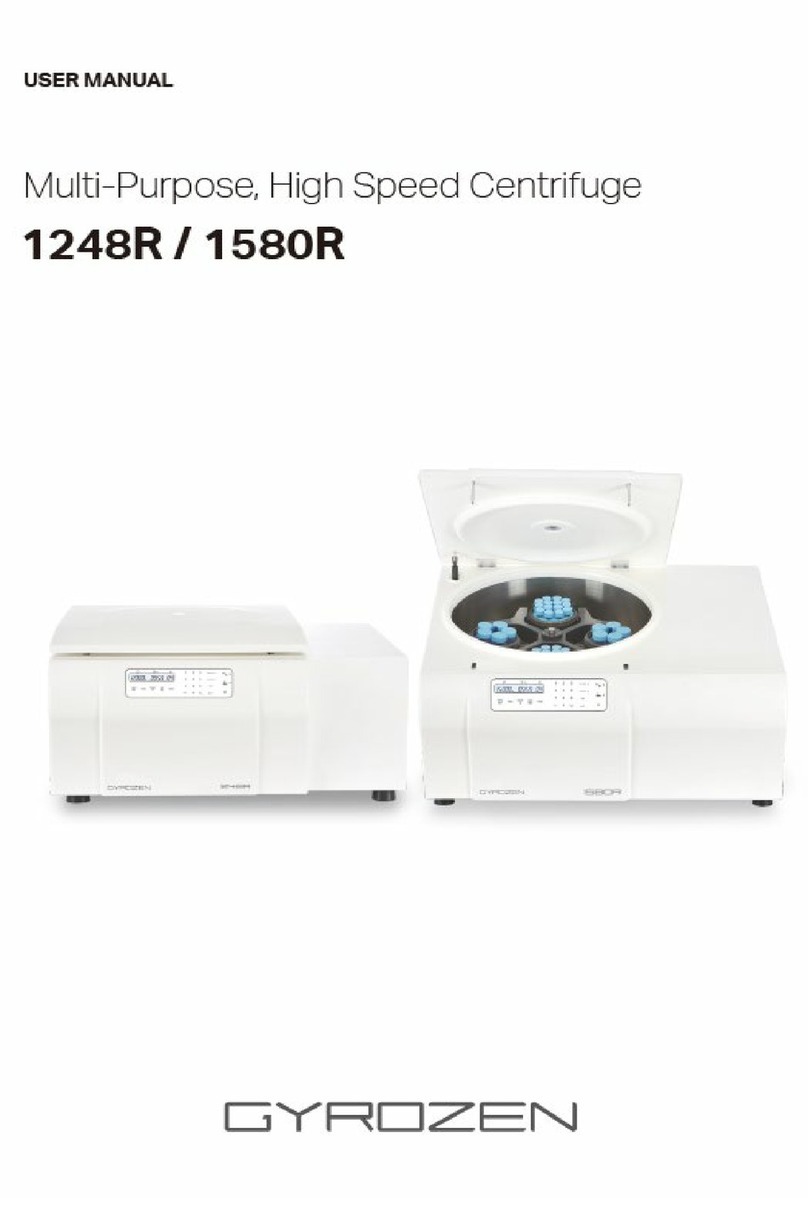
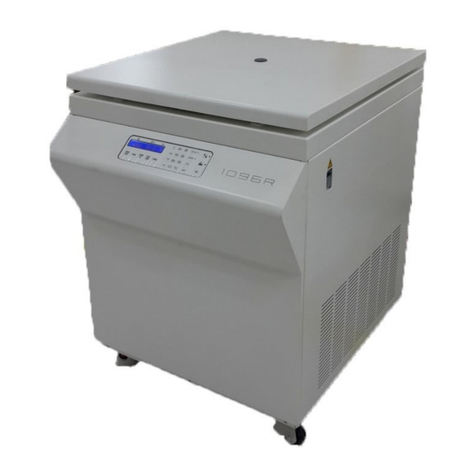
GYROZEN 1696R User manual


Operating Manual
UM-1696R(Rev.1)
2 www.gyrozen.com
Manufacturer: GYROZEN Co., Ltd.
1F & 5F, 16 Arayuk-ro, Gimpo-si, Gyeonggi-do, KOREA
Tel: +82-2-3452-7736 / Fax: +82-31-985-9158
info@gyrozen.com
http://www.gyrozen.com

CONTENTS
1. Safety Warning and Caution ---------------------------------------------- 4
1.1 Safety Label ----------------------------------------------------------------- 4
1.2 Caution ----------------------------------------------------------------------- 6
2. Configuration and information ------------------------------------------- 7
2.1 Configuration --------------------------------------------------------------- 7
2.2 Component------------------------------------------------------------------ 7
2.3 Information(Technical Specification) --------------------------------- 8
3. Installation-------------------------------------------------------------------- 9
3.1 Unpacking------------------------------------------------------------------- 9
3.2 Power connection --------------------------------------------------------- 9
3.3 Lid open -------------------------------------------------------------------- 10
3.4 Rotor Mounting and Separation ------------------------------------- 10
3.5 Sample tube mounting -------------------------------------------------- 12
4. Use and Precautions ------------------------------------------------------ 13
4.1 Operation ------------------------------------------------------------------ 13
4.2 Speed set------------------------------------------------------------------- 14
4.3 Time set -------------------------------------------------------------------- 15
4.4 Temp set-------------------------------------------------------------------- 16
4.5 FASTCOOL set ------------------------------------------------------------- 16
4.6 ACC/DEC -------------------------------------------------------------------- 17
4.7 Start/stop set-------------------------------------------------------------- 18
4.8 Pulse(Short spin) --------------------------------------------------------- 18
4.9 Save and Recall Programs , Hot KEY P1/P2/P3/P4 ---------------- 19
4.10 Key Lock ------------------------------------------------------------------ 20
4.11Preference----------------------------------------------------------------- 21
4.12 Change settings during operation ----------------------------------- 21
4.13 Emergency manual lid open ------------------------------------------ 22
5. Admin ------------------------------------------------------------------------- 23
6. Problem solution----------------------------------------------------------- 24
6.1 Check before report a failure ------------------------------------------ 24
6.2 Error message------------------------------------------------------------- 25
7. Rotor & accessories-------------------------------------------------------- 27
A/S : 02-3452-8966 / 070-8620-5350 / techsupport@gyrozen.com 3
Refrigerated High Speed Centrifuge, 1696R

Operating Manual
User's Guide contains detailed instructions for using the 1696R product.
Please observe the following for proper use and maintenance.
☞Be sure to read this instruction manual before using the device for the first time.
☞This manual is part of the product. Always place around the product.
☞If you are transferring equipment to a third party,
please ensure that this manual is delivered with the product.
1. Safety Warning and Caution
1.1 Safety label
Labels attached to the body provide information on how to use and safety.
Label Information
Warning indication of risks and warnings
Electric shock hazard warning indicator
In case of emergency,
the hole position is manually opened
Rotor / Tube Insert and Lid Close Warning Display
4 www.gyrozen.com
Manua
l Door Open

Warning! An electric shock due to damage to the device or power cable.
☞Check the equipment and power cables for damage and, if correct, turn on the power.
☞Only use products that have been installed and repaired properly
☞Disconnect the power cable of the equipment in case of danger
WARNING! Electrical shock
☞Ensure that the main body of the product is normally assembled and free from
external impact or damage
☞Do not disassemble the body except as a skilled technician.
☞Do not allow liquids to penetrate into the system
WARNING! Risk due to incorrect supply voltage
☞Use only the supplied power cable.
Check and use the supply voltage to meet the specifications of the product
☞Use only a protective grounded power socket
WARNING! Risk of injury due to incomplete fitting
☞Use the rotor & rotor lid after verifying that it is fully locked.
☞If you hear a strange noise or noise when the centrifuge is started,
the rotor or rotor lid may not be fitted correctly.
Press the start/stop key to stop the product.
WARNING! Risk of injury due to non-symmetrical insertion
☞Attach symmetrically to the same tube or bucket.
☞When using a swing rotor, make sure to fit the bucket in all positions
☞Always apply the same type of tube. (weight, material, volume)
WARNING! Rotor lid or bucket cap damaged by chemicals
The transparent rotor lid or bucket cap is made of PC and PP,
which can be loose due to the effects of organic solvents
☞If the rotor lid or bucket cap comes into contact with organic solvents,
wash it immediately
☞Regularly check for damaged or cracked parts
☞If damaged or cracked parts are found, do not use them and replace them
A/S : 02-3452-8966 / 070-8620-5350 / techsupport@gyrozen.com 5
Refrigerated High Speed Centrifuge, 1696R

Operating Manual
1.2 Safety Precautions
Be sure to read the operating instructions before using this product.
Prevent possible malfunctions during use.
1. ALWAYS locate the instrument on a flat, rigid and stable table capable of withstanding
the weight of the instrument and its spinning operation.
2. ALWAYS make a safety zone of 30 cm around the centrifuge to indicate that neither
hazardous materials nor persons should be permitted within the area during operation.
- ALWAYS position the instrument with enough space on each side of instrument to
ensure proper air circulation.
3. Always install the instrument in a place where temperature and humidity can be controlled.
- Permissible ambient temperature: +5°C ~ +35 °C, Relative humidity: ≤ 85%)
4. Before connecting the power, check the rated voltage.
5. Should not use unapproved rotors and associated accessories.
6. Before operating the instrument, check if the rotor and the rotor lid are securely fastened.
- Should operate the instrument with a rotor properly installed and secured to the motor shaft
7. Mount the rotor on the motor shaft properly, check it with spinning manually.
8. Do not stop the rotor by touching with hand during the instrument is running.
9. Emergency lid open should be performed only when spinning is completely stopped.
10. Should not exceed the rated speed or specific gravity.
Samples whose density is greater than 1.2g/ml must have reduced
maximum rotational speed to avoid rotor failure.
11. The sample content should not exceed 80% of total capacity of a tube. Otherwise, it
would cause spillage of sample fluid and even the tube breakage.
12. ALWAYS load the tubes symmetrically with evenly weighted samples to avoid
rotor imbalance. If necessary, use the water blank to counterbalance the unpaired sample.
13. The operation speed should not exceed the highest value of the individual guaranteed
g-forces of each centrifuge, rotor, bucket or adaptors and sample container, especially
the guaranteed g-force of sample container should not be neglected.
14. The rotors should be cleaned and kept dry after every use for longer life and safety.
15. ALWAYS disconnect the power supply prior to maintenance care and service to avoid electrical shock.
16. ALWAYS use proven disinfection procedures after centrifuging biohazardous materials.
17. Should not centrifuge flammable, toxic, radioactive, explosive, or corrosive materials.
18. When it is necessary to use toxic or radioactive materials or pathogenic
micro-organisms which belong to the Risk Group II
of WHO: “Laboratory Bio- safety Manual,” should follow national regulations.
6 www.gyrozen.com

2. Product Description & Technical Specification
2.1 Product Description
①Lid ④Manual Lid Opening Hole ⑦Drain hole
②Power Socket ⑤Display & Control Panel
③Power Switch ⑥Tool Box (must be closed during operation,
can store Wrench, Lubricant, Balancing tube )
①
②
③
⑥
④
⑤
2.2 Accessory
User manual AC Power Cord Rotor Locking Tool
(Manual Lid Open Tool) Lubricant(SuperLube)
(For swing-out rotor only)
A/S : 02-3452-8966 / 070-8620-5350 / techsupport@gyrozen.com 7
Refrigerated High Speed Centrifuge, 1696R
⑦
Attention
The refrigerated centrifuges will be a drain hole on the right of the main body. This hole will be
equipped to allow water or condensate to drain out of the centrifuge. If there is a moisture or
condensate inside of chamber, it can be drained outside by turning the drain cap of the drain hole.

Operating Manual
2.3 Technical Specification
Max. RPM/RCF Fixed angle 16,000 / 27,590 xg
Max. RPM/RCF Swing out 5,000 / 5,394 xg
Max. Capacity Fixed angle 6 x 250 mL
Max. Capacity Swing out 4 X 1,000 ml
Temp.Range (℃) -11 ~ 40
FastCool Button Yes
Time Control Timed < 10 hr or Continuous
Time Count Modes Selectable, At Set Speed or From Starting
RPM/RCF Conversion Yes
ACC / DEC Ramps 9/10
Program Memory 100 (4 Easy Program Call/Save)
Display White-16-Digit FND
Automatic Rotor Identification Yes
Radius Correction Yes
Imbalance Cut-Off Yes
Safety Lid Lock Yes
Lid Drop Protection Yes
Motorized Lid Open & Close Yes
Power Supply 230V~, 50Hz
Power Requirement (VA) 2000
Dimension (WxDxH /mm) 775 x 695 x 395
Weight without Rotor (Kg) 116
8 www.gyrozen.com

3. Installation
3.1 Unpacking
1. Open the box and check accessory.
3.2 Power On/Off
1. After connection the AC power cord at the power socket on the
left back of the instrument, Put the plug into the outlet.
☞Check the proper Power(220V~, 60Hz)
2. Turn on a power switch [ I ] on the left side of instrument.
☞With beeping sound, right before setting value is displayed.
☞Check the status of rotor to push lid button at the panel,
if rotor is not installed or recognized by instrument.
Attention! [Automatic rotor recognition ] system
This product has automatic rotor recognition function for user safety.
Message “ Rotor scan…” will be shown when power on.
There will be error message , if rotor isn’t installed.
If this message appears, power off and install the rotor.
It will normal operate when power on.
Start up screen after power on
Start up screen will be shown as below after power on.
Logo / name of model / Rotor ID automatic Main screen will be shown,
software version recognition screen after rotor recognition
A/S : 02-3452-8966 / 070-8620-5350 / techsupport@gyrozen.com 9
Refrigerated High Speed Centrifuge, 1696R

Operating Manual
3.3 Lid Open
Use to open the Lid
Display operation button
1. Push the[ ] button while lid closed.
☞Lid will automatically closed, lower down to the end by automatic door close device.
☞Lid open phase will show at the display when lid opened.
☞Lid close phase will show at the display when lid closed.
3.4 Mounting and separation of rotor
Swing out Rotor
1. Remove moisture or foreign substance of rotor and shaft
by dry cloth before assembly the rotor.
2. Place the rotor on the center axis of the chamber
and turn it using the provided rotor locking tool.
☞Rotor installation : clockwise direction
☞Rotor separation : anti-clockwise direction
☞Hold the rotor wing with one hand and
use the tool with the other to install or disconnect.
10 www.gyrozen.com

3. Fit the correct bucket for the sample tube to the rotor latch.
☞When used, all rotors must be equipped
with the same bucket.
☞Beware that the rotor and the bucket are free
from dirt or foreign substance.
☞Manually rotate the rotor to make sure that
all the fitted buckets are smooth.
Make sure it is unfolded and if the unfolding is not smooth or the unfolding angle is not the same,
apply lubricant (grease)
Fixed Angle Rotor
1. Remove moisture or foreign substance of rotor and shaft by dry cloth before assembly the rotor.
2. Place the rotor on the center axis of the chamber and turn it using the provided rotor locking tool.
☞Rotor installation : clockwise direction
☞Rotor separation : anti-clockwise direction
☞Hold the rotor wing with one hand and use the tool with the other to install or disconnect.
3. Insert the correct sample tube into the rotor,
close the rotor lid, and fix the lid knob clockwise.
☞Rotor lid installation : clockwise direction
☞Rotor lid separation : anti-clockwise direction
☞Hold the rotor with one hand and rotate
the rotor lid knob with the other to secure or remove it.
4. After installing the rotor,
place the horizontal on the rotor center nut and
keep the water droplets inside level.
☞Keep the product level so that
all water droplets inside the horizontal are located within
both black lines.
A/S : 02-3452-8966 / 070-8620-5350 / techsupport@gyrozen.com 11
Refrigerated High Speed Centrifuge, 1696R

Operating Manual
Attention! Check the rotator lid before driving.
Very loud noise and serious damage can occur,
If you operate the fixed angle rotor without closing the lid.
Be sure to close the rotor lid and use it.
3.5 Sample tube mounting
1.Before inserting the sample tube,
make sure that there is no foreign matter or moisture inside the rotor hall or bucket.
☞If you have any foreign substances or moisture, make sure to remove them with a dry cloth.
2. The sample tubes must be installed symmetrically.
☞There shall be no difference in weight of the tube filled with samples,
and the density shall be equally symmetrical.
☞It is safe to use after check the strength of the centrifugal force(Max. RCF)/tube material/
the appropriate sample capacity of the sample tube.
?? ?
9,000 xg 8,000 xg 10,000 xg
Wait! [Sample Weight Asymmetric Detection] System
For the safety of the device as well as the user,
the sample weight varies by more than a certain amount.
12 www.gyrozen.com
Check the centrifugal
force strength of the sample
container itself

4. Usage and Care Points
4.1 Operation (Control Panel)
Display Shows SPEED, TIME, TEMP, ACC, DEC, Prog.
Button Description
Function Key
UP/ DOWN
LEFT/ RIGHT
Function cancel
Del. or Back space
Entering the setup mode or saving the settings
Change the setup mode
Cancel all settings
Back space or delete for the category
Option Enter Configuration (Time counting , Button sound,
Number of alerts when the operation is complete, Set Rotor Radius
Number
Temp code setting
Program call/ save
1,2,3,4,5,6,7,8,9,0 Enter setting value
temperature code( + / - set)
Program load and save
Program Hot
Key Lock
FastCOOL
Start/Pulse, STOP
Lid open
P1, P2, P3, P4 Program load shortcut
Key lock
Fast cool function
Start / Pulse
Short spin action when pressed for 2 seconds
Lid open
Power saving mode All non-power displays and panel leads turn off when
power saving mode is turned on. Power saving mode always running.
A/S : 02-3452-8966 / 070-8620-5350 / techsupport@gyrozen.com 13
Refrigerated High Speed Centrifuge, 1696R

Operating Manual
4.2 Speed set
Rotation speed is indicated as RPM/RCF, RPM is set to 16,000 and RCF to 27,590 xg.
The RPM and RCF values are interlocked and automatically calculated..
RPM set
Display Operation button
1. [Enter setup mode ] Push Ent.
☞Display: The rpm value flashes
2. [Enter rpm setting ] Enter the desired setting using the numeric keys .
☞rotor is max. /min. Only the speed range value is entered .
☞If you do not enter a set value for 10 seconds, the setup mode is turned off.
☞Press Del. or and re-enter
the settings, If the setting value is entered incorrectly.
3. [Save RPM setting] Push Ent.
☞Press ENT. to complete the rpm setting value
RCF set
Display Operation button
1. [Enter setup mode ] Push Ent.
☞Display: The RPM value flashes
2. [Enter RCF setting ] Push ▲(UP)
☞Press ▲(UP) to enter RCF setting mode.
☞Display: Flashing RCF values, converting to RPM → RCF
3. [Enter RCF setting value] Enter the desired setting with the numeric keys.
☞rotor is max. /min. Only the speed range value is entered
☞If you do not enter a set value for 10 seconds, the setup mode is turned off
☞Press Del. or and re-enter
the settings, If the setting value is entered incorrectly.
14 www.gyrozen.com

4.3 Time set
Time can be set to 'hour', 'minute', up to 9 hours 59 minutes, or continuously (0:00).
Display Operation button
1. Press Time key
☞minute value blinks on the display.
☞Time value blinks after press Time key.
2. Press Ent. after input set value
☞Change the set value with the numeric keys and press Ent. to save the time value.
☞After setting time, press TIME key to blink minute value and change setting value
then press Ent. to change and save hour and minute at the same time.
☞Set range: Hour: 0~9 / Minute 0 ~59
Set 00:00 goes up to the up-count and down-count at 9:59.
-Set 1 min: down count from 59, 58….0
-Set 0:00: up count from 0, 1, 2... until 1 minute and it will be marked 1 minute after 59.
☞If you do not enter a set value for 10 seconds, the setup mode is turned off.
☞Press Del. and re-enter setting, if the set value is incorrectly.
A/S : 02-3452-8966 / 070-8620-5350 / techsupport@gyrozen.com 15
Refrigerated High Speed Centrifuge, 1696R

Operating Manual
4.4 Temp set
The temperature range can be set from -11 to 40 degrees.
Display Operating button
1. Press TEMP key.
☞Temp value blinks on the display.
2. Press Ent. after set value.
☞Change the set value with the numeric keys and press Ent. to save the temp value.
☞Press (+/-) to change temperature sign.
☞Set range: - 11 ~ 40℃
☞If you do not enter a set value for 10 seconds, the setup mode is turned off.
☞Press Del. and re-enter setting, if the set value is incorrectly.
4.5 ACC/DEC set
For temperature sensitive samples, it supports fast cooling function
that reaches below room temperature in a short time.
Display Operating button
16 www.gyrozen.com
Set ACC 9 steps, DEC 10 steps(natural Dec :0)
for sensitive sample protection and clean layer separation.
1. Press ACC or DEC key.
☞ACC/DEC value blinks on the display.
2. Press Ent. after set value.
☞Change the set value with the numeric keys and press Ent. to save the ACC or DEC value.
☞Set range: ACC 1~9 / DEC 0~9 (The higher the number, the faster the step.)
☞If you do not enter a set value for 10 seconds, the setup mode is turned off.
☞Press Del. and re-enter setting, if the set value is incorrectly.

A/S : 02-3452-8966 / 070-8620-5350 / techsupport@gyrozen.com 17
1. Input set value(SPEED, TIME, TEMP, ACC, DEC) to save the program.
2. S xx value blinks on the display after press program key.
3. Input the number and press Ent. to save.
*Frequently used conditions are convenient by using program hot key p1,p2,p3.
After input set value like above section 1 and press P1~P3 key about 3 sec,
SAVE -Px is displayed in the bottom of the screen and saved automatically.
☞Set range: 0~99(1,2,3 and the program Hot key p1,p2,p3 store the same values.)
☞If you do not enter a set value for 10 seconds, the setup mode is turned off.
☞Press Del. and re-enter setting, if the set value is incorrectly.
4.6 Save and Recall Programs
You can save settings such as speed, time, temperature, etc. in advance and call them as
needed to use them immediately
1. P xx value blinks on the display after press program key.
2. Input the number and press Ent. to call.
*Frequently used conditions are convenient by using program hot key p1,p2,p3.
Press P1~P3 key to call saved data and p1,p2,p3 values on the screen are displayed interlinked.
☞Set range: 0~99(1,2,3 and the program Hot key p1,p2,p3,p4 store the same values.)
☞If you do not enter a set value for 10 seconds, the setup mode is turned off.
☞Press Del. and re-enter setting, if the set value is incorrectly.

Refrigerated High Speed Centrifuge, 1696R
18 www.gyrozen.com

4.8 User set
The screen for setting the settings for your user environment. Can only be set while stationary.
Display Operation button
1. Press option button
2. Screen changes on the display
* Setting method
- category : Up /down key
- Set : Numeric key
preferences mode
1) TIME : time counting method determination
☞Nor (from Start key-in to time count) : t0~t2
☞SET (from set RPM to time count) : t1~t2 t0 t1 t2
2) Sound - VoL : Key adjust
☞5 phase (0: mute)
3) Sound- RPT: Shutdown Notifications Number of Sounds
☞0 ~ 10 repeated alerts (0: mute, 10 : End Notifications 10 times )
4) RADIUS : change the radius value of the recognized rotor
4.12 Change settings during operation
change the SPEED/TIME/TEMP/ACC/DEC setting value even during operation
1. Able to change the setting during operation,
you can change the RPM /TIME/TEMP/ACC/DEC setting by pressing [ENT].
Refrigerated High Speed Centrifuge, 1696R

Operating Manual
4.9 Start and stop set
Can be used to start or stop motion
Display Operation button
1. Enter set value(RPM,TIME,TEMP,ACC,DEC..) and press start/stop to start the operation.
2. Press the start/stop key to finish operation, immediately decelerate to the deceleration stage.
4.10 Pulse (Short spin) function
Press Pulse key to rotates and release the button to slow down(short spin mode)
Display Operation button
1. Press Pulse key
2. While Pulse key is pressed, it rotates to the desired RPM and decelerates immediately
when Pulse key is released
20 www.gyrozen.com
Table of contents
Other GYROZEN Laboratory Equipment manuals

GYROZEN
GYROZEN 416 User manual
GYROZEN
GYROZEN 2236R User manual

GYROZEN
GYROZEN 1736R User manual

GYROZEN
GYROZEN 2236R User manual

GYROZEN
GYROZEN 1248R User manual

GYROZEN
GYROZEN 1248R User manual

GYROZEN
GYROZEN MD406 User manual

GYROZEN
GYROZEN 1580 User manual

GYROZEN
GYROZEN 1580 User manual

GYROZEN
GYROZEN 406 User manual

GYROZEN
GYROZEN mini User manual

GYROZEN
GYROZEN MicroCentrifuge mini User manual

GYROZEN
GYROZEN 1730R User manual
GYROZEN
GYROZEN 1524 User manual

GYROZEN
GYROZEN 1580R User manual

GYROZEN
GYROZEN 416 User manual

GYROZEN
GYROZEN 1848R User manual

GYROZEN
GYROZEN 1096R User manual
GYROZEN
GYROZEN 624R User manual
GYROZEN
GYROZEN 1848R User manual