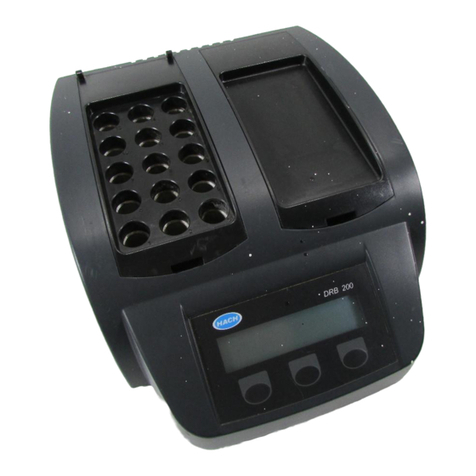
Hach DRB 200 User manual

DOC022.97.80188
DRB 200
03/2021, Edition 4
User Manual
Manuel de l'utilisateur
User Manual
Manual do Usuário
用户手册
取扱説明書
사용 설명서

Table of Contents
English...................................................................................................................................................................................................3
Français.............................................................................................................................................................................................. 13
English.................................................................................................................................................................................................23
Português.......................................................................................................................................................................................... 33
中文.......................................................................................................................................................................................................43
日本語.................................................................................................................................................................................................. 51
한글.......................................................................................................................................................................................................60
.......................................................................................................................................................................................................... 69
...................................................................................................................................................................................................... 79
2

Table of Contents
1 Specifications on page 3
2 General information
on page 3
3 Installation on page 5
4 User interface and navigation
on page 7
5 Startup on page 8
6 Operation on page 9
7 Maintenance on page 10
8 Troubleshooting on page 11
9 Replacement parts and
accessories on page 11
Section 1 Specifications
Specifications are subject to change without notice.
Specification Details
Dimensions 25 x 14.5 x 31 cm (9.8 x 5.7 x 12.2 in.)
Weight Single heating block: 2 kg (4.4 lb)
Dual heating block: 2.8 kg (6.17 lb)
Power requirements 100–240 V, +5%/–15%, 50/60 Hz, Protection
Class I
Power input Single heating block: 115 V: 300 VA; 230 V:
450 VA
Dual heating block: 115 V: 600 VA; 230 V:
900 VA
Storage temperature –40 to +60 °C (–40 to +140 °F)
Operating temperature 10 to 45 °C (50 to 113 °F)
Operating humidity 90% (non-condensing)
Temperature range 37 to 165 °C (98.6 to 329 °F)
Timer: 0 to 480 minutes
Temperature stability ± 2 °C (± 3.5 °F)
Specification Details
Heating rate From 20 to 150 °C (68 to 302 °F) in
10 minutes
Certification CE and cTUVus
Section 2 General information
In no event will the manufacturer be liable for direct, indirect, special,
incidental or consequential damages resulting from any defect or
omission in this manual. The manufacturer reserves the right to make
changes in this manual and the products it describes at any time, without
notice or obligation. Revised editions are found on the manufacturer’s
website.
2.1 Safety information
NOTICE
The manufacturer is not responsible for any damages due to
misapplication or misuse of this product including, without limitation,
direct, incidental and consequential damages, and disclaims such
damages to the full extent permitted under applicable law. The user is
solely responsible to identify critical application risks and install
appropriate mechanisms to protect processes during a possible
equipment malfunction.
Please read this entire manual before unpacking, setting up or operating
this equipment. Pay attention to all danger and caution statements.
Failure to do so could result in serious injury to the operator or damage
to the equipment.
Make sure that the protection provided by this equipment is not impaired.
Do not use or install this equipment in any manner other than that
specified in this manual.
English 3

2.1.1 Use of hazard information
DANGER
Indicates a potentially or imminently hazardous situation which, if not
avoided, will result in death or serious injury.
W A R N I N G
Indicates a potentially or imminently hazardous situation which, if not
avoided, could result in death or serious injury.
CAUTION
Indicates a potentially hazardous situation that may result in minor or
moderate injury.
NOTICE
Indicates a situation which, if not avoided, may cause damage to the
instrument. Information that requires special emphasis.
2.1.2 Precautionary labels
Read all labels and tags attached to the instrument. Personal injury or
damage to the instrument could occur if not observed. A symbol, if noted
on the instrument, will be included with a danger or caution statement in
the manual.
This symbol, if noted on the instrument, references the
instruction manual for operation and/or safety information.
Electrical equipment marked with this symbol may not be
disposed of in European domestic or public disposal
systems. Return old or end-of-life equipment to the
manufacturer for disposal at no charge to the user.
This symbol indicates that the marked item can be hot and
should not be touched without care.
This symbol indicates that the marked item requires a
protective earth connection. If the instrument is not supplied
with a ground plug on a cord, make the protective earth
connection to the protective conductor terminal.
2.2 Product overview
This instrument has one or two heating blocks that increase the
temperature of solutions in round sample cells to a specified temperature
for a specified time period (Figure 1). There are six stored temperature
programs and three temperature programs that are configured by the
user and saved.
4 English

Figure 1 Front view
1 Protective cover 3 Display 5 Left heating block
2 Right heating
block
4 Keys
Section 3 Installation
3.1 Install the protective covers
W A R N I N G
Shock and Burn Hazard. The protective cover must be
installed to prevent personal injury. The protective cover
prevents burns and power cord contact with the heating
block.
Refer to the illustrated steps that follow.
English 5

1 2
6 English

Section 4 User interface and navigation
4.1 User interface
The instrument is operated using three keys that are located below the
display (Figure 2). The function of each key is shown on the display. If
no function is shown for a key, that key is not currently active.
Figure 2 Keypad description
1 Display 3 Middle key
2 Right key 4 Left key
4.2 Display description
Figure 3 Screen display when a program is active on the left
heating block only
1 Thermometer symbol 5 Left heating block
2 Temperature of heating block 6 Remaining time
3 Right heating block 7 Timer symbol
4 Down arrow key (use to select
program)
English 7

Table 1 Thermometer symbols
Symbol Description
The heating block is increasing in
temperature.
The heating block is at the
selected temperature.
The heating block is decreasing in
temperature.
Section 5 Startup
5.1 Turn the instrument on
NOTICE
Do not turn the instrument off and on quickly as this can damage the
instrument. Always wait about 20 seconds before turning the
instrument on again.
1. Put the instrument on a stable, level, heat-resistant surface.
2. Connect the power cord to the power plug on the back of the
instrument.
3. Connect the power cord to a power socket with earthing contact.
4. Push the power switch on the back of the instrument to turn the
instrument on.
5.2 Select the language
To change the default language setting (English):
1. Hold down the left key and turn the instrument on.
2. Push the right arrow key to scroll through the menu. The display
goes back to the start of the menu at the end of the menu.
3. When the correct language is shown, push the key for the language.
Refer to Table 2.
Table 2 Language settings
Setting Language Setting Language
GB English E Spanish
D German NL Dutch
F French S Swedish
I Italian PL Polish
5.3 Set the display contrast
1. Hold down the middle key and turn the instrument on.
2. Push or hold down the up and down arrow keys to change the
contrast value.
3. Push OK to save the change.
8 English

Section 6 Operation
DANGER
Chemical exposure hazard. Obey laboratory safety
procedures and wear all of the personal protective equipment
appropriate to the chemicals that are handled. Refer to the
current safety data sheets (MSDS/SDS) for safety protocols.
6.1 Routine operation
CAUTION
Burn Hazard. Do not put a finger in an opening in the heating
block. Close the protective cover before increasing the
temperature of the heating block, and always keep the
protective cover closed during operation.
CAUTION
Burn Hazard. Sample cells are hot. Wear thermal insulating
material (e.g., gloves or finger cots). Do not remove a sample
cell that is greater than 80 °C. Do not put a sample cell that is
greater than 80 °C in a colorimeter.
CAUTION
Chemical Hazard. If a sample cell breaks, do not let the liquid
touch skin. Use a fume hood as necessary to remove
chemical fumes.
CAUTION
Chemical exposure hazard. Dispose of chemicals and wastes
in accordance with local, regional and national regulations.
NOTICE
To prevent sample cell and instrument damage, keep the openings in
the heating block dry. Dry the outside of sample cells fully.
NOTICE
To prevent instrument damage, immediately disconnect power if an
accidental spill occurs or a sample cell breaks, then clean the
instrument. Refer to Clean the instrument on page 10.
NOTICE
Do not cover the ventilation slits in the protective cover. The instrument
and sample cells may become too hot and decrease the accuracy of
measurement.
1. Prepare the test sample cells as specified in the analysis procedure.
2. Close the sample cells with the cap.
3. Dry the outside of the sample cells fully.
4. Turn the instrument on and open the protective cover. The last
temperature program(s) selected is shown on the display.
5. If using 16 mm tubes with a heating block with 20 mm openings, put
reducing adapters in the openings.
6. Select the correct temperature program (and digestion period if
applicable) using the keys, then push Start. Refer to Stored
programs on page 9. The temperature program is selected
independently for each heating block when there are two heating
blocks.
Note: To stop a program, push the key below the program two times.
7. When the heating block is at the selected temperature (two beeps
are heard), put the test sample cells in the correct heating block and
close the protective cover.
8. Push Start to start the program.
The time counts down to zero (0). When the digestion program is
completed, three beeps are heard and the heater turns off.
6.2 Stored programs
Table 3 gives descriptions of the stored temperature programs.
English 9

Table 3 Stored programs
Program Description
COD Increases the temperature of the sample cells to 150 °C for
120 minutes. In the cooling phase, four beeps are heard
when the sample cells are at 120 °C. Remove and carefully
invert the sample cells several times, before letting them
decrease in temperature in a rack.
TOC Increases the temperature of the sample cells to 105 °C for
120 minutes. The TOC temperature program can be used
for all Hach TOC sample cell tests.
100 °C Increases the temperature of the sample cells to 100 °C for
30, 60 or 120 minutes. For example, the “100 °C,
60 minutes” temperature program is used to:
• Digest samples using the Metals Prep Set
• Identify phosphate and chromium
• Digest heavy metals
105 °C Increases the temperature of the sample cells to 105 °C for
30, 60 or 120 minutes.
150 °C Increases the temperature of the sample cells to 150 °C for
30, 60 or 120 minutes.
165 °C Increases the temperature of the sample cells to 165 °C for
30, 60 or 120 minutes.
6.3 User programs
The DRB 200 has three temperature programs that are configured by
the user (PRG1–PRG3).
To configure a user temperature program:
1. Select a user temperature program using the keys.
2. Push Prog to enter programming mode.
3. Select a 4-character name for the program. Push the left key to
change the character. Push the right arrow key to move the cursor to
the next position. Push OK to save the change.
4. Push or hold down the up and down arrow keys to set the
temperature (37 to 165 °C). Push OK to save the change.
5. Push or hold down the up and down arrow keys to set the time (0 to
480 minutes). Push OK to save the change.
6. Push OK to save the program.
Section 7 Maintenance
CAUTION
Multiple hazards. Only qualified personnel must conduct the
tasks described in this section of the document.
NOTICE
Do not disassemble the instrument for maintenance. If the internal
components must be cleaned or repaired, contact the manufacturer.
7.1 Clean the instrument
Keep the instrument clean to get continuous and accurate operation.
CAUTION
Fire hazard. Do not use flammable agents to clean the
instrument.
CAUTION
Burn hazard. Do not clean the instrument when it is hot.
10 English

NOTICE
To prevent instrument damage, do not use cleaning agents such as
turpentine, acetone or similar products to clean the instrument
including the display.
1. Turn the instrument off and disconnect the power cord.
2. When the instrument is cool, clean the surface of the instrument with
a soft, moist cloth and a weak soap solution. Make sure that no water
gets into the instrument.
If the liquid in a sample cell spills or a sample cell breaks:
1. Turn the instrument off and disconnect the power cord.
2. Let the temperature of the heating block(s) and sample cells
decrease until cool.
3. Remove the liquid with a pipette. Do not let the liquid touch skin.
4. Move the liquid to the correct disposal.
5. Remove broken glass using tweezers. Remove any remaining liquid
on the instrument. Do not let the liquid touch skin.
7.2 Measure the temperature of the heating block
Measure the temperature of the heating block to make sure that the
temperature shown on the display is correct.
The temperature shown on the display is the temperature in a closed
sample cell that is filled with a liquid. While the temperature of the
heating block is increasing, the temperature of the heating block, near
the heater, may be greater than the temperature shown on the display.
Tools needed:
• Sample cell (2275800)
• Glycerol (anhydrous), 5 mL
• Thermometer, stem-type, calibrated for 95 to170 °C (203 to 338 °F)
To measure the temperature of the heating block:
1. Fill a clean, empty sample cell with glycerol that is at room
temperature.
2. Put the thermometer in the sample cell until the thermometer touches
the bottom of the sample cell.
3. Make sure that the level of the glycerol is 56 mm ± 0.5 mm (2.20 in.
± 0.02 in.) from the bottom of the sample cell when the thermometer
is in the sample cell.
4. Put the sample cell in the center opening of the second row of the
heating block.
5. Select a temperature program of 150 °C for 60 minutes using the
keys, then push OK.
6. When the heating block is at the selected temperature (two beeps
are heard), the thermometer temperature should be the same as the
temperature shown on the display.
Section 8 Troubleshooting
Refer to Table 4 for error messages, possible causes and corrective
actions.
Table 4 Error messages
Error Solution
BLOCK IS TOO HOT!
PLEASE WAIT
The temperature of the heating block is greater
than the selected temperature. Wait until the
temperature of the heating block decreases.
INIT ERROR The instrument is defective. Contact Customer
Service.
Section 9 Replacement parts and accessories
W A R N I N G
Personal injury hazard. Use of non-approved parts may
cause personal injury, damage to the instrument or
equipment malfunction. The replacement parts in this section
are approved by the manufacturer.
Note: Product and Article numbers may vary for some selling regions. Contact the
appropriate distributor or refer to the company website for contact information.
English 11

Replacement parts
Description Quantity Item no.
Protective cover 1 LZT048
Accessories
Description Quantity Item no.
Reducing adapter, 20 > 16 mm 1 HHA155
Reducing adapter, 16 > 13 mm 1 2895805
Tube, 16 x 100 mm 1 2275800
Tube, 16 x 100 mm 6 2275806
Thermometer, 0 to 200 °C 1 4565500
12 English

Table des matières
1 Caractéristiques techniques
à la page 13
2 Généralités à la page 13
3 Installation à la page 15
4 Interface utilisateur et navigation
à la page 17
5 Mise en marche à la page 18
6 Fonctionnement à la page 19
7 Maintenance à la page 21
8 Dépannage à la page 22
9 Pièces de rechange et
accessoires à la page 22
Section 1 Caractéristiques techniques
Ces caractéristiques sont susceptibles d'être modifiées sans avis
préalable.
Caractéristique Détails
Dimensions 25 x 14.5 x 31 cm (9.8 x 5.7 x 12.2 po)
Poids Bloc de chauffage simple : 2 kg (4,4 lb)
Bloc de chauffage double : 2,8 kg
(6,17 lb)
Alimentation électrique 100–240 V, +5 %/–15 %, 50/60 Hz,
Classe de protection I
Entrée alimentation secteur Bloc de chauffage simple : 115 V :
300 VA ; 230 V : 450 VA
Bloc de chauffage double : 115 V :
600 VA ; 230 V : 900 VA
Température de stockage –40 à +60 °C (–40 à +140 °F)
Température de
fonctionnement
10 à 45 °C (50 à 113 °F)
Humidité de fonctionnement 90 % (sans condensation)
Caractéristique Détails
Plage de température 37 à 165 °C (98.6 à 329 °F)
Minuterie : 0 à 480 minutes
Stabilité de la température ± 2 °C (± 3.5 °F)
Vitesse de chauffage De 20 à 150 °C (68 à 302 °F) en
10 minutes
Certification CE et cTUVus
Section 2 Généralités
En aucun cas le constructeur ne saurait être responsable des
dommages directs, indirects, spéciaux, accessoires ou consécutifs
résultant d'un défaut ou d'une omission dans ce manuel. Le constructeur
se réserve le droit d'apporter des modifications à ce manuel et aux
produits décrits à tout moment, sans avertissement ni obligation. Les
éditions révisées se trouvent sur le site Internet du fabricant.
2.1 Consignes de sécurité
AVIS
Le fabricant décline toute responsabilité quant aux dégâts liés à une
application ou un usage inappropriés de ce produit, y compris, sans
toutefois s'y limiter, des dommages directs ou indirects, ainsi que des
dommages consécutifs, et rejette toute responsabilité quant à ces
dommages dans la mesure où la loi applicable le permet. L'utilisateur
est seul responsable de la vérification des risques d'application
critiques et de la mise en place de mécanismes de protection des
processus en cas de défaillance de l'équipement.
Veuillez lire l'ensemble du manuel avant le déballage, la configuration ou
la mise en fonctionnement de cet appareil. Respectez toutes les
déclarations de prudence et d'attention. Le non-respect de cette
procédure peut conduire à des blessures graves de l'opérateur ou à des
dégâts sur le matériel.
Français 13

Assurez-vous que la protection fournie avec cet appareil n'est pas
défaillante. N'utilisez ni n'installez cet appareil d'une façon différente de
celle décrite dans ce manuel.
2.1.1 Interprétation des indications de risques
DANGER
Indique une situation de danger potentiel ou imminent qui, si elle n'est
pas évitée, entraîne des blessures graves, voire mortelles.
AVERTISSEMENT
Indique une situation de danger potentiel ou imminent qui, si elle n'est
pas évitée, peut entraîner des blessures graves, voire mortelles.
ATTENTION
Indique une situation de danger potentiel qui peut entraîner des
blessures mineures ou légères.
AVIS
Indique une situation qui, si elle n'est pas évitée, peut occasionner
l'endommagement du matériel. Informations nécessitant une attention
particulière.
2.1.2 Etiquettes de mise en garde
Lire toutes les étiquettes et tous les repères apposés sur l’instrument.
Des personnes peuvent se blesser et le matériel peut être endommagé
si ces instructions ne sont pas respectées. Les symboles apposés sur
l'appareil sont complétés par un paragraphe Danger ou Attention dans le
manuel.
Si l'appareil comporte ce symbole, reportez-vous au manuel
d'utilisation pour consulter les informations de
fonctionnement et de sécurité.
Le matériel électrique portant ce symbole ne doit pas être
mis au rebut dans les réseaux domestiques ou publics
européens. Retournez le matériel usé ou en fin de vie au
fabricant pour une mise au rebut sans frais pour l'utilisateur.
Ce symbole indique que l’élément signalé peut être chaud et
que des précautions doivent être prises avant de le toucher.
Ce symbole indique que l'élément marqué nécessite une
connexion de protection à la terre. Si l'appareil n'est pas
fourni avec une mise à la terre sur un cordon, effectuez la
mise à la terre de protection sur la borne de conducteur de
protection.
2.2 Présentation du produit
Cet appareil comporte un ou deux bloc(s) de chauffage qui font
augmenter la température des solutions dans les cuves d'échantillon
arrondies jusqu'à une température spécifiée pendant une durée
déterminée (Figure 1). Il existe six programmes de température en
mémoire et trois programmes de température configurés par l'utilisateur
et enregistrés.
14 Français

Figure 1 Vue avant
1 Couvercle de
protection
3 Ecran 5 Bloc de chauffage
gauche
2 Bloc de chauffage
droit
4 Touches
Section 3 Installation
3.1 Installer les couvercles de protection
AVERTISSEMENT
Risque de brûlure et de choc électrique. Le couvercle de
protection doit être installé pour éviter les risques de
blessure. Le couvercle de protection empêche les brûlures et
tout contact entre le cordon d'alimentation et le bloc de
chauffage.
Reportez-vous aux étapes illustrées ci-dessous.
Français 15

1 2
16 Français

Section 4 Interface utilisateur et navigation
4.1 Interface utilisateur
L'appareil est commandé à l'aide de trois touches situées sous l'écran
d'affichage (Figure 2). La fonction de chaque touche est affichée à
l'écran. Si aucune fonction n'est affichée pour une touche, cela signifie
que la touche n'est pas active.
Figure 2 Description du clavier
1 Ecran 3 Touche du milieu
2 Touche droite 4 Touche gauche
4.2 Description de l'affichage
Figure 3 Affichage sur l'écran lorsqu'un programme est actif sur
le bloc de chauffage gauche uniquement
1 Symbole du thermomètre 5 Bloc de chauffage gauche
2 Température du bloc de
chauffage
6 Temps restant
3 Bloc de chauffage droit 7 Symbole de la minuterie
4 Touche fléchée vers le bas
(pour sélectionner le
programme)
Français 17

Tableau 1 Symboles du thermomètre
Symbole Description
La température du bloc de
chauffage augmente.
Le bloc de chauffage est à la
température sélectionnée.
La température du bloc de
chauffage baisse.
Section 5 Mise en marche
5.1 Mettre l'appareil sous tension
AVIS
Ne pas éteindre et rallumer l'appareil rapidement sous peine
d'endommager l'appareil. Toujours attendre 20 secondes avant de
rallumer l'appareil.
1. Placer l'appareil sur une surface plane, stable et résistante à la
chaleur.
2. Brancher le cordon d'alimentation sur la prise d'alimentation à
l'arrière de l'appareil.
3. Connecter le cordon d'alimentation à une prise de courant mise à la
terre.
4. Appuyer sur l'interrupteur marche/arrêt à l'arrière de l'appareil pour
allumer l'appareil.
5.2 Sélectionner la langue
Pour modifier le paramètre de langue par défaut (anglais) :
1. Maintenir la touche gauche enfoncée et allumer l'appareil.
2. Appuyer sur la touche fléchée vers la droite pour faire défiler le
menu. A la fin, l'écran revient au début du menu.
3. Lorsque la langue souhaitée est affichée, appuyer sur la touche
correspondant à la langue. Reportez-vous à la Tableau 2.
Tableau 2 Paramètres de langue
Réglages Langue Réglages Langue
GB Anglais E Espagnol
D Allemand NL Néerlandais
F Français S Suédois
I Italien PL Polonais
5.3 Réglage du contraste de l'écran
1. Maintenir enfoncée la touche du milieu et allumer l'appareil.
2. Appuyer sur les touches fléchées vers le haut et vers le bas ou les
maintenir enfoncées pour modifier la valeur de contraste.
3. Appuyer sur OK pour enregistrer la modification.
18 Français

Section 6 Fonctionnement
DANGER
Risque d'exposition chimique. Respectez les procédures de
sécurité du laboratoire et portez tous les équipements de
protection personnelle adaptés aux produits chimiques que
vous manipulez. Consultez les fiches de données de sécurité
(MSDS/SDS) à jour pour connaître les protocoles de sécurité
applicables.
6.1 Fonctionnement normal
ATTENTION
Risque de brûlure Ne pas mettre les doigts dans un des
orifices du bloc de chauffage. Fermer le couvercle de
protection avant d'augmenter la température du bloc de
chauffage et toujours maintenir le couvercle de protection
fermé pendant le fonctionnement.
ATTENTION
Risque de brûlure Les cuves d'échantillons sont chaudes.
Porter des vêtements isolants (par ex. gants ou doigtiers). Ne
pas déposer une cuve d'échantillon dont la température
dépasse 80 °C. Ne pas placer une cuve d'échantillon dont la
température dépasse 80 °C dans un colorimètre.
ATTENTION
Danger chimique En cas de rupture d'une cuve d'échantillon,
éviter tout contact du liquide avec la peau. Utiliser une hotte
de captation des fumées pour éliminer les vapeurs chimiques.
ATTENTION
Risque d'exposition chimique. Mettez au rebut les substances
chimiques et les déchets conformément aux réglementations
locales, régionales et nationales.
AVIS
Maintenir les orifices du bloc de chauffage secs pour éviter
d'endommager la cuve d'échantillon et l'appareil. Sécher complètement
l'extérieur des cuves d'échantillons.
AVIS
Pour éviter d'endommager l'appareil, débrancher immédiatement le
cordon d'alimentation si du liquide est renversé accidentellement ou en
cas de rupture d'une cuve d'échantillon, puis nettoyer l'appareil.
Reportez-vous à la Nettoyer l'instrument à la page 21.
AVIS
Ne pas couvrir les fentes de ventilation du couvercle de protection.
L'appareil et les cuves d'échantillons risqueraient de surchauffer, ce qui
réduirait la précision des mesures.
1. Préparer les cuves d'échantillons d'essai comme spécifié dans la
procédure d'analyse.
2. Fermer les cuves d'échantillons avec le capuchon.
3. Sécher complètement l'extérieur des cuves d'échantillons.
4. Démarrer l'appareil et ouvrir le couvercle de protection. Les derniers
programmes de température sélectionnés s'affichent à l'écran.
5. En cas d'utilisation de tubes de 16 mm avec un bloc de chauffage
doté d'orifices de 20 mm, placer des adaptateurs réducteurs dans les
orifices.
6. Sélectionner le programme de température approprié (et la période
de digestion le cas échéant) à l'aide des touches, puis appuyer sur
Démarrer. Reportez-vous à la Programmes enregistrés
à la page 20. Le programme de température est sélectionné
indépendamment pour chaque bloc de chauffage lorsque deux blocs
de chauffage sont utilisés.
Remarque : Pour arrêter un programme, appuyer deux fois sur la touche
située sous le programme.
Français 19

7. Lorsque le bloc de chauffage a atteint la température sélectionnée
(deux bips sonores), placer les cuves d'échantillons d'essai dans le
bloc de chauffage approprié et fermer le couvercle de protection.
8. Appuyer sur Start (Démarrer) pour démarrer le programme.
Le compte à rebours jusqu'à zéro (0) est lancé. Lorsque le
programme de digestion est terminé, trois signaux sonores
retentissent et le système de chauffage s'arrête.
6.2 Programmes enregistrés
Tableau 3 fournit des descriptions des programmes de température
enregistrés.
Tableau 3 Programmes enregistrés
Programme Description
DCO Accroît la température des cellules d'échantillons jusqu'à
150 °C pendant 120 minutes. Dans la phase de
refroidissement, quatre bips sonores sont émis lorsque
les cellules d'échantillons sont à 120 °C. Déposer et
inverser les cellules d'échantillons avec précaution
plusieurs fois avant de les laisser refroidir sur une
étagère.
COT Accroît la température des cellules d'échantillons jusqu'à
105 °C pendant 120 minutes. Le programme de
température TOC peut être utilisé pour tous les essais
de cellules d'échantillons TOC Hach.
100 °C Accroît la température des cellules d'échantillons jusqu'à
100 °C pendant 30, 60 ou 120 minutes. Par exemple, le
programme de température « 100 °C, 60 minutes » est
utilisé pour :
• Digérer des échantillons à l'aide du kit de préparation
des métaux ;
• Identifier les phosphates et le chrome ;
• Digérer les métaux lourds.
Tableau 3 Programmes enregistrés (suite)
Programme Description
105 °C Accroît la température des cellules d'échantillons jusqu'à
105 °C pendant 30, 60 ou 120 minutes.
150 °C Accroît la température des cellules d'échantillons jusqu'à
150 °C pendant 30, 60 ou 120 minutes.
165 °C Accroît la température des cellules d'échantillons jusqu'à
165 °C pendant 30, 60 ou 120 minutes.
6.3 Programmes utilisateur
Le DRB 200 compte trois programmes de température configurés par
l'utilisateur (PRG1–PRG3).
Pour configurer un programme de température défini par l'utilisateur :
1. Sélectionner un programme de température défini par l'utilisateur à
l'aide des touches.
2. Appuyer sur Prog pour activer le mode programmation.
3. Sélectionner un nom à 4 caractères pour le programme. Appuyer sur
la touche gauche pour modifier le caractère. Appuyer sur la touche
fléchée vers la droite pour déplacer le curseur jusqu'à la position
suivante. Appuyer sur OK pour enregistrer la modification.
4. Appuyer sur les touches fléchées vers le haut et vers le bas ou les
maintenir enfoncées pour régler la température (37 à 165 °C).
Appuyer sur OK pour enregistrer la modification.
5. Appuyer sur les touches fléchées vers le haut et vers le bas ou les
maintenir enfoncées pour régler la durée (0 à 480 minutes). Appuyer
sur OK pour enregistrer la modification.
6. Appuyer sur OK pour enregistrer le programme.
20 Français
Other manuals for DRB 200
3
Table of contents
Languages:
Other Hach Laboratory Equipment manuals
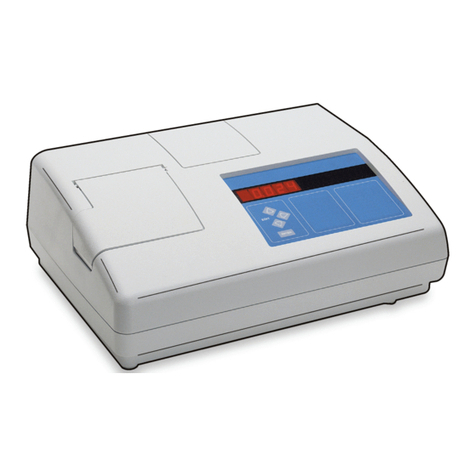
Hach
Hach LT 200 User manual

Hach
Hach AS1000 User manual

Hach
Hach LS 120 User manual

Hach
Hach sensION+ pH3 User manual

Hach
Hach TitraLab AT1000 Series Quick manual

Hach
Hach MET ONE 3400 Series User manual

Hach
Hach CDC401-01 User manual

Hach
Hach MTC10101 User manual

Hach
Hach GANIMEDE P User manual

Hach
Hach LT 200 User manual

Hach
Hach AS950 AWRS Instruction Manual

Hach
Hach PHC705 User manual

Hach
Hach PHC729 User manual

Hach
Hach 900 MAX User manual

Hach
Hach TenSette plus User manual

Hach
Hach AS950 AWRS Instruction Manual

Hach
Hach PHOSPHAX sigma High Range User manual

Hach
Hach DR 3900 Quick manual

Hach
Hach BODTrak User manual

Hach
Hach HQ440d Quick manual