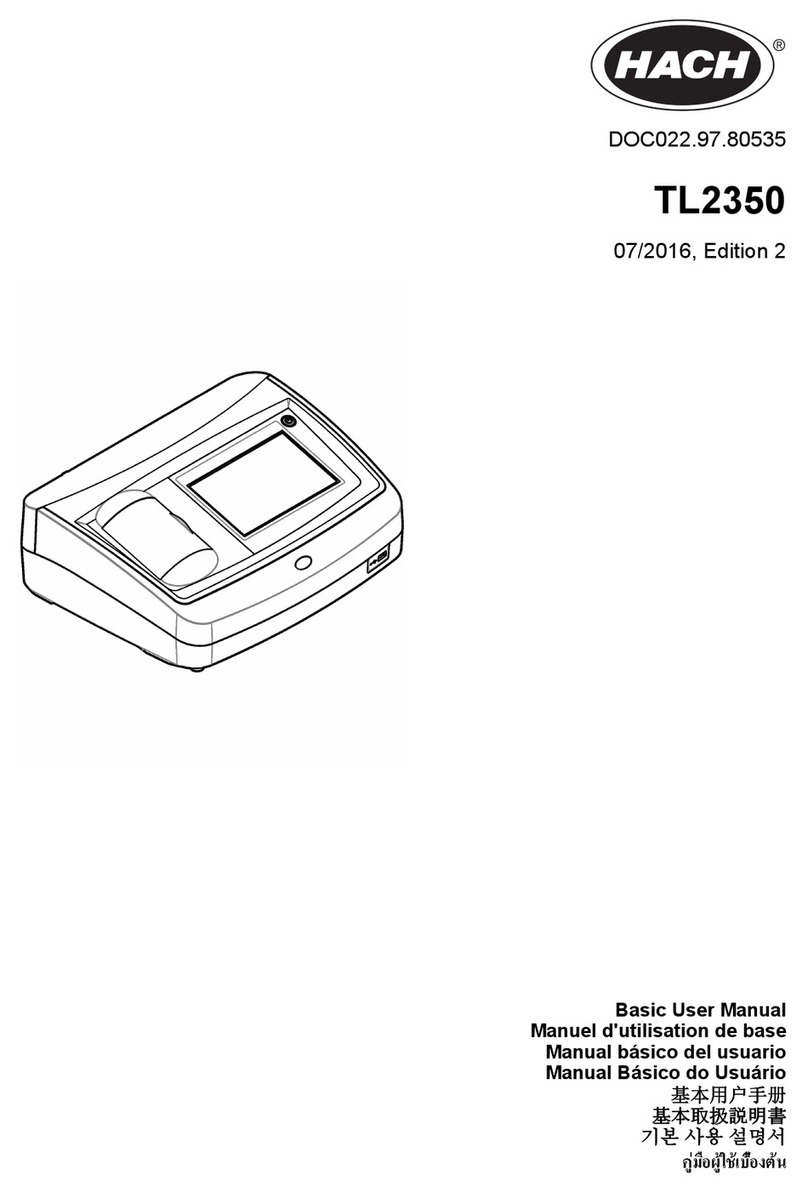
Hach QbD1200+ User manual

DOC022.97.80647
QbD1200+
09/2021, Edition 1
User Manual
用户手册
取扱説明書
사용 설명서
使用手冊

Table of Contents
English..............................................................................................................................3
中文................................................................................................................................. 24
日本語............................................................................................................................. 44
한국어............................................................................................................................. 65
.................................................................................................................................... 86
繁體中文...................................................................................................................... 106
2

Table of Contents
1 Product overview on page 3
2 Specifications on page 4
3 General information on page 5
4 Installation on page 8
5 User interface and navigation on page 11
6 Startup on page 13
7 Operation on page 14
8 Maintenance on page 19
9 Troubleshooting on page 20
10 Replacement parts and accessories
on page 22
Section 1 Product overview
The QbD1200+ TOC analyzer uses UV/Persulfate oxidation and NDIR detection for TOC analysis in
aqueous samples. This instrument is used in laboratories to measure pharmaceutical and drinking
water from 0.4 ppb to 100 ppm. The instrument has a built-in operating system that is controlled by a
touch screen or by an optional USB keyboard and mouse. The instrument is made for use with an
auto sampler. Refer to the auto sampler documentation for more information. Refer to Figure 1 and
Figure 2 for product features.
Figure 1 Product overview
1 Power button 5 Power connection
2 Touch screen display 6 Gas inlet port
3 Ethernet port 7 USB port
4 USB ports (2x) 8 Access door latch
English 3

Figure 2 Hydraulic connections overview
1 Syringe pump 6 Plumbing connections map
2 Ozone filter 7 Reagent bottle
3 Reagent tube 8 UV reactor
4 Sample tube 9 Drain tube
5 Removable drip tray 10 GLS (Gas Liquid Separator) water vessel
Section 2 Specifications
Specifications are subject to change without notice.
Specification Details
Dimensions (W x D x H) 32 x 51 x 41 cm (12.6 x 20.0 x 16.2 in.)
Weight 14 kg (31 lb)
Protection class III
Installation category I
Power requirements 12 VDC, 6.0 A maximum
Altitude 3048 m (10,000 ft) maximum
Operating temperature 5 to 35 ºC (41 to 95 ºF)
Relative humidity 0 to 90%, non-condensing
Storage temperature 5 to 40 ºC (41 to 104 ºF)
Range 0 to 100 ppm TOC
Accuracy ± 3% ≥ 500 ppb
4 English

Specification Details
Precision 2% RSD or 3 ppb (the larger value)
Oxidation UV/persulfate
Detection NDIR
Display 264.2 mm (10.4 in.) color touch screen
Air supply High purity air, oxygen or nitrogen; 684.4 kPa (100 psi) maximum air
pressure
Certifications Conforms to 21 CFR 11, USP <643>, JP <2.59>, EP <2.2.44>, IP, CP,
KP and EPA method 415.3 and Standard Method 5310C; CE mark
Host I/O Ethernet port
Warranty 1 year
Section 3 General information
In no event will the manufacturer be liable for direct, indirect, special, incidental or consequential
damages resulting from any defect or omission in this manual. The manufacturer reserves the right to
make changes in this manual and the products it describes at any time, without notice or obligation.
Revised editions are found on the manufacturer’s website.
3.1 Safety information
The manufacturer is not responsible for any damages due to misapplication or misuse of this product
including, without limitation, direct, incidental and consequential damages, and disclaims such
damages to the full extent permitted under applicable law. The user is soley responsible to identify
critical application risks and install appropriate mechanisms to protect processes during a possible
equipment malfunction.
Please read this entire manual before unpacking, setting up or operating this equipment. Pay
attention to all danger and caution statements. Failure to do so could result in serious injury to the
operator or damage to the equipment.
Make sure that the protection provided by this equipment is not impaired. Do not use or install this
equipment in any manner other than that specified in this manual.
3.1.1 Intended use
The QbD1200+ TOC analyzer is intended for use by individuals who measure water quality
parameters in the laboratory. The instrument does not treat or alter water.
3.1.2 Use of hazard information
D A N G E R
Indicates a potentially or imminently hazardous situation which, if not avoided, will result in death or
serious injury.
WARNING
Indicates a potentially or imminently hazardous situation which, if not avoided, could result in death
or serious injury.
CAUTION
Indicates a potentially hazardous situation that may result in minor or moderate injury.
N O T I C E
Indicates a situation which, if not avoided, may cause damage to the instrument. Information that
requires special emphasis.
English 5

3.1.3 Precautionary labels
Read all labels and tags attached to the instrument. Personal injury or damage to the instrument
could occur if not observed.
This symbol, if noted on the instrument, references the instruction manual for operation
and/or safety information.
This symbol indicates the presence of mercury. Components that contain mercury must
be disposed in accordance with all applicable local and regional law.
This symbol indicates a potential pinch hazard.
This symbol identifies a risk of chemical harm and indicates that only individuals qualified
and trained to work with chemicals should handle chemicals or perform maintenance on
chemical delivery systems associated with the equipment.
Electrical equipment marked with this symbol may not be disposed of in European
domestic or public disposal systems. Return old or end-of-life equipment to the
manufacturer for disposal at no charge to the user.
3.1.4 Icons used in illustrations
Manufacturer supplied parts Look Read the user manual
3.1.5 Product hazards
D A N G E R
Chemical or biological hazards. If this instrument is used to monitor a treatment process
and/or chemical feed system for which there are regulatory limits and monitoring
requirements related to public health, public safety, food or beverage manufacture or
processing, it is the responsibility of the user of this instrument to know and abide by any
applicable regulation and to have sufficient and appropriate mechanisms in place for
compliance with applicable regulations in the event of malfunction of the instrument.
CAUTION
Chemical exposure hazard. The UV lamp assembly of this instrument contains mercury.
Remove the UV lamp assembly before instrument disposal. Obey local, state and federal
law regulations for disposal of the UV lamp assembly.
CAUTION
Chemical exposure hazard. Obey laboratory safety procedures and wear all of the
personal protective equipment appropriate to the chemicals that are handled. Refer to
the current safety data sheets (MSDS/SDS) for safety protocols.
6 English

3.1.6 Compliance and certification
CAUTION
This equipment is not intended for use in residential environments and may not provide adequate
protection to radio reception in such environments.
Canadian Radio Interference-Causing Equipment Regulation, ICES-003, Class A:
Supporting test records reside with the manufacturer.
This Class A digital apparatus meets all requirements of the Canadian Interference-Causing
Equipment Regulations.
Cet appareil numérique de classe A répond à toutes les exigences de la réglementation canadienne
sur les équipements provoquant des interférences.
FCC Part 15, Class "A" Limits
Supporting test records reside with the manufacturer. The device complies with Part 15 of the FCC
Rules. Operation is subject to the following conditions:
1. The equipment may not cause harmful interference.
2. The equipment must accept any interference received, including interference that may cause
undesired operation.
Changes or modifications to this equipment not expressly approved by the party responsible for
compliance could void the user's authority to operate the equipment. This equipment has been tested
and found to comply with the limits for a Class A digital device, pursuant to Part 15 of the FCC rules.
These limits are designed to provide reasonable protection against harmful interference when the
equipment is operated in a commercial environment. This equipment generates, uses and can
radiate radio frequency energy and, if not installed and used in accordance with the instruction
manual, may cause harmful interference to radio communications. Operation of this equipment in a
residential area is likely to cause harmful interference, in which case the user will be required to
correct the interference at their expense. The following techniques can be used to reduce
interference problems:
1. Disconnect the equipment from its power source to verify that it is or is not the source of the
interference.
2. If the equipment is connected to the same outlet as the device experiencing interference, connect
the equipment to a different outlet.
3. Move the equipment away from the device receiving the interference.
4. Reposition the receiving antenna for the device receiving the interference.
5. Try combinations of the above.
3.2 Product components
Make sure that all components have been received. Refer to Figure 3. If any items are missing or
damaged, contact the manufacturer or a sales representative immediately.
Note: The use of cables longer than 3 m (9.8 ft) can cause decreased electromagnetic immunity performance of
the equipment.
English 7
Figure 3 Product components
1 Analyzer 4 Power supply
2 Power cord 5 Gas inlet tube
3 Reagent bottle (empty) 6 GLS water vessel
Section 4 Installation
CAUTION
Multiple hazards. Only qualified personnel must conduct the tasks described in this
section of the document.
4.1 Installation guidelines
CAUTION
Chemical exposure hazard. Obey laboratory safety procedures and wear all of the
personal protective equipment appropriate to the chemicals that are handled. Refer to
the current safety data sheets (MSDS/SDS) for safety protocols.
CAUTION
Chemical exposure hazard. Dispose of chemicals and wastes in accordance with local,
regional and national regulations.
WARNING
Fire hazard. This product is not designed for use with flammable liquids.
N O T I C E
This instrument is sensitive to electromagnetic and electromechanical interference. These
interferences may have an effect on the analysis performance of this instrument. Do not put this
instrument near equipment that may cause interference.
8 English

Install the instrument:
• Indoors in a clean, dry, well-ventilated and temperature-controlled location
• In a location with a flat surface to prevent the unit from movement
• In a location with minimum mechanical vibrations and electronic noise
• In a location with no electromagnetic interferences from equipment such as transmitters, power
switching, etc.
• In an environmental enclosure that supplies protection from precipitation and direct sunlight
• In a location where there is sufficient clearance to make plumbing and electrical connections
• In a location where the display is easily seen by the user
• In a location with a compatible waste container for the drain tube
4.2 Plumbing
4.2.1 Install the GLS water vessel
Add water to the GLS water vessel as shown in the illustrated steps that follow. Open the instrument
door to do the procedure.
After each sample tray, examine the water level in the GLS water vessel to make sure that the vessel
is not more than half full. If the vessel is more than half full, remove some of the water to prevent a
possible overflow.
English 9

4.2.2 Plumb the sample and the drain tubes
Plumb the sample tube to an auto sampler (or a manual sample container) and plumb the drain tube
to the waste container as shown in the illustrated steps that follow.
4.2.3 Install the reagent bottle
Refer to the reagent preparation kit documentation to prepare the reagent solution. After the reagent
solution is prepared, connect the reagent tubing to the reagent bottle as shown in the illustrated steps
that follow.
10 English

4.2.4 Connect to air or carrier gas
The instrument cannot operate without a carrier gas connection. The carrier gas must not contain
carbon dioxide. Use the supplied gas inlet tubing to connect to carbon dioxide-free air, oxygen or
nitrogen.
1. Make sure that the pressure on the carrier gas cylinder regulator is 241 to 689 kPA (35 to
100 psi).
2. Make sure that both ends of the supplied tubing (⅛ in. outer diameter) are evenly cut and clean.
3. Put one end of the tubing into the gas inlet port on the rear of the instrument. Refer to Figure 1
on page 3.
4. Connect the other end of the tubing to the carrier gas supply.
5. Examine the tubing and connections for leaks. If necessary, make adjustments.
4.3 Electrical installation
4.3.1 Connect to external devices (optional)
The instrument has three USB ports and one ethernet port. If auxiliary cables are used, make sure
that the cables are less than 3 meters (9.84 ft) in length. Connect optional external devices to help
with the instrument setup and use. Refer to Product overview on page 3. Refer to the optional
external device documentation for more information.
• USB ports—Connect to a keyboard, mouse, printer, USB flash drive or an auto sampler.
• Ethernet port—Connect to an external communications network.
4.3.2 Connect to an auto sampler
Connect the auto sampler to the analyzer before power connections are made. Make sure that the
power to the auto sampler is set to on before power is connected to the analyzer. Refer to the auto
sampler documentation.
4.3.3 Connect to power
Refer to the illustrated steps that follow to connect power to the instrument and start the instrument.
Section 5 User interface and navigation
5.1 Display description
Refer to Figure 4 for the home screen description. Refer to Table 1 for the icon description. The
functions are through the touch screen. Do not use writing tips of pens or pencils or other sharp
objects to make selections on the screen. Only use a clean, dry finger tip to navigate the functions of
the touch screen.
English 11

Figure 4 Home screen
1 Log in icon 5 Menu icons
2 Log out icon 6 System status bar
3 Menu identification icon17 User status
4 Home icon 8 Date and time
Table 1 Icon description
Icon Description
Goes to the log in screen.
Logs the user out of the system.
Goes to the home screen when the button is in the upper-right corner. The
home icon shows near the left side of the display when the home screen is on
the display.
Makes a new tray, imports a tray from a USB flash drive, starts a pre-
configured tray or does a manual measurement.
Shows, selects and sends reports and instrument data.
1The menu identification icon shows the current menu selection.
12 English

Table 1 Icon description (continued)
Icon Description
Configures the instrument settings.
Starts the qualification procedures: calibration, SST500, background, SDBS,
SST8000 and accuracy tests.
Shows the maintenance procedures for the instrument.
Shows help and more information.
Shows when a user is logged into the instrument.
Shows when no user is logged into the instrument.
Selects the previous screen.
Saves the information on the selected screen and moves to the next screen. If
this arrow is selected at the end of a configuration, a procedure starts.
Shows the currently-selected screen.
Section 6 Startup
6.1 Log in as the administrator
1. Push Log In on the home screen.
2. Select "admin" from the list of users.
3. Enter the password: password
4. Enter a new password.
Make sure to record the new password.
5. Push Save.
6. After successful log in as the administrator, make specified user profiles. Refer to Add, change or
remove a user on page 14.
English 13

Section 7 Operation
7.1 Configuration
7.1.1 Set the system settings
Use the touch screen or connect a USB keyboard and a USB mouse to do the steps that follow.
1. Push Instrument Setup> System Settings.
2. Select an option.
Option Description
Date & Time Sets the date format, the time format, and the date and time.
Language Sets the display language.
Network Sets the network addresses necessary to do a paperless export of data to a
network server. Contact a network administrator to get the network addresses.
Display Sets the display time out to enabled. Options: 2, 5, 10, 30, 60 minutes or Never.
Data Archive Selects manual backup to a USB flash drive.
3. Push Save or Cancel.
7.1.2 Add, change or remove a user
1. Push Instrument Setup>User Settings.
2. Select an option.
Option Description
Add Adds a unique user name, first name, last name and password. Push
enable or disable to make the user an administrator. Push enable or
disable to change the password on the next log in. Push Add to save.
Deactivate Removes a user name. Push Deactivate>Yes to remove the user.
Edit Changes a user name. Push Edit to change to the user information.
Push Update when complete.
Edit Access Changes the access of a user. Push Edit Access to change the access
of a selected user. Enable or disable the fields as necessary. Push
Update when complete.
Security Enabled Sets the security to enabled or disabled. When security is enabled,
security restricts accessibility to all functions of the user interface.
Auto logoff after Sets automatic log off to occur after: 1, 3, 5, 10, 30, 60 minutes or Never
(default: 1).
Passwords expire
after
Sets the interval at which the user passwords expire. When a password
expires, the instrument prompts the user to enter a new password.
Options: Never or 15, 20, 30, 45, 60, 90 or 120 days.
Lock out user after Select to make a user wait a selected period of time to log in if they
enter the password incorrectly a selected number of times.
Failed login
attempts
Sets the maximum number of times a user can try to enter the correct
password to log in. Options: 1, 2, 3, 4 or 5.
Note: This option is only available when the "Lock user after" box is selected.
14 English

Option Description
Unlock user after Sets the period of time a user must wait to log in if they enter the wrong
password the selected number of times. Options: Never or 5, 10, 30 or
60 minutes.
Note: This option is only available when the "Lock user after" box is selected.
Edit Password
Requirements
Sets the number of characters, capital and lower case letters, numerals
and special characters that passwords must include. Select "Limit
Repeating Characters" to set the maximum number of times a character
is permitted in a password.
Require Audit
Comments
Select to make a user enter a comment when they change a
configuration setting.
3. Push Save or Cancel.
7.1.3 Set the report settings
View, add or change the report templates. Refer to Select a report on page 18 to view and export
reports and data.
1. Push Instrument Setup>Report Settings
2. Select an option.
Option Description
Add Makes a new report template. Configure the header and footer format and content.
Delete Erases a report template.
Set default Sets an existing report template as the default template.
Edit Changes an existing template.
3. Push Save or Cancel.
7.1.4 Configure the measurement settings
1. Push Instrument Setup>Measurement Settings.
2. Select an option.
Option Description
Default
Settings
Sets the default create tray wizard settings: the number of sample locations (1 to
64), sample replicates (1 to 5), standard positions, default labels (date/time, ID
individually, ID builder) and sample views (tray or table).
English 15

Option Description
Process
Settings
Sets the default sample process settings.
•Auto Ranging—Sets the instrument to adjust the measurement range
automatically. Do not select this option if the sample is less than 4 ppm.
•Conditioning—Sets the instrument to wait for the lamp temperature to increase
before a measurement is done to get accurate results. Conditioning only occurs
on the first replicate of the first sample on the tray. The manufacturer
recommends that this option is selected.
•Homogenizing—Sets the autosampler to homogenize the sample before a
measurement is done. Only select this option when an autosampler is used.
Note: Homogenizing moves the sample components equally through the sample. The
instrument pulls and pushes 2 mL of the sample back and forth 5 times during each
measurement.
•Dilution factor—Select this option if the sample is diluted before analysis.
Select to prompt the user to enter a dilution factor before a measurement is
done. The instrument adjusts the results to include the dilution factor.
•Adjust Temperature—Sets the target temperature of the UV reactor.
•Background measure times—Sets the number of background replicates.
Results
Display
Settings
Sets the default display settings for the results.
•Measurement Units—Sets the results to show in units of ppm or ppb. Select
the "Use SI Units" box to show the results in mg/L or µg/L.
•Pressure Units—Sets the internal air pressure of the instrument to show in
units of psi or mbar.
•TIC Analysis—Sets the approximate TIC (total inorganic carbon) value of the
sample to show.
•Measurement Rejection—First Rep: Sets the sample results to not include the
first replicate measurement. Outliers: Sets the sample results to not include the
replicate results that are not within a selected target deviation percentage or
ppb. When selected, the user enters a target deviation percent (or ppb) before a
measurement is started. Replicate results are rejected until the standard
deviation or relative standard deviation (the smaller value) is less than or equal
to the target deviation. A minimum of three results are kept if the target deviation
is not achieved.
3. Push Save or Cancel.
7.1.5 Configure the peripheral settings
1. Push Instrument Setup>Peripheral Settings.
2. Select an option.
Option Description
Printer Settings If a printer is connected to the instrument, push Add>Install. If more
than one printer is installed, set the default printer or remove a printer.
Autosampler
Settings
If an auto sampler is connected to the instrument push Autosampler
Settings. Select "Enable Autosampler", then select "AS0640
Autosampler". Push Save>Ok.
16 English

7.2 Measurement
7.2.1 Do a measurement
1. Push Perform Measurement.
2. Select an option.
Option Description
Create New Tray Makes a new sample tray. Refer to Make a sample tray
template on page 17.
Load Tray From File Imports trays from a USB flash drive that has sample tray
parameters set.
Manual Measurement Sets up a manual measurement of one specified sample. Enter
the sample ID and the quantity of samples to replicate.
Select a Pre-Configured
Tray from List
Selects a sample tray that is saved in the system to measure.
3. Read the parameters of the selected tray, then make the necessary changes.
4. Push to start the measurement.
7.2.2 Make a sample tray template
1. Push Perform Measurement>Create New Tray.
2. Select the tray options. Push to go to the next screen.
Option Description
How many samples Sets the quantity of sample locations. When a sample location is
selected for measurement, each sample location is identified with a blue
circle.
How many reps Sets the quantity of sample replicates to measure (1 to 5).
Sample ID label Select how to identify each sample: individually, by an automatic sample
ID with the tray position with time stamps or with the sample ID builder.
Review & Confirm Read the parameters of the tray. If necessary, make changes to the tray.
3. Push Save to continue.
4. Enter a name for the tray template.
5. Push Save Tray to save the tray template.
6. Select "Make Default" to make this the default tray template.
7. Push to start the measurement.
If the samples are not prepared for the procedure, push Home.
English 17

7.3 Data management
7.3.1 Select a report
The instrument saves measurement, calibration, system health analyses, system suitability tests,
error logs, background statistics and audit record data reports. Use the steps that follow to read or
export a report.
1. Push Reports and Data.
2. Select a report from the list, then push for output options.
Option Description
Filter Results Selects the data range to sort by date and/or by operator.
Select a
format
Selects the report template output format (PDF, CSV or XML).
Output Selects the output device: printer, export to USB, paperless export or show on
the display.
To get the report via printer, make sure a printer is connected to the
instrument. Refer to Configure the peripheral settings on page 16. When
prompted, push Print.
To output a report via a USB port, connect a USB flash drive. When prompted,
push Start.
7.4 Do a qualifications procedure
CAUTION
Chemical exposure hazard. Obey laboratory safety procedures and wear all of the
personal protective equipment appropriate to the chemicals that are handled. Refer to
the current safety data sheets (MSDS/SDS) for safety protocols.
Collect the necessary items before a qualification procedure starts. Do these procedures that follow
periodically or as required by regulatory agencies.
1. Push Qualifications.
2. Select an option.
Option Description
Calibration Shows the instructions on the display about how to prepare the reagent and the
standards.
SST500 Shows the instructions on the display about how to prepare the reagent and the
standards.
Background Shows the instructions on the display about how to prepare the reagent.
SDBS Shows the instructions on the display about how to prepare the reagent and the
standards.
SST8000 Shows the instructions on the display about how to prepare the reagent and the
standards.
Accuracy Shows the instructions on the display about how to prepare the reagent and the
standards.
3. Enter the lot identification number (Lot ID) and the expiration date for the standards.2
4. Push to start the procedure.
2This step does not apply to the background test.
18 English

If necessary, push Pause or Cancel during the procedure.
Section 8 Maintenance
D A N G E R
Multiple hazards. Only qualified personnel must conduct the tasks described in this
section of the document.
CAUTION
Chemical exposure hazard. Obey laboratory safety procedures and wear all of the
personal protective equipment appropriate to the chemicals that are handled. Refer to
the current safety data sheets (MSDS/SDS) for safety protocols.
8.1 Clean spills
CAUTION
Chemical exposure hazard. Dispose of chemicals and wastes in accordance with local,
regional and national regulations.
1. Obey all facility safety protocols for spill control.
2. Discard the waste according to applicable regulations.
8.2 Clean the instrument
Clean the exterior of the instrument with a moist cloth, and then wipe the instrument dry.
8.3 Clean the analyzer
Clean the analyzer after maintenance tasks or after storage for the best low-level measurement
accuracy. The cleaning process removes small quantities of carbon in the air that can collect in the
internal components.
1. Prepare a cleaning solution for one cleaning cycle as follows:
a. Add 30 mL of One Reagent Stock Solution to a clean reagent bottle.
b. Add 30 mL of ultra-pure water to the bottle.
c. Swirl to mix.
2. Put the reagent tube and the sample tube from the analyzer in the cleaning solution.
3. Push Maintenance > Clean Analyzer. The analyzer flushes the internal components with the
cleaning solution.
Note: One cleaning cycle is complete after approximately 30 minutes. The status shows on the display.
8.4 Replace an instrument component
WARNING
Pinch hazard. Parts that move can pinch and cause injury. Do not touch moving parts.
Refer to the ozone filter, UV reactor, syringe and tubing replacement kit documentation. Collect all of
the necessary items before these maintenance procedures start. Refer to the information on the
display for more replacement information.
English 19

1. Push Maintenance>Replace Component.
2. Select an option.
Option Description
Replace Ozone
Filter
Shows the hourly usage of the ozone filter. Shows how to replace the
ozone filter on the display.
Replace UV Lamp Shows the hourly usage of the UV lamp. Shows how to replace the UV
lamp on the display.
Replace Syringe Shows how to replace the syringe on the display. Push Start to replace
the syringe.
8.5 Install a firmware update
Locate the firmware update file on the product website. Save the file from the website to a USB flash
drive, then do the steps that follow to install the firmware upgrade.
1. Push Maintenance>Update Firmware.
2. Put the USB flash drive into a USB port. A list of files shows.
3. Select the setup.exe file for the firmware update.
4. Push Update.
5. Push Yes to confirm the update. The analyzer will reboot when the update is complete.
8.6 Prepare for shipment
N O T I C E
The instrument must be decontaminated before it is shipped. All fluids must be drained from the
instrument.
1. Push Maintenance>Prepare for Shipment.
2. Open the instrument door.
3. Remove the GLS water vessel. Refer to Product overview on page 3.
4. Discard the water into a drain.
5. Install the GLS water vessel back into the instrument.
6. Push Drain Analyzer to remove all liquid from the instrument.
7. When the instrument completes the draining procedure, the instrument is ready for shipment.
Section 9 Troubleshooting
Problem Possible cause Solution
The measurement does not
start.
An error occurred during
measurement setup. • Set the instrument power to
off, then to on.
• Contact technical support if
necessary.
The system test fails. An error occurred during the
system test. • Make sure that the carrier
gas supply is correctly
connected.
• Contact technical support if
necessary.
A hardware component failure
occurred.
20 English
Table of contents
Languages:
Other Hach Measuring Instrument manuals

Hach
Hach DR300 User manual

Hach
Hach 2100A User manual

Hach
Hach POCKET COLORIMETER II User manual

Hach
Hach LANGE DR 900 User manual

Hach
Hach POCKET COLORIMETER II LCK 360 Zinc User guide

Hach
Hach polymetron 9240 Quick manual

Hach
Hach Hach SL1000 Quick manual

Hach
Hach H120 User manual

Hach
Hach sensION MM340 User manual

Hach
Hach DR2400 User manual

Hach
Hach Intellical MTC30101 User manual

Hach
Hach POLYMETRON 8362 Quick manual

Hach
Hach TitraLab Quick manual

Hach
Hach POLYMETRON 9125 User manual

Hach
Hach DR 6000 Quick manual

Hach
Hach sensION3 User manual

Hach
Hach EZ Series Quick manual

Hach
Hach 2100Q Quick manual

Hach
Hach ORBISPHERE K-M1100 Quick manual

Hach
Hach QC8500 Series 2 User manual