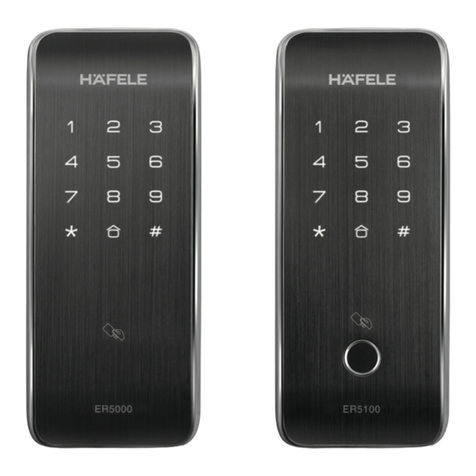
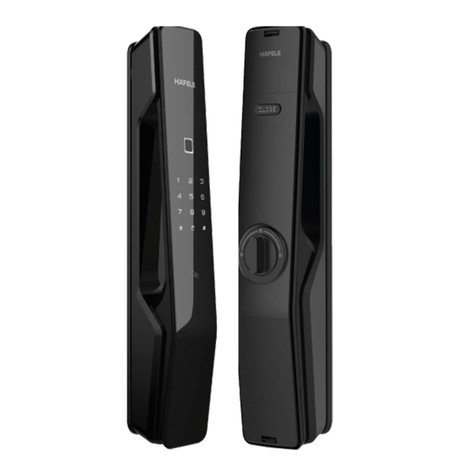
Hafele Series 7000 User manual

USER MANUAL
ENGLISH


- The images contained in this manual are only reference used for description and instruction and its types and colors may
differ in accordance with the product model.
Thank you for purchasing our product. Please read through the manual prior to starting using the product.
- This manual contains product warranty. Please fill up the warranty with details on installation shop, contact information
and data of installation to receive A/S under warranty.
- Product features and design may change without prior notification in order to improve product quality.
1. Voltage: DC6V / 2. Be cautious that reverse installation of batteries causes liquid leakage or a burst.
3. When battery is flat, replace all batteries and DO NOT use used batteries with new one.
4. Sensor operation temperature display:
04
Digital Door Lock User Manual
Caution
Since the product is keyless door lock, a part of door lock may need to be
damaged in case of malfunction.
It needs to be familiar with how to use manual closing and opening device
in case of emergency.
Ver. 4.0
_
60oC (+10oC)
Safety cautions
Prohibited
Prohibited
Prohibited
Prohibited
Prohibited
Caution
Caution
Caution
Caution
Caution
Do not dismantle the product yourself. It causes
malfunction of product. If you dismantle the product yourself,
the product may not function as it should.
Do not impact on or alter the product.
It may cause malfunction or abnormal operation.
Do not use the product in place with water or humidity.
Since the product does not have water and dust proof structure,
it may cause product malfunction due to short circuit, etc.
Completely block holes on door after product installation.
There is a risk of intrusion through milk hole or other door holes.
Do not place inflammables such as gas lighter near the product.
It may cause malfunction or abnormal operation.
Do not use the product in place with direct sunlight or high
temperature. It may cause malfunction or abnormal operation.
Do not install the product in place which water like snow
or rain can come through in.
It may cause malfunction or abnormal operation.
Do not directly spray water when cleaning the product.
Water coming through into the product causes malfunction or
abnormal operation.
Replace all batteries with new one when changing batteries.
When changing batteries, replace all batteries with new one. If using old
batteries together new one, product life span cannot be guaranteed and
product may malfunction.
Use alkaline battery only.
Using rechargeable battery may cause product malfunction.
Mortise Lock

Product Structure and Name
Outdoor body
(Types and colors of outdoor body will differ depending on the model.)
Cover type Non-cover type Fingerprint recognition type
Touchpad type A Touchpad type B
Touch keypad structure
Card / Key tag input part
Sliding cover
Keypad buttons
9V emergency power supply socket
Handle
Touch key input (Applied model)
Reset button (Applied model)
Touch keypad
Start / End button (Applied model)
External alarm lamp
(Applied model)
Fingerprint input

Battery cover
Input button ( ) : When you register or delete your password, use the touch key (card/key tag) and
the remote controller.
Open/Close button : Use Open/Close button to open or close the door in the room.
Manual opening and closing device : Use manual opening/closing device to open the door manually
(in case of a fire or other emergencies).
Handle
Indoor body
(Types and colors of indoor body will differ depending on the model.)
Support plate Remote controller
(Applied models with
remote controller)
1 outdoor body / 1 indoor body / 1 Mortise (latch)
Strike box 1 set / 1 user manual / 1 installation guide
1 caution sticker / Bolt set / 4 AA batteries (Alkaline)
Basic components (Extra accessories) and its quantity may differ depending on the product model
(Opening/closing function)
Types and colors of touch key (Remote controller) may change.
Basic components
(Check if your product contains all contents.)
Extra accessories
(Applied model with card/key tag)
Optional accessory sold separately
(Applied model with remote controller)
Emergency
key
Anti-metal
card
Small card
(Tag)
Touch key
Remove the protection tape on the touch pad
after digital door lock installation
Caution (Applied model)

The fingerprints of infants in the developmental stage or some users with unique fingerprints (those which cannot
be registered) may not be recognized.
Scanning foreign substance (sweat and moisture)-stained fingerprints or dry fingerprints may lead to failure to
recognize fingerprints.
Stay clean the fingerprint input unit so it is not stained with foreign substances and do not use a wet finger.
If fingerprint recognition is not successful, input and use the fingerprints of another finger.
Registered fingerprints may be also registered in a duplicate manner.
1. Open battery cover of indoor body and press Input button ( ). (Beeping sound)
2.
Push the cover of the outside fingerprint input slightly from right to left.
Place your finger to be registered with the fingerprint module gently on the unit and
input the fingerprints primarily (Beeping sound).
Once the sound goes off, take off the finger and re-input the fingerprints secondarily
(Two “beeps” sound).
Once the beep sounds go off, take off the finger and re-input the fingerprints thirdly
(“ppiririck” sound).
Maintain the contact state until the sound comes to an end.
(success sound: "ding dong dang”/ failure sound: two "beeps”).
Upon failure, restart from the beginning.
Up to 1 to 200 fingerprints can be registered.
Register password
(
Make sure that door is open when checking password registration)
Register touch key and card/key tag (Applied model with touch key and card/key tag)
Fingerprint Registration (Applied model with fingerprint input)
Before opening
and closing the
fingerprint cover
After opening
and closing the
fingerprint cover
1. Open battery cover of indoor body and press Input button ( ). (Beeping sound)
2. Enter password to register. Password should be 3-19 digits.
3. Press button to complete (Ding dong sound when successfully registered)
Please perform the next steps (Within 15 seconds) before the lamp is turned off.
Change password
Change password in the same way as above.
When registering new password, previous password is automatically deleted.
Make sure that a door keeps being open when registering/changing password.
Default factory password is set to “1234”. Please update the password after installation.
Caution
1. Open battery cover of indoor body and press Input button
( )
. (Beeping sound)
2. Touch each touch key or card/key tag on external input area.
Up to 1-50 touch keys or cards/key tags can be registered.
3. Press button to complete
(Ding dong sound when successfully registered / three beeping sounds when failed)
Delete touch key and card/key tag (Applied model with touch key and card/key tag)
1. Open battery cover of indoor body. 2. Press Input button. (Beeping sound)
3. Press 0 twice on outdoor keypad. 4. Press button to complete.
If deleting a touch key (Card/Key tag), all registered touch keys (Cards/Key tags) will be deleted.
It is required to register new touch key (Card/Key tag) after deletion.
For card/key tag model, please use and register only card/key tag provided by us.
We are not liable for any security incident if user uses other cards or tags (Such as traffic card, credit card, etc)
rather than dedicated card/key tag.
Caution
Caution
3. Press the “ “ button to complete your registration.
Open a door using password from outside
Opening the Door with Fingerprint, Touch Key, and Card/Key Tag from the Outside
(Applied models)
Open a door from inside
Pull down the handle of the indoor body, and the door will be opened easily.
(Anti-panic function)
Touch key(Card/ key tag) model
Place the registered touch key or Card / key tag on external
touch key pad. (Ding dong sound)
Opening the door with fingerprints
Contact the registered fingerprints with the fingerprint input.
( “Beep” sound)
After failure to input valid password in 5th attempt, operation will not be available for about 1 minute.
Please try it again after 1 minute when the operation is suspended.
Card/key tag pad
The deletion of fingerprints causes all the existing, registered ones to be deleted.
After the deletion, register the fingerprints to be used anew.
Fingerprint Deletion (Applied models with fingerprint input)
1. Open the battery cover of the indoor body. 2. Press the Input button ( ). ( “Beep” sounds)
3. Press the "0” and “1” buttons on the outside number plate in order.
4. Press the “
” button, and the deletion will be completed.
Caution
Caution
Cover type
1. Lift up external cover (Beeping sound / Keypad flashes) and enter password.
2. Pull down the cover or press button to open a door.
Non-cover type
Press the “ ” button, input the registered password, and press the “ ” button again,
and then the door will be opened.
Touch pad type A
1. Press ‘Start/End’ button or press more than 2 buttons on outdoor body (Beeping sound / Keypad
flashes) to turn on the light of touch pad.
2. Enter password and press
button or ‘Start/End’ button to open a door.
Touch pad type B / Fingerprint recognition type
1. Press more than 2 buttons on outdoor keypad (Beeping sound / Keypad flashes) to turn on
the light of touch pad.
2. Enter password and press button to open a door.

Ver. 4.0
Product Name
Production code
Date of purchase 1 year (12 months) from date of purchase (Day Month Year )
Customer
Name
Address
Store
(Installation
shop)
Name Tel:
Address
Product Warranty (For customer use)
※Please fill up all details when purchasing a product and present this warranty when requesting repair service.
Compensation Criteria for Consumers' Damages
Product warranty period is 1 year after purchase. (Please record the date of purchase in warranty card.)
About product warranty
1.This product is manufactured under the strict quality management and inspection. 2.Free A/S for 1 year is provided for any technical problem if a product is used in a
normal circumstance. Even within warranty period, if a case is matching with items described in paid service guide, service charge (Repair, parts and travel fee) will apply. 3.
This warranty is valid only in Korea. 4.It is required to present this warranty card when requesting repair service. 5.Please keep this warranty card carefully as it is not
re-issuable. 6.When re-installing a product due to relocation or more, installation and travel fee will apply. 7.A product cannot be returned or exchanged after installation
except in case of serious defect of a product. (It is in accordance with compensation criteria for consumers' damages.)
Requesting service
1.Please check instructions in user manual and check-list in case of malfunction prior to contacting us. 2.If the problem persists, stop using a product and contact sales
agency/HQs. ※It is very dangerous to try to repair a product yourself. ※Please provide the following information when contacting us: Model name, date of purchase and
place of purchase / Address, name, contact number and home address / Symptoms (In detail)
Type of consumer damages Compensation
Within warranty period
After warranty period
Normal usage
Malfunction within 1 year after installation Free service Paid service
Malfunction which identical defect occurs twice Free service Paid service
Parts for repair is not available Exchange
Exchange (In accordance
with the declining balance
method of depreciation)
Consumer’s intention
or mistake
User error such as incorrect battery replacement, incorrect input, etc Paid service Paid service
Replacement of consumables (such as battery) Paid service Paid service
Malfunction or damage caused by using a product for other purposes Paid service Paid service
Malfunction or damage is made intentionally Paid service Paid service
Malfunction or damage caused by fire or natural disaster Paid service Paid service
Free/paid service (Criteria in detail)
Service fee is charged in accordance with Consumer Protection Act. (Based on Article 5. Compensation Criteria for Consumers' Damages, Consumer Protection Act.) Service fee
consists of part cost and travel repair fee and each fee is determined by the followings. Service fee = part cost + travel repair fee (Repair service fee)
Free repair: Problems in performance or function occurred within warranty period while using a product in normal way. (Within ayear)
Paid repair: After warranty period or in the following cases within warranty period
In case of ‘User error’ / Service request for How-to question or forgotten password (Loss of key) / Request to check up product without precise defect / Malfunction after
installing a product by consumer / Damage caused by external impact / Malfunction caused by incorrect way of inserting or replacing batteries / Damaged cover when
consumer replaces battery / Malfunction or quality issue caused by using chemical materials / Request for re-installation due to faulty installation (Alter front location)
For models with emergency key, product damage caused since consumer did not take emergency with him/her / Product malfunction caused by condensation
Part cost: Part cost refers to cost of part(s) which is required for product repair (Part cost includes 10% VAT)
Travel repair fee: Travel repair fee applies to paid service and is total of technical fee in accordance with required level of difficulty (Time) and travel fee.

How to Register/Delete Door-Opening Switch for Home Videophone
(Applied models using the remote controller type)
How to register
Open the battery cover of the inside body and press the Input button once
Press the “0” button Press the "#" button
Press the Homepack button “ppiriring” sound (The input is completed)
How to delete
Open the battery cover of the inside body and press the Input button once
Press the “0” button Press the "#" button Press the "5" button twice
Press the “ ” button “ppiriring” sound (The deletion is completed).
< Specifications for 6-Pin Connector >
Pin1 (red) Power DC12V input
Pin2 (blue) Power GND
Pin3 (orange) Polarity Open input
Pin4 (brown) Signal GND
Improper connections may cause breakdowns
or malfunctions, so please consult an expert.
On auto mode
-Door will be automatically locked in 1 second after closing the door. (With a built-in auto-lock internal sensor)
On manual mode
- Cover type: lift the cover of the outdoor body or press the “#” button.
- Non-Cover type: press the “#” button from the outside.
- Touch pad A-type:press the "Start/End button of the outdoor body or press two or more buttons of the touch-type number plate.
- Touch pad B-type: press two or more buttons of the touch-type number plate.
On auto mode
-Door will be automatically locked in 1 second after closing the door.
On manual mode
- Press ‘Open/Close’ button to lock a door.
For the models that do not use Open/Close button, turn the manual opening and closing
device to lock the door.
Lock a door from outside
Lock a door from inside
Use manual opening/closing device only in case of fire or other emergencies.
Use remote controller (Applied model with remote controller / Optional item)
Register/delete remote controller
- Registration : Press indoor input button one time "0" "#" Press open button
or center button on remote controller (Ding-dong-dang sound) Press button to register
(Registered within 8 seconds)
- Delete: Press indoor Input button one time Press 5 on external keypad twice
Press button to delete
Up to 15 remote controllers can be registered.
Open/close door
Door will open or close 2~3 seconds after pressing Open/Close button.
Frequency: FM 447.275 Mhz Battery: AAA Size X 2EA (CR2032 X 1EA)
Open/Close
button
Open button
Close button

Press button
Applied model with Reset button
Press Reset button using a sharp object such as ballpoint pen, toothpick, etc
Function to reset program by pressing Reset button in case of temporary error rather than product malfunction.
Reset function (Applied model with reset function)
External dual locking function(Applied model with external dual locking function)
Model with Open/Close button
-
Enable : Press and hold Open/Close button for more than 5 seconds (Ding dong sound)
-
Disable : Press and hold Open/Close button for more than 5 seconds to disable the function
and open a door
When the external dual lock is set, the door does not open in spite of pressing Open/Close button from the indoor.
(Prevent intrusion through milk hole)
Master number function (Applied model with master number)
Cover type
- Enable: Press and hold # button on outdoor body for more than 5 seconds to enable dual locking function
- Disable: Lift up outdoor body cover Enter registered password Pull down cover or press “ ” button to disable the function
Non-cover type
- Enable: Press and hold # button on outdoor body for more than 5 seconds to enable dual locking function
- Disable: Press the “ ” button of the outdoor body Enter registered password Press the “ ” button
Touch pad type A
- Enable: Press and hold ‘Start/End’ button on outdoor body for more than 5 seconds to enable dual locking function
- Disable: Press and hold ‘Start/End’ button on outdoor body Enter registered password Press or ‘Start/End’ button to
disable the function
Touch pad type B
- Enable: Press more than 2 buttons on touch keypad of outdoor body Press and hold # button on outdoor body for more than
5 seconds to enable dual locking function
-
Disable: Press more than 2 buttons on touch keypad of outdoor body Enter registered password Press“ ” button to
disable the function
Inside dual locking function(Applied model with Inside dual locking function)
Once inside dual locking function is enabled, a door will not open even though entering valid password from outside.
It is allowed to register or use password and touch key (Card/Key tag) in Administrator mode.
Register and change master number
- Registration: Indoor Input button Press 0 and # in order Enter master number to register Press button
- Change: Indoor Input button Press 0 and # in order Enter registered master number Press button
Enter new master number Press button
Register and delete master touch key (Card/Key tag)
- Registration: Indoor Input button Press 0 and # in order Enter registered master number Press button
Enter master touch key (Card/Key tag) Press button
- Delete: Indoor Input button Press 0 and # in order Enter registered master number Press # and O in order

Function to open a door using outside emergency key
(Applied model with emergency key)
The function allows opening a door using emergency key in case of emergency or other
particular situations. Pull emergency hole cap to side, insert emergency key to the hole and
turn around the key.
User the function only in case of emergency. Alarm sounds when using emergency key.
Always take the emergency key with you in case of emergency.
Function to prevent password exposure
(Fake number function)
Hide password by pressing password after entering random numbers.
Alert function
- Locking error alert function:
When a door is not properly closed, it makes 3 attempts to open the door and generate 3 beeping sounds to alert.
- Intrusion and prank prevention function:
Function to generate emergency alarm for 1 minute to prevent intrusion when there is an attempt to open a door by force.
Enter password or touch key (Card/Key tag) to turn off the alarm.
Sound settings
- Adjust sound (Mute →High volume):
Press internal Input button →Press 1, 3, and in order Press "1" button several times to turn down volume or
"3" button several times to turn up the volume (Mute to High volume) Press button
Touch pad type can adjust volume from low to high. The volume of sound can be adjusted in seven steps.
- Manner mode (Mute function):
Lift up outdoor body cover and press # button Enter password Pull down cover or press button
Touch pad type does not support mute function.
The silent function is for a single occasion, so perform the function whenever you need it.
Fire detection function
(Built in fire detection sensor)
When heat detection sensor detects heat , it automatically opens a door.
When indoor body is exposed to direct sunlight for a long period of time, the temperature sensor may generate alarm.
External alarm function
(Applied model with external alarm function)
Other useful functions
- External‘Pin Err’lamp flashes when entering invalid password. Enter correct password again.
-‘Low Batt’lamp flashes, when batteries are going flat. Immediately change all of 4 batteries.
- When‘Double lock’ lamp flashes, a door will not open even after entering correct password.
(Dual locking function is enabled).
- If ‘Bolt Err’lamp flashes, open/close function is not working properly since dead bolt(Latch)
of indoor body is stuck in front (Strike).
Set auto/manual locking
(Convenient function to automatically lock 1 second after closing a door)
- Auto lock: Open battery cover and press Input button Press # button PressInput button (Ding-dong-dang sound)
- Manual lock: Open battery cover and press Input button Press # button Press Input button
(Beeping sound when set to manual lock mode)
Set auto locking time
(Change auto lock time to 2 ~ 9 seconds)
Press Input button on indoor body Press 8 Press time you wish to set (2~9 button) Press button
_
(60oC +10oC)

When installed batteries are going flat, lamp flashes 7 days before and alarm sounds (Ding dong sound like school bell). In this
case, replace all batteries with new one. Password or touch key (Card/Key tag) will not change even after replacing the batteries.
Change battery
Product life span cannot be guaranteed if used batteries are used together with new one. It is required to use
quality alkaline battery. When using rechargeable battery, product can cause malfunction.
Please check battery polarity (+/-). Polarity reversal may cause malfunction. Consumer is liable for any damage
caused by faulty battery and make sure to use quality alkaline battery only.
Caution
Unlock a door using password
Contact 9V battery to emergency socket →Press button and enter password →Press button to unlock
Unlock a door using touch key or card/key tag
(Applied model with touch key and card/key tag)
Contact 9V battery to emergency socket and place touch key (Card/Key tag) on external input pad to unlock a door.
Unlock a door with emergency battery
When batteries are completely flat after long term travel, the emergency power supply function
allows safe unlocking of a door. Purchase DC9V alkaline battery, contact it to emergency socket
on outdoor body and apply password or touch key (Card/Key tag).
Make sure that battery is properly contacted with emergency socket when using
this function. (External emergency power supply socket does not have polarity).
Location of external emergency power supply socket may differ according to
the product model.
Product speicifications
Fault diagnosis and troubleshooting
Caution
Symptoms Troubleshooting
Cannot remember password - Open a door using touch key (Card/Key tag) and register new password.
(number-dedicated models excluded)
Password input failure
(5 attempts)
- All functions are not available for 1 minute after failure of 5th attempt.
Wait for 1 minute and set new password or touch key (Card/Key tag).
Door is not automatically locked - Check if auto locking function is enabled
button is not working - If other functions are not working, check if batteries are properly inserted.
If batteries are flat, replace them with new batteries.
External button sound is not working
and lamp is not flashing
- Check if there is any liquid leakage on battery case or product and if so,
wipe out contact area with a dry cloth.
Type Specification
Basic items
Use password 3 ~ 19 digits
The number of touch keys (Cards/Key tags)
to be registered Up to 50 (Applied models with touch key and card/key tag)
The number of remote controller to be registered Up to 15 (Applied models with remote controller)
The number of fingerprints to be registered Up to 200 (Applied models with the input of the fingerprints)
Thickness of door 35 ~ 50 mm
Power supply
Power source 6V (AA Size 1.5V Alkaline Battery X 4EA)
Emergency power source (Do not have polarity) 9V square alkaline battery (Purchase separately)

HƯỚNG DẪN SỬ DỤNG
TIẾNG VIỆT


- Hình ảnh sử dụng trong hướng dẫn này chỉ mang tính tham khảo nhằm mô tả sản phẩm và hướng dẫn sử dụng. Kiểu dáng
và màu thực tế của sản phẩm có thể khác với hình mẫu.
Cảm ơn quý khách đã tin mua sản phẩm của chúng tôi. Vui lòng đọc kỹ hướng dẫn trước khi bắt đầu sử dụng sản phẩm
- Hướng dẫn có bao gồm thông tin liên quan đến bảo hành. Vui lòng điền đầy đủ thông tin cửa hàng, thông tin liên hệ và
thông số về lắp đặt để nhận dịch vụ hậu mãi khi bảo hành.
- Tính năng và thiết kế sản phẩm có thể thay đổi mà không báo trước để phục vụ cho mục đích nâng cấp sản phẩm.
04
HƯỚNG DẪN SỬ DỤNG KHÓA ĐIỆN TỬ
Ver. 4.0
Lưu ý an toàn:
Cấm
Cấm
Cấm
Cấm
Cấm
Lưu ý
Lưu ý
Lưu ý
Lưu ý
Lưu ý
Không tự ý tháo rời sản phẩm, vì sẽ gây hỏng hóc.
Nhiều khả năng sản phẩm sẽ không hoạt động theo đúng
chức năng vốn có.
Không dùng lực tác động lên sản phẩm hoặc thay đổi sản phẩm.
Có thể khiến sản phẩm bị hỏng hoặc hoạt động bất thường.
Không sử dụng sản phẩm ở nơi có nước hoặc độ ẩm.
Do sản phẩm không chống nước và bụi, việc sử dụng có thể dẫn đến
sự cố chập mạch, gây hỏng sản phẩm.
Đảm bảo không có khe hở sau khi lắp đặt khóa.
Các khe hở sẽ tạo điều kiện cho kẻ gian xâm nhập.
Không đặt các chất dễ gây cháy nổ như bật lửa gần sản phẩm.
Có thể khiến sản phẩm bị hỏng hoặc hoạt động bất thường.
Không sử dụng sản phẩm ở nơi tiếp xúc trực tiếp với ánh nắng mặt trời hoặc
nhiệt độ cao. Có thể khiến sản phẩm bị hỏng hoặc hoạt động bất thường.
Không lắp đặt sản phẩm ở nơi dễ bị thấm nước như mưa hoặc tuyết.
Có thể khiến sản phẩm bị hỏng hoặc hoạt động bất thường.
Không để sản phẩm tiếp xúc trực tiếp với nước trong quá trình vệ sinh.
Nước thấm vào sản phẩm sẽ khiến sản phẩm bị hỏng hoặc
hoạt động bất thường.
Thay toàn bộ pin khi cần thay pin mới.
Nếu sử dụng pin mới và cũ cùng nhau, tuổi thọ sản phẩm sẽ
không được đảm bảo và sản phẩm có thể bị hỏng.
Chỉ sử dụng pin kiềm (pin Alkaline).
Dùng pin sạc có thể khiến sản phẩm bị hỏng.
1. Điện áp: DC6V 2. Lưu ý: việc lắp ngược pin sẽ khiến pin bị chảy nước hoặc nổ.
3. Khi hết pin, thay toàn bộ pin trong khóa và KHÔNG dùng pin cũ chung với pin mới.
4. Nhiệt độ hoạt động cảm biến: 60oC (+10oC)
LƯU Ý:
Vì sản phẩm không sử dụng chìa khóa cơ nên khi sự cố xảy ra, có thể sẽ
phải phá một phần khóa để mở cửa.
Cần hiểu rõ cách sử dụng thiết bị dùng để mở và đóng khóa thủ công
trong trường hợp khẩn cấp.
_
Mortise Lock

Tên và cấu tạo sản phẩm
Phần thân ngoài
(Kiểu dáng và màu sắc thay đổi tùy theo sản phẩm)
Loại có nắp che Loại không có nắp che Loại nhận dạng vân tay
Bàn phím loại A Bàn phím loại B
Cấu trúc bàn phím cảm ứng
Nơi nhận thẻ từ/thẻ nhỏ
Nắp trượt
Nút bàn phím
Ổ cắm 9V khi cần sạc nhanh
Tay nắm gạt
Nơi tra chìa cảm ứng (tùy theo sản phẩm)
Nút Reset (tùy sản phẩm)
Phím cảm ứng
Nút bật/tắt – “Start/End” (tùy sản phẩm)
Nút bật/tắt -“Start/End”
(tùy sản phẩm)
Cảm biến vân tay

Nắp pin
Nút nhập (Input) ( ) Dùng để đăng kí mới hoặc xóa mật khẩu, sử dụng chìa cảm ứng (thẻ từ/thẻ nhỏ)
và remote điều khiển.
Nút mở/đóng (Open /Close): Dùng để đóng hoặc mở cửa.
Thiết bị đóng và mở thủ công : Dùng để đóng và mở cửa khi có hỏa hoạn hoặc những tình huống
khẩn cấp khác.
Tay nắm gạt
Thân trong
(Kiểu dáng và màu sắc có thể thay đổi tùy theo sản phẩm)
Tấm bas treo Remote điều khiển
(áp dụng cho sản phẩm
hỗ trợ remote)
1 thân ngoài/ 1 thân trong / 1 thân khóa ( cò gió)
1 bộ bas hộp / 1 hướng dẫn sử dụng / 1 hướng dẫn lắp đặt
1 dán nhãn cảnh báo / 1 bộ chốt cửa / 4 pin AA
( pin kiềm - Alkaline)
Các chi tiết cơ bản (phụ kiện kèm theo) và số lượng có thể thay đổi tùy theo sản phẩm (chức năng đóng/mở).
Kiểu dáng và màu sắc của chìa cảm ứng (remote điều khiển) có thể thay đổi.
Các chi tiết cơ bản
(Cần kiểm tra sản phẩm có đầy đủ các chi tiết không)
Phụ kiện kèm theo
(Áp dụng cho sản phẩm sử dụng thẻ từ / thẻ nhỏ)
Phụ kiện bán riêng lẻ
sản phẩm sử dụng remote điều khiển)
Chìa khóa cơ
Thẻ từ Thẻ nhỏ
(Tag)
Chìa
cảm ứng
Tháo bỏ miếng dán bảo vệ trên phần
cảm ứng sau khi cài đặt khóa điện tử.
Lưu ý (tùy theo sản phẩm)
(áp dụng cho

3. Ấn nút để hoàn tất việc đăng kí
3. Nhấn phím để kết thúc (Khi đăng ký mật khẩu thành công sẽ có âm thanh đinh đoong phát ra).
Dấu vân tay của trẻ sơ sinh trong giai đoạn phát triển hoặc một số người dùng có dấu vân tay đặc biệt (không thể
đăng ký) có thể không nhận dạng được
Đăng ký vân tay khi tay bị dính các tạp chất (mồ hôi và độ ẩm) hoặc khi tay bị khô có thể khiến khóa không
nhận diện được vân tay
Giữ khe đặt vân tay sạch sẽ, không để nó tiếp xúc với các tạp chất và không sử dụng khi tay bị ướt.
Nếu nhận dạng vân tay không thành công, nhập và sử dụng vân tay của ngón khác
Vân tay đã đăng ký có thể cũng được đăng ký trùng lặp
1. Mở nắp pin và ấn nút Input ( ). (Có tiếng bíp bíp phát ra)
2.
Đẩy nhẹ nắp che cảm biến vân tay từ phải sang trái
Đặt nhẹ nhàng ngón tay cần đăng ký lên module vân tay và nhập vân tay lần 1
(1 tiếng bíp)
Khi âm thanh tắt đi, lấy ngón tay ra và nhập vân tay lần 2
(2 tiếng bíp bíp)
Khi âm thanh tắt đi, lấy ngón tay ra và nhập vân tay lần 3
(tiếng ppiririck)
Giữ ngón tay trên bộ phận cảm biến cho đến khi âm thanh kết thúc.
(Âm báo thành công : "đinh đoong đang" / âm báo không thành công: 2 tiếng bíp bíp)
Khi đăng ký không thành, hãy thực hiện quá trình lại từ đầu.
Có thể đăng kí từ 1 - 200 vân tay.
Đăng ký mật khẩu (Cần chắc chắn rằng cửa có thể mở với mật khẩu đã đăng ký)
Đăng ký chìa cảm ứng và thẻ từ/ thẻ nhỏ
(áp dụng cho sản phẩm sử dụng chìa cảm ứng và thẻ từ/thẻ nhỏ)
Đăng ký vân tay (Áp dụng cho sản phẩm sử dụng cảm ứng vân tay )
Trước khi mở
và đóng nắp
che vân tay
Sau khi mở
và đóng nắp
che vân tay
1. Mở nắp pin và ấn nút Input ( ).(Có tiếng bíp bíp phát ra)
2. Nhập mật khẩu cần đăng ký. Mật khẩu có thể dài từ 3 đến 19 ký tự.
Các bước cần thực hiện cách nhau 15 giây, trước khi đèn tắt.
Đổi mật khẩu
Đổi mật khẩu theo cách tương tự như trên.
Khi đăng ký mật khẩu mới, mật khẩu cũ sẽ tự động xóa.
Cửa phải luôn mở trong quá trình đăng ký/ đổi mật khẩu.
Mật khẩu mặc định là “1234”. Vui lòng cập nhật mật khẩu mới sau khi lắp đặt.
Chú ý
1. Mở nắp pin và ấn nút Input
( )
. (Có tiếng bíp bíp phát ra).
2. Tra từng chìa cảm ứng hoặc thẻ từ/thẻ nhỏ trên vùng nhập bên ngoài. Có thể đăng ký
từ 1 đến 50 chìa cảm ứng hoặc thẻ từ/thẻ nhỏ
3. Nhấn phím để kết thúc (Khi đăng ký thành công sẽ có âm thanh đinh đoong phát ra/
Khi đăng ký thất bại sẽ có 3 tiếng bíp bíp phát ra)
Xóa chìa cảm ứng và thẻ từ (Áp dụng cho sản phẩm sử dụng chìa cảm ứng và thẻ từ/thẻ nhỏ)
1. Mở nắp pin 2. Nhấn nút Input (có tiếng bíp bíp phát ra)
3. Nhấn phím 0 hai lần trên bàn phím 4. Nhấn phím để kết thúc
Nếu xóa một chìa cảm ứng (thẻ từ/thẻ nhỏ), tất cả các chìa cảm ứng (thẻ từ/thẻ nhỏ) đã được đăng ký cũng sẽ bị xóa.
Cần đăng ký chìa cảm ứng mới (thẻ từ/thẻ nhỏ) sau khi xóa.
Đối với chìa khóa loại thẻ từ/ thẻ nhỏ, vui lòng chỉ sử dụng thẻ từ/ thẻ nhỏ do chúng tôi cung cấp.
Chúng tôi không chịu trách nhiệm về mọi sự cố bảo mật, nếu người dùng sử dụng thẻ từ/ thẻ nhỏ khác
không phải là thẻ từ/thẻ nhỏ chuyên dụng (ví dụ như thẻ xe, thẻ tín dụng, v.v)
Chú ý
Chú ý

Nhấn phím “ ”, nhập mật khẩu đã đăng ký và nhấn phím “ ” một lần nữa, cửa sẽ mở.
Mở cửa từ bên ngoài bằng mật khẩu
Mở cửa từ bên ngoài bằng vân tay, chìa cảm ứng và thẻ từ/thẻ nhỏ
(tùy theo sản phẩm)
Mở cửa từ bên trong
Kéo tay nắm bên trong xuống, cửa sẽ mở dễ dàng.
(Chức năng chống hoảng loạn)
Mở bằng chìa cảm ứng (thẻ từ/ thẻ nhỏ)
Đặt khóa cảm ứng đã đăng kí hoặc thẻ từ/ thẻ nhỏ lên vùng
cảm ứng bên ngoài. (Âm thanh đinh đoong đang).
Mở bằng vân tay
Đặt ngón tay đã đăng ký vào khe nhập vân tay.
(tiếng bíp)
Nếu nhập mật khẩu sai 5 lần, khóa sẽ tạm ngừng hoạt động trong khoảng 1 phút
Thử nhập lại mật khẩu sau 1 phút.
Thẻ từ/thẻ nhỏ
Việc xóa dấu vân tay sẽ khiến tất cả những vân tay đã đăng ký và đang sử dụng cũng bị xóa.
Sau khi xóa, đăng ký dấu vân tay mới để sử dụng.
Xóa vân tay (Áp dụng cho sản phẩm sử dụng cảm ứng vân tay )
1. Mở nắp che pin. 2. Nhấn nút Input ( ). (1 tiếng bíp).
3. Nhấn phím "0" và "1" theo thứ tự trên bàn phím bên ngoài
4.
Nhấn phím " " để hoàn tất việc xóa vân tay.
Chú ý
Chú ý
Loại có nắp bảo vệ
1. Đẩy nắp lên (âm thanh bíp bíp/Bàn phím lóe sáng) và nhập mật khẩu.
2. Kéo nắp xuống và nhấn phím để mở cửa.
Loại không có nắp
Bàn phím loại A
1. Nhấn nút ‘Start/End’ hoặc nhấn hơn 2 phím trên phần thân ngoài (tiếng bíp bíp / bàn phím
lóe sáng ) để để bật đèn của bàn phím.
2. Nhập mật khẩu và nhấn phím hoặc nút ‘Start/End’ để mở cửa.
Bàn phím loại B / Loại nhận dạng vân tay
1. Nhấn nhiều hơn 2 nút trên bàn phím cảm ứng (âm thanh bíp bíp/ bàn phím lóe sáng) để bật đèn
của bàn phím cảm ứng.
2. Nhập mật khẩu và nhấn nút để mở cửa.

Ver. 4.0
Tên sản phẩm
Mã sản phẩm
Ngày mua hàng 1 năm (12 tháng) từ ngày mua hàng (Ngày Tháng năm )
Khách hàng Tên
Địa chỉ
Cửa hàng
(Cửa hàng
lắp đặt)
Tên Điện thoại:
Địa chỉ
Bảo hành sản phẩm (Dành cho khách hàng)
※Vui lòng điền đầy đủ thông tin khi mua sản phẩm và mang theo phiếu này khi khách hàng có nhu cầu bảo hành.
Tiêu chí bồi thường cho thiệt hại của khách hàng
※Thời gian bảo hành là 1 năm kể từ ngày mua hàng (Vui lòng ghi lại ngày mua hàng trong phiếu bảo hành)
Về bảo hành sản phẩm
Yêu cầu dịch vụ
1. Khi xảy ra vấn đề, vui lòng xem hướng dẫn trong hướng dẫn sử dụng và danh sách những điều cần kiểm tra trước khi liên hệ với chúng tôi. 2.Nếu vấn đề vẫn tiếp tục, ngừng
sử dụng sản phẩm và liên hệ với đơn vị bán hàng/công ty chủ quản.
※
Việc tự ý sửa sản phẩm sẽ có thể gây nguy hiểm.
※Vui lòng cung cấp những thông tin sau khi liên hệ
với chúng tôi: Mã sản phẩm, Ngày mua hàng và Nơi mua hàng/ Địa chỉ, tên, số điện thoại và địa chỉ nhà/ Những biểu hiện của sự cố (chi tiết)
Loại thiệt hại Chính sách bồi thường
Trong thời gian bảo hành
Sau thời gian bảo hành
Trong điều kiện
sử dụng
bình thường
Hỏng hóc xảy ra trong vòng 01 năm sau khi lắp đặt Miễn phí dịch vụ
Lỗi tương tự xảy ra hai lần Miễn phí dịch vụ
Không có linh kiện để sửa chữa Đổi mới
Do ý định
sử dụng hoặc
lỗi của khách hàng
Lỗi người dùng như: thay sai pin, sai đầu vào, v.v Có phí dịch vụ
Có phí dịch vụ
Có phí dịch vụ
Có phí dịch vụ
Có phí dịch vụ
Có phí dịch vụ
Có phí dịch vụ
Có phí dịch vụ
Có phí dịch vụ
Có phí dịch vụ
Thay đổi hư hao (như pin)
Hỏng hóc hoặc hư hại do sử dụng sản phẩm sai mục đích
Hỏng hóc hoặc hư hại do cố ý gây ra
Hỏng hóc hoặc hư hại sản phẩm do hỏa hoạn hoặc thiên taia
Có phí dịch vụ
Có phí dịch vụ
Đổi mới
(Khấu hao theo
thời gian sử dụng)
Phí dịch vụ (cụ thể)
Phí dịch vụ bao gồm chi phí linh kiện, phí đi lại để sửa chữa và mỗi khoản phí sẽ được tính như sau: Phí dịch vụ = Phí linh kiện + phí đi lại để sửa chữa (Phí dịch vụ sửa chữa).
consists of part cost and travel repair fee and each fee is determined by the followings. Service fee = part cost + travel repair fee (Repair service fee)
Sửa chữa miễn phí: Áp dụng với những vấn đề về hoạt động hoặc chức năng xảy ra trong thời gian bảo hành và trong điều kiện sử dụng bình thường (01 năm)
Sửa chữa có phí: Áp dụng sau thời gian bảo hành hoặc trong thời gian bảo hành đối với :
Phí linh kiện: Phí của những linh kiện cần thiết cho việc sửa chữa sản phẩm (phí đã bao gồm 10% VAT).
Phí đi lại để sửa chữa: Phí đi lại để sửa chữa áp dụng cho dịch vụ có phí và là tổng của chi phí kỹ thuật tùy theo mức độ phức tạp (thời gian) và phí đi lại.
Sản phẩm được sản xuất theo những tiêu chuẩn nghiêm ngặt về quản lý và kiểm tra chất lượng. 2. Miễn phí Dịch vụ hậu mãi 01 năm cho tất cả các vấn đề về kỹ thuật, nếu
khóa được sử dụng trong điều kiện bình thường. Trong thời gian còn hạn bảo hành, nếu sự cố về sản phẩm nằm trong điều khoản dịch vụ phải chi trả, khách hàng sẽ thanh toán
chi phí dịch vụ liên quan (phí sửa chữa, phí phụ tùng thay thế và phí di chuyển). 3. Chính sách bảo hành này chỉ có giá trị ở Việt Nam. 4. Khách hàng phải mang theo thẻ bảo
hành khi sử dụng dịch vụ bảo hành sản phẩm. 5. Phiếu bảo hành sẽ không được cấp lại, nên vui lòng bảo quản cẩn thận. 6. Khi có nhu cầu lắp đặt lại sản phẩm do thay đổi vị
trí hoặc vì những lý do khác, phí lắp đặt và vận chuyển sẽ được áp dụng. 7. Sản phẩm không được đổi trả sau khi đã lắp đặt trừ trường hợp sản phẩm bị lỗi nghiêm trọng (theo
tiêu chí bồi thường đối với thiệt hại của khách hàng).
Trường hợp “lỗi người dùng” / Yêu cầu dịch vụ hướng dẫn sử dụng hoặc khi quên mật khẩu (mất chìa khóa) / Yêu cầu kiểm tra sản phẩm khi không có lỗi cụ thể xảy ra/ Hỏng
hóc do khách hàng sau khi lắp đặt sản phẩm/ Hư hại do tác động bên ngoài/ Hỏng hóc do lắp hoặc thay pin sai cách/ Vỏ bị hỏng khi khách hàng thay pin/ Hỏng hóc hoặc lỗi
về chất lượng do sử dụng hóa chất/ Yêu cầu đặt lại do cài đặt sai (thay đổi vị trí lắp đặt mặt trước)
Đối với các khóa sử dụng chìa khóa khẩn cấp, hư hại sản phẩm xảy ra khi khách hàng không mang theo chìa khóa khẩn cấp/ Hư hỏng do ngưng tụ nước.
This manual suits for next models
3
Table of contents
Languages:
Other Hafele Door Lock manuals

Hafele
Hafele DT 600 User manual

Hafele
Hafele PP8100 User manual

Hafele
Hafele ER4800 User manual

Hafele
Hafele Dialock DT 210 R2 User manual

Hafele
Hafele DT 700 User manual

Hafele
Hafele DT 700 User manual

Hafele
Hafele DT 510 User manual

Hafele
Hafele DT 750 User manual

Hafele
Hafele 981.16.100 User manual

Hafele
Hafele PP9000 User manual
Popular Door Lock manuals by other brands

Assa Abloy
Assa Abloy Yale Essential Series user guide

Assa Abloy
Assa Abloy IP2326N Quick guide for use

Allegion
Allegion Von Duprin 374-T-BE installation instructions

Iseo
Iseo KW13398 Use and maintenance instructions

Schlage
Schlage M400 Series installation instructions

CAMDEN
CAMDEN CX-DE1200 installation instructions