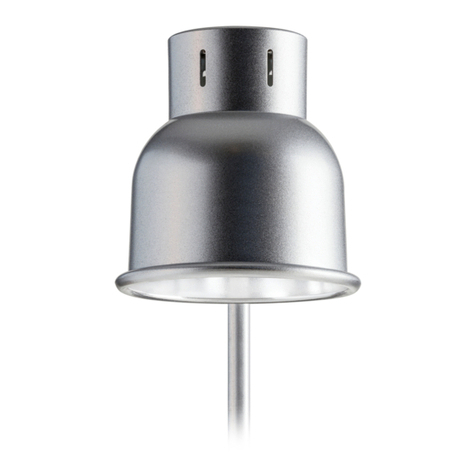
Hagen EXO TERRA Reptile Dome NANO User manual

Operating Instructions
Mode d’emploi
Gebrauchsanleitung
Manual de Instrucciones
Modalità d’uso
Gebruiksaanwijzing
Reptile Dome
NANO
PT2362
Fixture w/ Bracket

2
INDEX
ENGLISH 4
FRANÇAIS 9
DEUTSCH 15
ESPAÑOL 20
ITALIANO 25
NEDERLANDS 30
Reptile Dome
NANO
Fixture w/ Bracket
PT2362
ENGLISHFRANÇAISDEUTSCHESPAÑOLITALIANONEDERLANDS
Diagram / Dessin /Zeichnung
Dibujo / Disegno / Tekening
Reptile Dome NANO
Fixture w/ Bracket
1 2
3 4
5 6
7 8

4
Thank you for purchasing the Reptile Dome NANO Fixture w/
Bracket. The Exo Terra Reptile Dome NANO is designed to
accommodate the Exo Terra NANO light bulbs. Please read this
operation manual carefully before use and operate according to
the instructions provided for maximum safety and performance. We
recommend that you keep this manual handy for future reference.
• Stylish and functional design, perfect for use
with Nano & Mini terrariums
• Highly-polished aluminum dome increases
light and heat output significantly!
• Easy to install and fully adjustable
• Ideal for use with Exo Terra’s NANO light
bulbs
• Heat resistant ceramic socket
• Self-adhesive support-bracket increases
safety
• With On/Off switch and extra long power
cord
INTRODUCTION
The stylish and functional design of Exo Terra’s Reptile Dome NANO
makes it an ideal fixture for smaller terrariums, like the Exo Terra
Natural terrarium NANO or MINI. The highly-polished aluminum
reflector increases the light and heat output significantly! Its heat
resistant ceramic socket accommodates R45, JDR or Type A bulbs
up to 40W max. The adjustable bracket allows you to swivel the
fixture from left to right to direct the heat and/or light sources to the
preferred basking area in your terrarium. The fixture can be moved
up or down to adjust the distance between the basking spot bulb
and your animals in order to regulate the temperature of the basking
area. The light can be easily turned on and off by the On/Off switch,
mounted on the extra long power cord.
Stylish design, safety and ease of use were emphasised during
the creation of this state-of-the-art fixture. Simply stick the self-
adhesive support-bracket to the terrarium glass and the fixture is
ready-for-use.
Ideal for use with the following R45, JDR or Type A bulbs; Exo Terra’s
Daylight Basking Spot NANO, Daylight LED Spot NANO and Infrared
Basking Spot NANO.
AVAILABLE IN 1 SIZE:
PT2362 – Reptile Dome NANO – Aluminum NANO Dome Fixture w/
Reptile Dome NANO
Fixture w/ Bracket
Operating
Instructions
ENGLISHFRANÇAISDEUTSCHESPAÑOLITALIANONEDERLANDS
Bracket – 40W Max. – diameter: 10cm / 4inch
Combine multiple fixtures to create a 24-hour cycle and/or to provide
UV light to animals with UV-requirements.
Combine the Reptile Dome NANO Fixture with an Exo Terra Compact
Top holding a Reptile UVB100, Reptile UVB150 or Reptile UVB200
depending on your animal’s UV requirements.
Pet care fixture for use with Reptiles, Amphibians and
Invertebrates only!
Read instructions thoroughly prior to installation and operation
INSTRUCTIONS PERTAINING TO A RISK OF FIRE, ELECTRIC
SHOCK, OR INJURY TO PERSONS
IMPORTANT SAFETY INSTRUCTIONS
WARNING: To guard against injury, basic safety precautions should
be observed when handling the Exo Terra® Reptile Dome NANO,
including the following:
WARNING – This appliance is NOT waterproof and MUST be
prevented from coming in contact with water.
WARNING – Hot surface, avoid any contact while operating. To avoid
injury, do not contact hot parts. Allow fixture to cool for 15 min.
before RE-lamping, cleaning or repositioning the fixture.
1.
READ AND FOLLOW ALL SAFETY INSTRUCTIONS
and all
important notices on the appliance before using. Failure to do so
may result in in personal injury or damage to the unit.
2.
DANGER – For each of the following situations, do not attempt
repairs yourself; return the product to an authorized service
facility for service if it is still under warranty or discard the
appliance. Do not operate the appliance if it has a damaged
electrical cord or if it is malfunctioning or if it is dropped or
damaged in any manner.
A. For INDOOR HOUSEHOLD USE ONLY, NOT for commercial use.
B. Carefully examine the appliance after installation. It should not
be plugged in if there is water on parts not intended to be wet.
C. Do not operate any appliance if it has a damaged cord or plug,
or if it is malfunctioning or if it is dropped or damaged in any
manner. If the external flexible cable or cord of this luminaire is
damaged, it shall be exclusively replace by the manufacturer or
his service agent or a similar qualified person in order to avoid
a hazard.
D. To avoid the possibility of the appliance plug or electrical
socket getting wet, position the unit to one side of a wall
mounted socket to prevent water from dripping onto the socket
or plug. A “drip-loop” (Diagram p.2 #8) should be arranged. The
“driploop” is that part of the cord below the level of the socket,
or the connector if an extension cord is used, to prevent water
from traveling along the cord and coming into contact with the
socket. If the plug or socket does get wet, DO NOT unplug the
cord. Disconnect the fuse or circuit breaker that supplies power
to the appliance. Then unplug and examine for the presence of
water in the socket.
3.
Read and observe all the important notices on the appliance.
4.
This appliance can be used by children aged from 8 years
and above and persons with reduced physical, sensory or
mental capabilities or lack of experience and knowledge if
they have been given supervision or instruction concerning

6
use of the appliance in a safe way and understand the hazards
involved. Children shall not play with the appliance. Cleaning
and user maintenance shall not be made by children without
supervision.
5.
Always unplug an appliance from an outlet when not in use,
before putting on or taking off parts, and before cleaning.
Never yank cord to pull the plug from the outlet. Grasp the plug
and pull to disconnect.
6.
Do not use the appliance for other than intended use. The use
of attachments not recommended or sold by the appliance
manufacturer may cause an unsafe condition.
7.
Do not install or store the appliance where it will be exposed to
weather or to temperatures below freezing. Do not expose the
unit to direct sunlight.
8.
If an extension cord is necessary, ensure the connection
is watertight and dust proof. A cord with a proper rating
should be used. A cord rated for less amperes or watts than
the appliance rating may overheat. Care should be taken to
arrange the cord so that it will not be tripped over or pulled.
The connection should be carried out by a qualified electrical
installer.
9.
Keep unit out of reach of children. Keep unit away from
curtains or other flammable objects.
10.
Make sure the appliance is securely installed before operating
it.
SAVE THESE INSTRUCTIONS
Only close adherence to these installation, electrical and
maintenance guidelines will ensure the safe and efficient use of
this appliance.
INSTALLATION (Diagram p.2)
1.
Glass surface preparation: surface temperature for
application should be no lower than 60°F degrees (16°C) and
not higher than 85°F degrees (29°C). If climate will not permit,
move unit to appropriate conditions. Area to receive tape should
first be thoroughly cleaned with a liquid detergent and warm
water solution. Rinse with clean water and dry completely. A
final wipe with 50/50 alcohol/water is highly recommended for
best results (use a clean, lint-free cloth). Ensure surface is dry
and residue free before proceeding. Note: The position of the
adhesive support base cannot be changed after it has been
affixed.
2.
With the protective backing still intact, place the adhesive
support base on the back or the side of the terrarium to
determine its final position and mark the position with a wax
pencil or other marker.
3.
Remove the protective backing and carefully fit the adhesive
support base within the marked area.
4.
Press the adhesive tape firmly and evenly against the glass
panel, while gently twisting, to ensure proper adhesion. Make
sure no air bubbles are showing. Once in place, the adhesive
support base should not be removed!
5. Allow the adhesive tape bond to cure for 24 hours!
Let the
Reptile Dome NANO rest on the terrarium mesh for 24 hours
to allow the tape bond to cure properly before the dome is
suspended and the weight of the dome can exert pressure on
the support base.
INSTALL LIGHT AFTER 24 HOURS TO ALLOW
THE TAPE BOND TO CURE PROPERLY
ENGLISHFRANÇAISDEUTSCHESPAÑOLITALIANONEDERLANDS
6. Adjust the height and tighten the screw of adhesive supporting
base when the Exo Terra Reptile Dome NANO is suspended
above the terrarium at the desired height.
7. Ensure that the light’s focal point is not positioned above any
plastic parts of the terrarium or screen cover to prevent damage.
8. Screw light bulb into the Exo Terra Reptile Dome NANO (follow
maximum wattage guidelines: 40W Max.). TIP: apply a thin layer
of petroleum jelly to the threads on the base of the light bulb
before screwing it in. This will make it easier to unscrew the bulb
when it is time to replace it.
INSTALL LIGHT AFTER 24 HOURS TO ALLOW THE TAPE BOND TO
CURE PROPERLY
NOTE : FAILURE OF PROPER TAPE BONDING MAY BE ATTRIBUTED TO
ONE OF FOUR ISSUES:
1. Poor surface preparation and/or application.
2. Poor adhesive contact: exposed adhesive side of tape being
touched or contaminated.
3. Insufficient pressure being applied.
4. Lamp hung too soon, tape not fully cured.
GUARANTEE
This product is guaranteed for defective parts and workmanship
for a period of 2 years from the date of purchase. This guarantee is
valid with proof of purchase only. The guarantee is limited to repair
or replacement only and does not cover consequential loss, loss or
damage to livestock and personal property or damage to animate or
inanimate objects, irrespective of the cause thereof. This guarantee
is valid only under normal operating conditions for which the unit
is intended. It excludes any damage caused by unreasonable use,
negligence, improper installation, tampering, abuse or commercial
use. The warranty does not cover wear and tear or parts which
have not been adequately or correctly maintained. THIS DOES NOT
AFFECT YOUR STATUTORY RIGHTS.
RECYCLING
This item bears the selective sorting symbol for waste
electronic and electrical equipment (WEEE). This
means that the product must be handled pursuant
to European Directive 2012/19/EU in order to be
recycled or dismantled to minimize it’s impact on
the environment. For further information please
contact your local or regional Authorities. Electronic
products not included in the selective sorting process are potentially
dangerous for the environment and human health due to the
presence of hazardous substances.
SERVICE
If you have any problems or questions about the operation of this
product, please let us try to help you before you return the product
to your dealer. Most problems can be resolved in store, but in the
unlikely event it cannot, please return the unit with a valid proof
of purchase to the retailer for a replacement under the two year
warranty. When you call (e-mail or write) our Customer Service
Department, please have all relevant information such as model
number and/or part numbers available, as well as the nature of the
problem:

8
Customer Service and Authorized Warranty Repair Service:
U.K.:
Rolf C. Hagen (UK) Ltd.
California Dr. Whitwood Industrial Estate
Castleford, West Yorkshire WF10 5QH
mail to: http://faq.hagencrm.com/?uk
Helpline Number 01977 521015. Between 9:00 AM and 5:00 PM,
Monday to Thursday and 9:00 AM and 4:00 PM on Friday (excluding
Bank Holidays).
Germany:
HAGEN Deutschland GmbH & Co. KG, Lehmweg 99-105, 25488 Holm
Service-Hotline: +49 (0) 4103 / 960-2000
Montag – Freitag von 9:00 – 16:00 Uhr
Spain:
Rolf C Hagen España, S.A., P.I. L’Alteró, 46460 Silla (Valencia)
mail to: info@hagen.es
Malaysia:
Rolf C.Hagen (Sea) Sdn.Bhd.
Lot 14A, Jalan 3A, Kawasan Perusahaan
Cheras Jaya, Balakong 43200 Cheras,
Selangor Darul Ehsan, Malaysia.
Tel: 603-9074 2388
Fax: 603-9074 2389
For general information on our whole product range, explore our
websites at: www.exo-terra.com or www.hagen.com.
Distributed by:
Canada: Rolf C. Hagen Inc., Montreal, QC H9X 0A2
U.K.: Rolf C. Hagen (U.K.), W. Yorkshire WF10 5QH
Germany: HAGEN Deutschland GmbH & Co. KG, 25488 Holm
Spain: Rolf C Hagen España, S.A. P.I. L’Alteró, 46460 Silla (Valencia)
Malaysia: Rolf C. Hagen (SEA) SDN, 43200 Cheras, Selangor D.E.
Nous vous remercions d’avoir acheté l’appareil Dôme d’éclairage
Reptile Dome NANO Exo Terra®. Le Dôme d’éclairage Exo Terra
Reptile Dome NANO est conçu pour accueillir les ampoules Exo Terra
NANO. Veuillez lire le présent mode d’emploi soigneusement avant
d’utiliser l’appareil et de le faire fonctionner selon les instructions
fournies pour obtenir le meilleur rendement possible, et ce, de la
façon la plus sécuritaire qui soit. Nous vous recommandons de
garder ce mode d’emploi à portée de la main pour consultation
ultérieure.
• Possède une forme élégante et fonctionnelle,
idéale pour les mini terrariums et les
nanoterrariums
• Augmente de manière importante la sortie de
lumière et de chaleur grâce à son dôme en
aluminium hautement poli
• Est facile à installer et entièrement ajustable
• S’utilise parfaitement avec les ampoules Nano
Exo Terra
• Est muni d’une douille de céramique
résistante à la chaleur
• Contient un support autoadhésif pour une
sûreté accrue
• Comprend un cordon d’alimentation très long
et un interrupteur marche/arrêt
INTRODUCTION
Grâce à sa forme élégante et fonctionnelle, le dôme d’éclairage
Reptile Dome NANO Exo Terra constitue un dispositif d’éclairage
idéal dans les terrariums de petite taille, comme le mini terrarium
naturel ou le nanoterrarium naturel Exo Terra. Le réflecteur en
aluminium hautement poli augmente de manière importante la sortie
de lumière et de chaleur. Sa douille de céramique résistante à la
chaleur est compatible avec des ampoules R45, JDR ou Type A d’au
plus 40 W. Aussi, le support réglable permet d’ajuster le dispositif
de gauche à droite afin de diriger les sources de chaleur ou de
lumière sur un endroit choisi pour lézarder dans le terrarium. Le
dispositif peut être déplacé vers le haut ou vers le bas afin d’ajuster
la distance entre l’ampoule pour lézarder et les animaux, et ainsi de
réguler la température de l’endroit où lézarder. Par ailleurs, la lampe
peut être facilement allumée ou éteinte au moyen de l’interrupteur
marche/arrêt situé sur le cordon d’alimentation très long.
REPTILE DOME NANO
avec support
Mode d’emploi
ENGLISHFRANÇAISDEUTSCHESPAÑOLITALIANONEDERLANDS
Other manuals for EXO TERRA Reptile Dome NANO
1
This manual suits for next models
2
Table of contents
Languages:
Other Hagen Pet Care Product manuals

Hagen
Hagen EXO TERRA Monsoon MULTI II User manual

Hagen
Hagen EXO TERRA TERRASKY PT2413 User manual

Hagen
Hagen Fresh&Clear User manual

Hagen
Hagen Fresh & Clear DRINKING FOUNTAIN User manual

Hagen
Hagen Zeus 96411 User manual

Hagen
Hagen Zeus Fresh & Clear User manual

Hagen
Hagen Habitrail OVO User manual

Hagen
Hagen Fresh&Clear User manual

Hagen
Hagen Exo Terra PT2060 User manual

Hagen
Hagen Catit Senses 2.0 Mushroom User manual