Hallde CC-32S User manual

NemcoFoodEquip.com
User Instructions
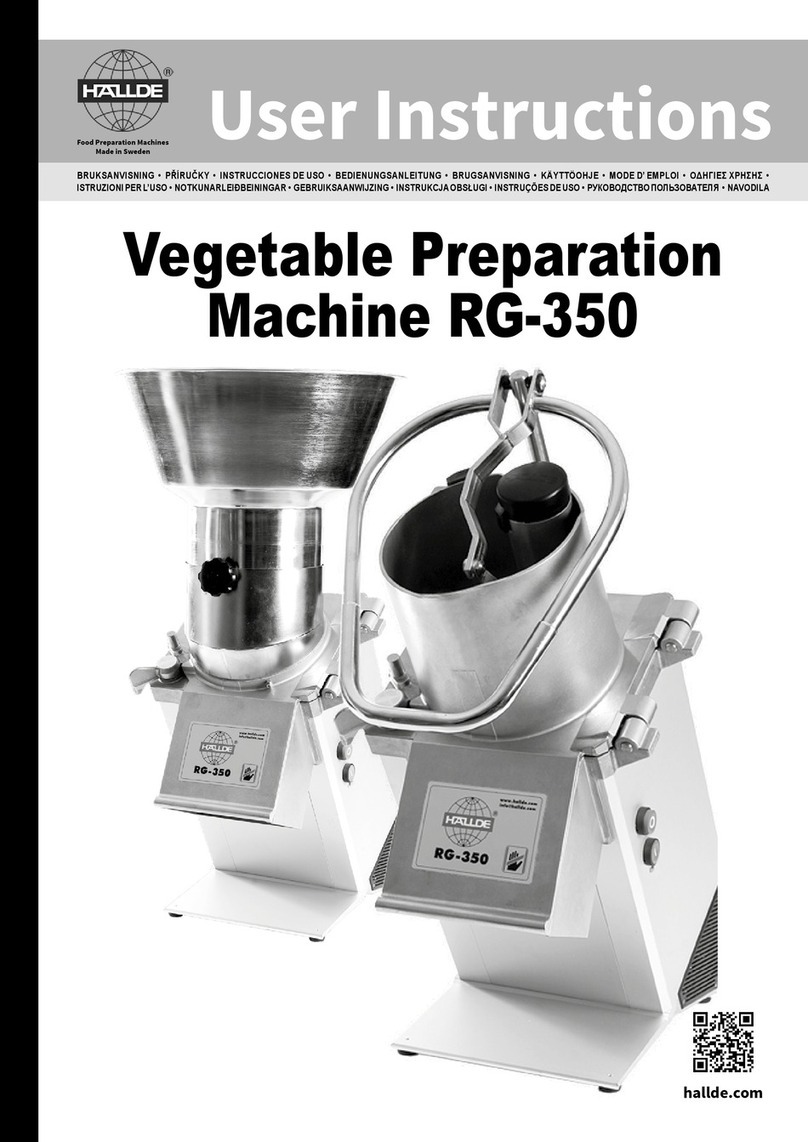
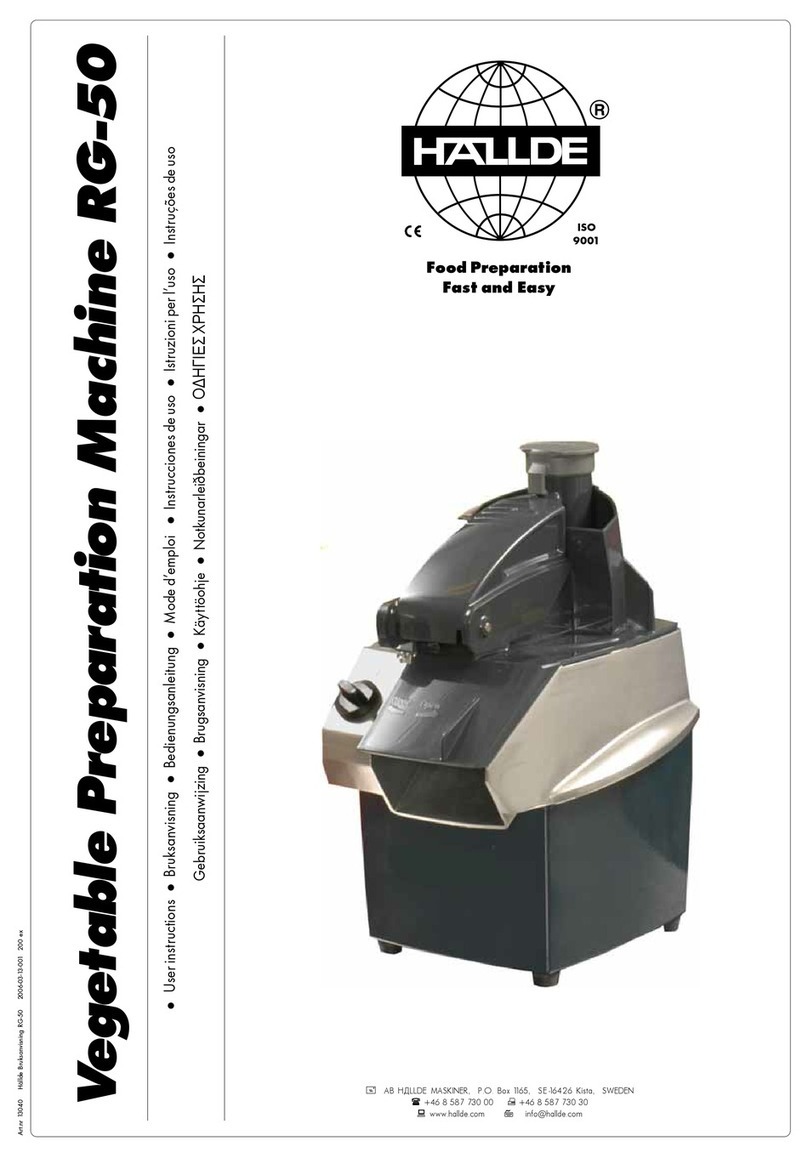
Vegetable Preparation Machine RG-50S and RG-50
Combi Cutter CC-32S and CC-34 (Veg. Prep/ Vertical Cutter)
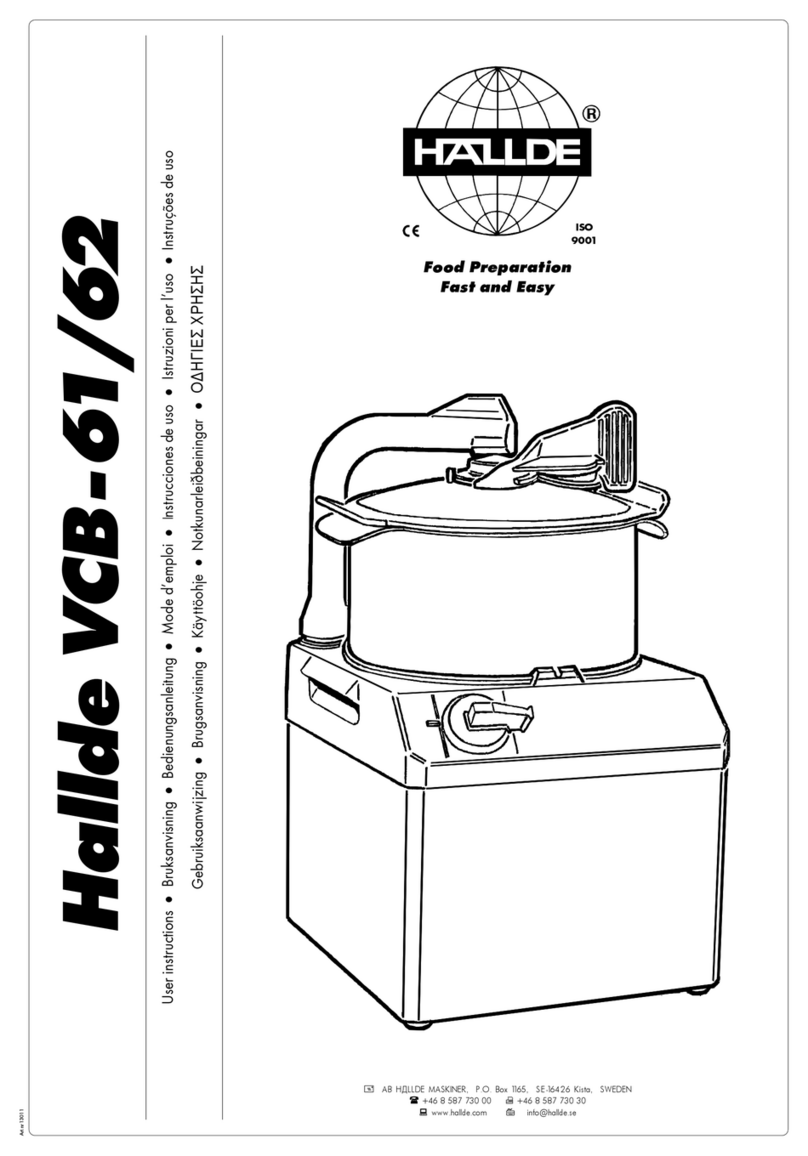
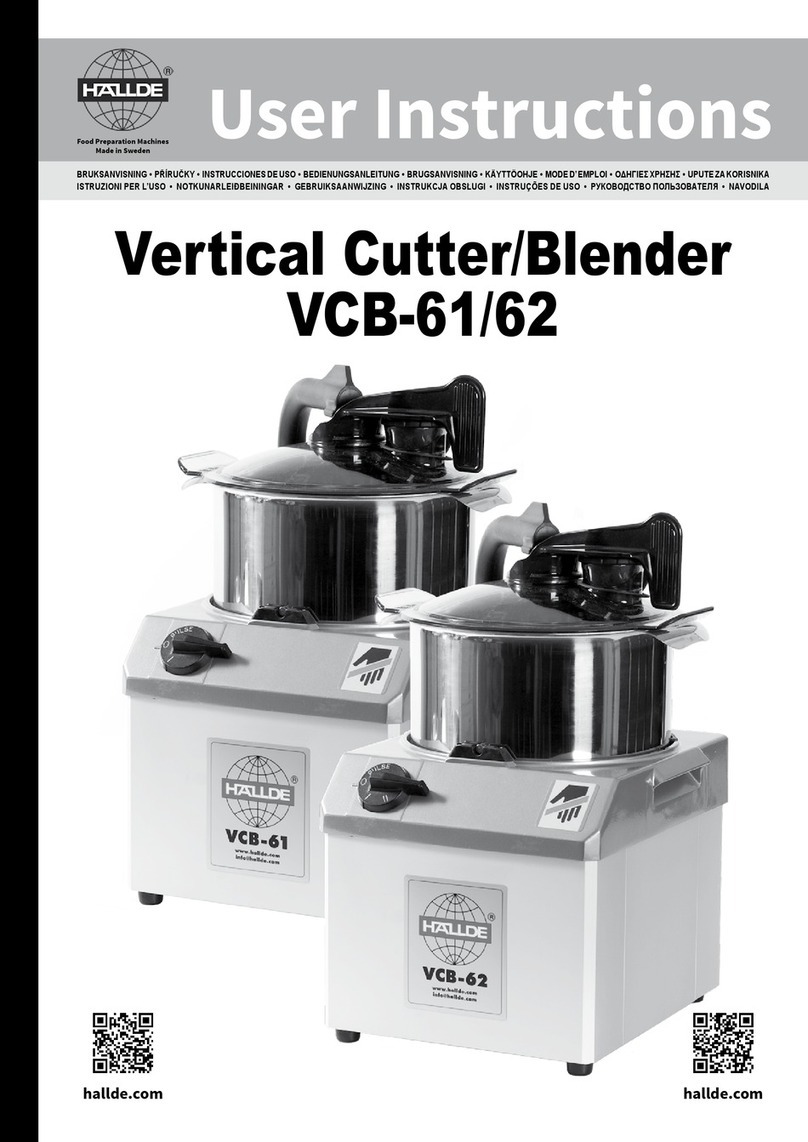
Cutting Tools Vertical Cutter Blender VCB-32

Note!
Nemco reserves the right to make changes to machines, accessories and cutting tools.
We make a reservation against any printing errors.
Model RG-50 and CC-34 have dicing capabilities..
Machines that are presented in this catalog are available
as NSF- and UL-listed models.
User Instructions
RG-50S.................................................................3
RG-50...................................................................7
CC-32S...............................................................12
CC-34 .................................................................18
Cutting Tools.......................................................26
VCB-32...............................................................29
Wiring Diagrams
CC-32S, CC-34 and VCB-32..............................34
RG-50S and RG-50............................................35

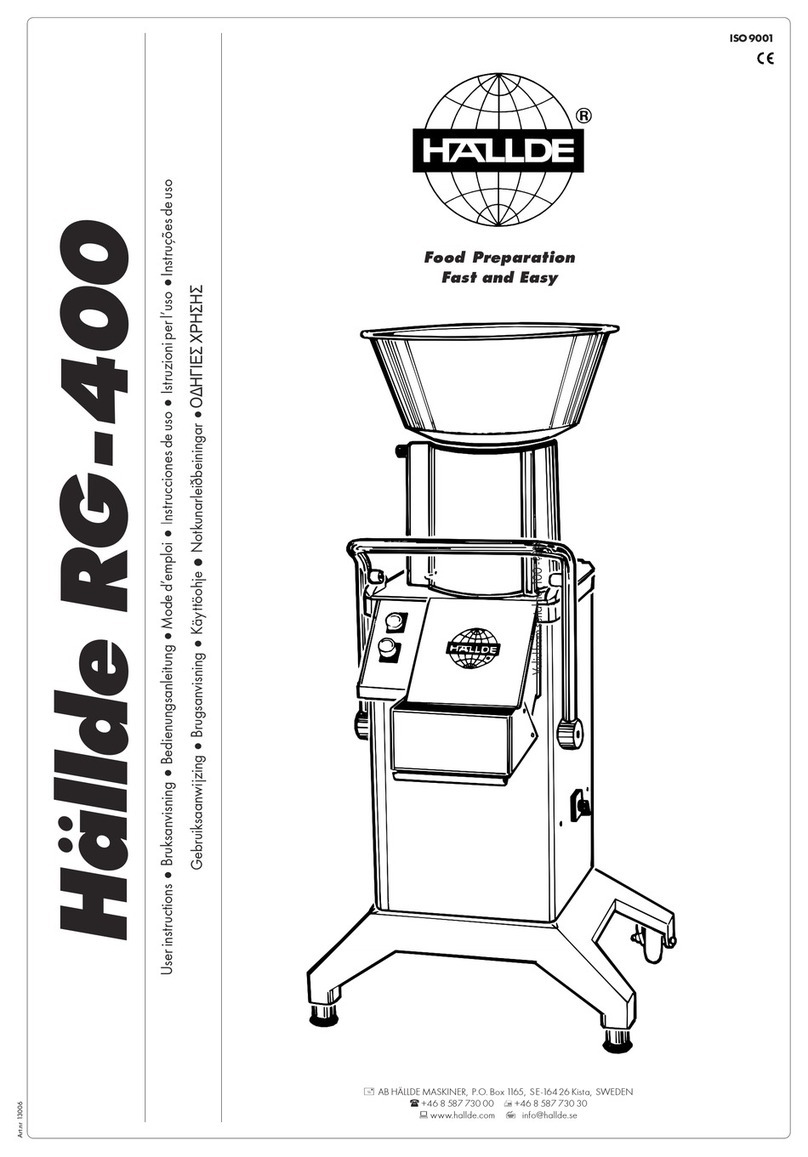
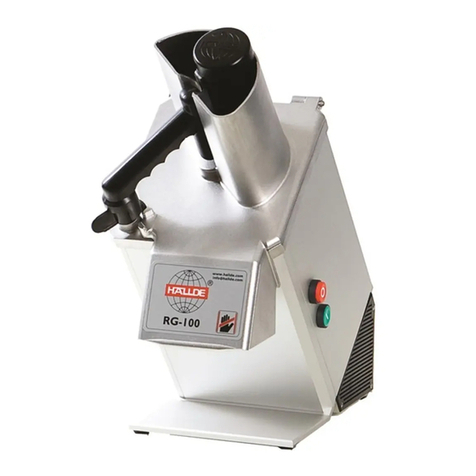
Vegetable Preparation Machine
RG-50S/ RG-50
Combi Cutter
CC-32S/CC-34
Cutting ToolVertical Cutter Blender
VCB-32
Nemco • User Instructions 3NemcoFoodEquip.com
ENG
USER INSTRUCTIONS
Vegetable Preparation
Machine RG-50S
CAUTION!
Be very careful, especially of your hands,
with sharp knife blades and moving parts.
Always carry the machine by the two
handles on the sides of the machine base.
Never put your hands into the feed com-
partment or in the feed tube of the vegetable
preparation attachment.
Always use the pestle during cutting with
the feed tube of the vegetable preparation
attachment.
Before cleaning the machine, always switch
it off by moving the speed control into the
“O” position and then removing the power
plug from the wall socket, alternatively turn
off the main switch.
Always grip the handle of the vegetable
preparation attachment when the feed
compartment is being opened or closed.
Only a qualied service technician may
repair the machine and open the machine
housing.
Do not use the machine to cut frozen foods.
Remove all hard parts from foods before
cutting (e.g., apple stems, woody parts of
turnips, etc.) to avoid damaging the cutting
blades.
These appliances are not to be operated by
children or persons with reduced physical,
sensory or mental capabilities or persons
lacking experience of such appliances,
unless they are given adequate instruction
or supervision.
UNPACKING
Check that all the parts are included, that the
machine works and that nothing has been
damaged during shipping. If unit fails to operate
properly when rst used call Nemco customer
service at 1-800-782-6761.
INSTALLATION
Connect the machine to a main electricity
supply with specication in accordance with
the details on the data plate on the back of
the machine base.
Place the machine on a sturdy bench or table
26"–35" high.
ALWAYS CHECK BEFORE USE
Remove the plug from the power supply socket
or open the isolating switch, and then check
that the electric cable is in good condition and
is not cracked on the outside.
Remove the vegetable preparation attachment,
any cutting tools and the ejector plate in
accordance with the instructions under the
heading “Dismantling”, and then check that the
machine will not start when the speed control
is in the “I” position.
Fit the vegetable preparation attachment in
accordance with the instructions under the
heading “Assembling”. Set the speed setting
knob to the “I” position. Check that the machine
stops when the handle of the vegetable
preparation attachment is raised and that the
axle/shaft stops rotating within 2 seconds.
Then check that the machine re-starts when
the handle is lowered.
Check that the rubber feet on the machine base
are rmly screwed into position.
With regard to cutting tools, see page 26-28.
In the event of any fault or malfunction, call in
a qualied service technician to remedy the
fault before using the machine.
TYPE OF PROCESSING
Slices, grates, shreds, cuts julienne and
crimping slicers in a variety of dimensions,
depending on the cutting tool selected.
Processes vegetables, fruit, dry bread, cheese,
nuts, mushrooms etc.
USERS
Restaurants, cafés, bakeries, retirement
homes, schools, fast food outlets, day care
centers, salad bars etc.
CAPACITY
Up to 80 portions per day and 4 lbs per minute.
USING THE VEGETABLE
PREPARATION ATTACHMENT
The large feed compartment is used mainly
for bulk feeding of all sorts of products and
for cutting larger products such as cabbage.
The large feed compartment is also used when
the product is to be cut in a specic direction,
such as tomatoes and lemons. Place/stack the
products as shown in the picture.
The built-in feed tube is used (picture) for
cutting long products such as cucumbers,
see picture.
ASSEMBLING
Place the ejector plate on the shaft, turn the
ejector plate and press it down into its coupling.
Place the chosen cutting tool on the shaft
and rotate the cutting tool so that it drops into
its coupling.
Place the vegetable preparation attachment
on the machine base so that the text “Close
Open” is at 5 o’clock in relation to the outlet
of the machine base and turn the vegetable
preparation attachment clockwise as far as it
will go and it is rmly in position.
DISMANTLING
Turn the vegetable preparation attachment
counterclockwise as far as it will go, then lift it off.
Turn the cutting tool clockwise and lift it off.
Lift off the ejector plate.
USING THE SPEED CONTROL
With the speed control in the ”O” position the
machine is switched off. In the ”I” position the
machine operates continuously.
CLEANING
Read all of the instructions before you begin
to clean the machine.
BEFORE CLEANING: Always switch off the
machine and remove the power supply plug
from the socket. Alternatively, if the machine
does not have a plug, open the isolating switch.
Remove all the removable parts that are to
be cleaned.
CLEANING IN ADISHWASHER:All removable
parts are machine washable.
CLEANING BY HAND: Always use hand
dishwashing liquid.
CLEANING MATERIALS: Use a dish brush to
clean the food zones. The knife shaft in the
center of the machine can be cleaned with a
small bottlebrush. Use a damp cloth to wipe
down the other surfaces on the machine.
DISINFECTING: Use isopropyl alcohol (65–
70%). Isopropyl alcohol is highly inammable
so use caution when applying it.
WARNING:
• Do not pour or spray water onto the sides
of the machine.
• Do not use boiling or hot water.
• Do not use sodium hypoclorite (chlorine)
or any agent containing this substance.
• Do not use sharp objects or any objects not
intended for the purpose of cleaning.
• Do not use abrasive detergents or cleaning
products.
AVOID: Do not use cleaning sponges with
scouring pads (e.g. Scotch-Brite™) unless
absolutely necessary. This roughens the
surface and makes it less water repellent.
ADVICE ON CARE:
• Clean the machine immediately after use.
• Dry the machine immediately after cleaning
to avoid oxidation and discoloration of the
surface.
INFORMATION: If the machine is left damp
for longer periods stains will appear. These
stains are harmless but the original surface
will lose its luster. Vegetables and fruit contain
acids. Depending on which products are
processed this will have an effect on the metal
after varying periods of time. It is therefore
important to clean the machine immediately
after processing salty and acidic products.
TROUBLE SHOOTING
To eliminate the risk of damage to the motor,
the RG-50S is fitted with thermal motor
protection that automatically switches off the
machine if the temperature of the motor should
become too high. The thermal motor protection

Vegetable preparation machine
RG-50S/ RG-50
Combi Cutter
CC-32S/ CC-34
Cutting Tools Vertical Cutter Blender
VCB-32
Nemco • User InstructionsNemcoFoodEquip.com4
has automatic reset, which means that the
machine can be started again when the motor
has cooled down, which usually takes between
10 and 30 minutes.
FAULT: The machine will not start or stops
while running and cannot be re-started.
REMEDY: Check that the power plug is
properly inserted in the wall socket or,
alternatively, turn on the main switch. Check
that the fuses in the wall box for the premises
have not blown and have the correct ampere
rating. Check that the vegetable preparation
attachment is correctly tted and that the its
handle has been lowered. Wait for up to 30
minutes and then try to start the machine again.
Call in a qualied service technician for action.
FAULT: Low capacity or poor processing result.
REMEDY: Select the right cutting tool. Always
use the ejector plate. Check that the knives
and cutting tools are whole and sharp. Press
the food down loosely with less force.
FAULT: The cutting tool cannot be removed.
REMEDY: Always use the ejector plate.
Use a thick leather glove or other glove that
the blades of the cutting tool cannot cut
through and remove the cutting tool by turning
it clockwise.
TECHNICAL SPECIFICATION
NEMCO RG-50S
CAPACITY AND VOLUME: Processes up to
4 lbs. per minute depending on the type of
cutting tool and foods. Volume of the feeder:
1 qt. Diameter of the feed tube: 2".
MACHINE BASE: Motor: 1.0 kW. 120 V,
single phase, 50-60 Hz. 220-240 V, single
phase, 50/60 Hz. Thermal motor protection.
Transmission: Maintenance-free toothed belt.
Safety system: Two safety switches. Degree
of protection: IP34. Power supply socket:
Earthed, single phase, 10 A. Fuse in fuse
box for the premises: 10 A, delayed. Sound
level: LpA (EN31201): 76 dBA. Magnetic eld:
Less than 0.1 microtesla. Speed: One speed.
Approx. 500 rpm.
CUTTING TOOLS The diameter of the cutting
tools is 7".
NET WEIGHTS: Machine base: 15 lbs. Feed
head: 2 lbs. Cutting tools: approx. 10.5 oz.
average.
NORMS/STANDARDS: NSF STANDARD 8.
ES
INSTRUCCIONES DE USO
Máquina Preparación
de Hortalizas RG-50S
¡ATENCIÓN!
Tenga mucho cuidado, especialmente con
las manos, al tocar las cuchillas aladas y
los elementos móviles.
Para trasladar el aparato, utilice siempre las
dos empuñaduras situadas en los laterales
de la base.
Nunca ponga las manos en el com parti-
mento de alimentación o en el tubo de
alimentación del accesorio de preparación
de verduras.
Utilice siempre la mano de mortero al cortar
con el tubo de alimentación del accesorio
de preparación de verduras.
Antes de limpiar el aparato, apáguelo
siempre moviendo el mando de velocidad
hasta la posición “O” y extraiga el enchufe
de la pared o, como alternativa, desconecte
el interruptor de trabajo.
Sujete siempre el asa del accesorio de
preparación de verduras al abrir o cerrar el
compartimento de alimentación.
Solo el personal técnico cualicado puede
reparar el aparato y abrir la carcasa.
No utilice el aparato para cortar alimentos
congelados. Retire todas las partes duras
de los alimentos antes de cortarlos (por
ejemplo, pedúnculos de manzana, partes
duras de los nabos, etc.) para evitar daños
en las cuchillas de corte.
Este aparato no debe ser utilizado por
niños ni personas con capacidades físicas,
sensoriales o mentales reducidas, ni por
personas que no tengan experiencia con
dichos aparatos, a menos que cuenten
con las instrucciones o la supervisión
adecuadas.
DESEMBALAJE
Verifique que no falta ninguna pieza, que
el aparato funciona, y que nada haya
sufrido daños durante el transporte. Las
reclamaciones deberán realizarse dentro
de los ocho días siguientes a la entrega al
proveedor del aparato.
INSTALACIÓN
Enchufe el aparato a una toma de alimenta-
ción eléctrica principal, que cumpla las
especificaciones incluidas en la placa de
características de la parte posterior de la base.
Sitúe el aparato sobre una supercie o mesa
resistente que tenga una altura de 650-900
mm.
CONTROL DE SEGURIDAD ANTES
DE USO
Extraiga el enchufe de la toma de pared o,
como alternativa, desconecte el interruptor
de trabajo, y compruebe después que el
cable eléctrico esté en buen estado y no
tenga grietas.
Extraiga la unidad de preparación de verduras,
las herramientas de corte y la placa proyectable
de acuerdo con las instrucciones del capítulo
”Desmontaje”, y luego verique que el aparato
no se iniciará cuando el control de velocidad
esté en la posición ”II”.
Coloque el accesorio de preparación de
verduras de acuerdo con las instrucciones
del capítulo ”Montaje”. Ajuste el mando de
velocidad en posición ”I”. Compruebe que
el aparato se detiene cuando el mango del
accesorio de preparación de verduras se
eleva y que el eje deja de girar al cabo de 2
segundos. A continuación, compruebe que el
equipo vuelva a iniciarse cuando se baja de
nuevo el mango.
Compruebe que la base de goma del aparato
está rmemente atornillada en su posición.
En cuanto a las herramientas de corte,
consulte la página 26-28.
En caso de fallo o funcionamiento incorrecto,
llame a un mecánico cualicado para solu-
cionar el fallo antes de usar el aparato.
TIPOS DE PROCESADO
Corta en rodajas, ralla, corta en tiras, en juliana
y con corte rizado en distintos tamaños,
en función de la herramienta de corte
seleccionada. Procesa verduras, frutas, pan
seco, queso, frutos secos, setas, etc.
USUARIOS
Restaurantes, tiendas de cocina, cafeterías,
pastelerías, cocinas dietéticas, residencias
geriátricas, escuelas, centros de comida
rápida, centros de día, bufés de ensaladas, etc.
CAPACIDAD
Hasta 80 porciones al día y 4 kg por minuto.
USO DEL ACCESORIO DE
PREPARACIÓN DE VERDURAS
El compartimiento de alimentación grande
se utiliza principalmente para la alimentación
a granel de todo tipo de productos y para el
corte de productos más grandes, como la col.
El compartimiento de alimentación grande se
usa también cuando es necesario cortar el
producto en una dirección especíca, como
por ejemplo tomates y limones. Coloque/apile
los productos, como se muestra en la imagen.
El tubo de alimentación incorporado (foto)
se utiliza para cortar productos largos, como
pepinos por ejemplo, ver foto.
MONTAJE
Coloque la placa proyectable en el eje, gire
la placa proyectable y presione hacia abajo
hasta su acople.
Coloque la herramienta de corte elegida en el
eje y gire la herramienta de modo que caiga
dentro de su acople.
Coloque el accesorio de preparación de
verduras en la base del aparato de modo que
el texto ”Close-Open” se encuentre ”a las 5” en
relación con la salida de la base del aparato y
gírelo en sentido horario hasta que haga tope
y esté rmemente sujeto en su posición.
DESMONTAJE
Gire el accesorio de preparación de verduras
en sentido anti-horario hasta el tope, y luego
retírelo.
Gire la herramienta de corte hacia la derecha
y retírela.
Retire la placa proyectable.
USO DEL CONTROL DE
VELOCIDAD
Con el mando de velocidad situado en posición
”O” el aparato estará desconectado. En la
posición “I”, el aparato funciona de forma
ininterrumpida.

Vegetable Preparation Machine
RG-50S/ RG-50
Combi Cutter
CC-32S/CC-34
Cutting ToolVertical Cutter Blender
VCB-32
Nemco • User Instructions 5NemcoFoodEquip.com
LIMPIEZA
Lea todas las instrucciones antes de empezar
a limpiar el aparato.
ANTES DE LALIMPIEZA: Desconecte siempre
el aparato y extraiga el enchufe de la pared.
También puede, si el aparato no dispone
de enchufe, desconectar el interruptor de
trabajo. Retire todas las piezas extraíbles
para limpiarlas.
LIMPIEZA EN LAVAVAJILLAS Todas las piezas
extraíbles son aptas para lavavajillas.
LIMPIEZA A MANO: Use siempre detergente
líquido de lavado a mano.
MATERIAL DE LIMPIEZA: Use un cepillo para
vajilla para limpiar las zonas de alimentos. El
eje de la cuchilla en el centro del aparato puede
limpiarse con una pequeña escobilla cilíndrica.
Use un trapo húmedo para limpiar las demás
supercies del aparato.
DESINFECCIÓN: Use alcohol isopropílico
(65-70%). El alcohol isopropílico es altamente
inamable, de modo que úselo con precaución
al aplicarlo.
ATENCIÓN:
• No vierta o pulverice agua sobre los
laterales del aparato.
• No utilice agua caliente o hirviendo.
• No use hipoclorito de sodio (cloro) u otro
agente que contenga esta sustancia.
• No utilice objetos alados ni ningún objeto
que no esté pensado para la limpieza.
• No use detergentes o productos de limpieza
abrasivos.
A EVITAR: No use esponjas de limpieza con
estropajo (como Scotch-Brite™) salvo que sea
imprescindible. Esto raspará la supercie y la
hará menos repelente al agua.
CONSEJOS SOBRE EL CUIDADO:
• Limpie el aparato inmediatamente después
de su uso.
• Seque el aparato inmediatamente después
de limpiarlo para evitar que se oxide y
decolore la supercie.
INFORMACIÓN: Si el aparato permanece
húmedo por un periodo prolongado, apare-
cerán manchas. Estas manchas no son
problemáticas, pero la superficie original
perderá su brillo. Las verduras y frutas
contienen ácidos. Dependiendo de qué
productos se procesen, esto tendrá un efecto
en el metal tras periodos variables de tiempo.
Por eso es importante limpiar el aparato justo
después de usarlo para procesar productos
salados y ácidos.
RESOLUCIÓN DE PROBLEMAS
Para eliminar el riesgo de dañar el motor, el
RG-50S está equipado con protección térmica
del motor que automáticamente apagará
el aparato si la temperatura del motor es
demasiado alta. La protección térmica del
motor tiene reinicio automático, lo que signica
que el aparato podrá encenderse de nuevo
cuando el motor se haya enfriado. Esto puede
llevar entre 10 y 30 minutos.
FALLO: El aparato no se pone en marcha o
se para durante el funcionamiento y no puede
volver a ponerse en marcha.
SOLUCIÓN: Compruebe que el cable de
alimentación está correctamente enchufado
a la toma de corriente, o bien, conecte el
interruptor principal. Controle que los fusibles
del cuadro eléctrico de las instalaciones
no hayan saltado y que sean del amperaje
correcto. Compruebe que el accesorio de
preparación de verduras esté instalado
correctamente y que el mango del accesorio
se haya desplazado hacia abajo. Espere 30
minutos y después, vuelva a intentar encender
el aparato de nuevo. Llame a un mecánico
cualicado.
FALLO: Capacidad baja o resultado de
procesado deciente.
SOLUCIÓN: Seleccione la herramienta
de corte correcta. Utilice siempre la placa
proyectable. Compruebe que las cuchillas
y herramientas de corte están completas y
aladas. Presione los alimentos hacia abajo
ligeramente y con menos fuerza.
FALLO: La herramienta de corte no se puede
retirar.
SOLUCIÓN: Utilice siempre la placa
proyectable. Utilice un guante de cuero
grueso u otro guante que las cuchillas de la
herramienta de corte no puedan cortar y retire
la herramienta de corte girándola en sentido
horario.
ESPECIFICACIONES TÉCNICAS
DE NEMCO RG-50S
CAPACIDAD Y VOLUMEN: Procesa hasta
2 kg por minuto dependiendo del tipo de
herramienta de corte y de alimentos. Volumen
del alimentador: 0,9 litros. Diámetro del tubo
de alimentación: 53 mm.
BASE DEL APARATO: Motor: 1,0 kW. 120 V,
monofásico, 50-60 Hz. 220-240 V, monofásico,
50/60 Hz. Protección térmica del motor.
Transmisión: Correa dentada libre de
mantenimiento. Sistema de seguridad:
Dos interruptores de seguridad. Grado de
protección: IP34. Toma de corriente de
alimentación. Con toma de tierra, monofásico,
10 A, fusible en la caja de fusibles de las
instalaciones: 10 A, retardado. Nivel de ruido:
LpA (EN31201): 76 dBA. Campo magnético:
Menos de 0,1 microteslas. Velocidad: Una
velocidad. Aprox. 500 rpm.
HERRAMIENTAS DE CORTE El diámetro
de las herramientas de corte es de 185 mm.
PESOS NETOS: Base del aparato: 7 kg.
Cabezal de alimentación: 1 kg. Herramientas
de corte: aprox. 0,3 kg de media.
NORMAS/CRITERIOS: CRITERIO NSF 8,
consulte la declaración de conformidad.
FR
MODE D’EMPLOI
Coupe-légumes
RG-50S
ATTENTION !
Attention de ne pas se couper sur les
couteaux et de ne pas se blesser sur les
pièces en mouvement.
Toujours porter l’appareil par les deux
poignées latérales.
Ne jamais mettre les mains dans la
chambre d’alimentation ou dans la goulotte
d’alimentation du coupe-légumes.
Utiliser impérativement le poussoir, lorsque
l’alimentation s’effectue par la goulotte du
coupe-légumes.
Avant de procéder au nettoyage, toujours
déconnecter l’appareil, en tournant le
sélecteur de vitesse en position « 0 » et
en débranchant ensuite la che de la prise
murale ou en coupant l’interrupteur de
service.
Utiliser impérativement la poignée du
coupe-légumes pour ouvrir ou fermer la
chambre d’alimentation.
Seul un technicien qualié peut réparer
l’appareil et ouvrir le corps de celui-ci.
Le RG 50S ne doit pas être utilisé pour
préparer des produits congelés. Il faut aussi
prendre soin d’enlever toutes les parties
dures des matières premières (queues de
pommes, morceaux de choux-navets trop
coriaces, etc.) an de ne pas endommager
les arêtes tranchantes.
Cet appareil ne doit pas être utilisé par des
enfants ou des personnes avec des capa-
cités physiques, sensorielles ou intellectu-
elles réduites ou des personnes sans expé-
rience de ces appareils, à moins qu’elles
ne reçoivent une formation adéquate ou ne
soient supervisées.
DÉBALLAGE
Vérier que toutes les pièces sont jointes,
que l’appareil fonctionne et que rien n’a
été endommagé lors du transport. Toute
réclamation doit parvenir au fournisseur de
l’appareil sous huitaine.
INSTALLATION
Brancher l’appareil à une prise de courant
correspondant aux caractéristiques indiquées
sur la che signalétique au dos du bloc moteur.
Placer l’appareil sur un plan de travail ou une
table solide de 65 à 90 cm de hauteur.
CONTRÔLE DE SÉCURITÉ
AVANT UTILISATION
Débrancher la prise murale ou fermer
l’interrupteur de service, puis vérier que le
câble électrique est intact et ne présente pas
de ssures.
Retirer le coupe-légumes, tous les accessoires
tranchants et le plateau répartiteur selon
les instructions du chapitre « Démontage »,
puis vérier que la machine ne démarre pas
lorsque le sélecteur de vitesse est mis dans
la position “I”.
Mettre en place le coupe-légumes, en suivant
les instructions du chapitre « Montage ». Mettre
le sélecteur de vitesse en position « I ». Vérier
que l’appareil s’arrête, lorsque la poignée du
coupe-légumes est repoussée vers le haut
et s’assurer que l’axe cesse de tourner dans
les 2 secondes. Puis s’assurer que l’appareil
redémarre dès que l’on rabat la poignée.

Vegetable preparation machine
RG-50S/ RG-50
Combi Cutter
CC-32S/ CC-34
Cutting Tools Vertical Cutter Blender
VCB-32
Nemco • User InstructionsNemcoFoodEquip.com6
Vérifier que les pieds en caoutchouc de
l’appareil sont bien vissés.
En ce qui concerne les accessoires tranchants,
cf. pages 26-28.
En cas de défaut ou de mauvais fonctionnement,
faire appel à un professionnel qualifié qui
réparera l’appareil avant toute remise en
service.
TYPES DE PRÉPARATION
L’appareil sert à couper en tranches, en
lamelles, en julienne et en tranches gaufrées
de différentes dimensions et à râper, en
fonction de l’accessoire tranchant choisi. Il
prépare les légumes, les fruits, le pain sec, le
fromage, les noisettes, les champignons, etc.
UTILISATEURS
Restaurants, traiteurs, cafés, boulangeries-
pâtisseries, cuisines diététiques, maisons de
retraite, écoles, restauration rapide, centres
d’accueil, saladeries, etc.
CAPACITÉ
Jusqu’à 80 portions par jour et 2 kg par minute.
UTILISATION DU
COUPE-LÉGUMES
Utiliser la grande chambre d’alimentation pour
charger en continu toutes sortes de produits et
pour couper de gros produits comme le chou.
Utiliser également la grande chambre
d’alimentation pour couper dans un sens
déterminé, par exemple des tomates et des
citrons. Placer/empiler les produits selon le
schéma.
La goulotte d’alimentation intégrée sert pour
la découpe de produits longs comme le
concombre ; cf. schéma.
MONTAGE
Placer le plateau répartiteur sur l’axe et
appuyer en tournant pour l’encliqueter.
Ensuite placer l’accessoire tranchant choisi sur
l’axe et le tourner jusqu’à encliquetage.
Placer le coupe-légumes sur le bloc moteur
de telle sorte que l’inscription « Close Open »
soit dans la position « 5 heures » par rapport
à l’orice de sortie du bloc moteur et puis le
tourner dans le sens des aiguilles d’une montre
jusqu’à blocage.
DÉMONTAGE
Tourner le coupe-légumes dans le sens
contraire des aiguilles d’une montre jusqu’en
butée et l’enlever.
Tourner l’accessoire tranchant dans le sens
des aiguilles d’une montre et l’enlever.
Enlever le plateau répartiteur.
UTILISATION DU RÉGLAGE
DE LA VITESSE
Lorsque le sélecteur de vitesse est dans la
position « O », l’appareil est arrêté. Dans la
position « I », il fonctionne de manière continue.
NETTOYAGE
Avant de commencer à nettoyer l’appareil, lire
toutes les instructions.
AVANT DE NETTOYER : Toujours arrêter
d’abord l’appareil et débrancher la prise
murale. A défaut d’une che, couper le courant
à l’aide de l’interrupteur de service. Retirer
toutes les pièces amovibles qui doivent être
nettoyées.
NETTOYAGE DANS LE LAVE-VAISSELLE
: Toutes les pièces amovibles peuvent être
lavées dans le lave-vaisselle.
NETTOYAGE À LA MAIN : Utiliser toujours un
détergent pour vaisselle à la main.
MATÉRIAUX DE NETTOYAGE : Pour nettoyer
les zones exposées aux aliments, utiliser une
éponge à récurer la vaisselle. L’axe au milieu
de l’appareil peut être nettoyé à l’aide d’une
petite brosse à bouteilles. Pour essuyer les
autres surfaces de l’appareil, utiliser un chiffon
humide.
DÉSINFECTION : Utiliser l’alcool isopropylique
(de 65 à 70 %). L’alcool isopropylique est très
inammable ; lors de son application, il faut
donc être prudent.
ATTENTION !
• Ne pas verser ou asperger d’eau sur les
côtés de l’appareil.
• Ne pas utiliser d’eau bouillante ou chaude.
• Ne pas utiliser l’hypochlorite de sodium ou
d’autres produits contenant cette substance.
• Ne pas utiliser d’objets tranchants pour
nettoyer l’appareil ou d’autres objets qui ne
sont pas destinés au nettoyage.
• Ne pas utiliser de détergents ou de produits
de nettoyage abrasifs.
À ÉVITER Ne pas utiliser d’éponges à récurer
avec une toison abrasive (par exemple
Scotch-Brite™), si cela n’est pas absolument
nécessaire. Cela rend la surface plus rude et
moins hydrofuge.
CONSEIL D’ENTRETIEN :
• Nettoyer l’appareil immédiatement après
l’utilisation.
• Essuyer l’appareil immédiatement après
le nettoyage an d’éviter l’oxydation et la
décoloration du surface.
INFORMATION : Si vous laissez cet appareil
humide pendant des périodes plus longues,
des taches apparaîtront. Ces taches sont
inoffensives mais le surface originaire perdra
son lustre. Les légumes et les fruits contiennent
des acides. En fonction des aliments préparés,
cela exerce un effet sur le métal au bout
d’une période dont la durée varie. Il est donc
important de nettoyer l’appareil immédiatement
après la préparation d’aliments salés et acides.
DÉPANNAGE
Pour éliminer les risques de dommages
au niveau du moteur, le modèle RG-50S
intègre une fonction de sécurité qui l’arrête
automatiquement en cas d’échauffement. Le
réenclenchement est ensuite automatique,
ce qui signie donc qu’il n’est pas possible de
redémarrer l’appareil avant que le moteur ait
refroidi, ce qui demande normalement entre
10 et 30 minutes.
DÉFAUT : L’appareil ne démarre pas ou
s’arrête en cours de fonctionnement et refuse
de redémarrer.
MESURES : S’assurer que la fiche est
branchée sur la prise murale ou, selon le cas,
que l’interrupteur général est sur « I ». Vérier
que les fusibles dans l’armoire à fusibles
du local sont intacts et ont l’ampérage qui
convient. Vérier que le coupe-légumes est
correctement monté et que la poignée du
coupe-légumes est rabattue. Attendre jusqu’à
30 minutes avant d’essayer de remettre
l’appareil en marche. Le cas échéant, faire
appel à un professionnel compétent.
DÉFAUT : faible capacité ou mauvais résultats
MESURES : Choisir l’accessoire tranchant
approprié. Utiliser impérativement le plateau
répartiteur. S’assurer que les couteaux et les
accessoires tranchants sont intacts et bien
coupants. Exercer une pression plus légère
sur le produit à traiter.
DÉFAUT : Il n’est pas possible d’enlever
l’accessoire tranchant.
MESURES : Utiliser impérativement le plateau
répartiteur. Utiliser un gant épais, que les
arêtes tranchantes de l’accessoire tranchant
ne risquent pas de traverser, et libérer
l’accessoire en le tournant dans le sens des
aiguilles d’une montre.
CARACTÉRISTIQUES
TECHNIQUES NEMCO RG-50S
QUANTITÉS ET VOLUMES : jusqu’à 2 kg par
minute, selon l’accessoire tranchant choisi et
la nature du produit traité. Contenance de la
chambre d’alimentation : 0,9 litre. Diamètre de
la goulotte d’alimentation : 53 mm.
BLOC MOTEUR : Moteur : 1,0 kW. 120
kW, monophasé, 50 à 60 Hz. 220 à 240 V,
monophasé, 50 à 60 Hz. Protection thermique
du moteur. Transmission par courroie crantée
ne nécessitant pas d’entretien. Système de
sécurité : deux disjoncteurs de sécurité. Classe
d’isolation : IP34. Branchement secteur : prise
murale avec terre, alimentation monophasée,
10 A. Fusible dans l’armoire à fusibles du local
: 10 A, à action différée. Niveau sonore : LpA
(EN31201): 76 dBA. Champ magnétique :
inférieur à 0,1 microtesla. Vitesse : une vitesse.
Env. 500 tr/min.
ACCESSOIRES TRANCHANTS : Diamètre
des accessoires tranchants : 185 mm.
POIDS NETS : Bloc moteur : 7 kg. Dispositif
d’alimentation : 1 kg. Accessoires tranchants
: env. 0,3 kg en moyenne.
NORMES : NORME NSF 8, cf. déclaration de
la conformité.

Vegetable Preparation Machine
RG-50S/ RG-50
Combi Cutter
CC-32S/CC-34
Cutting ToolVertical Cutter Blender
VCB-32
Nemco • User Instructions 7NemcoFoodEquip.com
ENG
USER INSTRUCTIONS
Vegetable Preparation
Machine RG-50
CAUTION!
Be very careful, especially of your hands,
with sharp knife blades and moving parts.
Always carry the machine by the two
handles on the sides of the machine base.
Never put your hands into the feed com-
partment or in the feed tube of the vegetable
preparation attachment.
Always use the pestle during cutting with
the feed tube of the vegetable preparation
attachment.
Before cleaning the machine, always switch
it off by moving the speed control into the
“O” position and then removing the power
plug from the wall socket, alternatively turn
off the main switch.
Always grip the handle of the vegetable
preparation attachment when the feed
compartment is being opened or closed.
Only a qualied service technician may
repair the machine and open the machine
housing.
Do not use the machine to cut frozen foods.
Remove all hard parts from foods before
cutting (e.g., apple stems, woody parts of
turnips, etc.) to avoid damaging the cutting
blades.
These appliances are not to be operated by
children or persons with reduced physical,
sensory or mental capabilities or persons
lacking experience of such appliances,
unless they are given adequate instruction
or supervision.
UNPACKING
Check that all the parts are included, that the
machine works and that nothing has been
damaged during shipping. If unit fails to
operate properly when rst used call Nemco
customer service at 1-800-782-6761.
INSTALLATION
Connect the machine to a main electricity
supply with specication in accordance with
the details on the data plate on the back of
the machine base.
Place the machine on a sturdy bench or table
26"–35" high.
ALWAYS CHECK BEFORE USE
Remove the plug from the power supply socket
or open the isolating switch, and then check
that the electric cable is in good condition and
is not cracked on the outside.
Remove the vegetable preparation attachment,
any cutting tools and the ejector plate in
accordance with the instructions under the
heading “Dismantling”, and then check that the
machine will not start when the speed control
is in the “I” position.
Fit the vegetable preparation attachment in
accordance with the instructions under the
heading “Assembling”. Set the speed setting
knob to the “I” position. Check that the machine
stops when the feeder handle is raised and that
the axle/shaft stops rotating within 2 seconds.
Then check that the machine re-starts when
the feeder handle is lowered.
Check that the rubber feet on the machine base
are rmly screwed into position.
With regard to cutting tools, see page 26-28.
In the event of any fault or malfunction, call
in a qualied service technician to remedy to
correct the fault before using the machine.
TYPE OF PROCESSING
Slices, dices, grates, shreds, cuts julienne and
crimping slicers in a variety of dimensions,
depending on which cutting tool is selected.
Processes vegetables, fruit, dry bread, cheese,
nuts, mushrooms, etc.
USERS
Restaurants, cafés, bakeries, retirement
homes, schools, fast food outlets, day care
centers, salad bars, etc.
CAPACITY
Up to 80 portions per day and 4 lbs per minute.
USING THE VEGETABLE
PREPARATION ATTACHMENT
The large feed compartment is used mainly
for bulk feeding of all sorts of products and
for cutting larger products such as cabbage.
The large feed compartment is also used when
the product is to be cut in a denite direction,
such as tomatoes and lemons. Place/stack the
products as shown in the picture.
The built-in feed tube is used (picture) for
cutting long products such as cucumbers,
see picture.
ASSEMBLING
Place the ejector plate on the shaft, turn the
ejector plate and press it down into its coupling.
Place the chosen cutting tool on the shaft and
rotate the cutting tool so that it drops into its
coupling.
During dicing: place the dicing grid with the
sharp edge of the knives upward, so that the
recess in the side of the dicing grid ts into the
guide groove on the machine base. Then place
the slicer so that it drops down into its coupling.
Place the vegetable preparation attachment
on the machine base so that the text “Close
Open” is at 5 o’clock in relation to the outlet
of the machine base and turn the vegetable
preparation attachment clockwise as far as it
will go and it is rmly in position.
DISMANTLING
Turn the vegetable preparation attachment
clockwise as far as it will go, then lift it off.
Turn the cutting tool clockwise and lift it off.
If you have been using a dicing grid, lift it off.
Lift off the ejector plate.
USING THE SPEED CONTROL
With the speed control in the ”O” position the
machine is switched off. In the ”I” position the
machine operates continuously.
CLEANING
Read all of the instructions before you begin
to clean the machine.
BEFORE CLEANING: Always switch off the
machine and remove the power supply plug
from the socket. Alternatively, if the machine
does not have a plug, open the isolating switch.
Remove all the removable parts that are to
be cleaned
CLEANING IN ADISHWASHER:All removable
parts are machine washable.
CLEANING BY HAND: Always use hand
dishwashing liquid.
CLEANING MATERIALS: Use a dish brush to
clean the food zones. The knife shaft in the
center of the machine can be cleaned with a
small bottlebrush. Use a damp cloth to wipe
down the other surfaces on the machine.
DISINFECTING: Use isopropyl alcohol (65–
70%). Isopropyl alcohol is highly inammable
so use caution when applying it.
WARNING:
• Do not pour or spray water onto the sides
of the machine.
• Do not use boiling or hot water.
• Do not use sodium hypochlorite (chlorine)
or any agent containing this substance.
• Do not use sharp objects or any objects not
intended for the purpose of cleaning.
• Do not use abrasive detergents or cleaning
products.
AVOID: Do not use cleaning sponges with
scouring pads (e.g. Scotch-Brite™) unless
absolutely necessary. This roughens the
surface and makes it less water repellent.
ADVICE ON CARE:
• Clean the machine immediately after use.
• Dry the machine immediately after cleaning
to avoid oxidation and discoloration of the
surface.
INFORMATION: If the machine is left damp
for longer periods stains will appear. These
stains are harmless but the original surface
will lose its luster. Vegetables and fruit contain
acids. Depending on which products are
processed this will have an effect on the metal
after varying periods of time. It is therefore
important to clean the machine immediately
after processing salty and acidic products.

Vegetable preparation machine
RG-50S/ RG-50
Combi Cutter
CC-32S/ CC-34
Cutting Tools Vertical Cutter Blender
VCB-32
Nemco • User InstructionsNemcoFoodEquip.com8
TROUBLE SHOOTING
To eliminate the risk of damage to the motor,
the RG-50 is tted with thermal motor protection
that automatically switches off the machine if
the temperature of the motor should become
too high. The thermal motor protection has
automatic reset, which means that the machine
can be started again when the motor has
cooled down, which usually takes between
10 and 30 minutes.
FAULT: The machine will not start or stops
while running and cannot be re-started.
REMEDY: Check that the power plug is
properly inserted in the wall socket or,
alternatively, turn on the main. Check that
the fuses in the wall box for the premises
have not blown and have the correct ampere
rating. Check that the vegetable preparation
attachment is correctly tted and that its handle
has been lowered. Wait for up to 30 minutes
and then try to start the machine again. Call in
a qualied service technician for action.
FAULT: Low capacity or poor processing result.
REMEDY: Select the right cutting tool. Always
use the ejector plate. Check that the knives
and cutting tools are whole and sharp. Press
the food down loosely with less force.
FAULT: The cutting tool cannot be removed.
REMEDY: Always use the ejector plate.
Use a thick leather glove or other glove that
the blades of the cutting tool cannot cut
through and remove the cutting tool by turning
it clockwise.
TECHNICAL SPECIFICATION
NEMCO RG-50
CAPACITY AND VOLUME: Processes up to 4
lbs per. Volume of the feeder: 1 qt. Diameter
of the feed tube: 2".
MACHINE BASE: Motor: 1.0 W. 120 V, single
phase, 60 Hz. 220-240 V, single phase,
50/60 Hz. Thermal motor protection.
Transmission: Maintenance-free toothed belt.
Safety system: Two safety switches. Degree
of protection: IP34. Power supply socket:
Earthed, single phase, 10 A. Fuse in fuse box
for the premises: 10 A, delayed. Sound level:
LpA (EN31201): 76 dBA. Magnetic eld: Less
than 15 microtesla. Speed: One speed.Approx.
500 rpm.
CUTTING TOOLS: The diameter of the cutting
tools is 7".
NET WEIGHTS: Machine base: 19 lbs. Feed
head: 2 lbs. Cutting tools: approx. 10.5 oz.
average.
NORMS/STANDARDS: NSF STANDARD 8.
ES
INSTRUCCIONES DE USO
Máquina Preparación
de Hortalizas RG-50
¡ATENCIÓN!
Tenga mucho cuidado, especialmente con
las manos, al tocar las cuchillas aladas y
los elementos móviles.
Para trasladar el aparato, utilice siempre las
dos empuñaduras situadas en los laterales
de la base.
Nunca ponga las manos en el compartimento
de alimentación o en el tubo de alimentación
del accesorio de preparación de verduras.
Utilice siempre la mano de mortero al cortar
con el tubo de alimentación del accesorio
de preparación de verduras.
Antes de limpiar el aparato, apáguelo
siempre moviendo el mando de velocidad
hasta la posición “O” y extraiga el enchufe
de la pared o, como alternativa, desconecte
el interruptor de trabajo.
Sujete siempre el asa del accesorio de
preparación de verduras al abrir o cerrar el
compartimento de alimentación.
Solo el personal técnico cualicado puede
reparar el aparato y abrir la carcasa.
No utilice el aparato para cortar alimentos
congelados. Retire todas las partes duras
de los alimentos antes de cortarlos (por
ejemplo, pedúnculos de manzana, partes
duras de los nabos, etc.) para evitar daños
en las cuchillas de corte.
Este aparato no debe ser utilizado por
niños ni personas con capacidades físicas,
sensoriales o mentales reducidas, ni por
personas que no tengan experiencia con
dichos aparatos, a menos que cuenten
con las instrucciones o la supervisión
adecuadas.
DESEMBALAJE
Verifique que no falta ninguna pieza, que
el aparato funciona, y que nada haya
sufrido daños durante el transporte. Las
reclamaciones deberán realizarse dentro
de los ocho días siguientes a la entrega al
proveedor del aparato.
INSTALACIÓN
Enchufe el aparato a una toma de alimenta-
ción eléctrica principal, que cumpla las
especificaciones incluidas en la placa de
características de la parte posterior de la base.
Sitúe el aparato sobre una supercie o mesa
resistente que tenga una altura de 650-900 mm.
CONTROL DE SEGURIDAD
ANTES DE USO
Extraiga el enchufe de la toma de pared o,
como alternativa, desconecte el interruptor
de trabajo, y compruebe después que el
cable eléctrico esté en buen estado y no
tenga grietas.
Extraiga la unidad de preparación de verduras,
las herramientas de corte y la placa proyectable
de acuerdo con las instrucciones del capítulo
”Desmontaje”, y luego verique que el aparato
no se iniciará cuando el control de velocidad
esté en la posición ”II”.
Coloque el accesorio de preparación de
verduras de acuerdo con las instrucciones
del capítulo ”Montaje”. Ajuste el mando de
velocidad en posición ”I”. Compruebe que
el aparato se detiene cuando el mango del
alimentador se eleva y que el eje deja de
girar al cabo de 2 segundos. A continuación,
compruebe que el equipo vuelva a iniciarse
cuando se baja de nuevo el mango del
alimentador.
Compruebe que la base de goma del aparato
está rmemente atornillada en su posición.
En cuanto a las herramientas de corte,
consulte la página 26-28.
En caso de fallo o funcionamiento incorrecto,
llame a un mecánico cualificado para
solucionar el fallo antes de usar el aparato.
TIPOS DE PROCESADO
Corta en rodajas, dados, ralla, corta en tiras,
en juliana y con corte rizado en distintos
tamaños, en función de la herramienta de
corte seleccionada.
Procesa verduras, frutas, pan seco, queso,
frutos secos, setas, etc.
USUARIOS
Restaurantes, tiendas de cocina, cafeterías,
pastelerías, cocinas dietéticas, residencias
geriátricas, escuelas, centros de comida
rápida, centros de día, bufés de ensaladas, etc.
CAPACIDAD
Hasta 80 porciones al día y 2 kg por minuto.
USO DEL ACCESORIO DE
PREPARACIÓN DE VERDURAS
El compartimiento de alimentación grande
se utiliza principalmente para la alimentación
a granel de todo tipo de productos y para el
corte de productos más grandes, como la col.
El compartimiento de alimentación grande se
usa también cuando es necesario cortar el
producto en una dirección denida, como por
ejemplo tomates y limones. Coloque/apile los
productos, como se muestra en la imagen.
El tubo de alimentación incorporado (foto)
se utiliza para cortar productos largos, como
pepinos por ejemplo, ver foto.
MONTAJE
Coloque la placa proyectable en el eje, gire
la placa proyectable y presione hacia abajo
hasta su acople.
Coloque la herramienta de corte elegida en el
eje y gire la herramienta de modo que caiga
dentro de su acople.
Al cortar en dados: colocar la rejilla para corte
en dados con el borde alado de las cuchillas
hacia arriba, de modo que el hueco en el
lateral de la rejilla de corte en dados encaje
en la ranura de guía en la base del aparato.
Después, coloque la herramienta de corte
en rodajas de modo que caiga dentro de su
acople.
Coloque el accesorio de preparación de
verduras en la base del aparato de modo que
el texto ”Close-Open” se encuentre ”a las 5” en
relación con la salida de la base del aparato y
gírelo en sentido horario hasta que haga tope
y esté rmemente sujeto en su posición.
DESMONTAJE
Gire el accesorio de preparación de verduras
en sentido horario hasta el tope, y luego
retírelo.
Gire la herramienta de corte hacia la derecha
y retírela.

Vegetable Preparation Machine
RG-50S/ RG-50
Combi Cutter
CC-32S/CC-34
Cutting ToolVertical Cutter Blender
VCB-32
Nemco • User Instructions 9NemcoFoodEquip.com
Si ha estado utilizando una rejilla de corte en
dados, retírela.
Retire la placa proyectable.
USO DEL CONTROL DE
VELOCIDAD
Con el mando de velocidad situado en posición
”O” el aparato estará desconectado. En la
posición “I”, el aparato funciona de forma
ininterrumpida.
LIMPIEZA
Lea todas las instrucciones antes de empezar
a limpiar el aparato.
ANTES DE LALIMPIEZA: Desconecte siempre
el aparato y extraiga el enchufe de la pared.
También puede, si el aparato no dispone
de enchufe, desconectar el interruptor de
trabajo. Retire todas las piezas extraíbles
para limpiarlas.
LIMPIEZA EN LAVAVAJILLAS Todas las piezas
extraíbles son aptas para lavavajillas.
LIMPIEZA A MANO: Use siempre detergente
líquido de lavado a mano.
MATERIAL DE LIMPIEZA: Use un cepillo para
vajilla para limpiar las zonas de alimentos. El
eje de la cuchilla en el centro del aparato puede
limpiarse con una pequeña escobilla cilíndrica.
Use un trapo húmedo para limpiar las demás
supercies del aparato.
DESINFECCIÓN: Use alcohol isopropílico
(65-70%). El alcohol isopropílico es altamente
inamable, de modo que úselo con precaución
al aplicarlo.
ATENCIÓN:
• No vierta o pulverice agua sobre los
laterales del aparato.
• No utilice agua caliente o hirviendo.
• No use hipoclorito de sodio (cloro) u otro
agente que contenga esta sustancia.
• No utilice objetos alados ni ningún objeto
que no esté pensado para la limpieza.
• No use detergentes o productos de limpieza
abrasivos.
A EVITAR: No use esponjas de limpieza con
estropajo (como Scotch-Brite™) salvo que sea
imprescindible. Esto raspará la supercie y la
hará menos repelente al agua.
CONSEJOS SOBRE EL CUIDADO:
• Limpie el aparato inmediatamente después
de su uso.
• Seque el aparato inmediatamente después
de limpiarlo para evitar que se oxide y
decolore la supercie.
INFORMACIÓN: Si el aparato permanece
húmedo por un periodo prolongado,
aparecerán manchas. Estas manchas no
son problemáticas, pero la supercie original
perderá su brillo. Las verduras y frutas
contienen ácidos. Dependiendo de qué
productos se procesen, esto tendrá un efecto
en el metal tras periodos variables de tiempo.
Por eso es importante limpiar el aparato justo
después de usarlo para procesar productos
salados y ácidos.
RESOLUCIÓN DE PROBLEMAS
Para eliminar el riesgo de dañar el motor, el
RG-50 está equipado con protección térmica
del motor que automáticamente apagará
el aparato si la temperatura del motor es
demasiado alta. La protección térmica del
motor tiene reinicio automático, lo que signica
que el aparato podrá encenderse de nuevo
cuando el motor se haya enfriado. Esto puede
llevar entre 10 y 30 minutos.
FALLO: El aparato no se pone en marcha o
se para durante el funcionamiento y no puede
volver a ponerse en marcha.
SOLUCIÓN: Compruebe que el cable de
alimentación está correctamente enchufado
a la toma de corriente, o bien, conecte el
interruptor principal. Controle que los fusibles
del cuadro eléctrico de las instalaciones
no hayan saltado y que sean del amperaje
correcto. Compruebe que el accesorio de
preparación de verduras esté instalado
correctamente y que el mango del accesorio
se haya desplazado hacia abajo. Espere 30
minutos y después, vuelva a intentar encender
el aparato de nuevo. Llame a un mecánico
cualicado.
FALLO: Capacidad baja o resultado de
procesado deciente.
SOLUCIÓN: Seleccione la herramienta
de corte correcta. Utilice siempre la placa
proyectable. Compruebe que las cuchillas
y herramientas de corte están completas y
aladas. Presione los alimentos hacia abajo
ligeramente y con menos fuerza.
FALLO: La herramienta de corte no se puede
retirar.
SOLUCIÓN: Utilice siempre la placa
proyectable. Utilice un guante de cuero
grueso u otro guante que las cuchillas de la
herramienta de corte no puedan cortar y retire
la herramienta de corte girándola en sentido
horario.
ESPECIFICACIONES TÉCNICAS
DE NEMCO RG-50
CAPACIDAD Y VOLUMEN: Procesa hasta 2 kg
por minuto. Volumen del alimentador: 0,9 litros.
Diámetro del tubo de alimentación: 53 mm.
BASE DEL APARATO: Motor: 1,0 W. 120 V,
monofásico, 60 Hz. 220-240 V, monofásico,
50/60 Hz. Protección térmica del motor.
Transmisión: Correa dentada libre de
mantenimiento. Sistema de seguridad:
Dos interruptores de seguridad. Grado de
protección: IP34. Toma de corriente de
alimentación. Con toma de tierra, monofásico,
10 A, fusible en la caja de fusibles de las
instalaciones: 10 A, retardado. Nivel de ruido:
LpA (EN31201): 76 dBA. Campo magnético:
Menos de 15 microteslas. Velocidad: Una
velocidad. Aprox. 500 rpm.
HERRAMIENTAS DE CORTE: El diámetro
de las herramientas de corte es de 185 mm.
PESOS NETOS: Base del aparato: 8,6 kg.
Cabezal de alimentación: 1 kg. Herramientas
de corte: aprox. 0,3 kg de media.
NORMAS/CRITERIOS: CRITERIO NSF 8,
consulte la declaración de conformidad.
FR
MODE D’EMPLOI
Coupe-légumes
RG-50
ATTENTION !
Attention de ne pas se couper sur les
couteaux et de ne pas se blesser sur les
pièces en mouvement.
Toujours porter l’appareil par les deux
poignées latérales.
Ne jamais mettre les mains dans la
chambre d’alimentation ou dans la goulotte
d’alimentation du coupe-légumes.
Utiliser impérativement le poussoir, lorsque
l’alimentation s’effectue par la goulotte du
coupe-légumes.
Avant de procéder au nettoyage, toujours
déconnecter l’appareil, en tournant le
sélecteur de vitesse en position « 0 » et
en débranchant ensuite la che de la prise
murale ou en coupant l’interrupteur de
service.
Utiliser impérativement la poignée du
coupe-légumes pour ouvrir ou fermer la
chambre d’alimentation.
Seul un technicien qualié peut réparer
l’appareil et ouvrir le corps de celui-ci.
Le RG 50 ne doit pas être utilisé pour
préparer des produits congelés. Il faut aussi
prendre soin d’enlever toutes les parties
dures des matières premières (queues de
pommes, morceaux de choux-navets trop
coriaces, etc.) an de ne pas endommager
les arêtes tranchantes.
Cet appareil ne doit pas être utilisé par
des enfants ou des personnes avec des
capacités physiques, sensorielles ou
intellectuelles réduites ou des personnes
sans expérience de ces appareils, à
moins qu’elles ne reçoivent une formation
adéquate ou ne soient supervisées.
DÉBALLAGE
Vérier que toutes les pièces sont jointes,
que l’appareil fonctionne et que rien n’a
été endommagé lors du transport. Toute
réclamation doit parvenir au fournisseur de
l’appareil sous huitaine.
INSTALLATION
Brancher l’appareil à une prise de courant
correspondant aux caractéristiques indiquées
sur la che signalétique au dos du bloc moteur.
Placer l’appareil sur un plan de travail ou une
table solide de 65 à 90 cm de hauteur.
CONTRÔLE DE SÉCURITÉ AVANT
UTILISATION
Débrancher la prise murale ou fermer
l’interrupteur de service, puis vérier que le
câble électrique est intact et ne présente pas
de ssures.
Retirer le coupe-légumes, tous les accessoires
tranchants et le plateau répartiteur selon

Vegetable preparation machine
RG-50S/ RG-50
Combi Cutter
CC-32S/ CC-34
Cutting Tools Vertical Cutter Blender
VCB-32
Nemco • User InstructionsNemcoFoodEquip.com10
les instructions du chapitre « Démontage »,
puis vérier que la machine ne démarre pas
lorsque le sélecteur de vitesse est mis dans
la position “I”.
Mettre en place le coupe-légumes, en suivant
les instructions du chapitre « Montage ». Mettre
le sélecteur de vitesse en position « I ». Vérier
que l’appareil s’arrête, lorsque la poignée du
coupe-légumes est repoussée vers le haut
et s’assurer que l’axe cesse de tourner dans
les 2 secondes. Puis s’assurer que l’appareil
redémarre dès que l’on rabat la poignée.
Vérifier que les pieds en caoutchouc de
l’appareil sont bien vissés.
En ce qui concerne les accessoires tranchants,
cf. pages 26-28.
En cas de défaut ou de mauvais fonctionnement,
faire appel à un professionnel qualifié qui
réparera l’appareil avant toute remise en
service.
TYPES DE PRÉPARATION
L’appareil sert à couper en tranches, en
dés, en lamelles, en julienne et en tranches
gaufrées de différentes dimensions et à râper,
en fonction de l’accessoire tranchant choisi.
Il prépare les légumes, les fruits, le pain sec, le
fromage, les noisettes, les champignons, etc.
UTILISATEURS
Restaurants, traiteurs, cafés, boulangeries-
pâtisseries, cuisines diététiques, maisons de
retraite, écoles, restauration rapide, centres
d’accueil, saladeries, etc.
CAPACITÉ
Jusqu’à 80 portions par jour et 2 kg par minute.
UTILISATION
DU COUPE-LÉGUMES
Utiliser la grande chambre d’alimentation pour
charger en continu toutes sortes de produits et
pour couper de gros produits comme le chou.
Utiliser également la grande chambre
d’alimentation pour couper dans un sens
déterminé, par exemple des tomates et des
citrons. Placer/empiler les produits selon le
schéma.
La goulotte d’alimentation intégrée sert pour
la découpe de produits longs comme le
concombre ; cf. schéma.
MONTAGE
Placer le plateau répartiteur sur l’axe et
appuyer en tournant pour l’encliqueter.
Ensuite placer l’accessoire tranchant choisi
sur l’arbre et le tourner jusqu’à encliquetage.
Pour couper en dés: Placer la grille à macédoine
avec l’arête tranchante des lames vers le haut,
de manière que l’ergot de guidage dont est
muni le bloc moteur pénètre dans la rainure
située sur le côté de la grille. Ensuite placer le
trancheur et le tourner jusqu’à encliquetage.
Placer le coupe-légumes sur le bloc moteur
de telle sorte que l’inscription « Close Open »
soit dans la position « 5 heures » par rapport
à l’orice de sortie du bloc moteur et puis le
tourner dans le sens des aiguilles d’une montre
jusqu’à blocage.
DÉMONTAGE
Tourner le coupe-légumes dans le sens des
aiguilles d’une montre jusqu’en butée et
l’enlever.
Tourner l’accessoire tranchant dans le sens
des aiguilles d’une montre et l’enlever.
Si la grille à macédoine a été utilisée, l’enlever.
Enlever le plateau répartiteur.
UTILISATION DU RÉGLAGE
DE LA VITESSE
Lorsque le sélecteur de vitesse est dans la
position « O », l’appareil est arrêté. Dans la
position « I », il fonctionne de manière continue.
NETTOYAGE
Avant de commencer à nettoyer l’appareil, lire
toutes les instructions.
AVANT DE NETTOYER: Toujours arrêter
d’abord l’appareil et débrancher la prise
murale. A défaut d’une che, couper le courant
à l’aide de l’interrupteur de service. Retirer
toutes les pièces amovibles qui doivent être
nettoyées.
NETTOYAGE DANS LE LAVE-VAISSELLE:
Toutes les pièces amovibles peuvent être
lavées dans le lave-vaisselle.
NETTOYAGE À LA MAIN: Utiliser toujours un
détergent pour vaisselle à la main.
MATÉRIAUX DE NETTOYAGE : Pour nettoyer
les zones exposées aux aliments, utiliser une
éponge à récurer la vaisselle. L’axe au milieu
de l’appareil peut être nettoyé à l’aide d’une
petite brosse à bouteilles. Pour essuyer les
autres surfaces de l’appareil, utiliser un chiffon
humide.
DÉSINFECTION: Utiliser l’alcool isopropylique
(de 65 à 70 %). L’alcool isopropylique est très
inammable ; lors de son application, il faut
donc être prudent.
ATTENTION !
• Ne pas verser ou asperger d’eau sur les
côtés de l’appareil.
• Ne pas utiliser d’eau bouillante ou chaude.
• Ne pas utiliser l’hypochlorite de sodium ou
d’autres produits contenant cette substance.
• Ne pas utiliser d’objets tranchants pour
nettoyer l’appareil ou d’autres objets qui ne
sont pas destinés au nettoyage.
• Ne pas utiliser de détergents ou de produits
de nettoyage abrasifs.
À ÉVITER Ne pas utiliser d’éponges à récurer
avec une toison abrasive (par exemple
Scotch-Brite™), si cela n’est pas absolument
nécessaire. Cela rend la surface plus rude et
moins hydrofuge.
CONSEIL D’ENTRETIEN:
• Nettoyer l’appareil immédiatement après
l’utilisation.
• Essuyer l’appareil immédiatement après
le nettoyage an d’éviter l’oxydation et la
décoloration du surface.
INFORMATION: Si vous laissez cet appareil
humide pendant des périodes plus longues,
des taches apparaîtront. Ces taches sont
inoffensives mais le surface originaire perdra
son lustre. Les légumes et les fruits contiennent
des acides. En fonction des aliments préparés,
cela exerce un effet sur le métal au bout
d’une période dont la durée varie. Il est donc
important de nettoyer l’appareil immédiatement
après la préparation d’aliments salés et acides.
DÉPANNAGE
Pour éliminer les risques de dommages
au niveau du moteur, le modèle RG-50
intègre une fonction de sécurité qui l’arrête
automatiquement en cas d’échauffement. Le
réenclenchement est ensuite automatique,
ce qui signie donc qu’il n’est pas possible de
redémarrer l’appareil avant que le moteur ait
refroidi, ce qui demande normalement entre
10 et 30 minutes.
DÉFAUT: L’appareil ne démarre pas ou
s’arrête en cours de fonctionnement et refuse
de redémarrer.
MESURES: S’assurer que la fiche est
branchée sur la prise murale ou, selon le
cas, que l’interrupteur général est sur « I ».
Vérifier que les fusibles dans l’armoire à
fusibles du local sont intacts et ont l’ampérage
qui convient. Vérier que le coupe-légumes
est correctement monté et que la poignée du
coupe-légumes est rabattue. Attendre jusqu’à
30 minutes avant d’essayer de remettre
l’appareil en marche. Le cas échéant, faire
appel à un professionnel compétent.
DÉFAUT: faible capacité ou mauvais résultats
MESURES: Choisir l’accessoire tranchant
approprié. Utiliser impérativement le plateau
répartiteur. S’assurer que les couteaux et les
accessoires tranchants sont intacts et bien
coupants. Exercer une pression plus légère
sur le produit à traiter.
DÉFAUT: Il n’est pas possible d’enlever
l’accessoire tranchant.
MESURES: Utiliser impérativement le plateau
répartiteur. Utiliser un gant épais, que les
arêtes tranchantes de l’accessoire tranchant
ne risquent pas de traverser, et libérer
l’accessoire en le tournant dans le sens des
aiguilles d’une montre.
CARACTÉRISTIQUES
TECHNIQUES NEMCO RG-50
QUANTITÉS ET VOLUMES: Jusqu’à 2 kg
par minute. Contenance de la chambre
d’alimentation: 0,9 litre. Diamètre de la goulotte
d’alimentation: 53 mm.
BLOC MOTEUR: Moteur: 1,0 W. 120 V,
monophasé, 60 à Hz. 220 à 240 V, monophasé,
50 à 60 Hz. Protection thermique du moteur.
Transmission par courroie crantée ne
nécessitant pas d’entretien. Système de
sécurité: deux disjoncteurs de sécurité. Classe
d’isolation: IP34. Branchement secteur: prise
murale avec terre, alimentation monophasée,
10 A. Fusible dans l’armoire à fusibles du
local: 10 A, à action différée. Niveau sonore:
LpA (EN31201): 76 dBA. Champ magnétique:
inférieur à 15 microtesla. Vitesse: une vitesse.
Env. 500 tr/min.
ACCESSOIRES TRANCHANTS: Diamètre des
accessoires tranchants: 185 mm.
POIDS NETS: Bloc moteur: 8,6 kg. Dispositif
d’alimentation: 1 kg. Accessoires tranchants:
env. 0,3 kg en moyenne.
NORMES: NORME NSF 8, cf. déclaration de
la conformité.
Vegetable Preparation Machine
RG-50S/ RG-50
Combi Cutter
CC-32S/CC-34
Cutting ToolVertical Cutter Blender
VCB-32
Nemco • User Instructions 11NemcoFoodEquip.com
USING THE FEEDERS
LETTUCE
POTATOES
TOMATOES
CUCUMBER
DISMANTLING THE FEEDER
ASSEMBLING THE FEEDER
Vegetable Preparation Machine RG-50S and RG-50
PARTS / ASSEMBLING
PESTLE
VEGETABLE PREPARATION
ATTACHMENT
CUTTING TOOL
ALWAYS USE!
EJECTOR PLATE
MACHINE BASE
* ASSEMBLING/DISMANTLING
CUTTING TOOLS: SEE PAGE 28.
BUILT-IN
FEED TUBE

12
Vegetable preparation machine
RG-50S/ RG-50
Combi Cutter
CC-32S/ CC-34
Cutting Tools Vertical Cutter Blender
VCB-32
Nemco • User InstructionsNemcoFoodEquip.com
ENG
USER INSTRUCTIONS
Combi Cutter CC-32S
CAUTION!
Be very careful, especially of your hands,
with sharp knife blades and moving parts.
Always carry the machine by the two
handles on the sides of the machine base.
Never put your hands into the bowl, or in
the feed compartment or in the feed tube
of the vegetable preparation attachment.
Always use the pestle during cutting with
the feed tube of the vegetable preparation
attachment.
Before cleaning the machine, always switch
it off by moving the speed control into the
“O” position and then removing the power
plug from the wall socket, alternatively
open the isolating switch.
Always grip the handle of the vegetable
preparation attachment when the feed
compartment is being opened or closed.
Only a qualied service technician may
repair the machine and open the machine
housing.
Do not use the vegetable preparation
attachment to cut frozen foods. Remove
all hard parts from foods before cutting
(e.g., apple stems, woody parts of turnips,
etc.) to avoid damaging the cutting blades.
This appliance is not to be operated by
children or persons with reduced physical,
sensory or mental capabilities or persons
lacking experience of such appliances,
unless they are given adequate instruction
or supervision.
Only for the Canadian market: The machine
is not authorized to process meat.
UNPACKING
Check that all the parts are included, that the
machine works and that nothing has been
damaged during shipping. If unit fails to operate
properly when rst used call Nemco customer
service at 1-800-782-6761.
INSTALLATION
Remove the knife from the bowl before
installation.
Connect the machine to a main electricity
supply with specication in accordance with
the details on the data plate on the back of
the machine base.
Place the machine on a sturdy bench or table
26"–35" high.
Mount the wall rack for the cutting tools and the
ejector plate on a wall close to the machine.
ALWAYS CHECK BEFORE USE
WITH THE VEGETABLE PREPARATION
ATTACHMENT:
Remove the plug from the power supply socket
or open the isolating switch, and then check
that the electric cable is in good condition and
is not cracked on the outside.
Remove the vegetable preparation attachment,
any cutting tools and the ejector plate in
accordance with the instructions under the
heading “Dismantling ”, and then check that the
machine will not start when the speed control
is in the “I” position.
Fit the machine in accordance with the
instructions under the heading “Assembling”.
Set the speed setting knob to the “I” position.
Check that the machine stops when the handle
of the vegetable preparation attachment is
raised and that the axle/shaft stops rotating
within 2 seconds. Then check that the machine
re-starts when the handle is lowered.
Check that the rubber feet on the machine base
are rmly screwed into position.
With regard to cutting tools, see page 26-28.
In the event of any fault or malfunction, call in
a qualied service technician to remedy the
fault before using the machine.
WITH THE CUTTER/BOWLATTACHMENT:
Remove the plug from the power supply socket
or open the isolating switch, and then check
that the electric cable is in good condition and
is not cracked on the outside.
Fit the bowl, knife and lid. Set the speed control
to position “I” and check that the shaft then
stops rotating within 4 seconds after the lid has
been removed by turning it counterclockwise
as far as it will go.
Remove the lid, the knife and the bowl. Turn
the speed control to the “I” position and check
that the machine does not start.
Check that the rubber feet of the machine are
rmly screwed into position.
Check that the knives are in good condition
and sharp.
In the event of any fault or malfunction, call in
a qualied service technician to remedy the
fault before using the machine.
TYPE OF PROCESSING
WITH THE VEGETABLE PREPARATION
ATTACHMENT:
Slices, grates, shreds, cuts julienne and
crimping slicers in a variety of dimensions,
depending on the cutting tool selected.
Processes vegetables, fruit, dry bread, cheese,
nuts, mushrooms etc.
The large feed compartment is used mainly
for bulk feeding of all sorts of products
(picture) and for cutting larger products such
as cabbage.
The large feed compartment is also used when
the product is to be cut in a specic direction,
such as tomatoes and lemons. Place/stack the
products as shown in the picture.
The built-in feed tube is used for cutting long
products such as cucumbers, see picture.
WITH THE CUTTER/BOWLATTACHMENT:
Chops, grinds, mixes and blends minced meat,
aromatic butter, dressing, desserts, purée,
paté, soups etc. Prepares meat, sh, fruit,
vegetables, onions, parsley, nuts, almonds,
parmesan, mushrooms, chocolate, etc.
USERS
Restaurants, shop kitchens, cafés, bakeries,
diet kitchens, retirement homes, schools, fast
food outlets, day care centers, salad bars, etc.
CAPACITY
WHEN USING THE VEGETABLE
PREPARATION ATTACHMENT
Up to 80 portions per day and 4 lbs. per minute.
WHEN USING THE CUTTER/BOWL
ATTACHMENT
For a good and even result with rm foods such
as meat, cheese, they should rst be separated
into pieces of roughly equal size and no larger
than about 1"x1"x1".
The recommended maximum quantities that
the machine should process at one time are
shown below.
• Meat: 35 oz
• Fish: 35 oz
• Aromatic butter: 35 oz
• Mayonnaise: 33 oz
• Parsley: 33 oz
THE SCRAPER
(CUTTER/BOWL ATTACHMENT)
Always have the scraper tted during all types
of processing since the three scraper blades
slow down the rotation of the food in the bowl
and guide the food toward the center/cutting
zone of the bowl.
By turning the handle of the scraper back and
forth, the lid and walls of the bowl can easily
be scraped and the food returned to the cutting
zone while the machine is operating.
ASSEMBLING
THE VEGETABLE PREPARATION
ATTACHMENT:
Place the ejector plate on the shaft, turn the
ejector plate and press it down into its coupling.
Then place the chosen cutting tool on the shaft
and rotate it so that it drops into its coupling.
Place the vegetable preparation attachment
on the machine base so that the text “Close
Open” is at 5 o’clock in relation to the outlet of
the machine base and turn it clockwise as far
as it will go and is rmly in position.
THE CUTTER/BOWL ATTACHMENT:
Place the bowl on the machine base so that
the locating plate of the bowl is inserted into
the recess on the top of the machine base.
Place the knife on the shaft and rotate the
knife while pressing it down so that it sinks
completely into its coupling.

13
Vegetable Preparation Machine
RG-50S/ RG-50
Combi Cutter
CC-32S/CC-34
Cutting ToolVertical Cutter Blender
VCB-32
Nemco • User Instructions NemcoFoodEquip.com
Fit the sealing ring into the groove on the
inside of the lid.
Grip the center of the scraper ring and place
the lid on the scraper ring.
Place the scraper handle on top of the lid and
the scraper ring under it. Turn the scraper
handle counterclockwise as far as it will go in
the scraper ring and the three parts are joined.
Place the lid on the bowl so that the text “Close
Open” is at 5 o’clock in relation to the outlet of
the machine base.
Turn the lid clockwise as far as it will go.
DISMANTLING
THE VEGETABLE PREPARATION
ATTACHMENT:
Turn the vegetable preparation attachment
counterclockwise as far as it will go, then lift it off.
Turn the cutting tool clockwise and lift it off.
Lift off the ejector plate.
THE CUTTER/ BOWLATTACHMENT:
Turn the lid counterclockwise as far as it will
go and lift away the lid/scraper.
Press the scraper ring and the scraper handle
together, while rotating the scraper handle
clockwise as far as it will go and separate the
three parts.
Rotate the knife clockwise as far as it will go
and remove the knife and lift off the bowl.
If the contents of the bowl are liquid it should
be emptied before the knife is removed.
USING THE SPEED CONTROL
With the speed control in the “O” position the
machine is switched off. In the ”I” position the
machine operates continuously.
CLEANING
Read all of the instructions before you begin
to clean the machine.
BEFORE CLEANING: Always switch off the
machine and remove the power supply plug
from the socket. Alternatively, if the machine
does not have a plug, open the isolating switch.
Remove all the removable parts that are to be
cleaned. If the machine is tted with a vertical
cutter/mixer attachment remove the scraper
blades and sealing ring as well.
CLEANING IN ADISHWASHER:All removable
parts are machine washable.
CLEANING BY HAND: Always use hand
dishwashing liquid.
CLEANING MATERIALS: Use a dish brush to
clean the food zones. The knife shaft in the
center of the machine can be cleaned with a
small bottlebrush. Use a damp cloth to wipe
down the other surfaces on the machine.
DISINFECTING: Use isopropyl alcohol (65–
70%). Isopropyl alcohol is highly inammable
so use caution when applying it.
WARNING:
• Do not pour or spray water onto the sides
of the machine.
• Do not use boiling or hot water.
• Do not use sodium hypochlorite (chlorine)
or any agent containing this substance.
• Do not use sharp objects or any objects not
intended for the purpose of cleaning.
• Do not use abrasive detergents or cleaning
products.
AVOID: Do not use cleaning sponges with
scouring pads (e.g. Scotch-Brite™) unless
absolutely necessary. This roughens the
surface and makes it less water repellent.
ADVICE ON CARE:
• Clean the machine immediately after use.
• Dry the machine immediately after cleaning
to avoid oxidation and discoloration of the
surface.
INFORMATION: If the machine is left
damp for longer periods stains will appear.
These stains are harmless but the original
surface will lose its luster. Vegetables and fruit
contain acids. Depending on which products
are processed this will have an effect on
the metal after varying periods of time. It is
therefore important to clean the machine
immediately after processing salty and acidic
products.
TROUBLE SHOOTING
To eliminate the risk of damage to the motor,
the CC-32S is fitted with thermal motor
protection that automatically switches off the
machine if the temperature of the motor should
become too high. The thermal motor protection
has automatic reset, which means that the
machine can be started again when the motor
has cooled down, which usually takes between
10 and 30 minutes.
FAULT: The machine will not start or stops
while running and cannot be re-started.
REMEDY: Check that the power plug is
properly inserted in the wall socket or,
alternatively, set the main switch to the “I”
position. Check that the fuses in the wall box
for the premises have not blown and have
the correct ampere rating. Check that the
vegetable preparation attachment is correctly
tted and that the handle of the vegetable
preparation attachment has been lowered.
Check that the bowl and lid are correctly tted.
Wait for up to 30 minutes and then try to start
the machine again. Call in a qualied service
technician for action.
FAULT: Low capacity or poor processing
result when using the vegetable preparation
attachment.
REMEDY: Select the right cutting tool. Always
use the ejector plate. Check that the knives and
grater/shredder plates are whole and sharp.
Press the food down loosely with less force.
FAULT: Low capacity or poor processing
results when using the cutter/ bowl attachment.
REMEDY: Separate the foods into smaller,
evenly-sized pieces, max. 1"x1"x1". Process
for a shorter or longer period of time. Process
a smaller amount each time. Always have the
scraper tted and use it as required.
FAULT: The cutting tool cannot be removed
when using the vegetable preparation
attachment.
REMEDY: Always use the ejector plate. Use
a thick leather glove or other glove that the
blades of the cutting tool cannot cut through
and remove the cutting tool by turning it
clockwise.
TECHNICAL SPECIFICATION
NEMCO CC-32S
CAPACITY AND VOLUME: Processes up to
4 lbs. per minute with the vegetable preparation
attachment, depending on the type of cutting
tool and foods. Volume of the vegetable
preparation attachment: 1 qt. Diameter of the
feed tube: 2". Cutter/bowl attachment: gross
volume of bowl: 3 qt. Net volume of bowl with
free-owing liquid: 1 qt.
MACHINE BASE: Motor: 1.0 kW. 100-120 V,
Single phase, 50-60 Hz. 220-240 V, single
phase, 50/60 Hz. Thermal motor protection.
Transmission: maintenance-free toothed belt.
Safety system: Two safety switches. Degree
of protection: IP34. Power supply socket:
Earthed, single phase, 10 A. Fuse in fuse box
for the premises: 10 A, delayed. Sound level:
LpA (EN31201): 76 dBA during cutting and
82 dBA during chopping. Magnetic eld: Less
than 0.1 microtesla.
CONTROLS AND SPEEDS: Two speeds
(NEMCO 2-Speed) for perfect processing result
in connection with both vegetable preparation
attachment and cutter/ bowl attachment.
Automatic speed setting (NEMCO Auto-Speed)
that senses whether the vegetable preparation
attachment or the cutter/ bowl attachment
is fitted. During cutting with the vegetable
preparation attachment the machine operates
at 500 rpm, and while using the cutter/ bowl
attachment 1,450 rpm.
CUTTING TOOLS AND CHOPPING KNIFE:
The diameter of the cutting tools is 7". The
diameter of the chopping knife is 6.5".
NET WEIGHTS: Machine base: 15 lbs.
Vegetable preparation attachment complete
but excluding cutting tools: 2 lbs. Cutting tools:
approx. 10.5 oz. average. Vertical cutter/mixer
attachment complete but excluding knife: 3 lbs.
NORMS/STANDARDS: NSF STANDARD 8.
ES
INSTRUCCIONES DE USO
Combi Cutter CC-32S
¡ATENCIÓN!
Tenga mucho cuidado, especialmente con
las manos, al tocar las cuchillas aladas y
los elementos móviles.
Para trasladar el aparato, utilice siempre las
dos empuñaduras situadas en los laterales
de la base.
Nunca ponga las manos en el recipiente, o
en el compartimento de alimentación o en
el tubo de alimentación del accesorio de
preparación de verduras.
Utilice siempre la mano de mortero al cortar
con el tubo de alimentación del accesorio
de preparación de verduras.
Antes de limpiar el aparato, apáguelo
siempre moviendo el mando de velocidad
hasta la posición “O” y extraiga el enchufe
de la pared o, como alternativa, desconecte
el interruptor de trabajo.

14
Vegetable preparation machine
RG-50S/ RG-50
Combi Cutter
CC-32S/ CC-34
Cutting Tools Vertical Cutter Blender
VCB-32
Nemco • User InstructionsNemcoFoodEquip.com
Sujete siempre el asa del accesorio de
preparación de verduras al abrir o cerrar el
compartimento de alimentación.
Solo el personal técnico cualicado puede
reparar el aparato y abrir la carcasa.
No utilice el accesorio de preparación de
verduras para cortar alimentos congelados.
Retire todas las partes duras de los
alimentos antes de cortarlos (por ejemplo,
pedúnculos de manzana, partes duras de
los nabos, etc.) para evitar daños en las
cuchillas de corte.
Este aparato no debe ser utilizado por
niños ni personas con capacidades físicas,
sensoriales o mentales reducidas, ni por
personas que no tengan experiencia con
dichos aparatos, a menos que cuenten
con las instrucciones o la supervisión
adecuadas.
Solo para el mercado canadiense:
La máquina no está autorizada para
procesar carne.
DESEMBALAJE
Verifique que no falta ninguna pieza, que
el aparato funciona, y que nada haya
sufrido daños durante el transporte. Las
reclamaciones deberán realizarse dentro
de los ocho días siguientes a la entrega al
proveedor del aparato.
INSTALACIÓN
Quite la cuchilla del recipiente antes de
proceder a la instalación.
Enchufe el aparato a una toma de alimen-
tación eléctrica principal, que cumpla las
especificaciones incluidas en la placa de
características de la parte posterior de la base.
Sitúe el aparato sobre una supercie o mesa
resistente que tenga una altura de 650-900 mm.
Instale el estante de pared para las herramien-
tas de corte y la placa proyectable en una
pared cercana al aparato.
CONTROL DE SEGURIDAD ANTES
DE USO
USO DELACCESORIO DE PREPARACIÓN
DE VERDURAS:
Extraiga el enchufe de la toma de pared o,
como alternativa, desconecte el interruptor
de trabajo, y compruebe después que el
cable eléctrico esté en buen estado y no
tenga grietas.
Extraiga la unidad de preparación de verduras,
las herramientas de corte y la placa proyectable
de acuerdo con las instrucciones del capítulo
”Desmontaje”, y luego verique que el aparato
no se iniciará cuando el control de velocidad
esté en la posición ”I”.
Coloque el aparato de acuerdo con las
instrucciones del capítulo ”Montaje”. Ajuste
el mando de velocidad en posición ”I”.
Compruebe que el aparato se detiene cuando
el mango del accesorio de preparación de
verduras se eleva y que el eje deja de girar
al cabo de 2 segundos. A continuación,
compruebe que el equipo vuelva a iniciarse
cuando se baja de nuevo el mango.
Compruebe que la base de goma del aparato
está rmemente atornillada en su posición.
En cuanto a las herramientas de corte,
consulte la página 26-28.
USO DEL ACCESORIO DE CORTE/
RECIPIENTE:
Extraiga el enchufe de la toma de pared o,
como alternativa, desconecte el interruptor
de trabajo, y compruebe después que el
cable eléctrico esté en buen estado y no
tenga grietas.
Instale el recipiente, la cuchilla y la tapa.
Seleccione la velocidad en posición ”I” y
compruebe que el eje para de rotar 4 segundos
después de que la tapa haya sido levantada y
girada en el sentido contrario a las agujas del
reloj tanto como sea posible.
Retire la tapa, la cuchilla y el recipiente. Gire
el mando de selección de velocidad hasta la
posición “I” y compruebe que el aparato no se
pone en marcha.
Compruebe que la base de goma del aparato
está rmemente atornillada en su posición.
Compruebe que las cuchillas están en buen
estado y aladas.
En caso de fallo o funcionamiento incorrecto,
llame a un mecánico cualificado para
solucionar el fallo antes de usar el aparato.
TIPOS DE PROCESADO
USO DELACCESORIO DE PREPARACIÓN
DE VERDURAS:
Corta en rodajas, ralla, corta en tiras,
en juliana y con corte rizado en distintos
tamaños, en función de la herramienta de
corte seleccionada. Procesa verduras, frutas,
pan seco, queso, frutos secos, setas, etc. El
compartimiento de alimentación grande se
utiliza principalmente para la alimentación a
granel de todo tipo de productos (foto) y para el
corte de productos más grandes, como la col.
El compartimiento de alimentación grande se
usa también cuando es necesario cortar el
producto en una dirección especíca, como
por ejemplo tomates y limones. Coloque/apile
los productos, como se muestra en la imagen.
El tubo de alimentación incorporado se utiliza
para cortar productos largos, como pepinos
por ejemplo, ver foto.
USO DEL ACCESORIO DE CORTE/
RECIPIENTE:
Corta, pica, bate y mezcla carne picada,
mantequilla aromatizada, aliños, postres,
purés, patés, sopas, etc. Prepara carne,
pescado, fruta, verduras, cebollas, perejil,
nueces, almendras, parmesano, champiñones,
chocolate, etc.
USUARIOS
Restaurantes, tiendas de cocina, cafeterías,
pastelerías, cocinas dietéticas, residencias
geriátricas, escuelas, centros de comida
rápida, centros de día, bufés de ensaladas, etc.
CAPACIDAD
AL USAR EL ACCESORIO DE
PREPARACIÓN DE VERDURAS
Hasta 80 porciones al día y 2 kg por minuto.
AL USAR EL ACCESORIO DE CORTE/
RECIPIENTE
La cantidad y el tamaño de las porciones que
pueden ser procesadas a la vez y la duración
del tiempo de procesado, dependen de la
consistencia de la comida y del resultado
deseado.
Para un buen resultado igualado con comidas
sólidas como carne, queso, deberían cortarse
primero en trozos más o menos iguales y no
superiores a 3x3x3 cm.
Las cantidades máximas recomendadas que
el aparato puede procesar al mismo tiempo
son las siguientes:
• Carne: 1 kg
• Pescado: 1 kg
• Mantequilla aromatizada: 1 kg
• Mayonesa: 1 litro
• Perejil: 1 litro
LA ESPÁTULA
ACCESORIO DE CORTE/RECIPIENTE:
Use siempre la espátula en todos los tipos
de procesado, ya que la espátula de tres
palas reduce la velocidad de rotación de los
alimentos en el recipiente y los guía hacia el
centro y la zona de corte del recipiente.
Si gira el mango de la espátula de adelante a
atrás, podrá retirar los alimentos de la tapa y
las paredes del recipiente para devolverlos a
la zona de corte mientras el aparato está en
funcionamiento.
MONTAJE
ACCESORIO DE PREPARACIÓN DE
VERDURAS:
Coloque la placa proyectable en el eje, gire
la placa proyectable y presione hacia abajo
hasta su acople.
A continuación, coloque la herramienta de
corte elegida en el eje y gire de modo que
caiga dentro de su acople.
Coloque el accesorio de preparación de
verduras en la base del aparato para que el
texto ”Close-Open” quede en posición ”a las 5”
en relación con la salida de la base del aparato
y gírelo hacia la derecha hasta que haga tope y
esté rmemente sujeto en su posición.
ACCESORIO DE CORTE/RECIPIENTE:
Coloque el recipiente en la base del aparato
de forma que la placa para el recipiente esté
insertada en el hueco superior de la base del
aparato.
Coloque la cuchilla en el eje y gírela presio-
nando hacia abajo de modo que se hunda
completamente en su acoplamiento.
Ajuste el anillo de sellado en la ranura del
interior de la tapa.
Sujete el centro del anillo de la espátula y
coloque la tapa en el anillo de la espátula.
Coloque el mango de la espátula encima de la
tapa y el anillo de la espátula por debajo. Gire
el mango de la espátula en sentido contrario
a las agujas del reloj hasta el tope permitido
por el anillo de la espátula y se unirán las
tres partes.
Coloque la tapa en el recipiente de modo que
el texto “Close-Open” se encuentre “a las 5” en
relación con la salida de la base del aparato.
Gire completamente la tapa en dirección
horaria hasta su tope.

15
Vegetable Preparation Machine
RG-50S/ RG-50
Combi Cutter
CC-32S/CC-34
Cutting ToolVertical Cutter Blender
VCB-32
Nemco • User Instructions NemcoFoodEquip.com
DESMONTAJE
ACCESORIO DE PREPARACIÓN DE
VERDURAS:
Gire el accesorio de preparación de verduras
en sentido anti-horario hasta el tope, y luego
retírelo.
Gire la herramienta de corte hacia la derecha
y retírela.
Retire la placa proyectable.
ACCESORIO DE CORTE/RECIPIENTE:
Gire la tapa en dirección contraria a las agujas
del reloj lo máximo posible y retire la tapa/
espátula.
Presione sobre el mango de la espátula y el
anillo de la espátula a la vez, gire al mismo
tiempo el mango de la espátula hasta el tope
en sentido de las agujas del reloj y separe las
tres piezas.
Gire la cuchilla en sentido horario hasta llegar
al tope y retire la cuchilla y separe el recipiente.
Si el contenido del recipiente es líquido, deberá
vaciarlo antes de retirar la cuchilla.
USO DEL CONTROL DE
VELOCIDAD
Con el mando de velocidad situado en posición
”O” el aparato estará desconectado. En la
posición “I”, el aparato funciona de forma
ininterrumpida.
LIMPIEZA
Lea todas las instrucciones antes de empezar
a limpiar el aparato.
ANTES DE LALIMPIEZA: Desconecte siempre
el aparato y extraiga el enchufe de la pared.
También puede, si el aparato no dispone
de enchufe, desconectar el interruptor de
trabajo. Retire todas las piezas extraíbles para
limpiarlas. Si el aparato está equipado con un
accesorio de corte/mezclador vertical, retire
las palas de espátula y el anillo de sellado.
LIMPIEZA EN LAVAVAJILLAS Todas las piezas
extraíbles son aptas para lavavajillas.
LIMPIEZA A MANO: Use siempre detergente
líquido de lavado a mano.
MATERIAL DE LIMPIEZA: Use un cepillo para
vajilla para limpiar las zonas de alimentos. El
eje de la cuchilla en el centro del aparato puede
limpiarse con una pequeña escobilla cilíndrica.
Use un trapo húmedo para limpiar las demás
supercies del aparato.
DESINFECCIÓN: Use alcohol isopropílico
(65-70%). El alcohol isopropílico es altamente
inamable, de modo que úselo con precaución
al aplicarlo.
ATENCIÓN:
• No vierta o pulverice agua sobre los
laterales del aparato.
• No use hipoclorito de sodio (cloro) u otro
agente que contenga esta sustancia.
• No utilice objetos alados ni ningún objeto
que no esté pensado para la limpieza.
• No use detergentes o productos de limpieza
abrasivos.
A EVITAR: No use esponjas de limpieza con
estropajo (como Scotch-Brite™) salvo que sea
imprescindible. Esto raspará la supercie y la
hará menos repelente al agua.
CONSEJOS SOBRE EL CUIDADO:
• Limpie el aparato inmediatamente después
de su uso.
• Seque el aparato inmediatamente después
de limpiarlo para evitar que se oxide y
decolore la supercie.
INFORMACIÓN: Si el aparato permanece
húmedo por un periodo prolongado,
aparecerán manchas. Estas manchas no
son problemáticas, pero la supercie original
perderá su brillo. Las verduras y frutas
contienen ácidos. Dependiendo de qué
productos se procesen, esto tendrá un efecto
en el metal tras periodos variables de tiempo.
Por eso es importante limpiar el aparato justo
después de usarlo para procesar productos
salados y ácidos.
RESOLUCIÓN DE PROBLEMAS
Para eliminar el riesgo de dañar el motor, el
CC-32S está equipado con protección térmica
del motor que automáticamente apagará
el aparato si la temperatura del motor es
demasiado alta. La protección térmica del
motor tiene reinicio automático, lo que signica
que el aparato podrá encenderse de nuevo
cuando el motor se haya enfriado. Esto puede
llevar entre 10 y 30 minutos.
FALLO: El aparato no se pone en marcha o
se para durante el funcionamiento y no puede
volver a ponerse en marcha.
SOLUCIÓN: Compruebe que el cable de
alimentación está correctamente enchufado
a la toma de corriente, o bien, seleccione el
interruptor principal en posición ”I”. Controle
que los fusibles del cuadro eléctrico de las
instalaciones no hayan saltado y que sean
del amperaje correcto. Compruebe que el
accesorio de preparación de verduras esté
instalado correctamente y que el mango del
accesorio de preparación de verduras se
haya desplazado hacia abajo. Compruebe
que el recipiente y la tapa estén colocados
correctamente. Espere 30 minutos y después,
vuelva a intentar encender el aparato de
nuevo. Llame a un mecánico cualicado.
FALLO: Baja capacidad o mal resultado
de procesado al utilizar el accesorio de
preparación de verduras.
SOLUCIÓN: Seleccione la herramienta
de corte correcta. Utilice siempre la placa
proyectable. Compruebe que las cuchillas y
placas de rallado/corte en tira están completas
y aladas. Presione los alimentos hacia abajo
ligeramente y con menos fuerza.
FALLO: Baja capacidad o mal resultado de
procesado al utilizar el accesorio de corte/
recipiente.
SOLUCIÓN: Separe los productos en trozos
más pequeños de tamaños parecidos de un
máximo de 3x3x3 cm. Procese durante un
tiempo variable más o menos prolongado.
Procese una cantidad más pequeña cada vez.
Tenga siempre instalada la espátula y úsela
cuando sea conveniente.
FALLO: La herramienta de corte no se puede
retirar al utilizar el accesorio de preparación
de verduras.
SOLUCIÓN: Utilice siempre la placa
proyectable. Utilice un guante de cuero
grueso u otro guante que las cuchillas de la
herramienta de corte no puedan cortar y retire
la herramienta de corte girándola en sentido
horario.
ESPECIFICACIONES TÉCNICAS
DE NEMCO CC-32S
CAPACIDAD Y VOLUMEN: Procesa hasta 2 kg
por minuto con el accesorio de preparación de
verduras, dependiendo del tipo de herramienta
de corte y de alimentos. Capacidad del
accesorio de preparación de verduras: 0,9
litros. Diámetro del tubo de alimentación: 53
mm. Accesorio de corte/recipiente: volumen
bruto del recipiente: 3 litros. Volumen neto del
recipiente con líquido uido: 0,9 litros.
BASE DEL APARATO: Motor: 1,0 kW. 100-
120 V,
monofásico, 50-60 Hz. 220-240 V, monofásico,
50/60 Hz. Protección térmica del motor.
Transmisión: correa dentada libre de
mantenimiento. Sistema de seguridad:
Dos interruptores de seguridad. Grado de
protección: IP34. Toma de corriente de
alimentación. Con toma de tierra, monofásico,
10 A, fusible en la caja de fusibles de las
instalaciones: 10 A, retardado. Nivel de ruido:
LpA (EN31201): 76 dBA durante el triturado y
82 dBA durante el picado. Campo magnético:
Menos de 0,1 microteslas.
MANDOS Y VELOCIDADES: Dos velocidades
(NEMCO 2-Speed) para obtener resultados
de procesado perfectos al utilizar el accesorio
de preparación de verduras y el accesorio
de corte/recipiente. Ajuste automático de
velocidad (NEMCO Auto-Speed) que detecta
si están instalados el accesorio de preparación
de verduras o el accesorio de corte/recipiente.
Durante el triturado con el accesorio de la
preparación de verduras el aparato funciona
a 500 rpm, y durante el uso del accesorio de
corte/recipiente a 1.450 rpm.
HERRAMIENTAS DE CORTE Y CUCHILLA
DE PICADO: El diámetro de las herramientas
de corte es de 185 mm. El diámetro de la
cuchilla de picado es de 170 mm.
PESOS NETOS: Base del aparato: 7 kg.
Accesorio de preparación de verduras
completo, excluyendo las herramientas de
corte: 1 kg. Herramientas de corte: aprox. 0,3
kg de media. Triturador vertical/mezclador
completo, excluyendo cuchilla: 1,4 kg.
NORMAS/CRITERIOS: CRITERIO NSF 8,
consulte la declaración de conformidad.
FR
MODE D’EMPLOI
Combinés cutter/
coupe-légumes CC-32S
ATTENTION !
Attention de ne pas se couper sur les
couteaux et de ne pas se blesser sur les
pièces en mouvement.
Toujours porter l’appareil par les deux
poignées latérales.

16
Vegetable preparation machine
RG-50S/ RG-50
Combi Cutter
CC-32S/ CC-34
Cutting Tools Vertical Cutter Blender
VCB-32
Nemco • User InstructionsNemcoFoodEquip.com
Ne jamais mettre les mains dans le récipient,
dans la chambre d’alimentation ou dans la
goulotte d’alimentation du coupe-légumes.
Utiliser impérativement le poussoir, lorsque
l’alimentation s’effectue par la goulotte du
coupe-légumes.
Avant de procéder au nettoyage, toujours
déconnecter l’appareil, en tournant le
sélecteur de vitesse en position « 0 » et
en débranchant ensuite la che de la prise
murale ou en coupant l’interrupteur de
service.
Utiliser impérativement la poignée du
coupe-légumes pour ouvrir ou fermer la
chambre d’alimentation.
Seul un technicien qualié peut réparer
l’appareil et ouvrir le corps de celui-ci.
Le CC-32S ne doit pas être utilisé pour
préparer des produits congelés. Il faut aussi
prendre soin d’enlever toutes les parties
dures des matières premières (queues de
pommes, morceaux de choux-navets trop
coriaces, etc.) an de ne pas endommager
les arêtes tranchantes.
Cet appareil ne doit pas être utilisé par
des enfants ou des personnes avec des
capacités physiques, sensorielles ou
intellectuelles réduites ou des personnes
sans expérience de ces appareils, à
moins qu’elles ne reçoivent une formation
adéquate ou ne soient supervisées.
Seulement pour le marché canadien:
La machine n’est pas autorisée à
transformer de la viande.
DÉBALLAGE
Vérier que toutes les pièces sont jointes,
que l’appareil fonctionne et que rien n’a
été endommagé lors du transport. Toute
réclamation doit parvenir au fournisseur de
l’appareil sous huitaine.
INSTALLATION
Avant de procéder à l’installation, retirer le
couteau du récipient.
Brancher l’appareil à une prise de courant
correspondant aux caractéristiques indiquées
sur la che signalétique au dos du bloc moteur.
Placer l’appareil sur un plan de travail ou une
table solide de 65 à 90 cm de hauteur.
Fixer le porte-accessoires pour le rangement
des accessoires tranchants et le plateau
répartiteur sur un mur proche de l’appareil.
CONTRÔLE DE SÉCURITÉ AVANT
UTILISATION
AVEC LE COUPE-LÉGUMES
Débrancher la prise murale ou fermer
l’interrupteur de service, puis vérier que le
câble électrique est intact et ne présente pas
de ssures.
Retirer le coupe-légumes, tous les accessoires
tranchants et le plateau répartiteur selon les
instructions du chapitre “Démontage ”, puis
contrôler que la machine ne démarre pas
lorsque le sélecteur de vitesse est mis dans
la position “I”.
Mettre en place l’appareil, en suivant les
instructions du chapitre « Montage ». Mettre le
sélecteur de vitesse en position « I ». Vérier
que l’appareil s’arrête, lorsque la poignée du
coupe-légumes est repoussée vers le haut
et s’assurer que l’axe cesse de tourner dans
les 2 secondes. Puis s’assurer que l’appareil
redémarre dès que l’on rabat la poignée.
Vérifier que les pieds en caoutchouc de
l’appareil sont bien vissés.
En ce qui concerne les accessoires tranchants,
cf. pages 26-28.
En cas de défaut ou de mauvais fonctionnement,
faire appel à un professionnel qualifié qui
réparera l’appareil avant toute remise en
service.
AVEC LE COUTEAU/LE RÉCIPIENT
Débrancher la prise murale ou fermer
l’interrupteur de service, puis vérier que le
câble électrique est intact et ne présente pas
de ssures.
Mettre en place le récipient, le couteau et le
couvercle. Mettre le sélecteur de vitesse sur
« I » et vérier que l’axe s’arrête dans les 4
secondes après que le couvercle ait été tourné
dans le sens contraire des aiguilles d’une
montre jusqu’en butée.
Retirer le couvercle, le couteau et le récipient.
Amener le sélecteur de vitesse dans la position
« I » et vérier que l’appareil ne démarre pas.
Vérifier que les pieds en caoutchouc de
l’appareil sont bien vissés.
Veiller à ce que les couteaux soient intacts et
bien coupants.
En cas de défaut ou de mauvais fonctionnement,
faire appel à un professionnel qualifié qui
réparera l’appareil avant toute remise en
service.
TYPES DE PRÉPARATION
AVEC LE COUPE-LÉGUMES
L’appareil sert à couper en tranches, en
lamelles, en julienne et en tranches gaufrées
de différentes dimensions et à râper, en
fonction de l’accessoire tranchant choisi. Il
prépare les légumes, les fruits, le pain sec, le
fromage, les noisettes, les champignons, etc.
Utiliser la grande chambre d’alimentation pour
charger en continu toutes sortes de produits
(cf. schéma) et pour couper de gros produits
comme le chou.
Utiliser également la grande chambre
d’alimentation pour couper dans un sens
déterminé, par exemple des tomates et des
citrons. Placer/empiler les produits selon le
schéma.
La goulotte d’alimentation intégrée sert pour
la découpe de produits longs comme le
concombre ; cf. schéma.
AVEC LE COUTEAU/LE RÉCIPIENT
L’appareil sert à hacher, à moudre, à mélanger
ou à émulsionner la viande, le beurre aromatisé,
les assaisonnements, les desserts, les purées,
les pâtés, les soupes, etc. Il prépare la viande,
le poisson, les fruits, les légumes, les oignons,
le persil, les noix, les amandes, le parmesan,
les champignons, le chocolat, etc.
UTILISATEURS
Restaurants, traiteurs, cafés, boulangeries-
pâtisseries, cuisines diététiques, maisons de
retraite, écoles, restauration rapide, centres
d’accueil, saladeries, etc.
CAPACITÉ
EN UTILISATION AVEC LE COUPE-
LÉGUMES
Jusqu’à 80 portions par jour et 2 kg par minute.
EN UTILISATION AVEC LE COUTEAU/LE
RÉCIPIENT
Les quantités et la taille des morceaux ainsi
que la durée de préparation requise sont
fonction de la consistance du produit et du
résultat souhaité.
Pour obtenir un bon résultat et une bonne
homogénéité de la préparation réalisée, les
produits à chair ferme comme la viande, le
fromage, etc., doivent être préalablement
découpés en morceaux de même taille, ne
dépassant pas 3x3x3 cm.
La liste ci-dessous indique la quantité maximale
à traiter par remplissage.
• Viande : 1 kg
• Poisson : 1 kg
• Beurre aromatisé : 1 kg
• Mayonnaise : 1 litre
• Persil : 1 litre
RACLEUR
COUTEAU/RÉCIPIENT
Toujours laisser le racleur en place pendant
l’utilisation car ses trois pales servent à ralentir
la rotation de l’aliment dans le récipient et à
le guider vers le centre/la zone de hachage
du récipient.
En tournant la poignée du racleur vers l’avant
et l’arrière, on peut facilement racler le
couvercle et les parois du récipient et ramener
l’aliment dans la zone de hachage pendant
l’utilisation.
MONTAGE
COUPE-LÉGUMES
Placer le plateau répartiteur sur l’axe et
appuyer en tournant pour l’encliqueter.
Ensuite placer l’accessoire tranchant choisi sur
l’axe et le tourner jusqu’à encliquetage.
Placer le coupe-légumes sur le bloc moteur
de telle sorte que l’inscription « Close Open »
soit dans la position « 5 heures » par rapport
à l’orice de sortie du bloc moteur et puis le
tourner dans le sens des aiguilles d’une montre
jusqu’à blocage.
COUTEAU/RÉCIPIENT
Placer le récipient sur le bloc moteur de
manière que son ergot de verrouillage pénètre
dans l’évidement ménagé sur le dessus du
bloc moteur.
Placer le couteau sur l’arbre et appuyer en
tournant jusqu’à encliquetage.
Fixer le joint d’étanchéité dans la gorge à
l’intérieur du couvercle.
Saisir la bague du racleur au centre et placer
le couvercle dessus.
Placer la poignée du racleur au-dessus du
couvercle et la bague du racleur sous celui-ci.
Tourner la poignée du racleur dans le sens
contraire des aiguilles d’une montre jusqu’en
butée pour assembler les trois éléments.

17
Vegetable Preparation Machine
RG-50S/ RG-50
Combi Cutter
CC-32S/CC-34
Cutting ToolVertical Cutter Blender
VCB-32
Nemco • User Instructions NemcoFoodEquip.com
Mettre en place le couvercle sur le récipient
de telle sorte que l’inscription « Close Open »
soit dans la position « 5 heures » par rapport
à l’orice de sortie du bloc moteur.
Tourner le couvercle dans le sens des aiguilles
d’une montre jusqu’en butée.
DÉMONTAGE
COUPE-LÉGUMES
Tourner le coupe-légumes dans le sens
contraire des aiguilles d’une montre jusqu’en
butée et l’enlever.
Tourner l’accessoire tranchant dans le sens
des aiguilles d’une montre et l’enlever.
Enlever le plateau répartiteur.
COUTEAU/RÉCIPIENT
Tourner le couvercle dans le sens contraire des
aiguilles d’une montre jusqu’en butée et tirer
le couvercle/le racleur vers le haut.
Serrer l’une contre l’autre la bague et la
poignée du racleur, tout en tournant en même
temps la poignée dans le sens contraire des
aiguilles d’une montre jusqu’en butée pour
séparer les trois éléments.
Tourner le couteau dans le sens des aiguilles
d’une montre jusqu’en butée, puis l’enlever et
sortir le récipient. Si le contenu du récipient est
liquide, il convient de le vider avant d’enlever
le couteau.
UTILISATION DU RÉGLAGE
DE LA VITESSE
Lorsque le sélecteur de vitesse est dans la
position « O », l’appareil est arrêté. Dans
la position « I », elle fonctionne de manière
continue.
NETTOYAGE
Avant de commencer à nettoyer l’appareil, lire
toutes les instructions.
AVANT DE NETTOYER: Toujours arrêter
d’abord l’appareil et débrancher la prise
murale. A défaut d’une che, couper le courant
à l’aide de l’interrupteur de service. Retirer
toutes les pièces amovibles qui doivent
être nettoyées. Si l’appareil est muni d’un
accessoire tranchant vertical/hachoir, enlever
également les pales et la bague du racleur.
NETTOYAGE DANS LE LAVE-VAISSELLE:
Toutes les pièces amovibles peuvent être
lavées dans le lave-vaisselle.
NETTOYAGE À LA MAIN: Utiliser toujours un
détergent pour vaisselle à la main.
MATÉRIAUX DE NETTOYAGE: Pour nettoyer
les zones exposées aux aliments, utiliser une
éponge à récurer la vaisselle. L’axe au milieu
de l’appareil peut être nettoyé à l’aide d’une
petite brosse à bouteilles. Pour essuyer les
autres surfaces de l’appareil, utiliser un chiffon
humide.
DÉSINFECTION: Utiliser l’alcool isopropylique
(de 65 à 70 %). L’alcool isopropylique est très
inammable ; lors de son application, il faut
donc être prudent.
ATTENTION !
• Ne pas verser ou asperger d’eau sur les
côtés de l’appareil.
• Ne pas utiliser l’hypochlorite de sodium ou
d’autres produits contenant cette substance.
• Ne pas utiliser d’objets tranchants pour
nettoyer l’appareil ou d’autres objets qui ne
sont pas destinés au nettoyage.
• Ne pas utiliser de détergents ou de produits
de nettoyage abrasifs.
À ÉVITER Ne pas utiliser d’éponges à
récurer avec une toison abrasive (par
exemple Scotch-Brite™), si cela n’est pas
absolument nécessaire. Cela rend la surface
plus rude et moins hydrofuge.
CONSEIL D’ENTRETIEN:
• Nettoyer l’appareil immédiatement après
l’utilisation.
• Essuyer l’appareil immédiatement après
le nettoyage an d’éviter l’oxydation et la
décoloration du surface.
INFORMATION: Si vous laissez cet appareil
humide pendant des périodes plus longues,
des taches apparaîtront. Ces taches sont
inoffensives mais le surface originaire perdra
son lustre. Les légumes et les fruits contiennent
des acides. En fonction des aliments préparés,
cela exerce un effet sur le métal au bout
d’une période dont la durée varie. Il est donc
important de nettoyer l’appareil immédiatement
après la préparation d’aliments salés et acides.
DÉPANNAGE
Pour éliminer les risques de dommages
au niveau du moteur, le modèle CC-32S
intègre une fonction de sécurité qui l’arrête
automatiquement en cas d’échauffement. Le
réenclenchement est ensuite automatique,
ce qui signie donc qu’il n’est pas possible de
redémarrer l’appareil avant que le moteur ait
refroidi, ce qui demande normalement entre
10 et 30 minutes.
DÉFAUT: L’appareil ne démarre pas ou
s’arrête en cours de fonctionnement et refuse
de redémarrer.
MESURES: S’assurer que la fiche est
branchée sur la prise murale ou, selon le
cas, que l’interrupteur général est sur « I ».
Vérifier que les fusibles dans l’armoire à
fusibles du local sont intacts et ont l’ampérage
qui convient. Vérier que le coupe-légumes
est correctement monté et que la poignée du
coupe-légumes est rabattue. Vérier que le
récipient et le couvercle sont correctement
montés. Attendre jusqu’à 30 minutes avant
d’essayer de remettre l’appareil en marche.
Le cas échéant, faire appel à un professionnel
compétent.
DÉFAUT: faible capacité ou mauvais résultats
en utilisation avec le coupe-légumes
MESURES: Choisir l’accessoire tranchant
approprié. Utiliser impérativement le plateau
répartiteur. Vérier que les couteaux et les
râpes sont intacts et bien coupants. Exercer
une pression plus légère sur le produit à traiter.
DÉFAUT: faible capacité ou mauvais résultats
en utilisation avec le couteau/le récipient
MESURES: Couper le produit en morceaux
plus petits et de mêmes dimensions (max.
3x3x3 cm). Raccourcir ou prolonger le temps
de préparation. Préparer une plus petite
quantité à la fois. Le racleur doit toujours être
monté et il doit être utilisé à des ns prévus.
DÉFAUT: Il n’est pas possible d’enlever
l’accessoire tranchant en utilisation avec le
coupe-légumes.
MESURES: Utiliser impérativement le plateau
répartiteur. Utiliser un gant épais, que les
arêtes tranchantes de l’accessoire tranchant
ne risquent pas de traverser, et libérer
l’accessoire en le tournant dans le sens des
aiguilles d’une montre.
CARACTÉRISTIQUES
TECHNIQUES NEMCO CC-32S
QUANTITÉS ET VOLUMES: jusqu’à 2 kg
par minute avec le coupe-légumes, selon
l’accessoire tranchant choisi et la nature du
produit traité. Volume du coupe-légumes: 0,9
litre. Diamètre de la goulotte d’alimentation:
53 mm. Couteau/récipient: Volume brut
du récipient: 3 litres. Contenance nette du
récipient, liquide uide: 0,9 litre.
BLOC MOTEUR: Moteur: 1,0 kW. 100 à 120 V,
monophasé, 50 à 60 Hz. 220 à 240 V,
monophasé, 50 à 60 Hz. Protection thermique
du moteur. Transmission par courroie crantée
ne nécessitant pas d’entretien. Système de
sécurité: deux disjoncteurs de sécurité. Classe
d’isolation: IP34. Branchement secteur: prise
murale avec terre, alimentation monophasée,
10 A. Fusible dans l’armoire à fusibles du
local: 10 A, à action différée. Niveau sonore:
LpA (EN31201): 76 dBA (coupe) et 82 dBA
(hachage). Champ magnétique: inférieur à
0,1 microtesla.
RÉGLAGE DE LA VITESSE: deux vitesses
(NEMCO 2-SPEED) pour un résultat parfait
de la coupe ou du hachage en utilisation tant
avec le coupe-légumes qu’avec le couteau/
le récipient. Réglage de vitesse automatique
(NEMCO AUTO-SPEED) détectant si le
coupe-légumes ou l’accessoire tranchant/le
récipient est en place. Lors de la coupe à l’aide
du coupe-légumes, le moteur tourne à 500 tr/
min et en utilisation du couteau/du récipient, il
tourne à 1 450 tr/min.
ACCESSOIRES TRANCHANTS ET
COUTEAU DE HACHAGE: Diamètre des
accessoires tranchants: 185 mm. Diamètre du
couteau de hachage: 170 mm.
POIDS NETS: Bloc moteur: 7 kg. Ensemble
coupe-légumes mais sans accessoires
tranchants: 1 kg. Accessoires tranchants : env.
0,3 kg en moyenne. Ensemble coupeur/hachoir
complet mais sans couteau: 1,4 kg.
NORMES: NORME NSF 8, cf. déclaration de
la conformité.

18
Vegetable preparation machine
RG-50S/ RG-50
Combi Cutter
CC-32S/ CC-34
Cutting Tools Vertical Cutter Blender
VCB-32
Nemco • User InstructionsNemcoFoodEquip.com
ENG
USER INSTRUCTIONS
Combi Cutter CC-34
CAUTION!
Be very careful, especially of your hands,
with sharp knife blades and moving parts.
Always carry the machine by the two
handles on the sides of the machine base.
Never put your hands into the bowl or in the
feed compartment or in the feed tube of the
vegetable preparation attachment.
Always use the pestle during cutting with
the feed tube of the vegetable preparation
attachment.
Before cleaning the machine, always switch
it off by moving the speed control into the
“O” position and then removing the power
plug from the wall socket, alternatively
open the isolating switch.
Always grip the handle of the vegetable
preparation attachment when the feed
compartment is being opened or closed.
Only a qualied service technician may
repair the machine and open the machine
housing.
Do not use the vegetable preparation
attachment to cut frozen foods. Remove
all hard parts from foods before cutting
(e.g., apple stems, woody parts of turnips,
etc.) to avoid damaging the cutting blades.
This appliance is not to be operated by
children or persons with reduced physical,
sensory or mental capabilities or persons
lacking experience of such appliances,
unless they are given adequate instruction
or supervision.
Only for the Canadian market: The machine
is not authorized to process meat.
UNPACKING
Check that all the parts are included, that the
machine works and that nothing has been
damaged during shipping. If unit fails to operate
properly when rst used call Nemco customer
service at 1-800-782-6761.
INSTALLATION
Remove the knife from the bowl before
installation.
Connect the machine to a main electricity
supply with specication in accordance with
the details on the data plate on the back of
the machine base.
Place the machine on a sturdy bench or table
26"–35" high.
Mount the wall rack for the cutting tools and the
ejector plate on a wall close to the machine.
ALWAYS CHECK BEFORE USE
WITH THE VEGETABLE PREPARATION
ATTACHMENT:
Remove the plug from the power supply socket
or open the isolating switch, and then check
that the electric cable is in good condition and
is not cracked on the outside.
Remove the vegetable preparation attachment,
any cutting tools and the ejector plate in
accordance with the instructions under the
heading “Dismantling”, and then check that the
machine will not start when the speed control
is in the “II” position.
Fit the machine in accordance with the
instructions under the heading “Assembling”.
Set the speed setting knob to the “II” position.
Check that the machine stops when the handle
of the vegetable preparation attachment is
raised and that the axle/shaft stops rotating
within 2 seconds. Then check that the machine
re-starts when the handle is lowered.
Check that the rubber feet on the machine base
are rmly screwed into position.
With regard to cutting tools, see page 26-28.
In the event of any fault or malfunction, call
in a qualied service technician to remedy to
correct the fault before using the machine.
WITH THE CUTTER/BOWLATTACHMENT:
Remove the plug from the power supply socket
or open the isolating switch, and then check
that the electric cable is in good condition and
is not cracked on the outside.
Fit the bowl, knife and lid. Set the speed control
to position “II” and check that the shaft then
stops rotating within 4 seconds after the lid has
been removed by turning it counterclockwise
as far as it will go.
Remove the lid, the knife and the bowl. Turn
the speed control to the “II” position and check
that the machine does not start.
Check that the rubber feet of the machine are
rmly screwed into position.
Check that the knives are in good condition
and sharp.
In the event of any fault or malfunction, call in
a qualied service technician to remedy the
fault before using the machine.
TYPE OF PROCESSING
WITH THE VEGETABLE PREPARATION
ATTACHMENT:
Slices, dices, grates, shreds, cuts julienne and
crimping slicers in a variety of dimensions,
depending on the cutting tool selected.
Processes vegetables, fruit, dry bread, cheese,
nuts, mushrooms etc.
The large feed compartment is used mainly
for bulk feeding of all sorts of products and
for cutting larger products such as cabbage.
The large feed compartment is also used when
the product is to be cut in a specic direction,
such as tomatoes and lemons. Place/stack the
products as shown in the picture.
The built-in feed tube is used for cutting long
products such as cucumbers, see picture.
WITH THE CUTTER/BOWLATTACHMENT:
Chops, grinds, mixes and blends minced meat,
aromatic butter, dressing, desserts, purée,
paté, soups etc. Prepares meat, sh, fruit,
vegetables, onions, parsley, nuts, almonds,
parmesan, mushrooms, chocolate, etc.
USERS
Restaurants, shop kitchens, cafés, bakeries,
diet kitchens, retirement homes, schools, fast
food outlets, day care centers, salads bars etc.
CAPACITY
WHEN USING THE VEGETABLE
PREPARATION ATTACHMENT
Up to 80 portions per day and 4 lbs. per minute.
WHEN USING THE CUTTER/BOWL
ATTACHMENT
For a good and even result with rm foods such
as meat, cheese, they should rst be separated
into pieces of roughly equal size and no larger
than about 1"x1"x1".
The recommended maximum quantities that
the machine should process at one time are
shown below.
• Meat: 35 oz
• Fish: 35 oz
• Aromatic butter: 35 oz
• Mayonnaise: 33 oz
• Parsley: 33 oz
THE SCRAPER
CUTTER/BOWL ATTACHMENT:
Always have the scraper tted during all types
of processing since the three scraper blades
slow down the rotation of the food in the bowl
and guide the food toward the center/cutting
zone of the bowl.
By turning the handle of the scraper back and
forth, the lid and walls of the bowl can easily
be scraped and the food returned to the cutting
zone while the machine is operating.
ASSEMBLING
THE VEGETABLE PREPARATION
ATTACHMENT:
Place the ejector plate on the shaft, turn the
ejector plate and press it down into its coupling.
Then place the chosen cutting tool on the shaft
and rotate the cutting tool so that it drops into
its coupling.
During dicing: place the dicing grid with the
sharp edge of the knives upward, so that the
recess in the side of the dicing grid ts into the
guide grove on the machine base. Then place
the slicer on the shaft and rotate the slicer so
that it drops down into its coupling.
Place the vegetable preparation attachment
on the machine base so that the text “Close
Open” is at 5 o’clock in relation to the outlet

19
Vegetable Preparation Machine
RG-50S/ RG-50
Combi Cutter
CC-32S/CC-34
Cutting ToolVertical Cutter Blender
VCB-32
Nemco • User Instructions NemcoFoodEquip.com
of the machine base and turn the vegetable
preparation attachment clockwise as far as it
will go and it is rmly in position.
THE CUTTER/ BOWLATTACHMENT:
Place the bowl on the machine base so that
the locating plate of the bowl is inserted into
the recess on the top of the machine base.
Place the knife on the shaft and rotate the
knife while pressing it down so that it sinks
completely into its coupling.
Fit the sealing ring into the groove on the
inside of the lid.
Grip the center of the scraper ring and place
the lid on the scraper ring.
Place the scraper handle on top of the lid and
the scraper ring under it. Turn the scraper
handle counterclockwise as far as it will go in
the scraper ring and the three parts are joined.
Place the lid on the bowl so that the text
“Close Open” is at 5 o’clock in relation to the
outlet of the machine base.
Turn the lid clockwise as far as it will go.
DISMANTLING
THE VEGETABLE PREPARATION
ATTACHMENT:
Turn the vegetable preparation attachment
counterclockwise as far as it will go then lift it off.
Turn the cutting tool clockwise and lift it off.
Lift off the dicing grid.
Lift off the ejector plate.
THE CUTTER/ BOWL ATTACHMENT:
Turn the lid counterclockwise as far as it will
go and lift away the lid/scraper.
Press the scraper ring and the scraper handle
together, while rotating the scraper handle
clockwise as far as it will go and separate the
three parts.
Rotate the knife clockwise as far as it will go
and remove the knife and lift off the bowl. If
the contents of the bowl are liquid it should be
emptied before the knife is removed.
USING THE SPEED CONTROL
During dicing and slicing of fragile foods such
as tomatoes, etc., it is recommended that the
speed control is set in the “I” position to give
extra slow/gentle processing and the best
results.
With the speed control in the “O” position the
machine is switched off. In the “I” position the
machine operates continuously at low speed
and in the “II” position continuously at high
speed. In the “P” (pulse) position the machine
operates until the speed control is released
(cutter/ bowl attachment).
CLEANING
Read all of the instructions before you begin
to clean the machine.
BEFORE CLEANING: Always switch off the
machine and remove the power supply plug
from the socket. Alternatively, if the machine
does not have a plug, open the isolating switch.
Remove all the removable parts that are to be
cleaned. If the machine is tted with a vertical
cutter/mixer attachment remove the scraper
blades and sealing ring as well.
CLEANING IN ADISHWASHER:All removable
parts are machine washable.
CLEANING BY HAND: Always use hand
dishwashing liquid.
CLEANING MATERIALS: Use a dish brush to
clean the food zones. The knife shaft in the
center of the machine can be cleaned with a
small bottlebrush. Use a damp cloth to wipe
down the other surfaces on the machine.
DISINFECTING: Use isopropyl alcohol (65–
70%). Isopropyl alcohol is highly inammable
so use caution when applying it.
WARNING:
• Do not pour or spray water onto the sides
of the machine.
• Do not use sodium hypochlorite (chlorine)
or any agent containing this substance.
• Do not use sharp objects or any objects not
intended for the purpose of cleaning.
• Do not use abrasive detergents or cleaning
products.
AVOID: Do not use cleaning sponges with
scouring pads (e.g. Scotch-Brite™) unless
absolutely necessary. This roughens the
surface and makes it less water repellent.
ADVICE ON CARE:
• Clean the machine immediately after use.
• Dry the machine immediately after cleaning
to avoid oxidation and discoloration of the
surface.
INFORMATION: If the machine is left damp
for longer periods stains will appear. These
stains are harmless but the original surface
will lose its lustre. Vegetables and fruit contain
acids. Depending on which products are
processed this will have an effect on the metal
after varying periods of time. It is therefore
important to clean the machine immediately
after processing salty and acidic products.
TROUBLE SHOOTING
To eliminate the risk of damage to the
motor, the CC-34 is tted with thermal motor
protection that automatically switches off the
machine if the temperature of the motor should
become too high. The thermal motor protection
has automatic reset, which means that the
machine can be started again when the motor
has cooled down, which usually takes between
10 and 30 minutes.
FAULT: The machine will not start or stops
while running and cannot be re-started.
REMEDY: Check that the power plug is
properly inserted in the wall socket or,
alternatively, set the mains switch to the “I”
position. Check that the fuses in the wall box
for the premises have not blown and have
the correct ampere rating. Check that the
vegetable preparation attachment is correctly
tted and that the handle of the vegetable
preparation machine has been lowered. Check
that the bowl and lid are correctly tted. Wait
for up to 30 minutes and then try to start the
machine again. Call in a qualified service
technician for action.
FAULT: Low capacity or poor processing
result when using the vegetable preparation
attachment.
REMEDY: Select the right cutting tool. Always
use the ejector plate. Check that the knives and
grater/shredder plates are whole and sharp.
Press the food down loosely with less force.
FAULT: Low capacity or poor processing
results when using the cutter/ bowl attachment.
REMEDY: Separate the foods into smaller,
evenly-sized pieces, max. 1"x1"x1". Process
for a shorter or longer period of time. Process
a smaller amount each time. Always have the
scraper tted and use it as required.
FAULT: The cutting tool cannot be removed
when using the vegetable preparation
attachment.
REMEDY: Always use the ejector plate. Use
a thick leather glove or other glove that the
blades of the cutting tool cannot cut through
and remove the cutting tool by turning it
clockwise.
TECHNICAL SPECIFICATION
NEMCO CC-34
CAPACITY AND VOLUME: Processes up to
4 lbs. per minute with the Vegetable preparation
attachment depending on the type of cutting
tool and foods. Volume of the vegetable
preparation attachment: 1 qt. Diameter of the
feed tube: 2". Cutter/ bowl attachment: gross
volume of bowl: 3 qt. Net volume of bowl with
free-owing liquid: 1.5 qts.
MACHINE BASE: Motor: 1.0 kW. 100-120 V,
Single phase, 50-60 Hz. 220-240 V, single
phase, 50/60 Hz. Thermal motor protection.
Transmission: maintenance-free toothed belt.
Safety system: Two safety switches. Degree
of protection: IP34. Power supply socket:
Earthed, single phase, 10 A. Fuse in fuse box
for the premises: 10 A, delayed. Sound level:
LpA (EN31201): 76 dBA during cutting and
82 dBA during chopping. Magnetic eld: Less
than 0.1 microtesla.
CONTROLS AND SPEEDS: Four speeds
(NEMCO 4-Speed) for perfect processing
results in connection with both vegetable
preparation attachment and cutter/ bowl
attachment. Automatic speed setting (NEMCO
Auto-Speed) that senses whether the vegetable
preparation attachment or the cutter/ bowl
attachment is tted. During cutting with the
vegetable preparation attachment the machine
operates at 500 rpm in the “I” position and 800
rpm in the “II” position, and during chopping
with the cutter/ bowl attachment 1,450 rpm in
position “I” and 2,650 rpm in position “II”. The
pulse function operates at 2,650 rpm during
chopping with the cutter/ bowl attachment, in
“P” position.
CUTTING TOOLS AND CHOPPING KNIFE:
The diameter of the cutting tools is 7". The
diameter of the chopping knife is 7".
NET WEIGHTS: Machine base: 19 lbs.
Vegetable preparation attachment complete
but excluding cutting tools: 2 lbs. Cutting
tools: approx. 10.5 oz. average. Fast chopping
attachment complete but excluding knife: 3 lbs.
NORMS/STANDARDS: NSF STANDARD 8.

20
Vegetable preparation machine
RG-50S/ RG-50
Combi Cutter
CC-32S/ CC-34
Cutting Tools Vertical Cutter Blender
VCB-32
Nemco • User InstructionsNemcoFoodEquip.com
ES
INSTRUCCIONES DE USO
Combi Cutter CC-34
¡ATENCIÓN!
Tenga mucho cuidado, especialmente con
las manos, al tocar las cuchillas aladas y
los elementos móviles.
Para trasladar el aparato, utilice siempre las
dos empuñaduras situadas en los laterales
de la base.
Nunca ponga las manos en el recipiente, o
en el compartimento de alimentación o en
el tubo de alimentación del accesorio de
preparación de verduras.
Utilice siempre la mano de mortero al cortar
con el tubo de alimentación del accesorio
de preparación de verduras.
Antes de limpiar el aparato, apáguelo
siempre moviendo el mando de velocidad
hasta la posición “O” y extraiga el enchufe
de la pared o, como alternativa, desconecte
el interruptor de trabajo.
Sujete siempre el asa del accesorio de
preparación de verduras al abrir o cerrar el
compartimento de alimentación.
Solo el personal técnico cualicado puede
reparar el aparato y abrir la carcasa.
No utilice el accesorio de preparación de
verduras para cortar alimentos congelados.
Retire todas las partes duras de los
alimentos antes de cortarlos (por ejemplo,
pedúnculos de manzana, partes duras de
los nabos, etc.) para evitar daños en las
cuchillas de corte.
Este aparato no debe ser utilizado por
niños ni personas con capacidades físicas,
sensoriales o mentales reducidas, ni por
personas que no tengan experiencia con
dichos aparatos, a menos que cuenten
con las instrucciones o la supervisión
adecuadas.
Solo para el mercado canadiense:
La máquina no está autorizada para
procesar carne.
DESEMBALAJE
Verifique que no falta ninguna pieza, que
el aparato funciona, y que nada haya
sufrido daños durante el transporte. Las
reclamaciones deberán realizarse dentro
de los ocho días siguientes a la entrega al
proveedor del aparato.
INSTALACIÓN
Quite la cuchilla del recipiente antes de
proceder a la instalación.
Enchufe el aparato a una toma de alimen-
tación eléctrica principal, que cumpla las
especificaciones incluidas en la placa de
características de la parte posterior de la base.
Sitúe el aparato sobre una supercie o mesa
resistente que tenga una altura de 650-900 mm.
Instale el estante de pared para las herramien-
tas de corte y la placa proyectable en una
pared cercana al aparato.
CONTROL DE SEGURIDAD ANTES
DE USO
USO DELACCESORIO DE PREPARACIÓN
DE VERDURAS:
Extraiga el enchufe de la toma de pared o,
como alternativa, desconecte el interruptor
de trabajo, y compruebe después que el
cable eléctrico esté en buen estado y no
tenga grietas.
Extraiga la unidad de preparación de verduras,
las herramientas de corte y la placa proyectable
de acuerdo con las instrucciones del capítulo
“Desmontaje”, y luego verique que el aparato
no se iniciará cuando el control de velocidad
esté en la posición “II”.
Coloque el aparato de acuerdo con las
instrucciones del capítulo “Montaje”. Ajuste
el mando de velocidad en posición “II”.
Compruebe que el aparato se detiene cuando
el mango del accesorio de preparación de
verduras se eleva y que el eje deja de girar
al cabo de 2 segundos. A continuación,
compruebe que el equipo vuelva a iniciarse
cuando se baja de nuevo el mango.
Compruebe que la base de goma del aparato
está rmemente atornillada en su posición.
En cuanto a las herramientas de corte,
consulte la página 26-28.
En caso de fallo o funcionamiento incorrecto,
llame a un mecánico cualificado para
solucionar el fallo antes de usar el aparato.
USO DEL ACCESORIO DE CORTE/
RECIPIENTE:
Extraiga el enchufe de la toma de pared o,
como alternativa, desconecte el interruptor
de trabajo, y compruebe después que el
cable eléctrico esté en buen estado y no
tenga grietas.
Instale el recipiente, la cuchilla y la tapa.
Seleccione la velocidad en posición “II” y
compruebe que el eje para de rotar 4 segundos
después de que la tapa haya sido levantada y
girada en el sentido contrario a las agujas del
reloj tanto como sea posible.
Retire la tapa, la cuchilla y el recipiente. Gire
el mando de selección de velocidad hasta la
posición “II” y compruebe que el aparato no se
pone en marcha.
Compruebe que la base de goma del aparato
está rmemente atornillada en su posición.
Compruebe que las cuchillas están en buen
estado y aladas.
En caso de fallo o funcionamiento incorrecto,
llame a un mecánico cualificado para
solucionar el fallo antes de usar el aparato.
TIPOS DE PROCESADO
USO DELACCESORIO DE PREPARACIÓN
DE VERDURAS:
Corta en rodajas, dados, ralla, corta en tiras,
en juliana y con corte rizado en distintos
tamaños, en función de la herramienta de
corte seleccionada. Procesa verduras, frutas,
pan seco, queso, frutos secos, setas, etc. El
compartimiento de alimentación grande se
utiliza principalmente para la alimentación a
granel de todo tipo de productos y para el
corte de productos más grandes, como la col.
El compartimiento de alimentación grande se
usa también cuando es necesario cortar el
producto en una dirección especíca, como
por ejemplo tomates y limones. Coloque/apile
los productos, como se muestra en la imagen.
El tubo de alimentación incorporado se utiliza
para cortar productos largos, como pepinos
por ejemplo, ver foto.
USO DEL ACCESORIO DE CORTE/
RECIPIENTE:
Corta, pica, bate y mezcla carne picada,
mantequilla aromatizada, aliños, postres,
purés, patés, sopas, etc. Prepara carne,
pescado, fruta, verduras, cebollas, perejil,
nueces, almendras, parmesano, champiñones,
chocolate, etc.
USUARIOS
Restaurantes, tiendas de cocina, cafeterías,
pastelerías, cocinas dietéticas, residencias
geriátricas, escuelas, centros de comida
rápida, centros de día, bufés de ensaladas, etc.
CAPACIDAD
AL USAR EL ACCESORIO DE
PREPARACIÓN DE VERDURAS
Hasta 80 porciones al día y 2 kg por minuto.
AL USAR EL ACCESORIO DE CORTE/
RECIPIENTE
La cantidad y el tamaño de las porciones que
pueden ser procesadas a la vez y la duración
del tiempo de procesado, dependen de la
consistencia de la comida y del resultado
deseado.
Para un buen resultado igualado con comidas
sólidas como carne y queso, deberían cortarse
primero en trozos más o menos iguales y no
superiores a 3x3x3 cm.
Las cantidades máximas recomendadas que
se pueden procesar al mismo tiempo son las
siguientes:
• Carne: 1 kg
• Pescado: 1 kg
• Mantequilla aromatizada: 1 kg
• Mayonesa: 1 litro
• Perejil: 1 litro
LA ESPÁTULA
ACCESORIO DE CORTE/RECIPIENTE:
Use siempre la espátula en todos los tipos
de procesado, ya que la espátula de tres
palas reduce la velocidad de rotación de los
alimentos en el recipiente y los guía hacia el
centro y la zona de corte del recipiente.
Si gira el mango de la espátula de adelante a
atrás, podrá retirar los alimentos de la tapa y
las paredes del recipiente para devolverlos a
la zona de corte mientras el aparato está en
funcionamiento.
MONTAJE
ACCESORIO DE PREPARACIÓN DE
VERDURAS:
Coloque la placa proyectable en el eje, gire
la placa proyectable y presione hacia abajo
hasta su acople.
A continuación, coloque la herramienta de
Other manuals for CC-32S
3
This manual suits for next models
4
Table of contents
Other Hallde Kitchen Appliance manuals

Hallde
Hallde RG-50 User manual

Hallde
Hallde RG-350 User manual

Hallde
Hallde RG-50 User manual

Hallde
Hallde RG-200 Installation instructions

Hallde
Hallde RG-50 User manual

Hallde
Hallde RG-100 User manual

Hallde
Hallde VCB-61 User manual

Hallde
Hallde RG-7 User manual

Hallde
Hallde RG-200 User manual

Hallde
Hallde RG-350 User manual