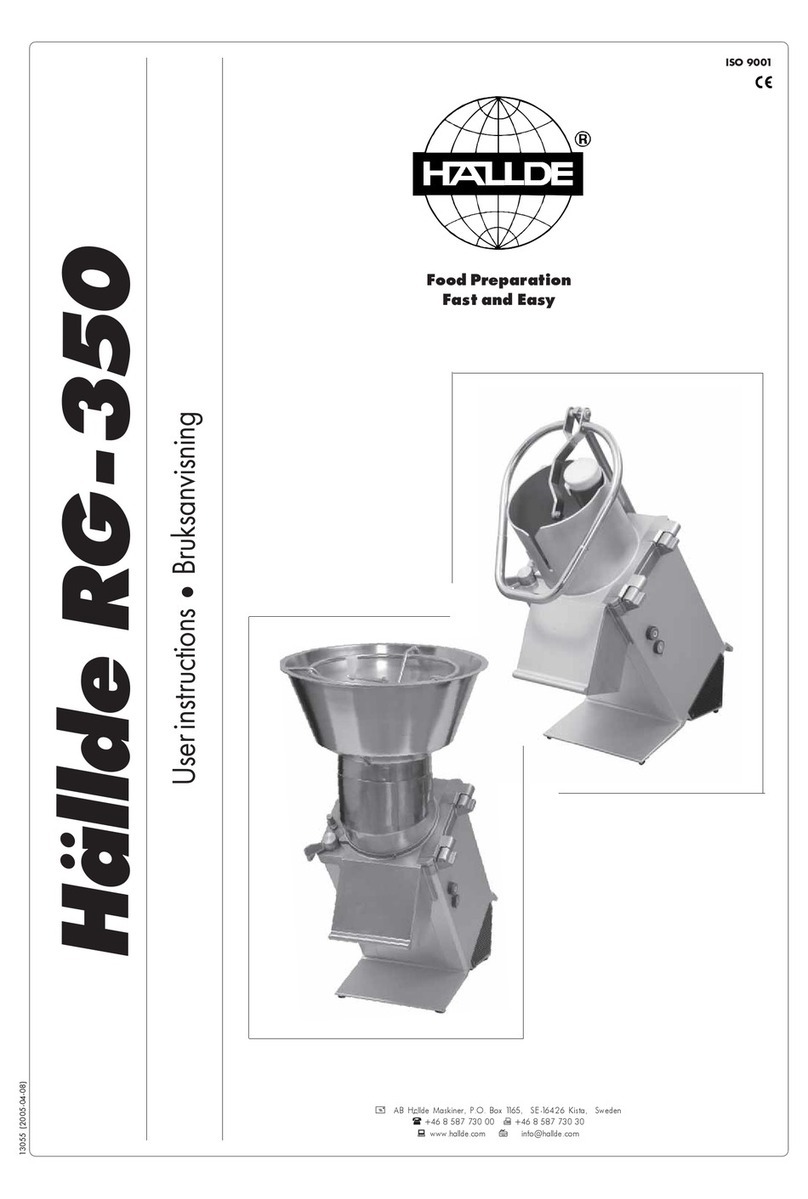
Hallde RG-350 User manual

User Instructions
BRUKSANVISNING • PŘÍRUČKY • INSTRUCCIONES DE USO • BEDIENUNGSANLEITUNG • BRUGSANVISNING • KÄYTTÖOHJE • MODE D’ EMPLOI • ΟΔΗΓΙΕΣ ΧΡΗΣΗΣ •
ISTRUZIONI PER L’USO • NOTKUNARLEIÐBEININGAR • GEBRUIKSAANWIJZING • INSTRUKCJA OBSŁUGI • INSTRUÇÕES DE USO • РУКОВОДСТВО ПОЛЬЗОВАТЕЛЯ • NAVODILA
Food Preparation Machines
Made in Sweden
Vegetable Preparation
Machine RG-350
hallde.com

EJECTOR PLATE EJECTOR PLATE
CUTTING TOOLCUTTING TOOL
DECORING DEVICE STIRRING SLEEVE
MACHINE BASE
PESTLE
FEED HOPPERERGO LOOP
FEED CYLINDER FEED CYLINDER
PARTS / ASSEMBLING
LETTUCE
POTATOES
TOMATOES
CUCUMBER
USING THE FEEDER
ASSEMBLING CUTTING TOOL
ALWAYS USE! ALWAYS USE!
WRENCH WRENCH

3
HALLDE • User Instructions
USER INSTRUCTIONS
HALLDE
RG-350
(GB)
CAUTION!
Take great care not to injure your hands on
sharp blades and moving parts.
Never put your hands in the feed hopper or
the manual feeder.
Always use the pestle when cutting through
the feed tube, and never put your hands into
the feed tube.
Hold only the push feeder handle, Ergo
Loop, when the manual feeder is to be
opened or closed.
The decoring device and stirring sleeve
must be tightened (anti-clockwise) and
unscrewed (clockwise), by means of the
wrench.
The 3-phase version of the RG-350 may
be installed only by a qualified service
mechanic.
Only a qualified service mechanic may
repair the machine and open the machine
housing.
Do not use the machine to cut frozen foods.
Remove all hard parts from foods before
cutting (e.g., apple stems, woody parts of
turnips, etc.) to avoid damaging the cutting
blades.
This appliance is not to be operated by
children or persons with reduced physical,
sensory or mental capabilities or persons
lacking experience of such appliances,
unless they are given adequate instruction
or supervision.
UNPACKING
Check that all of the parts have been delivered,
that the machine operates as intended, and
that nothing has been damaged in transit.
The machine supplier should be notied of any
shortcomings within eight days.
INSTALLATION
Connect the machine to an electric power
supply that is suitable for the machine.
The machine should be placed on a countertop
or table that is about 500 mm high.
Locate the hanger for the cutting tools on the
wall in the vicinity of the machine for convenient
and safe use.
Check the following two points without cutting
tools or ejector plate tted to the machine.
Check that the machine stops when the manual
push feeder, Ergo Loop, is moved up and
swung out, and that it restarts when it is swung
in and lowered.
Check that the machine cannot be started with
the feed cylinder removed and with the manual
push feeder lowered.
Check that the machine cannot be started
with the feeder cylinder tted but not the feed
hopper.
If the machine does not perform correctly, call
in a qualied service mechanic to remedy the
fault before taking the machine into operation.
ALWAYS CHECK BEFORE USE
WITH THE MANUAL FEEDER:
Remove the plug from the power supply socket
or open the isolating switch, and then check
that the electric cable is in good condition and
is not cracked on the outside.
Check that, with a cutting tool fitted, the
machine stops within 2 seconds as soon as
the pusher plate is swung out to the side and
restarts when the pusher plate is swung back
over the feeder.
Check that the machine cannot be started with
the feed cylinder removed and with the manual
push feeder lowered.
If either of the two safety functions does not
perform as intended or if the electric cable is
cracked, call in a qualied service mechanic or
electrician to remedy the fault before connec-
ting the machine back to the power supply.
Check that the pusher plate shaft runs freely. If
the shaft does not run freely, clean it carefully
and lubricate it with a few drops of machine oil.
Check that the cutting tools are in good condi-
tion and are sharp.
With regard to cutting tools, see page 44.
WITH THE FEED HOPPER:
Remove the plug from the power supply socket
or open the isolating switch, and then check
that the electric cable is in good condition and
is not cracked on the outside.
Check that the machine cannot be started
when the feed cylinder for the feed hopper is
tted but the feed hopper itself is not.
If the safety function does not perform as
intended or if the electric cable is cracked, call
in a qualied service mechanic or electrician
to remedy the fault before connecting the
machine back to the power supply.
Check that the cutting tools are in good condi-
tion and are sharp.
With regard to cutting tools, see page 44.
TYPE OF PROCESSING
Slices, dices, grates, shreds, cuts julienne,
crimping slicers and potato chips in a variety
of dimensions, depending on the cutting tool
selected. Processes vegetables, fruit, dry
bread, cheese, nuts, mushrooms etc.
USERS
Restaurants, shop kitchens, hospitals, diet
kitchens, retirement homes, schools, fast food
outlets, catering, day care centers, pizzerias,
ships, central kitchens, institution kitchens etc.
CAPACITY
Up to 1 200 portions per day, 12 kg per minute
with the manual feeder and 30 kg per minute
with the feed hopper.
USING THE FEEDERS
MANUAL FEEDER ERGO LOOP:
Manual feeder: The large feed compartment
is used mainly for bulk feeding of all sorts of
products and for cutting larger products such
as cabbage.
The large feed compartment is also used when
the product is to be cut in a specic direction,
such as tomatoes and lemons. Place/stack the
products as shown in the picture.
The in-built feed tube is used for cutting long
products such as cucumbers, see picture.
FEED HOPPER:
The Feed Hopper is used for continuous cutting
of large quantities of round products like pota-
toes, onions etc.
ASSEMBLING
THE MANUAL FEEDER ERGO LOOP
Fit the feed cylinder and turn the locking knob
clockwise as far as it will go (into the locked
position).
Grip the push feeder with both hands and insert
the shaft end into the mounting on the machine.
Press the push feeder down with the palm of
your right hand as far as it will go.
THE FEED HOPPER
Fit the feed cylinder for the feed hopper and
turn the locking knob clockwise as far as it
will go.
Fit the feed hopper onto the feed cylinder with
the feed hopper shaft inserted into the moun-
ting on the machine.
Press the feed hopper down into the feed
cylinder as far as it will go.
Turn the feed hopper locking knob, located
on the shaft at the back of the machine, anti-
clockwise as far as it will go (locked position).
Then tighten the screw at the front of the feed
hopper.
DISMANTLING
THE MANUAL FEEDER ERGO LOOP
Raise the push feeder and swing it out to the
left so that the feed cylinder is open.
Grip the push feeder with both hands.
Pull the pusher plate up/out with the right hand.

HALLDE • User Instructions
4
THE FEED HOPPER
Turn the feed hopper locking knob at the back
of the machine clockwise so that it points
straight out from the machine (unlocked posi-
tion) and release the feed hopper locking screw
in the front, anti-clockwise, and remove the
feed hopper. Release the locking knob from
the feed cylinder, anti-clockwise and remove
the cylinder.
FITTING THE CUTTING TOOLS
Lift the push feeder handle and swing it out
to the left. If the feed hopper is being used,
lift the shaft out of its mounting at the back of
the machine.
Turn the locking knob anti-clockwise and tilt
the feed cylinder for the manual feeder/feed
hopper to the right.
Place the ejector plate on the shaft and turn/
press down the ejector plate into its coupling.
Place the chosen cutting tool on the shaft and
rotate the cutting tool so that it drops rmly
into its position.
During dicing: place the dicing grid with the
sharp edge of the knives upward, so that the
recess in the side of the dicing grid ts into
the guide groove on the machine base. Then
place the slicer so that it drops rmly down
into its position.
When using the push feeder, t the decoring
device by turning it anti-clockwise by means
of the wrench onto the centre shaft of the
cutting tool.
When using the feed hopper, t the stirring
sleeve by turning it anti-clockwise by means
of the wrench onto the center shaft of the
cutting tool.
Lower the feed cylinder for the manual feeder/
feed hopper and turn its locking knob clockwise
to the locked position.
REMOVING THE CUTTING TOOLS
Raise the push feeder handle and swing it out
to the left, or lift up the shaft of the feed hopper
in the back of the machine.
Turn the locking knob anti-clockwise and
raise the manual push feeder/feed hopper to
the right.
Remove the decoring device or the stirring
sleeve by turning it clockwise by means of
the wrench.
Remove the cutting tool/tools and the ejector
plate.
CLEANING
Read all of the instructions before you begin
to clean the machine.
BEFORE CLEANING: Always switch off the
machine and remove the power supply plug
from the socket. Alternatively, if the machine
does not have a plug, turn off the mains switch.
Remove all the removable parts that are to
be cleaned.
CLEANING IN A DISHWASHER: All plastic
parts are machine washable. NOTE! Never
wash metal parts in a dishwasher, unless they
are made of stainless steel. Cleaning alumi-
nium parts in a dishwasher will cause them to
blacken. This can be difcult to remove and
could stain other objects.
CLEANING BY HAND: Always use hand
dishwashing liquid.
CLEANING MATERIALS: Use the brush supp-
lied with the machine or a similar one to clean
the food zones. The knife shaft in the centre
of the machine can be cleaned with a small
bottlebrush. Use a damp cloth to wipe down
the other surfaces on the machine.
DISINFECTION: Use isopropyl alcohol
(65–70%). Isopropyl alcohol is highly inam-
mable so use caution when applying it.
WARNING:
• Do not pour or spray water onto the sides of
the machine.
• Do not use boiling or hot water.
• Do not use sodium hypochlorite (chlorine)
or any agent containing this substance.
• Do not use sharp objects or any objects not
intended for the purpose of cleaning.
• Do not use abrasive detergents or cleaning
products.
AVOID: Do not use cleaning sponges with
scouring pads (e.g. Scotch-Brite™) unless
absolutely necessary. This roughens the
surface and makes it less water repellent.
ADVICE ON CARE:
• Clean the machine immediately after use.
• Dry the machine immediately after cleaning
to avoid oxidation and discoloration of the
surface.
INFORMATION: If the machine is left damp for
longer periods stains will appear. These stains
are harmless but the original surface will lose
its lustre. Vegetables and fruit contain acids.
Depending on which products are processed
this will have an effect on the metal after
varying periods of time. It is therefore important
to clean the machine immediately after proces-
sing salty and acidic products.
TROUBLE SHOOTING
To eliminate the risk of damage to the motor,
the RG-350 is tted with thermal motor protec-
tion that automatically switches off the machine
if the temperature of the motor should become
too high. The thermal motor protection has
automatic reset, which means that the machine
can be started again when the motor has
cooled down, which usually takes between 10
and 30 minutes.
FAULT: The machine cannot be started,
or stops while it is running and cannot be
restarted.
REMEDY: Check that the plug is securely
tted into the power supply socket, or that the
isolating switch is closed. Check that the feed
cylinder for the manual feeder, or the feed
hopper is locked in the correct position. Move
down the pusher plate into the manual feed
cylinder. Check that the fuses in the fuse box
for the premises have not blown and that they
have the correct rating. Wait for a few minutes
and try to restart the machine. If the machine
still fails to run, call a qualied electrician or
service mechanic.
FAULT: Low capacity or poor cutting results.
REMEDY: Make sure that you are using the
correct cutting tool or combination of cutting
tools. Fit the decoring device (manual feeder)
or stirring sleeve (feed hopper). Check that the
knives and grater/shredder plates are in good
condition and are sharp. Press the food down
loosely with less force.
FAULT: The cutting tool cannot be removed.
REMEDY: Always use the ejector plate. Use a
thick leather glove or other glove that the knives
of the cutting tool cannot cut through, and turn
the cutting tool clockwise to release it.
FAULT: The decoring device or stirring sleeve
cannot be removed.
REMEDY: Use the wrench to unscrew the
decoring device or stirring sleeve clockwise.
TECHNICAL SPECIFICATION
HALLDE RG-350
MACHINE: Motor: 0.75 kW, 230 V, single-
phase, 50 Hz, or 400 V, 3-phase, 50 Hz, with
thermal motor protection. Transmission: gears.
Safety system: Four safety switches. Degree
of protection: IP44. Power supply socket:
Earthed, single-phase, 10 A, or 3-phase,
16 A. Fuse in fuse box for the premises: 10 A,
delayed. Sound level LpA (EN31201): 73 dBA.
TOOLS: Diameter: 215 mm. Speed: 360 rpm.
NET WEIGHTS: Machine base: 26 kg. Manual
push feeder complete: 6 kg. Feed hopper:
7.5 kg. Cutting tools: About 1 kg on average.
NORMS/STANDARDS: NSF STANDARD 8,
see declaration of conformity.

5
HALLDE • User Instructions
BRUKSANVISNING
HALLDE
RG-350
(SE)
VARNING!
Akta händerna för vassa knivar och rörliga
delar.
Stick aldrig ner händerna i trattmataren
eller den manuella mataren.
Använd alltid stöten vid skärning med
matarröret och stick aldrig ner händerna
i matarröret.
Håll endast i den manuella matarens
handtag, Ergo lopp, när mataren skall
öppnas eller stängas.
Borrhylsan och omrörarkapseln skall dras
åt (moturs) och lossas (medurs), med hjälp
av nyckeln.
RG-350 i 3-fasutförande får endast instal-
leras av en behörig fackman.
Maskinen får endast repareras och maskin-
huset öppnas av en behörig fackman.
Maskinen får inte användas till frysta
råvaror. Alla hårda delar måste också
avlägsnas från råvarorna, (äpplestjälkar,
träiga kålrotsbitar och dylikt) så att de inte
skadar knivbladen.
Denna maskin skall inte användas av
barn eller personer med nedsatt motorik,
kognitiv förmåga eller handikapp som
utgör fara för användaren t.ex. nedsatt
syn eller hörsel, utan uppsikt eller tydliga
instruktioner.
UPPACKNING
Kontrollera att alla detaljer nns med samt
att maskinen fungerar och att ingenting har
skadats under transporten.
Anmärkningar skall anmälas till maskin-
leverantören inom åtta dagar.
INSTALLATION
Koppla maskinen till ett el-uttag med för
maskinen korrekta data.
Maskinen bör placeras på en bänk eller ett
bord som är ca 500 mm högt.
Placera verktygshängare för skärverktygen på
väggen nära maskinen för bekväm och säker
användning.
Kontrollera nedanstående punkter utan
skär verktyg eller utmatarskivan monterade i
maskinen.
Att maskinen stannar när den manuella mata-
rens handtag, Ergo Loop, förs upp och svängs
ut samt återstartar när den förs tillbaka och
sänks ner.
Att maskinen inte går att starta med matar-
cylindern avlägsnat och med det manuella
matarhandtaget nedsänkt.
Att maskinen inte går att starta när matarcylin-
dern är monterad, men trattmataren ej är
monterad.
Vid felfunktion, tillkalla fackman för åtgärd
innan maskinen tas i bruk.
KONTROLLERA ALLTID FÖRE
ANVÄNDNING
MED MANUELLA MATAREN:
Dra ut stickkontakten ur vägguttaget alternativt
slå ifrån arbetsbrytaren och kontrollera därefter
att elkabeln är hel och inte har några sprickor.
Att maskinen med skärverktyg monterad
stannar inom två sekunder så fort matarplattan
svängs ut åt sidan samt återstartar när matar-
plattan svängs tillbaka över mataren.
Att maskinen inte går att starta med matar-
cylindern avlägsnat och med det manuella
matarhandtaget nedsänkt.
Om någon av de två säkerhetsfunktionerna ej
fungerar eller om elkabeln har sprickor, skall
fackman tillkallas för åtgärd innan maskinen
kopplas in på nätet igen.
Att matarplattans axel löper lätt. Om axeln löper
trögt ska den rengöras noggrant och smörjas
med några droppar maskinolja.
Att skärverktyg är hela och har god skärpa.
Gällande skärverktyg, se sidan 44.
MED TRATTMATAREN:
Dra ut stickkontakten ur vägguttaget alternativt
slå ifrån arbetsbrytaren och kontrollera därefter
att elkabeln är hel och inte har några sprickor.
Att maskinen inte går att starta när trattmata-
rens matarcylinder är monterat men trattma-
taren ej är monterad.
Om någon av de båda säkerhetsfunktionerna
ej fungerar eller om elkabeln har sprickor, skall
fackman tillkallas för åtgärd innan maskinen
kopplas in på nätet igen.
Att skärverktyg är hela och har god skärpa.
Gällande skärverktyg, se sidan 44.
TYP AV BEREDNING
Skivar, tärnar strimlar, river, räfar och skär
Pommes Frites i olika dimensioner beroende
på val av skärverktyg. Bereder grönsaker, frukt,
torrt bröd, ost, nötter, svamp etc.
ANVÄNDARE
Restauranger, butikskök, dietkök, hälsohem,
sjukhus, skolor, fast food-inrättningar,
catering kök, daghem, servicehem, pizzerior,
fartyg, centralkök, institutionskök etc.
KAPACITET
Upp till 1 200 portioner per dag, 12 kg per minut
med den manuella mataren och 30 kg per minut
med trattmataren.
SÅ HÄR ANVÄNDS MATARNA
MANUELL MATARE ERGO LOOP:
Det stora matarfacket används främst för
skopvis matning av alla typer av produkter,
samt vid skärning av större varor som exem-
pelvis kål.
Det stora matarfacket används även när varan
önskas skuren på en bestämd ledd, t ex tomat
och citron. Placera/stapla varan enligt bild.
Det inbyggda matarröret används för att skära
skivor av långsträckta varor som exempelvis
gurka, se bild.
TRATTMATARE
Används för kontinuerlig matning/ skärning av
större mängder runda produkter som potatis,
lök, etc.
MONTERING
MANUELL MATARE ERGO LOOP:
Montera matarcylindern och vrid låsvredet
medurs tills det tar stopp till låst läge.
Ta tag i matarhandtaget, Ergo Loop med båda
händerna och placera axelns ände mot fästet
på maskinen.
Pressa ner mataren med höger handata tills
det tar stopp.
TRATTMATAREN:
Montera trattmatarens matarcylinder och vrid
låsvredet medurs tills det tar stopp. Passa in
trattmataren på matarcylindern med trattmata-
rens axel mot fästet på maskinen.
Pressa ner trattmataren i matarcylindern tills
det tar stopp.
Vrid trattmatarens låsvred vid axeln i bakkant
av maskinen moturs tills det tar stopp (låst
läge).
Dra sedan åt skruven på trattmatarens fram-
sida.
DEMONTERING
MANUELL MATARE; ERGO LOOP:
För upp matarhandtaget och sväng ut det till
vänster så att matarcylindern ställs öppen.
Fatta tag i mataren med båda händerna.
Dra upp/loss matarplattan med höger hand.
TRATTMATAREN:
Vrid trattmatarens låsvred i bakkant medurs
tills det tar stopp (olåst läge)och lösgör skruven
på trattmatarens framsida, avlägsna sedan
trattmataren. Lossa låsvredet på maskinen
motsols, från trattmatarens cylinder och ta bort
trattmatarens cylinder.
Other manuals for RG-350
2
Table of contents
Languages:
Other Hallde Kitchen Appliance manuals

Hallde
Hallde RG-50 User manual

Hallde
Hallde VCB-61 User manual

Hallde
Hallde VCB-62 User manual

Hallde
Hallde RG-400 User manual

Hallde
Hallde RG-350 User manual

Hallde
Hallde RG-100 User manual

Hallde
Hallde RG-7 User manual

Hallde
Hallde RG-50 User manual

Hallde
Hallde RG-100 User manual

Hallde
Hallde RG-50 User manual