manuals.online logo
Brands
  1. Home
  2. •
  3. Brands
  4. •
  5. Handicare
  6. •
  7. Medical Equipment
  8. •
  9. Handicare MiniLift160 Classic User manual

Handicare MiniLift160 Classic User manual

Manual nr: 902 Rev 01 2020-03-31
MiniLift160 Classic
400641436
400641437
SWL: 160 kg/430 lbs
User manual – English
Bruksanvisning – Svenska
Brukermanual – Norsk
Brugsvejledning – Dansk
Käyttöohje – Suomi
Gebrauchsanweisung – Deutsch
Handleiding – Nederlands
Manuel d’utilisation – Français
Manuale utente – Italiano
Manual de usuario – Español
3
USER MANUAL
Table of contents
English............................................................................................... 4
Svenska ...........................................................................................20
Norsk.................................................................................................36
Dansk................................................................................................52
Suomi...............................................................................................68
Deutsch............................................................................................84
Nederlands ...................................................................................100
Français.........................................................................................116
Italiano..........................................................................................132
Español..........................................................................................148
Dimensions MiniLift160 Classic...........................................164
Dimensions MiniLift160 Classic, with low legs...................166
4
USER MANUAL
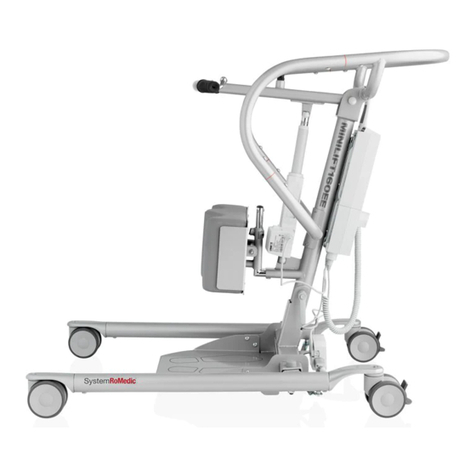
MiniLift160 Classic is a mobile sit-to-stand lift which has been developed to, as gently as possible, assist the user when
rising from a sitting to a standing position. When MiniLift160 Classic is combined with the appropriate lifting accessories,
the user gets support under the feet, for the front of the lower legs and behind the back, which provides for a safe and
secure
sit-to-stand procedure. The construction safely moves the user forwards and upwards in a natural movement pattern
and, at the same time, the leg muscles and balance is exercised.
1. Lift arm
2. Hooks for lift vest/sling
3. Hand control
4. Leg support
5. Footplate
6. Rear castor wheels with brakes
7. Battery
8. Emergency stop
9. Adjustment of leg support
10. Manual emergency lowering
11. Electrical emergency lowering
12. Charging lamp
13. Locking mechanism for adjustment of lift arm
14. Handles
15. Front castors
MiniLift160 Classic
6
D
C
B
A
E
F
G
H
E
A
B
C
D
F
5
4
3
2
1
7
8
9
10
11
12
1
2
3
4
5
6
7
8
G
12
11
10
9
SCALE:1:4
DWG. NO.
REV.
NAME
DATE
DRAWN
APPROVED BY
SHEET 1 OF 1
WEIGHT:
COMMENTS:
STATUS:
TITLE
MATERIAL:
SIZE
hc-jope
g
2010-07-27
A2
Unless otherwise stated, general
tolerances according to ISO 2768-m
1
2
4
5
6
7
9
10
13
14
15
8
11
12
3
English
Visual inspection
Inspect lift functions regularly. Check to ensure that material is free from damage.
Before use
Make certain the lift is properly assembled.
Check sling bar connection and safety latch function.
Check lifting function and base-width adjustment.
Check to ensure that the actuator is correctly installed.
Always read the user manuals for all assistive devices used during a transfer.
Keep the user manual where it is accessible to users of the product.
Always make sure that you have the right version of the user manual.
The most recent editions of user manuals are available for downloading from our website, www.handicare.com.
Under no circumstances may the lift be used by persons who have not received instruction in the operation of the lift.
It is strongly prohibited to modify the original product.
Safety information
Always read the user manual
5
USER MANUAL
Assembly of MiniLift160 Classic
Check to ensure that all components are included
Lift motor, control box, battery pack, base with motor, footplate, hand control and cord, manual and charging cable.
Screws and screw covers should also be included (see below).
Assembly
Place the upper section on the lower section and lower it carefully into place (1). Press it fully into place and tighten all
four screws. Finally, place the plastic covers over the screws (2).
Mount the footplate on the crossbar and then lower it (picture 3).
Mount the leg support by inserting the crossbars on the back into the xtures
on the lift (4), and then tighten.
Connect cables: Hand control cord in HS, cable for lift unit on mast in outlet
M1 and cable for base-width motor in outlet M2 (5).
F
8
E
D
C
B
A
G
H
J
K
L
M
7
6
5
4
3
2
1
9
10
11
12
13
14
15
16
9
1
2
3
4
5
6
7
8
10
11
12
K
G
A
B
C
D
E
F
H
J
SCALE:1:1
DWG. NO.
REV.
NAME
DATE
DRAWN
APPROVEDBY
SHEET1 OF 1
WEIGHT:
COMMENTS:
STATUS:
TITLE
MATERIAL:
SIZE
hc-mabr
g
2010-04-26
A1
Unless otherwise stated, general
tolerances according to ISO 2768-m
2
3
4
5
F
8
E
D
C
B
A
G
H
J
K
L
M
7
6
5
4
3
2
1
9
10
11
12
13
14
15
16
9
1
2
3
4
5
6
7
8
10
11
12
K
G
A
B
C
D
E
F
H
J
SCALE:1:3
DWG. NO.
REV.
NAME
DATE
DRAWN
APPROVEDBY
SHEET1 OF 1
WEIGHT:
COMMENTS:
STATUS:
TITLE
MATERIAL:
SIZE
hc-mabr
g
2010-04-26
A1
Unless otherwise stated, general
tolerances according to ISO 2768-m
1
HS M1 M2
English
6
USER MANUAL
Final inspection
Check to ensure that no parts have been left in the packaging.
Inspect the lift for signs of wear and damage.
Check all four castor wheels and castor wheel locks.
Check all connections and xtures including screws and bolts.
Check the emergency stop function by activating the emergency stop, and then
pressing either the up or down button. If nothing happens when the up or down
buttons are pressed, the emergency stop is functioning properly.
Grasp the hand control, press the up button and run the lift arm all the way up. Then,
press the down button and run the lift arm all the way down.
Test base-width adjustment function. Press the button for base-width adjustment to
widen the base fully, and then press the other button to narrow the base again.
Test lift function by lifting a person (not a user) using an approved sling. At the same
time, check the emergency lowering function with someone on the lift. See section on
Emergency lowering.
If the lift is functioning correctly, connect the charger and check to ensure that the
charging lamp on the control box lights up.
NOTE!
Before the lift is used for the rst time:
• it must be charged for at least 4 hours. See section on charging batteries.
• the control box service counter needs to be reset. To reset the service counters
press both lift buttons on the hand control at the same time for 5 seconds.
An audio signal will indicate that the timer has been reset.
Keep the user manual where it is accessible to users of the product.
F
8
E
D
C
B
A
G
H
J
K
L
M
7
6
5
4
3
2
1
9
10
11
12
13
14
15
16
9
1
2
3
4
5
6
7
8
10
11
12
K
G
A
B
C
D
E
F
H
J
SCALE:1:1
DWG. NO.
REV.
NAME
DATE
DRAWN
APPROVED BY
SHEET 1 OF 1
WEIGHT:
COMMENTS:
STATUS:
TITLE
MATERIAL:
SIZE
hc-mabr
g
2010-04-26
A1
Unless otherwise stated, general
tolerances according to ISO 2768-m
7
USER MANUAL
• The lift must be assembled according to the assembly instructions provided with the lift.
• The lift may only be used indoors and on a level oor.
• Lifting accessories must be properly trial tted and tested in relation to the user’s needs and functional ability.
• Do not leave the user unattended during a transfer situation.
• Under no circumstances may max. load be exceeded. See section on Safe working load.
• Ensure that the user’s feet do not get caught between the footplate and the oor. Ensure that the user’s feet do not get
caught between the footplate and the base when adjusting the base width.
• MiniLift160 Classic is not intended for transporting users. It may only be used for short transfers.
• Never move the lift by pulling on the actuator!
•The lift must not be used or immersed in or under water including showering.
• The lift should not be left / stored in a high humidity environment.
• The lift must not be charged in a wet room.
• To ensure optimal function, the lift must be inspected regularly. See section on Maintenance.
• Warranty applies only if repairs or alterations are done by an authorized technician.
• Using lifting accessories other than those approved by Handicare can entail a risk.
• The lift arm must be loaded throughout the entire lowering procedure.
Important Information
Safe working load
Different products on the same lift system (lift unit, sling bar, sling, scales and other lifting accessories) may have different
allowable safe working loads. The lowest allowable safe working load always determines the safe working load of the
assembled system. Always check the safe working loads for the lift and accessories before use. Contact your dealer if
you have any questions.
Using the product
To transfer with MiniLift160 Classic, the user must be able to:
• support weight while standing
• understand instructions
English
8
USER MANUAL
The control box and battery have the following features
1. Emergency stop
2. Charging lamps
3. Display showing battery charge level
4. Connection for charger cable
5. Connection for base-width adjustment motor
6. Connection for lift arm actuator
7. Connection for hand control
8. Electrical emergency lowering
9. Handle for lifting battery 1
7
65
4
3
2
2
9
8
Charging batteries
A tone sounding when using the lift indicates that the battery need recharging.
Charge the lift after use to ensure that the battery is always fully charged.
Lock the castor wheels when charging the battery.
1. Connect the charging cable to a power outlet and in the connection for charger cable.
The symbol for charging is shown on the display.
2. Check to ensure that the lamps on the control box light up. The green LED lamp indicates that the charger is receiving
power and the yellow LED lamp indicates that the battery is charging.
3. Charging stops automatically when the battery is fully charged.
Wall-mounted charger.
1. Remove the battery pack from the lift and place it in the wall-mounted charger.
2. Check to ensure that the LED lamp on the front of the charger lights up.
NOTE!
Before the lift is used for the rst time, it must be charged for at least 4 hours.
For maximum battery life, charge batteries regularly. We recommend daily charging when the lift is used daily.
The emergency stop must be deactivated during charging.
Battery information on the display
The battery discharging will be shown in four stages:
Battery state 1: The battery is ok, no need for charging (100 - 50 %).
Battery state 2: Battery needs charging. (50 - 25 %)
Battery state 3: Battery needs charging. (Less than 25 %) A tone sounds when a button is pressed in
this battery state.
Battery state 4: The battery needs charging (17V or lower). At this stage some of the functionality of the lift
is lost. At this battery stage it is only possible to drive the lifting arm down. Furthermore an audio signal will
sound when a control button is activated. The symbol will switch between the two pictures for 10 seconds.
The battery symbol is shown when the box is active until power down (2 minutes after use).
It is not possible to use other batttery types than BAJ1/BAJ2.
The battery level is measured via voltage level. This means that it is possible to experience e.g. that
the battery switches from state 1 to state 2 and back to state 1.
9
USER MANUAL
Hand control
Raising/lowering the lift arm
Symbol indicate direction of travel.
Motion stops as soon as the button is released.
If the lift arm encounter an obstacle while lowering, the lift will
immediately stop the motion. In order to continue, the lift arm will
need to be raised slightly by using the hand control before further
lowering.
Widening/narrowing the base
Markings on the buttons indicate function.
Motion stops as soon as the buttons are released.
Service information read-out
Basic service information can be read out on the display. To get the service information on the
display please press the lifting arm up button for half a second. The information will be shown
for ½ minute or until other buttons are activated.
• Total cycles done by the actuator
• Total work done by the actuator (ampere usage times seconds in use)
• Total number of overloads
• Days since last service/Days between services
Changing the battery
”Click!”
12
English
10
USER MANUAL
Manual emergency
lowering
Electrical emergency
lowering
Emergency stop
To activate the emergency stop
Press the red emergency stop button on the control box.
Resetting
Turn the button in the direction of the arrows until the button pops
out.
To prevent battery discharge, we recommend that the emergency-
stop button is pressed in when the lift is not in use.
Emergency lowering
Manual emergency lowering
For manual emergency lowering, lift the red slider upwards.
Electrical emergency lowering
For electrical emergency lowering, use the down button on the
control box. Use a narrow object such as a pen.
Instructions for use
These instructions must be followed for correct use of MiniLift160 Classic.
Hand control functions
The hand control has four functions: up and down (lift arm), out and in (base width).
Two functions cannot be used at the same time.
NOTE: The hand control functions do not operate if the emergency stop button is activated
NOTE: MiniLift160 Classic may only be used for short transfers. It is not intended for transporting users.
Caution Never move the lift by pulling on the actuator.
Caution Ensure that the user’s feet do not get caught between the footplate and the oor. Ensure that the user’s feet do
not get caught between the footplate and the base when adjusting the base width.
11
USER MANUAL
IFU for MiniLift
1. Before using the MiniLift, always plan and asses the risk before a lift and
transfer:
a. Check that the environment is suitable and plan for the task
b. Check the MiniLift and ThoraxSling function
c. Check the MiniLift battery
d. Check that the MiniLift has been serviced
e. Visually inspect the MiniLift and ThoraxSling for signs of damage or
defects
f. Ensure sizing of the ThoraxSling is correct in accordance with IFU
2. Requirements for use:
a. The client must have some standing capability to use the MiniLift –
this is dependent on the individual risk assessment.
3. Attach the ThoraxSling to the client according to the ThoraxSling
instructions - see IFU for ThoraxSling.
4. Buckle the safety belt. Consider not buckling the safety belt if the client
uses a stomia bag, PEG, has wounds or similar. Raising a client with the
MiniLift will work well even without buckling the safety belt.
5. If needed, lift the client’s feet from the wheelchair’s foot support and turn
these away.
6. Spread the legs of the MiniLift as wide as possible and position the MiniLift
in front of the client, facing the client.
7. Lock the wheels of the MiniLift and of the wheelchair/bed if applicable.
8. Ensure that the client’s feet can reach the foot rest and position the clients
feet wide apart on the foot rest of the MiniLift, to ensure maximum balance.
9. Adjust the knee support height and depth position so that the clients shins
are supported.
10. Lift the locking handle on the standing arm and set the standing arm so
that the patient can reach it comfortably with bent arms.
11. Attach suitable loops of the sling on the hooks on the standing arm
intended for the loops of the slings.
12. Pull on the slings loops to make sure they are attached properly.
13. Lift the locking handle on the standing arm and set the standing arm so
that the loops of the sling are under tension and are not slacking.
14. Place the client’s hand on the handles of the standing arm, or let the client
push off from the armrests of the wheelchair. For clients with reduced
muscle function in the arms, place the arm/s in ThoraxSling armrest.
English
12
USER MANUAL
15. Consider different patterns or ways of raising the client:
a. Short setting of the standing arm results in a more forward leaning
position that requires more muscle strength in the legs. Suitable
for a shorter and more active client.
b. Long setting of the standing arm is more suited for a weaker
patient who needs training. Suitable for a taller client.
16. Instruct the client about the lifting.
17. Caregiver positioning: The caregiver should stand on the side of the lift
and press the up button on the hand control. Watch the foot placement
of the client and ensure that the ThoraxSling does not slip.
18. Raise the client to a position where they can stand upright. It is
important to note that some clients might not want to stand upright for
fear of falling forward.
19. If needed have the client adjust their hand positions to the frame of the
MiniLift.
20. Unlock the wheels of the MiniLift.
21. When transferring the patient, close the leg-spreading of the MiniLift and
move the MiniLift so that the patient faces forward.
22. Perform desired activity: e.g. transfer, standing training, toileting.
23. Once client is in the desired standing position, move the MiniLift to the
intended transfer position.
24. Lock the wheels of the MiniLift and the wheelchair, if the client is to be
lowered there.
25. Positions the client’s hands on the standing arm’s handles.
26. The caregiver’s position should be standing to the side of the MiniLift.
Use the down-button on the hand control to lower the client.
27. If possible, encourage the client to lean forward during the lowering so
that is resembles standing up without aid.
28. Lower the standing arm and ensure that the client ends up positioned
well in the sitting position (e.g. in a wheelchair).
29. Let the client remove their hands from the MiniLift, extend the standing
arm and detach the ThoraxSling completely from the MiniLift.
30. Unlock the MiniLift wheels and carefully remove the client’s feet from the
MiniLift’s footrest.
31. Move the MiniLift away from the client.
32. Remove the ThoraxSling from the client.
13
USER MANUAL
Trouble-shooting
If the lift or base-width adjustment cannot be activated, check the following:
- That the emergency stop function is activated.
- That all cables are properly and securely connected. Pull out the contact and plug it in again rmly.
- That battery charging is not in progress.
- That the battery is charged.
If the lift is not working properly, contact your dealer.
If the lift makes unusual noises:
- Try to determine the source of the sound. Take the lift out of operation and contact your dealer.
Accessories
ThoraxSling, polyester, XS-XXL, article no.: 45500003-009
ThoraxSling, wipeable, S-XXL, article no.: 45500004-009
ThoraxSling, with seat support, polyester, S-XL, article no.: 45600004-008
ThoraxSling, with seat support, disposable, non-woven, S-XL,
article no.: 45690004-008
CalfStrap, article no.:70200033
Hand control
Hand control HB33-6, 6 buttons, with service, battery status and overload
indicators, article no.: 70200089
English
14
USER MANUAL
Maintenance
The lift must undergo thorough inspection at least once per year. Inspection must be performed by authorized personnel
and in accordance with Handicare’s service manual.
Repairs and maintenance may only be done by authorized personnel using original spare parts.
Used batteries are to be left at the nearest recycling station. Used batteries can also be returned to
Handicare or a Handicare dealer for recycling.
+50 ºC
-10 ºC
Cleaning/disinfection
Clean the lift with warm water or rubbing alcohol and ensure that the castor wheels are free of dirt and hair. Do not use
cleaning agents containing phenol or chlorine, as this may damage the material.
Storage and transportation
If the lift is not to be used for some time or e.g., during transport, we recommend that the emergency stop button be
pressed in. The lift should be transported and stored in -10 ° C to + 50 ° C and in normal humidity, 30% -75 %. The air
pressure should be between 700 and 1060 hPa. Let the lift reach room temperature before the batteries are charged or
the lift is used.
Service agreements
Handicare offers the possibility of service agreements for maintenance and regular testing of your mobile lift. Contact
your local Handicare representative.
106 kPa
70 kPa
75%
30%
1060 hPa
700 hPa
+50 °C
-10 °C
75%
30%
Normal use environment
This equipment is intended for indoor use. It is not recommended to be used outside normal indoor temperature
and humidity ranges, 10°C to 40°C and 30% to 75%.
15
USER MANUAL
Symbols
White/blue
Read user manual
May not be discarded in domestic waste
The product complies with the requirements of the Medical Devices Directive 93/42/EEC
Type B, according to the degree of protection against electric shock
The device is intended for indoor use
Class lI equipment
Important
Be observant
Red/ black
Do not puch or pull the lift by the actuator
English
16
USER MANUAL
Medical Device Class I. The product complies with the requirements of the Medical Devices Directive 93/42/EEC.
Lifting speed 35 mm/s without load.
Batteries Two 12V, 2.9 Ah valve-regulated, sealed, lead accumulator (gel-type batteries)
Charger Max. 400mA
Motor (mast) DC 24 V, 10.5 Ah. Operating time: 10% maximum continuous operation for 2 minutes
Push: 7500N.
Motor (base) DC 24 V, 12.3 Ah. Operating time: 10% maximum continuous operation for 2 minutes
Push: 2000N.
Sound level 55.8 dB(A)
Material Steel
Emergency lowering Manual and electrical
Castors Front 3,1”, 80 mm, back 3,1”, 80 mm
Weight 39 kg/104,5 lbs
Weight loose parts (Foot plate) 5 kg / 11 lbs
Footplate, measurement 390 x 345 mm / 15.3 x 13.5
Number of lifts per charge 20-25
IP class IP X4
Expected lifetime 10 years
Operating forces buttons on
hand control
4 N
Max. load 160 kg/ 430 lbs
Technical Information
17
USER MANUAL
Product has been tested for compliance with current regulatory standards regarding its capacity to block EMI (electro-
magnetic interference) from external sources. Some procedures can help reduce electromagnetic interferences:
• Use only Handicare cables and spare parts to avoid increased emissions or decreased immunity which can compro-
mise the correct functioning of the equipment.
• Ensure that other devices in patient-monitoring and/or life-support areas comply with accepted emissions standards.
Electromagnetic Compatibility (EMC)
Intended Environment: Home Healthcare Environment and Professional Healthcare facility environment
Exceptions: HF Surgical Equipment and RF Shielded room of an ME SYSTEM for magnetic resonance imaging.
WARNING
Use of this equipment adjacent to or stacked with other equipment should be avoided because it could result in improper
operation. If such use is necessary, this equipment and the other equipment should be observed to verify that they are
operating normally.
WARNING
Wireless communications equipment such as wireless computer network devices, mobile phones, cordless telephones
and their base stations walkie-talkies, etc. can affect this equipment and should be kept at least 1.5m away from the
equipment.
The MiniLift160Classic is a a device for safely raising persons from a sitting to a standing position using a moving lift arm.
In case the unit stops operating due to possible EM disturbance, the unit should be switched off. Its function should be
veried and the equipment should be used in another room or environment. In case of other equipment being disturbed,
its function should be veried before using again.
English
18
USER MANUAL
Guidance and manufacturer’s declaration - electromagnetic emissions
Emissions test Compliance Electromagnetic environment - guidance
RF emissions CISPR 11 Group 1 This equipment uses RF energy only for its internal functions. There-
fore its RF emissions are very low and are not likely to cause any
interference in nearby electronic equipment.
RF emissions
CISPR 11
Class B
This equipment is suitable for use in all establishments, including
domestic establishments and those directly connected to the public
low voltage power supply network that supplies buildings used for
domestic purposes.
Harmonic emissions
IEC 61000-3-2
Class A
Voltage uctuations/icker
emissions
IEC 61000-3-3
Complies
Guidance and manufacturer’s declaration - electromagnetic emissions
Immunity test IEC60601-1-2 test level Compliance Electromagnetic environment - guidance
Surge
IEC 61000-4-5
±1kV differential mode
±2kV common mode
±1kV differential mode
±2kV common mode
Mains power quality should be that of a typical
commercial or hospital environment.
Voltage
dips, short
interruptions
and voltage
variations on
power supply
input lines IEC
61000-4-11
Voltage reduction in
% of UN: 100% for 1
period, 100% for 0.5
periods, 30% for 25
periods, 100% for 250
periods
Voltage reduction in
% of UN: 100% for 1
period, 100% for 0.5
periods, 30% for 25
periods, 100% for 250
periods
Mains power quality should be that of a typical
commercial or hospital environment. If the user
of the MiniLift160Classic requires continued
operation during power mains interruptions, it
is recommended that the MiniLift160Classic be
powered from an uninterruptible power supply
or a battery.
19
USER MANUAL
Guidance and manufacturer’s declaration - electromagnetic immunity
Immunity test IEC60601-1-2 test level Compliance level Electromagnetic environment-
guidance
Electrostatic
discharge (ESD)
IEC 61000-4-2
±2kV, ±4kV, ±8kV, ±15kV air
±8kV contact
±2kV, ±4kV, ±8kV, ±15kV air
±8kV contact
Floor should be wood,
concrete or ceramic tile. If
the oors are covered with
synthetic material, the rela-
tive humidity level should be
at least 30%.
Conducted
disturbances
inducted by RF
elds
IEC 61000-4-6
3V in 0.15 MHz to 80MHz
6V in ISM and amateur radio
bands between 0.15 and 80
MHz
80% AM at 1 kHz
3V in 0.15 MHz to 80MHz
6V in ISM and amateur radio
bands between 0.15 and 80
MHz
80% AM at 1 kHz
Portable and mobile RF
communications equipment
should be used no closer
to any part of the product,
including cables, than 1.0m,
if the transmitter’s output
power rating exceeds 1W.(a)
Field strength from xed RF
transmitters, as determined
by an electromagnetic site
survey, should be less than
the compliance level in each
frequency range.(b)
Interference may occur in
the vicinity of equipment
marked with this symbol:
Radiated RF
electromagnetic
eld
IEC 61000-4-3
Home Healthcare Environment
10 V/m
80 MHz to 2.7 GHz
80% AM and 1 kHz
Home Healthcare Environment
10 V/m
80 MHz to 2.7 GHz
80% AM and 1 kHz
Proximity elds
from RF wireless
communications
equipment
IEC 61000-4-3
385 MHz - 27 V/m
450 MHz - 28 V/m
710, 745, 780 MHz - 9 V/m
810, 870, 930 MHz - 28 V/m
1720, 1845, 1970, 2450 MHz
- 28 V/m
5240, 5500, 5785 MHz - 9 V/m
385 MHz - 27 V/m
450 MHz - 28 V/m
710, 745, 780 MHz - 9 V/m
810, 870, 930 MHz - 28 V/m
1720, 1845, 1970, 2450 MHz
- 28 V/m
5240, 5500, 5785 MHz - 9 V/m
Electrical fast
transient/burst
IEC 61000-4-4
Signal and control lines: ±1kV
AC: ±2kV
100 kHz repetition frequency
Signal and control lines: ±1kV
AC: ±2kV
100 kHz repetition frequency
Power frequency
Magnetic eld
IEC 61000-4-8
30 A/m
50 Hz and 60 Hz
30 A/m
50 Hz and 60Hz
Power frequency magnetic
elds should be at levels
characteristic of a typical
location in a typical com-
mercial or hospital environ-
ment.
(a) Field strength from xed transmitters, such as base stations for radio (cellular/cordless) telephones and land mobile
radios, amateur radio, AM and FM radio broadcast and TV broadcast cannot be predicted theoretically with accuracy.
To assess the electromagnetic environment due to xed RF transmitters, an electromagnetic site survey should be
considered. If the measured eld strength in the location in which the MiniLift160 Classic is used exceeds the appli-
cable RF compliance level above, the MiniLift160 Classic should be observed to verify normal operation. If abnormal
performance is observed, additional measures may be necessary.
(b) Over the frequency range 150 kHz to 80 MHz, eld strength should be less than 1V/m.
English
165
USER MANUAL
Dimensions MiniLift160 Classic All measurement are in mm/inch
Tolerance +/- 5 mm/ 0.2”
873/34.3
1020/40.1
856/33.7
34/1.3 57/2.2 91/3.5 121/4.7

Other manuals for MiniLift160 Classic

1

Other Handicare Medical Equipment manuals

Handicare SystemRoMedic Vega505EE User manual

Handicare

Handicare SystemRoMedic Vega505EE User manual

Handicare SitWalk User manual

Handicare

Handicare SitWalk User manual

Handicare SystemRoMedic TurnSafe2 User manual

Handicare

Handicare SystemRoMedic TurnSafe2 User manual

Handicare AP-450 User manual

Handicare

Handicare AP-450 User manual

Handicare SystemRoMedic EasyBelt User manual

Handicare

Handicare SystemRoMedic EasyBelt User manual

Handicare Eva400 User manual

Handicare

Handicare Eva400 User manual

Handicare SystemRoMedic TurnTable User manual

Handicare

Handicare SystemRoMedic TurnTable User manual

Handicare AP-300 User manual

Handicare

Handicare AP-300 User manual

Handicare SystemRoMedic SoftLegSupport User manual

Handicare

Handicare SystemRoMedic SoftLegSupport User manual

Handicare LinidoSolutions LI2403.150 Series User manual

Handicare

Handicare LinidoSolutions LI2403.150 Series User manual

Handicare Xclusive User manual

Handicare

Handicare Xclusive User manual

Handicare SystemRoMedic AmpSling Series User manual

Handicare

Handicare SystemRoMedic AmpSling Series User manual

Handicare 3309320 User manual

Handicare

Handicare 3309320 User manual

Handicare SitWalk User manual

Handicare

Handicare SitWalk User manual

Handicare LI2214.201 Series User manual

Handicare

Handicare LI2214.201 Series User manual

Handicare SystemRoMedic WendyLett User manual

Handicare

Handicare SystemRoMedic WendyLett User manual

Handicare TopSheet 1510 User manual

Handicare

Handicare TopSheet 1510 User manual

Handicare SystemRoMedic EasyGlide Series User manual

Handicare

Handicare SystemRoMedic EasyGlide Series User manual

Handicare SystemRoMedic Vega505EE User manual

Handicare

Handicare SystemRoMedic Vega505EE User manual

Handicare 200382004 User manual

Handicare

Handicare 200382004 User manual

Handicare Eva400 User manual

Handicare

Handicare Eva400 User manual

Handicare System RoMedic PositioningCover User manual

Handicare

Handicare System RoMedic PositioningCover User manual

Handicare SystemRoMedic EasySlide Series User manual

Handicare

Handicare SystemRoMedic EasySlide Series User manual

Handicare 1000 Smart XL User manual

Handicare

Handicare 1000 Smart XL User manual

Popular Medical Equipment manuals by other brands

ATS Dental B-ONE Operation and maintenance instruction manual

ATS Dental

ATS Dental B-ONE Operation and maintenance instruction manual

Esaote MyLab SigmaVET Getting started

Esaote

Esaote MyLab SigmaVET Getting started

Bio Compression Systems SC-2008 operating instructions

Bio Compression Systems

Bio Compression Systems SC-2008 operating instructions

Guardian G1562 Operation & maintenance guide

Guardian

Guardian G1562 Operation & maintenance guide

MERCIAN Micro Torque MT5000 Operating instructions manual

MERCIAN

MERCIAN Micro Torque MT5000 Operating instructions manual

Mortara Surveyor user manual

Mortara

Mortara Surveyor user manual

ProMed INH-2.1 Instruction leaflet

ProMed

ProMed INH-2.1 Instruction leaflet

PROTEOR AGILIX F15 Instructions for use

PROTEOR

PROTEOR AGILIX F15 Instructions for use

Hanger ACP OmniSWD user manual

Hanger

Hanger ACP OmniSWD user manual

Orliman LUMBITEC FX-214 manual

Orliman

Orliman LUMBITEC FX-214 manual

Weinmann MEDUMAT Easy CPR Instructions for use

Weinmann

Weinmann MEDUMAT Easy CPR Instructions for use

Mercoframes Optical Corp HFC-009 PLUS Service manual

Mercoframes Optical Corp

Mercoframes Optical Corp HFC-009 PLUS Service manual

Atos Medical Provox LaryTube manual

Atos Medical

Atos Medical Provox LaryTube manual

laerdal Tuff Kelly Directions for use

laerdal

laerdal Tuff Kelly Directions for use

Aerogen Solo System instruction manual

Aerogen

Aerogen Solo System instruction manual

ADC e-sphyg 3 Installation

ADC

ADC e-sphyg 3 Installation

Chattannoga OptiFlex SHOULDER CPM operating instructions

Chattannoga

Chattannoga OptiFlex SHOULDER CPM operating instructions

Arthrex NanoScope manual

Arthrex

Arthrex NanoScope manual

manuals.online logo
manuals.online logoBrands
  • About & Mission
  • Contact us
  • Privacy Policy
  • Terms and Conditions

Copyright 2025 Manuals.Online. All Rights Reserved.