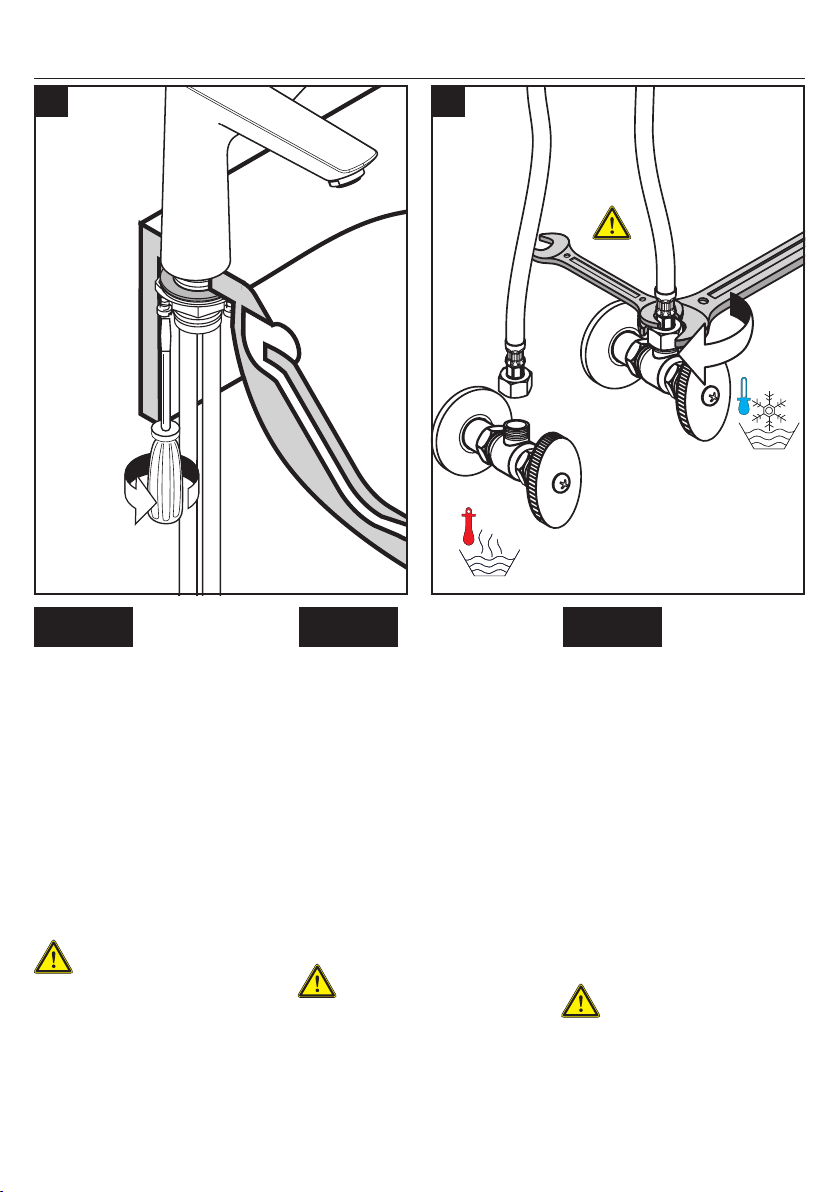
Hans Grohe Talis E 150 71754 1 Series Instruction Manual
Other Hans Grohe Bathroom Fixture manuals

Hans Grohe
Hans Grohe PuraVida 120 28558000 User manual

Hans Grohe
Hans Grohe Raindance 04731 0 Series Instruction Manual

Hans Grohe
Hans Grohe Talis M51 160 2jet 72815007 Manual

Hans Grohe
Hans Grohe Rainmaker Select 580 3jet 24001400 Manual

Hans Grohe
Hans Grohe Talis E 71720 1 Series Instruction Manual

Hans Grohe
Hans Grohe Crometta 160 1jet 26577 Series User manual

Hans Grohe
Hans Grohe Raindance Fontana 120 Rainmaker 91200000 User manual

Hans Grohe
Hans Grohe Metropol 14017 Series User manual

Hans Grohe
Hans Grohe Versostat 15345000 Manual

Hans Grohe
Hans Grohe Ecostat E 15773000 Manual

Hans Grohe
Hans Grohe PuraVida 28430 Series User manual

Hans Grohe
Hans Grohe Pulsify 105 3jet Relaxation 24110 5 Series User manual

Hans Grohe
Hans Grohe Metris S 31161 1 Series Instruction Manual

Hans Grohe
Hans Grohe Metropol 32517 1 Series Instruction Manual

Hans Grohe
Hans Grohe Marin 2 Eco Set 27324000 User manual

Hans Grohe
Hans Grohe Axor Montreux 16523 Series Manual

Hans Grohe
Hans Grohe Pharo Duschtempel 100 Quadra ML40L 29 36... User manual

Hans Grohe
Hans Grohe Axor Starck 10458000 Manual

Hans Grohe
Hans Grohe Croma 280 Air 1jet 26220 Series User manual

Hans Grohe
Hans Grohe AXOR Urquiola 11901000 Manual