manuals.online logo
Brands
  1. Home
  2. •
  3. Brands
  4. •
  5. Haverland
  6. •
  7. Heater
  8. •
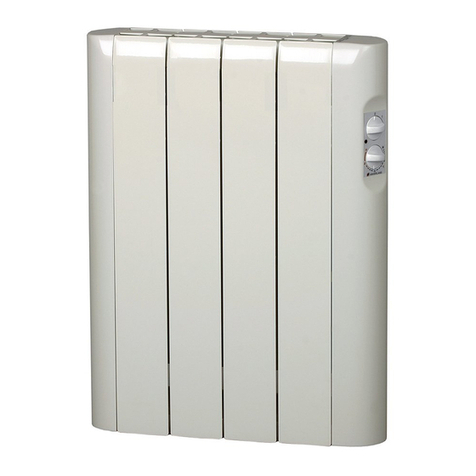
  9. Haverland SIMPLY-4 Parts list manual

Haverland SIMPLY-4 Parts list manual

Español
Manual de instalación y uso
Instructions & installation manual
Manuel d’installation et utilisation
Manual de instalação e uso
Français
English
Português
SIMPLY
SIMPLY_V1.2_21FEBRUARY2020_MISA_ESUKFP2020
HAVERLAND
APP
ES ÍNDICE
41. ADVERTENCIAS GENERALES
62. INSTALACIÓN
93. FUNCIONAMIENTO
93.1 PANEL DE CONTROL
93.2 MODO MANUAL
10 3.3 MODO AUTO “BLUETOOTH®”
14 3.4 DESCONEXIÓN RED ELÉCTRICA / CORTE SUMINISTRO
15 3.5 FUNCIÓN INTELIGENTE ITCS
15 3.6 FUNCIÓN AHORRO “VENTANAS ABIERTAS”
15 4. MANTENIMIENTO
EN CONTENTS
16 1. GENERAL WARNINGS
18 2. INSTALLATION
21 3. OPERATION
21 3.1 CONTROL PANEL
21 3.2 MANUAL MODE
22 3.3 AUTO MODE (BLUETOOTH®)
26 3.4 DISCONNECTION FROM THE ELECTRICITY / POWER CUT
27 3.5 INTELLIGENT ITCS FUNCTION
27 3.6 “OPEN WINDOWS” SAVE FUNCTION
27 4. MAINTENANCE
ES
EN
FR
P
PT ÍNDICE
40 1. ADVERTÊNCIAS GERAIS
42 2. INSTALAÇÃO
45 3. FUNCIONAMENTO
45 3.1 PAINEL DE CONTROLO
45 3.2 MODO MANUAL
46 3.3 MODO AUTO (BLUETOOTH®)
50 3.4 DESLIGAR DA REDE ELÉTRICA / CORTE ABASTECIMENTO
51 3.5 FUNÇÃO INTELIGENTE ITCS
51 3.6 FUNÇÃO ECONOMIA “JANELAS ABERTAS”
51 4. MANUTENÇÃO
FR TABLE DES MATIERES
28 1. AVERTISSEMENTS GÉNÉRAUX
30 2. INSTALLATION
33 3. FONCTIONNEMENT
33 3.1 PANNEAU DE COMMANDE
33 3.2 MODE MANUEL
34 3.3 MODE AUTO (BLUETOOTH®)
38 3.4DÉCONNEXIONDURÉSEAUÉLECTRIQUE/COUPURED’ÉLECTRICITÉ
39 3.5 FONCTION INTELLIGENTE ITCS
39 3.6 FONCTION ÉCONOMIE “FENÊTRES OUVERTES”
39 4. ENTRETIEN
EN
16 SIMPLY
• Please read these instructions carefully.
• To disconnect mains power from the radiator remove the
plug from the wall socket, but never pull on the cable.
• Do not leave the mains cable in contact with the radiator
when it is switched on.
• During operation, the radiator must be kept well away from
combustible materials, such as curtains, carpets and furniture
etc.
• The warranty for the radiator does not cover any damage
caused by not reading these instructions.
WARNING: In order to avoid overheating, do not
cover the heater.
• WARNING: If the mains power cable is damaged, it must
be replaced by the manufacturer, with their after-sales
service or similar qualied persons, in order to prevent
any danger.
• WARNING: If the heater is to be installed in a bathroom,
it must be positioned so that it cannot be touched by
anybody in the bath or shower.
• The installation should be carried out with consideration
to the manufacturer’s instructions and in accordance to
the relevant National Wiring Regulations BS7671.
• It is very important that radiator has a good Electric Earth
connection.
• The radiator shall be installed so that its mains plug is always
accessible.
• The radiator must not be installed below or in front of a mains
socket.
• This radiator cannot be surface-mounted with a wall.
Safety distances shall always be respected.
1. CAUTION
EN
EN
SIMPLY 17
• This unit is not designed to be handled by persons (including
children) with physical, sensorial or mental handicaps, with
little experience or knowledge unless they are under the
supervision of an adult responsible for their safety with the
instructions on its use. Children shall always be supervised to
ensure they do not play with the unit.
• Children under three shall be kept well away from the heater
unless they are continually supervised.
• Children between three and eight shall only switch the unit o
or on providing it is positioned or installed in its nal operating
location and be supervised or have received instructions on
how to use the unit in a safe manner and understand the risks
involved.
• Children between three and eight shall not plug in, adjust or
clean the heater or carry out any maintenance operations.
• This unit may be used by children older than eight and by
persons with physical, sensorial or mental handicaps, with
little experience or knowledge, provided they have been duly
trained and are supervised by an adult that understands the
risks involved.
• Cleaning and maintenance shall be performed by adults not
children. Children must not play with the unit.
• WARNING: Certain parts of this product can become
very hot and cause burns. Special attention shall be paid
when children and other vulnerable persons are present.
• Do not touch the external parts of the radiator when it is
operating.
• It is quite normal that, with the rst switch-on, the unit
produces a “new” smell. Allow your heater to operate in a
well-ventilated place for two or three hours.
• Before the rst switch on for the coming winter or when the
heater has not been used for several days, the unit should be
1. CAUTION
EN
18 SIMPLY
• It is important that the radiator IS FIXED FIRMLY TO A SOLID AND LEVELLED WALL.
• Make sure that there is a socket near the area where you are going to place it.
• Take out the wall pattern from the box to see the exact positions of the necessary drill
holes.
• You must keep a minimum distance of 15 cm between the radiator and any object, wall
or combustible material.
IMPORTANT
2. INSTRUCTIONS FOR INSTALLATION
cleaned (follow the steps given in the “maintenance section”.This
cleaning operation will avoid burning the accumulated dust and
other remains.
• This radiator CAN’T OPERATE with external programmable
controllers or any other exterior control device.
• CAUTION: Keep bags and other accessories well out of the
reach of children.
• The convection eect, together with other ambient factors, can
cause discolouring to metal surfaces and to plastics.
• Temperature dierences can cause crackling and other noises in
the unit. This does not indicate any failure in the radiator.
• When the radiator is disposed of, the requirements established
by current legislation on waste processing and recycling shall be
taken into account.
EN
EN
SIMPLY 19
1
3
5
1
3
2
4
2
2. INSTRUCTIONS FOR INSTALLATION
Cardboard template
4 Screws
5.5 x 50 mm
Place the screw
but don’t
screw it fully.
(M. 6 x 40 mm)
Slide the
radiator up,
Place over top
tang and lower
gently into
position
Place
the radiator
EN
20 SIMPLY
7
6
Press ON /
OFF switch
located at the
right rear part
of the unit.
8
2. INSTRUCTIONS FOR INSTALLATION
Screw down
FULLY to lock
the radiator
INFORMATION
IMPORTANT:
(W)
600
900
1200
1500
1800
“A” (mm)
420
420
420
420
420
“B” (mm)
246
246
246
246
246
“C” (mm)
159
319
478
638
638
Plug in
3 pin 13 amp
plug
EN
EN
SIMPLY 21
3. OPERATION
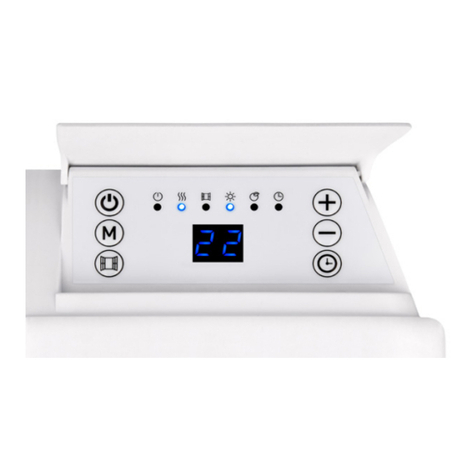
3.1 CONTROLS
1. Ambient Thermostat Knob
2. Antifreeze Mode
3. “In operation” Indicator LED
4. Comfort Mode
5. AUTO “Bluetooth®” Mode
6. “Bluetooth®” Indicator LED
* Press the ON/OFF button located on the right side.The appliance has a built in thermostat that
can be regulated and it controls the temperature.
* The “In operation” indicator LED will turn on indicating that the radiator is working.
* To settle the room temperature, turn the electronic thermostat control knob to the desired
position.
The electronic thermostat will maintain a constant temperature.
* The thermostat has an antifreeze position. With the thermostat control at minimum, the
appliance will start working when the room temperature goes down to 5ºC.
3.2 MANUAL MODE
1
2
36
4
5
The background colour of the “in operation” indicator LED will change when
the pre-set temperature is modied or changed, indicating the selected
temperature range to the user by showing:
• Red if the temperature is over 24ºC
• Yellow if it is higher than 19º and up to 24ºC
• Green if it is equal to or lower than 19ºC
• Blue if it is equal to or lower than 5ºC
NOTE 1
EN
22 SIMPLY
3. OPERATION
3.4 AUTO “BLUETOOTH®” MODE
Haverland has developed a simple and functional App so that you can make a weekly program,
day by day, hour by hour.
Download “Haverland BT” the application on your smartphone and / or tablet from the
AppleStore (iOS) or Google Play (Android).
HAVERLAND BT
Make sure you download the
correct App as indicated.
21
HAVERLAND BT
3
Start
Screen
Programming
Screen
4Choose comfort and
economy temperatures. 5By pressing successively on the
icons, choose the operating mode
required for each hour and day.
NOTE 2
EN
EN
SIMPLY 23
3. OPERATION
7
To facilitate programming, you can copy the program made one day to the next
days that you want.
Press on the day to be copied (for
example, Monday “1”).
Activate your BT
connection.
8Turn the thermostat control knob to the
AUTO position. The “Bluetooth®” LED will
flash.
NOTE 3
Press on the days to be copied (for example,
Tuesday, Wednesday and Thursday).
IMPORTANT:
If the “Bluetooth®” LED does not flash, turn
the knob counterclockwise and return to
the AUTO position.
6Press on the “Connect”
button to reach the
“Connection” screen.
EN
24 SIMPLY
3. OPERATION
OFF
9Press
Then, the radiator will be displayed
on your smartphone. Press on
“HAVERLAND” the radiator will be
selected (grey background).
The radiator is linked with
your smartphone or tablet.
12 To finish, “send” the
configured program to
your radiator by pressing:
10
11
EN
EN
SIMPLY 25
3. OPERATION
Once the program has been sent to the device, the radiator will switch to
automatic mode, whatever the current mode of operation is, including the “anti-
frost” mode.
MODO AUTOMÁTICO
If you do not remember the
program that is set on your
radiator, you can “recover
it” and look it up in the
PROGRAMMING screen, by
pressing:
To disconnect the
radiator from your
smartphone or
tablet and to set
other radiator, press:
The “BLUETOOTH®”
indicator LED indicate
that the radiator is in
AUTOMATIC mode and
is connected to your
smartphone.
NOTE 4
NOTE 5
NOTE 6
EN
26 SIMPLY
3. OPERATION
Remember that to link your mobile device with your radiator you must:
Press and turn the knob in AUTO position
NOTE 7
3.5 DISCONNECTING THE MAINS SUPPLY / SUPPLY CUT OFF
If the radiator is kept disconnected from the mains or if there is a mains supply cut o for more
than 2 hours, YOU MUST UPDATE THE CLOCK AND THE DAY OF THE WEEK.
The rest of the programmed parameters (temperatures and programming) are kept in memory.
TO UPDATE THE CLOCK AND THE DAY OF THE WEEK:
If you have downloaded the “Haverland BT” App,
link your mobile device to your radiator (follow the
previous point 6) and click on the App .
The clock and day will be updated via the internet.
EN
EN
SIMPLY 27
4. MAINTENANCE
4. MAINTENANCE
Your device does not require any type of special maintenance.
You need only clean any dust that may accumulate with a dry and soft cloth.
We advise that you clean any accumulated dust from the radiator surface at the beginning
of the winter season.
NEVER USE SOLVENTS OR ABRASIVE PRODUCTS.
NOTE 8
3.5 ITCS INTELLIGENT FUNCTION
The radiator incorporates an innovative ITCS smart temperature control system.
This system activates the start-up of the device in advance of the scheduled time (2
hours maximum), ensuring that the desired temperature is achieved at the specied time and
following the weekly schedule set.
This intelligent function is only available in AUTO mode.
3.6 ”OPEN WINDOW” FUNCTION
This function is activated when there is a sudden drop in the temperature in the room.
When closing the window, the radiator will detect a temperature rise or turn the thermostat
control knob to the left and turn again the thermostat control know to the AUTO position and
this function will be deactivated. The radiator will switch on again, returning to the state before
the disconnection.
NOTE 9
When this function is activated, the “In operation” Indicator LED appears on blue
(Anti-freeze Mode).
The radiator will be switched o avoiding unnecessary energy consumption.
NOTE 10
This intelligent function is only available in AUTO mode.
4. MAINTENANCE
MARSAN INDUSTRIAL, S.A. guarantees that the devices comply with the contracted specications.
This warranty only covers the model of heater showed on the valid invoice.
Such rectications will be guaranteed against any manufacturing and operating defect for the normal
and domestic use of this product, for a period of 24 months as from the purchase date shown on the
invoice.
HAVERLAND guarantees against material, design or manufacturing faults at the moment of its original
acquisition for 2 years. The electronic component and paintwork / nish for 3 years and 10 years for
the aluminium body (exclude accidental damage, transport, and misuse).
This warranty only covers the device whose model appears on the purchase invoice.
This warranty DOES NOT COVER incorrect installation, maintenance, cleaning or conserving the
device, and neither does it cover failures and faults due to force major, chemical agents or atmospheric
phenomena, incorrect use of the device, the purchaser’s faulty electrical installations, transporting the
device or problems caused by the device being handled by persons not authorised by MARSAN
INDUSTRIAL, S.A.
This warranty must not be modied, altered or extended, and the Manufacturer does not authorise
anybody to act on his behalf to modify, alter or extend it.
This warranty applies only to the Product.
To repair the device, the consumer must dial the Technical Assistance Service at 0330 3651940 or
send an email to [email protected] and ask for the information needed about the procedure
to follow:
For a replacement, cancellation or price reduction, when in order, the consumer must go the
establishment where the device was purchased. This warranty does not aect the consumers’ rights
as established in the provisions contained In Law 23/2003, the Consumer Goods Sales Guarantee
Act.
Haverland UK Limited
Challengue House
Sherwood Drive
Bletchley MK3 6DP
Marsan Industrial, S.A. reserves the right to modify without previous warning
Made in Spain
GUARANTEE
Customer Service Telephone:
0330 3651940
E-mail: [email protected]o.uk
Modelos / Models / Modèles / Modelos SIMPLY-4 SIMPLY-6 SIMPLY-8 SIMPLY-10 SIMPLY-12
Potencia caloríca / Heat output / Puissance thermique / Potência caloríca
Potencia caloríca nominal (kW)
Nominal heat output (kW)
Puissance thermique nominale (kW)
Potência caloríca nominal (kW)
0.6 0.9 1.2 1.5 1.8
Potencia caloríca máxima continuada (kW)
Maximum continuous heat output (kW)
Puissance thermique maximale continue (kW)
Potência caloríca contínua máxima (kW)
0.6 0.9 1.2 1.5 1.8
Consumo auxiliar de electricidad / Auxiliary electricity consumption / Consommation d’électricité auxiliaire / Consumo de
eletricidade auxiliar
A potencia caloríca nominal (kW)
At nominal heat output (kW)
À la puissance thermique nominale (kW)
À potência caloríca nominal (kW)
0.6 0.9 1.2 1.5 1.8
A potencia caloríca mínima (kW)
At minimum heat output (kW)
À la puissance thermique minimale (kW)
À potência calorí ca mínima (kW)
0.6 0.9 1.2 1.5 1.8
En modo de espera (kW)
In standby mode (kW)
En mode veille (kW)
Em estado de vigilia (kW)
N.A. N.A. N.A. N.A. N.A.
Tipo de control de temperatura interior
Type of heat room temperature control
Type de contrôle de la température de la
pièce
Tipo de comando da temperatura interior
Con control electrónico de temperatura interior y temporizador semanal
Electronic room temperature control plus week timer
Contrôle électronique de la température de la pièce et programmateur
hebdomadaire
Com comando eletrónico da temperatura inte rior e temporizador semanal
Otras opciones de control - Control de temperatura interior con detección de ventanas abiertas
- Con control de puesta en marcha adaptable
Other control options - Room temperature control, with open window detection
- With adaptive start control
Autres options de contrôle - Contrôle de la température de la pièce, avec détecteur de fenêtre ouverte
- Contrôle adaptatif de l’activation
Outras opções de comando - Comando da temperatura interior, com deteção de janelas abertas
- Com comando de arranque adaptativo
Nombre del fabricante / Name del fabricante /
Nom du fabricant / Nome do fabricante Marsan Industrial, S.A.
Dirección / Address / Adresse / Endereço Avda. San Martín de Valdeiglesias, Km 2.2 28925 Alcorcón (Madrid)
España / Spain / Espagne / Espanha
SIMPLY
WNº
900
1200
1500
1800
6
8
10
12
SIMPLY-4 600 4
230 V - 50 Hz
CLASE I / CLASS I
CLASSE I
SIMPLY-6
SIMPLY-8
SIMPLY-10
SIMPLY-12

This manual suits for next models

4

Other Haverland Heater manuals

Haverland XTAL BAGNO Manual

Haverland

Haverland XTAL BAGNO Manual

Haverland RC 6 E Quick guide

Haverland

Haverland RC 6 E Quick guide

Haverland ECO-DRY GPS Series Parts list manual

Haverland

Haverland ECO-DRY GPS Series Parts list manual

Haverland Designer TT Manual

Haverland

Haverland Designer TT Manual

Haverland Compact Series Parts list manual

Haverland

Haverland Compact Series Parts list manual

Haverland RCTT 2018 Version User manual

Haverland

Haverland RCTT 2018 Version User manual

Haverland RC WAVE User manual

Haverland

Haverland RC WAVE User manual

Haverland ES 4 User manual

Haverland

Haverland ES 4 User manual

Haverland RC3W Parts list manual

Haverland

Haverland RC3W Parts list manual

Haverland RCO Parts list manual

Haverland

Haverland RCO Parts list manual

Haverland HE600 User manual

Haverland

Haverland HE600 User manual

Haverland RCWave+ ANTHRACITE Parts list manual

Haverland

Haverland RCWave+ ANTHRACITE Parts list manual

Haverland OTTiMO Series Parts list manual

Haverland

Haverland OTTiMO Series Parts list manual

Haverland RCTT Manual

Haverland

Haverland RCTT Manual

Haverland DENVER 22 Parts list manual

Haverland

Haverland DENVER 22 Parts list manual

Haverland RCW Parts list manual

Haverland

Haverland RCW Parts list manual
Haverland RCES LCD Parts list manual

Haverland

Haverland RCES LCD Parts list manual

Haverland RC 4 A Manual

Haverland

Haverland RC 4 A Manual

Haverland OSYRIS Series User manual

Haverland

Haverland OSYRIS Series User manual

Haverland Wi SmartWave Series Manual

Haverland

Haverland Wi SmartWave Series Manual

Haverland RC11BL Manual

Haverland

Haverland RC11BL Manual

Haverland CHT-180 Parts list manual

Haverland

Haverland CHT-180 Parts list manual

Haverland IDK-1 User manual

Haverland

Haverland IDK-1 User manual

Haverland IDK-1 User manual

Haverland

Haverland IDK-1 User manual

Popular Heater manuals by other brands

Reece Kado Lussi installation instructions

Reece

Reece Kado Lussi installation instructions

Conair GasTrac user guide

Conair

Conair GasTrac user guide

Dimplex DXFF20TS Installation and operating instructions

Dimplex

Dimplex DXFF20TS Installation and operating instructions

Olimpia splendid CALDO UP Instructions for installation, use and maintenance

Olimpia splendid

Olimpia splendid CALDO UP Instructions for installation, use and maintenance

Empire Heating Systems DV-25-4SG Installation instructions and owner's manual

Empire Heating Systems

Empire Heating Systems DV-25-4SG Installation instructions and owner's manual

Aurora EAS4 Instruction guide

Aurora

Aurora EAS4 Instruction guide

GSi PNEG-012 Series Installation and operation

GSi

GSi PNEG-012 Series Installation and operation

Quick 854D instruction manual

Quick

Quick 854D instruction manual

Powrmatic PZN 12 User, installation & servicing instructions

Powrmatic

Powrmatic PZN 12 User, installation & servicing instructions

Rowenta SO 2040 manual

Rowenta

Rowenta SO 2040 manual

Delfield Meridian MHPT1-S Specifications

Delfield

Delfield Meridian MHPT1-S Specifications

Brava STELPRO AB41002W owner's manual

Brava

Brava STELPRO AB41002W owner's manual

Blyss WDH-122E manual

Blyss

Blyss WDH-122E manual

Midea NTH15-20AR Maintenance manual

Midea

Midea NTH15-20AR Maintenance manual

Winterwarm HR10 instruction manual

Winterwarm

Winterwarm HR10 instruction manual

Adler Europe AD 7714 user manual

Adler Europe

Adler Europe AD 7714 user manual

CONVECTAIR Allegro 7300-C07 Installation notes

CONVECTAIR

CONVECTAIR Allegro 7300-C07 Installation notes

Rinnai FC824 Installation and operation manual

Rinnai

Rinnai FC824 Installation and operation manual

manuals.online logo
manuals.online logoBrands
  • About & Mission
  • Contact us
  • Privacy Policy
  • Terms and Conditions

Copyright 2025 Manuals.Online. All Rights Reserved.