5-9406-F-99-X
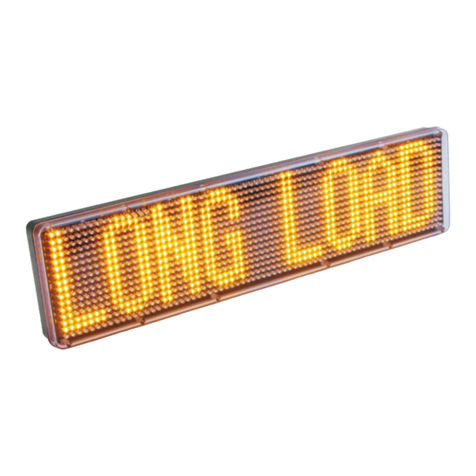
Flip-Up LED Message Sign
M243.1.2 - 2 - March 2022
Installation Instructions:
▪Determine a suitable location within the vehicle to mount the message sign. Ideally this
should be a solid surface and where the wiring looms can reach the desired position for the
controller
▪Drill suitable sized holes to match those in the message sign base (6.5mm)
▪Use the bracket and fixings provided to securely mount the message sign in the required
location
▪The message sign can be angled so that when raised, it will face in the required direction
for maximum visibility
▪Connect the main loom to the message sign using the 4-pin connector, then connect the
loom to the LCD handset
▪Connect the red wire to +12VDC and the black wire to earth/ground
Software Installation:
▪Handsets are usually supplied pre-programmed. However, programming software and
hardware can be purchased separately
▪Insert the Haztec memory stick into the USB port of your PC or Laptop
▪If the PC or Laptop is set up to autorun when a USB stick is inserted into the drive, follow
the on-screen instructions for software installation
▪If the software installation does not begin automatically, browse to the contents of the USB
and double-click on the ‘Setup USB’ file. This will begin the installation process; please
follow the on-screen instructions
▪Once the software has successfully installed, navigate to the programs folder and click on
‘EasyProgrammer2009’
▪Click on the icon ‘EasyProgrammer2009 for USB’ to launch the programming software
▪The main programming screen will the open (Fig.1)
Entering Text:
▪To edit the default message ‘test1’; click the cursor just after the ‘1’ and use the backspace
key to delete the characters
▪Type in the required text
▪Each message entry has a maximum of 18 characters available using normal type fonts.
These are split onto 2 lines each of 9 characters long
▪When the first line has been filled with text the cursor will automatically return to the start
of the second line (Fig. 2)
▪Once the message has been entered, confirm by clicking the ‘tick’ at the bottom right-hand
side of the screen (Fig.3). The message will then appear in the icon view pane to the right-
hand side (Fig.1)
▪To create another message, click on the ‘+’ icon (Fig.3) and follow the steps for text entry
