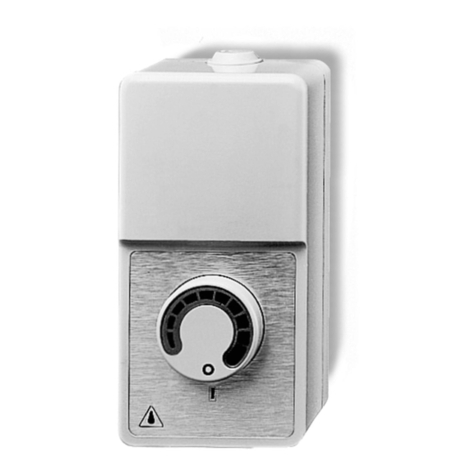
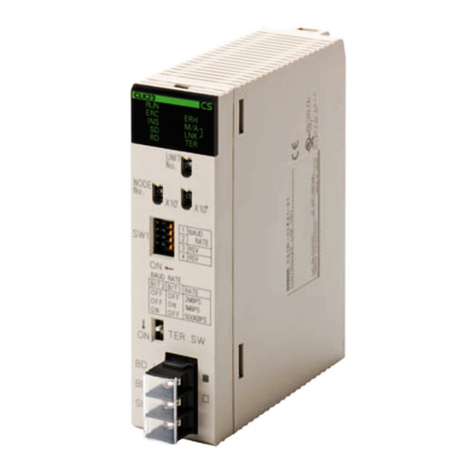
Helios TSD 0,8 User manual

Trafo-Drehzahlsteller TSD 0,8 – 11 / TSW 1,5 – 12
Transformer controller TSD 0,8 – 11 / TSW 1,5 – 12
Régulateur de vitesse à transformateur TSD 0,8 – 11 / TSW 1,5 – 12
1
MONTAGE- UND BETRIEBSVORSCHRIFT
Zur Sicherstellung einer einwandfreien Funktion
und zur eigenen Sicherheit sind alle nachstehenden
Vorschriften genau durchzulesen und zu beachten.
EMPFANG
Sendung sofort bei Anlieferung auf Beschädigungen
und Typenrichtigkeit prüfen. Falls Schäden vorliegen,
umgehend Schadensmeldung unter Hinzuziehung
des Transportunternehmens veranlassen. Bei nicht
fristgerechter Reklamation gehen evtl. Ansprüche
verloren.
EINLAGERUNG
Der Lagerort muss erschütterungsfrei, wasserge-
schützt und frei von Temperaturschwankungen sein.
Schäden, deren Ursache in unsachgemäßem Trans-
port, Einlagerung oder Inbetriebnahme liegen, sind
nachweisbar und unterliegen nicht der Gewährlei-
stung.
EINSATZBEREICH
Diese 1~ u. 3~ Trafo-Drehzahlsteller sind Einheiten
zur 5-stufigen Drehzahlsteuerung von dafür geeigne-
ten Ventilatoren. An ein Steuergerät können mehre-
re Ventilatoren (auch mit Motoren unterschiedlicher
Leistung) bis zur Nennstrom-Belastung des Trafo-
Steuergerätes angeschlossen werden.
Mit dem Ausgang NK-LK kann z.B. eine Klappe an-
gesteuert werden. An LK liegen 230 V an, wenn sich
der Stufenschalter nicht auf „0“ befindet.
WICHTIG: Der Motor bzw. die Motoren, die an das
Trafo-Steuergerät angeschlossen werden, müssen
für den Betrieb mit Drehzahlverstellung über einen
Transformator (Spannungssteuerung) geeignet sein.
Die max. Stromaufnahme des Motors (der Motoren)
darf den max. Ausgangsstrom des Trafo-Steuerge-
rätes nicht übersteigen. Eine Motorüberwachung fin-
det nicht statt. Diese ist bauseits durch geeignetes
Zubehör (z.B. MW und MD) sicherzustellen.
– Max. Strom
Bei Auswahl der Steller, ist die unterschiedliche Strom-
aufnahme bei den Spannungen zu berücksichtigen.
Dies ist bei der Steller-Zuordnung zu den Ventilatoren
in den Druckschriften bereits berücksichtigt. Werden
die Regler selbständig zu bestehenden Anlagen aus-
gewählt, ist der zulässige max. Strom gemäß Dia-
gramm (siehe unten) zu beachten, da sonst der Regler
zu heiß werden kann.
ALLGEMEINE HINWEISE
Nach VDE 100 Teil 720 und Teil 705 sind elektrische
Maschinen durch eine geeignete Motorschutzeinrich-
tung abzusichern.
Untersuchungen und statistische Auswertungen von
Motorausfällen ergaben, dass in der Mehrzahl der
Fälle der Motor durch zu hohe Temperaturen zerstört
worden ist. Speziell bei Ventilatorantrieben kann eine
überhöhte Wicklungstemperatur nicht nur aus block-
iertem Laufad resultieren, sondern auch durch:
– starke Verschmutzung
– zu geringer Luftdurchsatz bei geschlossenen
Klappen
– zu hohe Fördermitteltemperatur
– falsche Betriebsweise
– falsche Drehrichtung (Radialventilatoren)
– zu geringer Gegendruck (Radialventilatoren)
– Betrieb im unzulässigen Kennlinien-Bereich
– zu häufiges Ein- und Ausschalten
– schwergängige Lager
Um den Totalausfall der Anlage zu vermeiden, ist eine
Temperaturüberwachung im Motor durch Thermo-
kontakte und ein entsprechendes Auslösegerät mit
einer Wiedereinschaltsperre sinnvoll.
INSTALLATION AND OPERATING INSTRUCTIONS
It is important for safety reasons, that you read
and observe these instructions fully before pro-
ceeding.
RECEIPT
Please check consignment immediately on receipt
for accuracy and damage. If damaged, please notify
carrier immediately. Delay in notification may invalida-
te any possible claim.
STORAGE
The storage area must be free of water, vibration and
temperature variations.
Damages due to improper storage, transportation or
installation are not liable for warranty.
OPERATION
These single phase and three phase controllers regu-
late the speed of the motor in 5 steps . Several ven-
tilators (also with motors of different ratings) may be
connected to one controller. However, the total load
current must not exceed the nominal output current
of the controller.
The NK-LK give a full single phase power output to
switch other equipment on at the same time as the
motor. (e.g. Motorised shutter).
IMPORTANT: The motor(s)for connection to the cont-
roller must be suitable for transformer reduced voltage
speed control. The total maximum current load of (all)
the motor(s)connected to the controller must not ex-
ceed the nominal output current of the transformer
speed controller. A motor protection is not included in
this unit. Suitable motor protection must be provided
with in the system. (for example MW and MD).
- Max. current
For the selection of a controller the different power
consumption in connection with the voltage has to
be put into consideration. In the publication of Helios
the allocation of the different controllers has to be
indicated. If the controllers will be selected by the
clients the max. admissible current has to be consi-
dered according to the diagram (see below) because
the controller could be overheated.
GENERAL INFORMATION
According to the regional and national electrical
safety regulations as well as the EN-Norm, all elec-
trical motors are to be protected through a suitable
motor protective device. Most motors are destroyed
through overheating. Causes can include:
- impeller obstruction
- excessive dust or dirt on motor
- too low air flow, where shutters are used
- too high air flow temperature
- incorrect operation
- wrong direction of rotation (centrifugal fans)
- resistance too low (forward curved centrifugal fans)
- operation at unsuitable working point (see perfor-
mance curve)
- frequent switching
- worn bearings
To avoid damaging the equipment, Helios recom-
mend monitoring the motor temperature through
thermal contacts connected to a manually resettable
motor protection device.
MOUNTING
The maximum admissible ambient temperature during
operation is + 40°C. The controller must be mounted
vertically onto a solid surface, or horizontal to a solid,
not inflammable surface. The controller must not be
mounted upside down. The cable entries should point
down.
NOTICE DE MONTAGE ET D’UTILISATION
Il est important de lire et de respecter l‘ensemble
des prescriptions suivantes, pour le bon foncti-
onnement de l‘appareil et la sécurité des utilisa-
teurs.
RECEPTION
Dès réception, vérifier l‘état et la conformité du ma-
tériel commandé. En cas d‘avaries, des réserves doi-
vent être portées sur le bordereau du transporteur.
Elles doivent être précises, significatives, complètes
et confirmées dans les 3 jours par lettre recommandée.
Attention: le non-respect du délai peut entraîner le re-
jet de la réclamation.
STOCKAGE
Le matériel est à stocker dans un endroit abrité de
l‘eau, exempt de variations de température et de vi-
brations. Les dommages dus à de mauvaises condi-
tions de transport, à des stockages défectueux ou à
une utilisation anormale sont sujets à vérification et
contrôle et entraînent la suppression de notre garantie.
DOMAINE D’UTILISATION
Ces régulateurs de vitesse à 5 étages à transforma-
teur 1~ et 3~ sont conçus pour des moteurs régu-
lables. Plusieurs ventilateurs (même de puissances
et de types différents) peuvent être raccordés à un
même transformateur.
Les bornes NK-LK permettent par ex. de com-
mander un volet. La tension à la borne LK est de 230
V, si le sélecteur n’est pas en position „0“.
IMPORTANT: Le(s) moteur(s) doit (doivent) être con-
çus pour la régulation de vitesse par modificationde
tension. Le courant nominal du moteur ne doit pas
excéder celui indiqué sur la plaque signalétique du
transformateur. Il n’y a pas de protection moteur. La
prévoir en utilisant des accessoires adaptés (par ex.
MW et MD).
– Courant maximum
Pour la sélection des TSD/TSW, il faut tenir compte
des courants admissibles aux différentes tensions. Les
régulateurs affectés aux ventilateurs Helios ont été dé-
terminés en tenant compte de cette caractéristique. Si
les régulateurs sont utilisés avec d’autres ventilateurs
ou installations, vérifier le courant admissible en réduc-
tion de tension (risque de surchauffe du transforma-
teur). Voir diagramme ci-dessous.
REMARQUES GENERALES
Selon les normes de sécurité électriques régionales
et nationales VDE 100 partie 720 et partie 705 et se-
lon les normes EN, les moteurs électriques doivent
être protégés par un appareil de protection approprié.
Les recherches et études statistiques sur des mo-
teurs cassés ont montré que dans la plupart des cas,
le moteur a été détruit à cause des températures
trop élevées. Surtout sur les ventilateurs, une tempé-
rature trop élevée du bobinage ne résulte pas seule-
ment d’un blocage de l’hélice mais aussi:
– d’un encrassement
– d’un débit d’air insuffisant, par ex. volets fermés
– d’une température du fluide véhiculé trop élevée
– d’un mauvais mode d’application
– d’un mauvais sens de rotation
(ventilateurs centrifuges)
– d’une perte de charges trop faible (ventilateurs
centrifuges)
– d’un fonctionnement dans une plage de la
courbe du ventilateur non admise
– d’un fonctionnement marche-arrêt trop fréquent–
– d’une surcharge par roulements à billes grippés.

Trafo-Drehzahlsteller TSD 0,8 – 11 / TSW 1,5 – 12
Transformer controller TSD 0,8 – 11 / TSW 1,5 – 12
Régulateur de vitesse à transformateur TSD 0,8 – 11 / TSW 1,5 – 12
2
AUFSTELLUNG
Die max. Umgebungstemperatur während des Be-
triebs ist +40° C. Das Steuergerät muss senkrecht
an eine stabile Wand, oder horizontal auf eine stabi-
le, nicht brennbare Unterlage montiert werden. Das
Steuergerät darf nicht kopfüber (d.h. oben nach unten)
montiert werden. D.h. die Kabeleinführungen müssen
nach unten zeigen. Es darf nicht an oder direkt unter
der Decke montiert werden. Zur Kühlung muss um
das Gerät umlaufend ein Abstand von mind. 5 cm
eingehalten werden, um ausreichende Luftzirkulation
zu ermöglichen.
SICHERHEIT
Bei Einbau sind die gültigen Arbeitsschutz- und Un-
fallverhütungsvorschriften (VDE, DIN) zu beachten.
ELEKTRISCHE INSTALLATION
ACHTUNG: Alle Arbeiten sind in spannungsfreiem
Zustand durchzuführen.
Der elektrische Anschluss darf nur von einer au-
tori-sierten Elektrofachkraft durchgeführt werden.
Die einschlägigen Sicherheitsvorschriften, Normen
und Richtlinien (VDE 0100 und VDE 0700 sowie die
TAB‘s der EVU‘s und UVV) sind einzuhalten. Eben-
so ist die Montage- und Betriebsvorschrift des Venti-
lators zu beachten.
Die Einführung der Zuleitung ist so vorzunehmen,
dass bei Wasserbeaufschlagung kein Eindringen ent-
lang der Leitung möglich ist. Leitung nie über scharfe
Kanten führen.
BETRIEB IN VERBINDUNG MIT KANALVENTI-
LATOR KVD... EX UND DACHVENTILATOREN
RD/VD...EX
Sofern durch die Ex-Konformitätserklärung des Ven-
tilatormotors zugelassen, kann diese Gerätetype mit
dem TSD drehzahlgesteuert werden. Dabei ist zu be-
achten:
– Der TSD muss zwingend außerhalb des Ex-Berei-
ches installiert werden.
– Da ein Betrieb bei 80 V nicht zugelassen ist,
muss die Stufe 1 von 80 V auf 115 V geändert
werden.
ACHTUNG: Die Motorzuleitungen müssen ent-
sprechend den gültigen Normen und Richtlinien
abgesichert werden. Die Angaben der Konfor-
mitätserklärung des Ventilator-Motors sind bin-
dend!
MONTAGESCHRITTE
ACHTUNG: Alle Arbeiten sind in spannungsfrei-
em Zustand durchzuführen.
a) Mechanisch
– Den Deckel des Steuergerätes entfernen, bzw. die
Fronttür öffnen.
– Auf der Rückseite sind Montagelöcher vorhanden.
Bei einigen Kunststoffgehäusen müssen diese
Löcher vorher durchgestochen werden. Bei Metall-
gehäusen zuerst die Kunststoffstopfen entfernen.
– Falls notwendig, kann die Montageplatte mit allen
Aufbauten aus dem Gehäuse herausgenommen
werden, um die Montage zu erleichtern.
– Zur Montage müssen geeignete dauerhafte
Schrauben bzw. Befestigungsmaterialien verwen-
det werden.
– Nachdem das Gehäuse montiert wurde, müssen
die Löcher verschlossen werden (um die IP Schutz-
klasse aufrecht zu erhalten).
b) Elektrisch
Das Trafo-Steuergerät gemäß dem beigefügten
Schaltplan und den Bezeichnungen der Klemmen-
leiste anschließen. Der Schutzleiter (grün-gelb) der
Netzanschlussleitung und jedes andere Gerät das an
den Trafo-Drehzahlsteller angeschlossen wird, muss
an die PE-Klemmen, bzw. der PE-Klemmstelle (falls
vorhanden) angeschlossen werden.
It must not be mounted directly under, or onto the
ceiling. To ensure adequate cooling, a minimum dis-
tance of 5 cm is required around the controller.
SAFETY
Please ensure that the relevant safety regulations are
observed during installation and operation.
ELECTRICAL CONNECTION
ATTENTION: All work must be carried out with the
equipment fully isolated from the power supply.
All electrical connections are to be carried out in ac-
cordance with the relevant wiring diagram and are
only to be carried out by a qualified electrician. All
relevant safety regulations, national standards and
norms are to be adhered to. The Installation and
Operation Instruction for the fans are also to be ob-
served.
The cable entry into the unit should be made using
the cable glands supplied to maintain the IP rating
of the unit (i.e. to prevent moisture entering the unit).
Never pass electrical cable over sharp edges.
OPERATION IN CONNECTION WITH EXPLO-
SION PROOF RECTANGULAR-CENTRIFUGAL
FANS KVD..EX AND ROOF FANS RD/VD...EX
If the fan motor is certified as being explosion proof
and speed controllable, this device can be speed
controlled by TSD. It is essential that the following are
observed:
- The TSD can not be used in the hazardous area
and must be installed outside of the Ex-range.
- Since an operation under 100 V is not permitted,
step 1 of the controller must be changed from
80 V to 100 V.
ATTENTION: The motor supply cables must be
secured according to the current standards an-
degulations. The specifications of the declaration
of conformity of the fan motors are obligatory.
INSTALLATION
ATTENTION: All work must be carried out with the
equipment fully isolated from the power supply.
a) mechanical
- Remove cover or open the door of the controller.
- Mounting holes are provided on the inside back pa-
nel of the enclosure.
- On some of the plastic enclosures the mounting ho-
les should be opened by knocking out the
membrane covering the mounting hole. Metal en-
closures have blanking plugs covering the moun-
ting holes.
- For the ease of mounting, the mounting plate may
be removed from the enclosure.
- The controller enclosure should be mounted using
corrosion resistant screws or bolts as required.
- Once secured in position, the mounting screws or
bolts should be sealed to maintain the IP-rating
of the enclosure.
b) electrical
The controller should be wired in accordance with
the wiring diagram supplied with the controller and
markings on the terminals. The earth-wire (green-yel-
low) of the electrical supply and of any equipment
con-nected to the controller must be connected to
the terminals marked PE.
TERMINAL NK / LK
A shutter or another control unit for 230 V and max.
2 A can be connected to the terminal NK / LK.
PUTTING INTO OPERATION
Check if the switch of the controller is in „0“ position.
Check the mains supply voltage (rated voltage, tole-
rance +6%, -10%).
Pour éviter la détérioration totale de l’installation, un
contrôle de la température dans le moteur par des
thermocontacts et un appareil de coupure et de pro-
tection totale du moteur avec réarmement manuel
après disjonction, sont conseillés.
INSTALLATION
La température ambiante pendant le fonctionnement
ne doit pas excéder +40°C. Le régulateur doit être
monté sur une paroi verticale ou sur un plan horizon-
tal stable non inflammable. Le régulateur ne doit pas
être monté à l’envers. Les entrées de connections
doivent en effet se trouver sous le régulateur.
L’appareil ne doit pas être monté directement sous
ou au plafond. Pour des raisons de refroidissement,
un espace de 5 cm autour du régulateur est à re-
specter.
SECURITE
Lors de l’installation, il faut respecter strictement les
prescriptions concernant la protection du travail et la
prévention des accidents (VDE, DIN).
BRANCHEMENT ELECTRIQUE
ATTENTION: Tous les travaux doivent être effec-
tués hors tension.
Le branchement électrique doit être effectué par un
électricien qualifié. Les consignes de sécurité et les
règles d‘installation en vigueur ( VDE 0100, VDE 0700
et TAB, EVU, UVV) doivent être respectées. De plus,
il est impératif de respecter les indications données
dans la notice de montage et d’utilisation. Le passa-
ge du câble d’alimentation doit être effectué de telle
sorte qu’un éventuel filet d’eau ne puisse pas s’infil-
trer le long du câble. Ne pas fairepasser le câble sur
des surfaces tranchantes.
FONCTIONNEMENT AVEC UN VENTILATEUR
DE GAINE RECTANGULAIRE KVD... EX ET
RD/VD... EX
Si le moteur du ventilateur a obtenu le certificat de
conformité Ex, ce type d’appareil peut être régulé
avec le régulateur TSD. Pour cela, prendre en compte
les éléments suivants:
– Le TSD doit être obligatoirement installé en dehors
de la zone antidéflagrante.
– Un fonctionnement en 80 V n’est pas permis,
il faut donc passer en vitesse 1 de 80 V à 115 V.
ATTENTION: le câblage du moteur doit se faire
conformément aux normes et directives en vigu-
eur. Les indications données dans le certificat de
conformité Ex sont à respecter impérativement.
ETAPES DU MONTAGE
ATTENTION: tous les travaux doivent être effec-
tués hors tension.
a) Mécanique
– Enlever le couvercle ou ouvrir la porte du boîtier du
transformateur.
– A l’arrière des boîtiers se trouvent les points de
fixation. Pour certains boîtiers en plastique, ces
trous de fixation doivent être perforés. Pour les
boîtiers métalliques, il faut enlever les protections
en plastique des points de fixation.
– La plaque de base peut être enlevée pour faciliter
le raccordement.
– Pour la fixation, utiliser des vis et chevilles pour fi-
xation murale ou vis et écrous.
– Après la fixation, veillez à l’étanchéité des points
de fixation (pour maintenir la classe IP).
b) Electrique
Raccorder le transformateur suivant le schéma de
raccordement livré avec le transformateur et les spé-
cifications indiquées sur les bornes de raccordement.
Le fil de terre (jaune-vert) de l’alimentation électrique
doit être raccordé à la borne PE, et éventuellement à
d’autres bornes PE si elles existent.

ANLSCHUSS NK / LK
An die Klemme NK/LK kann eine Klappe oder ein
anderes Steuergerät von 230 V und max. 2 A ange-
schlossen werden.
INBETRIEBNAHME
Überprüfen, ob der Schalter am Trafo-Steuergerät
in Position „0“ steht. Die Versorgungsspannung
überprüfen (Nennspannung, Toleranz + 6%, – 10%).
Zuerst die Versorgungsspannung (Netz) einschalten
und dann das Steuergerät. Die grüne Lampe außen
am Gerät muss leuchten. Die Spannung in jeder
Schalterposition überprüfen (lt. technischen Daten).
Im Fehlerfalle die Sicherung im Gerät überprüfen (nur
TSW).
WARTUNG
Das Trafo-Steuergerät benötigt keine besondere
Wartung. Zur Reinigung kann ein feuchtes Tuch ver-
wendet werden. Es darf auf keinen Fall mit einem
Schlauch abgespritzt werden.
ACHTUNG: Alle Arbeiten sind in spannungsfreiem
Zustand durchzuführen.
ZUBEHÖR, SCHALT- UND STEUERELEMENTE
Der Gebrauch von Zubehörteilen, die nicht von Helios
empfohlen oder angeboten werden, ist nicht statt-
haft. Eventuell auftretende Schäden unterliegen nicht
der Gewährleistung.
GARANTIEANSPRÜCHE – HAFTUNGSAUS-
SCHLUSS
Wenn die vorausgehenden Ausführungen nicht be-
achtet werden, entfällt unsere Gewährleistung und
Behandlung auf Kulanz. Gleiches gilt für abgeleitete
Haftungsansprüche an den Hersteller.
VORSCHRIFTEN – RICHTLINIEN
Bei ordnungsgemäßer Installation und bestimmungs-
gemäßem Betrieb entspricht das Gerät den zum Zeit-
punkt seiner Herstellung gültigen Vorschriften und
Richtlinien CE.
Trafo-Drehzahlsteller TSD 0,8 – 11 / TSW 1,5 – 12
Transformer controller TSD 0,8 – 11 / TSW 1,5 – 12
Régulateur de vitesse à transformateur TSD 0,8 – 11 / TSW 1,5 – 12
3
Switch on the mains power supply first, and then the
controller. The green light on the outside of the en-
closure will be on. Check the voltage given in every
switch position (see technical data). In case of failure,
check the fuse inside of the enclosure. (only TSW).
MAINTENANCE
The controller needs no specific maintenance. The
housing may be cleaned using a moist cloth. It must
not be hosed down.
ATTENTION: All work must be carried out with the
equipment fully isolated from the power supply.
ACCESSORIES, SWITCHES AND
CONTROLLING DEVICES
The use of accessories not offered or recommended
by Helios is not permitted. Any potential damage
claims become invalid.
WARRANTY - EXCLUSION OF LIABILITY
If the preceding instructions are not observed all war-
ranty claims are excluded. The Helios warranty is limi-
ted to the material and workmanship of the product.
CERTIFICATES
The products are manufactured in compliance with
applicable European standards and regulations.
Stromreduzierungskurven TSW 1,5 - 12
0
20
40
60
80
100
120
230170 130100 80
Ausgangsstufe (V)
Belastbarkeit (%)
TSW 3 + MWS 3
TSW 5 + MWS 5
TSW 7,5
TSW1,5 + TSW10 +
TSW12 + MWS1,5 +
MWS7,5 + MWS10
Stromreduzierungskurven TSD 0,8 - 11
0
20
40
60
80
100
120
400280 200140 80
Ausgangsstufe (V)
Belastbarkeit (%)
RDS 1
RDS 2
RDS 4
RDS 7 + TSD 7
RDS 11 + TSD 11
TSD 0,8
TSD 1,5
TSD 3
TSD 5,5
Stromreduzierungskurve TSW 1,5 - 12
power reduction curves TSW 1,5 - 12
Courbes de réduction de courant TSW 1,5 - 12
Charge admissible en %
capacity (%)
Stromreduzierungskurve TSW 0,8 - 11
power reduction curves TSW 0,8 - 11
Courbes de réduction de courant TSW 0,8 - 11
capacity (%) Charge admissible en %
RACCORDEMENT NK / LK
Une électrovalve ou un servo-moteur peuvent être
raccordés aux bornes LK et NK ( tension 230 V, maxi
2 A).
MISE EN MARCHE
Vérifier si le commutateur est en position „0”. Vérifier
la tension d’alimentation
(tension nominale, tolérance
+ 6%, – 10 %)
. Enclencher d’abord l’interrupteur gé-
néral et ensuite le régulateur. La lampe verte sur le boî-
tier de commande doit alors s’allumer. Vérifier la tension
pour chaque position du commutateur (conformément
aux données techniques). En cas de défaut, vérifier le
fusible à l’intérieur du boîtier
(seulement TSW)
.
ENTRETIEN
Le régulateur à transformateur ne nécessite aucun
entretien particulier. Pour nettoyer le boîtier, utiliser un
chiffon humide. En aucun cas le régulateur ne doit
être nettoyé au jet d’eau.
ATTENTION: tous les travaux doivent être effec-
tués hors tension.
ACCESSOIRES, APPAREILS DE TEMPORISA-
TION ET DE REGULATION
L’utilisation d’accessoires et d’équipements qui ne
sont pas directement fournis ou conseillés par Helios
n´est pas autorisée. Nous déclinons toute responsa-
bilité en cas de défaut consécutif à leur utilisation.
DEMANDE DE GARANTIE - RESERVES DU
CONSTRUCTEUR
En cas de non-respect des indications précédentes,
toute demande de remplacement ou de réparation à
titre gratuit sera déclinée. Il en sera de même pour
toute implication de responsabilité du fabricant
REGLEMENTATIONS - NORMES
Cet appareil est conforme aux directives CE en vigu-
eur le jour de sa fabrication sous réserve d’une utili-
sation appropriée.

Trafo-Drehzahlsteller TSD 0,8 – 11 / TSW 1,5 – 12
Transformer controller TSD 0,8 – 11 / TSW 1,5 – 12
Régulateur de vitesse à transformateur TSD 0,8 – 11 / TSW 1,5 – 12
Ausgang für Klappe
Port for shutter
Sortie pour volet
92822 001 SS-437,1 07.06.10
TSW 5,0 bis 12
max A
PE PE N L1
NU1NKLK
MW
TK M
1~ TK M
1~
MW
L1NPE
230V 50/60 Hz
PE
2 2
TSD 0,8 - 11,0
F=Imax
92823 002 SS-436,2 20.01.04
PE L1 L2 L3N
MD
MD
M
3~
M
3~
TK TK
PE PE PE N N L1 L2 L3 U1 V1 W1NK LK 80V 115V 80V 115V
Ausgang für Klappe
Port for shutter
Sortie pour volet
Service und Information
DHELIOS Ventilatoren GmbH & Co · Lupfenstraße 8 · 78056 VS-Schwenningen FHELIOS Ventilateurs · Le Carré des Aviateurs · 157 av. Charles Floquet · 93155 Le Blanc Mesnil Cedex
CH HELIOS Ventilatoren AG · Tannstraße 4 · 8112 Otelfingen GB HELIOS Ventilation Systems Ltd. · 5 Crown Gate · Wyncolls Road · Severalls Industrial Park ·
AHELIOS Ventilatoren GmbH · Postfach 854 · Siemensstraße 15 · 6023 Innsbruck Colchester · Essex · CO4 9HZ
Druckschrift-Nr. 90 772 -000/ 0518
Ausgang für Klappe
Port for shutter
Sortie pour volet
85155 001 SS-960 07.06.10
TSW 1,5 bis 3,0
max A
PE PE NNL1 U1NKLK
MW
TK M
1~ TK M
1~
MW
L1NPE
230V 50/60 Hz
PE
2 2
SS-436.2
SS-960
SS-437.1
This manual suits for next models
5
Other Helios Controllers manuals
Helios
Helios PA Series User manual
Helios
Helios 5 Target User manual
Helios
Helios KWL-BEC User manual
Helios
Helios ESA User manual
Helios
Helios WS 1,5 User manual
Helios
Helios KWL-BE User manual
Helios
Helios KWL-BE Touch User manual
Helios
Helios KWL-MZB-BE User manual
Helios
Helios EDR Owner's manual
Helios
Helios KWL 45 BEU User manual
Helios
Helios ESD User manual
Helios
Helios TSD 0,8-11 User manual
Helios
Helios ESE 2,5 Service manual

Helios
Helios TDS 0,8 User manual
Helios
Helios MWS User manual

Helios
Helios KWL-BE Eco User manual
Helios
Helios 90 770 User manual
Helios
Helios AIR1-BE ECO User manual
Helios
Helios KWL-MZB-ZR User manual
Helios
Helios ETR User manual
