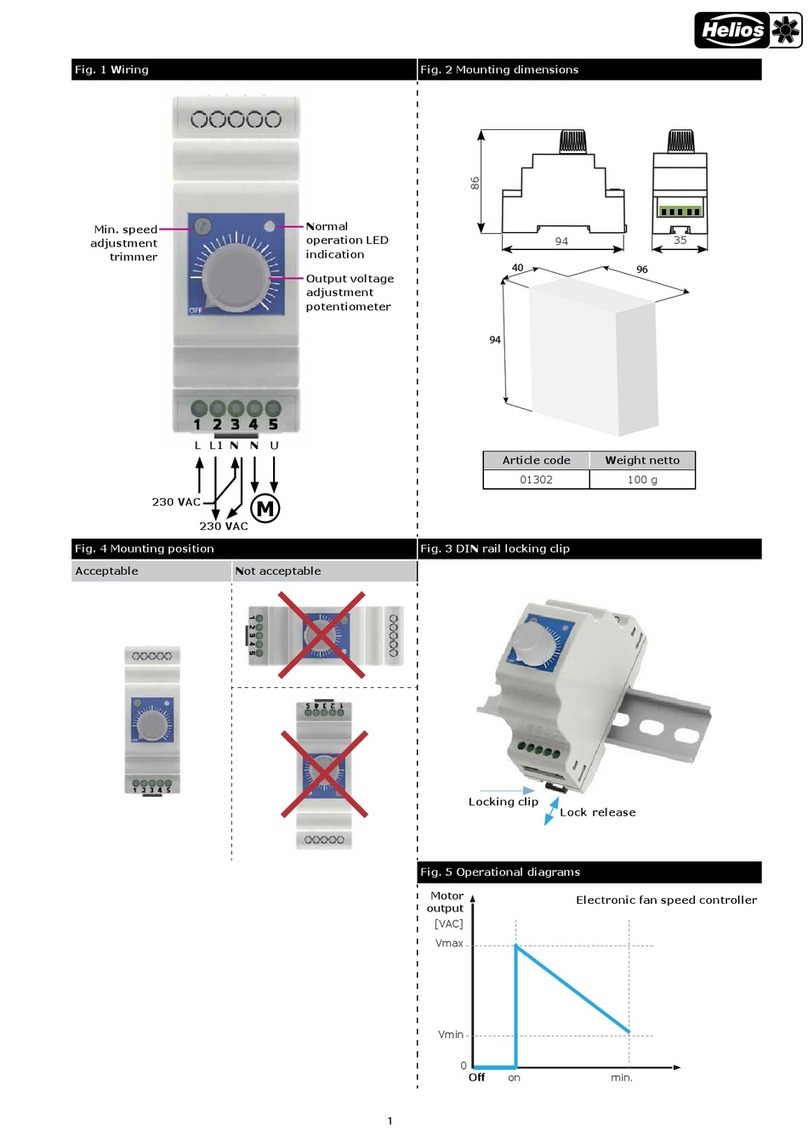
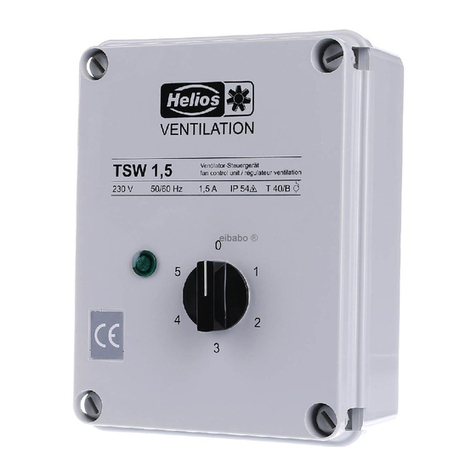
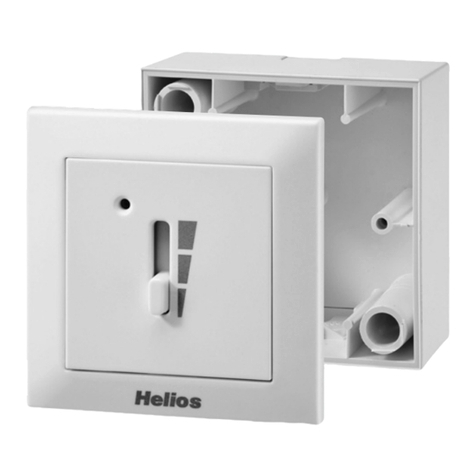
Helios WS 1,5 User manual

Trafo-Drehzahlsteller mit Motorvollschutzeinrichtung MWS
Transformer controller with full motor protection unit MWS
Régulateur à transformateur avec protection moteur intégrée MWS
MONTAGE- UND BETRIEBSVORSCHRIFT
NR. 90 769
Zur Sicherstellung einer einwandfreien Funktion und
zur eigenen Sicherheit sind alle nachstehenden Vor-
schriften genau durchzulesen und zu beachten.
EMPFANG
Sendung sofort bei Anlieferung auf Beschädigungen
und Typenrichtigkeit prüfen. Falls Schäden vorliegen,
umgehend Schadensmeldung unter Hinzuziehung
des Transportunternehmens veranlassen. Bei nicht
fristgerechter Reklamation gehen evtl. Ansprüche
verloren.
EINLAGERUNG
Es wird empfohlen, das Gerät bis zur Aufstellung in
der Originalverpackung zu belassen, um mögliche
Beschädigungen und Verschmutzungen zu vermei-
den. Bei Einlagerung über einen längeren Zeitraum
sind zur Verhinderung schädlicher Einwirkungen fol-
gende Maßnahmen zu treen: Schutz durch trocke-
ne, luft- und staubdichte Verpackung (Kunststobeu-
tel mit Trockenmittel und Feuchtigkeitsindikatoren).
Der Lagerort muß erschütterungsfrei, wasserge-
schützt und frei von Temperaturschwankungen sein.
Schäden, deren Ursache in unsachgemäßem Trans-
port, Einlagerung oder Inbetriebnahme liegen, sind
nachweisbar und unterliegen nicht der Gewährlei-
stung.
EINSATZBEREICH
Dieser 1~ Wechselstrom Transformator-Drehzahl-
steller ist eine Einheit zur Drehzahlstufenumschaltung
von Elektromotoren, die für Transformatorbetrieb ge-
eignet sind.
Über das Trafo-Steuergerät kann der Motor in 5 Dreh-
zahlen betrieben werden.
An ein Steuergerät können auch mehrere Ventilatoren
(auch mit Motoren unterschiedlicher Leistung) bis zur
Nennstrom-Belastung des Trafo-Steuergerätes an-
geschlossen werden. Mit dem Ausgang N(1)-L1 kann
z.B. eine Klappe angesteuert werden. An L1 liegen
230 V an, wenn sich der Stufenschalter nicht auf „0“
befindet.
WICHTIG:
– Der Motor bzw. die Motoren, die an das Trafo-
Steuergerät angeschlossen werden, müssen für den
Betrieb mit Drehzahlverstellung über einen Transfor-
mator (Spannungssteuerung) geeignet sein.
Die Nennspannung des Trafo-Steuergerätes muß mit
der Versorgungsspannung übereinstimmen.
– Max. Strom
Bei Auswahl der Steller, ist die unterschiedliche
Stromaufnahme bei den Spannungen zu berücksich-
tigen. Dies ist bei der Steller-Zuordnung zu den Ven-
tilatoren in den Druckschriften bereits berücksichtigt.
Werden die Regler selbständig zu bestehenden An-
lagen ausgewählt, ist der zulässige max. Strom zu be-
achten, da sonst der Regler zu heiß werden kann.
MONTAGE DES GERÄTES
Die max. Umgebungstemperatur während des Be-
triebs ist +40° C. Das Steuergerät muß senkrecht an
eine stabile Wand montiert werden. Das Steuergerät
darf nicht kopfüber (d.h. oben nach unten) montiert
werden. D.h. die Kabeleinführungen müssen nach
unten zeigen. Es darf nicht an oder direkt unter der
Decke montiert werden. Zur Kühlung muß um das
Gerät ein Abstand von mind. 5 cm eingehalten wer-
den.
INSTALLATION AND OPERATING
INSTRUCTIONS NO 90 769
It is important for safety reasons, that you read and
observe these instructions fully before proceeding.
RECEIPT
Please check delivery immediately on receipt for
accuracy and damage. If damaged, please notify
carrier immediately. In case of delayed notification,
any possible claim may be void.
STORAGE
It is recommended to leave the product in the original
packaging before installation to prevent any possible
damage and contamination. When storing for a pro-
longed time the following measures should be taken
to avoid damaging influences:
Protection by dry, air-tight and dustproof packaging
(plastic bags with drying agent and moisture indica-
tors).
The storage area must be free of water, vibration and
temperature variations. Damages due to improper
storage, transportation or installation are not liable for
warranty.
OPERATION/USE
The 1-phase controller is designed to be used in
combination with an electric motor which is suitable
for speed control by means of a transformer.
The controller can regulate the speed of the motor
in 5 steps.
Several ventilators (also with motors of different ratings)
may be connected to one controller. However, the to-
tal load current must not exceed the nominal output
current of the controller.
Terminals N(1)-L1 give a 230 V output in all positions
except “0“. This is, for example, for opening electric
dampers.
Important
Motor(s) for connection to the controller must be suit-
able for transformer reduced voltage speed control.
The nominal voltage of the controller must be suitable
for the electrical supply to which it will be connected.
– Maximum current
The controller has a variable maximum current rating
at differing voltage settings. Therefore, the controller
needs to be correctly matched to the fan. If the fan
/ controller combination is not recommended in the
Helios catalogue, refer to the diagram overleaf for cor-
rect selection (if not observed the unit may overheat).
MOUNTING OF THE CONTROLLER
The maximum admissible ambient temperature
during operation is +40° C. The controller must be
mounted vertically onto a solid surface, alternatively,
it may be mounted to a solid horizontal surface.
The controller must not be mounted upside down.
The cable entries should point down. It must not be
mounted directly under, or onto the ceiling. To ensu-
re adequate cooling, a minimum distance of 5 cm is
required around the controller.
INSTALLATION OF THE CONTROLLER
Remove the cover of the controller. Mounting
holes are provided on the inside back
panel of the enclosure. On some of the plastic en-
closures the mounting holes should be opened by
knocking out the membrane covering the mounting
hole.
For the ease of mounting, the mounting plate (in-
side) may be removed from the enclosure. The con-
troller enclosure should be mounted using corrosion
resistant screws or bolts as required. Once secured
NOTICE DE MONTAGE ET D‘UTILISATION
NR. 90769
Il est important de lire et de respecter l‘ensemble des
prescriptions suivantes, pour le bon fonctionnement
de l‘appareil et la sécurité des utilisateurs.
RÉCEPTION
Dès réception, vérifier l‘état et la conformité du ma-
tériel commandé. En cas d‘avaries, des réserves doi-
vent être portées sur le bordereau du transporteur.
Elles doivent être précises, significatives, complètes et
confirmées dans les 3 jours par lettre recommandée.
Attention: le non-respect du délai peut entraîner le re-
jet de la réclamation.
STOCKAGE
Il est recommandé de laisser l‘appareil dans son em-
ballage d‘origine jusqu‘à son installation afin d‘éviter
tout dommage et toute contamination éventuels.
Pour un stockage de longue durée et pour éviter tou-
te détérioration préjudiciable, il convient de se confor-
mer aux instructions suivantes:
Protéger avec un emballage sec, étanche à l’air et à la
poussière (sac en matière synthétique contenant des
sachets déshydrateurs et un indicateur d’humidité).
Le matériel est à stocker dans un endroit abrité de
l‘eau, exempt de variations de température et de vi-
brations. Les dommages dus à de mauvaises con-
ditions de transport, à des stockages défectueux ou
à une utilisation anormale sont sujets à vérification et
contrôle et entraînent la suppression de notre garantie.
DOMAINE D’UTILISATION
Ce régulateur à transformateur monophasé a été
conçu pour la variation de vitesse de moteurs électri-
ques réglables par modification de tension. Il permet
5 vitesses de fonctionnement. Plusieurs ventilateurs
(même de puissances et de types différents) peuvent
être raccordés à un même régulateur, la limite étant
le courant nominal max. du transformateur.
Les bornes N(1)-L1 permettent par ex. de com-
mander un volet. La tension à la borne LK est de 230
V, si le sélecteur n‘est pas en position „0“.
Important
Le(s) moteur(s) doit (doivent) être conçus pour la ré-
gulation de vitesse par modification de tension. La
tension d‘alimentation doit correspondre à celle in-
diquée sur la plaque signalétique du transformateur.
– Courant maximum
Pour la sélection des MWS, il faut tenir compte des
courants admissibles aux différentes tensions. Les ré-
gulateurs affectés aux ventilateurs Helios ont été déter-
minés en tenant compte de cette caractéristique. Si les
régulateurs sont utilisés avec d‘autres ventilateurs ou
installations, vérifier le courant admissible en réduction
de tension (risque de surchauffe du transformateur).
Voir diagramme page suivante.
MONTAGE DU REGULATEUR
La température ambiante pendant le fonctionnement
ne doit pas excéder +40°C. Le régulateur doit être
monté sur une paroi verticale ou sur un plan horizon-
tal stable. Le régulateur ne doit pas être monté à l‘en-
vers. Les entrées de connections doivent en effet se
trouver sous le régulateur. L‘appareil ne doit pas être
monté directement sous ou au plafond. Pour des rai-
sons de refroidissement, un espace de 5 cm autour
du régulateur est à respecter.
INSTALLATION DU REGULATEUR
Enlever le couvercle du boîtier du régulateur. A l‘ar-
rière des boîtiers se trouvent les points de fixation.
1

Trafo-Drehzahlsteller mit Motorvollschutzeinrichtung MWS
Transformer controller with full motor protection unit MWS
Régulateur à transformateur avec protection moteur intégrée MWS
INSTALLATION DES GERÄTES
Den Deckel des Steuergerätes entfernen. Die auf der
Rückseite angebrachten Montagelöcher müssen bei
einigen Kunststoffgehäusen vorher durchgestochen
werden.
Zur Montage müssen geeignete dauerhafte Schrauben
bzw. Befestigungsmaterialien verwendet werden.
Nachdem das Gehäuse montiert wurde, müssen die
Löcher verschlossen werden (um die IP-Schutzklasse
aufrecht zu erhalten).
ELEKTRISCHER ANSCHLUSS
Der elektr. Anschluß darf nur von einer autorisierten
Elektrofachkraft durchgeführt werden. Die einschlägi-
gen Sicherheitsvorschriften, Normen (VDE 0100 und
VDE 0700 sowie die TAB‘s der EVU‘s und UVV) sind
einzuhalten. Ebenso ist die Montage- und Betriebs-
vorschrift des Ventilators zu beachten.
Achtung: Alle Arbeiten sind im spannungsfreien Zu-
stand durchzuführen.
Die Spannungsversorgung abschalten! Das Trafo-
Steuergerät gemäß dem beigefügten Schaltplan und
den Bezeichnungen der Klemmenleiste anschließen.
Der Schutzleiter (grün-gelb) der Netzanschlußleitung
und jedes andere Gerät das an den Trafo-Drehzahl-
steller angeschlossen wird, muß an die PE-Klemmen,
bzw. der PE-Klemmstelle (falls vorhanden) ange-
schlossen werden.
ANSCHLÜSSE
– Klappenventil oder Servomotor
An die Klemmen L1 und N(1) (gekennz. mit „KLAPPE“)
können elektrische Betriebsmittel, wie z.B. Störmelde-
lampe, Klappenantrieb o.ä. angeschlossen werden.
An diesen Klemmen steht die Spannung 230 V an
(max. Belastung 2A), wenn die Versorgungsspan-
nung eingeschaltet ist. Diese Klemmen dürfen nicht
überbrückt werden!
Beachten Sie bitte, daß L1 nur in Schalterstellung „0“
ausgeschaltet ist, nicht aber bei TK-Auslösung des
Motors.
– Thermokontake des Motors „TK“
Die Thermokontakte (normal geschlossen) des Motors
sind an die Klemmen „TK 20“ und „TK 21“ anzu-
schließen. Im Falle einer Überhitzung des Motors lö-
sen die Thermokontakte aus und schalten den Motor
über den MWS dauerhaft ab. Die rote LED geht an.
Nachdem der Motor abgekühlt ist (TK schließt selbst-
tätig), kann der Ventilator durch Aus- /und wieder
Einschalten des MWS erneut in Betrieb genommen
werden. Sollte der MWS danach wieder auf „Störung“
gehen, ist der Ventilator zu überprüfen (mögliche
Ursachen sind: Verschmutzung, zu hohe Tempera-
turen oder Motordefekt).
Bei Verwendung eines Motors ohne TK ist zwischen
die beiden Klemmen eine Brücke einzusetzen. Dabei
ist jedoch zu beachten, daß dann keine Schutz-
funktion mehr besteht.
Nachdem das Steuergerät angeschlossen wurde,
müssen alle Verbindungen auf korrekten Anschluß und
festen Sitz überprüft werden. Dann den Deckel wie-
der montieren. Die Schrauben anziehen um etwaiges
Eindringen von Staub und Schmutz in das Gerät zu
vermeiden.
Bei Ventilatoren mit 6-pol Klemmbrett bei dem der
TK in Reihe geschaltet ist, muss das Klemmbrett
nach SS-825 umverdrahtet werden.
INBETRIEBNAHME
Überprüfen, ob der Schalter am Trafo-Steuergerät in
Position „0“ steht. Die Versorgungsspannung über-
prüfen (Nennspannung, Toleranz +6%, -10%). Zuerst
die Versorgungsspannung (Netz) einschalten und
dann das Steuergerät. Die grüne Lampe außen am
in position, the mounting screws or bolts should be
sealed to maintain the IP-rating of the enclosure.
ELECTRICAL CONNECTION
All electrical connections are to be carried out in
accordance with the relevant wiring diagram and are
only to be carried out by a qualified electrician. All
relevant safety regulations, national standards and
norms are to be adhered to. The installation and
operation instructions for the fans are also to be ob-
served.
Attention: All work must be carried out with the
equipment fully isolated from the power supply.
Switch off the mains supply! The controller should be
wired in accordance with the wiring diagram supplied
with the controller and markings on the terminals.
The earth-wire (green/yellow) of the electrical supply
and of any equipment connected to the controller
must be connected to the terminals marked PE.
CONNECTIONS
– Valve- or servomotor
A valve- (close off flap) or servomotor may be connected
to terminals L1 and N(1) (marked „KLAPPE“). A 230
V (max. load 2 A) supply is available at these terminals,
when the controller is switched on. If connection to
external devices is not used, terminals N(1) and L1
must not be linked together !
Note: the 230 V output on “L1“ is disconnected with
the switch is in the “0“ position and when the unit is
tripped.
– Motor thermal switch „TK“
The normally closed contacts of the thermal switch
(from the motor) should be connected to terminals
marked „TK 20“ and „TK 21“.
Should the thermal switch contacts open due to
motor overheating, the supply to the motor will be
switched off and the green indicator light goes off.
(note: add to previous sentence).
After the motor has cooled down, and the thermal
switch contacts have closed, the controller can be
reset by switching the control switch to the „0“ posi-
tion and then back to position 1 to 5 as appropriate. If
this connection is not used, the terminals TK 20 and
TK 21 must be linked together !
Once all wiring to the controller has been completed,
check that connections have been made to the correct
terminals and that all connections are secure. Finally
replace the cover and ensure the securing screws
are tight to prevent ingress of dirt and moisture.
OPERATION
Check if the switch of the controller is in „0“ position.
Check the mains supply voltage (nominal voltage,
tolerance +6%, -10%). Switch on the mains power
supply first, and then the controller. The green light
on the outside of the enclosure will be on. Check the
voltage given in every switch position (see technical
data). In case of failure, check the fuse inside of the
enclosure.
MAINTENANCE
The controller needs no specific maintenance. The
housing may be cleaned using a moist cloth. It must
not be hosed down.
ACCESSORIES, SWITCHES AND
CONTROLLING DEVICES
The use of accessories not offered or recommended
by Helios is not permitted. Any potential damage
claims become invalid.
Pour certains boîtiers en plastique, ces trous de fixa-
tion
doivent être perforés. Si nécessaire, la plaque de
base peut être enlevée pour faciliter le raccordement.
Pour la fixation, utiliser des vis et chevilles pour fixa-
tion murale ou vis et écrous de bonne qualité. Après
montage, vueillez à l‘étanchéité des points de fixation
(pour maintenir la classe IP).
BRANCHEMENT ELECTRIQUE
Le branchement électrique doit être effectué par un
électricien qualifié. Les consignes de sécurité et les
règles d‘installation en vigueur ( VDE 0100, VDE 0700
et TAB, EVU, UVV) doivent être respectées. De plus,
il est impératif de respecter les indications données
dans la notice de montage et d‘utilisation.
Attention: Tous les travaux doivent être effectués
hors tension.
Couper la tension d‘alimentation. Raccorder le régu-
lateur à transformateur suivant le schéma de bran-
chement livré avec l‘appareil et les repérages sur les
bornes. Le fil de terre (jaune-vert) de l‘alimentation
électrique et tout autre appareil branché sur le régu-
lateur, doit être raccordé à la borne PE et éventuelle-
ment à d‘autres bornes PE si elles existent.
RACCORDEMENT
– clapet motorisé ou servo-moteur
Un clapet motorisé ou un servo-moteur peuvent
être raccordés aux bornes L1 et N(1) (désignée par
„KLAPPE“). A ces bornes, la tension est de 230 V
(puissance maxi 2 A) tant que l‘alimentation générale
n‘est pas coupée. Ces bornes ne doivent pas être
court-circuitées.
Attention: la borne L1 est coupée uniquement lors-
que le commutateur est en position „0“ et non lors-
que le thermocontact TK du moteur s‘est déclenché.
– thermocontacts TK du moteur
Les thermocontacts (normalement fermés) du mo-
teur sont à relier aux bornes „TK 20“ et „TK 21“. En
cas de surchauffe du moteur, les thermocontacts se
déclenchent et coupent la tension d‘alimentation. La
lampe verte s‘éteint. Quand le moteur a repris une
température normale (le TK se ferme automatique-
ment), le ventilateur peut être remis en marche en
éteignant puis en réenclenchant le régulateur. En cas
de coupure fréquente, vérifier le ventilateur ( causes
possibles: encrassement, température trop élevée,
défaut du moteur). Si un moteur sans thermocontact
est utilisé, faire un pont entre les 2 bornes. Attention,
dans ce cas il n‘y a plus de protection.
Après avoir raccordé les différents équipements, vér-
ifier que les connexions ont été correctement effec-
tuées. Remonter le couvercle en vissant fermement
de façon à éviter les infiltrations de poussières et
saletés.
MISE EN MARCHE
Vérifier si le commutateur est en position „0“. Vérifier
la tension d‘alimentation (tension nominale, tolérance
+6%, -10%). Enclencher d‘abord l‘interrupteur gé-
néral et ensuite le régulateur. La lampe verte sur le
boîtier de commande doit alors s‘allumer. Vérifier la
tension pour chaque position du commutateur (con-
formément aux données techniques).
En cas de défaut, vérifier le fusible à l‘intérieur du
boîtier.
ENTRETIEN
Le régulateur à transformateur ne nécessite aucun
entretien particulier. Pour nettoyer le boîtier, utiliser
un chiffon humide. En aucun cas le régulateur ne doit
être nettoyé au jet d‘eau.
2

Trafo-Drehzahlsteller mit Motorvollschutzeinrichtung MWS
Transformer controller with full motor protection unit MWS
Régulateur à transformateur avec protection moteur intégrée MWS
Gerät muß leuchten. Die Spannung in jeder Schal-
terposition überprüfen (lt. technischen Daten). Im
Fehlerfalle, die Sicherung im Gerät überprüfen.
WARTUNG
Das Trafo-Steuergerät benötigt keine besondere
Wartung. Zur Reinigung kann ein feuchtes Tuch ver-
wendet werden. Es darf auf keinen Fall mit einem
Schlauch abgespritzt werden.
ZUBEHÖR, SCHALT- UND
STEUERELEMENTE
Der Gebrauch von Zubehörteilen, die nicht von Helios
empfohlen oder angeboten werden, ist nicht statt-
haft. Eventuell auftretende Schäden unterliegen nicht
der Gewährleistung.
GARANTIEANSPRÜCHE – HAFTUNGSAUS-
SCHLUSS
Alle Ausführungen der zum Gerät gehörenden Doku-
mentationen müssen beachtet werden, sonst entfällt
die Gewährleistung. Gleiches gilt für Haftungsansprü-
che an den Hersteller. Der Gebrauch von Zubehör-
teilen, die nicht von Helios empfohlen oder angebo-
ten werden, ist nicht zulässig. Eventuell auftretende
Schäden unterliegen nicht der Gewährleistung. Ver-
änderungen und Umbauten am Gerät sind nicht zu-
lässig und führen zum Verlust der Konformität. Jeg-
liche Gewährleistung und Haftung ist in diesem Fall
ausgeschlossen.
Wenn die vorausgehenden Ausführungen nicht be-
achtet werden, entfällt unsere Gewährleistung und
Behandlung auf Kulanz. Gleiches gilt für abgeleitete
Haftungsansprüche an den Hersteller.
VORSCHRIFTEN – RICHTLINIEN
Bei ordnungsgemäßer Installation und bestimmungs-
gemäßem Betrieb entspricht das Gerät den zum Zeit-
punkt seiner Herstellung gültigen Vorschriften und
Richtlinien CE.
WARRANTY – EXCLUSION OF
LIABILITY
All versions of this documentation must be obser-
ved, otherwise the warranty shall cease to apply. The
same applies to liability claims against the manufactu-
rer. The use of accessory parts which are not recom-
mended or oered by Helios is not permitted. Any
possible damages are not covered by the warranty.
Changes and modifications to the product are not
permitted and lead to a loss of conformity, and any
warranty and liability shall be excluded in this case.
If the preceding instructions are not observed all
warranty claims are excluded. The Helios warranty is
limited to the material and workmanship of the product.
CERTIFICATES
The products are manufactured in compliance with
applicable European standards and regulations.
ACCESSOIRES, APPAREILS DE
TEMPORISATION ET DE REGULATION
L‘utilisation d‘accessoires et d‘équipements qui ne
sont pas directement fournis ou conseillés par Helios
n´est pas autorisée. Nous déclinons toute responsabi-
lité en cas de défaut consécutif à leur utilisation.
DEMANDE DE GARANTIE- RESERVES DU
CONSTRUCTEUR
Si toutes les consignes indiquées dans cette notice
ne sont pas correctement respectées, la garantie
s’annule. Idem pour les garanties constructeur He-
lios. L’utilisation d’accessoires, non fournis, non con-
seillés ou non proposés par Helios, est interdite. Tous
changements ou transformations eectués sur l’ap-
pareil sont interdits, altèrent sa conformité et annulent
la garantie.
En cas de non-respect des indications précédentes, toute
demande de remplacement ou de réparation à titre gra-
tuit sera déclinée. Il en sera de même pour toute implica-
tion de responsabilité du fabricant.
REGLEMENTATIONS - NORMES
Cet appareil est conforme aux directives CE en vigu-
eur le jour de sa fabrication sous réserve d‘une utili-
sation appropriée.
3
Service und Information
D HELIOS Ventilatoren GmbH & Co · Lupfenstraße 8 · 78056 VS-Schwenningen F
HELIOS Ventilateurs · Le Carré des Aviateurs · 157 av. Charles Floquet · 93155 Le Blanc Mesnil Cedex
CH HELIOS Ventilatoren AG · Steinackerstraße 36 · 8902 Urdorf/ Zürich GB HELIOS Ventilation Systems Ltd. · 5 Crown Gate · Wyncolls Road · Severalls Industrial Park ·
A HELIOS Ventilatoren · Postfach 854 · Siemensstraße 15 · 6023 Innsbruck Colchester · Essex · CO4 9HZ

Trafo-Drehzahlsteller mit Motorvollschutzeinrichtung MWS
Transformer controller with full motor protection unit MWS
Régulateur à transformateur avec protection moteur intégrée MWS
4
MWS 1,5 MWS 3-7,5
MWS 10
Service und Information
D HELIOS Ventilatoren GmbH & Co · Lupfenstraße 8 · 78056 VS-Schwenningen F
HELIOS Ventilateurs · Le Carré des Aviateurs · 157 av. Charles Floquet · 93155 Le Blanc Mesnil Cedex
CH HELIOS Ventilatoren AG · Steinackerstraße 36 · 8902 Urdorf/ Zürich GB HELIOS Ventilation Systems Ltd. · 5 Crown Gate · Wyncolls Road · Severalls Industrial Park ·
A HELIOS Ventilatoren · Postfach 854 · Siemensstraße 15 · 6023 Innsbruck Colchester · Essex · CO4 9HZ

Trafo-Drehzahlsteller mit Motorvollschutzeinrichtung MWS
Transformer controller with full motor protection unit MWS
Régulateur à transformateur avec protection moteur intégrée MWS
SS-825 / Câblage usine
Enlever les barrettes
Déplacer le fil U2 de la
borne centrale vers la
borne à droite C
Enlever les fils des bornes
C/droite.
U1/gauche, U2/milieu
et
Déplacer le fil U1 de la
borne gauche vers la
borne centrale
Raccorder les fils C et U1
sur la borne centrale.
Raccorder le fil U2 sur la
borne de droite.
Mettre une barrette
entre Z1 / U1
Mettre une barrette
entre Z1 / U2
Bornier ventilateur modifié pour
raccordement séparé
des thermocontacts !
Enlever les barrettes
/ Wiring as supplied
Remove links Remove links
Change wire U2 from
middle to right terminal C
Disconnect wires
C/right
from terminal.
U1/left,
U2/middle and
Change wire U1 from
left to middle terminal.
Connect wire C and U1
to middle terminal, wire
U2 to right terminal.
Put a link between Z1 / U1 Put a link between Z1 / U2
Modified terminal plate for separate connection of thermal contacts.
U2
Z1TK
TK
U1 C
Z2
C
L N
TK Z1 Z2
C
TK U1 U2
1
2
Lieferzustand
U2
Z1TK
TK
U1 C
Z2
C
TK Z1 Z2
C
TK U1 U2 Brücken entfernen
3
U2
Z1TK
TK
U1 C
Z2
C
TK Z1 Z2
C
TK U1 U2 U2
Draht von
mittlere auf rechte
Klemmstelle legen
U2
C
4
Z1TK
TK
U1
Z2
C
TK Z1 Z2
C
TK U1 U2
Draht von linker
auf mittlere
Klemmstelle legen
U1
U1
5
C
U2
Z1TK Z2
C
TK Z1 Z2
C
U2 Brücke auf /Z1 U1
U1
U1
C
U2
TK
TK
Z1TK Z2
C
TK Z1 Z2
C
U2
U1
U1
C
U2
TK
TK
L NTKTK
Fertige Anpassung für separaten TK Anschluss !
AB
U2
Z1TK
TK
U1 C
Z2
C
TK Z1 Z2
TK U1 U2
NL
C
U2
Z1TK
TK
U1 C
Z2
C
TK Z1 Z2
TK U1 U2
C
U2
Z1TK
TK
U1 C
Z2
C
TK Z1 Z2
C
TK U1 U2
Draht
/rechts vonC,
U1 U2/links, /mitte
und
Klemmstelle nehmen
Z1TK
TK
Z2
C
TK Z1 Z2
C
TK U1 U2
Draht auf
mittlere Klemmstelle
Draht auf rechte
Klemmstelle legen.
C und U1
,
U2
Z1TK
U2
Z2
C
TK Z1 Z2
C
U1 U2
U1
C
TK
TK
Brücke auf /Z1 U2
Z1TK
U2
Z2
C
TK Z1 Z2
C
U1 U2
U1
C
TK
TK
L NTKTK
92931 001 SS-825 26.03.04
Brücken entfernen
Anpassung der Motoranschlußstelle
mit MWS Trafo-Drehzahlsteller.
Conversion instruction for use of MWS trans-
former (thermal contacts wired into controller).
Instructon de modification de branchement du
moteur avec régulateur à transformateur MWS.
5

Trafo-Drehzahlsteller mit Motorvollschutzeinrichtung MWS
Transformer controller with full motor protection unit MWS
Régulateur à transformateur avec protection moteur intégrée MWS
Druckschrift-Nr. 90 769 -001/ 21-0125/V01/0122
Service und Information
D HELIOS Ventilatoren GmbH & Co · Lupfenstraße 8 · 78056 VS-Schwenningen F
HELIOS Ventilateurs · Le Carré des Aviateurs · 157 av. Charles Floquet · 93155 Le Blanc Mesnil Cedex
CH HELIOS Ventilatoren AG · Tannstrasse 4 · 8112 Otelfingen GB HELIOS Ventilation Systems Ltd. · 5 Crown Gate · Wyncolls Road · Severalls Industrial Park ·
A HELIOS Ventilatoren · Postfach 854 · Siemensstraße 15 · 6023 Innsbruck Colchester · Essex · CO4 9HZ
SS-440.3
Anpassung HRF.. an einen MWS Trafo-Drehzahlsteller.
Instructions for connecting fan type HRF.. to MWS transformer controller.
Instructions de modification pour brancher un ventilateur type HRF.. à un
régulateur à transformateur MWS.
6
This manual suits for next models
3
Table of contents
Other Helios Controllers manuals

Helios
Helios 5 Target User manual

Helios
Helios KWL-BE Eco User manual

Helios
Helios ESE 2,5 Service manual

Helios
Helios ESA 5 User manual

Helios
Helios AIR1-BE ECO User manual

Helios
Helios ESA User manual

Helios
Helios KWL-MZB-BE User manual

Helios
Helios 90 770 User manual

Helios
Helios ESA User manual

Helios
Helios ETR User manual

Helios
Helios TSD 0,8 User manual

Helios
Helios KWL 45 BEU User manual

Helios
Helios MWS User manual

Helios
Helios KWL-BE Touch User manual

Helios
Helios PA Series User manual

Helios
Helios KWL-MZB-ZR User manual

Helios
Helios KWL-BE User manual

Helios
Helios TDS 0,8 User manual

Helios
Helios ESD User manual

Helios
Helios AIR1-BE TOUCH User manual